“Love what you do and share what you love.”
Sunday, 31 October 2021
Harvest Meadow Designer Series Paper
Hello friends,

“Love what you do and share what you love.”
Here is a beautiful verse for a card to send to someone for no real reason, and isn’t it nice to receive an unexpected card.
I added texture to the Basic White card front (#159228) using a Basic Patterns Decorative Mask (#150697) and the Shimmery White Embossing Paste (#145645) and applied it with a Palette Knife (#142808). This embossing paste dries quickly so ensure you wash the mask and palette knife immediately you are finished using them.
I cut the scallops with a die from the Penned Flowers Dies (#155557) from Misty Moonlight card (#153086). This was attached to the Harvest Meadow Designer Series Paper (#156494), then attached to the embossed card front.
The sentiment is from the Encircled In Friendship stamp set (#155408) and stamped with Misty Moonlight ink (#153118). This and the Misty Moonlight card under the sentiment were cut with Hippo & Friends Dies (#153585). This was attached to the card with Stampin’ Dimensionals (#104430). A clear Elegant Faceted Gem (#152464) was attached to the sentiment.
“Love what you do and share what you love.”
Stay safe & keep crafting!!
Saturday, 30 October 2021
Free As a Bird stamp set
Hi & welcome again,
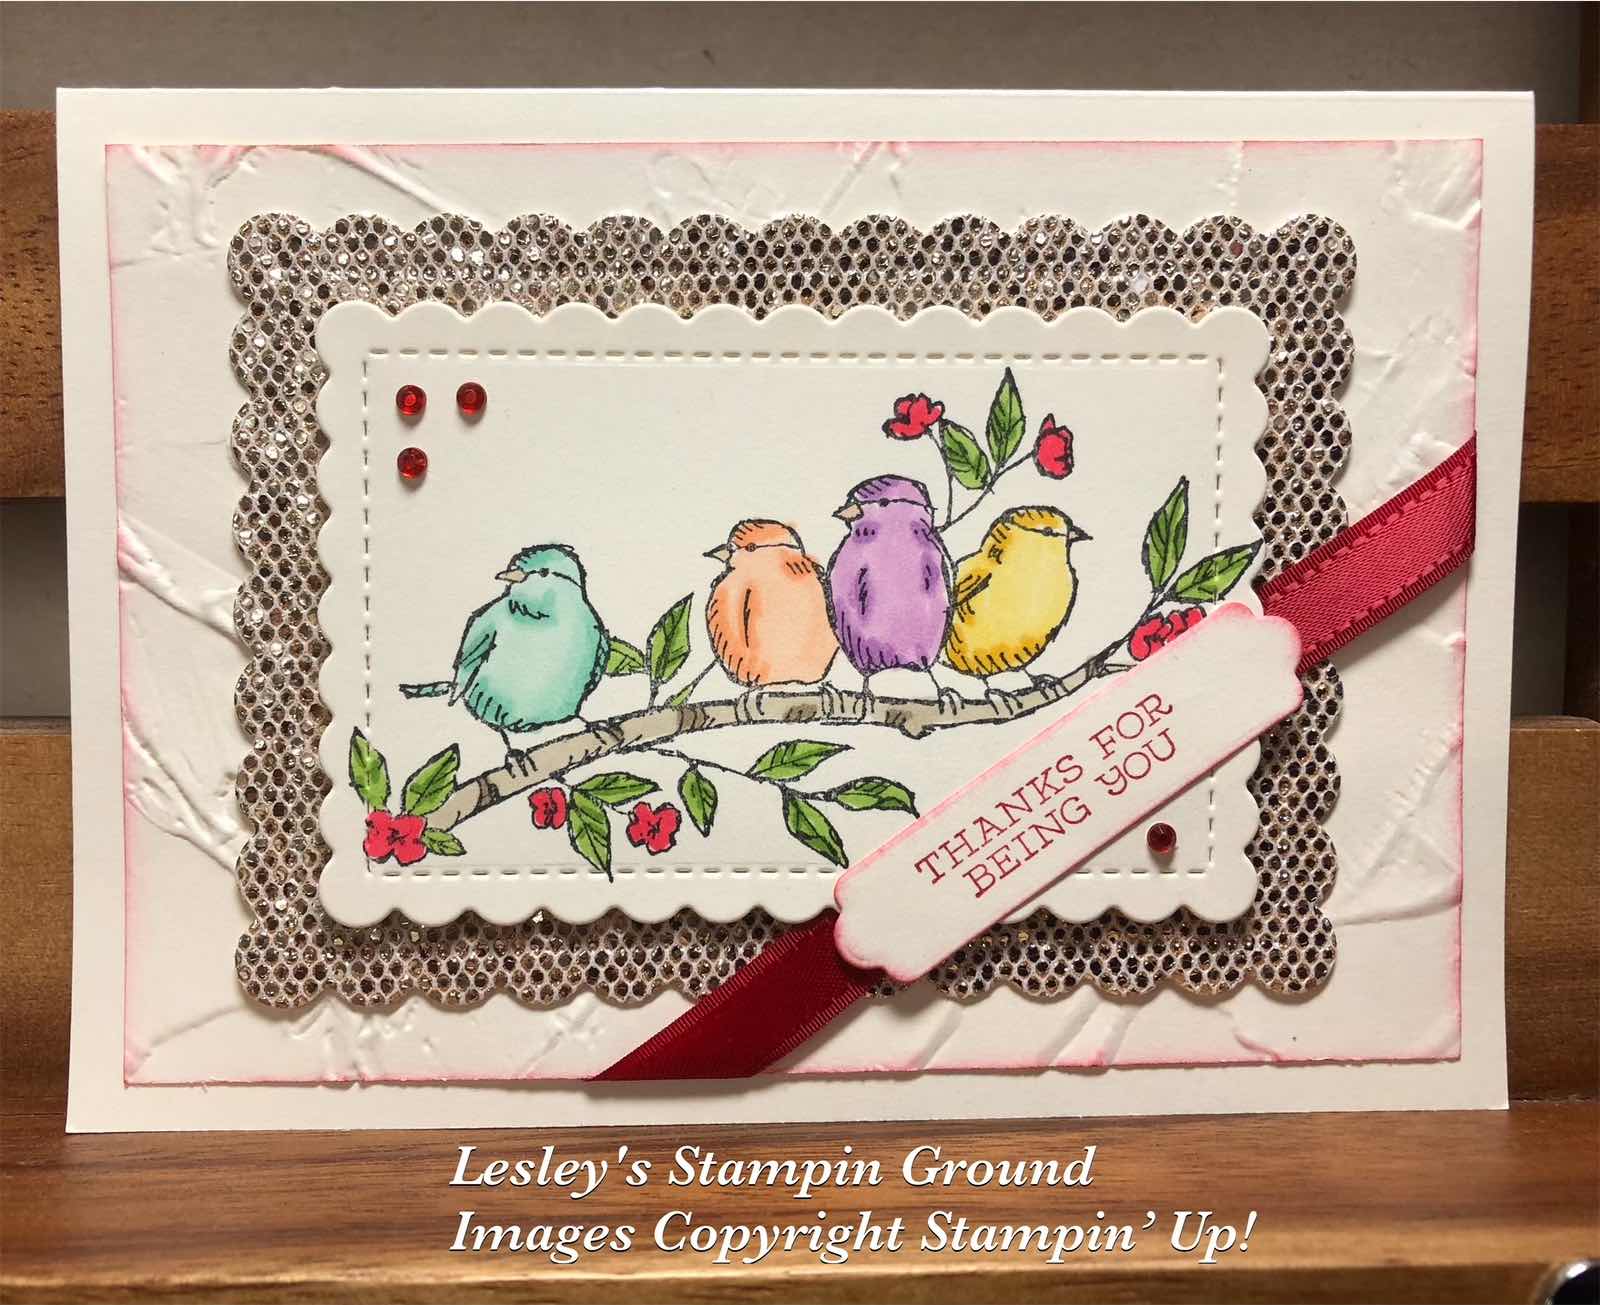
These cute little birds and the sentiment are from the Free As A Bird stamp set (#148468).
The cardstock is Very Vanilla (#106550) and Be Dazzling Specialty Paper which was one of the Sale-a-bration products. I dry embossed the card front with the Painted Texture 3D Embossing Folder (#154317) and daubered the edges with Real Red ink (#147084). The Be Dazzling Specialty Paper and the Very Vanilla on top were cut with dies from the Scalloped Contours (#155560).
I stamped the birds with Tuxedo Black Memento ink (#132708). The Stampin’ Blends to colour this image are Granny Apple Green (#154885), Crumb Cake (#154882), Poppy Parade (#154958), Pool Party (#154894), Pale Papaya (#155519), Fresh Freesia (#155518) and Daffodil Delight (#154883).
I wrapped the Real Red Double-Stitched Satin Ribbon (#151155) around the card front then I attached the stamped card to the Be Dazzling Paper with Stampin’ Dimensionals (#104430). The sentiment was stamped with Real Red ink and cut with a die from the Seasonal Labels (#156299). The Red Rhinestone Basic Jewels (#146924) were added to finish the card.
Friday, 29 October 2021
Merriest Moments Bundle
Hi,
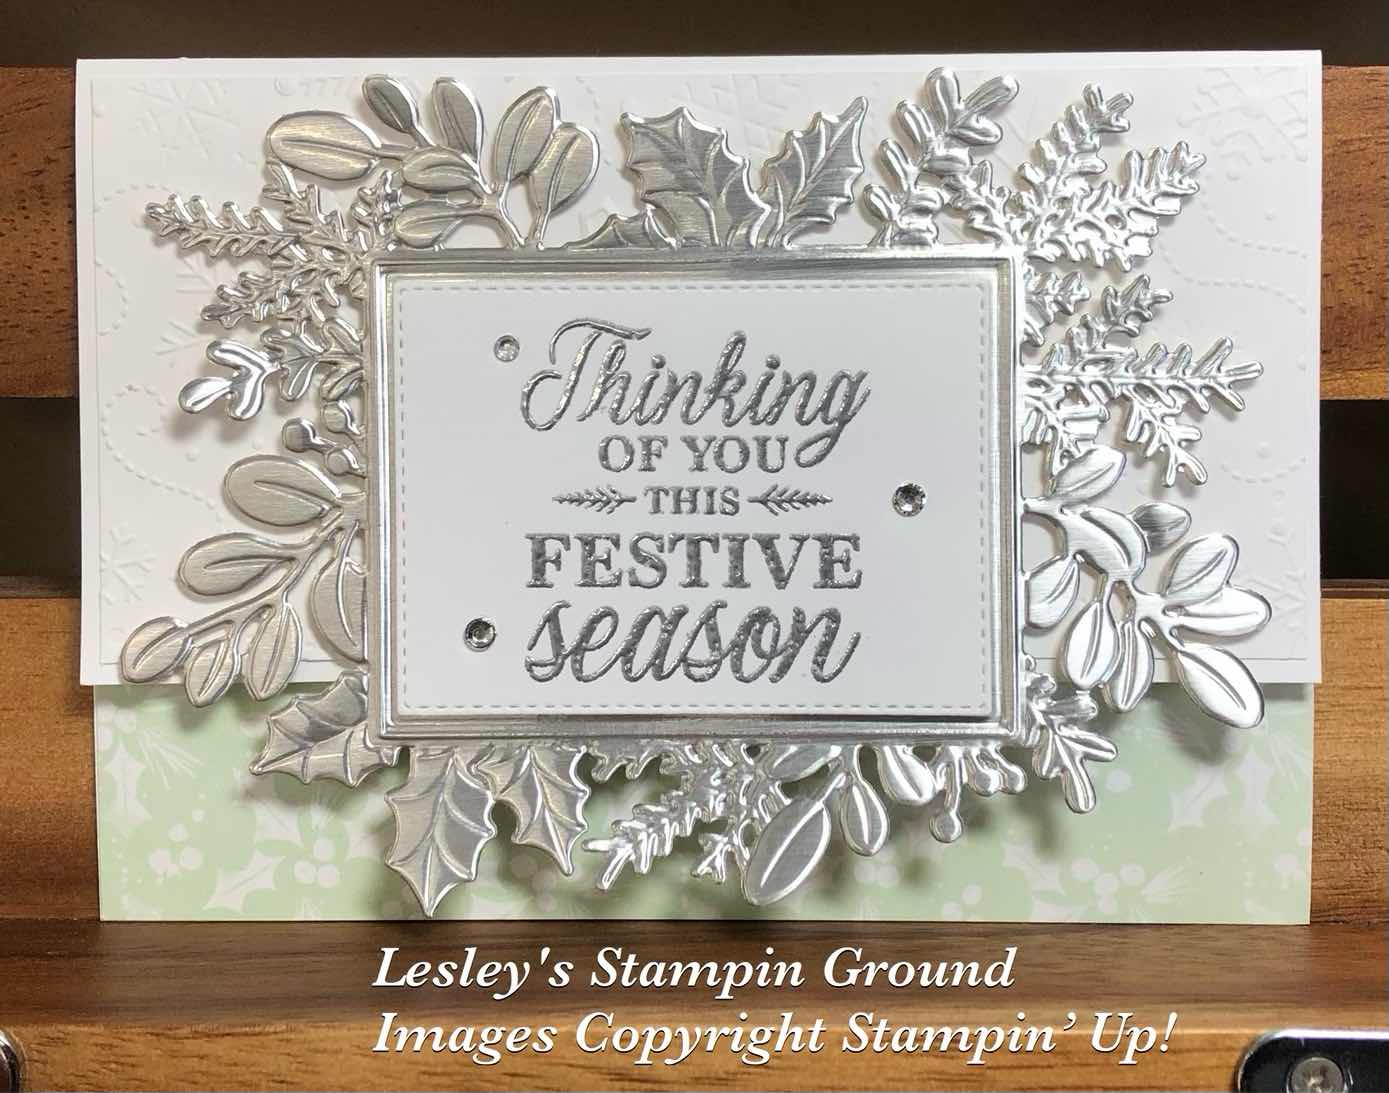
A pretty card but very easy to make with the right tools.
A lovely subtle coloured Christmas card using the Merriest Moments Bundle (#156783).
I cut 3cms from the bottom of the card, allowing you to see the Painted Christmas Designer Series Paper (#156292) which I had attached to the inside of the Basic White card (#159228).
I embossed a piece of Basic White card using the Wintry 3D Embossing Folders (#155433) with the snowflakes. This was attached to the front of the card.
The lightest Silver from the Silver Foil Specialty Pack (#156457) was cut and embossed using the Merriest Frames Hybrid Embossing Folder (#156385). This hybrid embossing folder also includes the dies. The sentiment from the Merriest Moments stamp set (#156353) was stamped with VersaMark (#102283) and heat embossed with Silver Stampin’ Emboss Powder (#155555) and set with the Heat Tool (#129056). This was cut with another die from the set and attached with Stampin’ Dimensionals (#104430). The detailed leaves were also attached with Stampin’ Dimensionals.
The embellishments around the sentiment are the Rhinestone Basic Jewels (#144220).
A pretty card but very easy to make with the right tools.
“Love what you do and share what you love.”
Stay safe & keep crafting!!
Thursday, 28 October 2021
Hand-Drawn Blooms
Welcome my friends,

I find colouring quite relaxing & it was fun colouring this floral image from the Hand-Drawn Blooms (#152565).
The flowers and stems are separate images. I stamped both images using Tuxedo Black Memento ink (#132708) onto Basic Black card (#159228). I used a variety of Stampin’ Blends - Daffodil Delight (#154883), Highland Heather (#154887), Pool Party (#154894), Real Red (#154899), Granny Apple Green (#154885), Cherry Cobbler (#154880), Pumpkin Pie (#154897) and Polished Pink (#155520).
I then dry embossed the card front using the Timber 3D Embossing Folder (#156406) and punched the corners with the Detailed Trio Punch (#146320). This card was then matted with Daffodil Delight card (#121680) and attached to the Basic White base card.
Congratulations is also from the Hand-Drawn Blooms stamp set and stamped with Tuxedo Black Memento ink. A die from the Ornate Frames (#150664) was used to cut the sentiment. I attached this to the card with Stampin’ Dimensionals (#104430). The Gold Shimmer Ribbon (#152156) was used to make the bow and then attached with Mini Glue Dots (#103683). The embellishments are from the Silver & Clear Epoxy Essentials (#155567).
“Love what you do and share what you love.”
Stay safe & keep crafting!!
Wednesday, 27 October 2021
Art In Bloom
Hi again everyone,
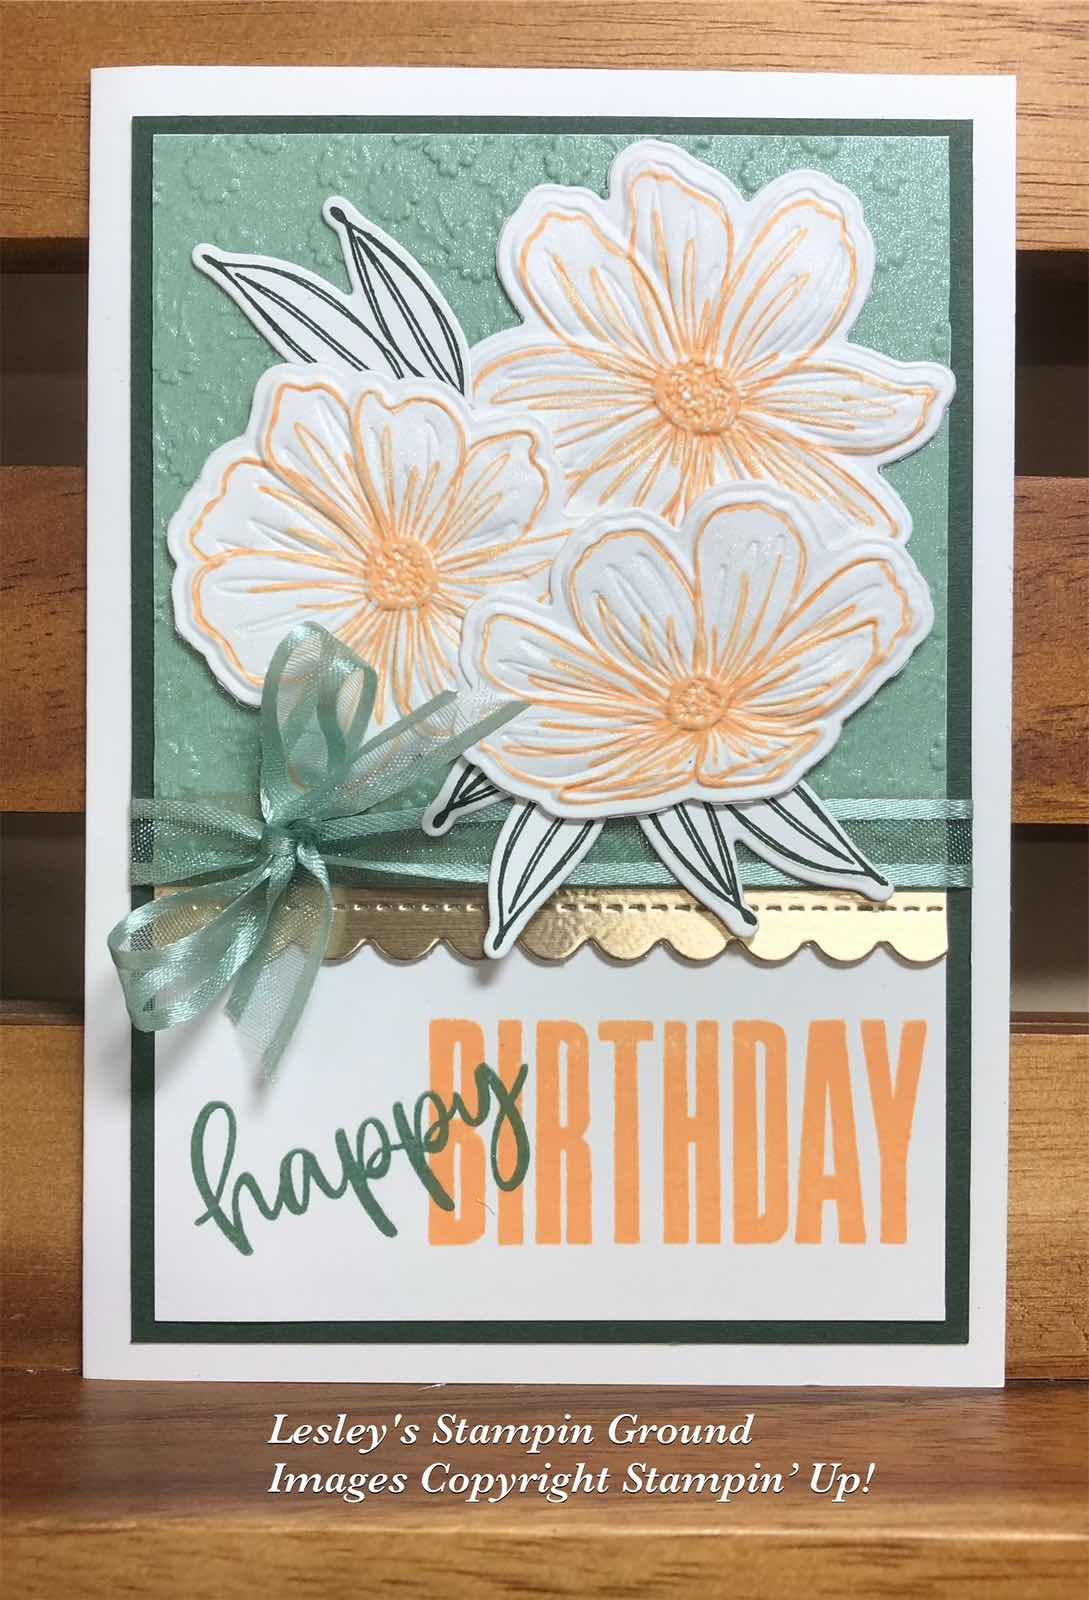
I adhered Adhesive Sheet (#152334) to the back of the Soft Succulent from the 2021-2023 In Color Shimmer Vellum (#155616). This was then dry embossed with the Ornate Floral 3D Embossing Folder (#152725). I cut a piece of the Gold Brushed Metallic 12”x12” cardstock (#153524) with a die from the Penned Flowers Dies (#155557). This was attached to the embossed vellum and this was then attached to the Basic White card (#159228). This was matted with Evening Evergreen card (#155575). The Soft Succulent Open Weave Ribbon (#155780) was wrapped around the card front. The base card is also Basic White.
I stamped the flowers with Pale Papaya ink (#155670). The 3 flowers are on the one stamp, so this makes it easy to place the stamped flowers in the embossing folder with the die and cut and emboss them all at once. The leaves were stamped with Evening Evergreen ink (#155576) and cut with the co-ordinating dies, then attached to the card with Mini Glue Dots (#103683). The flowers were attached with Stampin’ Dimensionals (#104430).
Today I have used the Art In Bloom stamp set (#155085) as well as the Bloom Hybrid Embossing Folder (#155989) which gives a variation to the flowers from yesterdays card.
Happy Birthday is from the Biggest Wish stamp set (#155052). I used Soft Succulent ink (#155778) for “happy” and Pale Papaya ink (#155670) for “happy”.
I stamped the flowers with Pale Papaya ink (#155670). The 3 flowers are on the one stamp, so this makes it easy to place the stamped flowers in the embossing folder with the die and cut and emboss them all at once. The leaves were stamped with Evening Evergreen ink (#155576) and cut with the co-ordinating dies, then attached to the card with Mini Glue Dots (#103683). The flowers were attached with Stampin’ Dimensionals (#104430).
“Love what you do and share what you love.”
Stay safe and keep crafting!!
Tuesday, 26 October 2021
Bloom Hybrid Embossing Folder
Hi everyone,
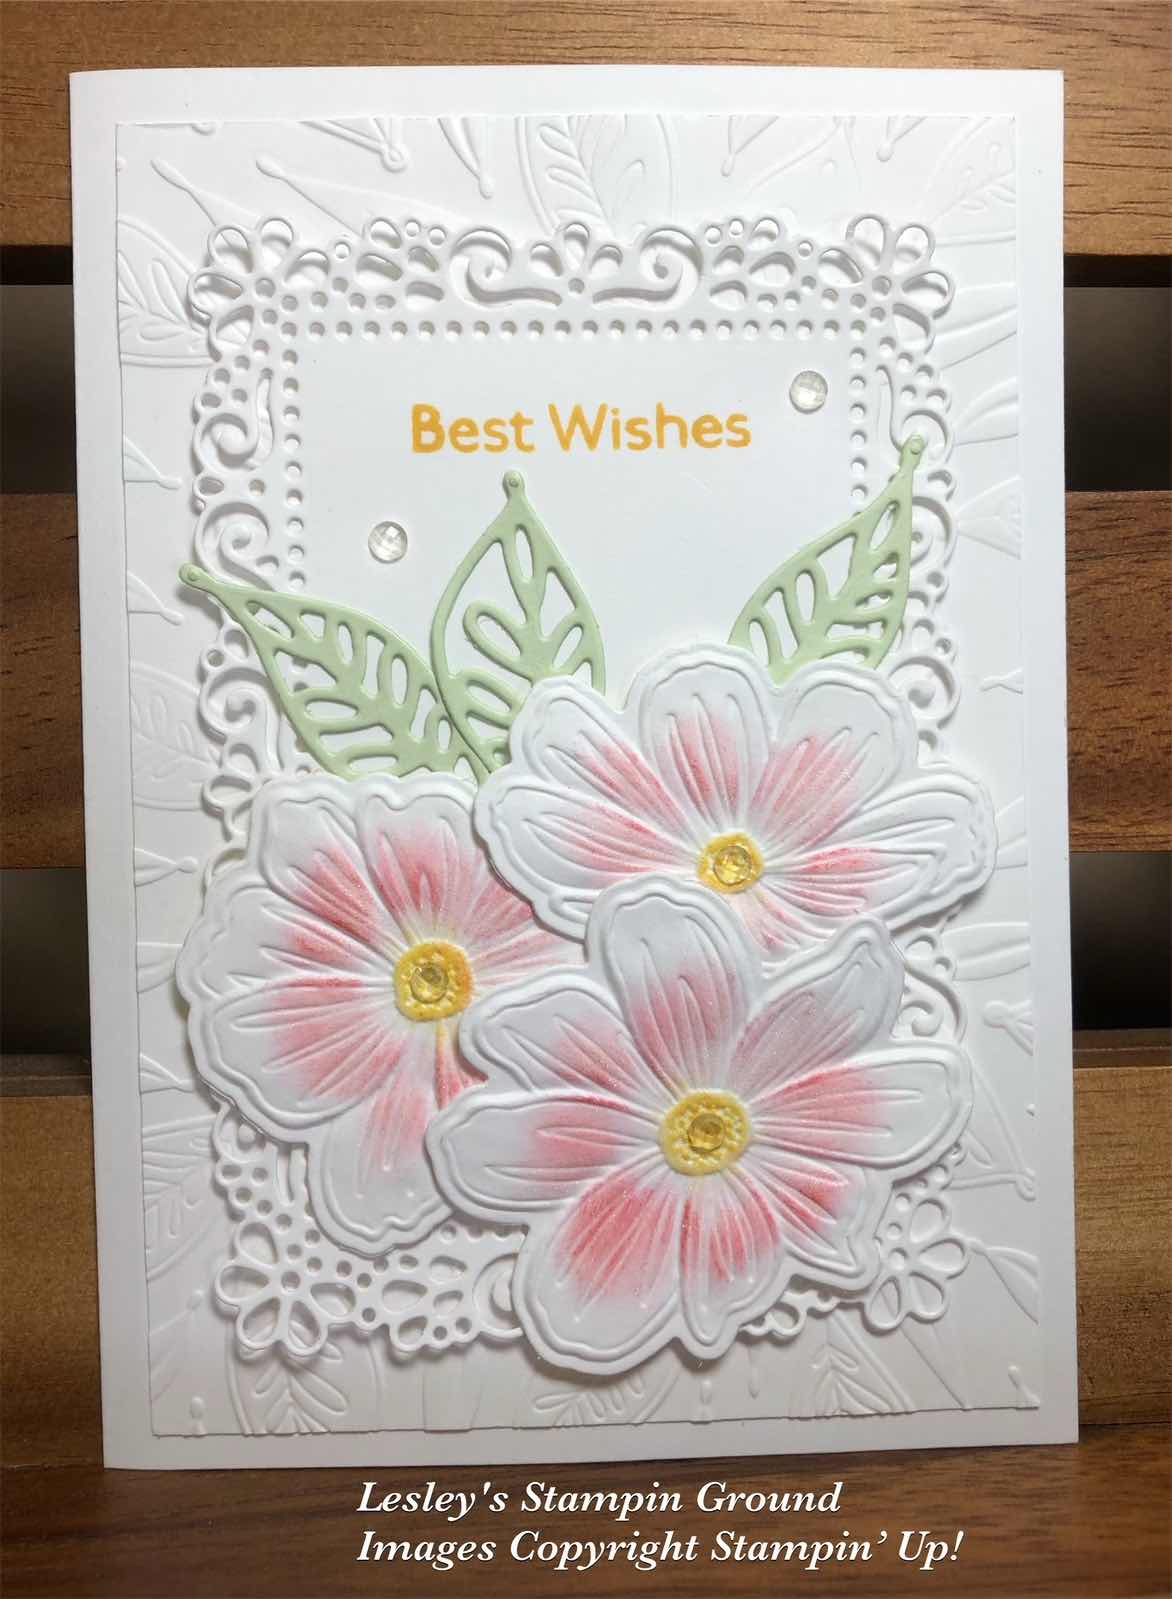
I love the subtle colours and textures on this card using the Bloom Hybrid Embossing Folder (#158368). This folder also includes the Dies and can be used together or separately.
I dry embossed a piece of Basic White card (#159228), without the dies, for the card front. Next I positioned the die to cut the flowers in the folder then the card is embossed and the flowers are cut at the same time and I used these flowers. I lightly daubered the flowers with Real Red ink (#147084) and Daffodil Delight ink (#147094) for the centres. I used the Clear Wink Of Stella (#141897) on the areas I coloured.
I cut a piece of Basic White card using an Ornate Layers Dies (#152726). Best Wishes from the Art Gallery stamp set (#158201) was stamped with Daffodil Delight ink, then I attached this card to the card front. The leaves were cut with the dies from the Bloom dies using Soft Sea Foam card (#147012) which was backed with Adhesive Sheet (#152334).
The flowers were all attached with Stampin’ Dimensionals (#104430). The card was finished by adding the Elegant Faceted Gems (#152464) to the flower centres and the card.
“Love what you do and share what you love.”
Stay safe & keep crafting!!
Monday, 25 October 2021
Poinsettia Petals
Hi again friends,

“Love what you do and share what you love.”
I have used the traditional red & green for this Christmas card using the beautiful poinsettia.
I used the Stitched Greenery Die (#155451) for the “stitching” on the Basic White card front (#159228). I attached the Real Red card (#106578) to the back of the cardfront. I wrapped the Metallic Mesh Ribbon (#153550) around the card front, then attached this to the Basic White base card.
The poinsettias from the Poinsettia Petals stamp set (#158251) were stamped with Real Red ink (#147084) and cut with the Poinsettia Dies (#153522). The leaves and flower centre were cut and embossed also with these dies using Garden Green card (#108605) and Real Red card. The flower was assembled with Stampin’ Dimensionals (#104430). I taped the leaves to the flowers and also used Dimensionals to attach the whole flower to the card.
The sentiment from the Poinsettia Petals stamp set was stamped with Real Red ink and a die from the Potted Succulents (#154330) was used to cut the sentiment. This was attached with Stampin’ Dimensionals.
Some sparkle was added to the poinsettia using the Clear Wink Of Stella Brush (#141897).
“Love what you do and share what you love.”
Stay safe & keep crafting!!
Sunday, 24 October 2021
Stamping on Gold Metallic Specialty Paper
Hi my crafty friends,

“Love what you do and share what you love.”
I love to experiment and here on this card I heat embossed on the Gold Metallic Specialty Paper, then coloured with Stampin’ Blends. Last week I heat embossed on cards using Black & White Stampin’ Emboss powders, so today I have used the Gold.
The floral image from the Hand-Penned Petals stamp set (#155070) was stamped with VersaMark (#102283) onto the Gold from the Gold & Rose Gold 6”x6” Metallic Specialty Paper (#156844). I added the Gold Stampin’ Emboss Powder (#155555) and set it with the Heat Tool (#129056). I then coloured the flowers with Highland Heather Stampin’ Blends (#154887), Polished Pink Stampin’ Blends (#155520) and Flirty Flamingo Stampin’ Blends (#154884). I used Granny Apple Green Stampin’ Blends (#154885) for the leaves.
I matted this gold paper with Gorgeous Grape card (#147011). The Highland Heather card front (#147010) was dry embossed with the Pretty Flowers Embossing Folder (#155428), then attached to the Basic White base card (#159228).
“Congratulations” is also from the Hand-Penned Petals stamp set and stamped with Gorgeous Grape ink (#147099). The sentiment and the Gorgeous Grape Label under the sentiment were cut with the Potted Succulents dies (#154330). The sentiment was attached to the card with Stampin’ Dimensionals (#104430). The Gorgeous Grape Sheer Ribbon (#154572) was used to make the bow and attached to the card with a Mini Glue Dot (#103683).
The Elegant Faceted Gems (#152464) were coloured with the dark Highland Heather Stampin’ Blends (#154887) before attaching to the card.
“Love what you do and share what you love.”
Stay safe & keep crafting!!
Friday, 22 October 2021
Angels Of Peace stamp set
Hello friends,

I have heat embossed this cute little angel with White Stampin’ Emboss Powder (#155554) onto the Gold paper from the Gold & Rose Gold 6”x6” Metallic Specialty Paper (#156844).
The image from the Angels Of Peace stamp set (#156365) was stamped with VersaMark (#102283), sprinkled with the white embossing powder and heat set with the Heat Tool (#129056). I cut this with a Hippo & Friends Die (#153585). Merry Christmas from the Poinsettia Petals stamp set (#158251) was heat embossed with Gold Stampin’ Emboss Powder (#155555). I used a Stitched Rectangle die (#151820) to cut the sentiment.
The Basic White card front (#159228) was dry embossed with the Star-Crossed Embossing Folder (#156567). I daubered the edges with Daffodil Delight ink (#147094) and Soft Suede ink (#147115) to try to achieve a “gold” look. The card front was attached to the Basic White base card.
The sentiment & Angel were attached to the card with Stampin’ Dimensionals (#104430). The lovely Gold Holly Leaves (#156311) were attached with Mini Stampin’ Dimensionals (#144108) and Mini Glue Dots (#103683). The Genial Gems (#155500) were added to add that extra glitter & gold to the card.
“Love what you do and share what you love.”
Stay safe & keep crafting!!
Wednesday, 20 October 2021
Shaded Summer stamp set
Hi ladies & guys,

“Love what you do and share what you love.”
These flowers are from the Shaded Summer stamp set (#155783).
The flowers were stamped with VersaMark (#102283) and heat embossed with Gold Stampin’ Emboss Powder (#155555), then set with the Heat Tool (#129056). These were cut with the Summer Shadows Dies which were available during Sale-a-bration. I coloured the flowers with Flirty Flamingo Stampin’ Blends (#154884) and the leaves with Granny Apple Green Stampin’ Blends (#154885).
The stitching on the Basic White card (#159228) was achieved with the Stitched Greenery Die (#155451). I cut the scallops on the Flirty Flamingo card (#141421) using a Scalloped Contours Die (#155560)
“Happy Birthday” from the Shaded Summer stamp set was stamped with Flirty Flamingo ink (#147052) and cut with an Ornate Frames Die (#150664). The flowers and sentiment were attached to the white card with Stampin’ Dimensionals (#104430).
I made the bow using the White Glittered Organdy Ribbon (#156408) and attached this with Mini Glue Dots (#103683). The embellishments are the Elegant Faceted Gems (#152464).
“Love what you do and share what you love.”
Stay safe & keep crafting!!
Monday, 18 October 2021
Angels Of Peace
Hello everyone,

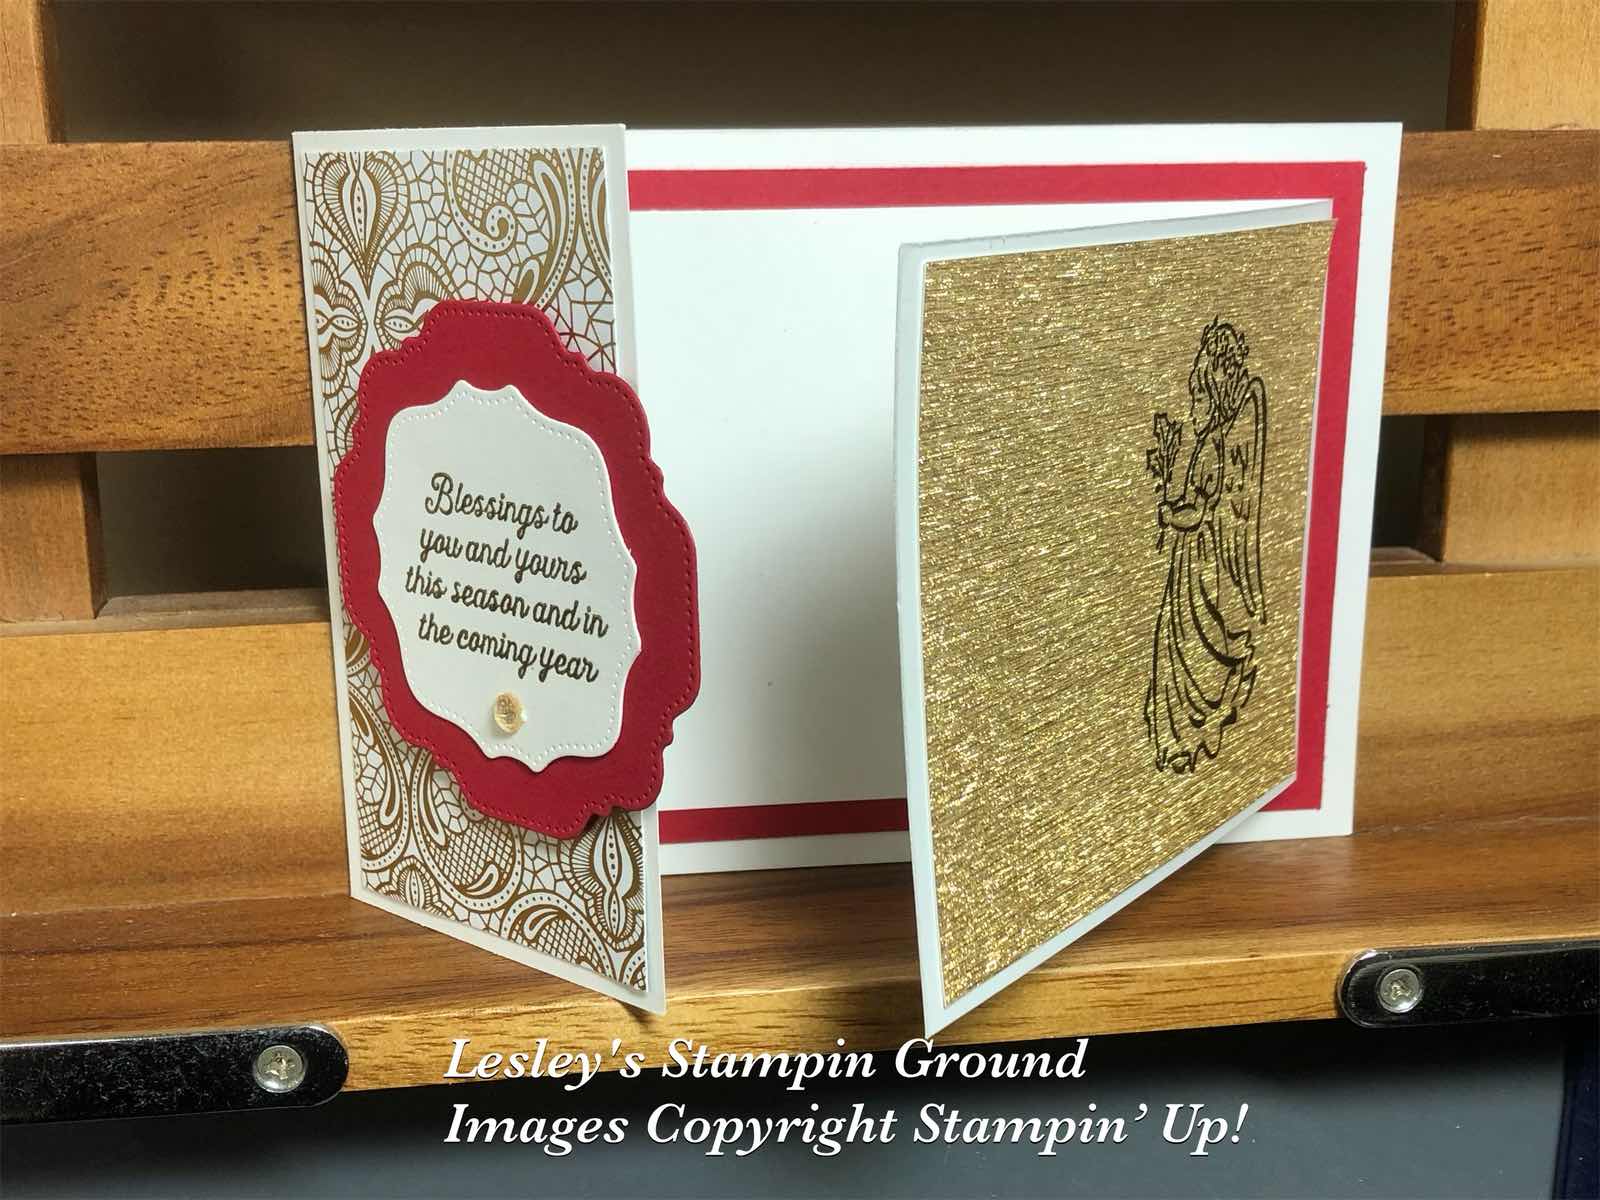

I love this fancy fold card which I have made for a special Christmas card using the Angels Of Peace stamp set (#156365).
The Basic White base card (#159228) measures 21cm x 10.5cm and scored at 6cm for the flap on the left side of the card. The Real Red card (#106578) measures 14cm x 9.5cm and was attached to the base card. The next layer of Basic White card measures 23cm x 8.5cm and scored at 13cms, then placed over the red card with the flap on the right side of the card.
The gold card from the Gold & Rose Gold 6”x6” Metallic Specialty Paper (#156844) measures 9.5cm x8cm. I stamped the angel with VersaMark (#102283) and sprinkled it with the Black Stampin’ Emboss Powder (#155554), then set it with the Heat Tool (#129056). The gold was attached to the flap on the right side of the card. I then attached the Simply Elegant Specialty Designer Series Paper (#155761) to the flap on the left side of the card.
The sentiment from the Angels Of Peace stamp set was heat embossed with VersaMark & Gold Stampin’ Emboss Powder (#155555). The dies to cut this and the Real Red card under the sentiment are from the Hippo & Friends Dies (#153585). I used Stampin’ Dimensionals (#104430) under the left side of the sentiment which allows you to tuck the flap under .
A Genial Gem (#155500) was attached under the sentiment.
“Love what you do and share what you love.”
Stay safe & keep crafting!!
Sunday, 17 October 2021
Stitched Greenery Die
Hello friends,

I am loving this Stitched Greenery Die (#155451) which is great for backgrounds. I am sure it will be used on many of my cards in the future. Not sure why it took so long to get it.
I used this die on the Pearlescent Specialty Paper (#154291) and matted it with the Rich Razzleberry card (#119981). The base card is Shimmery White card (#121717).
I stamped the floral images from the Art Gallery stamp set (#158201) using Rich Razzleberry ink (#147091) on Shimmer White card. I used the stamping off method to stamp the background of the flowers for a lighter image and the darker areas are stamped normally. These were cut with the co-ordinating Floral Gallery dies (#154316). I taped the flowers on the right side of the card and used Stampin’ Dimensionals (#104430) to attach the other flowers.
The detailed “circle” was cut with a die from the Encircled In Beauty Dies (#155546) using Rich Razzleberry card. The sentiment is from the Positive Thoughts stamp set (#151490) and also stamped with Rich Razzleberry ink. I used a Tasteful Labels Die (#152886) to cut this. The Rich Razzleberry cut-out was attached to the card with Stampin’ Dimensionals. The Elegant Faceted Gems (#152464) were added to the card.
“Love what you do and share what you love.”
Stay safe & keep crafting!!
Saturday, 16 October 2021
Picture This Dies
Hello again my crafty friends,
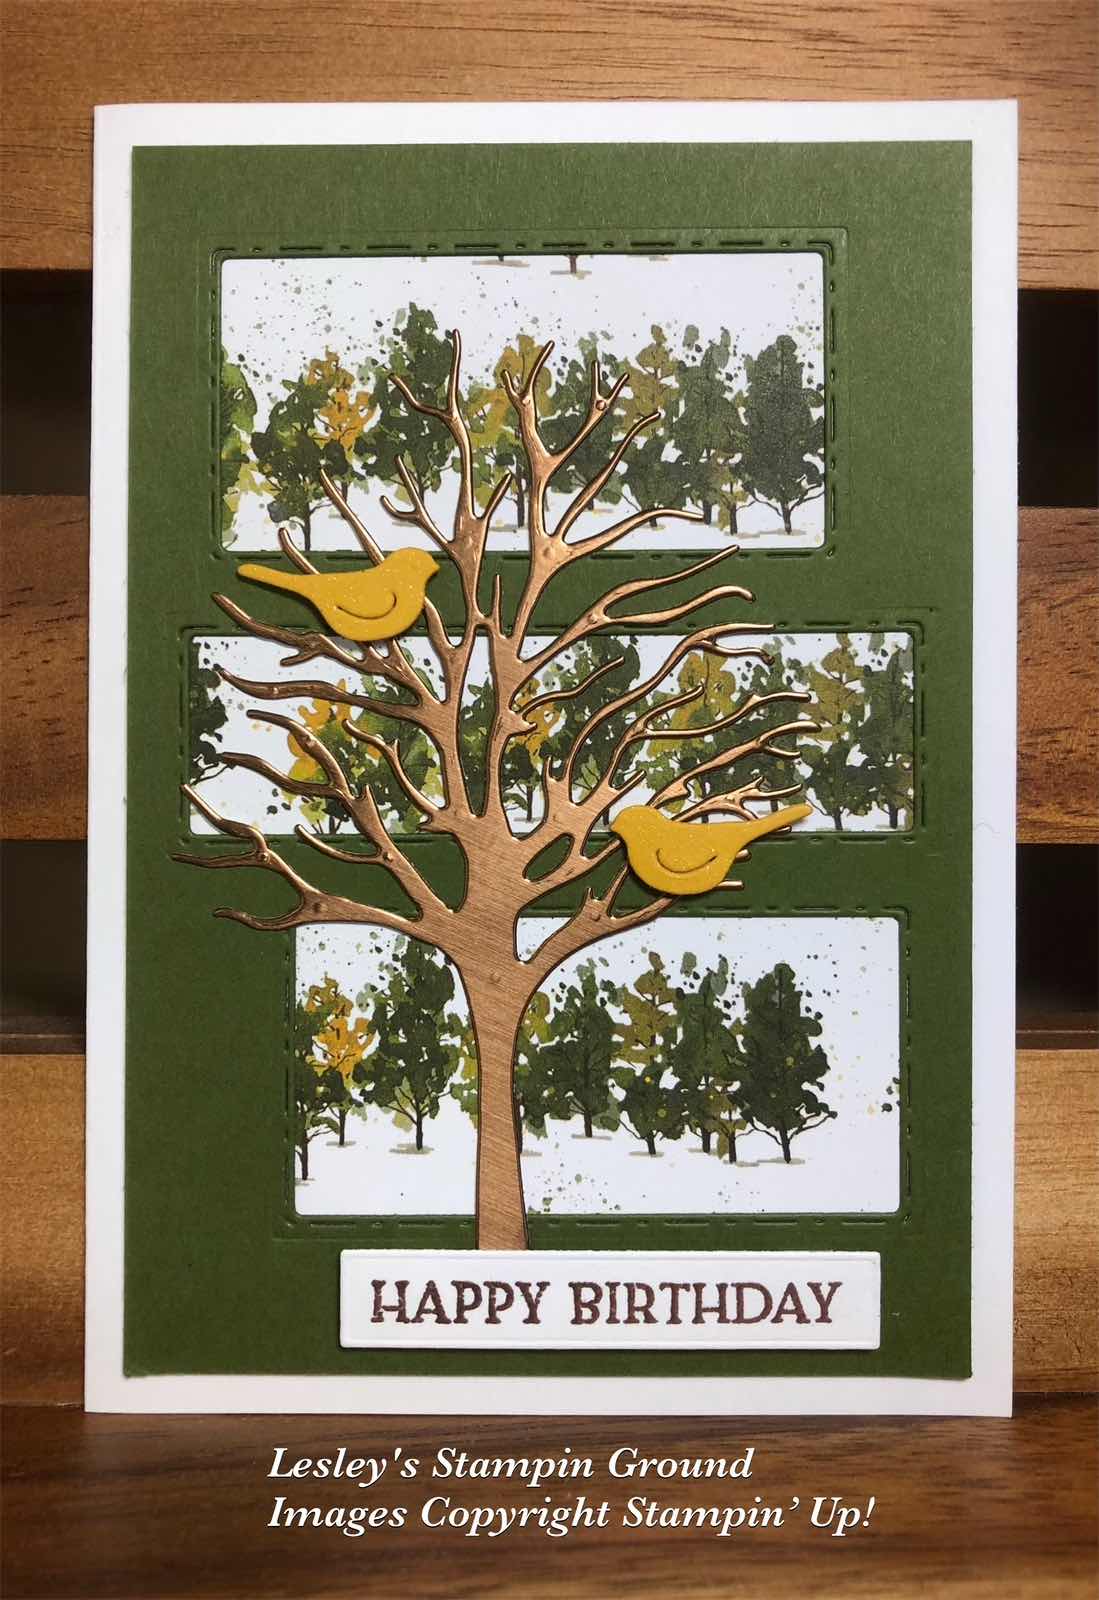
I finished the card by adding glimmer using the Clear Wink Of Stella Brush (#141897) on the birds.
Stampin’ Up! have such a great range of dies, many of them co-ordinate with stamps and others can be used alone with great results.
I cut the Mossy Meadow card (#133683) with one of the Picture This Dies (#155559). This was attached to the Beauty Of The Earth Designer Series Paper (#155841), then this was attached to the Basic White base card (#159228).
I cut the tree from Beautiful Trees Dies (#155840) using the darkest of the Brushed Metallic 12”x12” cardstock (#153524) which was backed with Adhesive Sheet (#152334). This makes it easy to attach more detailed pieces to the card.
The birds, also from the Beautiful trees dies were cut from Bumble Bee card (#153082) and attached to the card with Mini Stampin’ Dimensionals (#144108).
“Happy Birthday” is from the Blossoms In Blooms stamp set (#152684) and I stamped this with VersaMark (#102283). I heat embossed this with Copper Stampin’ Emboss Powder (#155555) and set it with the Heat Tool (#129056). The die to cut this is also from the Beautiful Trees dies. I attached the sentiment with Stampin’ Dimensionals (#104430).
I finished the card by adding glimmer using the Clear Wink Of Stella Brush (#141897) on the birds.
“Love what you do and share what you love.”
Stay safe & keep crafting!!
Thursday, 14 October 2021
Harvest Meadow Designer Series Paper
Welcome everyone,

“Love what you do and share what you love.”
I love the variety of Designer Series Papers available from Stampin’ Up!. I have used the Harvest Meadow 12”x12” DSP (#156494) today.
I matted the smaller piece of Designer Series Paper with Merry Merlot card (#147005) and the card front was attached to the Basic White base card (#159228). The leaves and branches were cut with the Intricate Leaves Dies (#153566). I adhered the Adhesive Sheets (#152334) to the cards before cutting. The cards used are Soft Suede (#119982), Mossy Meadow (#133683), Merry Merlot and Crumb Cake (#121685).
The Gold Trim from the Simply Elegant Trim (#155766) was attached to the card. The sentiment was stamped with Merry Merlot ink (#147112) and this was cut with a Stitched So Sweetly die (#151690). The edges were daubered with Merry Merlot ink, then attached to the card with Stampin’ Dimensionals (#104430).
Beautiful DSP makes it very easy to make a lovely card.
“Love what you do and share what you love.”
Stay safe & keep crafting!!
Wednesday, 13 October 2021
Whimsical Trees
Hello friends,
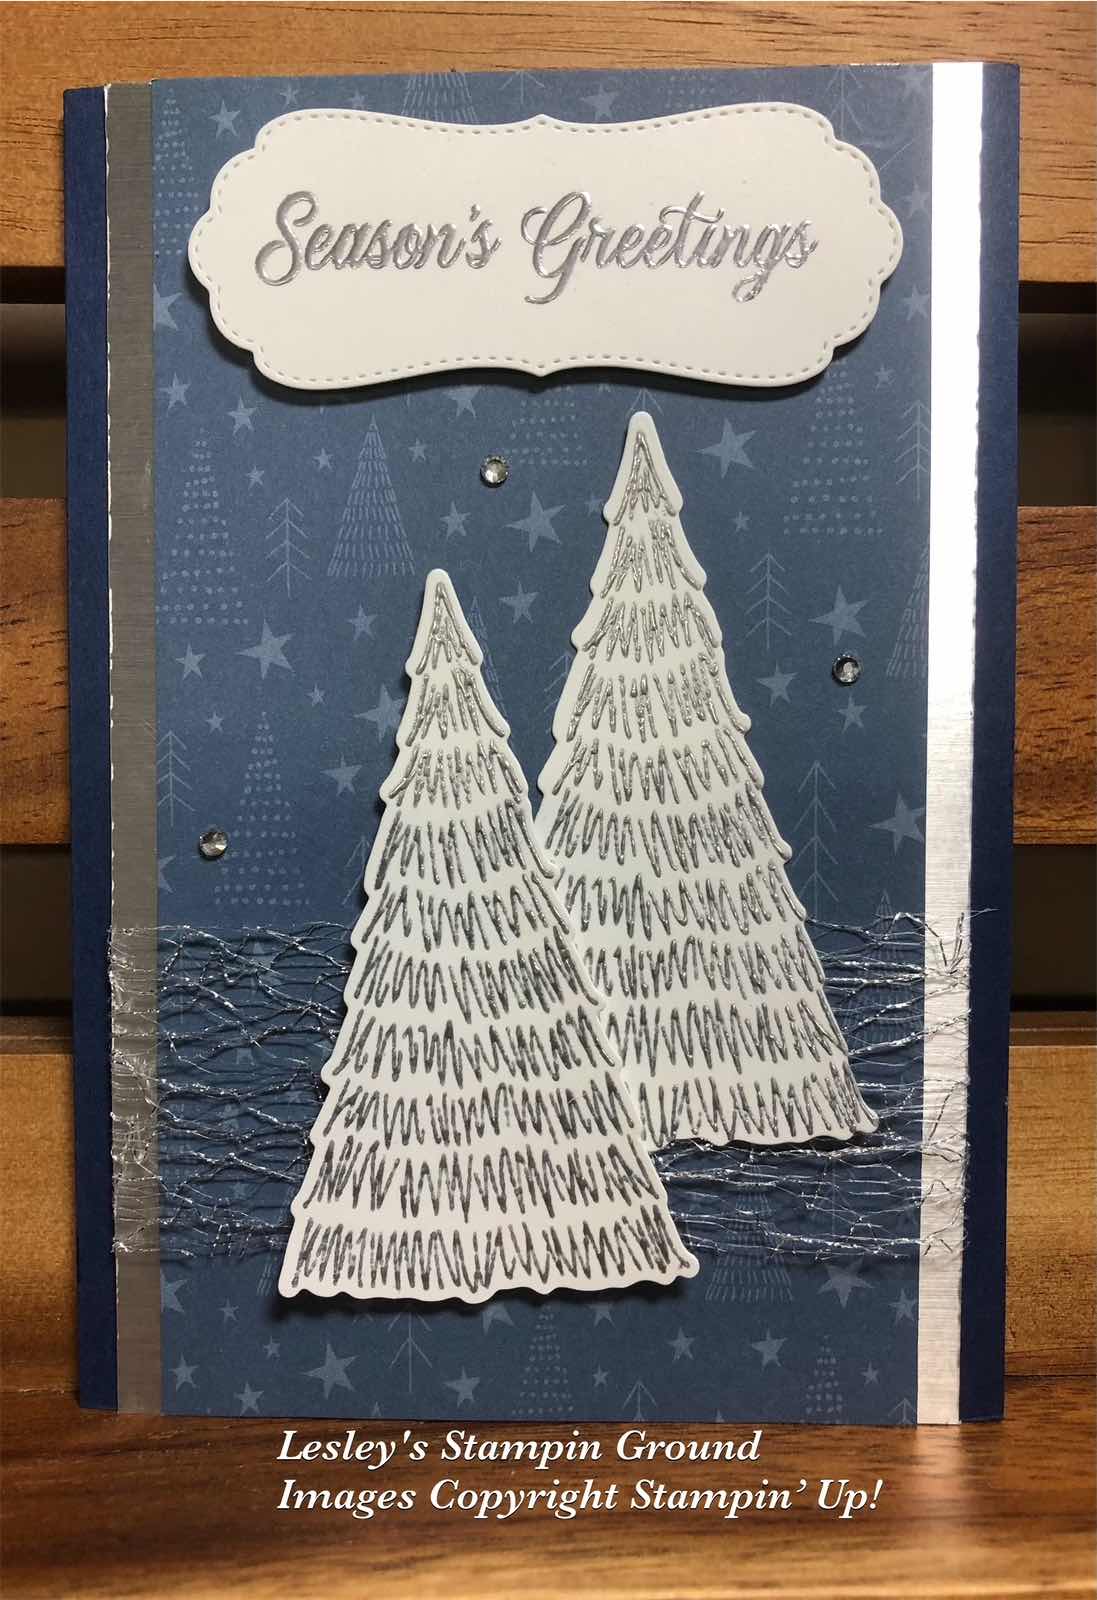
The trees and designer series paper are from the beautiful Whimsy & Wonder Suite Collection (#156276).
The trees are from the Whimsical Trees stamp set (#156330) and stamped with VersaMark (#102283), then heat embossed with Silver Stampin’ Emboss Powder (#155555) and set with the Heat Tool (#129056). These were then cut with a die from the Christmas Trees Dies (#156339).
I attached silver foil from the Silver Foil Specialty Pack (#156457) to the Whimsy & Wonder 12”x12” Specialty Designer Series Paper (#156329). I wrapped the Metallic Mesh Ribbon (#153550) around the card front, then attached this to the Night Of Navy base card (#106577).
“Season’s Greetings” from the Merriest Moments stamp set (#156353) was also Silver Embossed, then cut with a Potted Succulent Die (#154330). The sentiment and the top tree were attached with Stampin’ Dimensionals (#104430). The Rhinestone Basic Jewels (#144220) were added to the card.
“Love what you do and share what you love.”
Stay safe & keep crafting!!
Tuesday, 12 October 2021
Stitched Snowflakes Dies
Hi again,

“Love what you do and share what you love.”
It isn’t hard to make a pretty card with some dies and an embossing folder.
I dry embossed the Basic White card front (#159228) with the snowflakes images from the Wintry 3D Embossing Folder (#155433). This was matted with Balmy Blue card (#147007). The Metallic Mesh Ribbon (#153550) was wrapped around the card front, then attached to the Basic White base card.
The snowflakes are cut with the Stitched Snowflakes Dies (#156455) using Silver Foil Specialty Paper (#156457). These were attached to the card with Mini Stampin’ Dimensionals (#144108). The Rhinestone Basic Jewels (#144220) were coloured with the Dark Balmy Blue Stampin’ Blends (#154830) before attaching to the snowflakes and card.
“Joy” is from the Bright Baubles stamp set (#156350) and stamped with Balmy Blue ink (#147105). The circle is from Textures & Frames stamp set which was from Sale-a-bration, and also stamped with Balmy Blue ink. This was cut with the Picture This Die (#155559) and attached to the card with Stampin’ Dimensionals (#104430).
“Love what you do and share what you love.”
Stay safe & keep crafting!!
Monday, 11 October 2021
Eden’s Garden Bundle
Hi everyone,

“Love what you do and share what you love.”
I am using the leaves here on this card that I had left from yesterdays card.
The leaves were cut with the Eden Dies (#157831) using the Ever Eden 12”x12” Specialty Designer Series Paper (#159996). The background is also from the same DSP. I stamped the leaves from the Eden’s Garden stamp set (#157823) onto this DSP with VersaMark (#102283) and heat embossed with Silver Stampin’ Emboss Powder (#155555), then set with the Heat Tool (#129056). The sentiment from the same stamp set was also silver embossed onto Basic White card (#159228). The sentiment and Evening Evergreen card (#155575) were cut with the Hippo & Friends Dies (#153585).
The die cut leaves were attached to the DSP card front with Mini Glue Dots (#103683). I threaded the Soft Succulent Open Weave Ribbon (#155780) through the sentiment and attached the sentiment to the Evening Evergreen label with Stampin’ Dimensionals (#104430). The ribbon was wrapped around the card, and the card front was attached to the Evening Evergreen base card.
The card was finished with the addition of the Rhinestone Basic Jewels (#144220).
Stay safe & keep crafting!!
Sunday, 10 October 2021
Eden Dies
Hello friends,
“Love what you do and share what you love.”
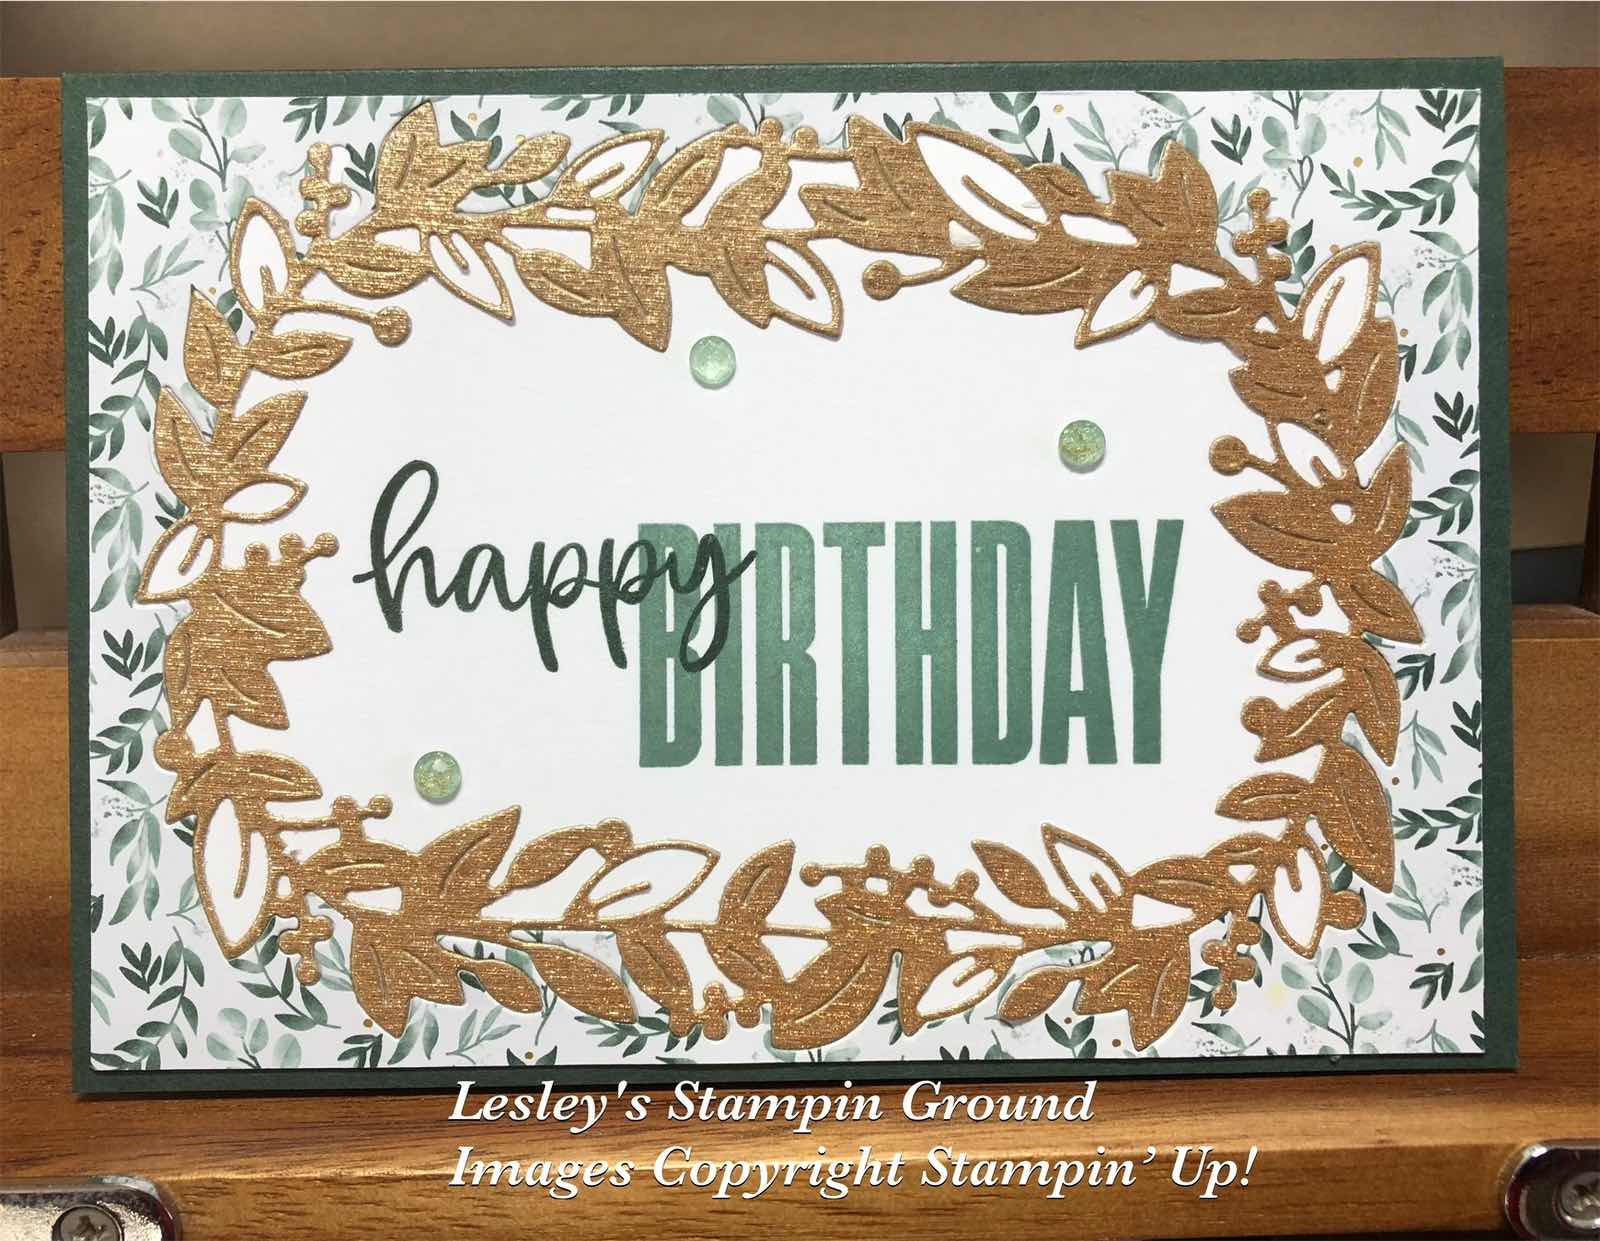
Here is another card using some of the early release Eden’s Garden collection (#160849).
Using the larger die from the Eden Dies (#157831) I cut the Ever Eden 12”x12” Specialty Designer Series Paper (#159996). I put the leaf cut out aside for another card and used the outside of the DSP and attached it to a piece of Basic White card (#159228). I then adhered the Adhesive Sheet (#152334) to the back of the Gold paper from the Gold & Rose Gold Metallic Specialty Paper (#156844), then cut with the same die, this time using the leaf cutout. I attached this onto the white card matching it up with the DSP cut out.
“Happy” & “Birthday” are from the Biggest Wishes stamp set (#155052). “Happy” is stamped with Evening Evergreen ink (#155576) and “Birthday” is stamped with Soft Succulent ink (#155778). The Genial Gems (#155500) were added to the card. The base card is Evening Evergreen (#155575).
An easy and pretty card.
“Love what you do and share what you love.”
Stay safe & keep crafting!!
Saturday, 9 October 2021
Eden’s Garden
Hi my crafty friends,
You will see more of these products used here over the next few weeks.
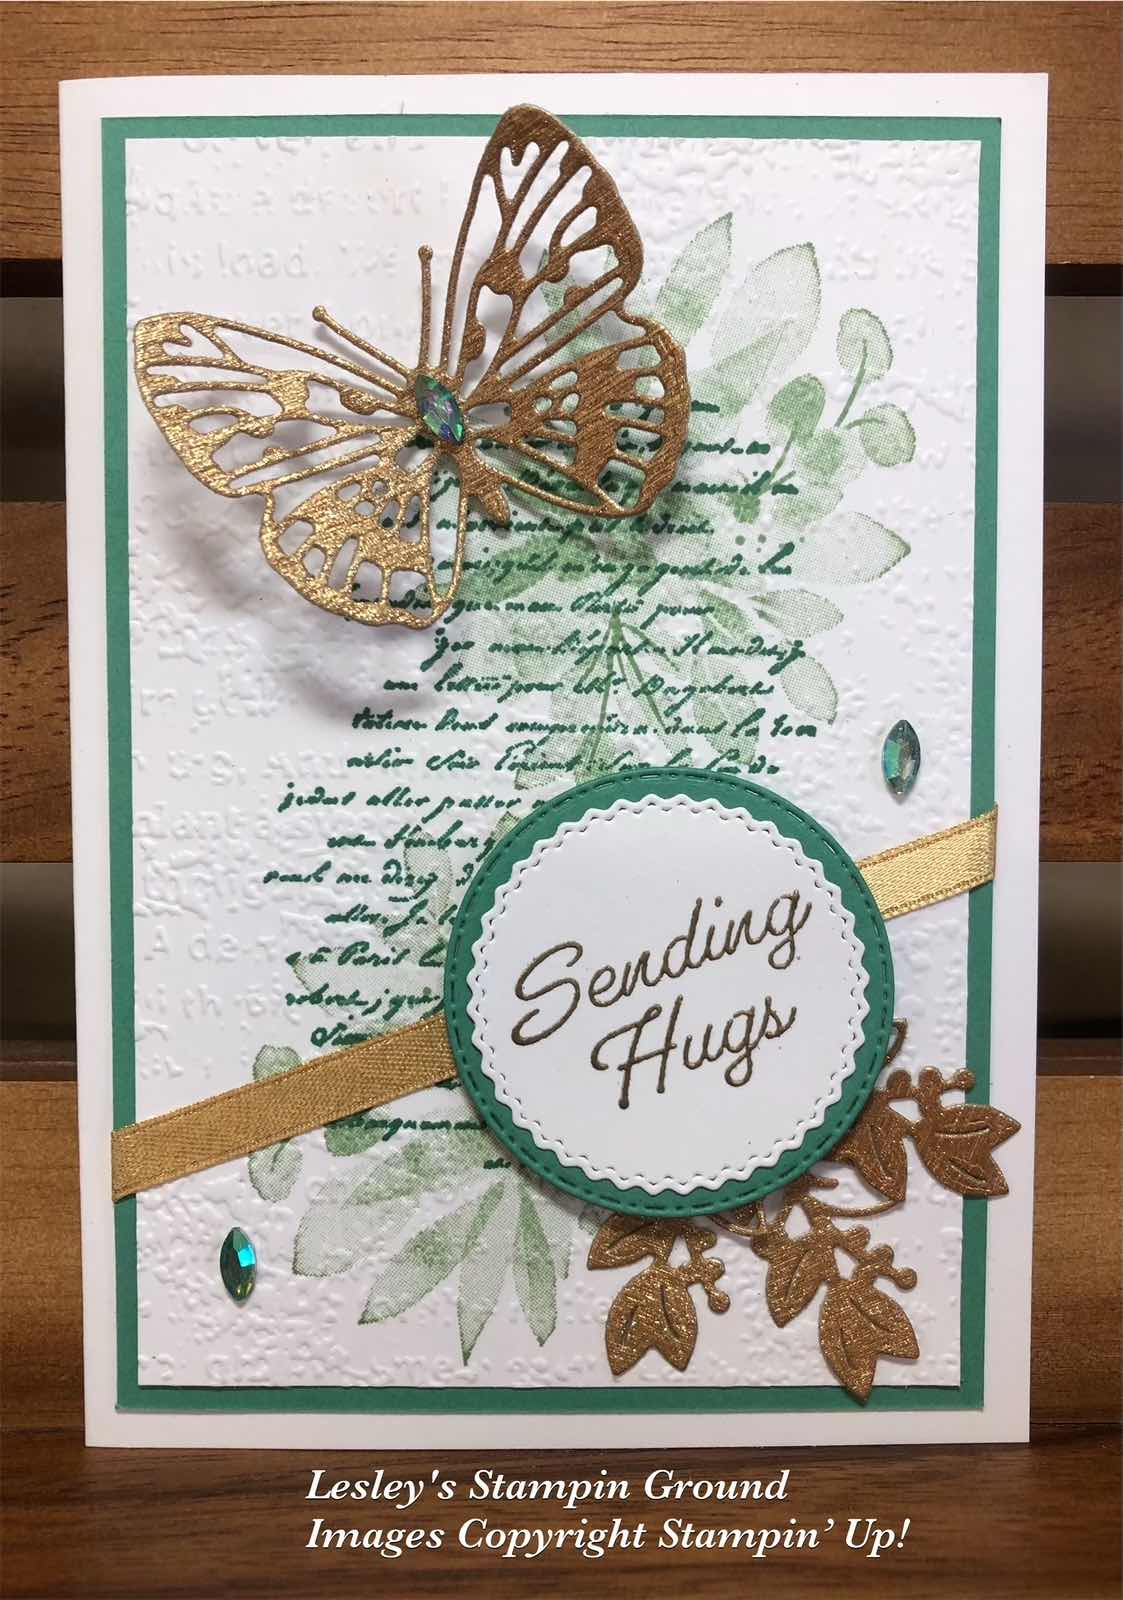
The Eden’s Garden Collection (#160849) is an early release product which will be available from 2nd November and some of the products will be then available in the mini catalogue in January. An advantage of being a demonstrator is the you can access these products in advance, so if you would like that opportunity just contact me.
I have used a couple of the products on this card and combined them with some of my other favourite products.
The leaves in the background are from the Eden’s Garden stamp set (#157823) and stamped with Mint Macaron ink (#147106). The “verse” from the Very Versailles stamp set (#149275) was stamped with Just Jade ink (#153115). The Basic White card front (#159228) was the dry embossed with the Timeworn Type 3D Embossing Folder (#156505). This was matted with Just Jade card (#153084), then I wrapped the Gold Shimmer Ribbon (#152156) around the card. This was attached to the Basic White base card.
The butterfly was cut with a die from the Brilliant Wings dies (#155523) using the gold from the Gold & Rose Gold Metallic Specialty Paper (#156844). This was attached to the card with Mini Stampin’ Dimensionals (#144108).
The sentiment is also from the Eden’s Garden stamp set and stamped with VersaMark (#102283) and embossed with Gold Stampin’ Emboss Powder (#155555), then set with the Heat Tool (#129056). I used a die from the Tasteful Labels Dies (#152886) to cut the sentiment. The Just Jade card under the sentiment was cut with a Warm Wraps Die (#153521) and Stampin’ Dimensionals (#104430) were used to attach this to the card.
The gold leaves were cut using a die from the Eden Dies (#157831) from the Gold & Rose Gold Metallic Specialty Paper. I used Mini Glue Dots (#103683) to attach the leaves. The beautiful gems are the Garden Gems (#159277) which are part of the Eden’s Garden collection.
“Love what you do and share what you love.”
Stay safe & keep crafting!!
Friday, 8 October 2021
Sending Hugs
Hello again,

“Love what you do and share what you love.”
I experimented today with heat embossing onto the Rose Gold Paper from the Gold & Rose Gold Metallic Specialty Paper (#156844) and it worked beautifully.
Using VersaMark (#102283) I stamped the image from the Sending Hugs stamp set (#155022) onto the Rose Gold Paper. I used Gold Stampin’ Emboss Powder (#155555) and heat set it with the Heat Tool (#129056). The card front was attached to the Basic White base card (#159228).
I attached a piece of Gold Foil sheet (#132622) to the Foam Adhesive Sheets (#152815) and cut this with the HUGS die from the Layering Hugs Dies (#155860). These letters were then attached over the embossed hug letters.
“On your special day” from Sending Hugs stamp set was gold embossed onto Basic White card and cut with a die from the Layering Hugs Dies. This was attached to the card with Mini Stampin’ Dimensionals (#144108). The trio of embellishments in the corners are from the Wonderful gems (#153536).
“Love what you do and share what you love.”
Stay safe, keep crafting and have a great weekend!!
Thursday, 7 October 2021
Gorgeous Leaves
Hello friends,

I don't very often make “vintage style” cards so tried it on this card. I thought the Timeworn Type 3D Embossing Folder (#156505) would be ideal for the background.
After dry embossing the Very Vanilla card front (#106550), I wiped the Crumb Cake ink pad (#147116) lightly over the embossed card, highlighting the raised embossed areas. Then using a Blending Brush (#153611) and Soft Suede ink (#147115), I added extra colour around the edges of the card front. I also tore some areas for a more vintage look. I matted the card front with So Saffron card (#108611).
The leaves are from the Gorgeous Leaves stamp set (#153365). I inked one leaf with So Saffron ink (#147109), then added Soft Suede ink (#147115) around the edges using a Sponge Dauber (#133773) before stamping. The other 2 stamped leaves were inked with Old Olive ink (#147090) and I added the Cherry Cobbler ink (#147083) to the tips with a dauber, then stamped.
I wrapped the Gold Fine Art Ribbon (#154561) around the card front before adding the leaves to the card.
I adhered the Adhesive Sheet (#152334) to the back of the Soft Suede card (#119982), Old Olive card (#106576) and So Saffron card before cutting these and the stamped leaves with the Intricate Leaves Dies (#153566).
The sentiment is from the retired Many Mates stamp set and stamped with Soft Suede ink, then cut with a Tasteful Labels Die (#152886). The sentiment and the stamped leaves were all attached with Stampin’ Dimensionals (#104430).
The Brushed Metallic Adhesive-Backed Dots (#156506) were added to the card. The card base is Soft Suede. I added sparkle to all the leaves using the Clear Wink Of Stella Brush (#141897).
“Love what you do and share what you love.”
Stay safe & keep crafting!!
Wednesday, 6 October 2021
Sweet Stockings Designer Series Paper
Hi my friends,


Here are 2 cards the “same but different” using the Sweet Stockings Designer Series Paper (#156281). How cute are these animals.
The base card and card front are Basic White card (#159228). I dry embossed the card front with one of the Wintry 3D Embossing Folders (#155433), then attached the DSP to the card. The edges of the card front were daubered with Cherry Cobbler ink (#147083) and attached to the card base.
I dots were dry embossed on the rectangular white card with one of the Checks & Dots Embossing Folder (#155432), then this was matted with the Cherry Cobbler card (#121681).
The dog and stockings were fussy cut from the Sweet Stockings DSP and attached to the card with Stampin’ Dimensionals (#104430). “Season’s Greetings” is from the Merriest Moments stamp set (#156353) and stamped with Cherry Cobbler ink. A die from the Ornate Frames Dies (#150664) was used to cut the sentiment. Stampin’ Dimensionals were also used to attach this to the card.
A great card for any animal lover.
“Love what you do and share what you love.”
Stay safe & keep crafting!!
Tuesday, 5 October 2021
Paper Pumpkin Expressions In Color
Hello Ladies & Guys,
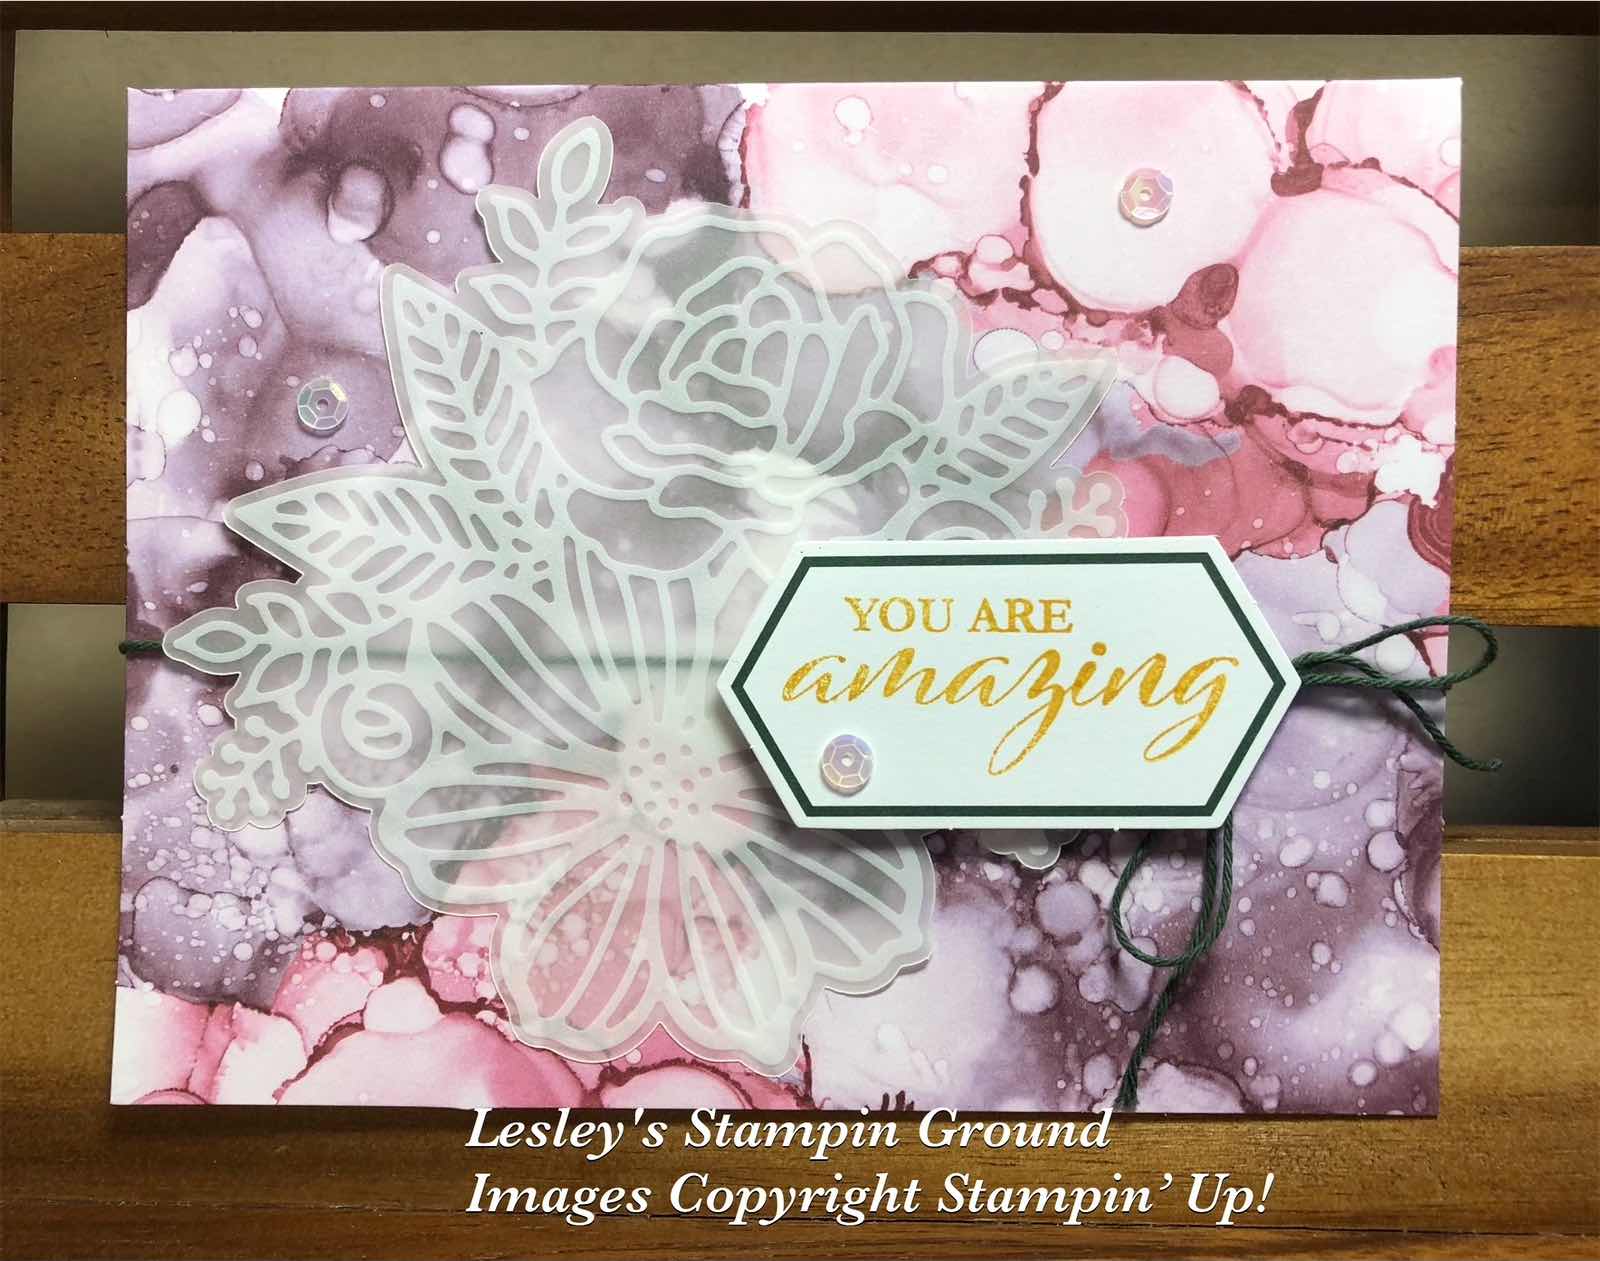


The Expressions In Color Paper Pumpkin kit (#158477) is available in Australia now while stocks last.
This beautiful kit consists of supplies for 9 cards (3 of each design) with envelopes, 2 ink spots - Bumble Bee & Evening Evergreen, stamp set, trim, vellum die-cuts, paper die-cuts, embellishments, Dimensionals & glue dots. Great value at $37 and all this is included in a cute, colorful & collectable box. The 3 cards are made as instructed for this kit but you could always add your own twist - the possibilities are endless. Instructions are included.
This kit also co-ordinates with the gorgeous Expressions In Ink Designer Series Paper (#155464).
This kit would also be a great gift for the beginner stamper.
“Love what you do and share what you love.”
Stay safe & keep crafting!!
Monday, 4 October 2021
Happy Holly-Days stamp set
Hi friends,
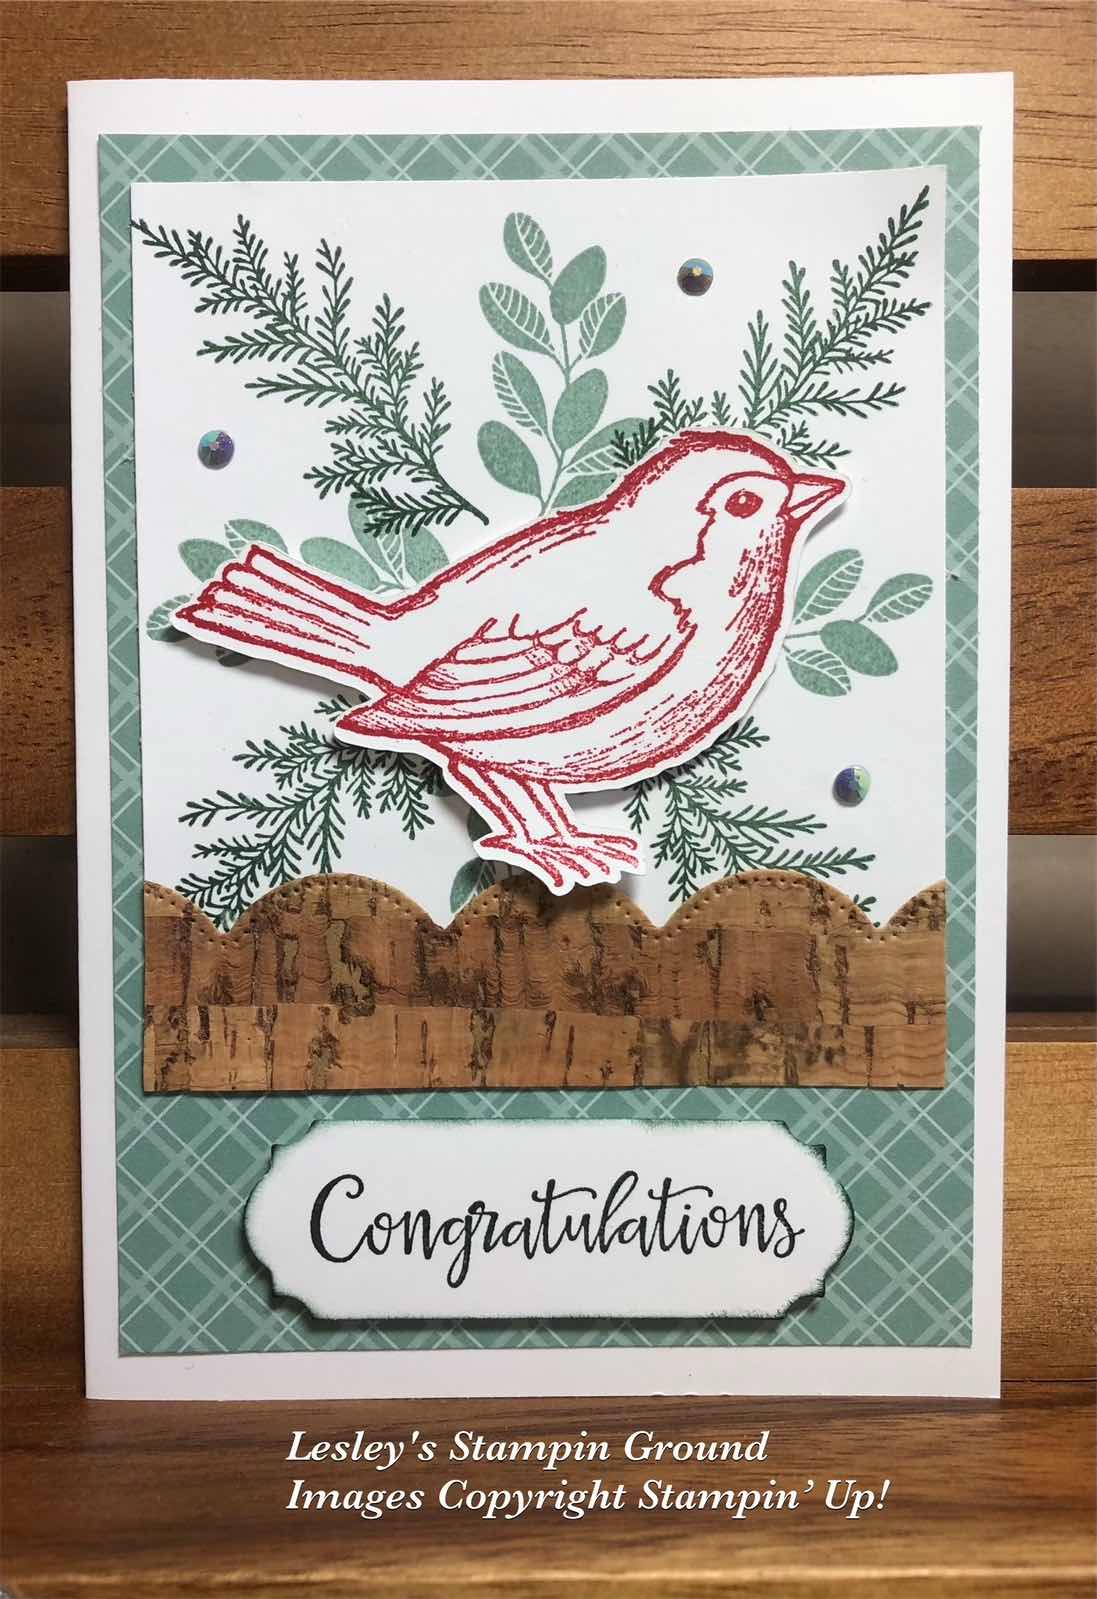
“Love what you do and share what you love.”
Today I have used 2 Christmas stamp sets but again have made a non Christmas card.
I often stamp an image which I don’t end up using so have a box of bits and pieces which come in very handy when I have little time to stamp but need a card. It’s a bit like a kit with all the pieces ready to put together. The bird, the stamped leaves and scalloped cork paper are all from that box so didn't take long to put together.
The Soft Succulent card front is from the 2021-2023 In Color Designer Series Paper (#155641) and attached to the Basic White base card (#159228). The leaves from the Merriest Moments stamp set (#156353) were stamped with Soft Succulent ink (#155778) and Evening Evergreen ink (#155576). This was attached to the card front.
The Cork Specialty Paper (#156393) was cut with the scalloped die from the Scalloped Contours Dies (#155560). The bird from Happy Holly-Days stamp set (#156342) was stamped with Real Red ink (#147084) and fussy cut. This was attached to the card with Stampin’ Dimensionals (#104430).
“Congratulations” from Peaceful Moments stamp set (#151595) was stamped with Evening Evergreen ink and cut with an Ornate Frames Die (#150664) and also attached with Stampin’ Dimensionals. The Soft Succulent embellishments are from the 2021-2023 In Color Jewels (#155571).
“Love what you do and share what you love.”
Stay safe & keep crafting!!
Subscribe to:
Comments (Atom)