Tuesday, 31 December 2019
Grace’s Garden Bundle
Hello,

How cute is this stamp set and dies from the new 2020 Stampin’ Up! Mini Catalogue. Grace’s Garden Bundle (#153789) consists of the Grace’s Garden stamp set (#151513) and Garden Gateway Dies (#151512).
I stamped the sentiment onto the Very Vanilla base card (#106550) using Merry Merlot ink (#147112). I cut the gateway from the Crumb Cake card (#121685) then I embossed the card with the Brick & Mortar 3D Embossing Folder (#149643). I used Merry Merlot card (#147005) for the gate and archway. The plants were stamped with Garden Green ink (#147089) and I coloured the flowers and leaves with Stampin’ Blends - Dark Mango Melody (#147944), Dark Poppy Parade (#146879), Light Flirty Flamingo (#147031) and Dark Soft Sea Foam (#148058). The cat was stamped with Tuxedo Black Memento Ink (#132708) and coloured with Light Smokey Slate Stampin’ Blends (#145054). The cute little bird was stamped with Mango Melody ink (#147093) and the flowers are from Mango Melody card (#147013). All the pieces were cut with the Garden Gateway dies. The flowers, bird and cat were attached to the card with Stamping’ Dimensionals (#104430) and Mini Stampin’ Dimensionals (#144108). I used the Fine-Tip Glue Pen (#138309) to glue the individual flowers and the gate and archway to the card.
I can’t believe it is the end of the year already. I am looking forward to an exciting New Year and I hope it is a fantastic year for you all.
Happy New Year!!!!
Monday, 30 December 2019
Lovely Lily Pad stamp set & Lily Pad Dies
Hi everyone,
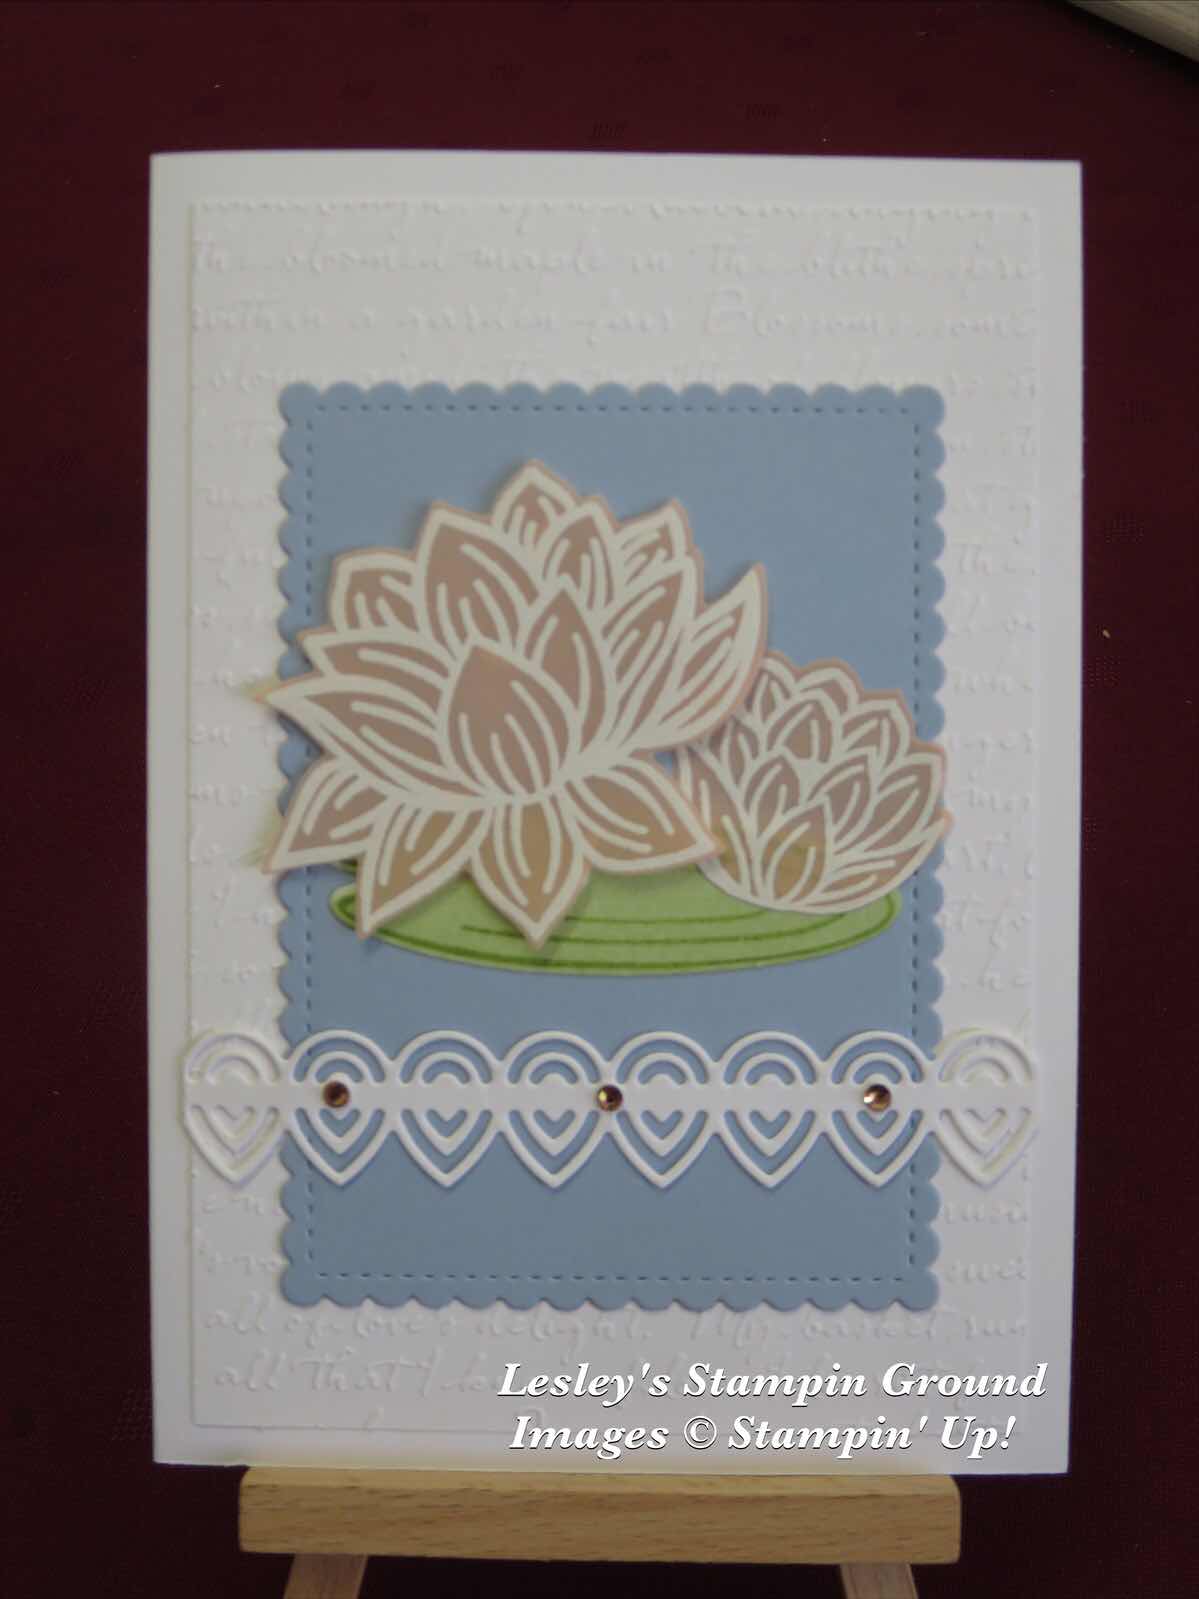
As well as Sale-A-Bration starting on 3rd January, so does the new Mini Catalogue which have fabulous new products to purchase. If you live in Australia and don’t have a demonstrator and would like a catalogue please contact me.
These beautiful lilies are free products from Sale-a-bration which starts on 3rd January, and yes, the Lily Pad dies are also free with a qualifying order.
The Whisper White card front (#106549) was embossed with the Scripty 3D Embossing Folder (#149634) and attached to the Whisper White base card. The Seaside Spray card (#150889) was cut with the largest scalloped rectangle of the Stitched So Sweetly Dies (#151690). The lilies from the Lovely Lily Pad stamp set (#152288) were stamped onto the Petal Pink vellum from the Perennial Essence 12”x12” Vellum cardstock (#149101), using VersaMark (#102283) and White Stampin’ Emboss Powder (#109131). This was then set with the Heat Tool (#129056). The base of the lily pad was stamped with Soft Sea Foam ink (#147102) onto Soft Sea Foam card (#147012). This set is “reversible” which allows you to stamp the base colour using the smooth side of the stamp, then turn it over to stamp the line image. All the images in this set are reversible. The lined image was stamped with Pear Pizzaz ink (#147104). The flowers, lily pad and detailed border were all cut with dies from the Lily Pad Dies (#152315). The stamp set is free with a $90 purchase and the dies with a $180 purchase. I added the Champagne Rhinestone Basic Jewels (#151193) to the card. I will add a sentiment when I decide what I want to use this card for.
As well as Sale-A-Bration starting on 3rd January, so does the new Mini Catalogue which have fabulous new products to purchase. If you live in Australia and don’t have a demonstrator and would like a catalogue please contact me.
Enjoy your day.
Sunday, 29 December 2019
By The Dock Bundle
Hello and welcome,


For the first card I used Seaside Spray card (#150889) for the base and Blueberry Bushel (#146991) for the frame. The jetty and boat from the By The Dock Stamp set (#c151622) were stamped onto Crumb Cake card (#121685) with the Saddle Brown StazOn ink (#151508). The birds were stamped with Seaside Spray ink (#150085) as were the ripples in the water and the fish. Happy Birthday from Itty Bitty Greetings stamp set (#c151331) was stamped with Blueberry Bushel ink (#147138) on Very Vanilla Card (#106550). All the stamped images were cut with the Dockside Dies (#151618). The frame was embossed with the Pinewood Planks 3D Embossing Folder (#152320). Stampin’ Dimensionals (#104430) were used to attach the frame, jetty and boat to the card. Mini Glue Dots (#103683) were used for the birds and oar.
Don’t forget that Sale-A-Bration also starts on the 3rd January, which means that for each $90 you spend on Stampin’ Up! products from the annual catalogue and/or mini catalogue you can get free products, and don’t we all like free products. There are a fabulous variety of products to choose from, so don’t miss out. If you have any questions just ask me.
Apologies for my absence over the last couple of weeks but with Christmas and other distractions I have only just back into the craft room and this is the first chance I have had to play with any new products from the Stampin’ Up! mini catalogue which is available to order from on the 3rd January 2020. I have made a masculine card with the By The Dock Bundle (#c153817). In fact I made 2 cards with slight variations.
For the variations on the second card I used Very Vanilla for the base card, jetty, boat, birds and oars, Crumb Cake for the frame, Seaside Spray for the water and Old Olive card (#106576) for the grass. I used a Stitched Rectangles Die (#148551) to cut the inside of the frame. When I stamped the jetty and boat, I stamped them on card which I had embossed with the Subtle 3D embossing Folder (#151775) first. This gave me a more of a “worn” look which I was hoping to achieve. I used Crumb Cake ink (#147116) to stamp these.
Don’t forget that Sale-A-Bration also starts on the 3rd January, which means that for each $90 you spend on Stampin’ Up! products from the annual catalogue and/or mini catalogue you can get free products, and don’t we all like free products. There are a fabulous variety of products to choose from, so don’t miss out. If you have any questions just ask me.
Enjoy your day, whatever you are doing.
Wednesday, 18 December 2019
Brightly Gleaming Specialty Designer Series Paper
Hi,

Have you got all your Christmas cards made and sent? It’s a good feeling when that job is finished. Here’s a card I made recently using the beautiful Brightly Gleaming Specialty Designer Series Paper (#150429).
The designer series paper was attached to the Whisper White base card (#106549). The Night Of Navy card (#106577), Copper Foil Sheet (#142020) and the DSP with the stars are all cut with the Stitched Nested Labels (#149638). The stars are cut with the Stitched Stars Dies (#150653) and attached to the card with Stampin’ Dimensionals (#104430). “Celebrate The Season” is from the Itty Bitty Christmas stamp set (#c150513) and stamped with Night Of Navy ink (#147110). This was cut with a die from the Merry Christmas Dies (#147912) and also attached with Dimensionals.
There are more products on the Clearance Rack so check them out here. There are some great bargains while stocks last.
Have a great day.
Tuesday, 17 December 2019
Detailed Peacock Dies
Hi and Welcome,
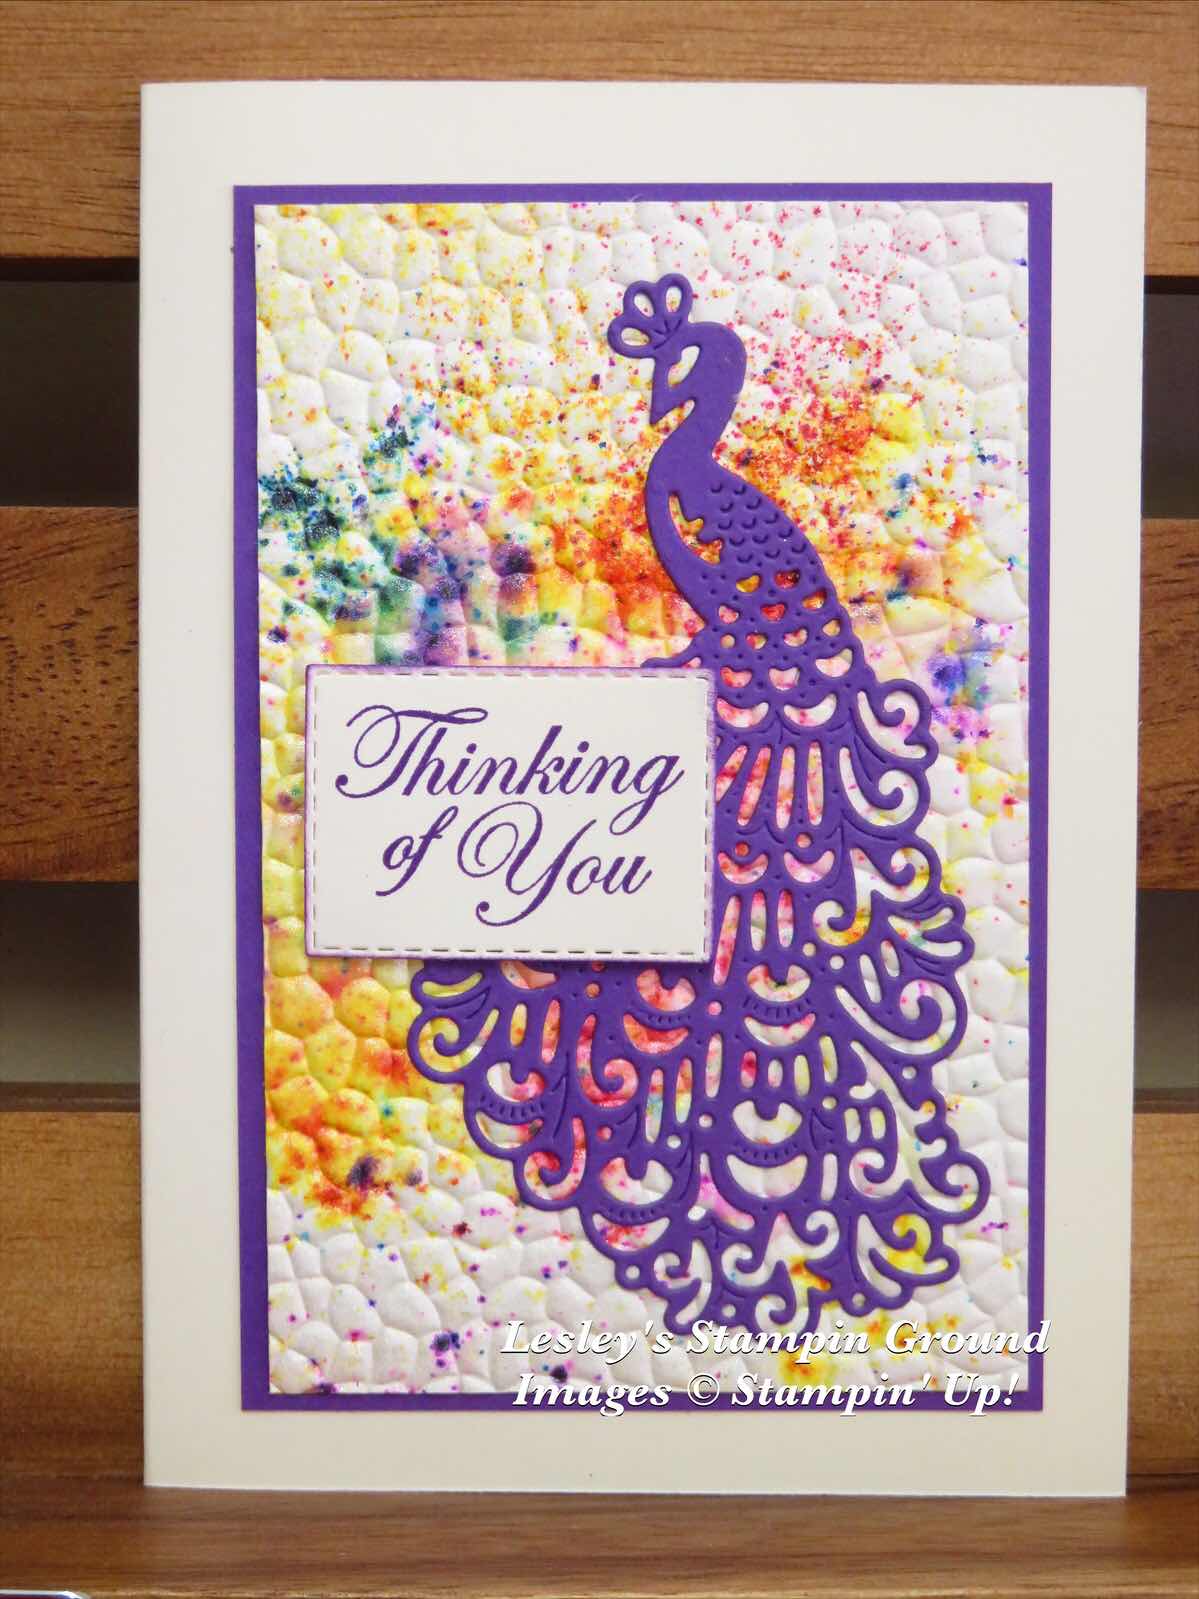
I was having a play with the Pigments Sprinkles (#149663) today and created this beautiful background. These are watercolour pigment crystals which you cam mix with water for unique backgrounds. The colours in the pack are Bermuda Bay, Daffodil Delight, Granny Apple Green, Gorgeous Grape, Mango Melody and Melon Mambo.
There are various methods you can use, but I very lightly sprinkled each of the 6 colours onto the Fluid 100 Watercolor Paper (#149612). A little goes a long way. Usually you would then spray it lightly with water but I decided to try using Frost White Shimmer Paint (#147046) which I had in a Stampin’ Spritzer (#126185) which was mixed with rubbing alcohol. I was very happy with the results as it helped disperse the colours as well as giving the lovely shimmer on the card. The more you spritz the card the more the colours will mix and blend. After the card was dried - I used the Heat Tool (#129056), but you can let it dry naturally - I embossed it with the Hammered Metal 3D Embossing Folder (#150646). The peacock was cut with a Detailed Peacock Die (#149582) from Gorgeous Grape card (#147011). This was glued to the card with Multipurpose Liquid Glue (#110755) using a Stampin’ Sponge (#141337). For this method I squeezed some glue onto a Silicon Craft Sheet (#127853), and dabbed the sponge onto the glue. Then I gently dabbed the glue all over the back of the peacock which is placed onto the craft sheet. This ensures you have glue on all the detailed pieces so is easy to glue to the card. The sentiment from Good Morning Magnolia stamp set (#149298) was stamped with Gorgeous Grape ink (#147099) onto Very Vanilla card (#106550) and cut with a Stitched Rectangles Die (#148551), then attached to the card with Stampin’ Dimensionals (#104430). The base card is also Very Vanilla and the cardfront was matted with Gorgeous Grape card.
Have a great day.
Monday, 16 December 2019
Mercury Glass Designer Acetate
Hello,
Have a great day.
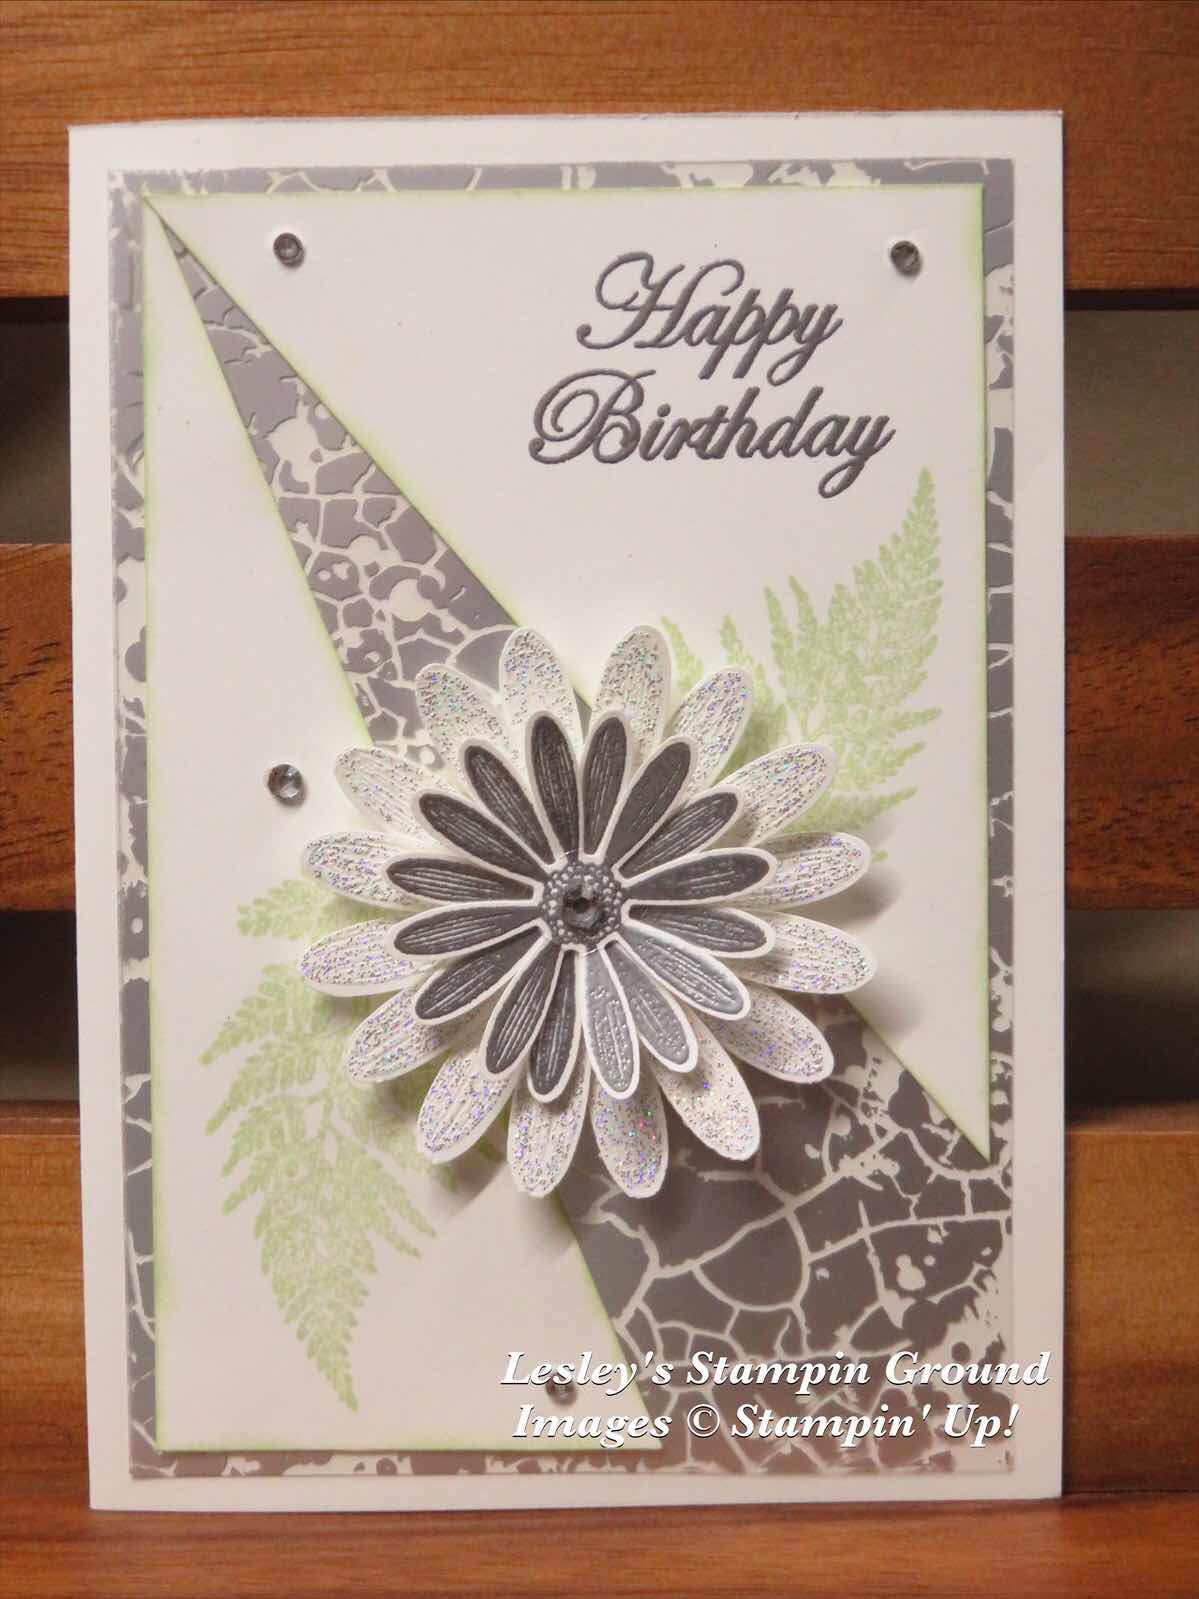
I have made this design a few times recently as it looks so nice and fairly easy to do.
I attached the Mercury Glass Designer Acetate (#150441) to the Whisper White base card (#106549). To cut the Whisper White card front, I measured and made a small mark 3cm from the bottom right corner both vertically and horizontally. From these marks I cut up to the left top corner, which gave me the 2 triangles. I stamped “Happy Birthday” with VersaMark (#102283) and embossed with Silver Stampin’ Emboss Powder (#109131) which needs to be heat set with the Heat Tool (#129056). I stamped the leaves from the Daisy Lane stamp set (#c149325) using Soft Sea Foam ink (#147102). The daisies are also from the Daisy Lane stamp set. The small daisies were heat embossed with Silver Stampin’ Emboss Powder and the large daisies with Shimmer White Stampin’ Emboss Powder (#149511). After setting, these were punched with the co-ordinating Daisy Punch (#143713) and Medium Daisy Punch (#149517). The daisies were assembled using Mini Glue Dots (#103683) and I used a Stampin’ Dimensional (#104430) to attach the flower to the card. Rhinestone Basic Jewels (#144220) were added to the card and flower.
Have a great day.
Friday, 13 December 2019
Floral Essence
Hi friends,
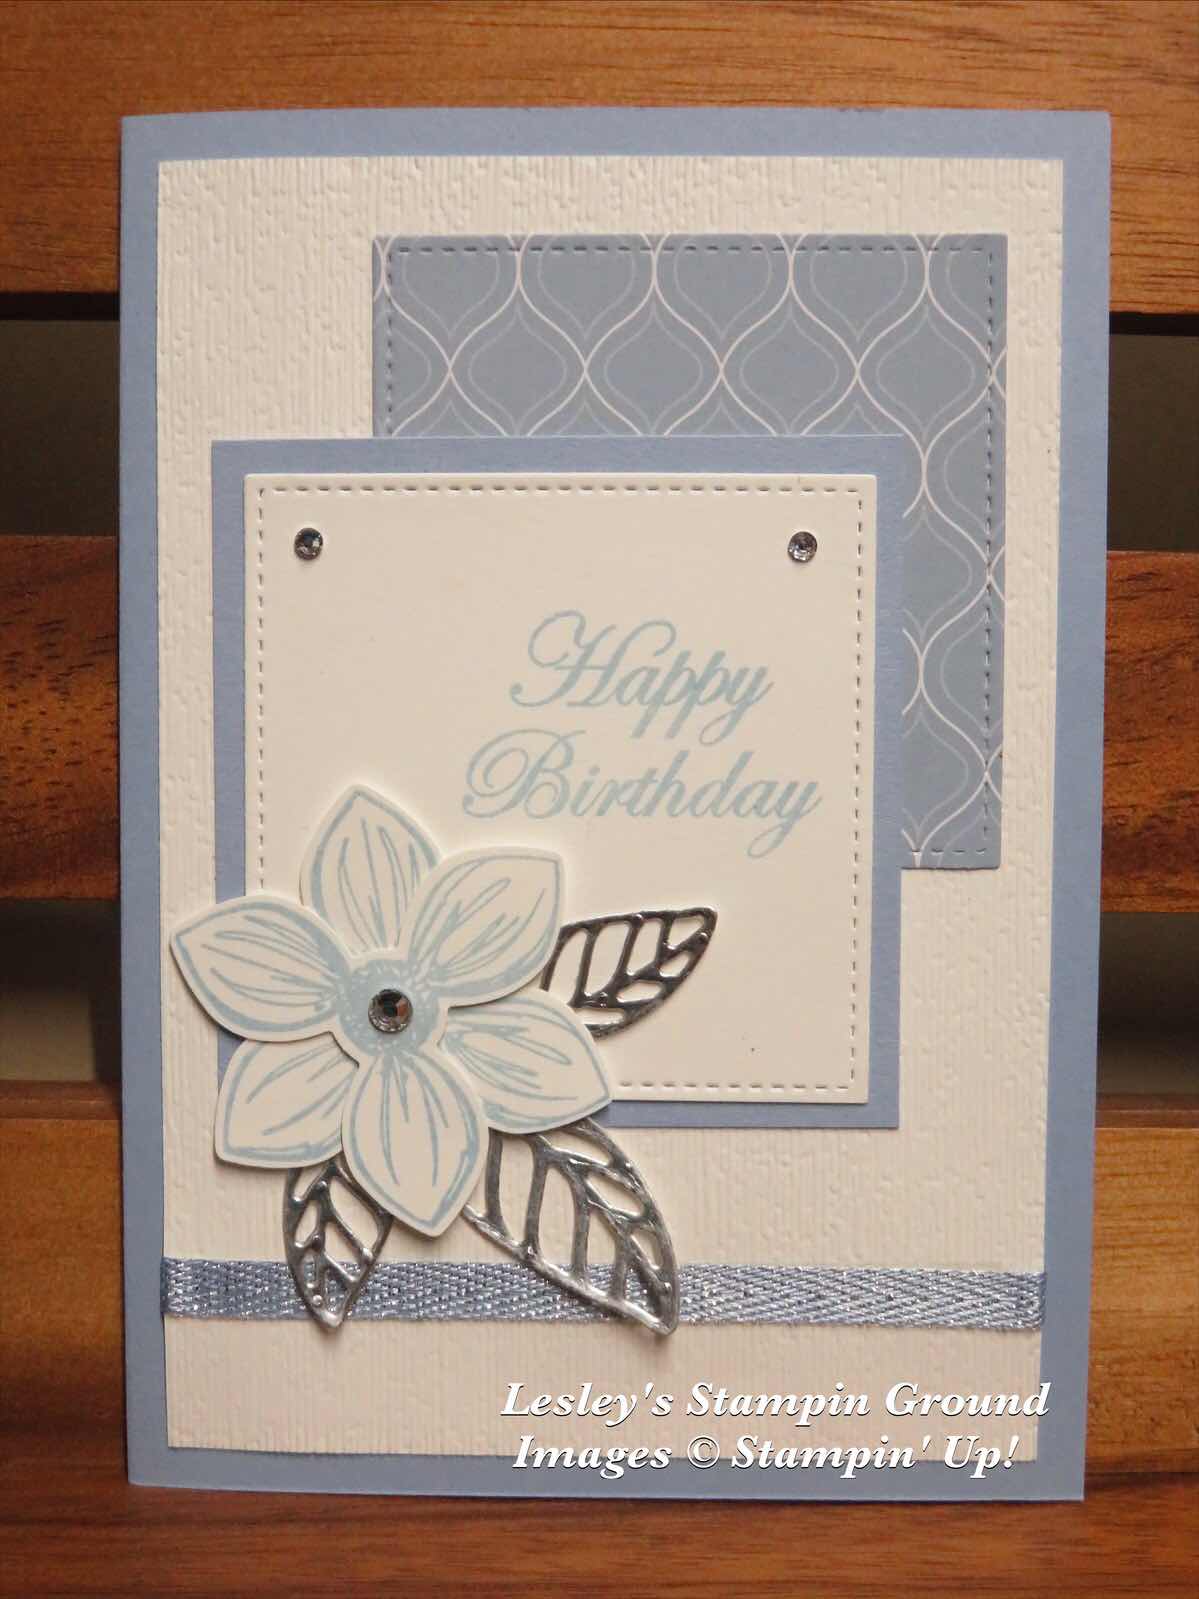
This flower is from the Floral Essence stamp set (#149450) which is in the Annual Catalogue. We can sometimes forget about this catalogue when the holiday catalogue is available.
The base card is Seaside Spray (#150889), then the Whisper White card was attached to the base after being embossed with the 3D Subtle Embossing Folder (#151775). I cut a piece of the Seaside Spray 2019-2021 In Color 6”x6” Designer Series Paper (#149617) with Stitched Shapes Dies (#145372), as well as the Whisper White card with the sentiment. “Happy Birthday” is from the Magnolia Blooms stamp set (#152729) and stamped with Seaside Spray ink (#150085). The flower was also stamped with Seaside spray ink and punched with the co-ordinating Perennial Flower Punch (#149450). I used Silver Foil Sheet (#132178) for the leaves which were cut with dies from the Magnolia Memory dies (#149578). The Seaside Spray 1/4” Metallic Ribbon (#150446) was wrapped around the card front. The flower was attached with Stampin’ Dimensionals (#104430) and the leaves were attached with Mini Glue Dots (#103683). The Rhinestone Basic Jewels (#144220) were added to the card and flower.
Have a great weekend.
Thursday, 12 December 2019
Christmas Gleaming
Hello again,
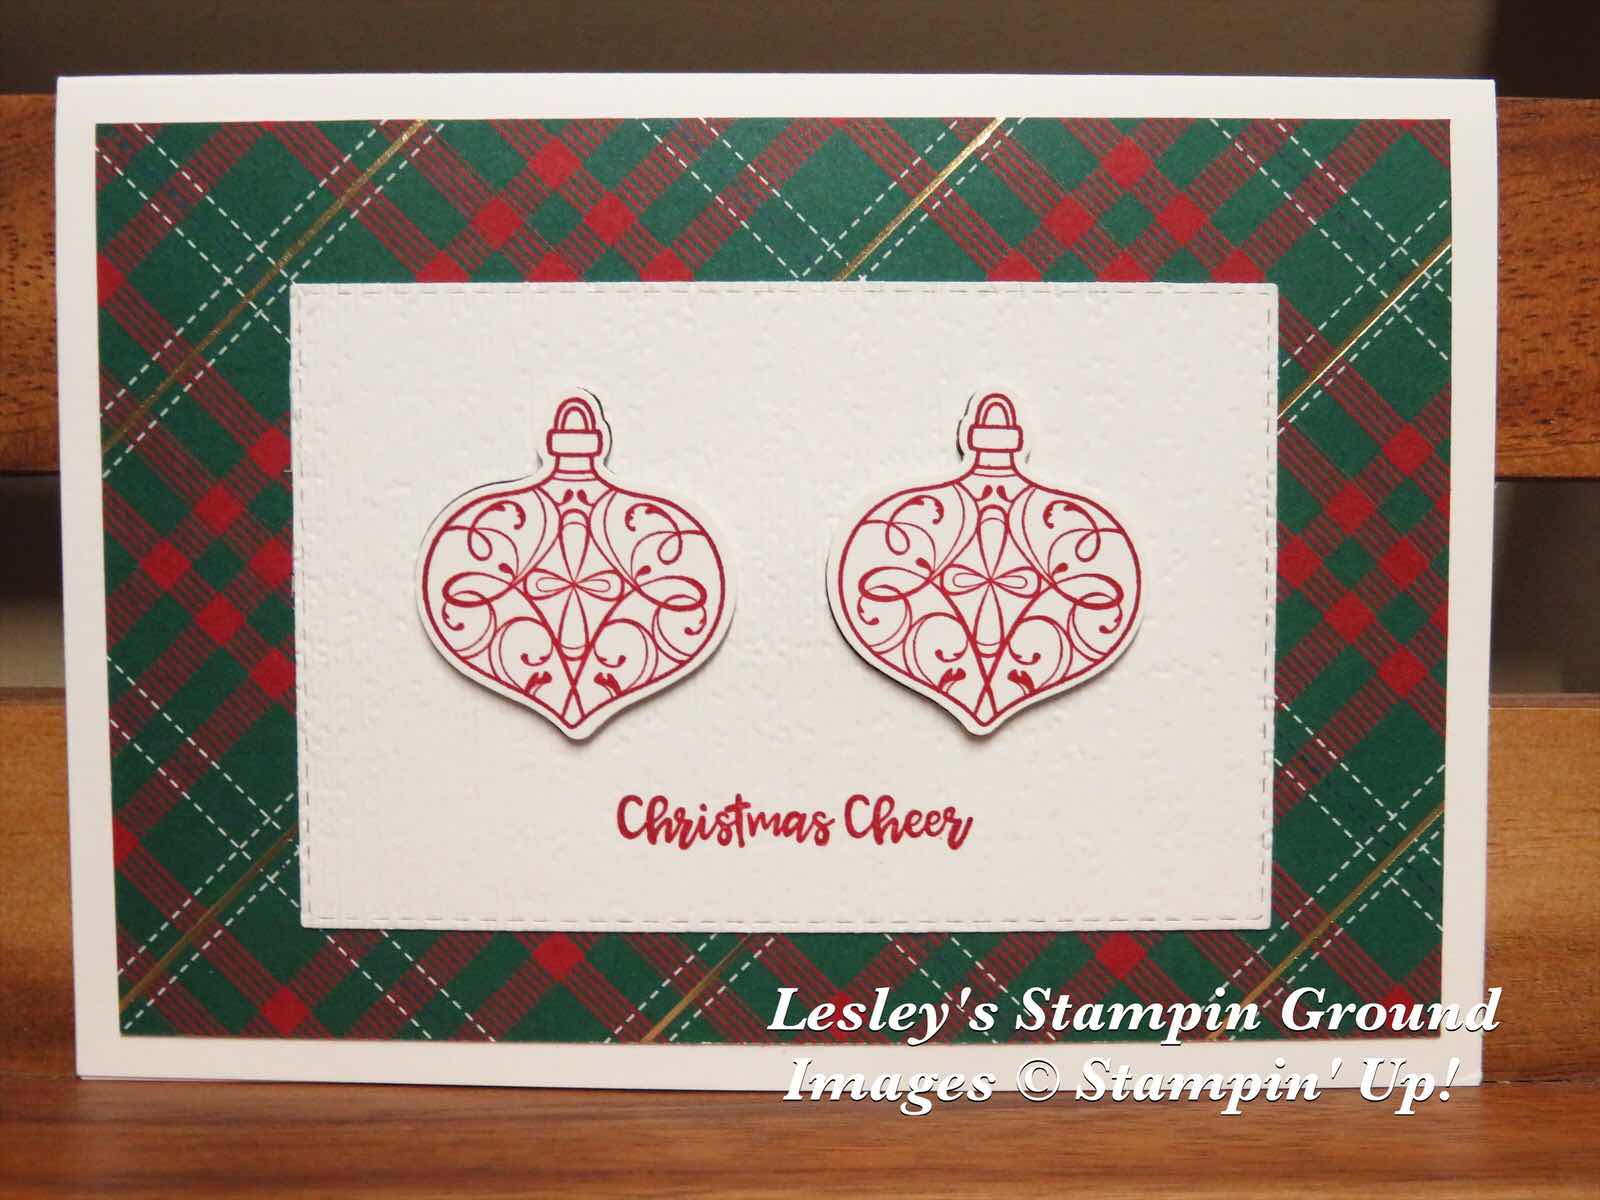

If you need a quick and easy last minute Christmas card this card is just for you.
I used Whisper White card (#106549) and Wrapped In Plaid 6”x6” Specialty Designer Series Paper (#149596). I stamped the baubles from the Christmas Gleaming stamp set (#c150464), using Cherry Cobbler ink (#147083) and punched them with the co-ordinating punch from the Gleaming Ornaments Punch Pack (#150647). “Christmas Cheer” is from the Itty Bitty Christmas Stamp set (#150513) and also stamped with Cherry Cobbler ink. The Whisper White card was cut with the Stitched Rectangles Dies (#148551), then this was embossed with the Subtle 3D Embossing Folder (#151775). I attached the baubles with Mini Stampin’ Dimensionals (#144108).
Yes that was quick and easy.
Monday, 9 December 2019
Feels Like Frost Specialty Designer Series Paper
Hi everyone,
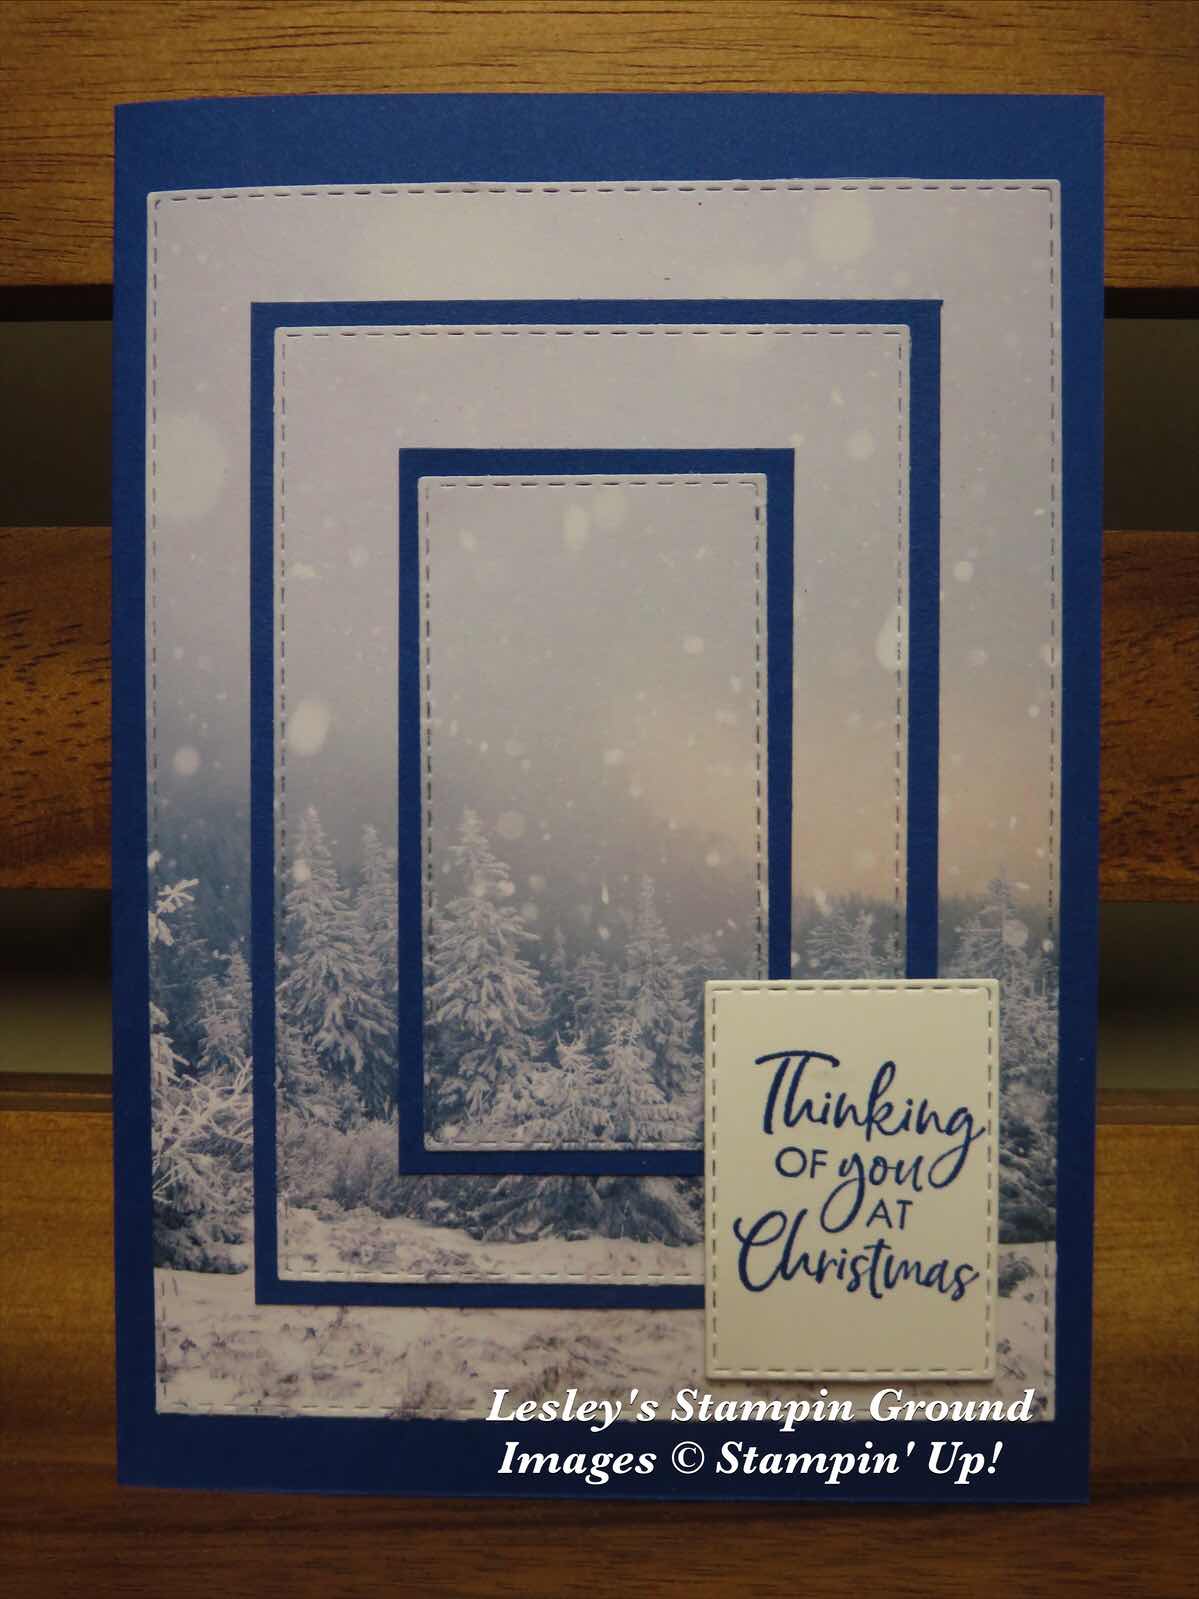
Here’s another easy card using Designer Series Paper. I have used one of the beautiful photographic images from the Feels Like Frost 6”x6” Specialty Designer Series Paper ((#150444).
I used 3 of the Stitched Rectangles Dies (#148551) to cut the one piece of DSP. I then cut the Blueberry Bushel card (#146991) slightly larger then the 2 smaller rectangles and attached the Designer Paper to these. The larger rectangle was attached to the base card and the other rectangles were attached on top. The sentiment is from the Itty Bitty Christmas stamp set (#150513), and stamped with Blueberry Bushel ink (#147138) on Whisper White card (#106549). This was also cut with the Stitched Rectangle Dies, then attached with Stampin’ Dimensionals (#104430).
As I said, an easy card but pretty with this Designer Paper.
Enjoy your day.
Sunday, 8 December 2019
Sympathy card
Hello friends,

Unfortuneately I need a Sympathy card for a very special friend, so this is what I have made, and was very pleased with the finished card.
I used the Shimmery White cardstock (#121717). I used the full A4 sheet and folded it in half as I wanted a larger card. I used the Mercury Glass Designer Acetate (#150441) and attached this to the base card. I then cut another piece of Shimmery White card to create the “v” shape. I stamped the sentiments from the Hold Onto Hope stamp set (#c151243) and the Woven Heirlooms stamp set (#c149306). These were stamped with Seaside Spray ink (#150889). The leaves are from Hold Onto Hope stamp set and stamped with Silvery Shimmer Ink (#150709). These 2 pieces of card were attached to the acetate. The crosses are cut with dies from the Cross Of Hope Dies (#145654). I used Silver Foil sheet (#132178) for the background cross and Seaside Spray card (#150889) for the detailed cross. I attached the cross to the card with Stampin’ Dimensionals (#104430).
Have a great day.
Saturday, 7 December 2019
Woven Threads Designer Series Paper
Hello & welcome,
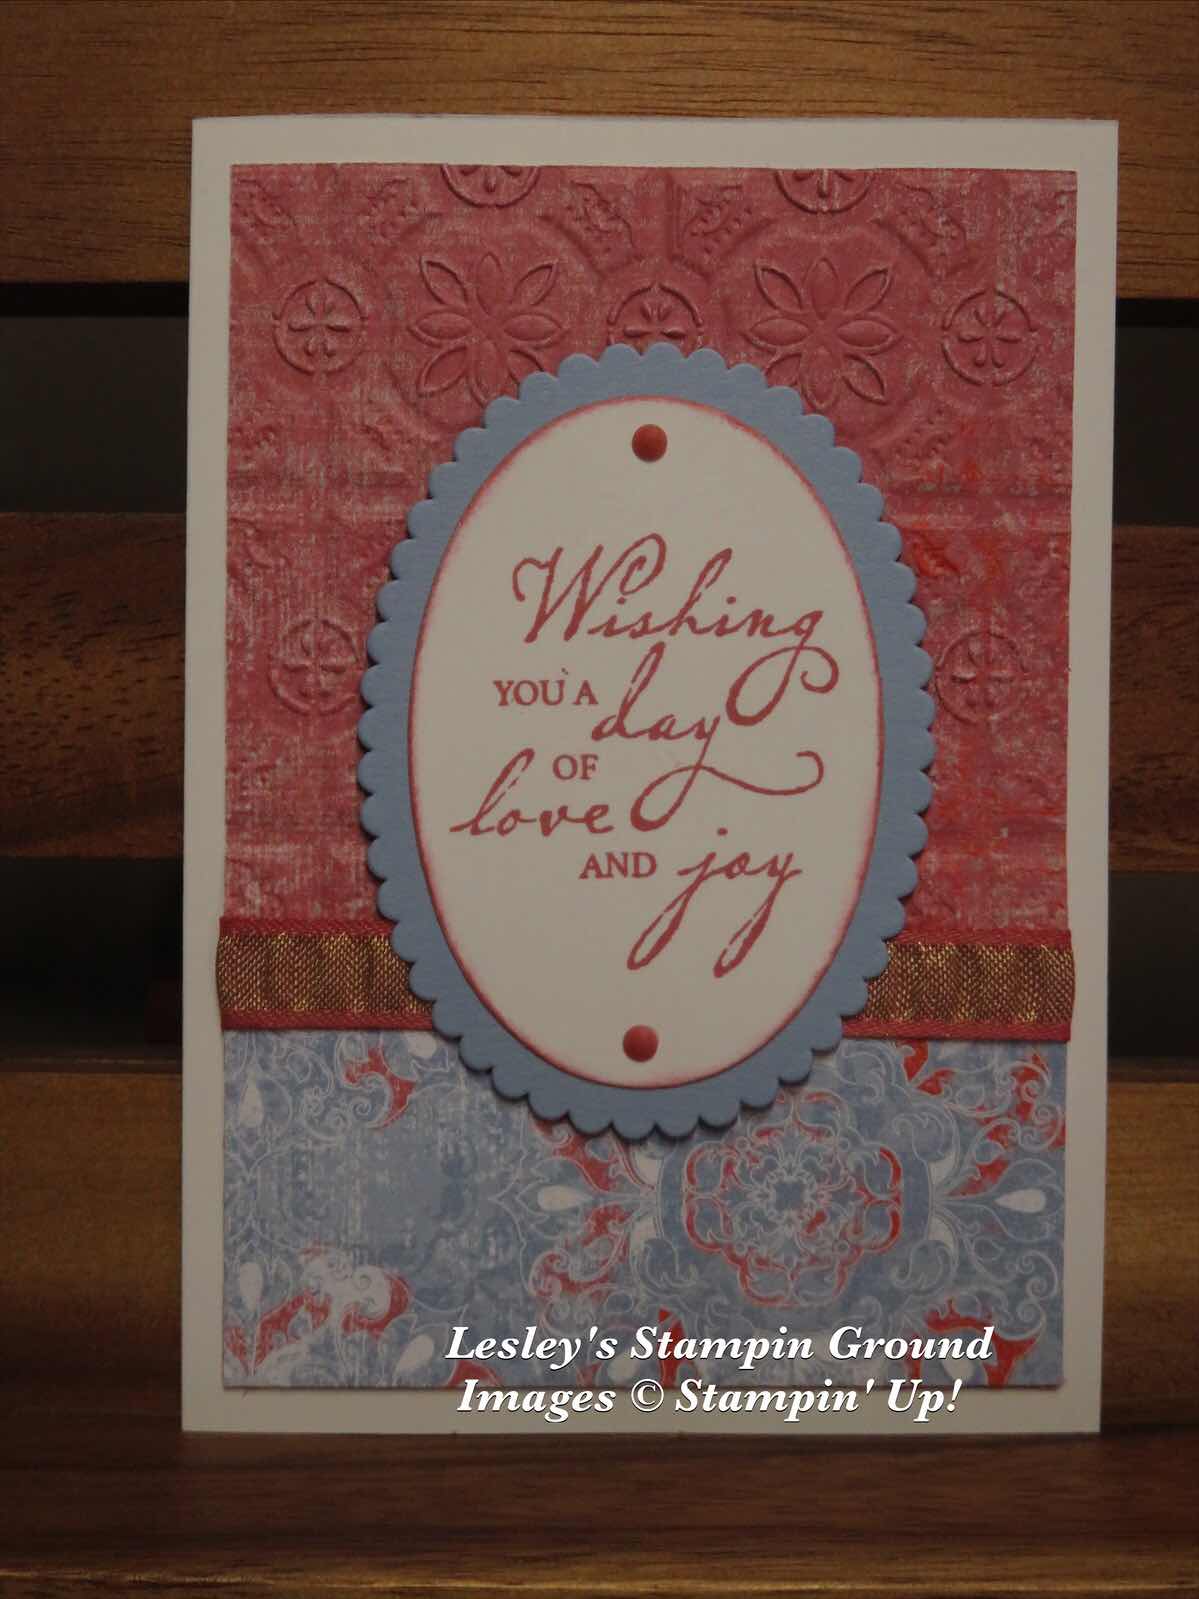
There are so many beautiful Designer Series Papers in the Stampin’ Up! catalogues which can be used for both cards and scrapbooking. I have used the Woven Threads Designer Series Paper (#149497) for the background on this card. You can make a quick and easy card using Designer Series Papers.
I embossed the Rococo Rose DSP with the Tin Tile 3D Embossing Folder (#151801). Then I wrapped Rococo Rose 1/2” Gathered Ribbon (#149587) around the DSP before it was attached to the Whisper White base card (#106549). The sentiment from the Woven Heirlooms stamp set (#c149306) was stamped with Rococo Rose ink (#150080). The ovals were cut with the Layering Ovals dies (#141706). The scalloped oval is Seaside Spray card (#150889). This was attached to the cardfront with Stampin’ Dimensionals (#104430), then I added the Rococo Rose dots from the 2019-2021 In Color Faceted Dots (#149607).
Hope you are having a great weekend.
Friday, 6 December 2019
See A Silhouette Designer Series Paper
Hi again,

If you like nice bright colours you can’t go past the See A Silhouette Designer Series Paper (#149443) which I have used for this background. This page has a look of using pigment sprinkles.
The cardstock used is Whisper White (#106549), Basic Black (#121688) and Real Red (#106578). I stamped the flourish and “thanks” from Beauty Abounds stamp set (#c148726) using Tuxedo Black Memento ink (#132708). The butterflies are from the Butterfly Gala stamp set (#148580). These were stamped with VersaMark (#102283) and heat embossed with Shimmer Black Stampin’ Emboss Powder (#149512), then set with the Heat Tool (#129056). The butterflies were punched with the co-ordinating Butterfly Duet punch (#148523), then attached to the card with Stampin’ Dimensionals (#104430). Red Rhinestone Basic Jewels (#146924) were added to the body of the butterfly.
Enjoy your day.
Thursday, 5 December 2019
Crafting Forever
Hello,
Have a great day.
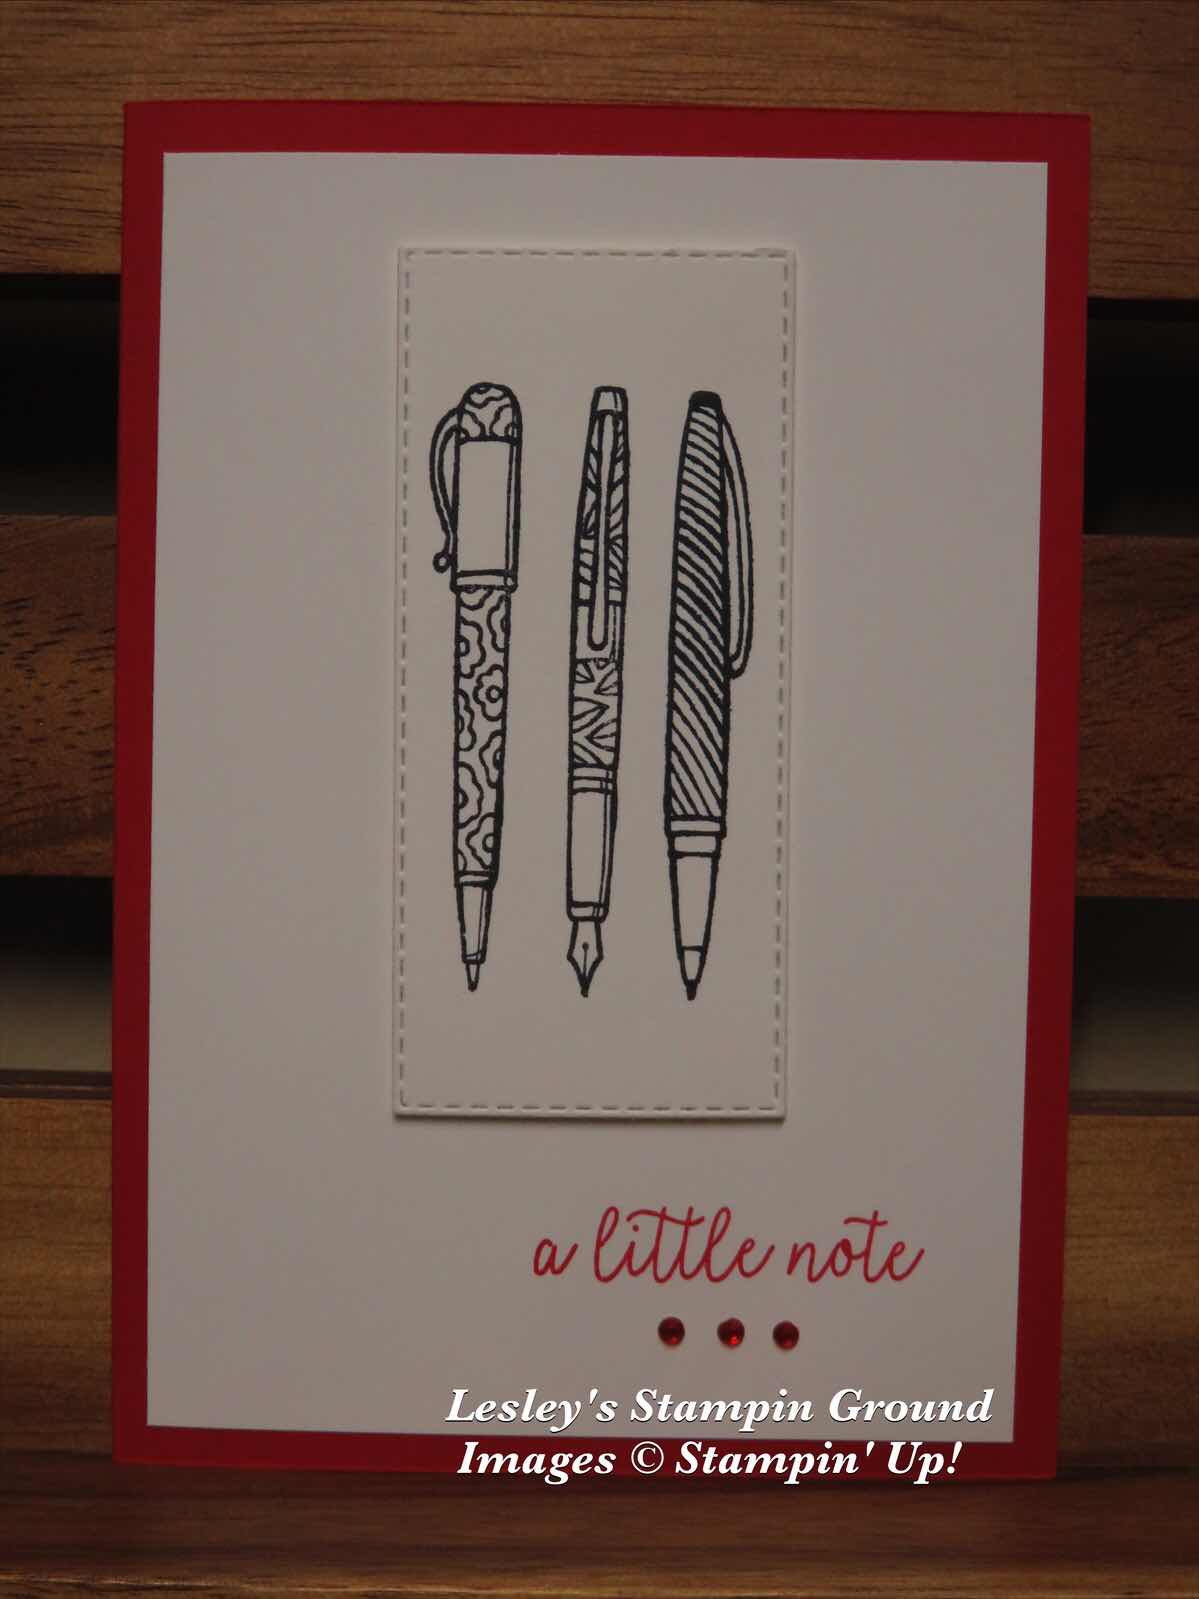
Firstly, apologies for my absence but I have been on holidays, so after a relaxing few weeks I’m back in the craft room. Today’s card is a simple one - sometimes that’s all that is needed.
I used Real Red (#106578) for the base card and Whisper White (#106549) for the card front and the stamped image. I stamped the pens from the Crafting Forever stamp set (#c151231) using Tuxedo Black Memento ink (#132708), then cut it with the Stitched Rectangles Dies (#148551). This was attached to the card with Stampin’ Dimensionals (#104430). “A little note” is from the Butterfly Gala stamp set (#p148580) and I used Real Red ink (#147084). Red Rhinestones Basic Jewels (#146924) were added under the sentiment.
The Holiday catalogue is coming to an end on 2nd January, which means many of the products won’t be available after that date. There are some good deals on some of the retiring products, so check out the discounted products here , and for all other retiring products here.
Let me know if you would like any of these products before they are gone, as they are available while stocks last.
Also if you live in Australia and don’t have a demonstrator and would like the new catalogue which will be available from 3rd January, please contact me and I will send one to you. Sale-a-bration also commences on 3rd January till 31st March, which means for every $90 you spend on Stampin’ Up! products, you will receive beautiful free products.
Monday, 11 November 2019
Brightly Gleaming Specialty Designer Series paper
Hello friends,
Enjoy your day.
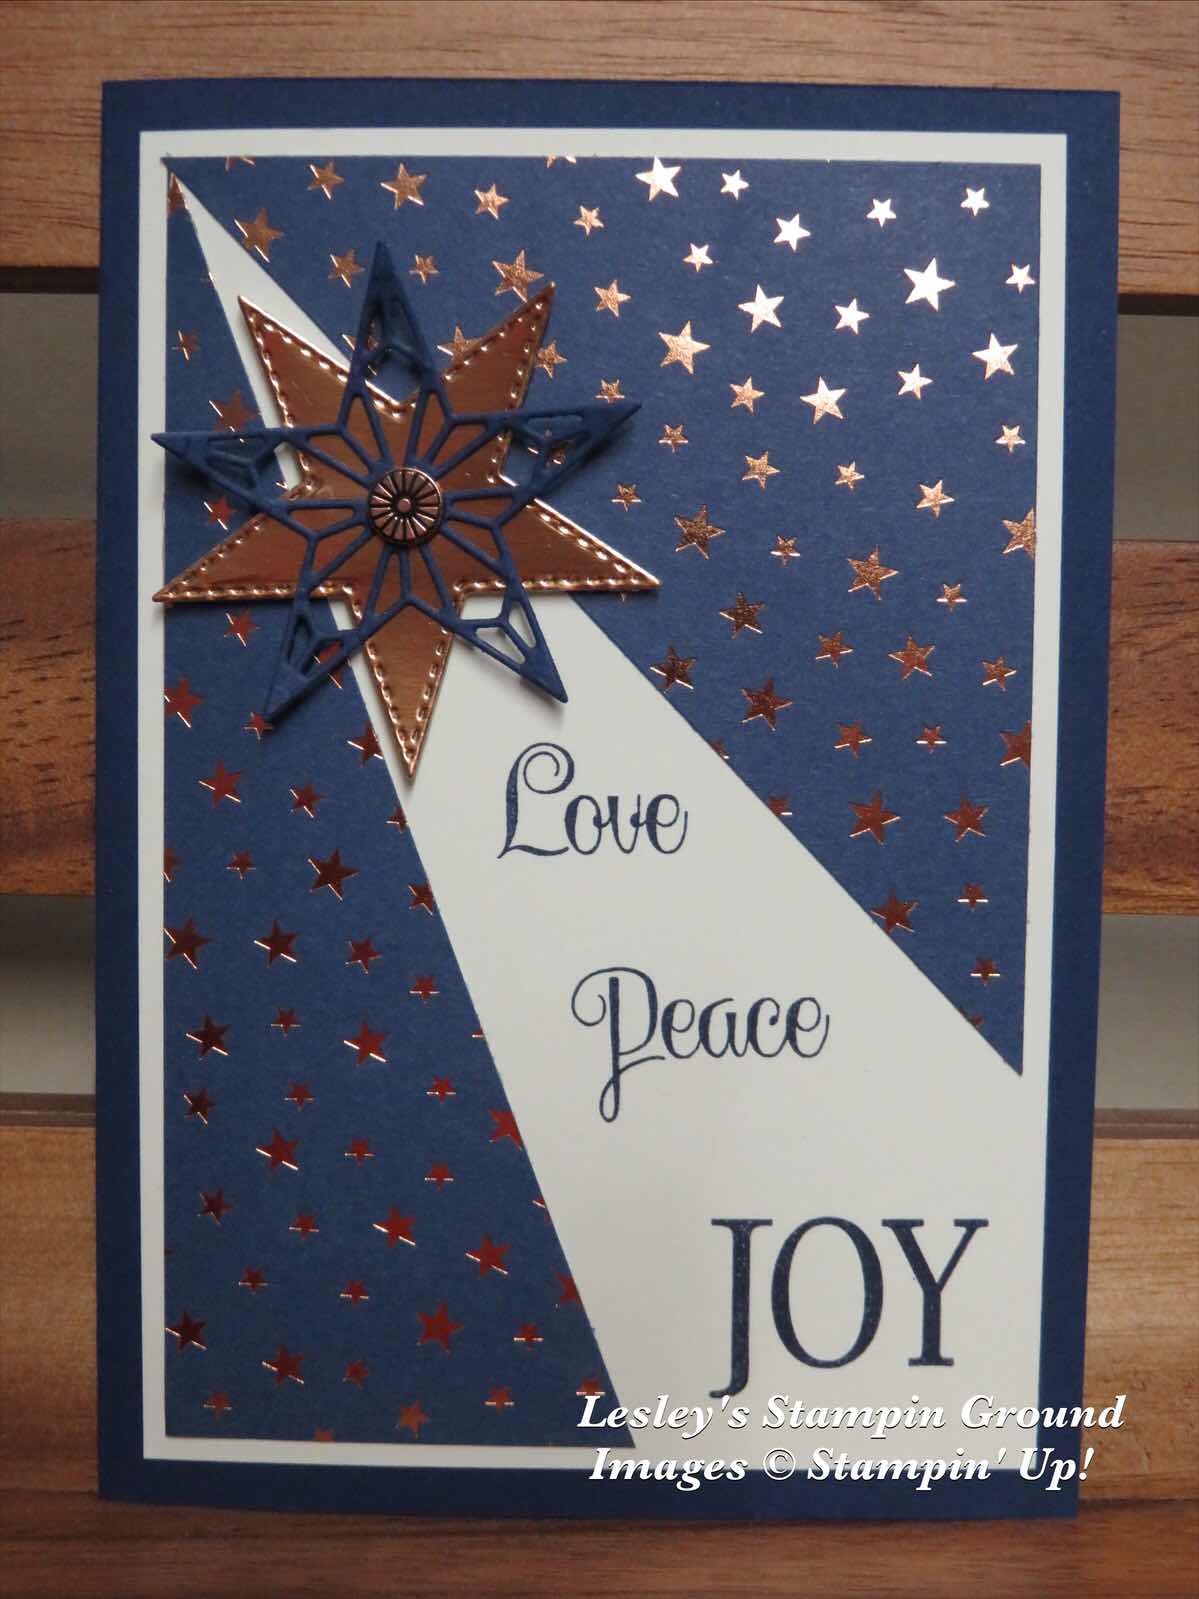
The Brightly Gleaming Specialty Designer Series Paper (#150429) has beautiful copper foil accents on one side and this design has the copper stars. There is a lovely range of designs in this pack.
I stamped “Love, Peace and Joy” with Night Of Navy ink (#147110) onto Very Vanilla card (#106550). These words are from the So Many Stars stamp set (#p150496). For the Designer Series Paper I cut a rectangle which measured 9 x 13.5cm. Then I placed a mark 4cm from the bottom left corner both horizontally and vertically. I then cut from each of these marks to the top right corner, then I attached these 2 pieces to the Very Vanilla card. The cardfront was attached to the Night Of Navy base card (#106577). The stars are cut with dies from the Stitched Stars Dies (#150653), from Copper Foil Sheet (#142020) and Night Of Navy card. The bottom star was attached with Stampin’ Dimensionals (#104430) and I used a Mini Glue Dot (#103683) to attach the detailed star. A Copper Designer Elements accent (#149586) was added to the star to finish the card.
Friday, 8 November 2019
Daisy Lane
Hello,
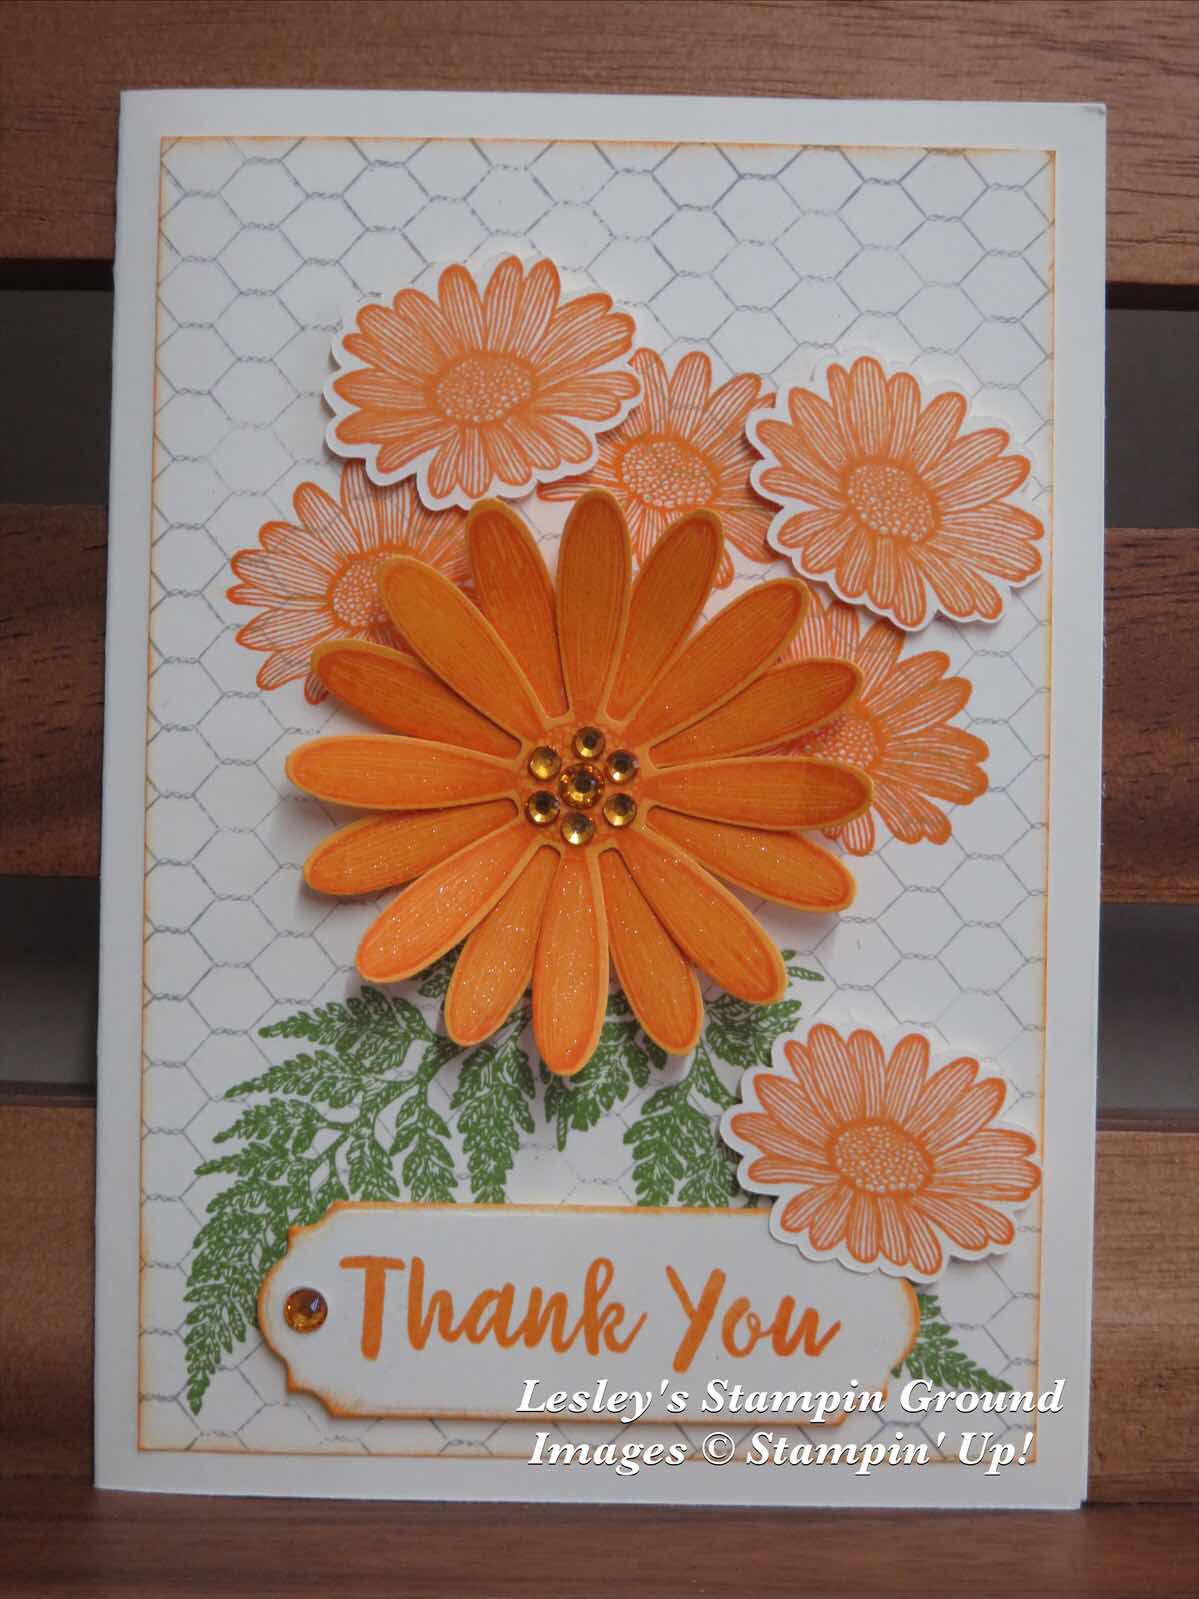
These beautiful daisies are from the Daisy Lane stamp set (#c149325).
The large daisy has been stamped twice with Mango Melody ink (#147093) on Mango Melody card (#147013), then punched with the co-ordinating Daisy Punch (#143713). These were assembled with Mini Glue Dots (#103683). The background was stamped with the All Wired Up background stamp (#c149262) using Smokey Slate ink (#147113). I then stamped 3 of the smaller daisies onto the card front, as well as 3 on separate Very Vanilla card (#106550) and fussy cut these. The daisies were then attached with Mini Stampin’ Dimensionals (#144108). The leaves, also from the Daisy Lane stamp set, were stamped with Old Olive ink (#147090). “Thank You” is from the Abstract Impressions stamp set (#p147513) and I used Mango Melody ink. This was cut with a die from the Ornate Frames (#150664). The Holiday Rhinestones Basic Jewels (#150457) were used on the sentiment and the centre of the large daisy. The base card and card front are Very Vanilla.
Have a great weekend.
Thursday, 7 November 2019
Pigment Sprinkles
Hi everyone,
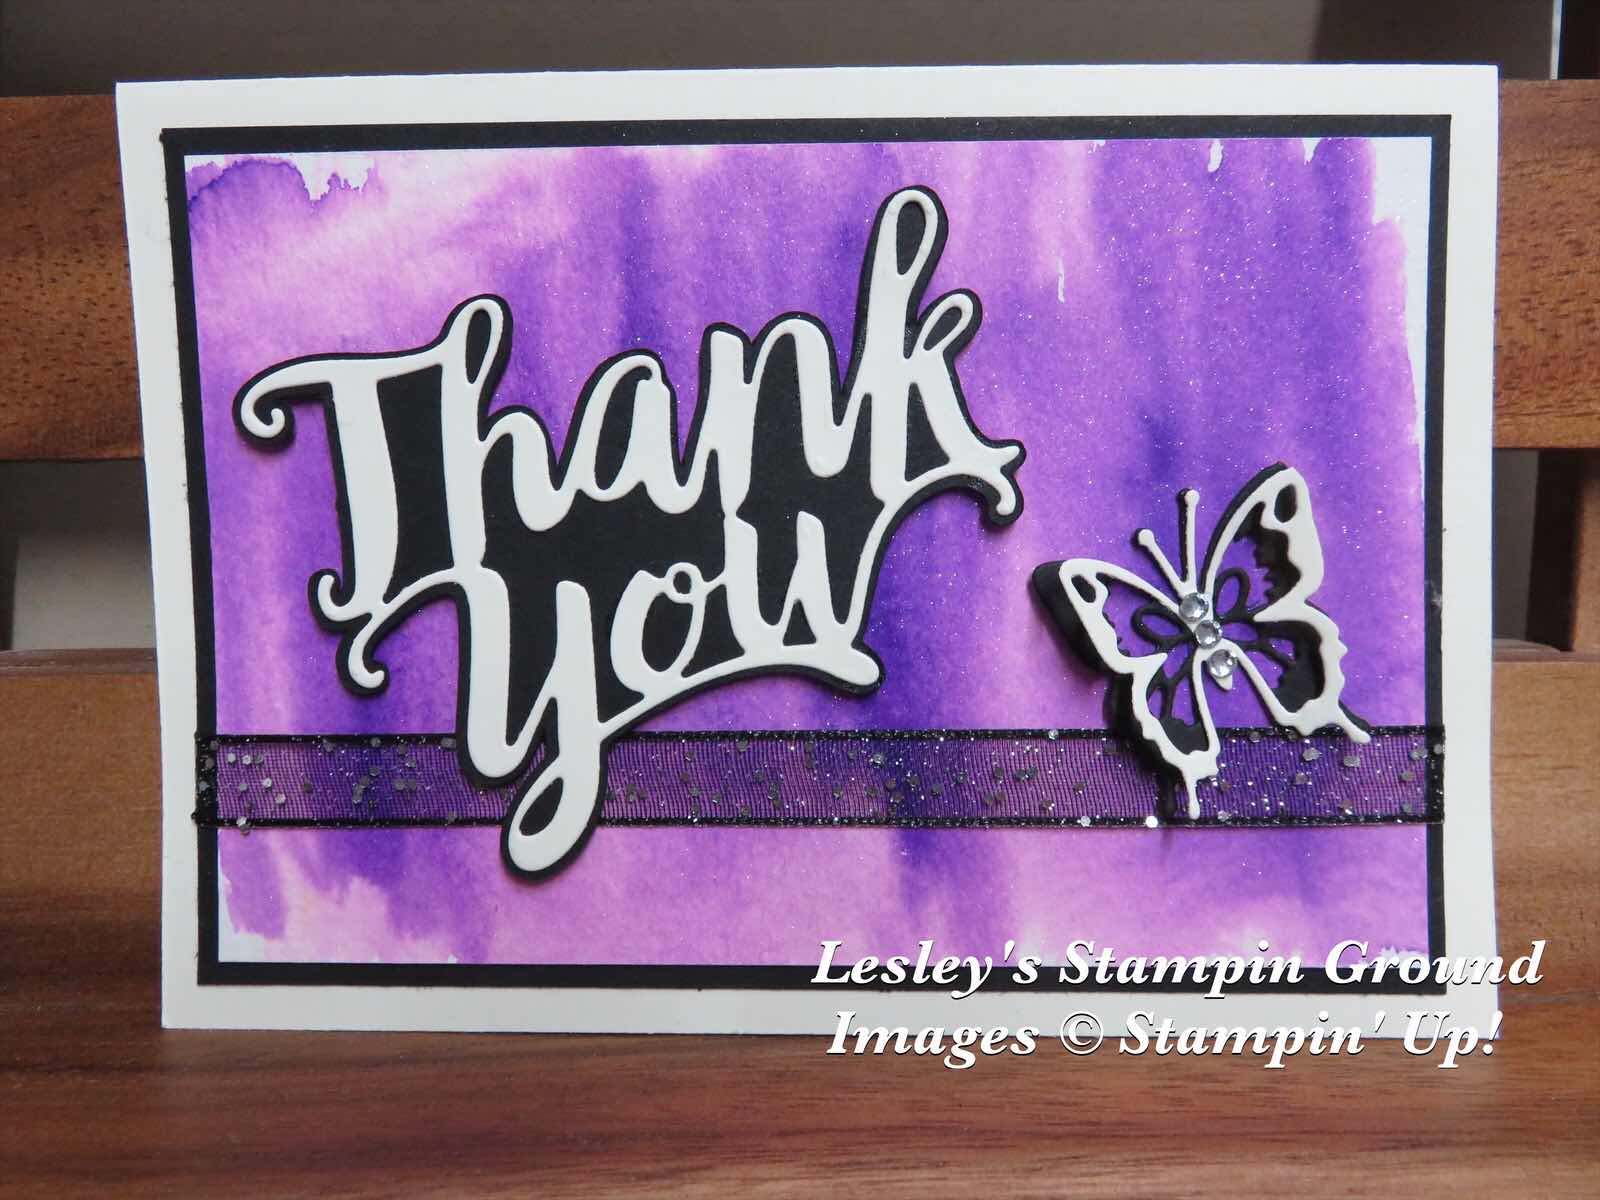
I have just had a play with the Pigment Sprinkles (#149663). These are watercolour pigment crystals which you just mix with water. You only need to use a very small amount of crystals. There are 6 Stampin’ Up! colours which are Bermuda Bay, Daffodil Delight, Granny Apple Green, Gorgeous Grape, Mango Melody and Melon Mambo.
I used the Gorgeous Grape pigment. I added a small amount of crystals and mixed with water on an acrylic block, then using an Aqua Painter (#103954) to colour the Watercolour Paper (#149612). This was the attached to a piece of Basic Black card (#121688). The base card is Very Vanilla (#106550). The Very Vanilla “Thank You” was cut with the Thank You Die (#146832) and I fussy cut the Basic Black card. The butterfly was cut from the Butterfly Beauty Dies (#148536) and I added Rhinestone Basic Jewels (#144220) to the body of the butterfly. The ribbon is Black 3/8” Glittered Organdy Ribbon (#147897).
Enjoy your day.
Tuesday, 5 November 2019
So Many Stars Bundle
Hello,

Gold and White always looks so stunning and I love how this card turned out.
I used Whisper White card (#106549), Gold Foil Sheets (#132622) and Gold Glimmer Paper (#146958). The card front was embossed with a retired embossing folder (Softly Falling). I stamped the star and the sentiment on Whisper White card with Crushed Curry Ink (#147087). Season’s Greetings is from the Itty Bitty stamp set (#c150513) and the star is from So Many Stars stamp set. The stars and the detailed cutout were cut with the Stitched Stars Dies. I cut the detailed cutout in half and spread it apart so I could see more of it, rather than the stars covering too much of it. The sentiment was punched with the Classic Label punch (#141491). The sentiment and Gold star were attached with Stampin Dimensionals (#104430) and the Gold glimmer star on top was attached with a Mini Glue Dot (#103683). The small solid stars come from the detailed cutout and placed onto the cardfront.
Have a fantastic day.
Monday, 4 November 2019
Christmas Gleaming
Hi again,
Have a great day.
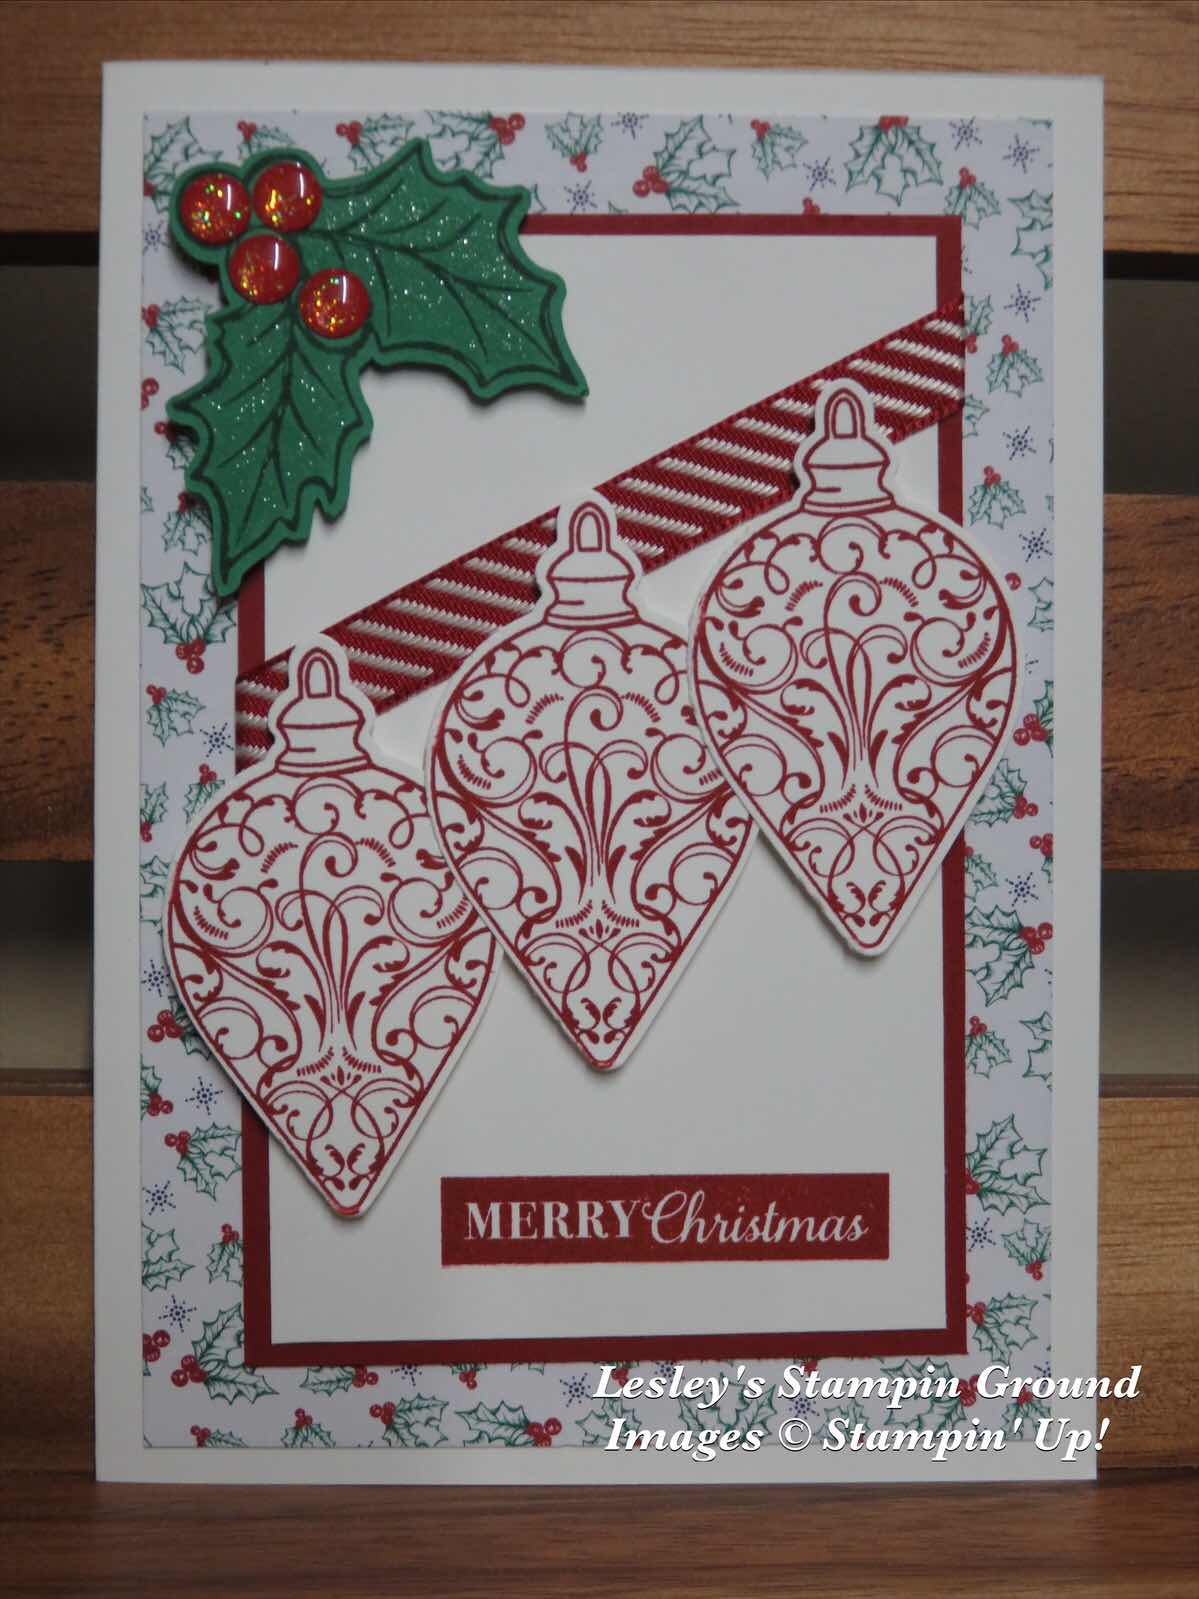
For today’s Christmas card I have used the Christmas Gleaming Bundle (#c153006) which consists of the Christmas Gleaming stamp set (#c150464) and the Gleaming Ornaments Punch Pack (#150647).
The Wrapped In Plaid 6”x6” Specialty Designer Series Paper (#149596) was attached to the Whisper White Base card (#106549). The Whisper White card front was attached to Cherry Cobbler card (#121681) and the Cherry Cobbler 3/8” Diagonal Stripe Ribbon (#150439) was wrapped around this. The baubles from the Christmas Gleaming stamp set were stamped with Cherry Cobbler ink (#147083) on Whisper White card and punched with the co-ordinating Gleaming Ornaments punch. Merry Christmas is also from the Christmas Gleaming stamp set and I used Cherry Cobbler ink. The holly was stamped with Shaded Spruce ink (#147088) on Call Me Clover card (#146992), then fussy cut. I added the Toile Tidings Glitter Enamel Dots (#150433) to the holly. The baubles and holly leaves were attached with Stampin’ Dimensionals (#104430). I used the Clear Wink Of Stella Brush (#141897) to add some glitter to the holly leaves.
Tuesday, 29 October 2019
Crafting Forever
Hi,

Have a crafty day.
I love this sentiment - “crafting forever, housework whenever”. I’m sure all crafters agree with this.
The sentiment and paint brush images are from the Crafting Forever stamp set (#c151231). I used Tuxedo Black Memento Ink (#132708) for the brushes and Daffodil Delight ink (#147094) for the sentiment. I coloured the brushes and pot with Stampin’ Blends. They include Bronze (#144607), Ivory (#144606), Dark Poppy Parade (#146879), Mossy Meadow combo (#148547), Light Night Of Navy (#144036), Daffodil Delight Combo (#144603) and Light Balmy Blue (#148540). This Whisper White card and the Daffodil Delight card are cut with the Stitched Rectangles Dies (#148551). The See A Silhouette Designer Series Paper (#149449) was attached to the Whisper White base card. Stampin’ Dimensionals (#104430) were used to attach the sentiment to the card and Holiday Rhinestone Basic Jewels (#150457).
Have a crafty day.
Monday, 28 October 2019
Free As A Bird
Hello again,

Have a great day.
The beautiful birds from the Free As A Bird stamp set (#c149468) was another image I had amongst a lot of other unused stamped images which I came across in my clean up the other day.
The image was stamped with Tuxedo Black Memento ink (#132708) on Whisper White card (#106549). The Stampin’ Blends used to colour this image are Balmy Blue Combo (#148544), Daffodil Delight Combo (#144603), Flirty Flamingo combo (#147278), Purple Posy combo (#149566), Light Old Olive (#144574), Dark Real Red (#147934) and Light Crumb Cake (#144582). This image was fussy cut and attached to the card with Stampin’ Dimensionals (#104430). The Whisper White cardfront was stamped with the Birch Background stamp (#c149256) using Crumb Cake ink (#121685). “Birthday” is from the Perennial Birthday stamp set (#c151240) and stamped with Real Red ink (#147084). This image is actually “happy birthday” but I wasn’t wanting to stamp that, so when I inked the stamp I covered the word happy to avoid getting ink on it. I removed the paper before stamping and was able to stamp Birthday without a problem. A post it note is great for doing this. “Happy” is cut with a die from the Merry Christmas To All Dies (#147912) from the Real Red Glimmer Paper (#150427) and glued to the card with the Fine-Tip Glue Pen (#138309). The base card is Real Red (#106578).
Sunday, 27 October 2019
Dandelion Wishes
Hello and welcome.
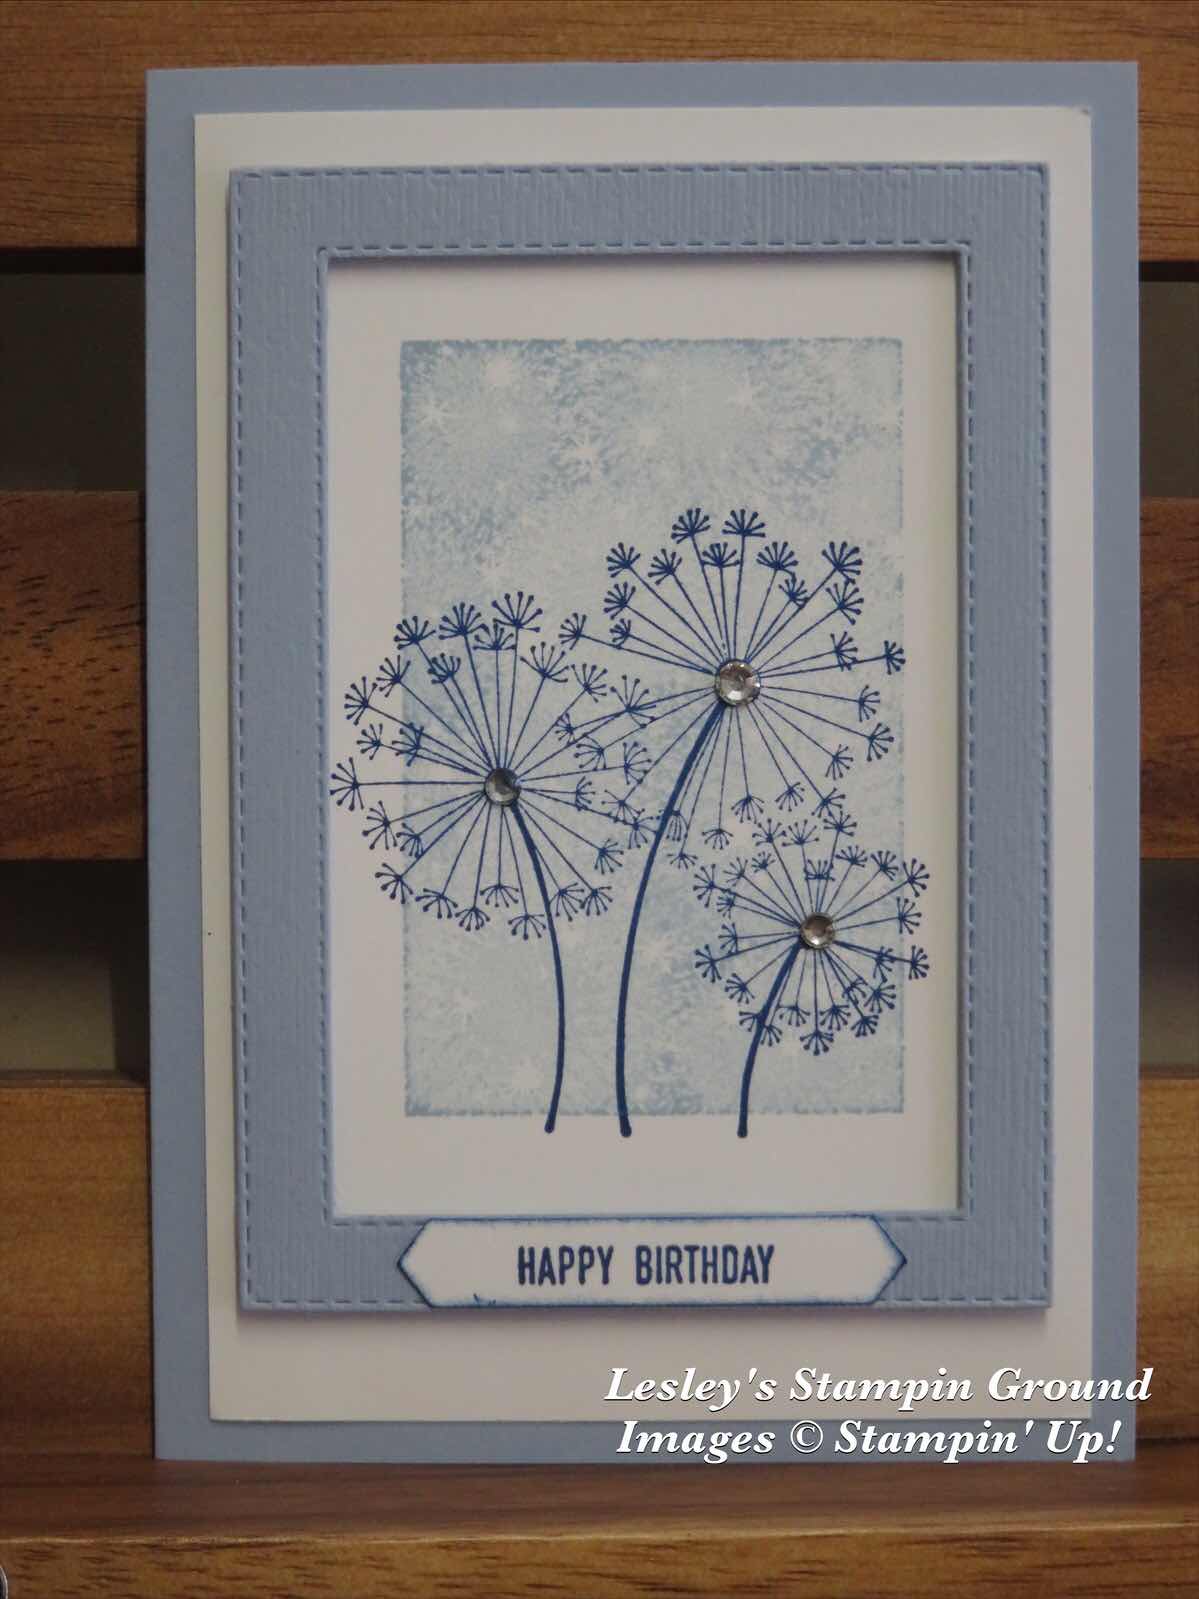
I was having a clean up (never ending around here) and I had this card front stamped so thought I would finish making a card with it.
I stamped the background using one of the images from the Bokeh Dots stamp set (#151368) onto Whisper White card (#106549) using Seaside Spray ink (#150085). Then I stamped the Dandelions from the Dandelion Wishes stamp set (#c151345) using Blueberry Bushel ink (#147138). These colours go so well together. The cardfront was attached to the Seaside Spray card (#150889). I made a frame also from Seaside Spray card using 2 of the Stitched Rectangles Dies (#148551) and embossed it with the Subtles 3D Embossing Folder (#151775). The frame was then attached with Mini Stampin’ Dimensionals (#144108). Happy Birthday is from the Itty Bitty Greetings stamp set (#c151331), stamped with Blueberry Bushel ink and punched with the Classic Label punch (#141491). The Rhinestone Basic Jewels (#144220) were added to the centre of the dandelions.
Enjoy your day.
Saturday, 26 October 2019
Bells Are Ringing
Hi,

Enjoy the rest of your weekend.
The Bells Are Ringing stamp set (#p150476) is a 2-step set, which allows you to add different images to this bell.
I stamped the bell onto Real Red card (#106578) with VersaMark (#102283) and added the Shimmer White Stampin’ Emboss Powder (#149511) and set with the Heat Tool (#129056). The images on the bell were stamped with Real Red ink (#147084) to give a subtle image. This was then cut with the Detailed Bells Dies (#150656). I embossed the Whisper White cardfront (#106549) with the Subtle 3D Embossing Folder (#151775). The white square was embossed with the Hammered Metal 3D Embossing Folder (#150646). The sentiment is from the Itty Bitty Christmas stamp set (#150513) and stamped with Real Red ink. This was punched with the Tailored Tag punch (#145667). Stampin’ Dimensionals (#104430) were used to attach the bell and the sentiment. The Toile Tidings Glitter Enamel Dots (#150433) were added to finish the card.
Enjoy the rest of your weekend.
Friday, 25 October 2019
Let It Ride
Hello friends,

It’s the weekend again already. Have a great one.
It’s a while since I made a masculine card, so here is one for horse lovers.
I stamped the horse from Let It Ride stamp set (#c148765) using Tuxedo Black Memento ink (#132708) on Crumb Cake card (#121685). The horse was then fussy cut. The background stamp is All Wired Up (#149262) and I stamped this with VersaMark (#102283) and embossed with Silver Stampin’ Emboss Powder (#141636) then set with the Heat Tool (#129056). The cardfront is Very Vanilla (#106550). Happy Birthday is from the Magnolia Blooms stamp set (#152729) and stamped with Tuxedo Black Memento ink on Very Vanilla Card. The sentiment and the Basic Black card (#121688) behind it were punched with the Tailored Tag punch (#145667). The ribbon is 5/8” Burlap Ribbon (#141487). The horse and sentiment are both attached with Stampin Dimensionals (#104430). The base card is Crumb Cake and Basic Black card was used to matt part of the cardfront.
It’s the weekend again already. Have a great one.
Thursday, 24 October 2019
Sympathy Card
Hi Ladies & guys,

Have a great day.
I needed a Sympathy card so I have used the Cross Of Hope Dies (#145654) and the Country Floral 3D Embossing Folder (#151823), and both of these represent the person that this card is for.
I used a full sheet of the Shimmery White card (#121717) and folded it in half. I embossed a smaller piece of Shimmery White card with the Country Floral 3D embossing folder and I matted this with Gold Foil Sheet (#132622). I used the Stitched Nested Labels Dies (#149638) to cut the Gold & white card for sentiment and the pieces under the cross. The cross was cut with dies from the Cross Of Hope Dies and attached to the card with Stampin’ Dimensionals (#104430). The sentiment is from the Painted Glass stamp set (#c151243) and stamped with VersaMark (#102283) and embossed with Gold Stampin’ Emboss Powder (#109129). This was set with the Heat Tool (#129056). The Shimmery White card has a lovely shimmer however I added extra shimmer to the embossed floral card using Frost White Shimmer Paint (#147046).
Have a great day.
Wednesday, 23 October 2019
Christmas Layers Dies
Hi everyone,
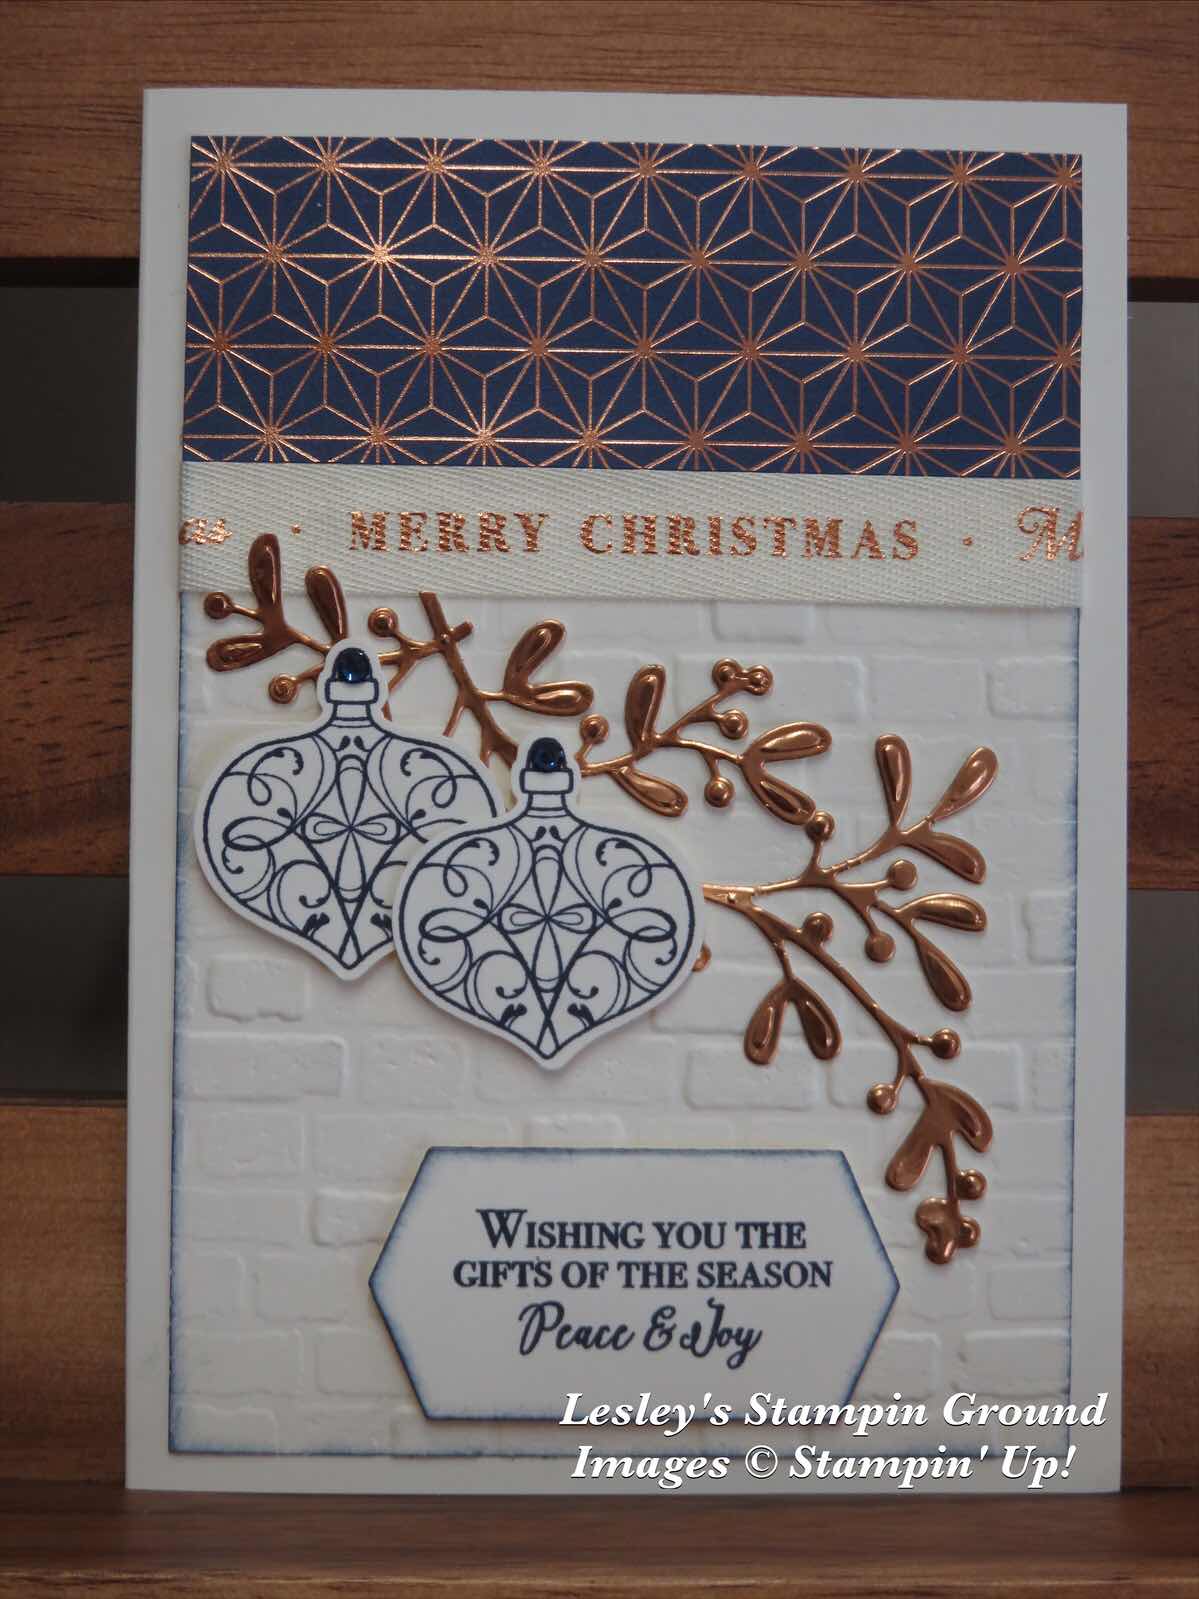
Enjoy your day.
Night Of Navy and Copper go so well together and look great on this Christmas card.
The cardstock is Very Vanilla (#106550) and the Designer Series Paper is Brightly Gleaming Specialty DSP (#150429). The Copper Foil Sheet (#142020) was used for the leaves which were cut with a die from Christmas Layers Dies (#150654). I wrapped the 1/2” Classic Weave Ribbon (#150394) around the cardfront, which I had embossed with the Brick & Mortar 3D Embossing Folder (#149643). The baubles and sentiment were stamped with Night Of Navy ink (#147110). The baubles are from the Christmas Gleaming stamp set (#c150464) and the sentiment from the Christmas Rose stamp set (#152431) - available from 1st November. The baubles were punched with the Gleaming Ornaments Punch pack (#150647). This pack has 2 different size Bauble punches. The sentiment was cut with a die from the Roses Dies (#152144), then attached with Stampin’ Dimensionals (#104430). I used Mini Glue Dots (#103683) to attach the leaves and Mini Stampin’ Dimensionals (#144108) were used for the baubles. I added the Holiday Rhinestone Basic Jewels (150457) to the top of the baubles.
Enjoy your day.
Subscribe to:
Comments (Atom)