Monday, 12 October 2015

Festive Flower Builder Punch

Hello again,

A Christmas card today using the Festive Flower Builder Punch (#139682). I only wanted a small flower so I have just used the double petals and cut 4 of these.


The sentiments are from the Versatile Christmas stamp set (#c140392, #w140389) and stamped with Cherry Cobbler ink (#126966).
To make the flower I stamped Cherry Cobbler ink onto Cherry Cobbler card (#121681) using the petal image from the Reason for the Season stamp set (#p139730). These were then punched with the Festive Flower Builder punch. To assemble the flower, I punched a circle using the 1-3/8" Circle Punch (#119860) for the base of the flower. I added some hot melt glue to the circle, then arranged 2 of the double petals in a cross. Adding more glue on top I then added the other 2 double petals. I punched 2 small crosses for the center of the flower from Crushed Curry card (#131288), again using hot melt glue to attach them to the flower. Cherry Cobbler Dazzling Details (#125585) was then applied to the centre of the flower.
The card used is Crushed Curry (#131288), Whisper White (#106549, Gold Foil sheets (#132622) and Winter Wonderland Designer Vellum Stack (#139594) I attached the DSP a to a piece of Whisper White, then this was attached to the Gold Foil using Mini Brads (#122941). I used Stampin' Dimensionals (#104430) to attach this gold foil sheet to the card. I then taped the flower to the card.

Come back tomorrow and I will continue with the basics of stamping.

Till then,
Happy Stamping!
Lesley.

Lesley Jendra,
Independent Stampin ' Up! Demonstrator.

www.lesleyjendra.stampinup.net
Email: lesleyjendra@bigpond.com.au

Sunday, 11 October 2015

Stamping Tips

Hi,

Today I am going back to basics and will give you a few tips on stamping and cardmaking which will be especially useful for those new to this great craft.

Most cards are made using half an A4 piece of Cardstock. To cut this A4 in half cut at 14.9cm on the long side of the A4 sheet. Then score at 10.5cm and fold in half to form the card.

If I am adding a piece of  card to the front, (as shown below) I usually cut it 1cm smaller than the card front, so it is cut 13.9cm x 9.5cm. Of course you can make this smaller or larger but this is the size I like to use in most cases.


When adding an insert to the inside, I use photocopy paper - size 20.2cm x 14.3cm, then folded in half. I put tape on the front of the insert near the folded edge, and push the insert into the fold of the card. Press down on card. Then tape the back of the insert.

Now to start stamping.
Ink your image. Before stamping onto your card, check the amount of ink on the stamp. The lighter inks will make it harder to see on some stamps.  Some inks are very wet (usually the new ones), others are drier. If the ink pad is very wet, gently tap the stamp onto the ink pad. If you push too hard into a wet ink pad you will have ink around the edges of the stamp and you will probably spoil your stamped image. Stamp onto your card. Press down firmly and evenly.

Ensure you clean your stamps after use. Spray Stampin' Mist onto one side of the Stampin' Scrub, rub the stamp over this to remove the ink then rub on the dry side of the scrub to dry the stamp. I only return the stamps into the cases once I have cleaned them, so I always know if they are in the case they are clean.

You will find that some inks will stain the photopolymer stamps. However, this won't affect any future stamping as long as the stamps are cleaned after each use.

Stampin' Up! have many stamps with co-ordinating punches or Framelits. Generally it it easier to stamp first before punching or cutting with Framelits. 

Using embossing Powders:
Use an embossing buddy to wipe over the card before using embossing powder. This removes static which minimizes the amount of unwanted powder which will stick to the card.
Stamp the image with VersaMark. The image won't be very visible on most cards. Quickly sprinkle the embossing powder over the image. Remove excess powder onto scrap paper, then return powder to container. Throw the scrap paper away. Check the image for any excess powder before heat setting. Sometimes a flick on the back of the card will remove most of the excess powder from the card. If necessary, a small brush can also remove any excess powder. Do not touch the stamped area as this will remove the powder. Now it's time to heat set the embossing powder with a heat tool. Heat until the entire image becomes shiny. When using the heat tool make sure you move away from the container of embossing powder. (I have seen a whole container of embossing powder heat set by mistake).

Hope this has been of some help. I'll be back with some more tips soon.

Till next time, 
Happy Sayamping!
Lesley.

Lesley Jendra,
Independent Stampin' Up! Demonstrator.

www.lesleyjendra.stampinup.net
Email: lesleyjendra@bigpond.com.au

Saturday, 10 October 2015

Flurry Of Wishes

Hello ladies,

Here is another of Stampin' Up! products that co-ordinate, which makes cardmaking so easy. The Flurry of Wishes stamp set (#p139732) co-ordinates with the Snow Flurry punch (#139680).


The Cardstock is Night Of Navy (#106577) and Whisper White (#106549). I stamped the snow flakes and sentiment using VersaMark (#102283) and White Stampin' Emboss powder (#109132), and this was then heat set using the Heat Tool (#129056). The snowflakes were punched before attaching them to the Whisper White card that had been embossed with the Softly Falling folder (# 139672). I added some Winter Wonderland Embellishments (#139621) to the card and snowflake.

Till next time,
Happy Stamping!
Lesley.

Lesley Jendra,
Independent Stampin' Up! Demonstrator.

www.lesleyjendra.stampinup.net
Email: lesleyjendra@bigpond.com.au

Friday, 9 October 2015

Embellished Ornaments

Hi,

This card is the same design as one I did recently but I used the Embellished Ornaments stamp set (#c139759, #w139756) instead of the flowers as used previously.


The base card of Night of Navy (#106577) has been embossed with the Softly Falling Textured Embossing folder (#139672). The DSP  is from the Brights DSP Stack (#138434). The other Cardstock - Cherry Cobbler (#121681) and Whisper White (#106549) were both cut with the Banners Framelits (#132173). The Christmas ornament from the Embellished Ormaments stamp set was heat embossed with VersaMark (#102283) and Silver Embossing Powder (#109131) on Night of Navy card. This was then cut with the co-ordinating Delicate Ornament Thinlits Dies (#139667). I also cut the top for the ornament from the Silver Foil Sheet (#132178) and glued this to the ornament. This was attached to the card with Stampin' Dimensioanals (#104430). Merry Christmas is from the Flurry of Wishes stamp set (#p139732) and stamped with Night Of Navy ink (#126970).

Have a great weekend.

Till next time,
Happy Stamping!
Lesley.

Lesley Jendra,
Independent Stampin' Up! Demonstrator.

www.lesleyjendra.stampinup.net
Email: lesleyjendra@bigpond.com.au

Thursday, 8 October 2015

Beautiful Bunch

Hello,

Here's a pretty card using the flower from the Beautiful Bunch stamp set (#c134282, #w134279).


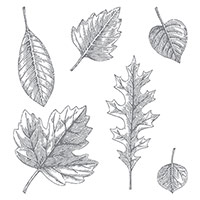
The Cardstock is Whisper White (#106549) and the Color Me Irresisible Specialty Designer Paper (#138439) was cut with the Deco Label Collection Framelits (#130102). The flower was stamped with Watermelon Wonder ink (#138323) and the leaves with Mossy Meadow (#133645) and Pear Pizzaz (#131180). The leaves are from the Vintage Leaves stamp set (#p138802) and these were cut with the Leaflets Framelits (#138283). The flowers were punched with the Fun Flower punch (#133785) and I used a Stampin' Dimensional (#104430) between the 2 layers of the flower. I added one of the gorgeous Something Borrowed embellishments to the flower (Whoops! I just realised this is retired). I actually meant to use the Winter Wonderland embellishments (#139621). The sentiment is from the Birthday Blossoms stamp set (#c139471, #w139167) and the broken line at the bottom of the card is from Butterfly Basics stamp set (#c138816, #w138813, #p137154).

Now for this week's WEEKLY DEALS-


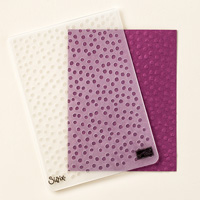
Decorative Dots Textured Impressions Embossing Folder by Stampin' Up!
DECORATIVE DOTS TEXTURED IMPRESSIONS EMBOSSING FOLDER
Price$13.00 $9.75
Hamburger Box Bigz XL Die by Stampin' Up!
HAMBURGER BOX BIGZ XL DIE
Price$66.00 $49.50
Hexagon Punch by Stampin' Up!
HEXAGON PUNCH
Price$28.00 $21.00
Pretty Petals Designer Series Paper Stack  by Stampin' Up!
PRETTY PETALS DESIGNER SERIES PAPER STACK
Price$14.00 $10.50

Tangelo Twist Classic Stampin' Pad by Stampin' Up!
TANGELO TWIST CLASSIC STAMPIN' PAD
Price$11.50 $8.63
Vintage Leaves by Stampin' Up!
VINTAGE LEAVES
Price$45.00 $33.75
Have a great day.

Till next time,
Happy Stamping!
Lesley.

Lesley Jendra,
Independent Stampin' Up! Demonstrator.

www.lesleyjendra.stampinup.net
Email: lesleyjendra@bigpond.com.au


Tuesday, 6 October 2015

Endless Birthday Wishes

Hi and Welcome,

The Endless Birthday Wishes stamp set (#p140273) has a great variety of sentiments and I have used happy birthday as well as the cake from this set.


The Cardstock is Melon Mambo (#119980) and Whisper White (#106549). Using Pink Pirouette ink (#126956) I stamped the background with the Watercolour Wash stamp (#c139538, #w138704). The heart and zig zag lines are from the Work of Art stamp set (#c134114, #w134111) and I used Melon Mambo ink (#126948) for these and the sentiment. The cake was stamped with Rose Red ink (#126954) and cut with one of the Circles Collection Framelits (#130911). This was attached to the card with Stampin' Dimensionals (#104430). For a bit of sparkle I used Dazzling Diamonds Stampin' Glitter (#133751) on the cake. I used the 2-way glue pen (#100425) as the adhesive for glitter.

Have a great day.

Till next time,
Happy Stamping!
Lesley.

Lesley Jendra,
Independent Stampin' Up! Demonstrator.

www.lesleyjendra.stampinup.net
Email: lesleyjendra@bigpond.com.au
Monday, 5 October 2015

Butterflies

Welcome,

This butterfly was stamped with the Watercolour Wings stamp set (#p139424) then cut with the Butterflies Thinlits (#137360). This two- step stamping set is made easy with the photopolymer stamps as you can see exactly where you are stamping.


The ink is Melon Mambo (#126948) and the cardstock is Melon Mambo (#119980) and Whisper White (# 106549). I embossed the whisper white card with the Fluttering embossing folder (#139304). I then added the labels cut with the Deco Labels Colllection  Framelits (#130102) and attached the butterfly to these with Stampin' Dimensionals (#104430). I added some Rhinestone Basic Jewels (#119246) to the butterfly and the ribbon. The ribbon is the 5/8" Organza Ribbon (#114319). The sentiment is from the Circle of Spring stamp set (#p138964) and cut with the Washi Label punch (#138296). 

That's all till next time.

Happy Stamping!
Lesley.

Lesley Jendra,
Independent Stampin' Up! Demonstrator.

www.lesleyjendra.stampinup.net
Email: lesleyjendra@bigpond.com.au