Saturday 31 October 2015

Serene Silhouettes

Hi and Welcome,

I was very pleased with the finished results of this card in Black and White with just a touch of colour.


I used Whisper White card (#106549) and Basic Black (#121688) with DSP from the Everday Chic Designer Series Paper (#138445). I cut 2cm from the front of the card and taped the DSP and Basic Black to the inside as shown.


Happy Birthday from Sassy Salutations stamp set (#c126707, #w132070) has been stamped with VersaMark (#102283) and Black Stampin' Emboss Powder (#109133) which was then heat set with the Heat Tool (#129056). I stamped the background images with the Work Of Art stamp set (#c134114, #w134111) using Soft Sky ink (#131181), So Saffron (#126957) and Pear Pizzaz (#131180). The birds in the tree from Serene Silhouettes stamp set (#c127324, #w132073) was also heat set with Black embossing powder and VersaMark.

Hope you have had a great day.

Till next time,
Happy Stamping,
Lesley.

Lesley Jendra,
Independent Stampin' Up! Demonstrator.

www.lesleyjendra.stampinup.net
Email: lesleyjendra@bigpond.com.au

Friday 30 October 2015

Festive Flower Builder Punch

Hello,

The Festive Flower Builder Punch (#139682) makes it so easy to make this beautiful Poinsettia flower.


I used the Red Glimmer Paper (#121790) to punch the petals and the Gold Glimmer Paper (#133719) for the centre of the flower. For this flower I punched 2 of the double petals and 8 of the medium size petals. I scored each petal down the centre to shape them. I cut a circle with the 1-3/8" circle for the base. I assembled the flower by adding hot melt glue to the circle and arranged 4 of the medium petals in a cross on the circle. Then the other 4 petals were added in a cross between the other petals, followed by the double petals, then the gold centres, using hot melt glue for each layer.
The base card is Very Vanilla (#106550) and the DSP is from the Home For Christmas Designer Series Paper (#139592). I added the Gold 1/8" Ribbon to the DSP so it looks like a present. The sentiment is from the Embellished Ornaments stamp set (#c139759, #w139756) and I stamped this with VersaMark (#102283) and Gold Embossing powder (#109129) and heat set it with the Heat Tool (#129056).

Have a great weekend.

Till next time,
Happy Stamping!
Lesley.

Lesley Jendra.
Independent Stampin' Up! Demonstrator.

www.lesleyjendra.stampinup.net
Email: lesleyjendra@bigpond.com.au

Thursday 29 October 2015

All Ye Faithful

Hello,

The current Holiday Catalogue has such a variety of Christmas stamps and I love this All Ye Faithful set (#c139901, #139898).


I stamped the 3 wise men using Crumb Cake ink (#126975) onto the Whisper White card (#106549). Then I embossed the card with Softly Falling Textured Impressions Embossing Folder (#139672). The image of Jesus, Mary and Joseph was stamped with VersaMark (#102283) and Gold Stampin' Emboss Powder (#109129), then heat set with the Heat Tool (#129056). This was cut with the Ovals Collection Framelits (#129381) as was the Gold Foil (#132622). This was then attached to the card with Stampin' Dimensionals (#104430). Merry Christmas from the Versatile Christmas stamp set (#c140392, #w140389) was stamped with VersaMark and Cherry Cobbler embossing powder (#122949) and heat set. The Framelit to cut this is from the Project Life Cards and Labels Framelits (#135707) and I cut the pointy end from the right side (so that it fitted on the card). I sponged around this and the oval with Cherry Cobbler ink (#126966).

If you want any information about Stampin' Up! products please contact me.

Have a great day.

Till next time,
Happy Stamping!
Lesley.

Lesley Jendra,
Independent Stampin' Up! Demonstrator.

www.lesleyjendra.stampinup.net
Email: lesleyjendra@bigpond.com.au

Wednesday 28 October 2015

Serene Silhouettes

Hi,

The image on this card is from the Serene Silhouettes stamp set (#c127324, #w132073).


After making this card I thought it needed something else, so added the butterflies.


The cardstock is Whisper White (#106549), Basic Black (#121688), Crushed Curry (#131288) and Old Olive DSP from the Brights Designer Series Paper Stack (#138437). Happy Birthday from Birthday Blossoms stamp set (#c139471, #w139167) is stamped with Crushed Curry ink (#131173). The plant is inked with Stampin' Write Markers, using Old Olive (#100079) and Crushed Curry (#131901). The butterflies from Papillion Potpourri stamp set (#c123759, #w132058) have been stamped with Crushed Curry ink on Crushed Curry card, then punched with the Bitty Butterfly punch (#129406).
The corners of the Basic Black and Whisper White card were punched with the reverse punch on the Envelope Punch Board (#133774). The black card was attached to the card with Stampin' Dimensionals (#104430).

Here are some great deals with this weeks WEEKLY DEALS-

Corner Garden Clear-Mount Background Stamp by Stampin' Up!
CORNER GARDEN CLEAR-MOUNT BACKGROUND STAMP
Price$26.00 $19.50
Feel Goods Wood-Mount Stamp Set by Stampin' Up!
FEEL GOODS WOOD-MOUNT STAMP SET
Price$45.00 $33.75
Floral Frames Collection Framelits Dies by Stampin' Up!
FLORAL FRAMES COLLECTION FRAMELITS DIES
Price$45.00 $33.75
Hearts Border Punch by Stampin' Up!
HEARTS BORDER PUNCH
Price$28.00 $21.00
Stars Framelits Dies by Stampin' Up!
STARS FRAMELITS DIES
Price$45.00 $33.75


That's all today,

Till next time,
Happy Stamping!
Lesley.

Lesley Jendra,
Independent Stampin' Up! Demonstrator.

www.lesleyjendra.stampinup.net
Email: lesleyjendra@bigpond.com.au


Tuesday 27 October 2015

Peaceful Pines

Hello,

Here is one of the cards we made at a recent Christmas Workshop. 


The Whisper White base card (#106549) was stamped with sentiments from Flurry of Wishes stamp set (#p139732) and Peaceful Pines stamps set (#p139728), using Garden Green ink (#126973). The Christmas tree from Peaceful Pines stamp set was also stamped with Garden Green ink then cut with the co-ordinating Perfect Pines Framelits Dies (#139665). One of the dies also cuts the holes for the "string of lights". This tree was then mounted onto a piece of Red Foil (#139607) which was also cut with the Framelits, so you can see the red showing through for the lights. The tree was then attached to a piece of Garden Green card (#108605) which was taped to Real Red card (#106578).

That's all today,

Till next time,
Happy Stamping!
Lesley.

Lesley Jendra,
Independent Stampin' Up! Demonstrator.

www.lesleyjendra.stampinup.net
Email: lesleyjendra@bigpond.com.au

Monday 26 October 2015

Flurry of Wishes

Hi and welcome,

The images from Flurry of Wishes stamp set (#p139732) co-ordinate with the Snow Flurry Punch (#139680) for the 2 smaller snowflakes and the Flower Medallion Punch (#137417) for the larger snowflake.


I used Whisper White card (#106549) as well as Night of Navy (#106577) and one of the snowflakes was punched from the Silver Glimmer Paper (#135314). The banners were cut with the Banners Framelits (#132173). The inks are Night of Navy (#126970) and Marina Mist (#126962). The snowflakes were attached to the card with Stampin' Dimensionals (#104430).

Till next time,
Lesley.

Lesley Jendra,
Independent Stampin' up, Demonstrator.

www.lesleyjendra.stampinup.net
Email: lesleyjendra@bigpond.com.au

Sunday 25 October 2015

Butterflies Thinlits

Hello,

This butterfly is cut using the Butterflies Thinlits (#137360).


The card for the butterfly is Melon Mambo (#119980). I stamped the image from Everything Eleanor (#c124164, #w131987) onto Whisper White card (#106548), using Melon Mambo ink (#126948) and using the stamping off method. This was then cut with the Deco Labels Collection Framelits (#130102) and taped to the Everyday Chic DSP (#138445). The butterfly was attached to this using Stampin' Dimensionals (#104430). I added some of the White Perfect Accents (#138416) to the centre of the butterfly. I taped the Melon Mambo 3/8" Stitched Satin ribbon (#138431) to the DSP. Happy Birthday is from the Sassy Salutations stamp set (#c126707, #132070). This was stamped with VersaMark (#102283) and Black Embossing powder (#109133), then heat set with the Heat Tool (#129056). 

Till next time,
Happy Stamping!
Lesley.

Lesley Jendra,
Independent Stampin' Up! Demonstrator.

www.lesleyjendra.stampinup.net
Email: lesleyjendra@bigpond.com.au

Friday 23 October 2015

Bird Builder punch

Hello,

It's easy to forget some of the older products when a new catalogue arrives, so today I have gone back to another old favourite - the Bird Builder punch (#117191) but also used some new products as well.


The cardstock I have used is Whisper White (#106549), Red Foil Sheets (#139607), Red Glimmer Paper (#121790) and Dazzling Diamonds Glimmer Paper (#135315). I embossed the base card with the Softly Falling Textured Impressions Embossing Folder (#139672). Thinking of You is from the Sassy Salutations stamp set (#c126707, #w132070) and stamped with Real Red ink (#126949). The image from World of Dreams stamp set (#c134184, #w134183) was stamped with Crumb Cake ink (#126975). I attached the bird which was punched with the Bird Builder Punch with Stampin' Dimensionals (#104430).

It's the end of another busy week. Not sure where the time goes.
Have a great weekend.

Happy Stamping! 
Lesley.

Lesley Jendra.
Independent Stampin' Up! Demonstrator.

www.lesleyjendra.stampinup.net
Email: lesleyjendra@bigpond.com.au

Thursday 22 October 2015

Hearth and Home Thinlits Dies

Welcome,

The Owl builder punch (#118074) has been a favourite for a long time to make this cute owl. 


Very Vanilla (#106550) has been used for the base card. The owl consists of Basic Black card (#121688), Real Red (#106578), Whisper White (#106549) and Dazzling Diamonds Glimmer Paper (#135315). Soft Sky card (#131292) was used for the sky and Crumb Cake (#121685) for the window which was cut using the Hearth and Home Thinlits Dies (#139666). I embossed the base card with the Woodgrain embossing folder (#127821). Birthday Wishes from the Endless Birthday Wishes stamp set (#p140273) was stamped with Real Red ink (#126949). The flourish from the Flowering Flourishes stamp set (#c126367, #w131998) was stamped with Old Olive ink (#126953). The window was attached with Stampin' Dimensionals (#104430).

Have a great day.

Till next time,
Happy Stamping!
Lesley.

Lesley Jendra.
Independent Stampin' Up! Demonstrator.

www.lesleyjendra.stampinup.net
Email: lesleyjendra@bigpond.com.au

Wednesday 21 October 2015

Beautiful Bunch

Hi Ladies,

The flowers and sentiment have both been heat embossed with VersaMark (#102283) and Gold Embossing Powder (#109129).


The base card is Whisper White (#106549), and I have also used the Bermuda Bay from the Brights Designer Series Paper Stack (#138434), Gold Foil sheets (#132622) and Bermuda Bay card (#131286). The sentiment is from the Birthday Blossoms stamp set (#c139471, #w139167) and the flower is from Beautiful Bunch (#c134282, #w134279). The flower has been punched with the Fun Flower punch (#133785) and I used a Stampin' Dimensional (#104430) between the 2 flowers to assemble them.

Check out these WEEKLY DEALS-
2014-2016 In Color Designer Washi Tape by Stampin' Up!
2014-2016 IN COLOR DESIGNER WASHI TAPE
Price$14.00 $10.50
Chalk Talk Framelits Dies by Stampin' Up!
CHALK TALK FRAMELITS DIES
Price$41.00 $30.75
Eclectic Paper-Piercing Pack by Stampin' Up!
ECLECTIC PAPER-PIERCING PACK
Price$14.00 $10.50
Fast Fuse Adhesive Refill by Stampin' Up!
FAST FUSE ADHESIVE REFILL
Price$13.00 $9.75
Vintage Faceted Designer Buttons by Stampin' Up!
VINTAGE FACETED DESIGNER BUTTONS
Price$10.50 $7.88


Have a great day.

Happy Stamping!
Lesley.

Lesley Jendra.
Independent Stampin' Up! Demonstrator.

www.lesleyjendra.stampinup.net
Email: lesleyjendra@bigpond.com.au

Tuesday 20 October 2015

Peaceful Pines Christmas card

Hello everyone,

Here's a Chritmas card using the Peaceful Pines stamp set (#p139728).


I stamped one of the Christmas trees using Mossy Meadow ink (#133645) onto the Dazzling Diamonds Glimmer Paper (#135315) and then cut this with the Perfect Pines Framelits Dies (#139665). This stamp set and Framelits are also available as a bundle (#140850) with a 15% saving. The other images which are all from the Peaceful Pines stamp set are stamped with Real Red ink (#126949 and Mossy Meadow. I cut 2cm off the Right side of the Very Vanilla base card (#106550). Then I attached a strip of Home For Christmas DSP (#139592) to the inside of the card, so is visible when the card is closed.  I also used Real Red card (#106578) for the rectangular piece on the front of the card. The tree was attached with Stampin' Dimensionals (#104430).
This is inside the card- 


Thanks for stopping by.
Till next time,
Happy Stamping!
Lesley.

Lesley Jendra.
Independent Stampin' Up! Demonstrator.

www.lesleyjendra.stampinup.net
Email: lesleyjendra@bigpond.com.au


Monday 19 October 2015

Petite Petals

Hi,

I often find the simpler the card the nicer it is, and I think this is one of those.


The cards used are Perfect Plum (#108615) and Whisper White (#106549). The background was stamped with the Gorgeous Grunge stamp set (#c130517, #130514) using Wisteria Wonder ink (#126985). The flowers from Petite Petals (#c133155, #w133152) were stamped with Perfect Plum ink (#126963), then they were punched with the Petite Petals punch (#133322). The centre for the flowers were punched with the Cupcake Builder punch (#121807) from Gold Glimmer Paper (#133719) and glued to the flowers with the 2-way glue pen (#100425). The Gold Cording Trim (#139618) is from the holiday catalogue. Happy Birthday is from the Butterfly Basics Stamp set (#c138816, #w138813, #p137154).

Have a great day.
Happy Stamping!
Lesley.

Lesley Jendra,
Independent Stampin' Up! Demonstrator.

www.lesleyjendra.stampinup.net
Email: lesleyjendra@bigpond.com.au

Sunday 18 October 2015

Bitty Butterfly

Hello and welcome,

These butterflies have been punched with the Bitty Butterfly Punch (#129406) then I added some DSP from the Brights Designer Series Paper Stack (#138434) underneath each of the butterflies.


The Cardstock is Daffodil Delight (#121680) and Whisper White (#106549). The corners of the Whisper White card are punched with the Curvy Corner Trio Punch (#139683). Happy Birthday from the Happy Birthday Everyone stamp set (#c139958, #w139171) was stamped with Real Red ink (#126949). The ribbon is Gold 1/8" ribbon (#134583). The white card was attached to the base card with Stampin' Dimensionals (#104430).

It's been another busy day, so till next time,
Happy Stamping! 
Lesley.

Lesley Jendra,
Independent Stampin' Up! Demonstrator.

www.lesleyjendra.stampinup.net
Email: lesleyjendra@bigpond.com.au

Saturday 17 October 2015

Everything Eleanor

Hi ladies,

Life has been a bit hectic here lately so here is a really quick and easy card I made in between other jobs today.


The card is Whisper White (#106549). I stamped the label from Everything Eleanor using Crumb Cake ink (#126975). Then using the masking technique, I stamped the flourish with Wild Wasabi ink (#126959). The flowers and the sentiment were stamped with Rich Razzleberry ink (#126950. The flowers are hand cut and attached with Stampin' Dimensionals (#104430). Happy Birthday is from the Butterfly Basics stamp set (#c138816, #w138813, #p137154).

As I said, a quick and easy card, so that's all today.

Till next time,
Happy Stamping!
Lesley.

Lesley Jendra,
Independent Stampin' Up! Demonstrator.

www.lesleyjendra.stampinup.net
Email: lesleyjendra@bigpond.com.au

Thursday 15 October 2015

Reason for the Season

Hello,

Today's card is the same design as a birthday card I made last week using the flower from Beautiful Bunch, but here I have made a Christmas card using the Reason for the Season stamp set (#p139730) for the flower and leaves.


The Cardstock I have used is Whisper White (#106549), Cherry Cobbler (#121681), Pear Pizzaz (#131290) and Mossy Meadow (#133683). The inks are Mossy Meadow (#133645), Pear Pizzaz (#131180) and Cherry Cobbler (#126966).  The flower was stamped with VersaMark (#102283) and Gold Embossing powder (#109129) then heat set and hand cut and attached with Stampin' Dimensionals (#104430). I added a small amount of Dazzling Diamonds Glitter (#133751) also to the flower. The 2 way glue was used as the adhesive for the glitter. The leaves were punched using the Festive Flower Builder Punch (#139682). Merry Christmas is also from Reason for the Season stamp set. The Framelits used are the Deco Labels Collection Framelits (#130102). The dotted line is from the Butterfly Basics stamp set (#c138816, #w138813, #p137154).

This week's WEEKLY DEALS -


Classy Designer Buttons by Stampin' Up!
CLASSY DESIGNER BUTTONS
Price$10.50 $7.88
Dazzling Diamonds Glimmer Paper by Stampin' Up!
DAZZLING DIAMONDS GLIMMER PAPER
Price$8.75 $6.56
Hearts & Stars Decorative Masks by Stampin' Up!
HEARTS & STARS DECORATIVE MASKS
Price$5.00 $3.75
Kraft Tag a Bag Gift Bags  by Stampin' Up!
KRAFT TAG A BAG GIFT BAGS
Price$6.25 $4.69
Metal Rimmed Pearls  by Stampin' Up!
METAL RIMMED PEARLS
Price$8.75 $6.56


That's all for today.
Till next time,
Happy Stamping!
Lesley.

Lesley Jendra,
Independent Stampin' Up! Demonstrator,

www.lesleyjendra.stampinup.net
Email: lesleyjendra@bigpond.com.au

Tuesday 13 October 2015

More stamping tips

Hi ladies,

I am continuing today with some more basic tips for cardmaking.

PUNCHES:
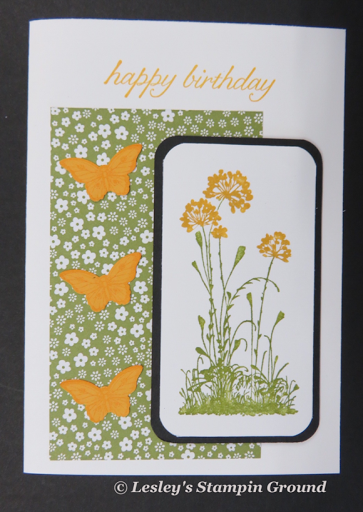
With all Stampin' Up! punches you put the card into the punch at the top of the punch so if you are punching a stamped image it is easier to stamp at the bottom of the piece of card as shown below.


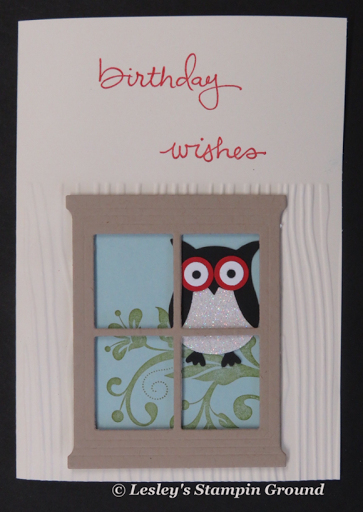
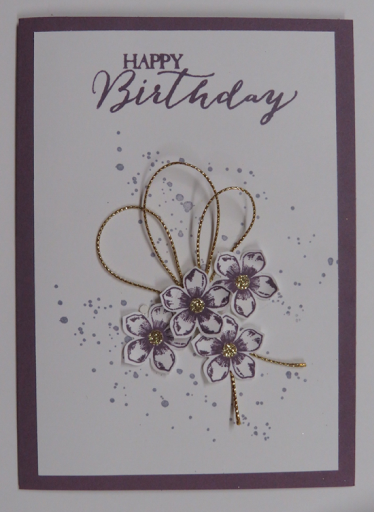
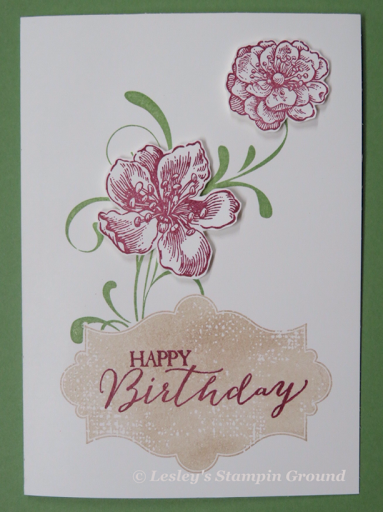
Also some punches which match a stamped image will only fit the image one way. This flower from Flower Shop stamp set is an example. I have marked all of my stamps so I know the correct way to stamp it and will punch correctly every time.

It most cases you need to stamp your image before punching. When punching a stamped image, turn the punch over so you can see your image that you are punching. 
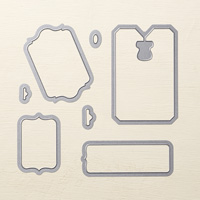
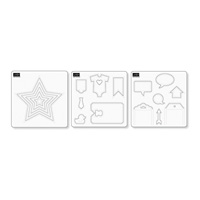

FRAMELITS:
Framelits or dies are used with the Big Shot with the Multipurpose platform or the Magnetic platform.
You need to make a "sandwich" as follows from the bottom-
                   Multipurpose or magnetic platform
                   Standard cutting pad
                   Card
                   Framelit or die
                   Standard cutting pad

If using the magnetic platform, some smaller dies will move (caused by the magnets), so just move your card and Framelit slightly till you can line up your image and Framelit correctly.

EMBOSSING FOLDERS:
Embossing folders are also used with the Big Shot. These add a patterned texture to your card
Make a "sandwich" as follows from the bottom- 
                     Multipurpose platform on Tab 1
                     Standard cutting pad
                     Embossing folder with card
                     Standard cutting pad

The multipurpose platform shows you what tabs to use for various folders and Framelits. There are also diagrams in the annual catalogue showing how to make your "sandwich".

ADHESIVES:
2 -Way Glue Pen:
As the name suggests, this glue can be used 2 ways. If you let the glue dry and becomes clear, it can be used as a temporary glue. It is permanent if you immediately adhere it while the glue is still blue and wet.
This glue can also be used with glitter. Just apply glue in the area you want glitter, then sprinkle with the glitter, remove excess glitter and allow to dry.

Crystal Effects:
This also works as an adhesive and is great for heavier embellishment etc. It is also used to create a raised, glossy and lacquered look to your images.

Stampin' Dimensionals:
These are double sided adhesive foam dots which give dimension and depth to your projects.

STAMP-A-MA-JIG:
I use the stamp-a-ma-jig to stamp images so they are straight and exactly where I want them. It consist of the stamp-a-ma-jig and a plastic sheet.

How to use the stamp-a-ma-jig:

Place the plastic sheet into the corner of the stamp-a-ma-jig


Take your inked stamp and butt it into the corner of the stamp-a-ma-jig. Make sure it is pushed right into the corner. Stamp your image onto the plastic sheet.


Now place the plastic sheet onto the card where you want to stamp this image.


Place the stamp-a-ma-jig and the plastic sheet together again as in step 1


Remove plastic sheet. DO NOT MOVE THE CARD OR STAMP-A-MA-JIG
Re-ink your stamp, place the stamp into the corner of the stamp-a-ma-jig and stamp the image


The image is exactly where I want it and straight. I'm not very good at getting it straight without the stamp-a-ma-jig


I hope these tips are of some help to you. Any other questions, just contact me.

Till next time,
Happy Stamping!
Lesley.

Lesley Jendra,
Independent Stampin' Up! Demonstrator.

www.lesleyjendra.stampinup.net
Email: lesleyjendra@bigpond.com.au

Monday 12 October 2015

Festive Flower Builder Punch

Hello again,

A Christmas card today using the Festive Flower Builder Punch (#139682). I only wanted a small flower so I have just used the double petals and cut 4 of these.


The sentiments are from the Versatile Christmas stamp set (#c140392, #w140389) and stamped with Cherry Cobbler ink (#126966).
To make the flower I stamped Cherry Cobbler ink onto Cherry Cobbler card (#121681) using the petal image from the Reason for the Season stamp set (#p139730). These were then punched with the Festive Flower Builder punch. To assemble the flower, I punched a circle using the 1-3/8" Circle Punch (#119860) for the base of the flower. I added some hot melt glue to the circle, then arranged 2 of the double petals in a cross. Adding more glue on top I then added the other 2 double petals. I punched 2 small crosses for the center of the flower from Crushed Curry card (#131288), again using hot melt glue to attach them to the flower. Cherry Cobbler Dazzling Details (#125585) was then applied to the centre of the flower.
The card used is Crushed Curry (#131288), Whisper White (#106549, Gold Foil sheets (#132622) and Winter Wonderland Designer Vellum Stack (#139594) I attached the DSP a to a piece of Whisper White, then this was attached to the Gold Foil using Mini Brads (#122941). I used Stampin' Dimensionals (#104430) to attach this gold foil sheet to the card. I then taped the flower to the card.

Come back tomorrow and I will continue with the basics of stamping.

Till then,
Happy Stamping!
Lesley.

Lesley Jendra,
Independent Stampin ' Up! Demonstrator.

www.lesleyjendra.stampinup.net
Email: lesleyjendra@bigpond.com.au