Showing posts with label #ornateframesdies. Show all posts

Tuesday, 22 March 2022

Symbols Of Fortune Specialty Designer Series Paper

Hello crafty friends,

I just adore this beautiful designer paper from the Symbols Of Fortune 12”x12” Specialty Designer Series Paper (#157652).


I have used Gold Foil Sheets (#132622) to matt the DSP  which co-ordinate with the gold foil accents on one side of this DSP. I cut the DSP with the crane with a die from the Hippo & Friends Dies (#153585). This was attached to the Gold Foil Sheet that I cut with a Stitched Rectangles Die (#151820). I also matted the larger piece of DSP with Gold Foil and attached this to the Basic White base card (#159228). 

The sentiment is from the Soaring Swallows stamp set (#157804). I stamped this with VersaMark (#102283) and heat embossed with Gold Stampin’ Emboss Powder (#155555). This needs to be set with the Heat Tool (#129056). A die from the Ornate Frames (#150664) was used to cut the sentiment.

The gold foil behind the crane and the sentiment were attached with Stampin’ Dimensionals (#104430). The Metallic Pearls (#146282) were added to finish the card.

A simple but elegant card.

“Love what you do and share what you love.”


Friday, 25 February 2022

Art Gallery

Hello stamping friends,

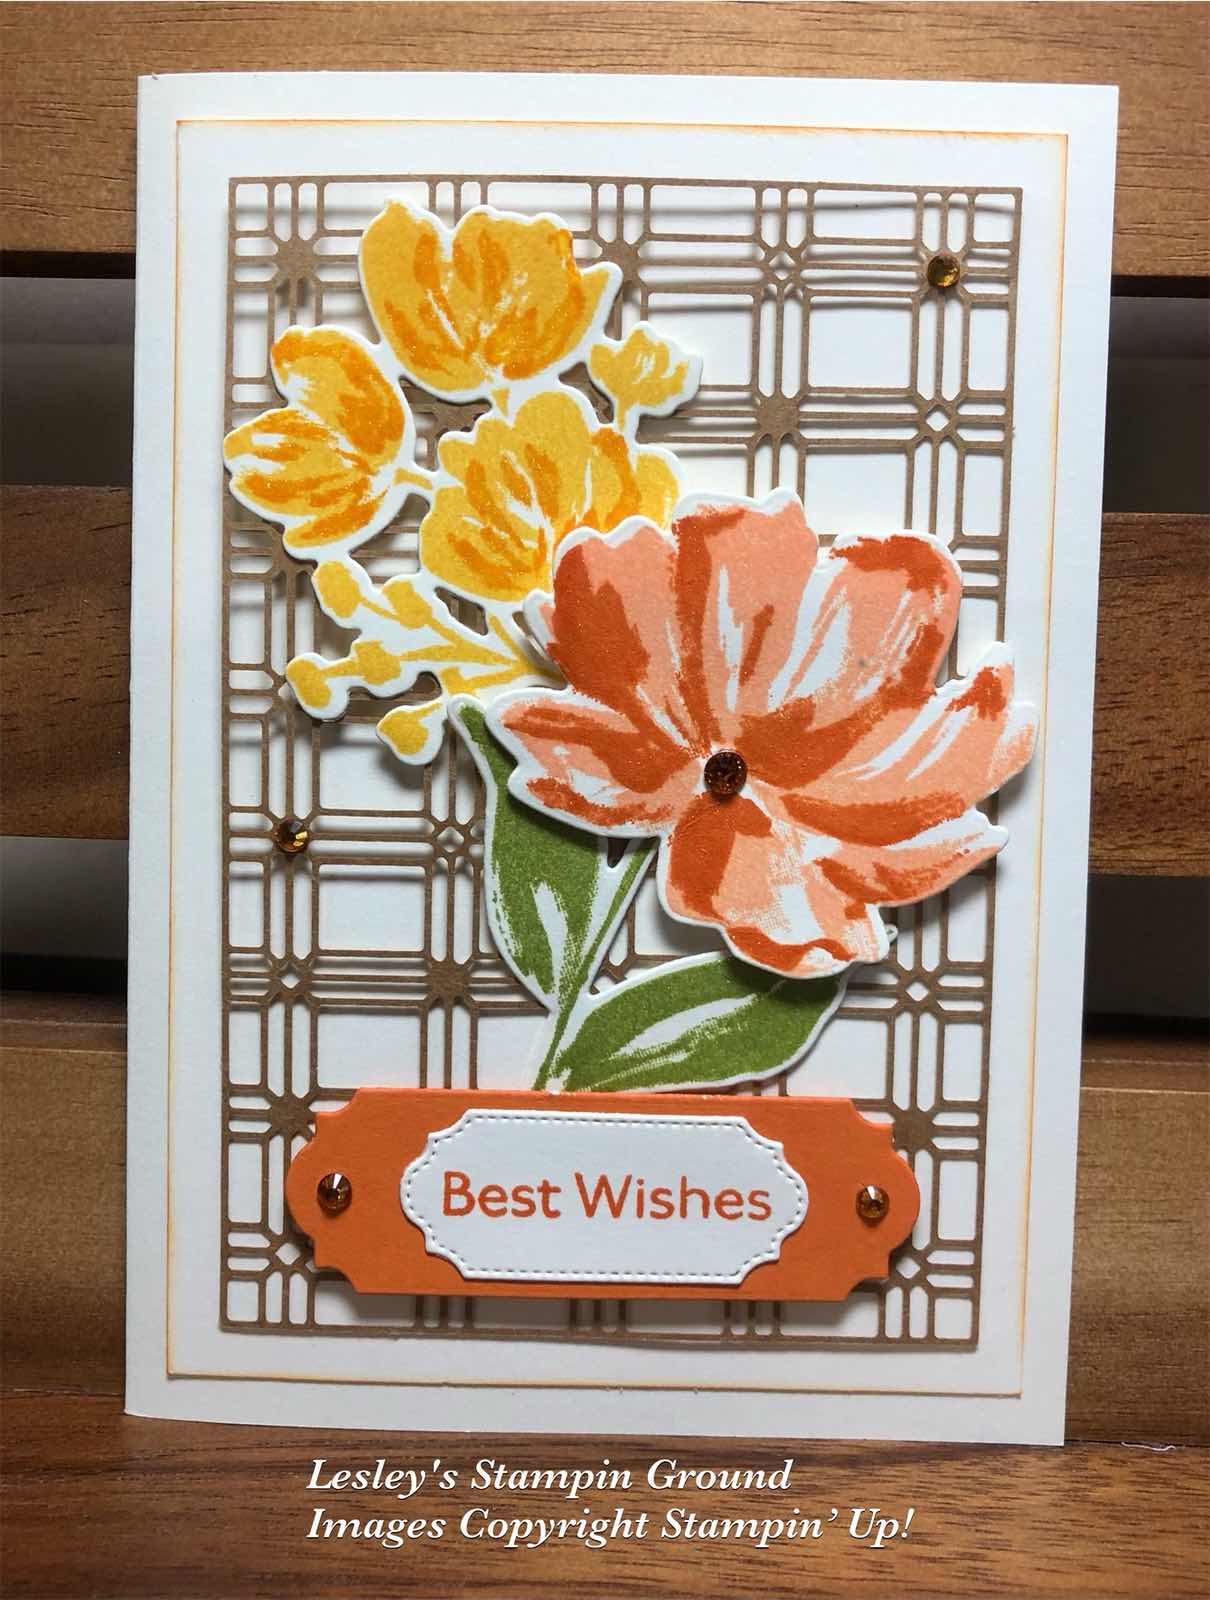
It’s always nice to re-visit some products in the annual catalogue. It’s so easy to play with all the new products once the mini catalogue arrives but there are still so many exciting products in the annual catty. These flowers and sentiment are from the Art Gallery stamp set (#158201).


This stamp set is a Two-Step set which means you can stamp 2 images with different colours. For the single flower I stamped the darker colour with Pumpkin Pie ink (#147086), then stamped the lighter colour with Pale Papaya ink (#155670). The group of small flowers was stamped with Daffodil Delight ink (#147094) for the background and Mango Melody ink (#147093) for the darker colour. The leaves were stamped with Pear Pizzaz ink (#147104). All these stamped images were then cut with dies from the co-ordinating Floral Gallery dies (#154316).

I attached the Paper Lattice (#155697) to the Very Vanilla card front (#106550) using Mini Glue Dots (#103683). The yellow flowers and leaves were also attached with Mini Glue Dots and the orange flower with Stampin’ Dimensionals (#104430).

The sentiment was stamped with Pumpkin Pie ink. The sentiment and the label under it were cut with Ornate Frames Dies (#150664). Stampin’ Dimensionals were used to attach this to the card. I daubered the edges of the card front with Pumpkin Pie ink, then this was attached to the Very Vanilla base card. The embellishments are from the Holiday Rhinestone Basic Jewels (#150457).

TIP: When I attached the Paper Lattice, I used adhesive under areas which would not be visible on the finished card - under the flowers and sentiment.

“Love what you do and share what you love.”


For those in any areas flooding in Queensland, please stay safe. This is a good excuse to stay home & craft if you are out of flood areas.


Thursday, 9 December 2021

Blessings Of Home

Hi my friends,

Here’s a simple but elegant card using just white & gold and would be great for any special occasion.


I stamped the image from Blessings Of Home stamp set (#157930) with VersaMark (#102283) and heat embossed with Gold Stampin’ Emboss Powder (#155555). This was set with the Heat Tool (#129056). The sentiment is from Forever Blossoms stamp set (#151457) and also gold embossed.

After setting the floral image on the Basic White card (#159228) I dry embossed this with the Timber 3D Embossing Folder (#156406). I attached the card front to the piece of Gold Foil sheet (#132622) then this was attached to the Basic White base card.

I cut the sentiment and the gold foil under the sentiment with dies from the Ornate Frames dies (#150664) and this was attached to the card with Stampin’ Dimensionals (#104430).

Yes, a simply elegant card!!

The Blessings Of Home stamp set will be available from 4th January in the next Mini catalogue.

“Love what you do and share what you love.”


Thursday, 25 November 2021

Adorning Designs Decorative Masks

Hi lovely friends,

Every time I make a Christmas card I think I have probably made enough but then decide I need to use another product, so here is yet another Christmas card. It’s a very easy one to make with lots of sparkle and as usual looks much nicer in reality.


I used the snowflakes mask from the Adorning Designs Decorative Masks (#156328) along with the Shimmery White Embossing Paste (#145645). Using one of Palette Knives (#142808), I wiped the embossing paste over the mask and onto the Balmy Blue card (#147007). This paste dries quickly so ensure you wash the mask & palette knife as soon as possible to remove all paste from the utensils.

After the Embossing Paste dried on the card I wrapped the White Glittered Organdy Ribbon (#156408) around the card front, then attached this to the Basic White base card (#159228).

The sentiment from the Peaceful Deer stamp set (#156891) was stamped with Balmy Blue ink (#147105) and I used a die from the Ornate Frames (#150664) to cut the sentiment. 

The Wonderful Snowflake (#156340) and the sentiment were attached to the card with Stampin’ Dimensionals (#104430) and the embellishments are the Elegant Faceted Gems (#152464).

“Love what you do and share what you love.”


Saturday, 20 November 2021

Festive Foliage

Hello friends,

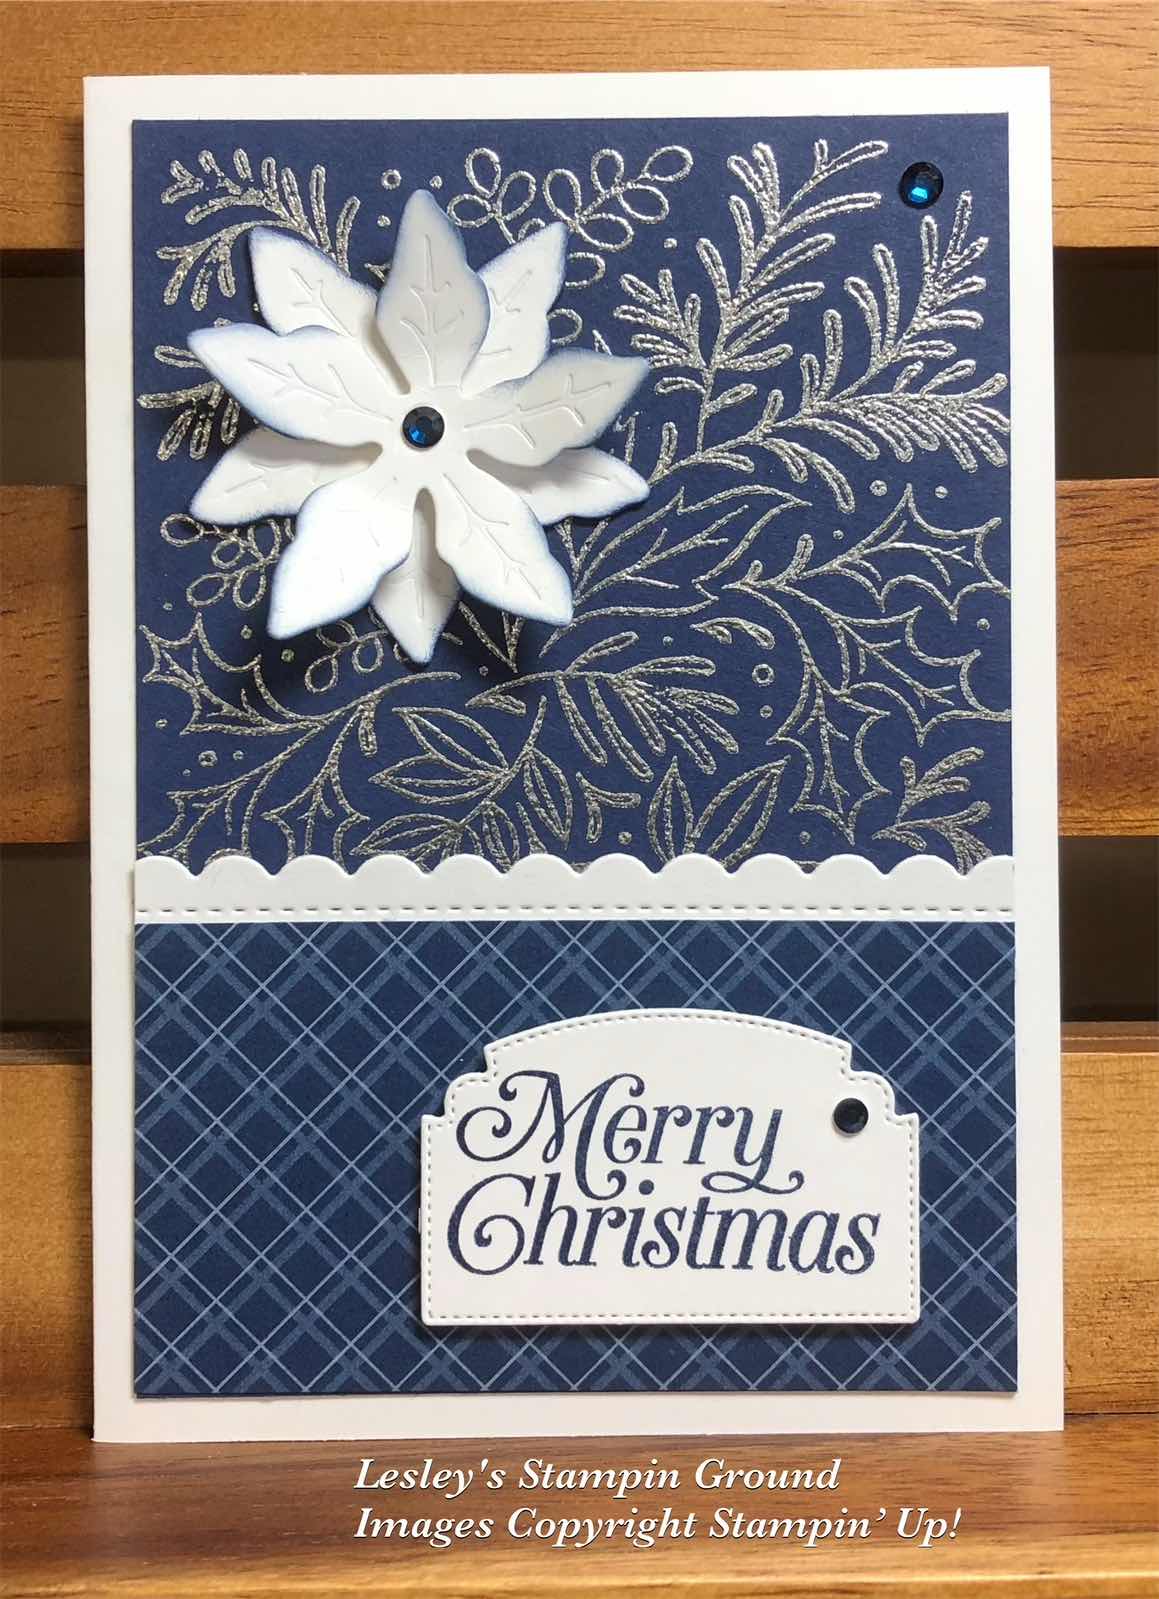
The background stamp used here is the Festive Foliage stamp (#155634) and of course great for Christmas cards. However I have previously used it for a birthday card by covering the holly leaves with flowers, which means it can be used all year round which I love.


I stamped the image with VersaMark (#102283) onto the Night Of Navy card (#106577). This was heat embossed with Silver Stampin’ Emboss Powder (#155555) and set with the Heat Tool (#129056).

The scallops were cut with a die from the Penned Flowers dies (#155557) and attached to a piece of Night Of Navy from the Neutrals 6”x6” Designer Series Paper (#155226). This was attached to the card front. The base card is Basic White card (159228).

“Merry Christmas” from the Perfectly Plaid stamp set (#149418) was stamped with Night Of Navy ink (#147110), then cut with an Ornate Frames Die (#150664). The poinsettia was cut with a Poinsettia Die (#153522) from Basic White card. I daubered the edges with Night Of Navy ink before assembling the flower with a Stampin’ Dimensional (#104430). I attached it to the card with Mini Glue Dots (#103683). The sentiment was attached with Stampin’ Dimensionals then the card was finished by adding the Night Of Navy Holiday Rhinestone Basic Jewels (#150457).


“Love what you do and share what you love.”


Wednesday, 17 November 2021

Meadow Dies

Hello everyone,

I used the Linen 12”x12” Specialty Paper (#155681) for these flowers & leaves. This already has adhesive on the back, so makes it easy to adhere it to the card.


Before cutting the flowers & leaves I coloured the linen using Blending Brushes (#153611) with Daffodil Delight ink (#147094), Highland Heather ink (#147103), Granny Apple Green ink (#147095) and Balmy Blue ink (#147105). After cutting these with the Meadow Dies (#155852), I added some extra colour around the edges using Sponge Daubers (#133773). These were then adhered to the Basic White card front (#159228) which was dry embossed with the Timber 3D Embossing Folder (#156406).  The edges of the cardfront were daubered with Highland Heather ink. The base card is also Basic White.

The sentiment from Peaceful Moments stamp set (#151595) was stamped with Highland Heather ink. This was cut with an Ornate Frames Die (#150664) and attached to the card with Stampin’ Dimensionals (#104430). The Elegant Faceted Gems (#152464) were attached to the sentiment and flowers.

Don’t forget about the Seasonal Sale which ends tomorrow (18th November) with 10% off card stock, 15% off inks and 20% off dies. All products are in the Annual catalogue.

For all details click here

You can place your order by emailing me at lesley.j.jendra@gmail.com


“Love what you do and share what you love.”


Monday, 15 November 2021

Peaceful Place Designer Series Paper

Hello my crafty friends,

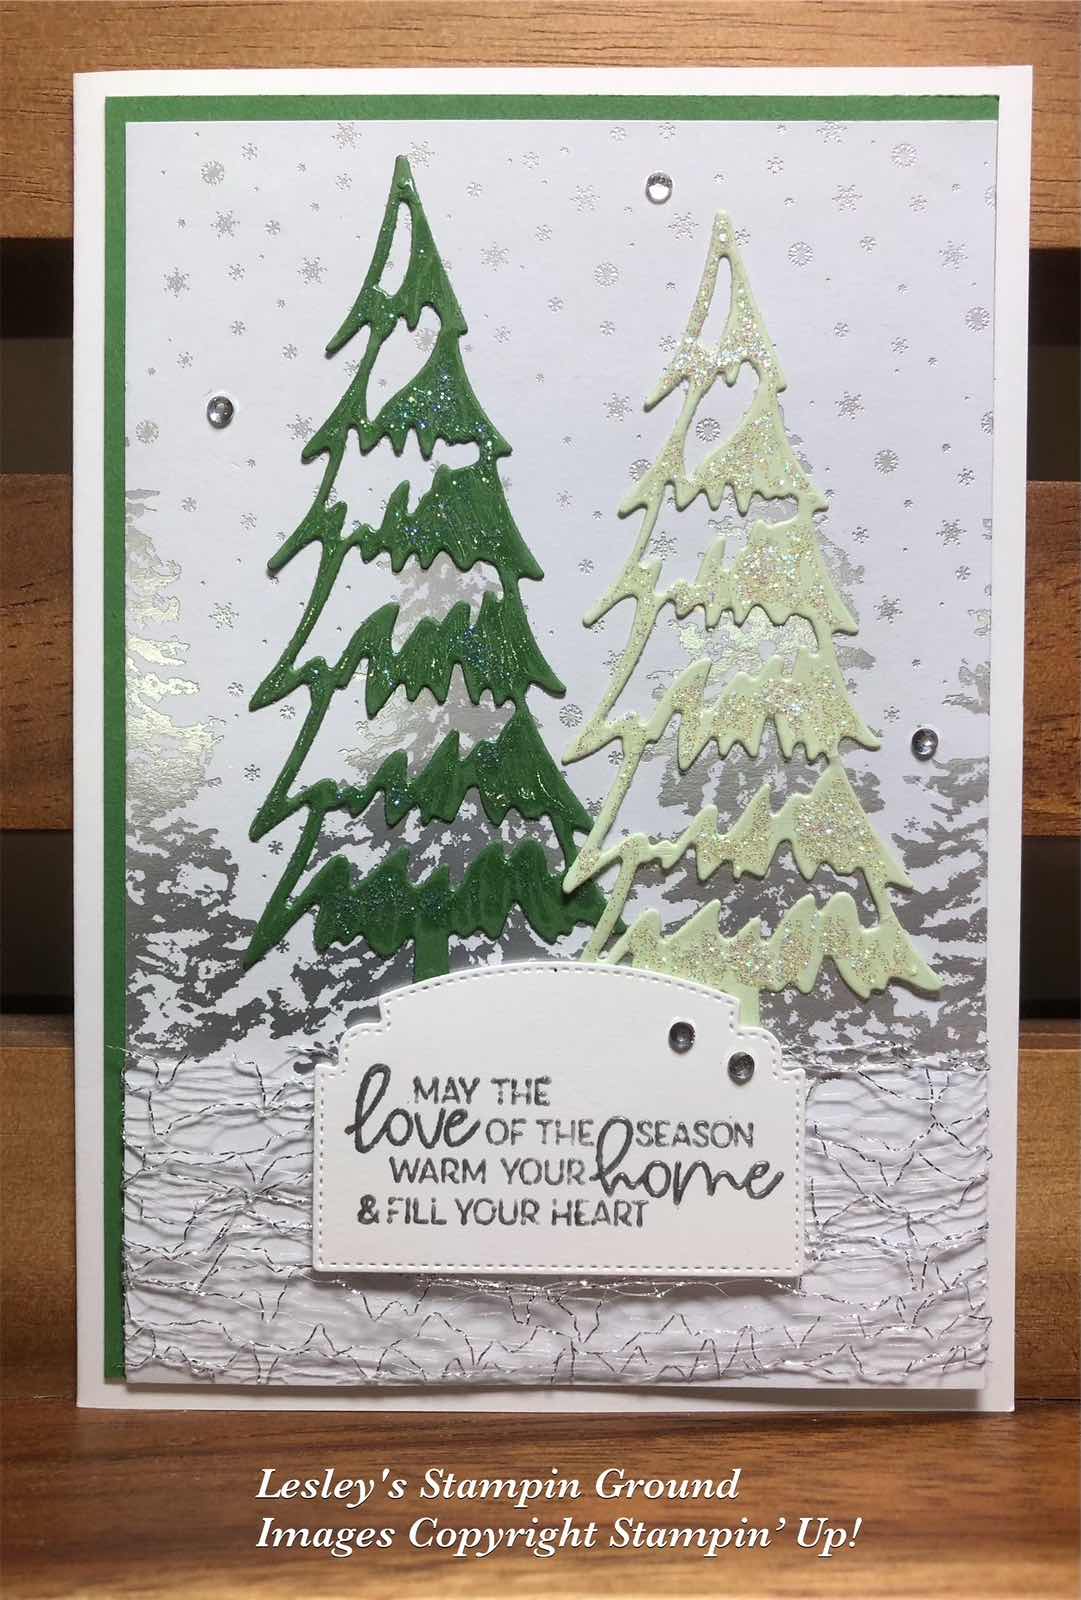
Here’s another easy Christmas card and again using some beautiful Designer Series Paper. This one is from the Peaceful Place Specialty DSP (#156394). All the designs in this pack are in grey, white & silver.


I wrapped the Metallic Mesh Ribbon (#153550) around the DSP then I attached the DSP to the Garden Green card (#108605), showing just 2 sides of the green card. This was attached to the Basic White base card (#159228).

I cut the trees using a die from the Christmas Trees Dies (#156339) from Garden Green card & Soft Sea Foam card (#147012) which has Adhesive Sheet (#152334) adhered to the back. I then applied glue with the Fine-Tip Glue Pen (#138309) to the trees and then sprinkled Dazzling Diamond Glitter over them. Put aside to dry and then you have a lovely glitter on the trees. Unfortunately Dazzling Diamonds are retired but hopefully you have some in your stash. 

Adhere the trees to the DSP. I stamped the sentiment from the Whimsical Trees stamp set (#156330) using VersaMark 102283) and heat embossed with Silver Stampin’ Emboss Powder (#155555). Set this with the Heat Tool (#129056). I used a die from the Ornate Frames Dies (#150664) to cut the sentiment and attached this to the card with Stampin’ Dimensionals (#104430). The Rhinestone Basic Jewels (#144220) were added to the card for some extra shine.

“Love what you do and share what you love.”


Thursday, 11 November 2021

Whimsy & Wonder Specialty Designer Series Paper

Hi & welcome again,

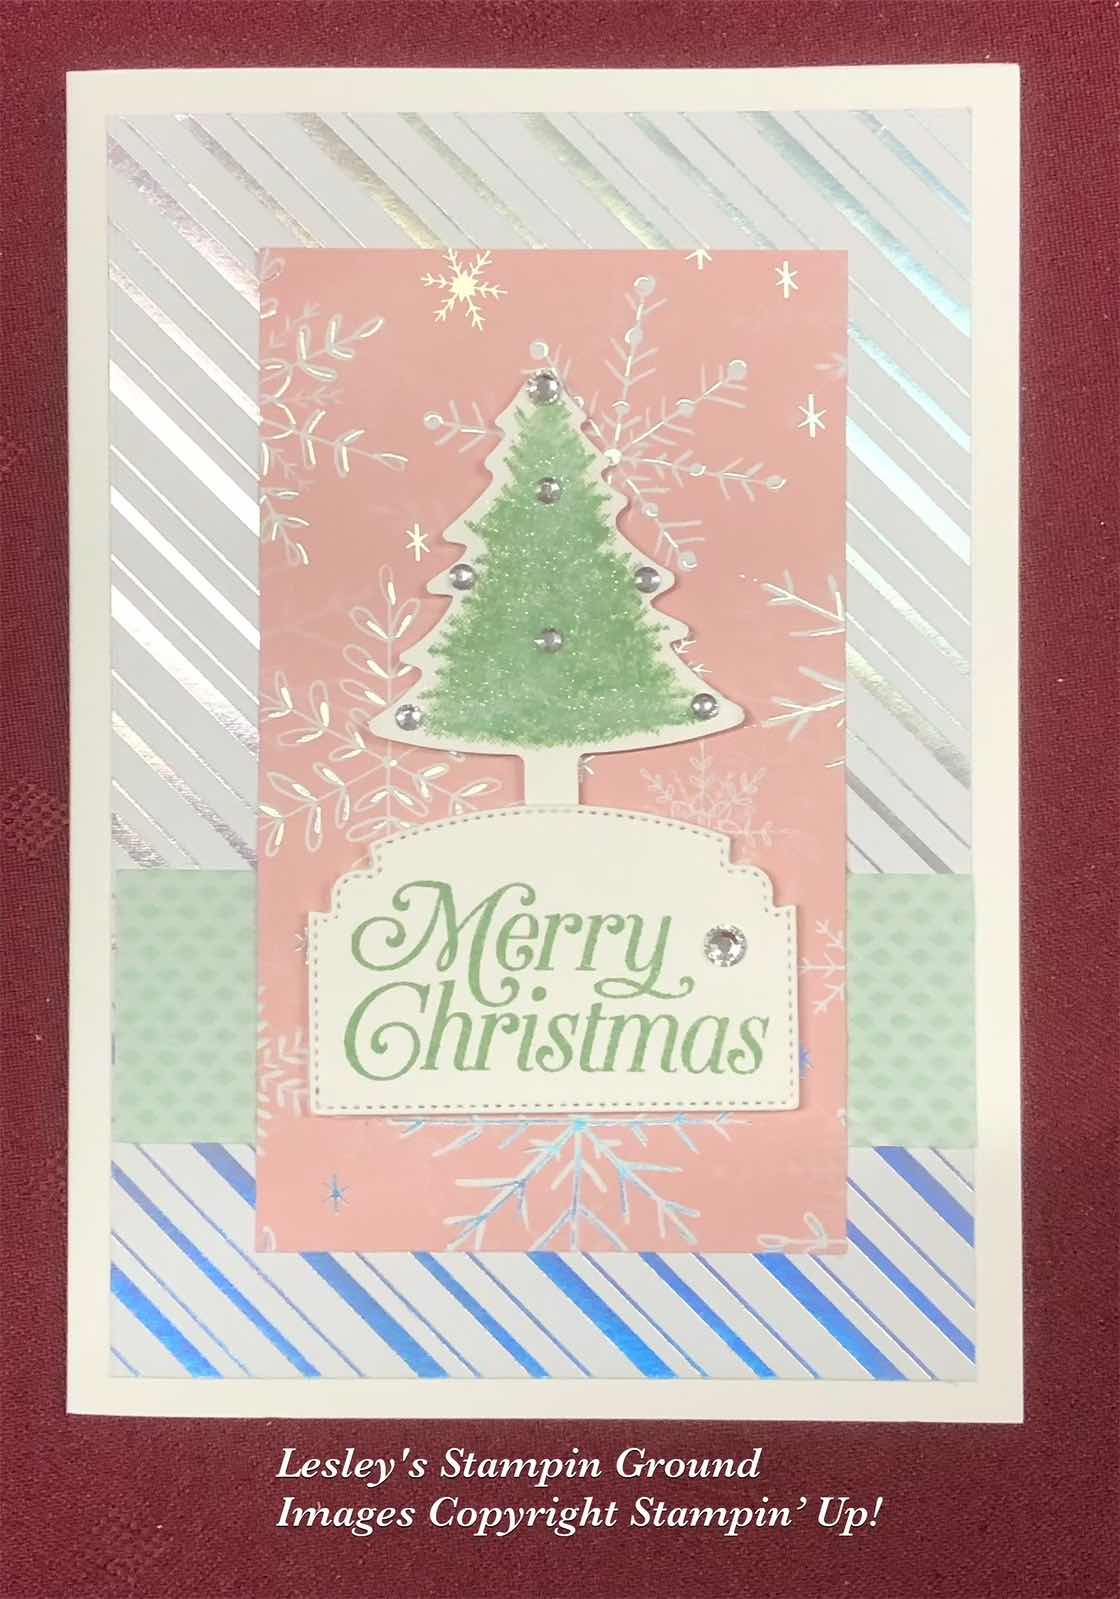
A quick and easy Christmas card using the gorgeous Whimsy & Wonder 12”x12” Specialty Designer Series Paper (#156329). This was very hard to photograph as the silver stripes picked up other colours, so the blue you see at the bottom of the card is just reflections.


The 3 pieces of Designer Paper are all from the Whimsy & Wonder DSP and attached to the Basic White base card (#159228). The tree and sentiment were stamped with Mint Macaron ink (#147106). These are from the Perfectly Plaid stamp set (#158335). The tree was cut with the Pine Tree Punch (#149521) and the sentiment was cut with an Ornate Frames Die (#150664). The tree and sentiment were attached to the card with Stampin’ Dimensionals (#104430).

Clear Wink Of Stella (#141897) was used to add some glitter to the tree. Then I added the Rhinestone Basic Jewels (#144220) to the tree and sentiment.

 An easy card when you don’t have a lot of time.

“Love what you do and share what you love.”

Stay safe & keep crafting!!


Friday, 19 March 2021

Forever Fern

Hello my friends,

I love the subtle colours on this card which could be used for a variety of occasions - sympathy, wedding, anniversary or birthdays.


The base card and card front are Basic White (#159228). I dry embossed the card front with the Dainty Diamonds 3D embossing Folder (#152702) and daubered the edges with Soft Sea Foam ink (#147102).

I stamped a variety of the leaves from the Forever Fern stamp set (#152559). I stamped each leaf twice. One image was stamped with VersaMark (#102283) and heat embossed with Silver Stampin’ Emboss Powder (#109131) and set with the Heat Tool (#129056). Another was stamped with Soft Sea Foam ink using the Stamparatus (#148187). After cleaning the stamp I re-stamped this with VersaMark and added Clear Stampin’ Emboss Powder (#109130) and heat set this. Another leaf was stamped with VersaMark and heat embossed with White Stampin’ Emboss Powder (#109132). I then sponged these leaves with  Soft Sea Foam ink using a Blending Brush (#153611). All these stamped images were cut with the Forever Flourishing Dies (#152714). I also cut extra leaves from Soft Sea Foam card (#147012) and Silver Foil Sheet (#132178).

I then attached the leaves with Mini Glue Dots (#103683) and Stampin’ Dimensionals (#104430). I attached a piece of the Metallic Mesh Ribbon (#153550) and the sentiment was placed on top. “Thinking Of You” is from the Happy Thoughts stamp set (#154507). This was heat embossed with Silver Embossing powder, then cut with a die from the Ornate Frames (#150664). A Rhinestone Basic Jewel (#144220) was attached to the sentiment.

Have a great weekend, and hopefully a crafty one!!

“Love what you do and share what you love.”


Friday, 1 January 2021

Floating & Fluttering

Hello and Happy New Year,

I hope you all had a relaxing Christmas and New Year. I was able to spend some time with some family, then I spent time cleaning and sorting my craft room - a never ending job. Now it’s all sorted, time to get back into making cards (and I guess mess it up again).

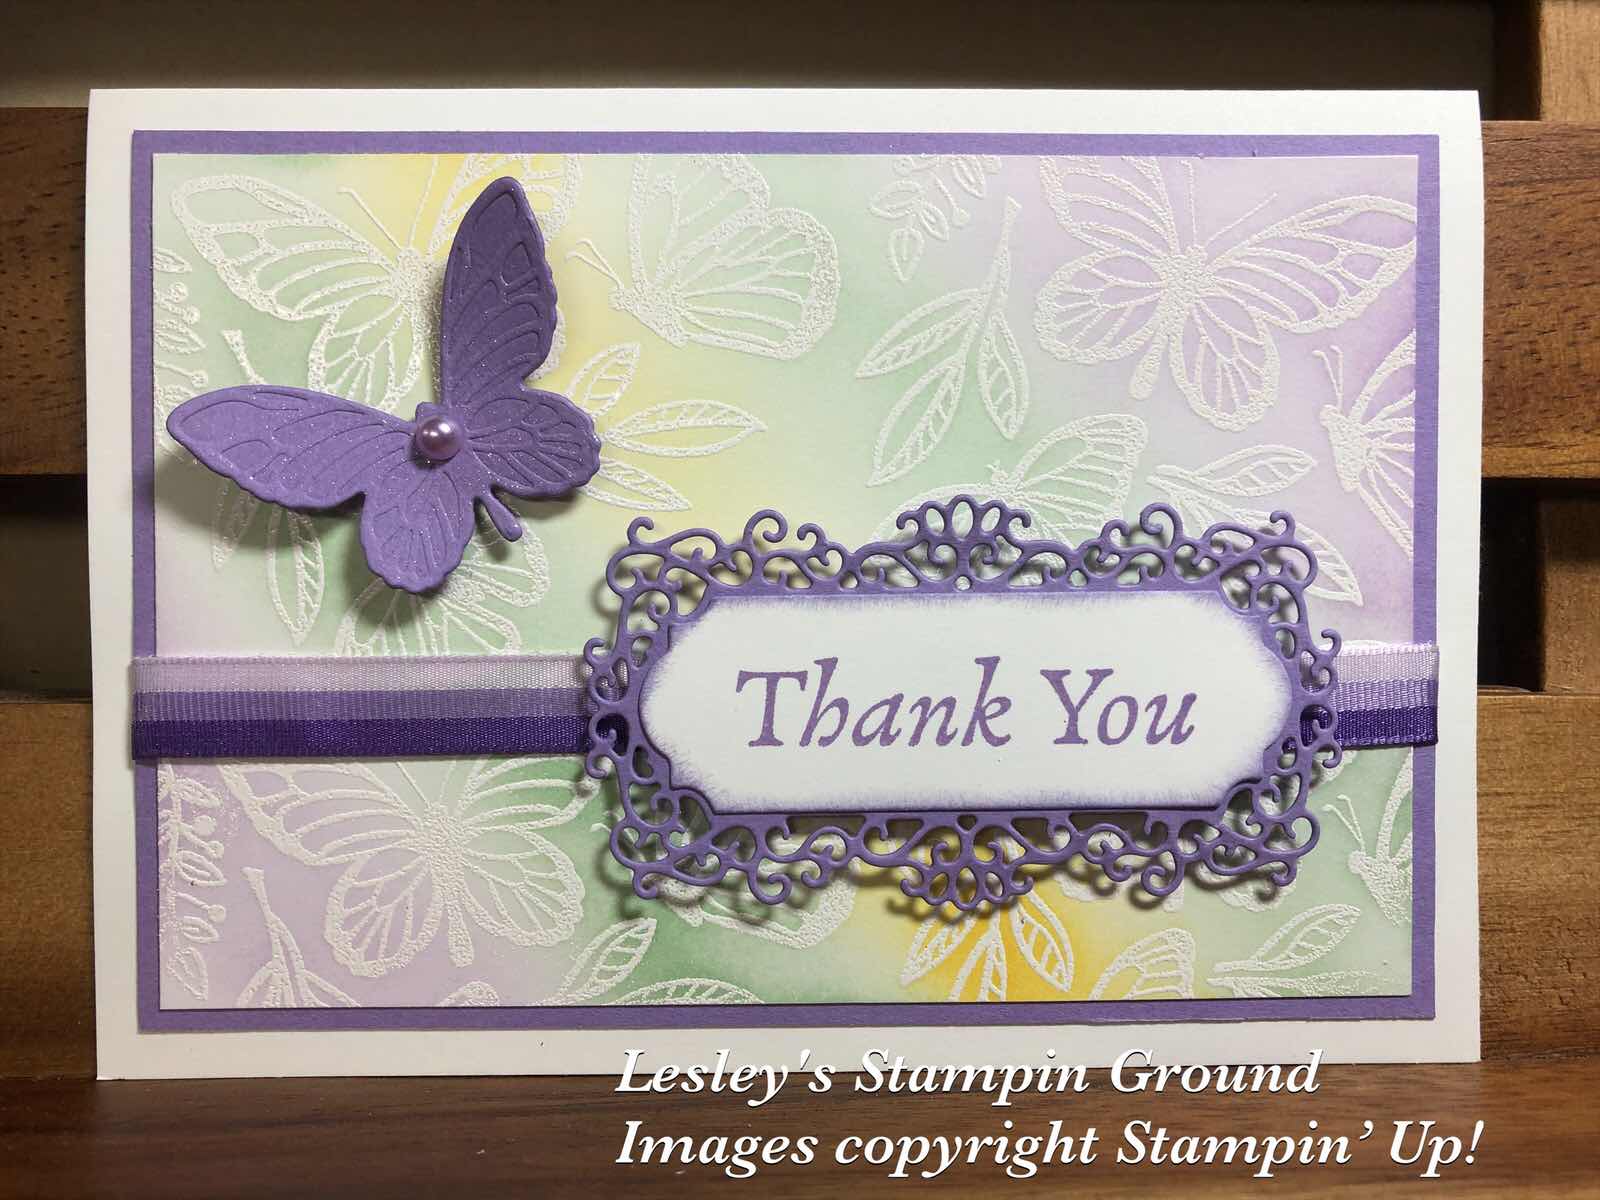
With the new Mini catalogue only days away, here is a card using new products with my favourites- mauve/purple and butterflies!!


The stamp set I have used for the background is Floating & Fluttering (#154424). There are 3 butterflies and 3 leaves grouped together on this one stamp, so I have stamped 4 images onto the Whisper White card (#106549). I stamped these with VersaMark (#102283), then added White Stampin’ Emboss Powder (#109132) which was set with the Heat Tool (#129056). I added the colours using the new Blending Brushes (#153611). These beautifully velvety soft brushes blend the colours easily. I used Highland Heather ink (#147103), Mint Macaron ink (#147106) and Daffodil Delight ink (#147094). The embossed areas resist the colouring. You can add as much or as little colour as you desire. Start by only applying a lighter colour then you can always add more, but you can’t remove it if you add too much first.
The cardfront was then attached to the Highland Heather card (#147010). The purple 3/8” Tricolor Ribbon (#149708) was wrapped around the cardfront, then this was attached to the Whisper White base card.
“Thank You” is from the Happy Thoughts stamp set (#c154507) and stamped with Highland Heather ink. The Ornate Frames Dies (#150664) were used to cut the sentiment and the Highland Heather card under the sentiment. Stampin’ Dimensionals (#104430) were used to attach this to the card. 
The butterfly was cut and embossed with a die from the Fluttering Dies (#154318) and I added a Pastel Pearl (#154571) to the body of the butterfly. The butterfly was attached with Mini Stampin’ Dimensionals (#144108) and I added some glitter using the Clear Wink Of Stella Glitter Brush (#141897) over the entire butterfly.

“Love what you do and share what you love”.

Enjoy your day!!


lesleyjendra.stampinup.net


lesleyjendra@bigpond.com.au


Wednesday, 16 December 2020

Wonder Of The Season Memories & More Card Pack

Hello again,

The Memories & More card packs are great for both cards and scrapbooking or memory keeping. Today’s card uses 2 cards from the Wonder Of The Season Memories & More Card Pack (#153538).


The base card is Whisper White (#106549). I wrapped the Real Red 3/8” Double Stitched Satin Ribbon (#151155) around the red & gold card from the memories & more card pack. The card with the Christmas Tree is also from the pack and I matted this with the Red Foil from the Red & Green Foil Sheets (#153510). This was attached to the card with Stampin’ Dimensionals (#104430). I added the Red Rhinestone Basic Jewels (#146924) to “decorate” the tree. The sentiment is from the Curvy Christmas stamp set (#155364) and this was cut with an Ornate Frames Die (#150664). I stamped the sentiment using Real Red ink (#147084) onto Whisper White card using the Stamparatus (#148187). I then re-stamped using VersaMark (#102283) and added Clear Stampin’ Emboss Powder (#109130) and set it with the Heat Tool (#129056). This gives a gloss to the stamped sentiment. I used Stampin’ Dimensionals to add the sentiment on top of the ribbon.

I hope your day has been an enjoyable one!!

“Love what you do and share what you love.”


Tuesday, 5 May 2020

Poppy Moments Dies

Hello,

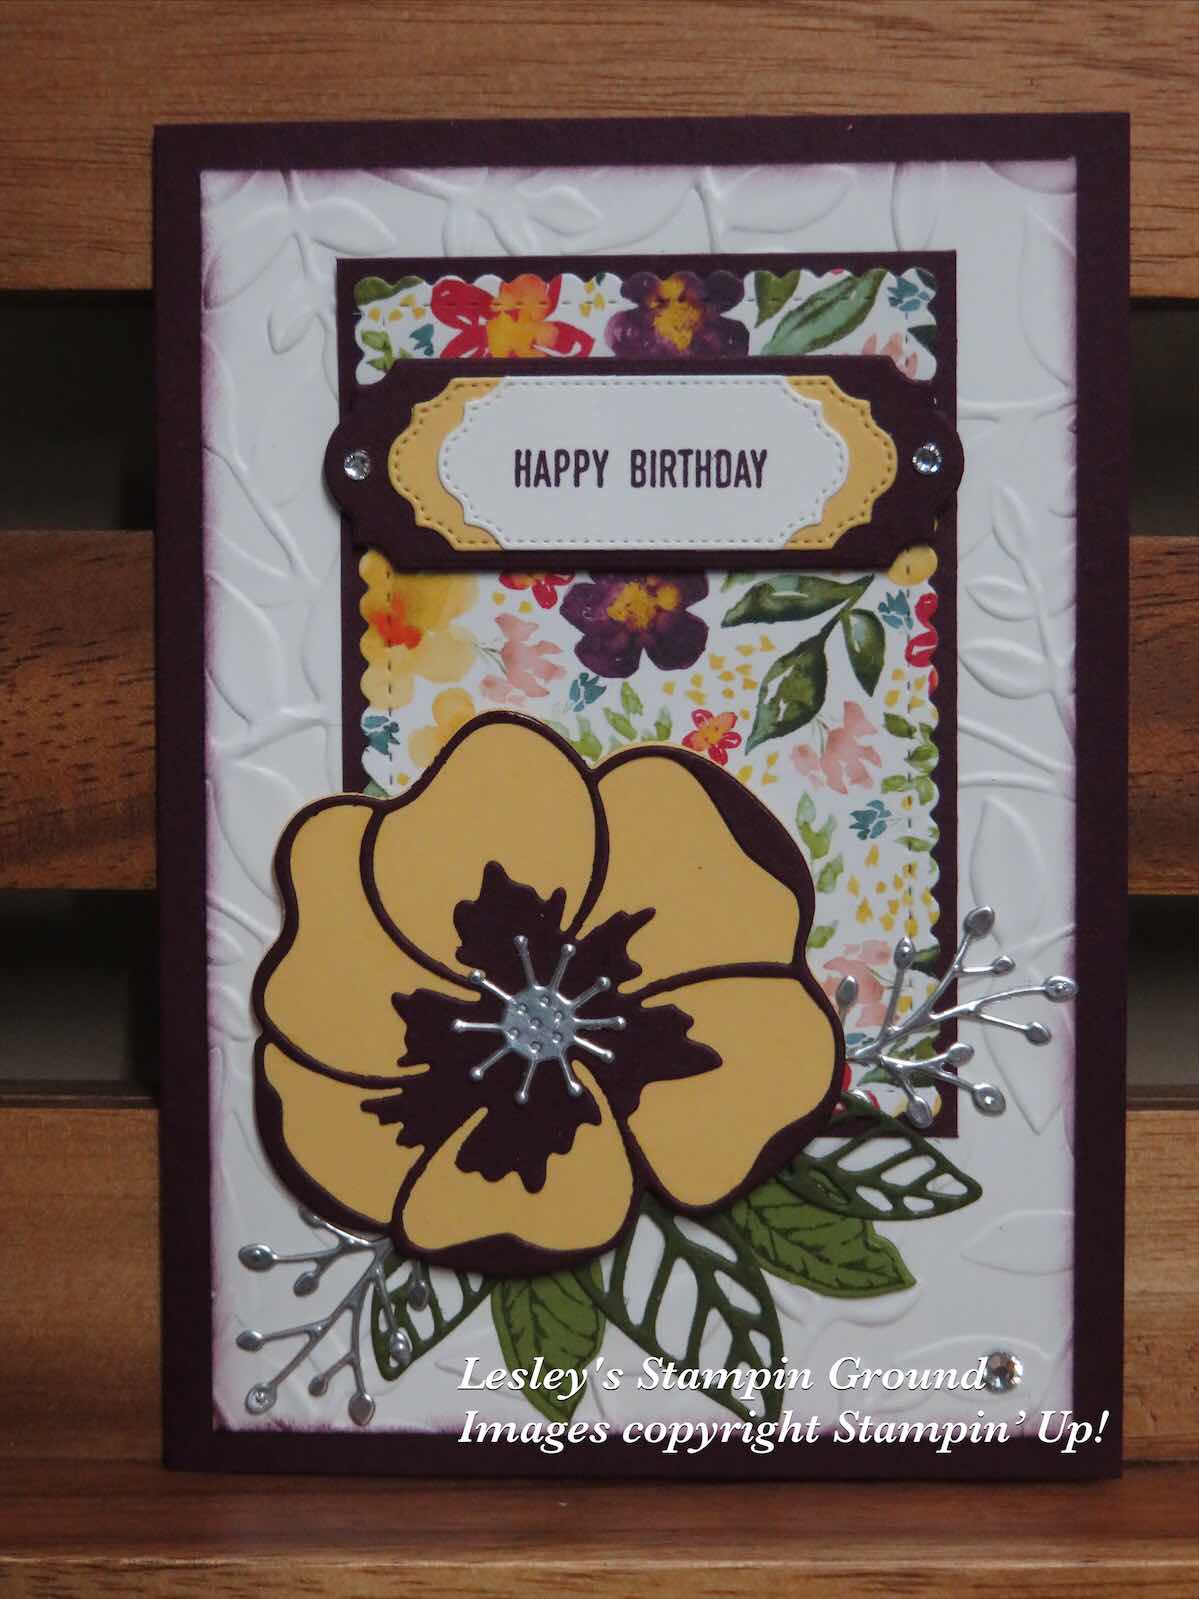
The flower on this card is made using The Poppy Moments Dies (#151594). It’s not a typical coloured poppy but chose the colours to match the Designer Series Paper.


The base card is Blackberry Bliss (#133682) and the Whisper White card front (#106549) was embossed with the Layered Leaves 3D Embossing Folder (#152321). The Best Dressed Designer Series Paper  (#151319) was cut with a Stitched So Sweetly Die (#151690), then attached to the Blackberry Bliss card. The base of the flower is So Saffron Card (#108611) and the detailed piece is Blackberry Bliss. This was glued with the Fine-Tip Glue Pen (#138309). The detailed leaves are Mossy Meadow card (#133683) and cut with the Magnolia Memory Dies (#149578). The leaf  from the Good Morning Magnolia stamp set (#149298) was stamped with Old Olive ink (#147090) onto Old Olive card (#10656). The dies to cut these are also from the Magnolia Memory Dies. The Silver Foil (#132178) Leaves are cut with the Birthday Dies (#153590). “Happy Birthday” from the Itty Bitty Greetings Stamp Set (#c151331) was stamped with Blackberry Bliss ink (#147092). The Whisper White card, the So Saffron card and Blackberry Bliss card for the sentiment were cut with the Ornate Frames Dies (#150664). The sentiment and flower were attached with Stampin’ Dimensionals (#104430). The Rhinestone Basic Jewels (#144220) were added  to the card.

Stay safe & keep crafting!!