Showing posts with label #layeringcirclesdies. Show all posts

Friday, 10 June 2022

Artisan Additions Dies

Hi & welcome again everyone,

The Artisan Additions Dies (#159172) is where you will find the die that I used for the detailed cut-out on this card. As usual, I had Adhesive Sheet (#152334) adhered to the back of the Gold from the Brushed Metallic Cardstock (#153524) before cutting with the die.


This was attached to the Basic White card front (#159228). The Designer Paper is from the Texture Chic 12”x12” Specialty Designer Series Paper (#158808). The scalloped strip was cut using a Penned Flowers die (#155557). This and the DSP was attached to the card front. I daubered the edges of the card front with Crumb Cake ink (#147116) before attaching it to the Basic White base card.

The sentiment is from the Edens Garden stamp set (#157823). This was stamped with VersaMark (#102283) and embossed with Gold Stampin’ Emboss Powder (#155555), then set with the Heat Tool (#129056). I used the Layering Circles Dies (#151770) to cut the sentiment and the Gold Brushed Metallic cardstock under the sentiment. This was attached to the card with Stampin’ Dimensionals (#104430).

I find you can make an easy card with some beautiful Designer Paper and some lovely dies just like I have done here.

“Love what you do and share what you love.”


Wednesday, 6 April 2022

All Together Designer Series Paper

Hello stamping friends,

The All Together 6”x6” Designer Series Paper (#160039) has a beautiful range of black & white images which could be coloured. I have just chosen to leave them as is for this card.


I chose 7 different designs and cut them with the Layering Circles Dies (#151770). These were attached to the Basic White card front (#159228) which was dry embossed with the Timeworn Type 3D Embossing Folder (#156505). This was matted with the Basic Black card (#121688) then attached to the Basic White base card.

I cut the leaves with a die from the Artistic Dies 155371) using the Silver Foil from the Blue Foils (#159983). This pack is available for a limited time. I had Adhesive Sheet (#152334) adhered to the back of the foil before cutting with the die to make it easy to attach the fine detailed die cut to the card. 

The sentiment is from the Encircled In Friendship Stamp Set (#155408) and stamped with Tuxedo Black Memento ink (#132708). The sentiment & silver foil under the sentiment were cut with Layering Circles Dies and attached to the card with Stampin’ Dimensionals (#104430).


TIP: Adhesive Sheets are great to attach a detailed cut out to your card. Just adhere the adhesive sheet to the back of the card you are using to cut with the die before cutting, then remove the backing of the adhesive and attach the die cut to the card.


“Love what you do and share what you love.”


Wednesday, 13 January 2021

Hydrangea Hill Mercury Glass Designer Acetate

Hello,

For all the purple lovers out there ( and yes I am one!!) you can’t go past the Hydrangea Hill papers and accessories.


I have used the Hydrangea Hill Mercury Glass Designer Acetate (#154574) for the cardfront.  I attached it to a piece of Whisper White card, then attached this to Gorgeous Grape card (#147011). The reason I attached it to the white card first was so you could see the white “splotches” as this is actually clear on the acetate. The base card is also Whisper White, which is being replaced by the Basic White card (#159228), and now available for purchase.
The flowers from the Hyrdangea Hill Designer Series Paper (#154570) were cut with a Layering Circles Die (#151770), as was the Gorgeous Grape card underneath.
The ribbon is the Silver/White 3/8” Metallic-edged Ribbon (#144213) which I lightly sponged with the Gorgeous Grape ink (#147099) before attaching the the card. The sentiment is from the Many Messages stamp set (#154510) and cut with the co-ordinating Messages Die (#154422). This stamp set has a great range of sentiments, so you can stamp them all, cut them and put them aside for later use, or you can just stamp and cut just the one you need. I stamped the sentiment with Gorgeous Grape ink.
The sentiment and flowers were attached to the card with Stamping Dimensionals (#104430) then the Pastel Pearls (#154571) were added to complete the card.

Have a great day!!

“Love what you do and share what you love.”


Monday, 16 November 2020

Zany Zebras

Hello,

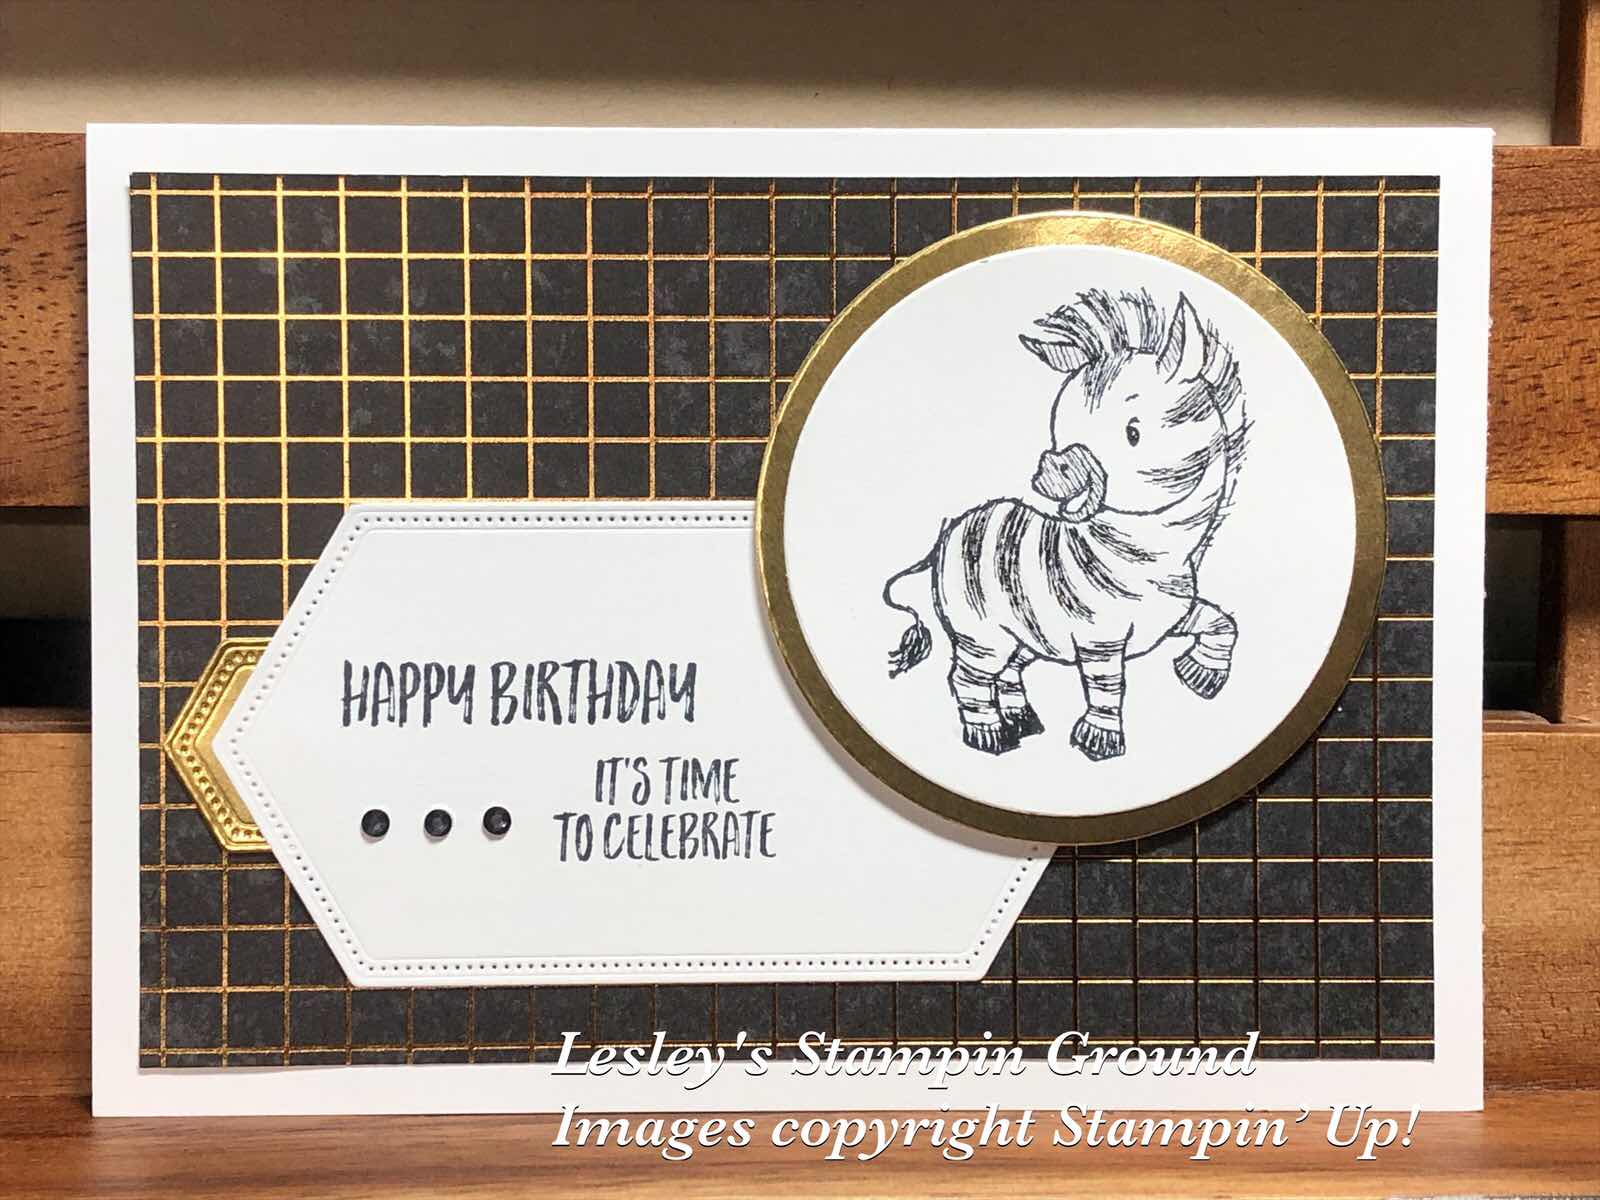
The Zany Zebras stamp set (#152536) includes 3 very cute zebras which are just adorable. Here’s an easy card using 1 of the zebras.


The zebra and sentiment are from the same set and stamped with Tuxedo Black Memento ink (#132708) on Whisper White card (#106549). The circles were cut with the Layering Circles Dies (#151770) and the sentiment with a dies from the Stitched Nested Labels (#149638). Gold Foil Sheet (#132622) was used to matt the zebra and for the small “label” under the sentiment.. The Designer Series Paper is from the World Of Good Specialty Paper (#152491) and attached to the Whisper White base card. I coloured 3 Rhinestone Basic Jewels (#144220) using the Basic Black Stampin’ Blends (#154843) before attaching them to the card.
I used the Clear Wink Of Stella Glitter Brush (#141897) to add shimmer to the Zebra. Not sure how visible it is in this photo.

Have a great day.


Sunday, 26 April 2020

Perennial Essence Designer Series Paper

Hi again,

It’s the start of another week, but everyday seems the same these days, but hopefully things will start to slowly change soon.

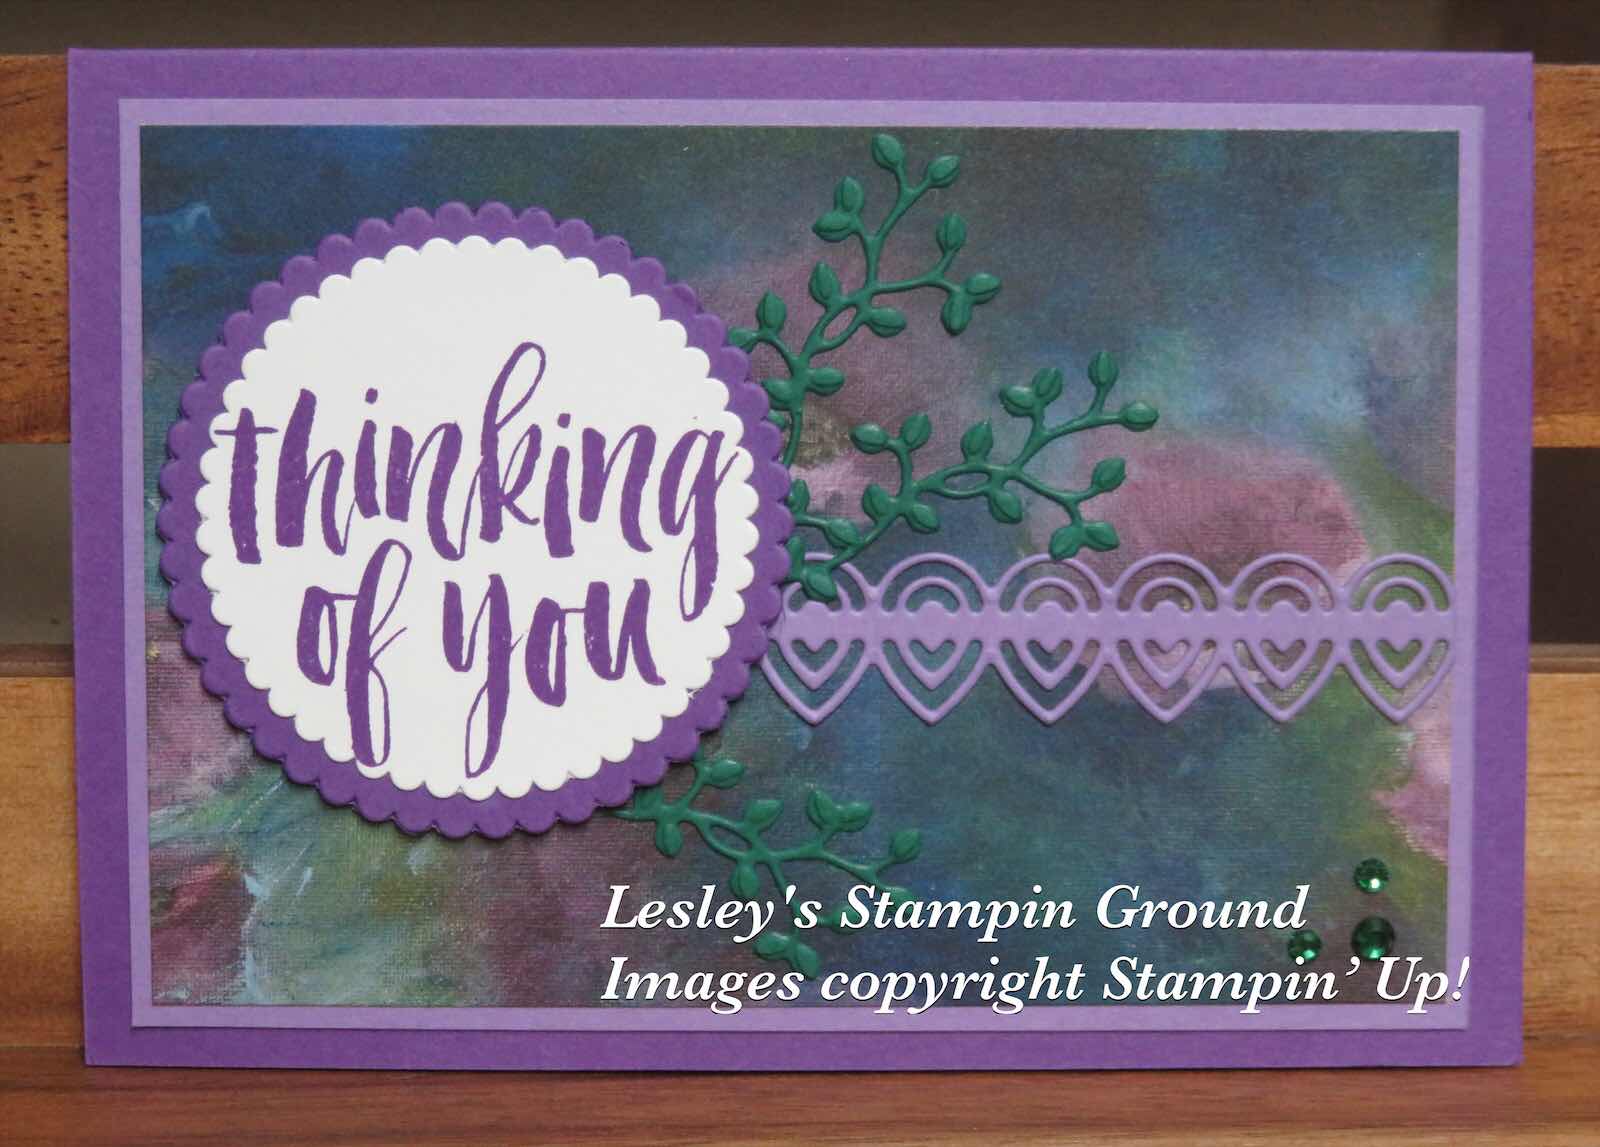
The beautiful Perennial Essence Designer Series Paper (#149100) has been used for the cardfront. All the Designer Papers from the Annual catalogue are retiring, so if you want any make sure you place your order soon.


The DSP was attached to the Highland Heather card (#147010), then this was attached to the Gorgeous Grape base card (#147011). I cut the detailed border using the Lily Pad Dies which were available during Sale-A-Bration. The leaves are cut with a die from the Garden Gateway Dies (#151512) and I used Shaded Spruce card (#147006). The Fine-Tip Glue Pen (#138309) was used to glue the leaves and border to the card. Thinking Of You is from Rooted In Nature stamp set (#146482) and I stamped it with Gorgeous Grape ink (#147099). The 2 scalloped circles from the Layering Circles Dies (#141705) cut the circles, then these were attached with Stampin’ Dimensionals (#104430). I used 3 of the Noble Peacock Rhinestones (#149494) in the lower right corner.

Stay safe & keep crafting!!


Tuesday, 21 April 2020

Lasting Elegance Dies

Hi again everyone,

The Lasting Elegance Dies (# 151475) are elegant, and are used to cut the detailed flowers and the border on this card front to make a very beautiful but easy card.


Silver Foil Sheet (#132178) was used for the card front and Merry Merlot card (#147005) for the base card. The sentiment is from the Positive Thoughts stamp set (#151490) and I stamped this with Merry Merlot ink (#147112) on Whisper White card (#106549). The Layering Circles Dies (#141705) were used to cut the sentiment and the Merry Merlot card. This was then attached to the card with Stampin’ Dimensionals (#104430)

How simple is that!!


Stay safe & keep crafting!!


Wednesday, 2 October 2019

Basketball card

Hello,

I was happy with how this basketball turned out for my grandson who loves his basketball.


I cut the Pumpkin Pie card (#108601) with a die from the Layering Circles Dies (#141705). Then I cut some Basic Black card (#121688) with the Layering Ovals dies (#141706) and glued these black strips onto the circle with the Fine-Tip Glue Pen (#138309). I then embossed the “ball” with the now retired Softly Falling folder. The base card is Pumpkin Pie, then Basic Black card followed by Very Vanilla card (#106550). I stamped Happy Birthday from the Perennial Birthday stamp set (#c151240) with Pumpkin Pie ink (#147086), then embossed the card with the Brick & Mortar 3D embossing Folder (#151797). The basketball was attached with Stampin’ Dimensionals (#104430).

Have a great day.