Sunday, 21 November 2021

Peaceful Place Designer Series Paper

Hello friends,

I decided to add some colour to the Peaceful Place Designer Series Paper (#156394). It didn't require much colour so was easy to do.


I used Old Olive Stampin’ Blends (#154892) to colour the trees, then I used Crumb Cake (#154882) and Bronze & Ivory Stampin’ Blends (#154922) on the buildings. The frame was cut using the Stitched Rectangles Dies (#151820) from Old Olive card (#106576). The frame was attached to the coloured DSP with Mini Stampin’ Dimensionals (#144108). This was then attached to another piece of the Peaceful Place DSP.  

The base card is Basic White (#159228). “Merry Christmas” from the Peaceful Deer stamp set (#156891) was stamped with Old Olive ink (#147090) and also cut with a Stitched Rectangles die. The Silver embellishments are from the Silver & Clear Epoxy Essentials (#155567) and attached to the sentiment.

Well that was easy!!


“Love what you do and share what you love.”


Saturday, 20 November 2021

Festive Foliage

Hello friends,

The background stamp used here is the Festive Foliage stamp (#155634) and of course great for Christmas cards. However I have previously used it for a birthday card by covering the holly leaves with flowers, which means it can be used all year round which I love.


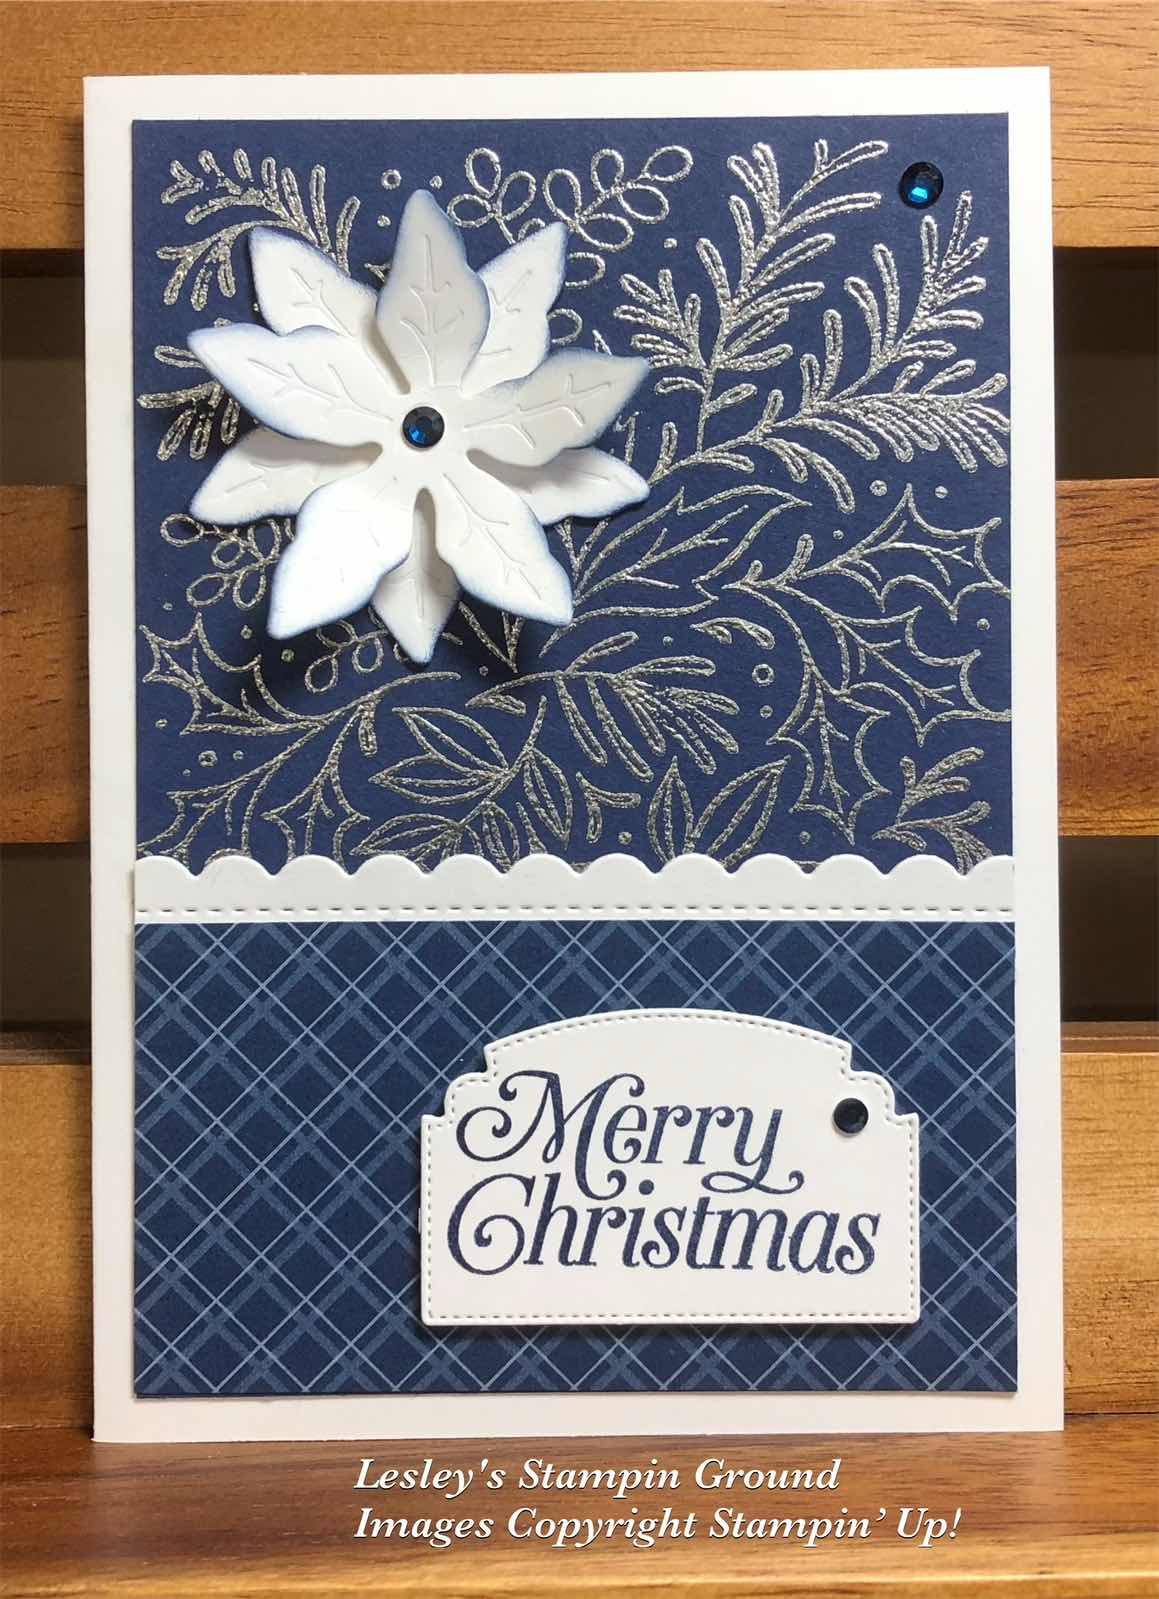
I stamped the image with VersaMark (#102283) onto the Night Of Navy card (#106577). This was heat embossed with Silver Stampin’ Emboss Powder (#155555) and set with the Heat Tool (#129056).

The scallops were cut with a die from the Penned Flowers dies (#155557) and attached to a piece of Night Of Navy from the Neutrals 6”x6” Designer Series Paper (#155226). This was attached to the card front. The base card is Basic White card (159228).

“Merry Christmas” from the Perfectly Plaid stamp set (#149418) was stamped with Night Of Navy ink (#147110), then cut with an Ornate Frames Die (#150664). The poinsettia was cut with a Poinsettia Die (#153522) from Basic White card. I daubered the edges with Night Of Navy ink before assembling the flower with a Stampin’ Dimensional (#104430). I attached it to the card with Mini Glue Dots (#103683). The sentiment was attached with Stampin’ Dimensionals then the card was finished by adding the Night Of Navy Holiday Rhinestone Basic Jewels (#150457).


“Love what you do and share what you love.”


Friday, 19 November 2021

Blessings Of Home stamp set

Hello my crafty friends,

Being a Stampin’ Up! Demonstrator has many advantages and one is being able to get new products early. The Blessings Of Home stamp set (#157930) will be available from 4th January 2022 but as a demonstrator I have been able to purchase it early and I love it.


I stamped the smaller floral image for this card and it was cut with the Flowers Of Home Dies (#157938). I stamped this with Tuxedo Black Memento ink (#132708) and coloured it with Stampin’ Blends. The colours used are Daffodil Delight (#154883), Fresh Freesia (#155518), Flirty Flamingo (#154884) and Granny Apple Green (#154885). I used the Clear Wink Of Stella (#141897) to add shimmer to the coloured image.

The Gold Foil from the Brushed Metallics 12”x12” cardstock (#153524) was cut with a Hippo & Friends Die (#153585). This gold pack includes 3 colours of gold - light, medium and dark. I have used the medium colour here.

I dry embossed the Basic White card front (#159228) with the Timber 3D Embossing Folder (#156406), then daubered the edges with Daffoldil Delight ink (#147094). The Pattern Party 12”x12” Designer Series Paper (#155426) was attached to the card front. The gold foil was attached to the card with Stampin’ Dimensionals (#104430).

The sentiment from the Elegantly Said stamp set (#155095) was stamped with VersaMark (#102283) and heat embossed with Gold Stampin’ Emboss Powder (#155555) and set with the Heat Tool (#129056). This was also cut with the Hippo & Friends dies and attached with Stampin’ Dimensionals.

I made a bow using the Gold Shimmer Ribbon (#152156) and used a Mini Glue Dot (#103683) to attach it to the card. The cute little bee from the Bumblebee Trinkets (#155568) was also attached with a Mini Glue Dot.

 If you would like to find out some of the perks of being a demonstrator please contact me. lesley.j.jendra@gmail.com I would love to hear from you.


“Love what you do and share what you love.”


Thursday, 18 November 2021

Pinwheel Tower card

Hello my friends,

I do love a fancy fold card and I have seen many of these pinwheel tower cards recently so just had to make one.


Although this card may seem difficult it is really quite easy. 
I used Mint Macaron card (#138344) for the base.
The measurements for Mint Macaron cardstock  are 1 at 15.5cm x 10.5cm and scored at 2cm, 4cm, 6cm and 8cm along the long side, and 3 at 7.5cmx10.5cm.
Fold the score lines and form a square as shown below. I glued this with Multipurpose Liquid Glue (#110755).


Then add each of the other pieces on each face of the square as shown-


The Hand-Penned Designer Series Paper (#155499) was cut in the following sizes -3 at 7cm x 10cm, 3 at 5cm x 10cm and 1 at 2.5cm x 10cm.  On the side with the Basic White card (#159228) which I cut at 5.3cm x 10cm, I added the piece of DSP on the side however if you want more area to write your message use a white card 7cm x 10cm. Attach each of the pieces of Designer Series Paper to the card.

I added sentiments to 3 of the larger sides. I used Encircled In Friendship stamp set (#155408) and Elegantly Said stamp set (#155095) and they were all stamped with Highland Heather ink (#147103). The dies to cut these are from the Ornate Frames Dies (#150664) and the Potted Succulents Dies (#154330). 

The flower images were cut using the Meadow dies (#155852) and the Penned Flowers Dies (#155557). I coloured the cut-outs with Highland Heather ink, Mint Macaron ink (#147106), Blushing Bride ink (#147100) and Granny Apple Green ink (#147095). 

I glued each of the elements and sentiments using the Multipurpose Liquid Glue. I chose not to use dimensionals as I didn't want to have too much extra thickness to the card.

The sizes used here give a finished card 15cm x10.5cm, so is the same size as a normal size card and it folds flat for postage.

“Love what you do and share what you love.”


Wednesday, 17 November 2021

Meadow Dies

Hello everyone,

I used the Linen 12”x12” Specialty Paper (#155681) for these flowers & leaves. This already has adhesive on the back, so makes it easy to adhere it to the card.


Before cutting the flowers & leaves I coloured the linen using Blending Brushes (#153611) with Daffodil Delight ink (#147094), Highland Heather ink (#147103), Granny Apple Green ink (#147095) and Balmy Blue ink (#147105). After cutting these with the Meadow Dies (#155852), I added some extra colour around the edges using Sponge Daubers (#133773). These were then adhered to the Basic White card front (#159228) which was dry embossed with the Timber 3D Embossing Folder (#156406).  The edges of the cardfront were daubered with Highland Heather ink. The base card is also Basic White.

The sentiment from Peaceful Moments stamp set (#151595) was stamped with Highland Heather ink. This was cut with an Ornate Frames Die (#150664) and attached to the card with Stampin’ Dimensionals (#104430). The Elegant Faceted Gems (#152464) were attached to the sentiment and flowers.

Don’t forget about the Seasonal Sale which ends tomorrow (18th November) with 10% off card stock, 15% off inks and 20% off dies. All products are in the Annual catalogue.

For all details click here

You can place your order by emailing me at lesley.j.jendra@gmail.com


“Love what you do and share what you love.”


Tuesday, 16 November 2021

Peaceful Deer with Peaceful Place DSP

Hi friends,


I have never experienced a white Christmas (and probably never will) but I am sure it would be beautiful. This beautiful winter scene and the background DSP is from the Peaceful Place 12”x12” Specialty Designer Series Paper (#156394).


I cut the DSP and the Silver from the Silver Foil 12”x12” Specialty Pack (#156457) using the Layering Diorama Dies (#155565). This was attached to the cardfront with Stampin’ Dimensionals (#104430). The base card is Basic White (#159228).

I added a pop of colour to the card by stamping the sentiments and the deer with Cherry Cobbler ink (#147083). These are from the Peaceful Deer stamp set (#156891). The deer was punched with the Deer Builder Punch (#156390) and the sentiments were cut with a Potted Succulents Die (#154330). When I attached these to the card I used tape where they were attached to the Diorama area which is already lifted and Stampin’ Dimensionals outside of the diorama which is lower.

From 16th - 18th November Stampin’ Up! has a Seasonal sale with 10% off cardstock, 15% off ink pads and 20% off dies, all from the Annual Catalogue. Please check out all the info on the link below-

Just email if you would like to place an order (in Australia) or shop here - lesleyjendra.stampinup.net

“Love what you do and share what you love.”

Monday, 15 November 2021

Peaceful Place Designer Series Paper

Hello my crafty friends,

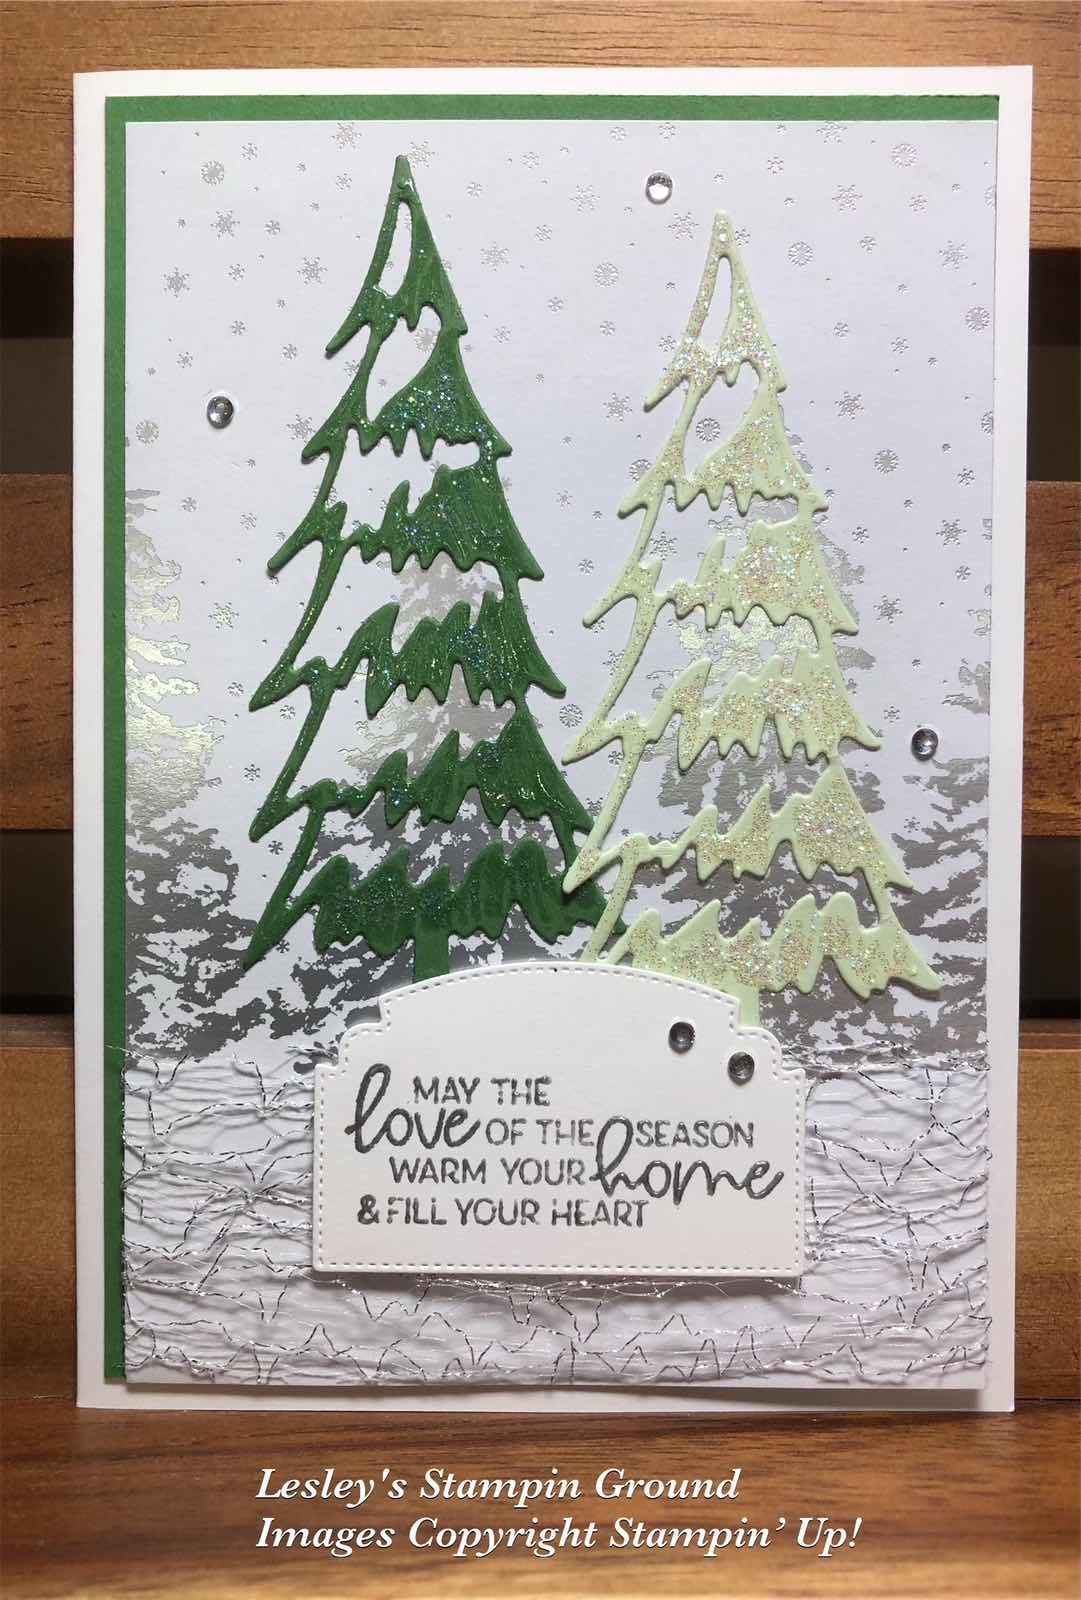
Here’s another easy Christmas card and again using some beautiful Designer Series Paper. This one is from the Peaceful Place Specialty DSP (#156394). All the designs in this pack are in grey, white & silver.


I wrapped the Metallic Mesh Ribbon (#153550) around the DSP then I attached the DSP to the Garden Green card (#108605), showing just 2 sides of the green card. This was attached to the Basic White base card (#159228).

I cut the trees using a die from the Christmas Trees Dies (#156339) from Garden Green card & Soft Sea Foam card (#147012) which has Adhesive Sheet (#152334) adhered to the back. I then applied glue with the Fine-Tip Glue Pen (#138309) to the trees and then sprinkled Dazzling Diamond Glitter over them. Put aside to dry and then you have a lovely glitter on the trees. Unfortunately Dazzling Diamonds are retired but hopefully you have some in your stash. 

Adhere the trees to the DSP. I stamped the sentiment from the Whimsical Trees stamp set (#156330) using VersaMark 102283) and heat embossed with Silver Stampin’ Emboss Powder (#155555). Set this with the Heat Tool (#129056). I used a die from the Ornate Frames Dies (#150664) to cut the sentiment and attached this to the card with Stampin’ Dimensionals (#104430). The Rhinestone Basic Jewels (#144220) were added to the card for some extra shine.

“Love what you do and share what you love.”