Friday, 2 August 2024

Changing Leaves

 Welcome friends,

All these leaves are from the Changing Leaves Bundle (#164139) which consists of the Changing Leaves stamp set (#164351) and the Changing Leaves Hybrid Embossing Folder (#164138). The Hybrid Embossing folder includes the dies (they aren’t sold separately). The dies can be inserted into the folder which cuts and embosses at the same time. The dies and embossing folder can also be used separately as usual, so there are many possibilities.


I dry embossed the Very Vanilla card front (#106550) with the embossing folder and matted this with Peach Pie card (#163800). The base card is also Very Vanilla.

I cut and embossed the Peach Pie leaf with the Hybrid folder & die. I then stamped it with Peach Pie ink (#163810). 

The detailed die cut leaves are also cut from the same die set. I used Pecan Pie card (#161726) and Wild Wheat card (#161734), both backed with Adhesive Sheet (#152334). I find I usually use this adhesive sheet for any detailed die cuts to make it easier to attach to the card.

The sentiment is from the Layering Leaves stamp set (#161277). I stamped this with Peach Pie ink using the Stamparatus. After cleaning the stamp and without moving it, I restamped with VersaMark (#102283), then added Clear from the Basics Wow! Embossing Powder (#165679) which was set with the Heat Tool (#129056). I used a die from the Greetings Of The Season dies (#164112) to cut the sentiment.

The sentiment and Peach Pie leaf were attached to the card with Stampin’ Dimensionals (#104430) and Mini Stampin’ Dimensionals (#144108).

I coloured the embellishments from the Rainbow Adhesive-Backed Dots (#162758) with Peach Pie Stampin’ Blends (#163827). This is an easy way to have co-ordinating coloured gems if you don't have the colour you want on hand.

“Love what you do and share what you love.”

INSPIRE. CREATE. SHARE. 


Thursday, 1 August 2024

Spotlight On Nature Bundle

 Hi everyone,

The Spotlight On Nature Bundle (#163581) consists of the Spotlight On Nature stamp set (#163579) and the Spotlight On Nature dies (#163580). The dies are all circles so doesn't actually cut around the stamped image. However this makes the dies very versatile as they can be used for a variety of images.


I dry embossed the Basic White card front (#159228) with the Dotted Circles 3D Embossing Folder (#163789). I then used a Blending Brush (#153611) with Summer Splash ink (#163809) and lightly coloured the embossed dots.

The floral image from the stamp set was stamped with Tuxedo Black Memento ink (#132708). I coloured the flowers with Peach Pie Stampin’ Blends (#163810) and the leaves with Summer Splash Stampin’ Blends (#163826).  The splotches, also from the stamp set, were stamped with Peach Pie inked which was stamped off for a lighter colour. The stamped image and the Summer Splash card (#163798) were cut with the Spotlight On Nature dies. These were attached to the card with Stampin’ Dimensionals (#104430).

“Feel Better Soon” is from the Unbounded Love stamp set (#163378) and stamped with Summer Splash ink. A Little Happy Things die (#163709) was used to cut the sentiment.

I flicked Clear Wink Of Stella (#141897) over the whole card, then I used it on each of the dots from the embossing.

“Love what you do and share what you love.”

Wednesday, 31 July 2024

Stylish Shapes dies

 Hi again my friends,

I have used the square dies from the Stylish Shapes Dies (#159183) for the diamond shapes.


I used Pretty Peacock card (#150886), Summer Splash card (#163798) and the Summer Splash from the 2024-2026 In Color Glimmer Specialty Paper (#163771). The card front is from the Unbounded Beauty Designer Series Paper (#163372), and this was attached to the Basic White base card (#159228).

The diamond under the butterfly was attached with Stampin’ Dimensionals (#104430). The  Pretty Peacock diamonds were attached with tape and the others with Mini Glue Dots (#103683).

The butterfly is from the Sketched Butterflies stamp set (#163490). This was stamped with VersaMark (#102283) and I added Copper from the Metallic Wow! Embossing Powder (#165678) and set it with the Heat Tool (#129056). The co-ordinating die from the Sketched Butterflies die (#163491) was used to cut the butterfly. I added some glimmer using the Clear Wink Of Stella (#141897) and attached the butterfly with Mini Stampin’ Dimensionals (#144108). The embellishments are the Adhesive-Backed Sparkle Gems (#161288).


“Love what you do and share what you love.”

Tuesday, 30 July 2024

Cheerful Daisies

 Hello friends,

I haven’t used the Cheerful Daisies stamp set (#161290) for a while so thought it was time to do so.


I stamped the outline of the daisies with Daffodil Delight ink (#147094). As this set is a 2 step stamping set, I stamped the inside with Lemon Lolly ink (#161666). I used Crumb Cake ink (#147116) to stamp the centre of the flowers. The flowers and the leaves were cut with the Cheerful Daisies dies (#161296). I used Granny Apple Green card (#147014) backed with Adhesive Sheet (#152334) for the leaves.

I attached a piece of the Country Woods Designer Series Paper (#163393) to the Daffodil Delight card (#121680). I cut a piece of Basic White card (#159228) and Gold Foil Sheet (#132622) with a die from the  Around the Bend dies (#160649) to create the curve. I dry embossed the Basic White card with one of the Basics Embossing Folders (#161598). These were attached to the Daffodil Delight card.

The sentiment is also from the Cheerful Daisies stamp set, stamped with Daffodil Delight ink and cut with a Cheerful Daisies die.

The daisies and sentiment were attached to the card with Mini Stampin’ Dimensionals (#144108). Clear Wink Of Stella (#141897) was used on the flowers for some glimmer. The Opal Rounds Assortment (#163298) were added to the card. I used small dots of the Pearlised Enamel Effects (#156310) in the centre of the daisies.

“Love what you do and share what you love.”

INSPIRE. CREATE. SHARE. 


Monday, 29 July 2024

Fully Flowering Ephemera Pack

 Hello friends,

The Fully Flowering Ephemera Pack (#163762) contains a range of die-cut flowers & leaves, which can be used for a quick & easy card or jazzed up with something extra. The floral image I used here was in black & white so I coloured it with Stampin’ Blends.


The flowers were coloured with Bubble Bath Stampin’ Blends (#161675). I used Soft Sea Foam Stampin’ Blends (#154902) and Pool Party Stampin’ Blends (#154894) for the leaves. I used Daffodil Delight Stampin’ Blends (#154883) on the “twigs”. I add the Clear Wink Of Stella (#141897) for the sparkle on the flowers & leaves.

The background was cut with a Citrus Blooms die 163294) using Pretty In Pink from the 2024-2026 In Color 6”x6” Designer Series Paper (#163777) and Pretty In Pink card (#163794). I cut the Pretty In Pink card in half diagonally and attached it to the DSP for an offset matt. This was attached to the Basic White base card (#159228).

The floral image was attached to the card with Stampin’ Dimensionals (#104430). I cut the leaves from the  Citrus Blooms dies using the white paper from the Berry Burst, Old Olive & White Glimmer Paper (#163769). These were attached with Mini Glue Dots (#103683).

“Let’s Celebrate” from the Sentimental Park stamp set (#160561) was stamped with Pretty In Pink ink (#163807), then cut with a Something Fancy die (#160424). The pretty Iridescent Faceted Gems (#163368) were added for a bit more sparkle.

“Love what you do and share what you love.”

INSPIRE. CREATE. SHARE. 


https://www.stampinup.com.au


lesley.j.jendra@gmail.com


http://lesleysstampinground.blogspot.com


Saturday, 27 July 2024

Frames & Flowers Specialty Designer Series Paper

 Welcome,

I have used the Flowers & Frames 12”x12” Specialty Designer Series Paper (#163765) for the leaves on this card. This pack includes full sheets of patterned DSP, card fronts and die-cut designs. The leaves are from the die-cuts.


I also die cut 2 leaves using the Delicate Forest dies (#162679) and Flirty Flamingo card (#141421) which was backed with Adhesive Sheet (#152334).

For the card front I attached a piece of the vellum from the Graceful Greenery Vellum 12”x12” Specialty Designer Series Paper (#164118) to the same size Soft Sea Foam card (#147012), then matted it with the Flirty Flamingo card. This was attached to the Basic White base card (#159228).

The sentiment from the Layering Leaves stamp set (#161277) was stamped with Shaded Spruce ink (#147088). The sentiment and Shaded Spruce card (#147006) for the circle were cut with Stylish Shapes Dies (#159183). The leaves in the background were taped to the card. The sentiment and the other 3 leaves were attached with Mini Stampin’ Dimensionals (#144108).

The card was finished by adding the Iridescent Foil Gems (#162842).

“Love what you do and share what you love.”

INSPIRE. CREATE. SHARE. 


Friday, 26 July 2024

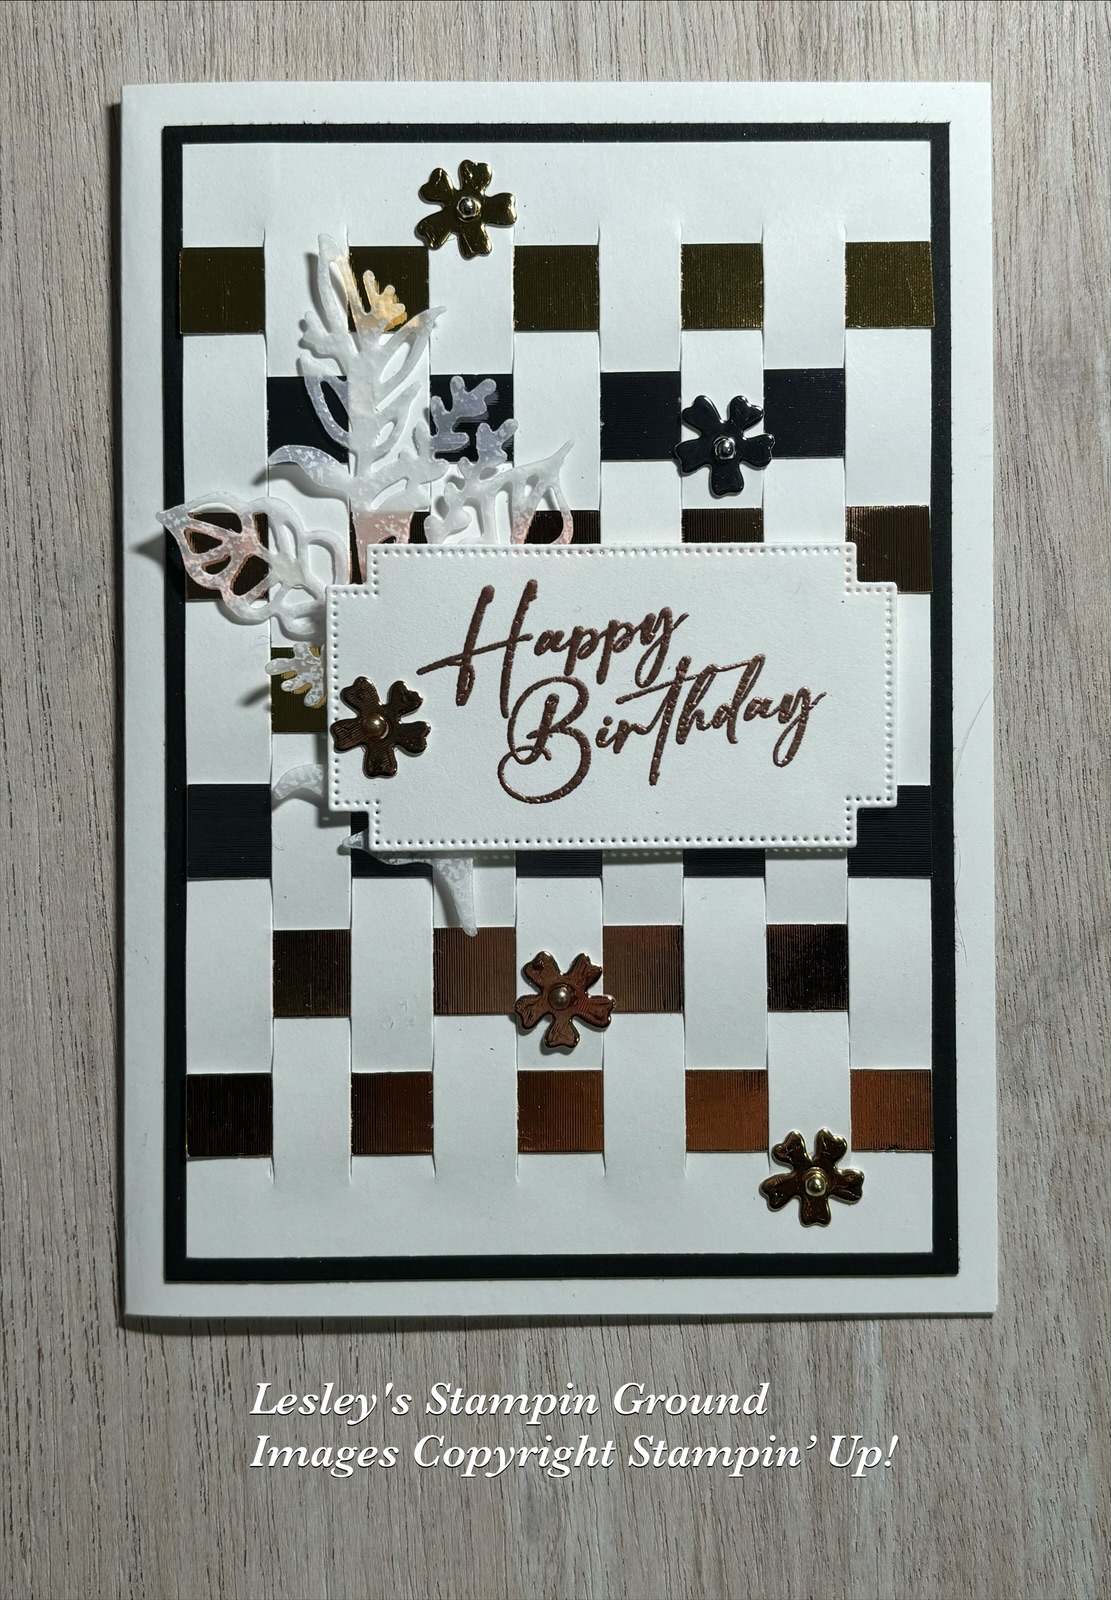
Paper Weaving

 Hello & welcome,

Today’s inspiration was from page 110 in the Annual Catalogue using the paper weaving technique. It’s an easy but effective technique.


I made cuts in the Basic White card front (#159228) 1cm apart and 1cm from the top & bottom of the card. I cut 1cm pieces from the 3 colours from the Textured Metallic 12”x12” Specialty Paper (#163772). These strips were woven through the card front, then this was matted with the Basic Black card (#121688). The base card is Basic White.

I cut the leaf with the Flowers Of Beauty dies (#163375) from the white patterned vellum from the Graceful Greenery Vellum Specialty Designer Series Paper (#164118). I used Mini Glue Dots (#103683) to attach this to the card.

The sentiment is from the Unbounded Love stamp set (#163378). This was stamped with VersaMark (#102283) and I used the Copper from the Metallic Wow! Embossing Powder (#165678) and this was set with the Heat Tool (#129056). A Greetings Of The Season Die (#164112) was used to cut the sentiment. The sentiment was attached to the card with Stampin’ Dimensionals (#104430).

The small flowers were cut with a die from the Flowers Of Beauty dies also using the Textured Metallic Paper and attached them to the card with Mini Glue Dots. The retired Festive Pearls were added to the centre of the flowers.

“Love what you do and share what you love.”

INSPIRE. CREATE. SHARE.