Showing posts with label #wrappedinchristmasstampset. Show all posts

Monday, 23 November 2020

So Many Snowflakes Dies

Hello everyone,

Here’s an easy card using the So Many Snowflakes Dies (#153560).
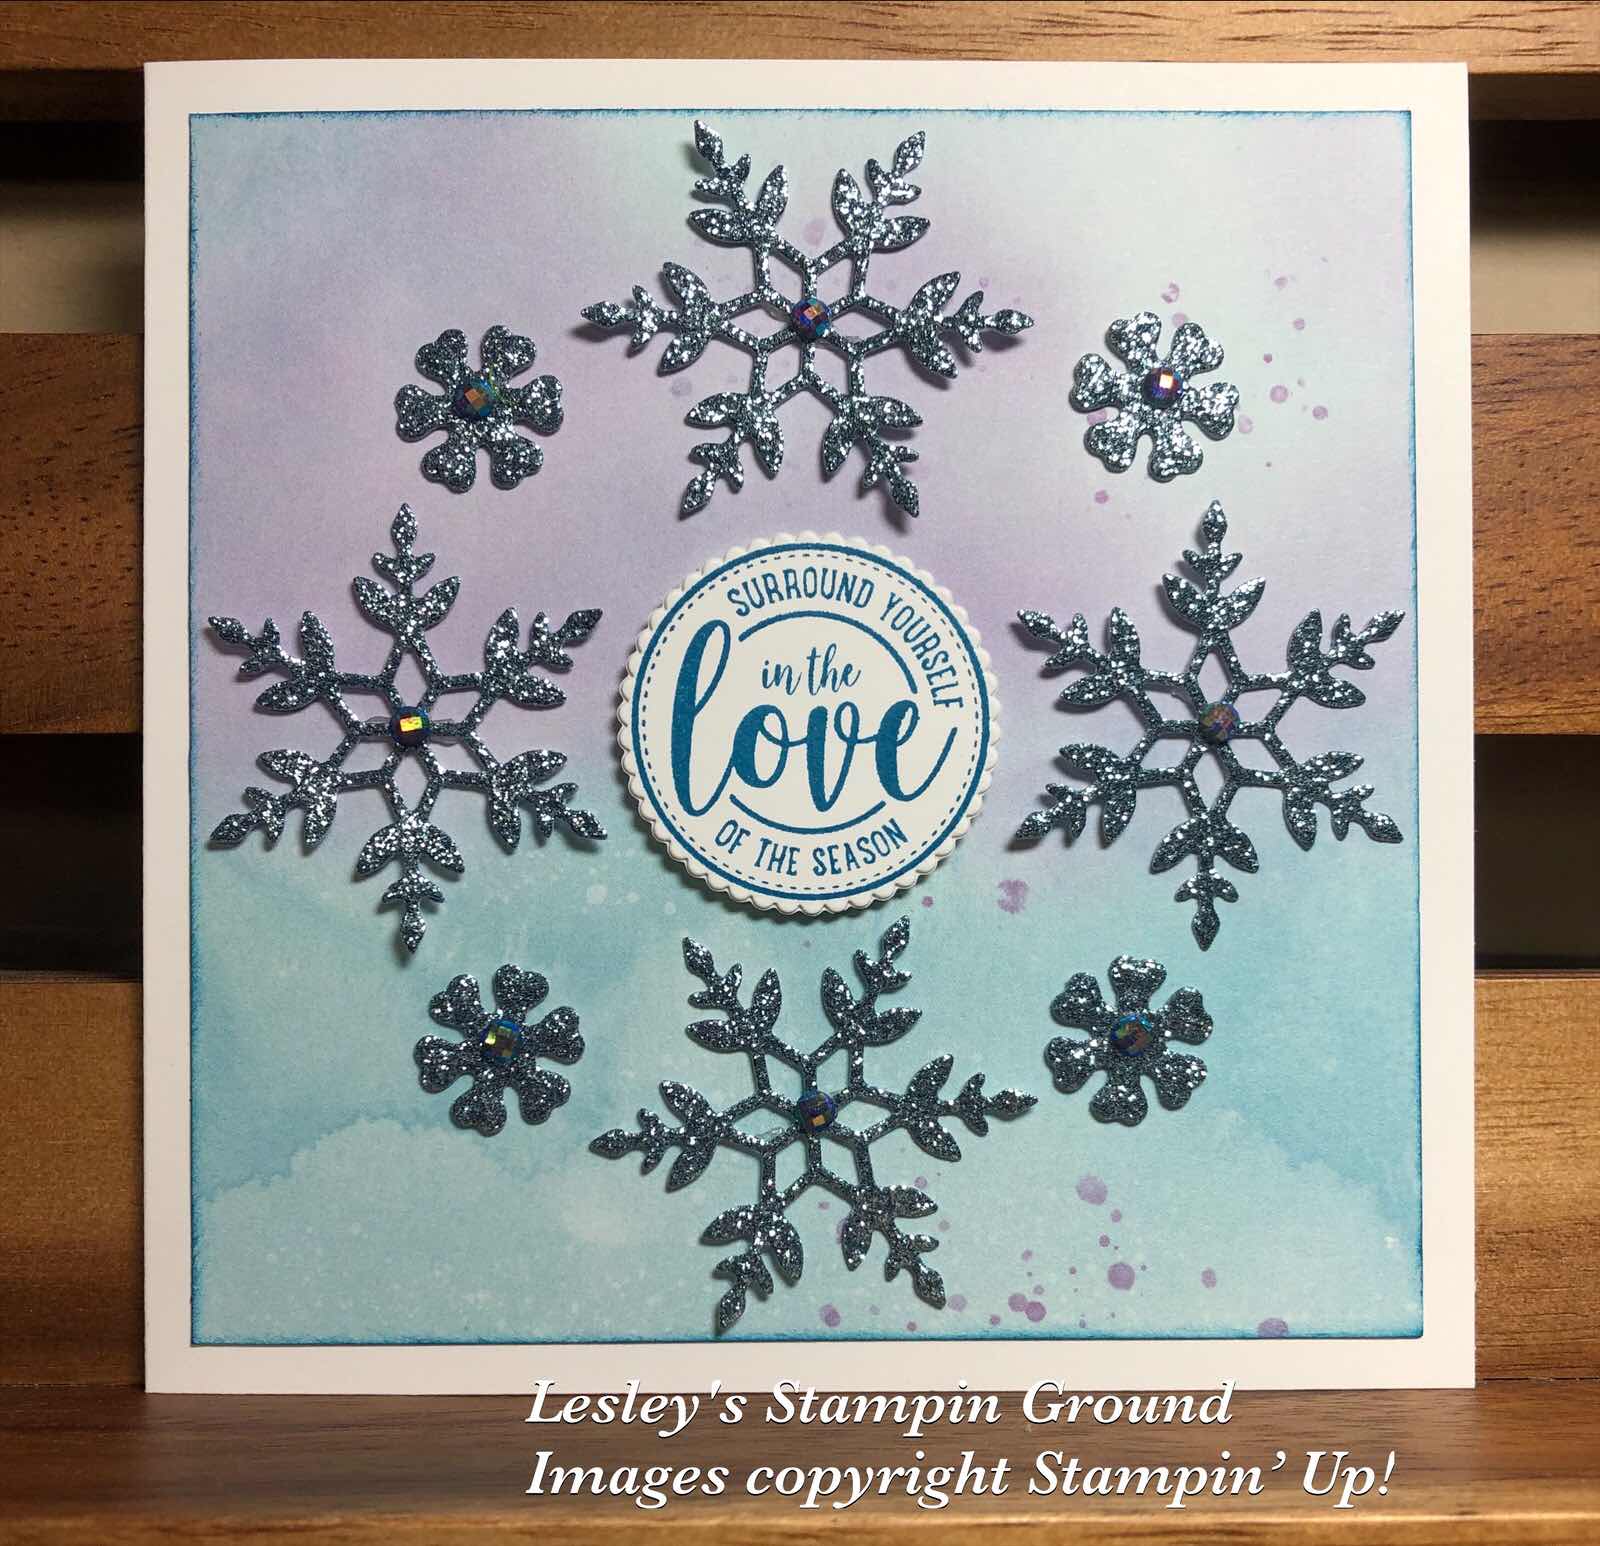


The finished size of this card is 13cm x 13cm. I used Whisper White card (#106549) for the base. I cut the Snowflake Splendor Designer Series Paper (#153512) 12cm x 12cm. The snowflakes are cut from the beautiful Balmy Blue Glimmer Paper (#153513) using dies from the So Many Snowflakes Dies (#153560). These were attached to the card with Mini Glue Dots (#103683). The sentiment from the Wrapped In Christmas stamp set (#153481) was stamped with Pacific Point ink (#147098), then cut with a Layering Circles Die (#151770). I attached the sentiment with Stampin’ Dimensionals (#104430). The Blue Adhesive-Backed Gems (#153547) were added to the centre of each of the snowflakes.

Don’t forget the one day only sale is on (today) Tuesday 24th November. Most products in the Annual Catalogue are 10% off. There are a few exceptions which you will find here. Don’t miss out on some great specials. Contact me for further info or order here - lesleyjendra.stampinup.net

Have a great day.

“Love what you do and share what you love!!”


Wednesday, 18 November 2020

Feels Like Frost Specialty Designer Series Paper

Hello my friends,

I always say that you don't need to do a lot on a card when using many of the beautiful Stampin’ Up! Designer Paper. The scene on this paper from the Feels Like Frost 6”x6” Specialty Designer Series Paper (#150444) is one of those papers.


I dry embossed the Whisper White card (#106549) using the Wrapped In Texture Embossing Folder (#153574). I cut a circle using a Layering Circles Dies (#151770) from the DSP, then attached this to the White card. The Snowflake Splendor 1/4” Ribbon (#153548) was wrapped around the cardfront, then this was attached to the Whisper White base card.
The sentiment from the Wrapped In Christmas stamp set (#153481) was stamped with VersaMark (#102283), then heat embossed with Gold Stampin’ Emboss Powder (#109129) and set with the Heat Tool (#129056). The sentiment and the scalloped circle from the Gold Foil Sheet (#132622) were also cut with Layering Circles Dies. The sentiment was attached to the card with Stampin’ Dimensionals (#104430).
The star and snowflake embellishments are from the Snowflake Sequins (#150443) and glued to the card with the Fine-Tip Glue Pen (#138309).

“Love what you do and share what you love”.

Enjoy your day!!


Saturday, 12 September 2020

Tree Angle stamp set

Hi everyone,

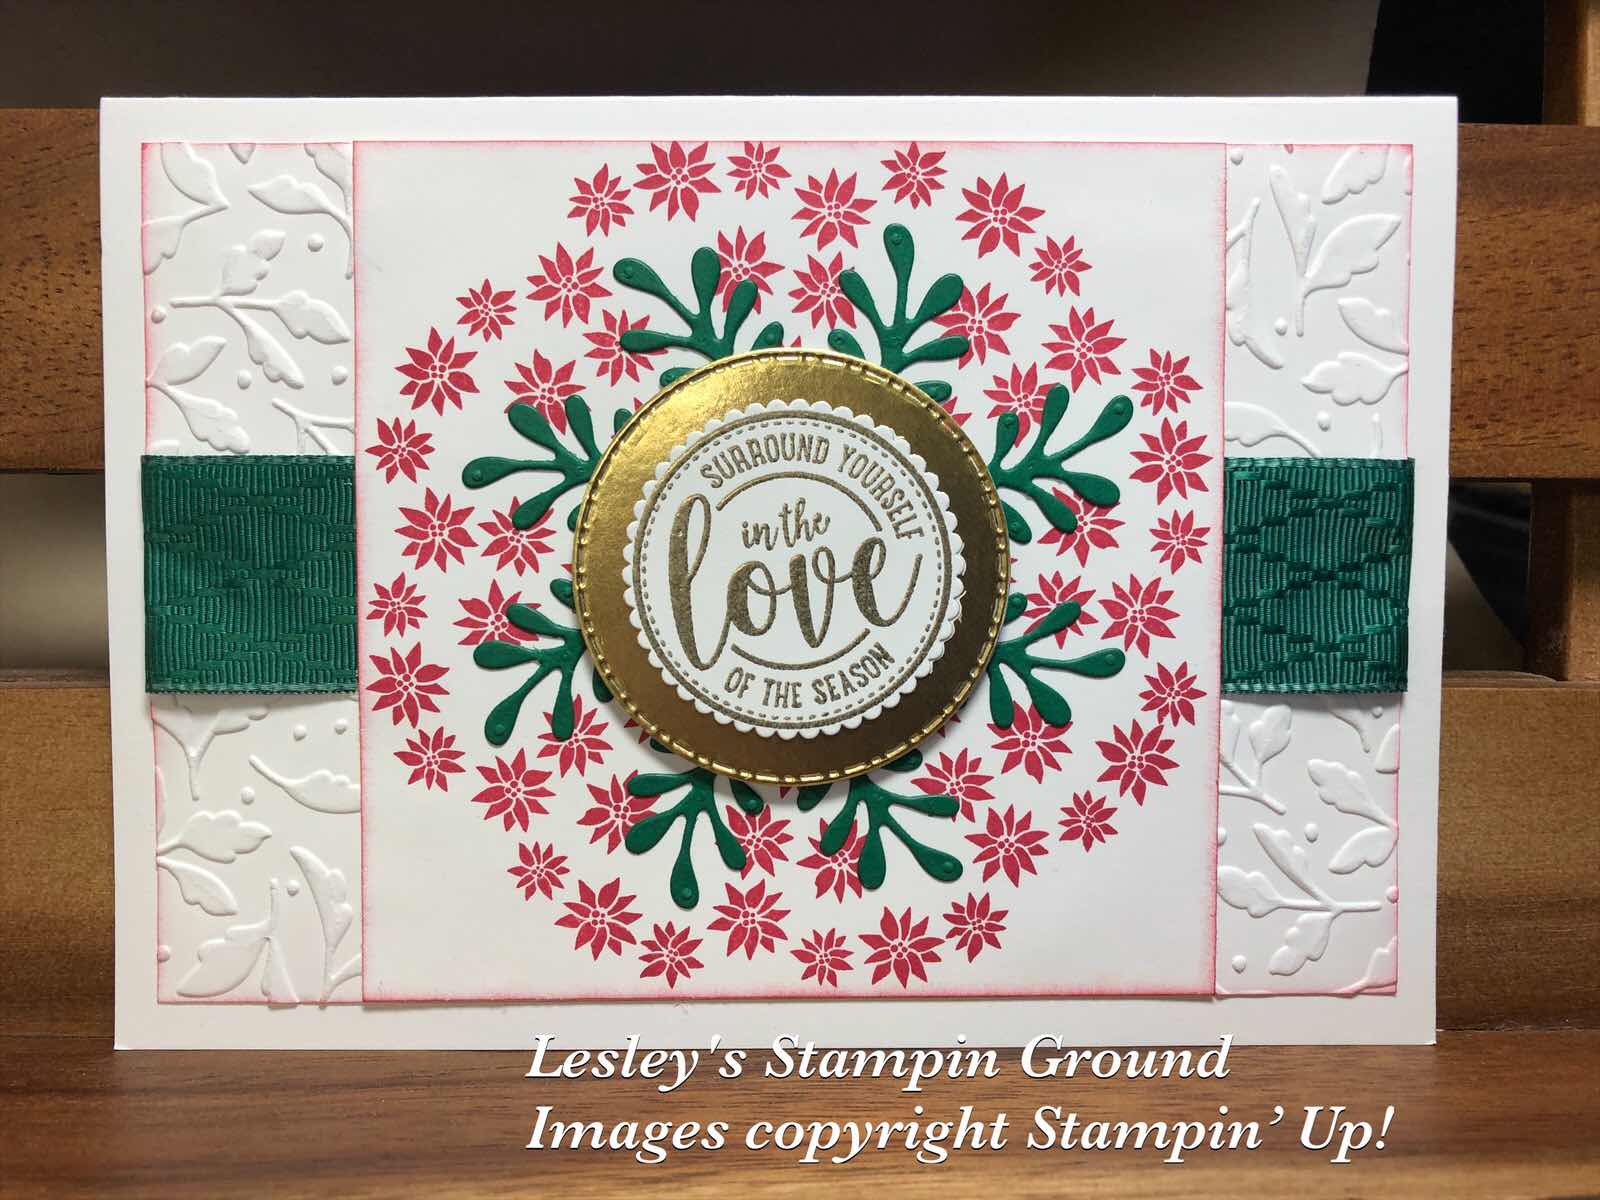
I have used the small poinsettias from the Tree Angle stamp set (#153442) to make the wreath for this card.


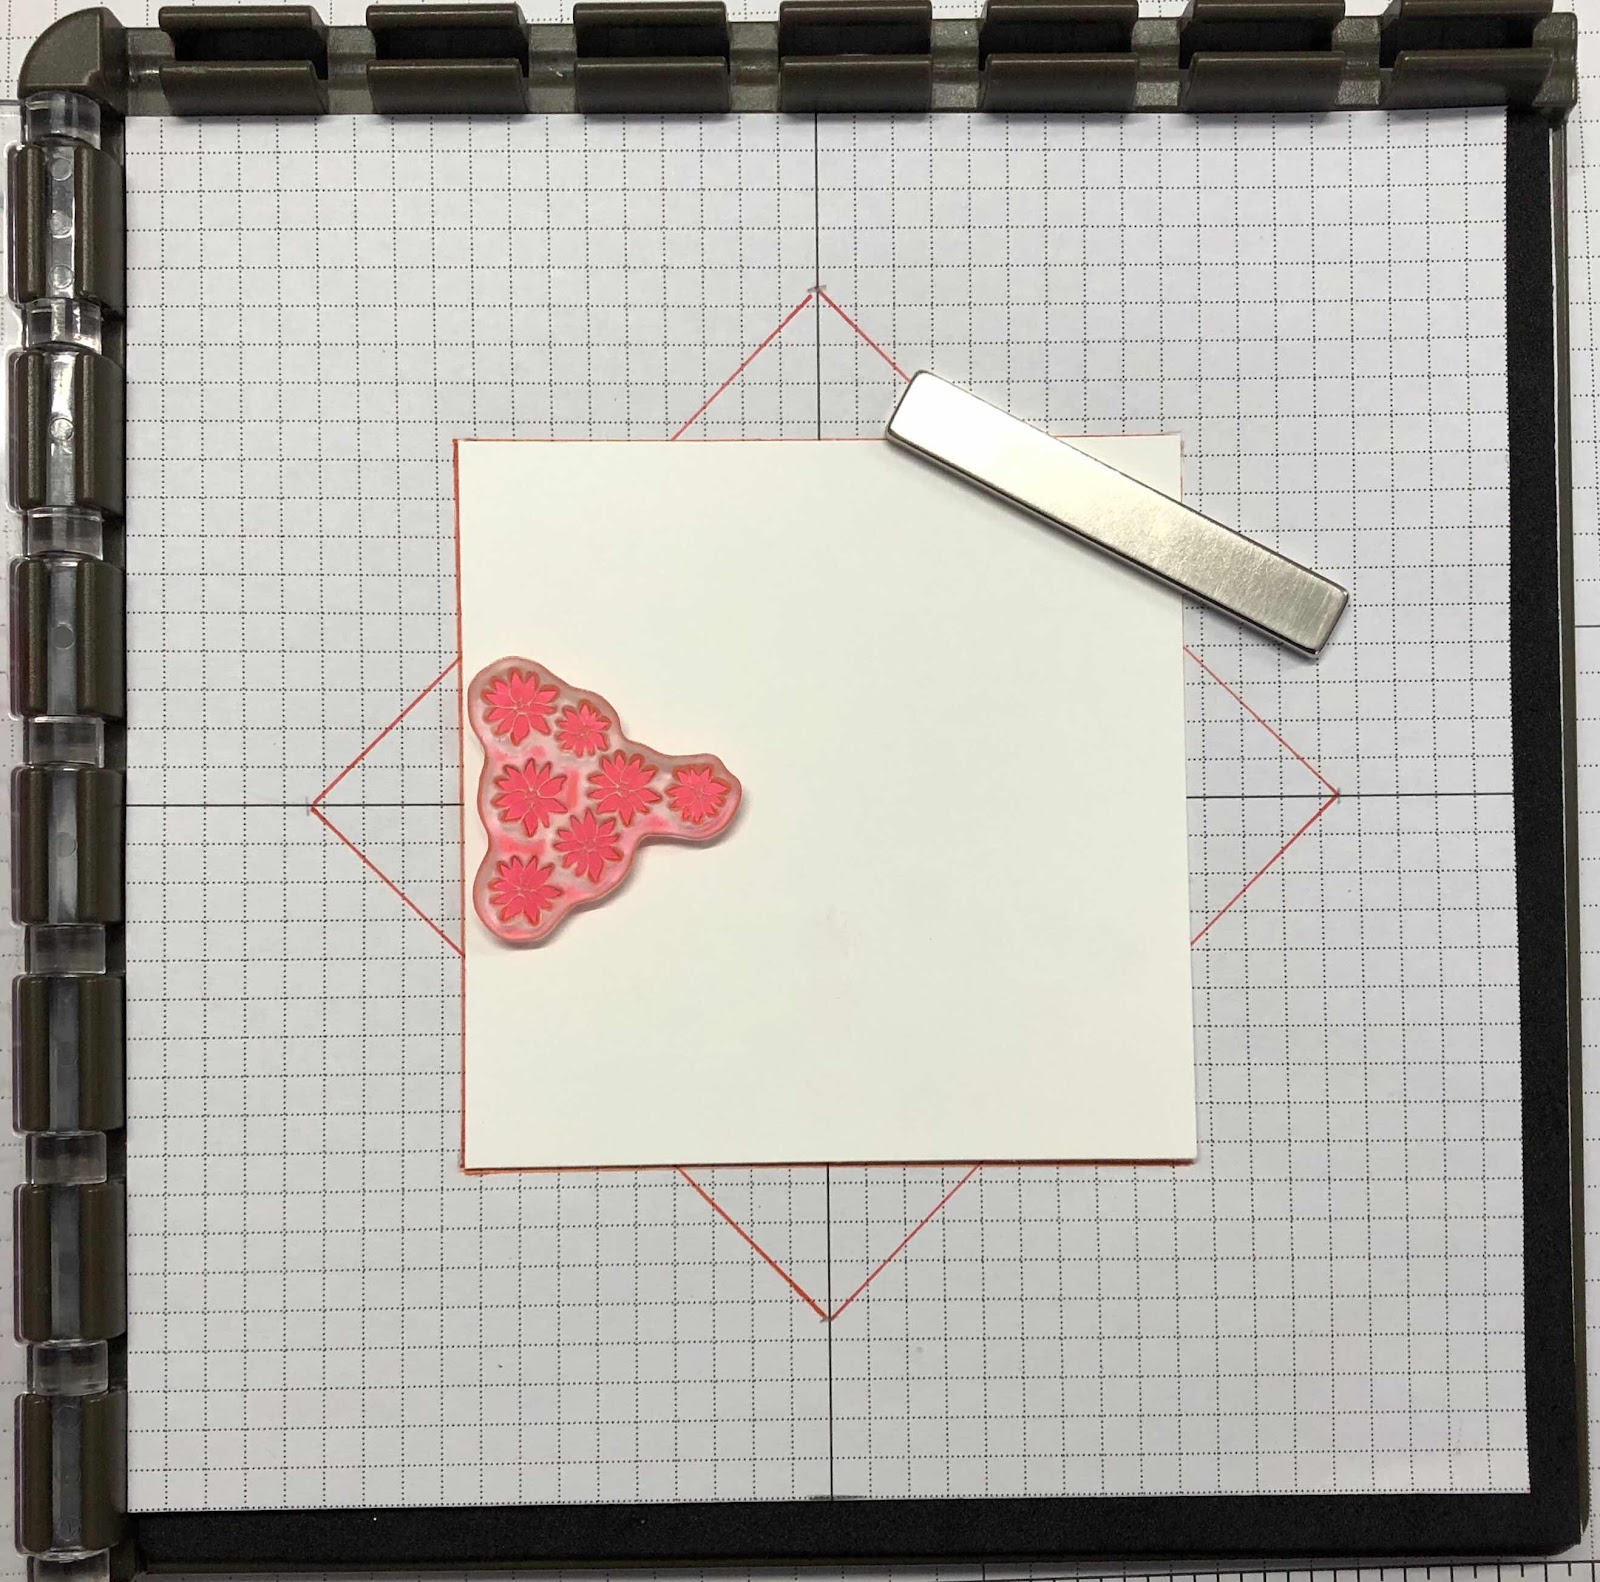
I used a piece of  9.5 x 9.5cm Whisper White card (#106549) to stamp the wreath, using the Stamparatus (#148187). I have a piece of grid paper marked with a 9.5 x 9.5cm square and diamond as shown below.


I then placed the stamp on the White card on the square and stamped the image with Real Red Ink (#147084).


Next, I turned the White card as shown below and re-stamped it. I continued till the card was stamped all around.


I dry embossed another piece of Whisper White card (which will be attached to the base card) using one of the Meadow Moments Embossing Folders (#153126). These are the smaller embossing folders so I embossed each end of the card separately. I wrapped the Shaded Spruce Ribbon from the Wonder Of The Season Ribbon Combo Pack (#153537) around the card, then attached the square card.
The sentiment from the Wrapped In Christmas stamp set (#153481) was stamped with VersaMark (#102283) and heat embossed with Gold Stampin’ Emboss Powder (#109129) and set with the Heat Tool (#129056). I used a Layering Circles Die (#151770) to cut the sentiment and a die from the Warm Wraps Dies (#153521) to cut the Gold Foil Sheet (#132622). This was attached to the card with Stampin’ Dimensionals (#104430).
I adhered Adhesive Sheet (#152334) to the Shaded Spruce card (#147006) before cutting the leaves from the Celebration Labels Dies (#153570), then attached these to the card.

There are a variety of stamps that you can use this technique with, so why not try it with some stamps you have. You will need to use smaller images.

Enjoy your day.


Sunday, 16 August 2020

Poinsettia Place Designer Series Paper

Welcome everyone,

I am loving all the Christmas products in the new August-December 2020 Mini Catalogue. One of my favourite suites is the Poinsettia Place suite and today I am using the beautiful designer paper.


I attached the Poinsettia Place Designer Series Paper (#153487) to the Very Vanilla Card front (#106550). I cut the leafy border using a die from the Birds & More dies (#152721) using the Gold Brushed Metallic 12”x12” Cardstock (#153524). This was glued to the card with the Multipurpose Liquid Glue (#110755). I daubered the edges of the cardfront with Garden Green ink (#147089) before attaching it to the Very Vanilla base card. I stamped the sentiment which can be found in the Wrapped In Christmas stamp set (#c153481) with VersaMark (#102283) and added the Gold Stampin’ emboss Powder (#109129) and set it with the Heat Tool (#129056). This was then cut with a Tasteful Labels Die (#1528860). (I matted this with Garden Green card which I cut with an electronic cutter). The bow from the Gift Wrapped stamp set (#153432) was also Gold heat embossed and fussy cut. I coloured the bow with So Saffron Stampin’ Blends (#154905), then added sparkle using the Clear Wink Of Stella Glitter Brush (#141897). The sentiment and the bow were attached to the card with Stampin’ Dimensionals (#104430). I added the Holiday Rhinestone Basic Jewels (#150457) to the sentiment to finish the card.

I hope your weekend has been a relaxing one.


Thursday, 6 August 2020

Mini Coffee Carrier and Mini Coffee Cups

Hi & welcome,

Have you seen the cute little coffee cups and carrier in the August-December 2020 Mini Catalogue? They are great for gifts filled with sweets or whatever other goodies you would like to add. The cups are even suitable for drinks up to 93 degrees Celsius (200 F).


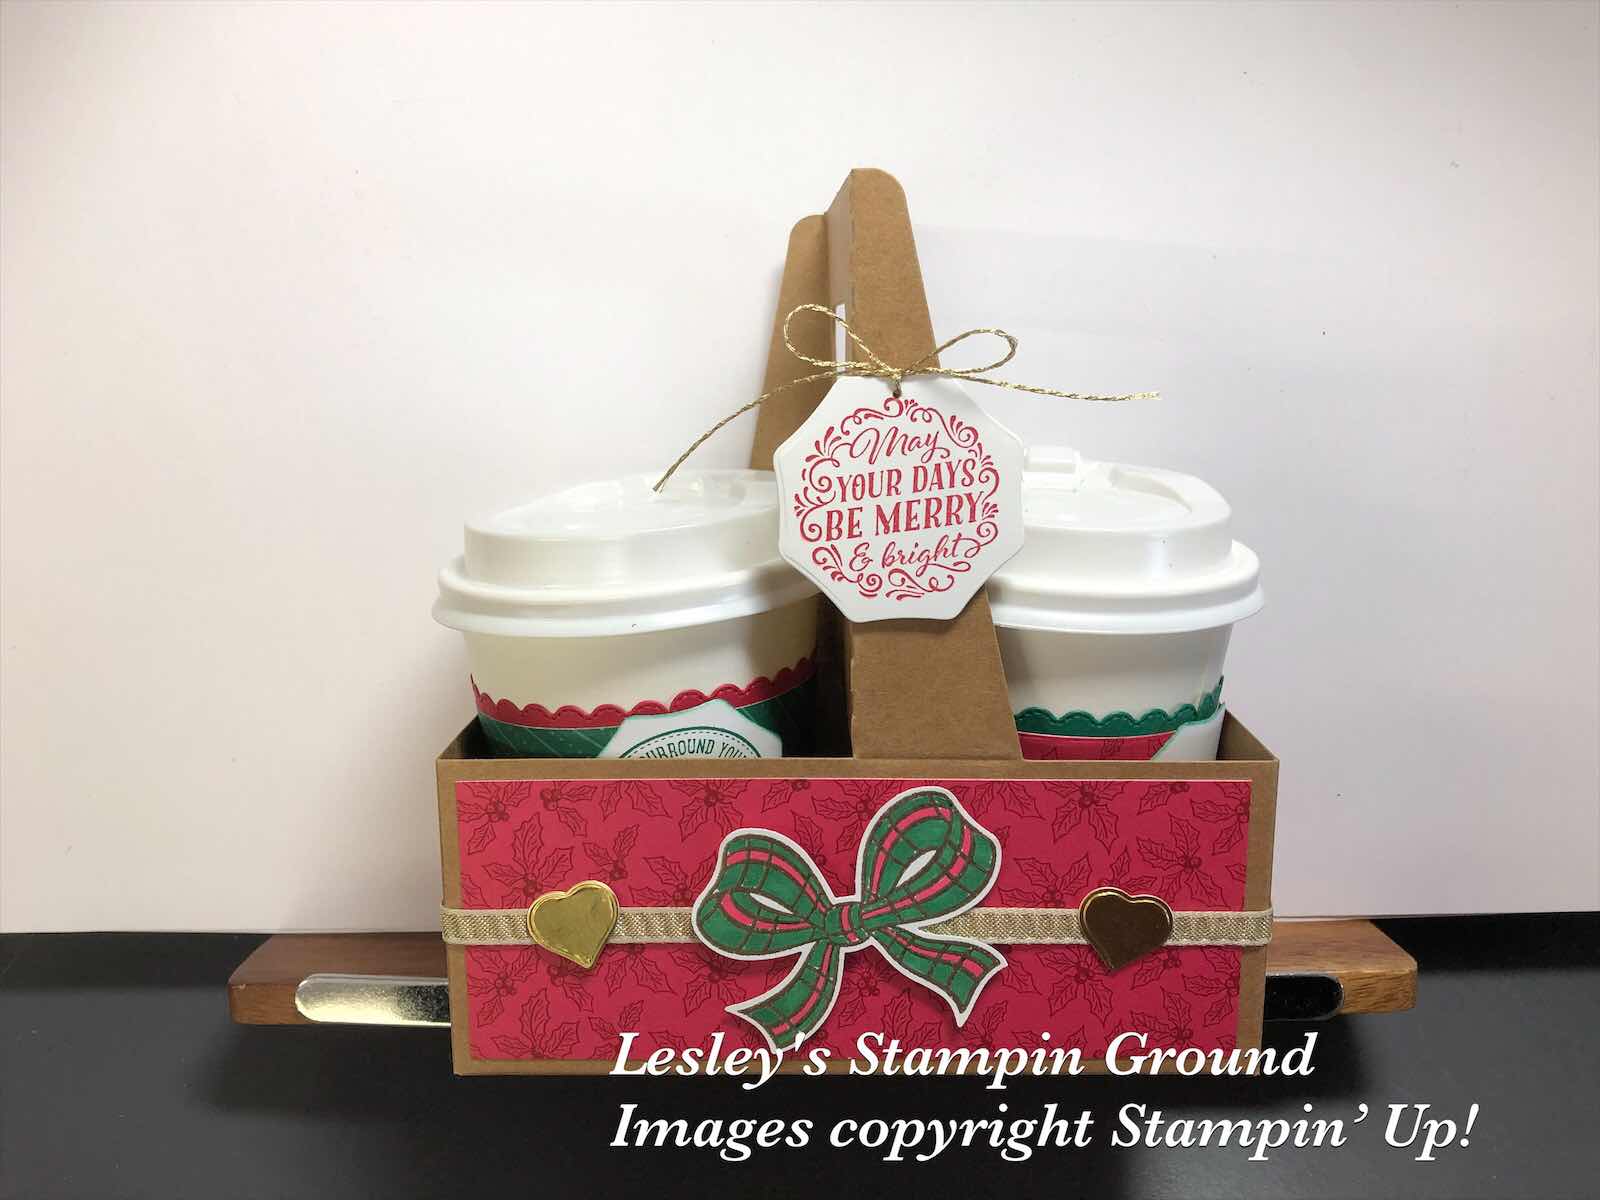
Each Mini Coffee Carrier (#153508) holds 2 of the Mini Coffee Cups (#153493). You could decorate them for any celebration, not just Christmas. I have decorated the carrier using the ‘Tis The Season 6”x6” Designer Series Paper (#153489). I then wrapped the gold ribbon from the Boho Indigo Product Medley (#153132), attaching it with the Mini Glue Dots (#103683). I stamped the bow from the Gift Wrapped stamp set (#153432) with VersaMark (#102283) and added the Gold Stampin’ Emboss Powder (#109129) and it was set with the Heat Tool (#129056). I coloured the bow with Real Red Stampin’ Blends (#154899) and Shaded Spruce Stampin’ Blends (#154903) and punched it with the Gift Bow Builder Punch (#153606). I die cut the little hearts from Gold Foil Sheets (#132622) using a die from the Warm Wraps Dies (#153521).
The Warm Wraps dies were also used to cut the ‘Tis the Season Designer Paper for the cups. You need 2 pieces for the wraps for each cup and 2 pieces for the scalloped pieces for the top and 2 for the bottom for each cup. I used Real Red card (#106578) and Shaded Spruce card (#147006) for the scalloped edges. There is a little tab to be able to join the 2 pieces of the wrap. I used a bone folder (#102300) to help curve the wrap before assembling it. The greetings on the cups and on the carrier are from the Wrapped In Christmas stamp set (#153481) and stamped with Shaded Spruce ink (#147088) and Real Red ink (#147084). These were all cut with another die from the Warm Wrap Dies. The sentiments and bow were attached with Stampin’ Dimensionals (#104430) and Mini Stampin’ Dimensionals  (#144108). I used the Gold Metallic Trim which is part of the Forever Greenery Trim Combo Pack (#152475) and this was attached to the label on the carrier.

Have a crafty day!!


Sunday, 2 August 2020

Evergreen Forest 3D Embossing Folder

Hi and welcome to another week,

The August-December 2020 Mini Catalogue is available from Tuesday 4th August so I am using some new products on this card as well as others from the Annual Catalogue.


The base card is Whisper White (#106549), followed by Garden Green card (#108605). I dry embossed the Soft Sea Foam card (#147012) with the Evergreen Forest 3D Embossing Folder (#153576). I used the Clear Wink Of Stella Glitter Brush (#141897) on the embossed trees. This not only added glimmer to the trees but also slightly darkened the trees. I attached the ‘Tis The Season 6”x6” Designer Series Paper (#153489) to the card, then wrapped the 3/8” Double-Stitched Satin Ribbon (#151155) around the card. I coloured the berries on the Designer Paper (which were white) with Real Red Stampin’ Blends (#154899). Christmas Blessings is from the Wrapped In Christmas stamp set (#153481) and this was stamped with Garden Green ink (#147089) and I used a die from the Stitched Rectangles (#151820) to cut it. There isn’t a die this size in the set, so I cut it then repositioned it to get the correct size. The sentiment is attached with Stampin’ Dimensionals (#104430). The leaves were cut from Garden Green card with the Beautiful Boughs Dies (#150661). I also used the Clear Wink Of Stella Glitter Brush on these leaves. The Red Velvet Paper (#153490) was used to cut the berries from the Poinsettia Dies (#153522). The leaves were attached with Mini Stampin’ Dimensionals (#144108) and Mini Glue Dots (#103683) for the berries. A Real Red Wonderful Gem (#153536) was added to the sentiment.


Enjoy your day!!