Friday 26 February 2021

Sailing Home stamp set

Hello again,

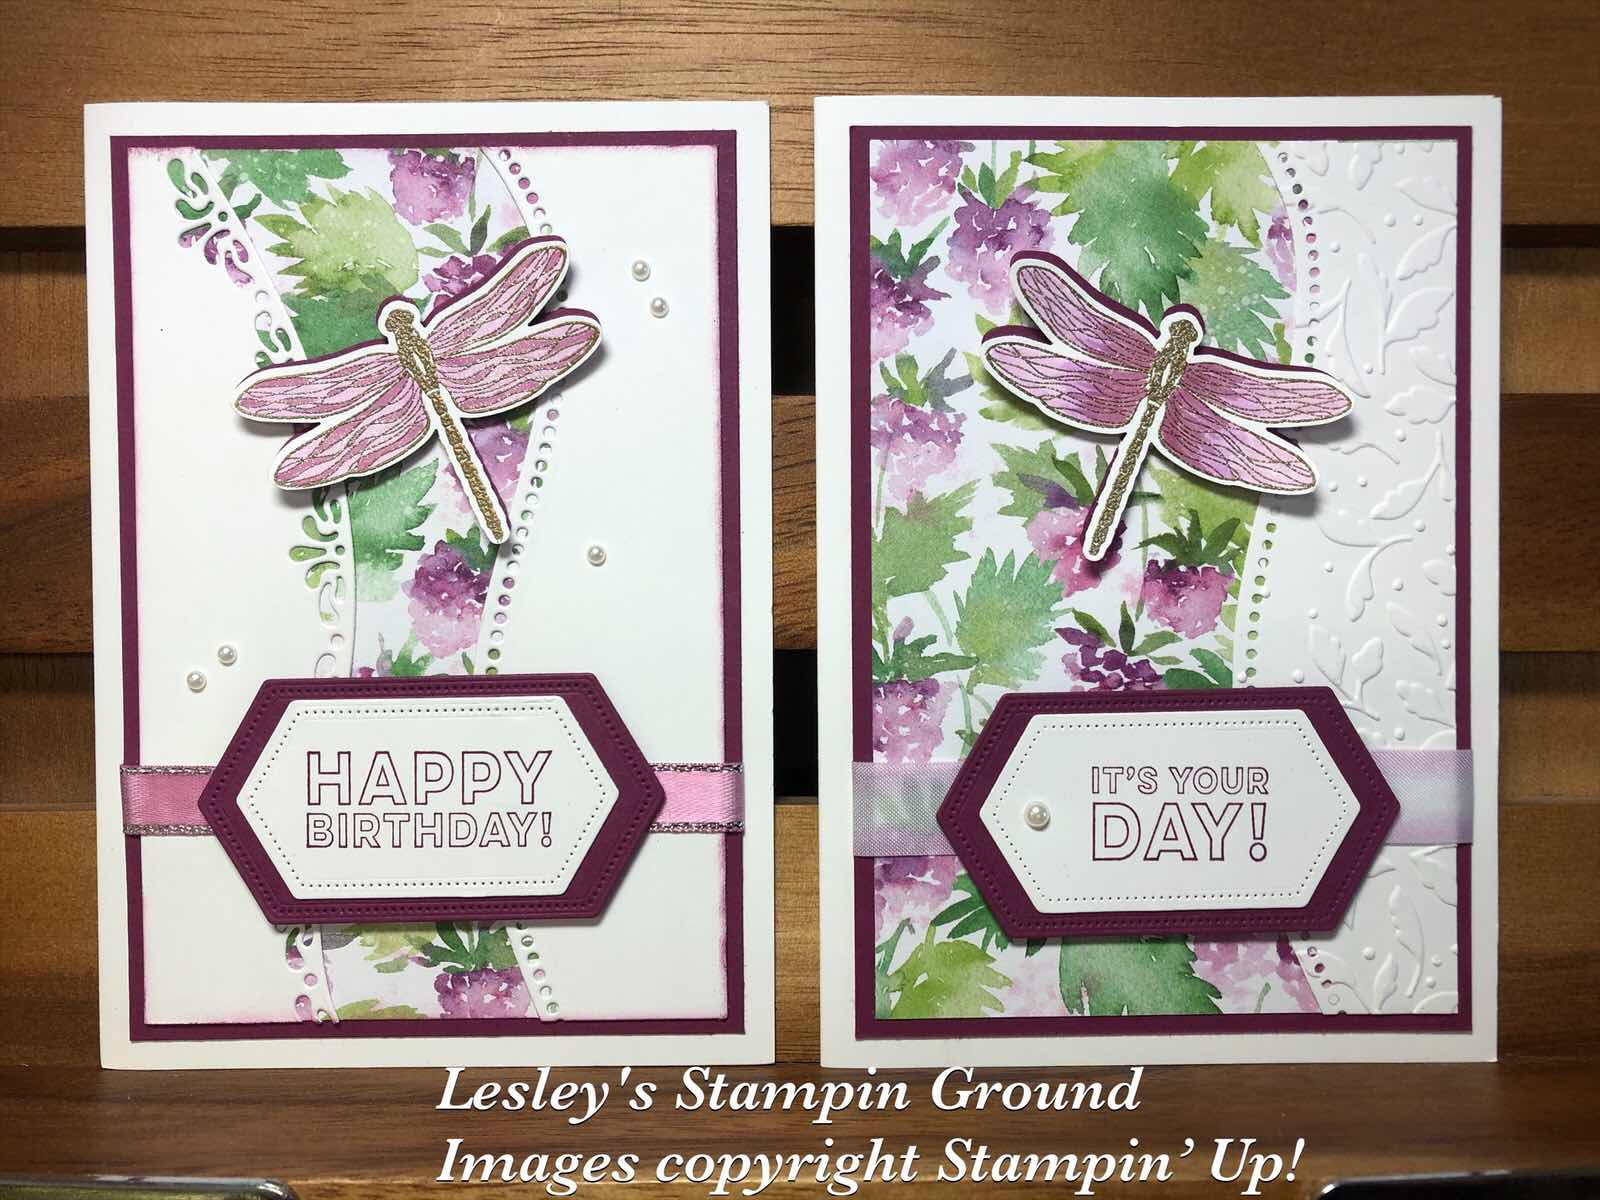
It’s nice to revisit some of the products from the Annual catalogue which we can sometimes forget when another catalogue arrives, so I have chosen the Sailing Home stamp set (#149457) which makes a great masculine card.


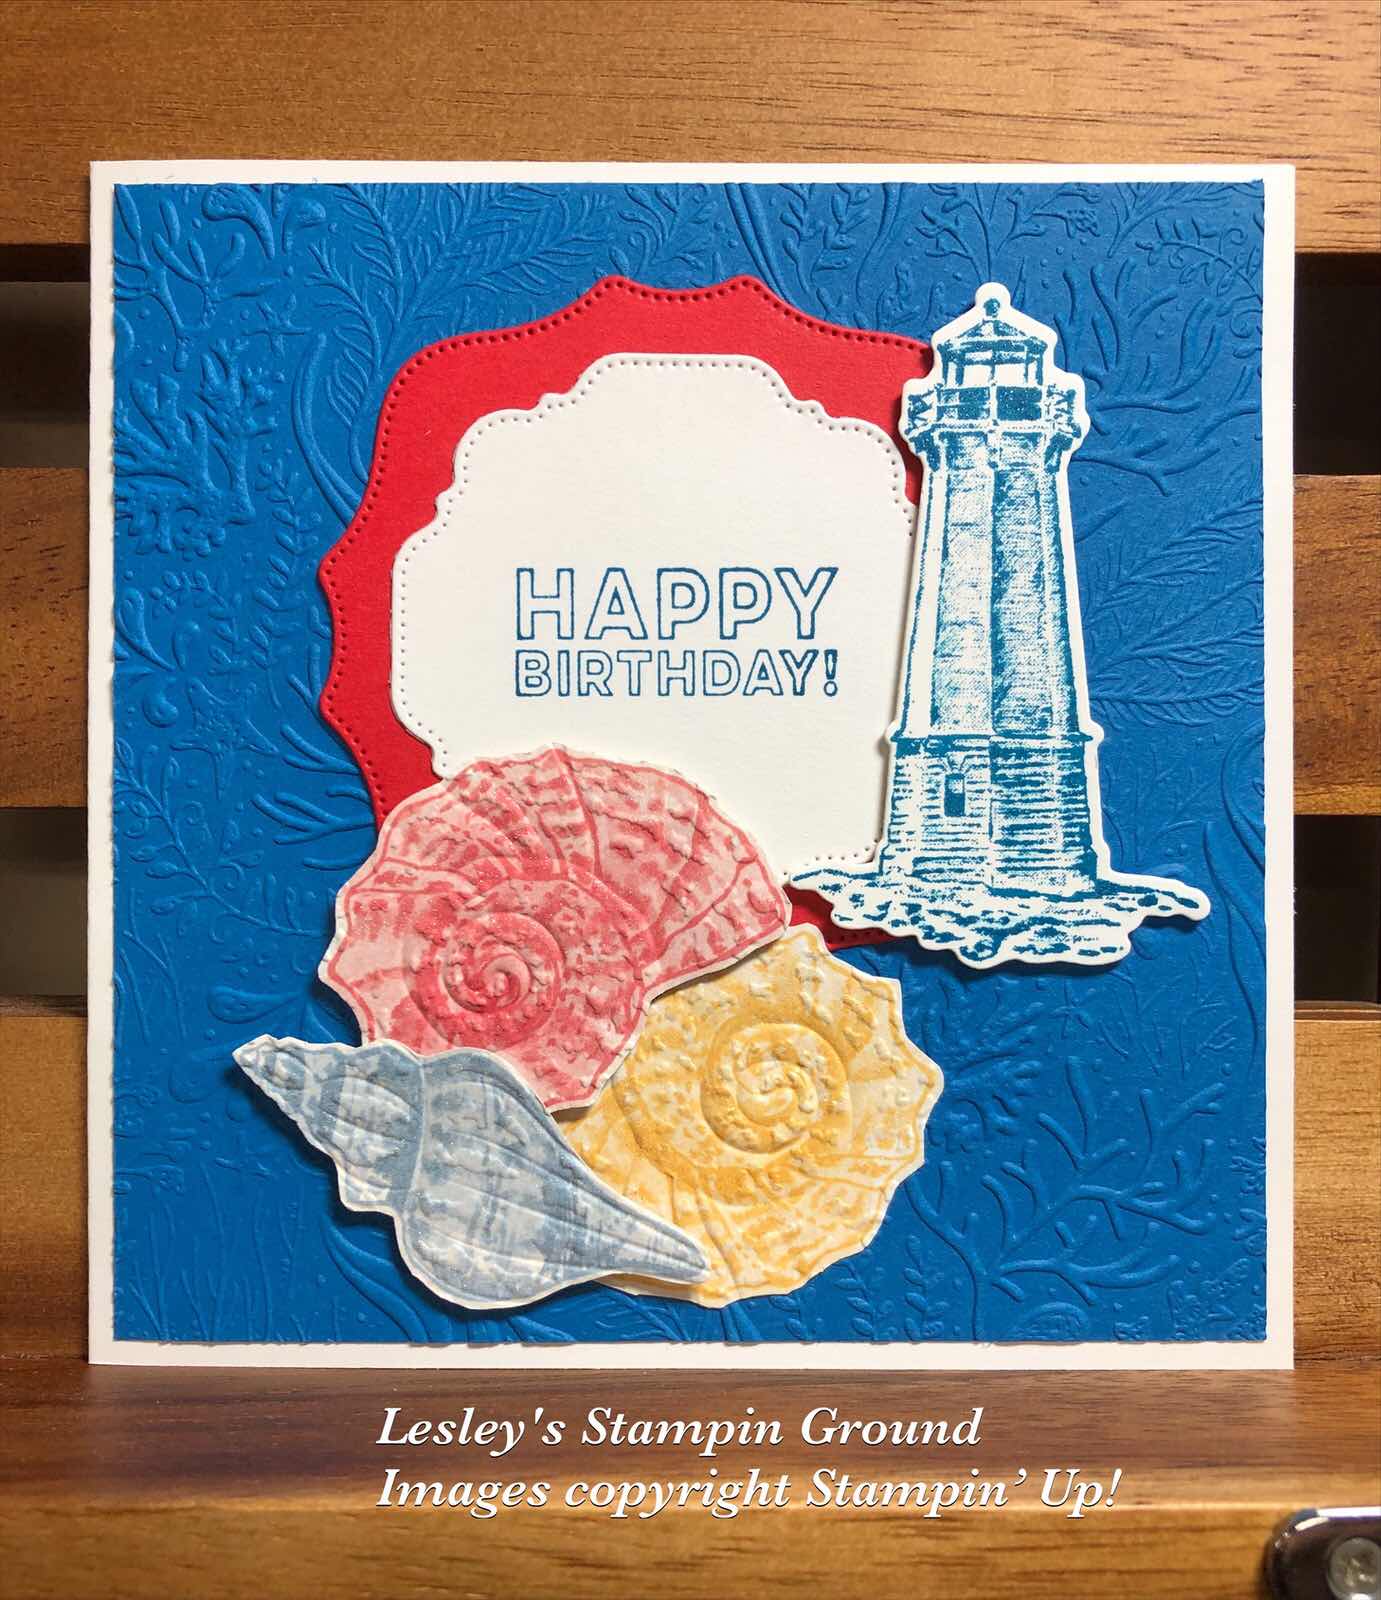
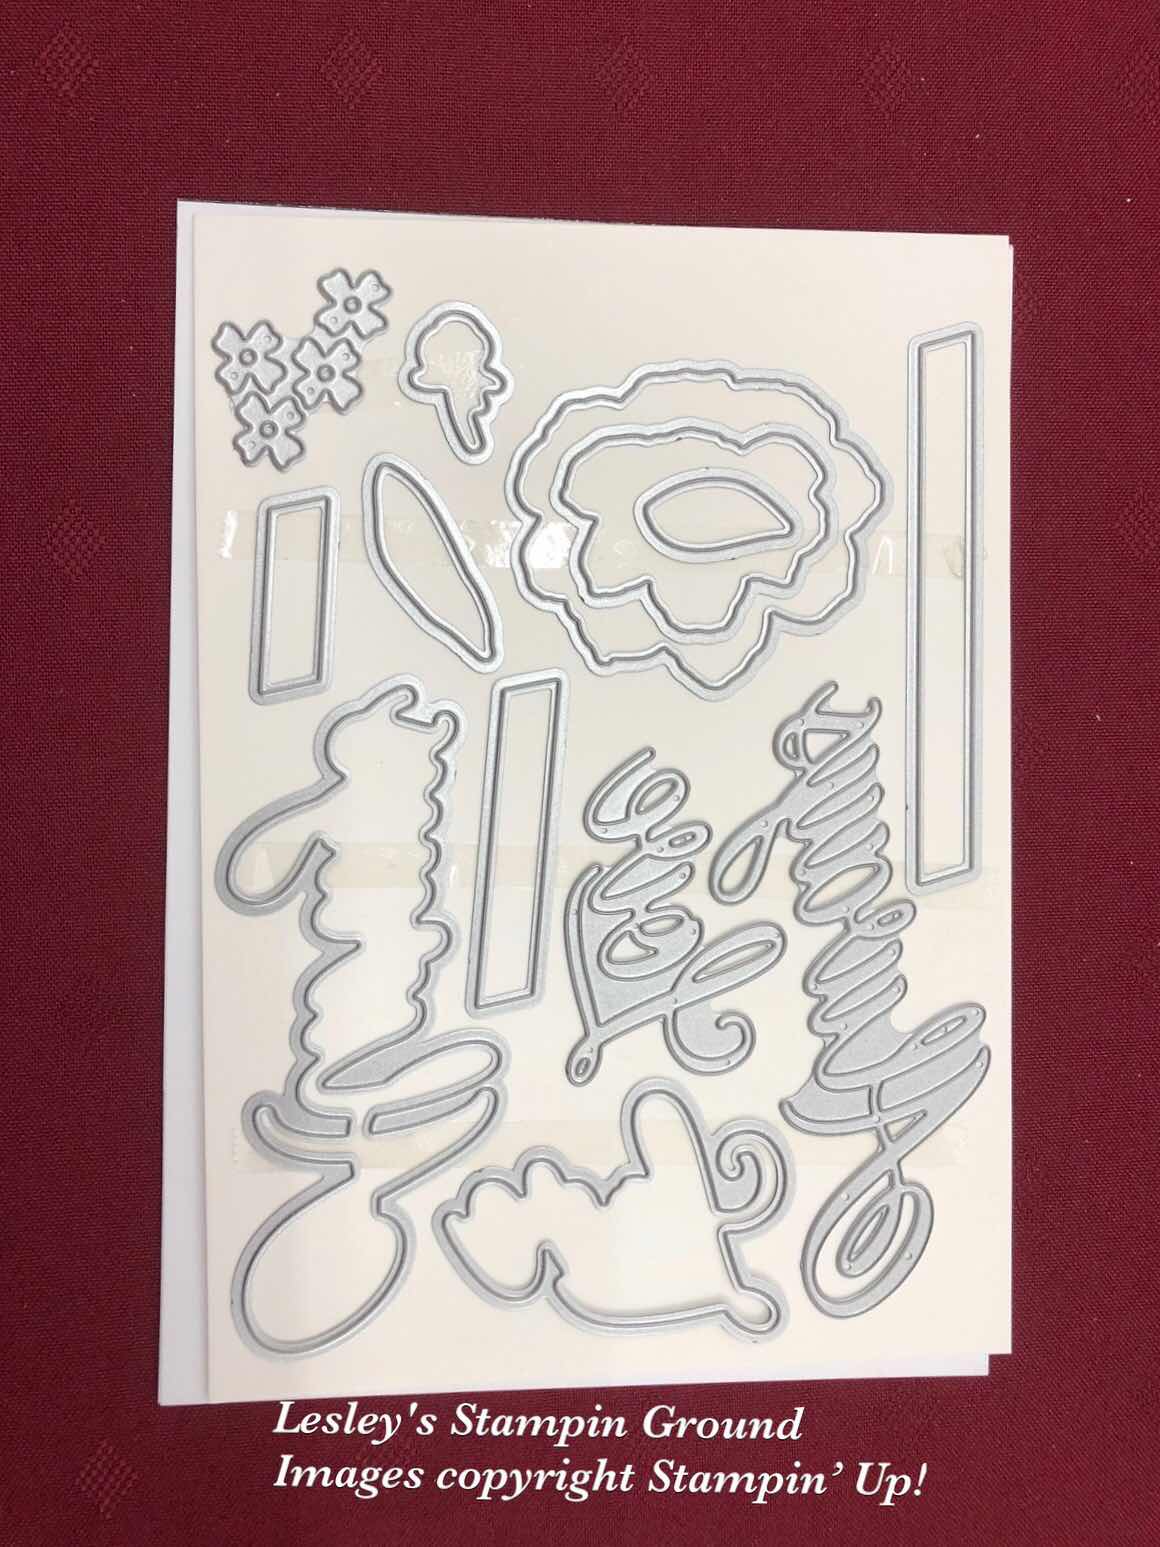
I have dry embossed the Pacific Point card (#116202) using the Seabed 3D Embossing Folder (#152700), then attached this to the Basic White base card (#159228). Happy Birthday is from the Many Mates stamp set (#152633) and stamped with Pacific Point ink (#147098) on Basic White card. This and the Poppy Parade card (#121694) were cut with the Hippo & Friends Dies (#153585).
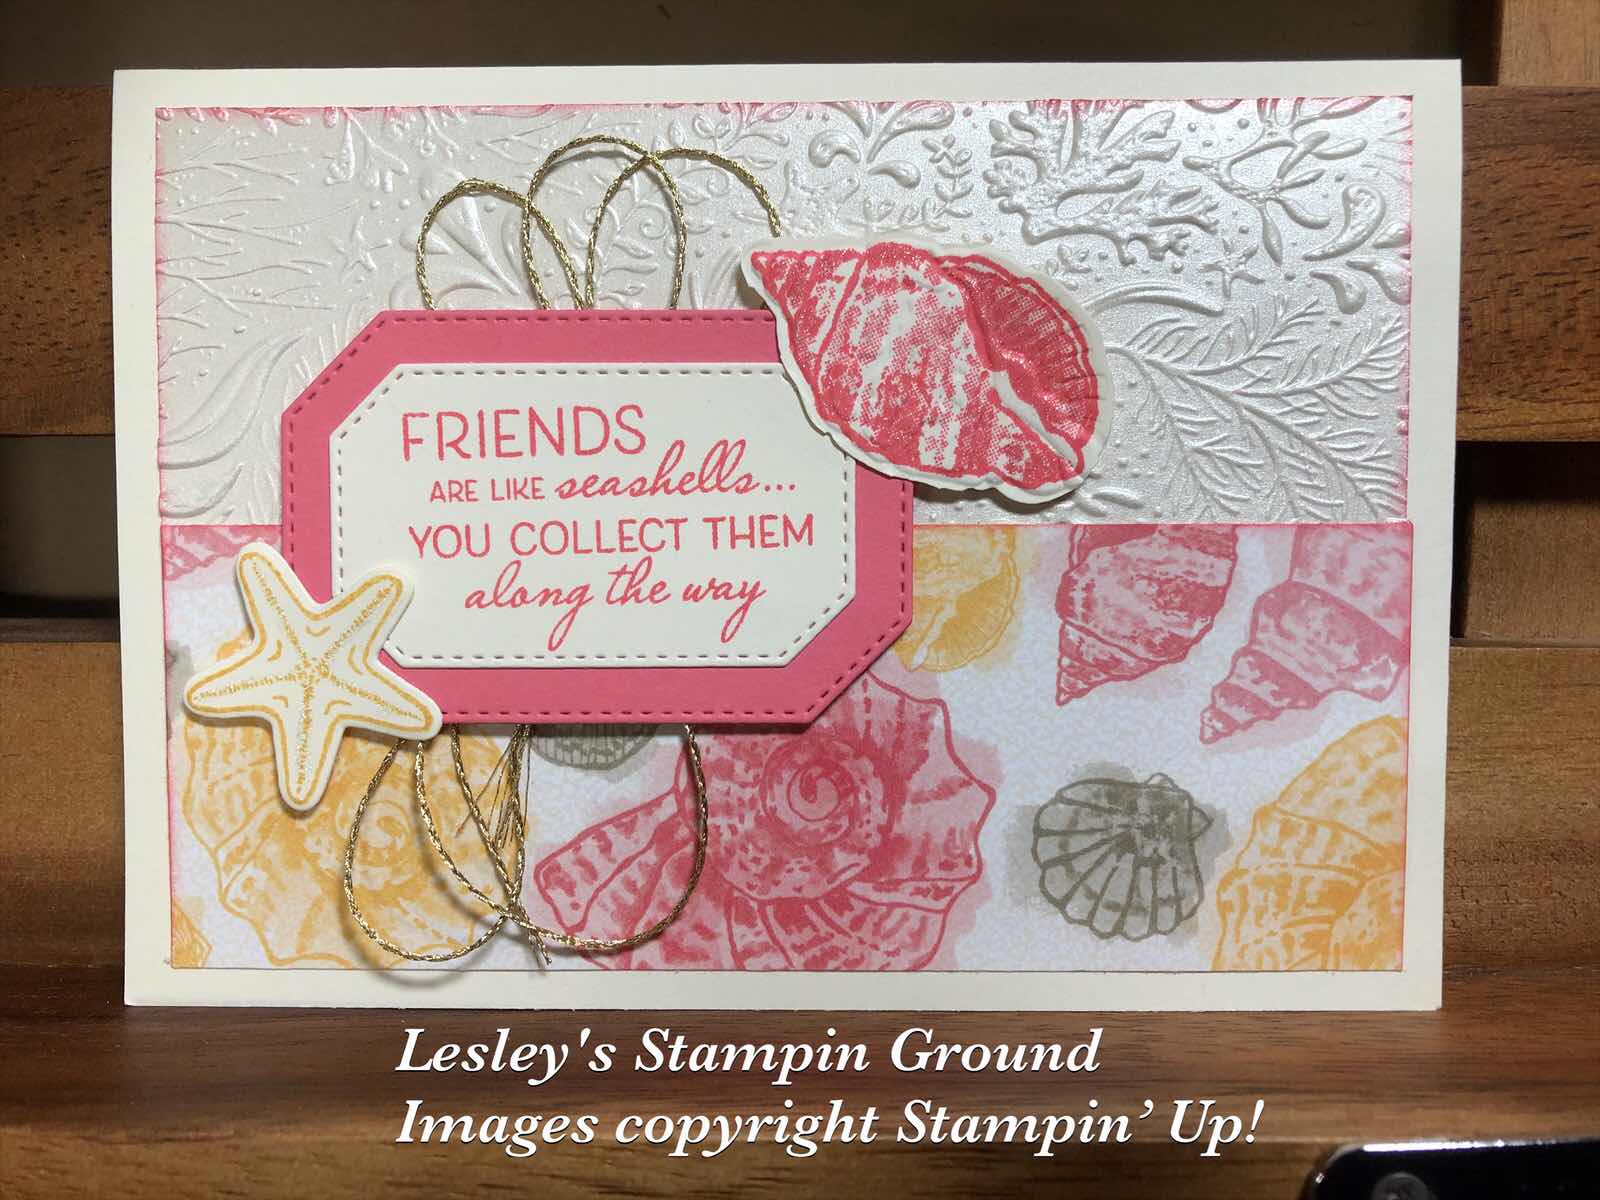
The lighthouse is from the Sailing Home stamp set and also stamped with Pacific Point ink. The shells are fussy cut from the Sand & Sea Designer Series Paper (#154288). Even though these shells are smaller than the shells in the Seashells 3D Embossing Folder (#154309), I was very pleased how well it embossed these shells. I find they just look so much better with the embossing then when flat.
The lighthouse and the red & blue shells were attached to the card with Stampin’ Dimensionals (#104430) and as usual couldn’t resist using the Clear Wink Of Stella (#141897) to add that touch of glimmer to the shells & lighthouse. Pity it doesn’t show in the photo but looks great in reality.

Have a great weekend.

“Love what you do and share what you love.”


Thursday 25 February 2021

Wildly Happy

Hello friends,

I have a box of unused stamped images and bits & pieces which are left overs from various projects, so they come in very handy when I need a quick & easy card like this one.


I attached the pre-cut Forever Gold Laser-Cut Specialty Paper (#152493) to the Soft Sea Foam card (#147012) which I cut the same size. This was then matted with the Basic Black card (#121688) and then attached to the Basic White card (#159228).
The elephants are from Wildly Happy stamp set (#149408) and the sentiment is from the Borders Abound stamp set (#152627). Both were stamped with Tuxedo Black Memento ink (#132708). I fussy cut the elephants and cut the sentiment with a Tasteful Labels Die (#152886). I daubered the sentiment with Soft Sea Foam ink (#147102). I added a small amount of colour to the elephants with the Smokey Slate Stampin’ Blends (#154904), then added glimmer with the Clear Wink Of Stella Glitter Brush (#141897).
Both the sentiment and elephants were attached to the card with Stampin’ Dimensionals (#104430). The leaf was cut with a Forever Flourishing Die (#152714) from Pear Pizzaz card (#131290). This was attached with Mini Glue Dots (#103683).


Have a great day!!


“Love what you do & share what you love.”


Wednesday 24 February 2021

True Love Designer Series Paper

Hello again everyone,

I have used so much of this beautiful True Love Designer Series Paper (#154281) and have loved colouring the beautiful flowers. Of course you can just use the black & white designs or add colour or use a bit of both as I have on today’s card.


I punched a circle using the 2” Circle Punch (#133782) from the DSP, then coloured the flowers in the circle. The Stampin’ Blends used to colour the flowers are Poppy Parade (#154958), Mango Melody (#154888), Flirty Flamingo (#154884), Purple Posy (#154896), Rococo Rose (#154900), Highland Heather (#154887), Rich Razzleberry (#154898), Pumpkin Pie (#154897), Magenta Madness (#153106) and Granny Apple Green (#154885).
I cut another circle from Real Red card (#106578) using the Layering Circles Dies (#151770) and attached the coloured DSP circle to it.
The rectangular piece of DSP was attached to a piece of Real Red card, then I attached the Vellum (#106584) on top. The circle was attached to the card with Stampin’ Dimensionals (#104430).
The Real Red Double Stitched Satin Ribbon (#151155) was wrapped around the cardfront before attaching this to the Basic White base card (#159228).
The sentiment is from the Many Messages stamp set (#154510) and cut with the co-ordinating Messages Die (#154422). I cut the Real Red card to matt the sentiment using a Stitched So Sweetly Die (#151690). To finish the card I added Rhinestone Basic Jewels (#144220) to each of the centres of the coloured flowers.


I hope your day has been enjoyable!!

“Love what you do and share what you love.”


Tuesday 23 February 2021

Flower & Field Designer Series Paper

Welcome my friends,

Sale-a-bration is coming to an end on 28th February so if you are placing an order you will receive a free product with each $90 you spend. The designer series paper on today’s card is from Sale-a-bration. It is the Flower & Fields DSP (#155223). I love the lovely range of vibrant colours and designs in this pack.


I have been trying to make some cards recently that could be used for men or women and I think this would work for either.

The Basic White card front (#159228) was dry embossed with one of the Meadow Moments Embossing Folder (#153126) before attaching it to the Granny Apple Green card (#147014). The DSP was also attached to the card front, then the Black Glittered Organdy Ribbon (#147897) was wrapped around the card.
The sentiment from the Many Mates stamp set (#152633) was stamped with Granny Apple Green ink (#147095). This and the Granny Apple Green Card were cut with Hippo & Friends Dies (#153585). These were attached to the card with Stampin’ Dimensionals (#104430) and Mini Stampin’ Dimensionals (#144108).
I stamped the dragonfly from the Dragonfly Garden stamp set (#154411) with Tuxedo Black Memento ink (#132708). The Dragonflies punch (#154240) was used to punch the dragonfly and this was attached to the card with Stampin’ Dimensionals.
The Clear Wink Of Stella Glitter Brush (#141897) was used to added some glimmer to the dragonfly, although this doesn’t show in the photo. The Matte Black Dots (#154284) were added to the sentiment.

Have a great day!!

“Love what you do and share what you love.”


Monday 22 February 2021

Brilliant Wings

Hello & welcome again,

Yes, it’s butterflies again using some of the Butterfly Bouquet products. These will be available from 2nd March and are an early release from the next  Annual Catalogue.


The base card is Basic White (#159228), then the next layer is Magenta Madness (#153085) with the Butterfly Bijou 6” x 6” Designer Series Paper (#156824) on top. The butterflies were cut with the Brilliant Wings Dies (#155523). The solid butterflies were cut from Magenta Madness card, Mango Melody card (#147013) and Mint Macaron card (#138344). The detailed butterflies were cut from Gold Foil Sheets (#132622). The gold butterflies were attached to the coloured butterflies with Mini Glue Dots (#103683).
The sentiment from Many Mates stamp set (#152633) was stamped with Magenta Madness ink (#153117), then cut with a die from the Painted Labels Dies (#151605). I attached some (retired) gold trim to the card then attached the sentiment with Stampin’ Dimensionals (#104430).
The butterflies were also attached with Stampin’ Dimensionals and the card was finished by adding the Pastel Pearls (#154571) to the sentiment.


Enjoy your day!!

“Love what you do and share what you love.”

Saturday 20 February 2021

Friends Are Like Seashells Bundle

Hi friends,

There’s probably not a lot of stamp sets or products that could be suitable for everyone - ladies, guys and children, but I think the Friends Are Like Seashells Bundle (#156205) is one of these.


The base card and card front is Basic White (#159228). I used Balmy Blue card (#147007) for the 3 rectangles. These were cut at 4cm x 8.5cm. The white embossed card was cut at 3.5cm x 8cm. These were embossed with the Seabed 3D Embossing Folder (#152700) and I lightly daubered these with Balmy Blue ink (#147105).
I have stamped the shells, starfish and sentiment from the Friends Are Like Seashells stamp set (#154368). The inks used are Balmy Blue (#147105), So Saffron (#147109) and Crumb Cake (#147116). After stamping, I cut the shells and starfish with the Seaside Seashells Dies (#156095). The shells were then dry embossed with the Seashells 3D Embossing Folder (#154309) and the sentiment was cut with a Stitched Rectangles Die (#151820). The shells were attached with Stampin’ Dimensionals (#104430). I also added some glitter to the shells with the Clear Wink Of Stella Glimmer Brush (#141897).

Hope you are having a relaxing weekend!!

“Love what you do and share what you love.”


Friday 19 February 2021

Garden Shed

Hello again friends,

It’s time for a masculine card, as it’s been a while since I did one. Today I have chosen the Garden Shed stamp set (#149247).


I stamped the garden shed with Soft Suede ink (#147115) onto Basic White card (#159228). I used Stampin’ Blends to colour the image. These are Granny Apple Green (#154885), Old Olive (#154892), Smokey Slate (#154904), Crumb Cake (#154882), So Saffron (#154905), Poppy Parade (#154958), Pool Party (#154894) and Ivory (#154922).
This was attached to a piece of the In Good Taste Designer Series Paper (#152494). I stamped “Happy Birthday” from Many Mates stamp set (#152633) with Soft Suede ink. The Basic White card and Soft Suede card (#119982) were cut with a Curvy Die (#154319) and attached to the cardfront. The base card is Basic White. The dragonfly was punched with the Dragonflies Punch (#154240) from Gold Foil Sheet (#132622) and I attached this to the card with Mini Glue Dots (#103683).

Hope you are having a crafty day!!

“Love what you do and share what you love.”


Thursday 18 February 2021

Brilliant Wings Dies

Hello friends,

I couldn’t resist making another card using the Brilliant Wings Dies (#155523).


There are 3 dies in the set that aren’t butterflies and I have used them on the background. This paper is from the Butterfly Bijou 6”x6” Designer Series Paper (#156824) which will be available from 2nd March along with the rest of the Butterfly Bouquet suite. I attached the DSP to a piece of Calypso Coral card (#124392) then this was attached to the Very Vanilla base card (#106550).

There is one die that includes 6 different butterflies which will cut the stamped butterfly images. The butterflies are cut separately using this die. 


I cut one of these butterflies from Gold Foil Sheet (#132622) for the base butterfly. Then there is a die to cut the detailed butterfly in the same shape which I cut from Calypso Coral card. This was attached to the Gold butterfly using Stampin’ Dimensionals (#104430). I added Clear Wink Of Stella (#141897) for some shimmer to the detailed butterfly.

“Celebrate” is from the Many Mates stamp set (#152633) and stamped with Calypso Coral ink (#147101). I cut this with the Messages die (#154510). Although this die co-ordinates with the Many Messages stamp set, I use it for a variety of sentiments.

Stampin’ Dimensionals were used to attach the sentiment to the card and I added the Gilded Gems (#152478) to the butterfly and sentiment.

Have a great day!!

“Love what you do and share what you love.”


Wednesday 17 February 2021

Butterfly Bouquet

Hi friends,

Here is a sneak peak of a new product that will be in the next Annual Catalogue but will be available in an early release from 2nd March. As you know I love butterflies so this set is going to feature on a lot of cards.


The Beautiful Bouquet Suite includes a stamp set, dies and designer paper. I have just used some of the dies from the Brilliant Wings Dies (#155523).
I cut the butterflies from Basic White card (#159228) and the lines at the bottom of the card are also created using a die from the Brilliant Wings. I attached the White card that had the butterflies cut from, to the Gorgeous Grape card (#147011) and this was attached to the Basic White base card.
Using a Blending Brush (#153611) I lightly coloured the wings of the butterflies with Highland Heather ink (#147103). Then I attached the butterflies with Stampin’ Dimensionals (#104430). I used the Clear Wink Of Stella Brush (#141897) to add some glimmer to the butterflies and added the Pastel Pearls (#154571) to the centre of each butterfly.
The sentiment is from the Itty Bitty Greetings stamp set (#151331) and stamped with Gorgeous Grape ink (#147099), then cut with an Ornate Frames die (#150664) and attached with Mini Stampin’ Dimensionals (#144108).

I will show you more of these products in the coming weeks.

Have a great day!!

“Love what you do and share what you love.”


Tuesday 16 February 2021

True Love Scrapbook page

Hi everyone,

Here’s a scrapbook page for a change. Wish I had more time for scrapbooking but I always seem to run out of time.


I had cut all the flowers from the inside of this page of True Love Designer Series Paper (#154281) for cards, so decided to use the outside for this scrapbook page. Can’t waste these beautiful flowers.  I fussy cut around the flowers, leaving it in one piece. I coloured the flowers and leaves with a variety of Stampin’ Blends - Granny Apple Green (#154885), Old Olive (#154892), Mango Melody (#154888), Rococo Rose (#154900), Poppy Parade (#154958), Cherry Cobbler (#154880), Balmy Blue (#154830), Calypso Coral (#154881), Highland Heather (#154887), Rich Razzleberry (#154898), Flirty Flamingo (#154884), Magenta Madness (#153106) and Purple Posy (#154896). I then attached this paper to the 12”x12” Basic White cardstock (#159231). 

The photos were matted with Gold Foil Sheets (#132622) and Basic Black card (#121688). I attached the Square Vellum Doilies (#152484) to the page.
“Happy Birthday” is cut with the Well Written dies (#151816) from Gold foil sheets which had Adhesive Sheets (#152334) attached to the back for ease of attaching.

Enjoy your day!!

“Love what you do and share what you love.”


Monday 15 February 2021

Forever & Always

Hello again,

I guess I should have made this card yesterday for Valentine’s Day but there is no reason why you couldn’t give it to that special person anytime.


The base card is Basic White (#159228). I dry embossed another piece of Basic White using one of the Meadow Moments Embossing Folders (#153126) and sponged the edges with Rococo Rose ink (#150080), then attached this to the base card. I also dry embossed a piece of the Rococo Rose from Love You Always Foil Sheet (#154286). I cut another piece of Basic White card with a die from the Ornate Layers Dies (#152726). The Love You Always Specialty Designer Series Paper (#154280) was also cut with a die from the Ornate Layers, and attached to the White die cut.
The flowers are from the Forever & Always stamp set (#154343) and stamped with Tuxedo Black Memento ink (#132708). These were coloured with Rococo Rose Stampin’ Blends (#154900). The flowers and “love” were cut with Always Dies (#154307). I had attached Adhesive Sheet (#152334) to the back of the Basic Black card (#121688) before cutting “love” with the die. The larger flower was attached to the card with Stampin’ Dimensionals (#104430). I brushed the Clear Wink of Stella Glitter (#141897) over the flowers. 

I hope your day has been great!!


“Love what you do and share what you love.”


Sunday 14 February 2021

Lacy Petals Dies

Hello friends,

How Gorgeous are these Lacy Petals Dies (#154328) to make this beautiful “flower”.


I dry embossed the Very Vanilla card (#106550) using the Dainty Diamonds 3D Embossing Folder (#152702). I attached the Artistry Blooms Designer Series Paper (#152495) to the Very Vanilla Card, then this was attached to the Crushed Curry card (#131288). I wrapped the Gold Metallic-Edge Ribbon (#144146) around the card front before attaching this to the Very Vanilla base card.

I used the Pearlescent Specialty Paper (#154291) for the 3 layers of the “flower”. The edges of the petals were lightly sponged with Crushed Curry ink (#147087). I attached the middle layer to the card with a Stampin’ Dimensional (#104430) in the centre of the flower. The petals for the bottom layer are separate pieces so I tucked each of these under the middle layer and they were attached using Mini Glue Dots (#103683). The top layer was also attached with Mini Glue Dots.
The sentiment is from the Delicate Petals stamp set (#154475). This was stamped with Crushed Curry ink and cut with an Ornate Frames Die (#150664) and attached with Stampin’ Dimensionals.
I added Wonderful Gems to the centre of the flower and to the cardfront.

Don’t forget that Sale-a-bration finishes at the end of February. So if you are placing a $90 order before then you have a free product to choose.

Have a great day!!

“Love what you do and share what you love”.


Friday 12 February 2021

Keeping track of your stamps

Hello,

Today I am doing something different as I’m not showing you a card. I wanted to show you what I do with my stamp sets and dies so I can try to keep track of them or if I am trying to find a particular stamp or die it is a bit easier to find. I often see where someone forgets where a die or stamp comes from, so this might help as well.


When I get a die set, I photograph it and print the photo and put it into the die pack. At any time if I’m not sure where the die belongs I look at the photos.


I also write the number of dies on the front of the pack and always count the number of dies before closing the pack and putting them away.

I put the name of the dies on the stamp set that it co-ordinates with and the name of the stamp set on the dies pack. I put the catalogue name and page that it can be found also on the front of the dies and stamp set. I use magnetic strips to attach the dies inside the pack.


I also highlight the products in the catalogue once I have received them, so I don’t order them again.

I then stamp each of the images onto photocopy paper and cut out each of the dies and the various ways they can be used as shown below. I put these into a folder with all current products. I have another folder with retired products, so it’s easy to flick through to find what you want.


With the cling stamps, I never throw the excess rubber away, as it is another way of knowing that all stamps are included or one is missing as shown below. Also I keep the paper that is left after removing the labels, to avoid the stamps sticking to the case.


I hope this may give you some ideas to help keep track of your stamps and dies.

Have a great day!!

“Love what you do and share what you love.”


Wednesday 10 February 2021

Seabed 3D Embossing Folder with Sand & Sea DSP

Hello and welcome friends,

I love the beautiful sheen on the Pearlescent Specialty Paper (#154291) and looks great when embossed with the Seabed 3D Embossing Folder (#152700).


This was then attached to the Very Vanilla base card (#106550) and then a piece of the Sand & Sea Designer Series Paper (#154288) was attached.
The sentiment, shell and star fish are from the Friends Are Like Seashells stamp set (#154368) and stamped onto Very Vanilla card. The sentiment and shell were stamped with Flirty Flamingo ink (#147052) and the starfish with So Saffron ink (#147109). The shell and starfish were cut with the Seaside Seashells Dies (#156095).
The sentiment and Flirty Flamingo card (#141421) under the sentiment were cut with Hippo & Friends Dies (#153585). I attached the Gold Trim from the Forever Greenery Trim Combo Pack (#152475), then attached the sentiment with Stampin’ Dimensionals (#104430). The shell and starfish were also attached with Dimensionals.

I hope you are having a great day!!

“Love what you do and share what you love.”


Monday 8 February 2021

True Love DSP and Stampin’ Blends

Hello again,

I have had so much fun colouring the flowers from the True Love Designer Series Paper (#154281) and I have made so many beautiful cards with them.


I fussy cut the flowers and coloured them with Stampin’ Blends - Highland Heather (#154887), Flirty Flamingo (#154884) and Granny Apple Green (#154885).
The Basic White card (#159228) for the background was coloured using the Blending Brushes (#153611). The inks used were Flirty Flamingo (#147052), Daffodil Delight (#147094) and Highland Heather (#147103). The leaves from the Vines Design stamp set (#154488) was stamped with Granny Apple Green ink (#147095). I then dry embossed the card with the Painted Texture 3D Embossing Folder (#154317).
I attached this card to the Flirty Flamingo card (#141421) then to the Basic White base card.
I attached the Metallic Mesh Ribbon (#153550) to the card and the flowers were placed on top using Stampin’ Dimensionals (#104430). “Celebrate” is from the Itty Bitty Greetings stamp set (#151331) and stamped with Flirty Flamingo ink and also attached with Stampin’ Dimensionals. I added the Pearl Basic Jewels (#144219) to the card.

Enjoy your day!!

“Love what you do and share what you love.”


Saturday 6 February 2021

Dragonfly Garden Bundle

Hi again my stamping friends,

I love when you can mix and match a variety of products, which I have done on today’s cards.


The 2 cards are basically the same but on one I only put one piece of the white card on top of the Designer Series Paper, used a different ribbon and sentiment and used an embossing folder on one of the white pieces of card.

I cut a piece of Basic White card (#159228) with 2 of the Curvy Dies (#154319). On the 2nd card I dry embossed the white card with one of the Meadow Moments Embossing Folders (#153126).  The white card was then attached to the Berry Delightful Designer Series Paper (#157613), which is part of the free product from Sale-a-bration. This is in a bundle with the Berry Blessings stamp set. 

The DSP was attached to the Rich Razzleberry card (#119981). The ribbon on the 1st card is Silver Metallic Edge Ribbon (#144213). I coloured this with a Sponge Dauber (#133773) and Rich Razzleberry ink (#147091) before wrapping around the card. The Purple Posy ribbon from Playing With Patterns Ribbon Combo Pack (#152468) was used on the 2nd card.

Both sentiments are from the Many Mates stamp set (#152633) and stamped with Rich Razzleberry ink. I used the Stitched Nested Labels dies (#149638) to cut the sentiment and the Rich Razzleberry card under the sentiment. This was attached to the card with Stampin’ Dimensionals (#104430),
I stamped the dragonfly from the Dragonfly Garden stamp set (#154411) using VersaMark (#102283), sprinkled with Gold Stampin’ Emboss Powder (#109129), then heat set it with the Heat Tool (#129056). The dragonfly was coloured with Stampin’ Blends - Rich Razzleberry (#154898) and Purple Posy (#154896), then punched with the Dragonflies Punch (#154240). I also punched another butterfly from Rich Razzleberry card. This was attached to the card and the coloured dragonfly was attached on top with Stampin Dimensionals. I slightly offset the dragonflies so you could see some of the colour from the bottom dragonfly. When I attach the dragonflies I usually only have the Dimensionals under the middle of the body, so you can curve the wings up slightly and it also allows you to see the coloured dragonfly underneath.

To finish the card I added some Pearl Basic Jewels (#144219).

“Love what you do and share what you love.”


Friday 5 February 2021

Sale-a-bration

Hello,

Today I have used 2 of the free Sale-a-bration products for 2 quick and easy cards.


The Designer Series Paper is Oh So Ombre (#155225) from Sale-a-bration. There are 4 colours in the pack, all with the ombré effect, in both plain and patterned. I used the Bermuda Bay and Rich Razzleberry colours. I stamped the flowers from the Corner Bouquet stamp set (#155273) - also from Sale-a-bration - with VersaMark (#102283) and sprinkled it with White Stampin’ Emboss Powder (#109132) then set it with the Heat Tool (#129056).

For the Rich Razzleberry card I coloured the floral image (which was white embossed) using the following Stampin’ Blends - Granny Apple Green (#154885), Daffodil Delight (#154883), Poppy Parade (#154958), Rococo Rose (#154900), Rich Razzleberry (#154898) and Calypso Coral (#154881).

I stamped Happy Birthday from Peaceful Moments stamp set (#151595). For the Bermuda Bay card, I stamped with Bermuda Bay ink (#147096) and for the Rich Razzleberry card I heat embossed with the White Emboss Powder.
I glued the Woven Threads Sequins (#149498) to both cards using the Fine -Tip Glue Pen (#138309) to complete these very easy cards.

Sale-a-bration continues till the end of February, so you still have time to get more free products (with a qualifying $90 order).


Have a great weekend!!

“Love what you do and share what you love.”


Thursday 4 February 2021

True Love Designer Series Paper

Hi again my stamping friends,


I really do love this True Love Designer Series Paper (#154281) which is black and white and gives you the option of colouring it which is what I have done with the flowers. How vibrant are these colours!!


I have fussy cut and used many of the flowers from this pack for my own cards and for classes, so have found I have many of the flowers from the outside edge of the DSP unused. Of course we don’t like to waste anything, so decided to use the edge flowers for this card, by placing them around the edge of the geometric DSP from the same pack.
The flowers and leaves were coloured with the following Stampin’ Blends - Poppy Parade (#154958), Mango Melody (#154888), Highland Heather (#154887), Rococo Rose (#154900), Melon Mambo (#153112), Calypso Coral (#154881), Magenta Madness (#153106), Pumpkin Pie (#154897), Flirty Flamingo (#154884), Purple Posy (#154896) and Granny Apple Green (#154885). I used the Multipurpose Liquid Glue (#110755) to attach the flowers to the DSP.
The sentiment is from the Peaceful Moments stamp set (#151595). I stamped this with Tuxedo Black Memento ink (#132708), then re-stamped it with VersaMark (#102283) and sprinkled it with Clear Stampin’ Emboss Powder (#109130), then set it with the Heat Tool (#129056). To do the stamping this way you need to use the Stamparatus (#148187), so that you can stamp in exactly the same place each time. This technique allows you to use any colour ink and have it heat embossed. The die to cut the sentiment is from the Potted Succulents dies (#154330). I attached the sentiment to the card with Black Stampin’ Dimensionals (#150893).
The white card for the sentiment and base card is Basic White (#159228). I used the Clear Wink Of Stella Brush (#141897) to add some glitter to the flowers.

I hope your day has been a good one.

“Love what you do and share what you love”


Wednesday 3 February 2021

Floating & Fluttering

Hello again friends,

I have used my favourites on this card (again) - butterflies and purple!!


I stamped the image from Beauty Abounds stamp set (#148726) on the Basic White card (#159228) using Highland Heather ink (#147103). I used the Stamparatus (#148187) to stamp these images. The next layer is Gorgeous Grape card (#147011), followed by Hydrangea Hill Designer Series Paper (#154570), then Gorgeous Grape again, then the Basic White card base. 
The butterflies from the Floating & Fluttering stamp set (#154424) were stamped with Gorgeous Grape ink (#147099) and coloured with Stampin’ Blends - Highland Heather (#154887) and Granny Apple Green (#154885). These were then cut with the Fluttering Dies (#154318). The 6 images are all cut in one piece. There are other dies to cut the images individually if you prefer. Happy Birthday was also stamped with Gorgeous Grape ink. This sentiment is from the Many Messages stamp set (#154510) and cut with the Messages Die. I sponged the edge of the sentiment with Gorgeous Grape inkThe butterflies and sentiment were attached with Stampin’ Dimensionals (#104430).
The Gorgeous Grape 3/8” Sheer Ribbon (#154572) was wrapped around the card. I made the bow separately and attached it to the card with Mini Glue Dots (#103683).


Have a great day!!

“Love what you do and share what you love.”


Tuesday 2 February 2021

Free As A Bird

Hi & welcome friends,

Today’s card is a variation from yesterday’s card. I used the Very Vanilla card (#106550) that was left after cutting the oval for the sentiment for that card. This oval was cut with a Layering Ovals Die #(151771).


I stamped part of the image from the Beauty Abounds Stamp set (#148726) around the edges of the card. This was stamped with Soft Suede ink (#147115). I blended the Crumb Cake ink (#147116) and Soft Suede ink using a Blending Brush (#153611) around the Very Vanilla card.
On another piece of Very Vanilla card I stamped the birds from Free As A Bird stamp set  (#149468) using Tuxedo Black Memento Ink (#132708). To colour this I used the following Stampin’ Blends - Seaside Spray (#154901), Petal Pink (#154893), So Saffron (#154905), Purple Posy (#154896), Pumpkin Pie (#154897), Granny Apple Green (#154885) and Crumb Cake (#154882)
Using 2 of the Layering Ovals Dies I cut the scalloped oval from the Gold Foil Sheet (#132622) and attached this over the cut out oval of the Very Vanilla card. I attached this card onto a piece of Gold Foil with the middle removed. I attached the card front to the card with the birds using Stampin’ Dimensionals (#104430), then attached the whole piece to the Very Vanilla base card.
Happy Birthday is from the Itty Bitty Greetings stamp set (#151331) and stamped with Soft Suede ink. An Ornate Frames die (#150664) was used to cut the sentiment and attached to the card with Stampin’ Dimensionals. A retired piece of gold trim was attached to the label.

Enjoy your day!!

“Love what you do and share what you love.”


Monday 1 February 2021

Layering Ovals Dies

Hello friends,

A fairly easy card today using a couple of stamp sets, some dies and a Blending Brush.


The stamped images on the corners of the card are from the Beauty Abounds stamp set (#148726) and the partial flowers in between these are from the Vine Design stamp set (#154488). These were all stamped with Soft Suede ink (#147115). Then using a Blending Brush (#153611) I blended the Daffodil Delight ink (#147094) around the edges of the stamped Very Vanilla card (#106550). I spritzed this card with Frosted White Shimmer Paint (#147046) to give a lovely shimmer to the card. This was attached to the Soft Suede card (#119982). 
I wrapped the Fine Art 3/8” Ribbon (#154561) around the card front. The sentiment is from the Grace’s Garden stamp set (#151513) and stamped with VersaMark (#102283), then embossed with Gold Stampin’ Emboss powder (#109129) and set with the Heat Tool (#129056). This was also spritzed with Frosted White Shimmer Paint. 
The ovals are cut with the Layering Ovals Dies (#151771). The yellow card is Daffodil Delight (#121680). These were attached to the card with Stampin’ Dimensionals (#104430). I lightly blended the oval with the sentiment using the Blending Brush and Daffodil Delight ink, then daubered the edge with Soft Suede ink. A Gold Glitter Enamel Dot (#152155) was added the the sentiment. The base card is also Very Vanilla.

Have a great day!!

“Love what you do and share what you love.”