Thursday 30 September 2021

Beautiful Trees Dies

Hi my lovely friends,

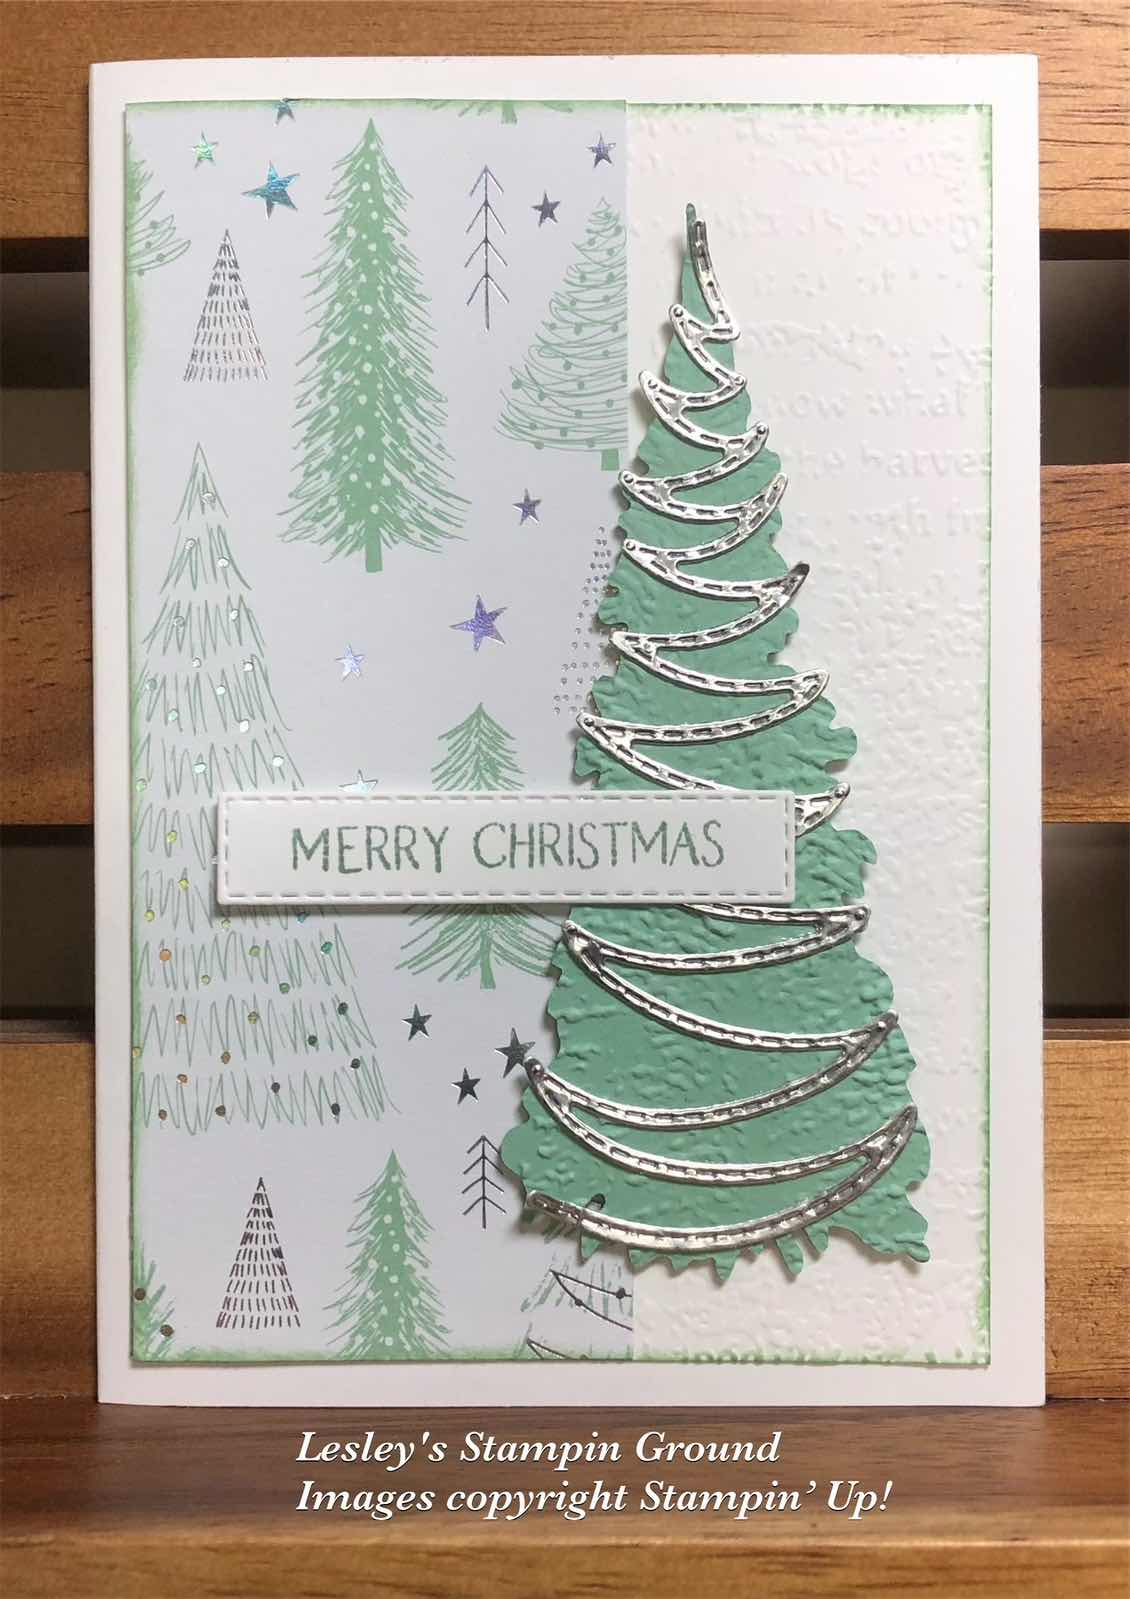
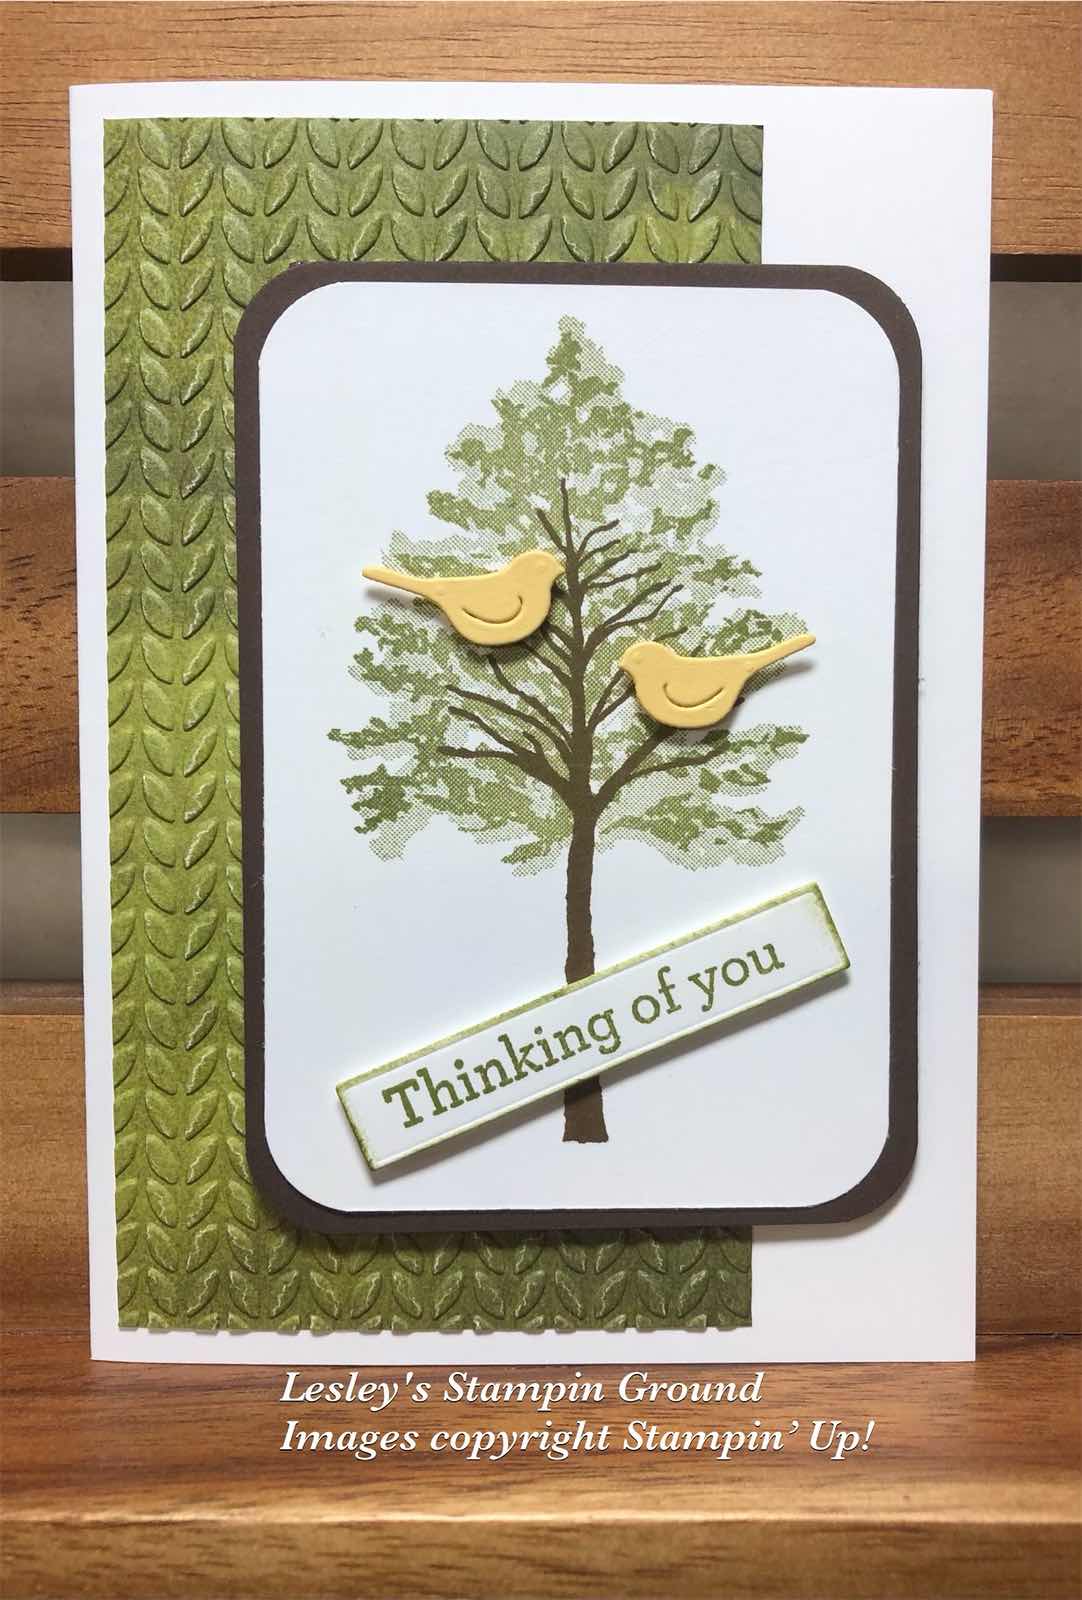
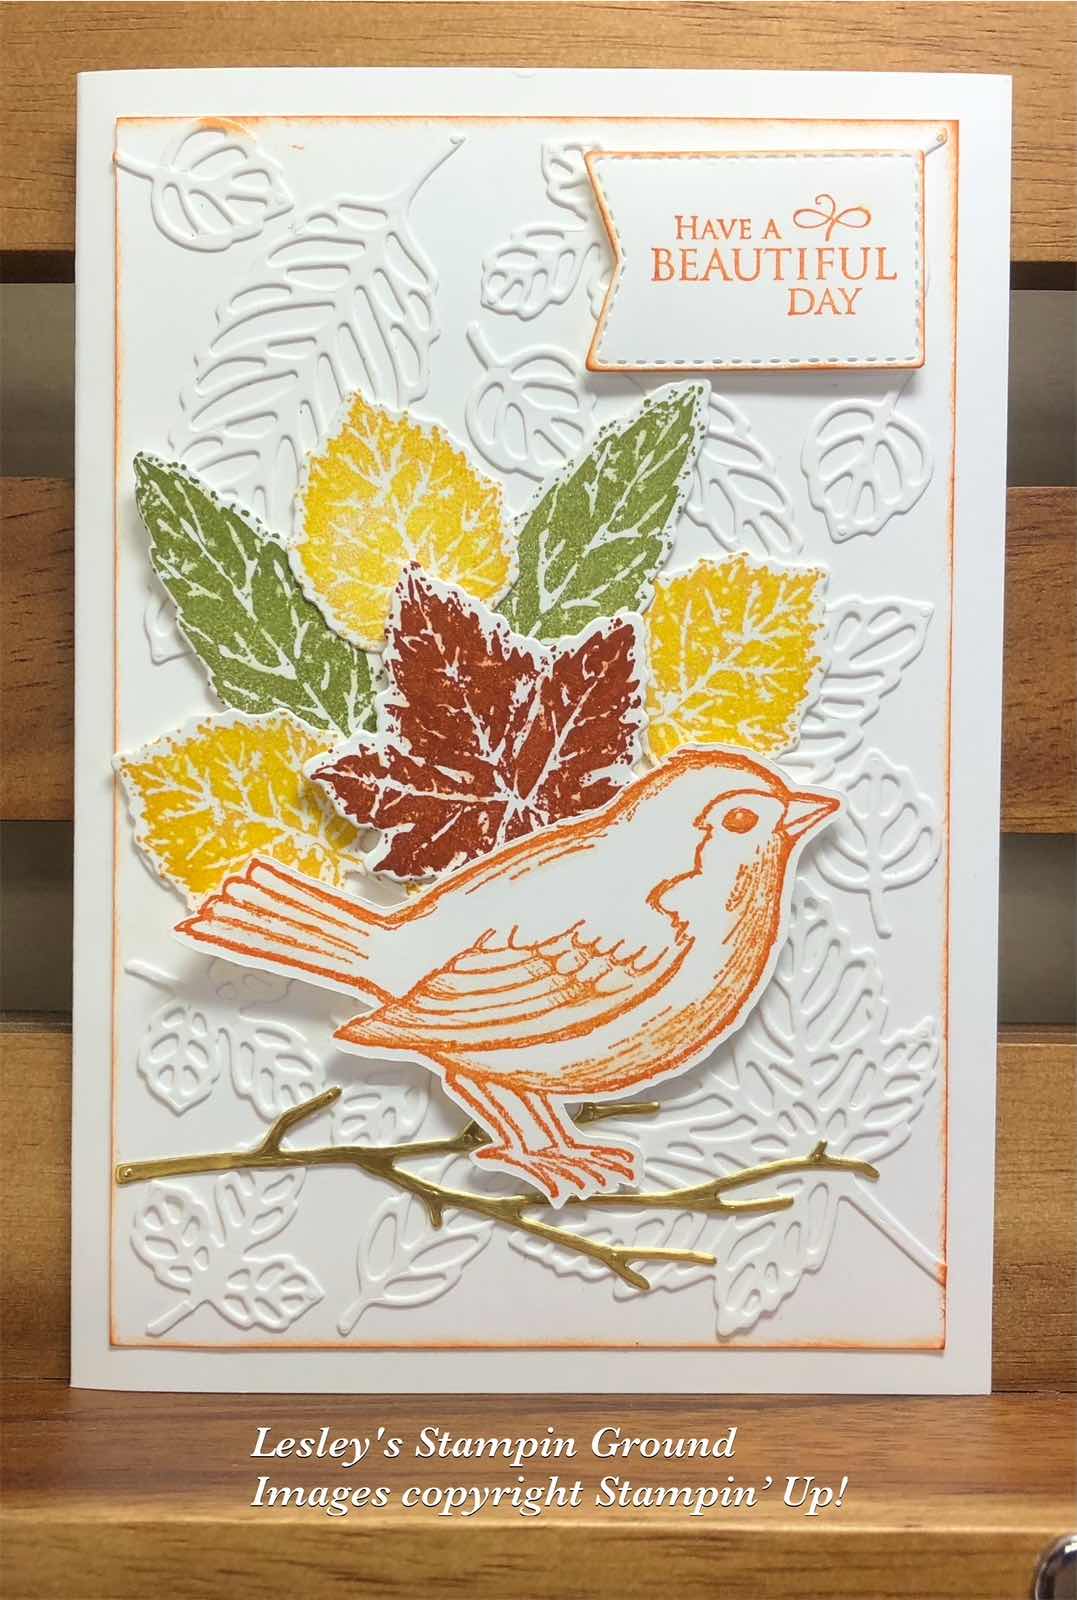
I have used the Beautiful Trees dies (#155840) for the tree on todays card. I know that the branches probably should be behind the cut-out leaves but I liked to see more of the branches as the leaves covered most of the branches. On the 2nd photo, I added some extra pieces of the detailed cut-out leaves and put on top of the branches.


I cut the solid part of the leaves from Garden Green card (#108605) and the detailed cut-out of the leaves from the Beauty Of The Earth Designer Series Paper (#155841). For the 2nd card I cut another piece of the detailed leaves and cut small pieces from this and randomly added on top of the branches so you can still see some of the branches. The trunk and branches were cut from Soft Suede card (#119982). These were assembled with the Fine Tip- Glue Pen (#138309).

I cut the Very Vanilla rectangle with a die from Natures Thoughts (#153586), then dry embossed with the Timber 3D Embossing Folder (#156406). This was attached to a piece of the Beauty Of The Earth DSP which was attached to the Very Vanilla base card.

“Thank You” from the Beauty Of Friendship stamp set (#154983) was stamped with Merry Merlot ink (#147112) and cut with a die from the Beautiful Trees Dies and attached to the card with Mini Stampin’ Dimensionals (#144108). The birds were also cut from the same die set from Merry Merlot card (#147005) and also attached with Mini Dimensionals. I added the Clear Wink Of Stella (#141897) to the birds. The embellishment is from the Holiday Rhinestone Basic Jewels (#150457). 

Today (30th September) is the last day to get any of the free products from Sale-a-bration, so contact me if you want anything or go to lesleyjendra.stampinup.net

“Love what you do and share what you love.”

Stay safe & keep crafting!!


Wednesday 29 September 2021

Whimsical Trees Bundle

Hello friends,

Each year I do a whole day of classes for Christmas cards where I have a great variety of cards for everyone to make. I try to keep the cards fairly simple which allows the ladies to make as many as possible. This was one of the cards, which was very popular.


The base card & card front are Basic White (#159228). I dry embossed the card front with the Timeworn Type 3D Embossing Folder (#156505), then attached the gorgeous Whimsy & Wonder Specialty Designer Series Paper (#156329). The edges of the card front were daubered with Mint Macaron ink (#147106).

The Christmas tree was cut from Mint Macaron card (#138344) and the tree decoration was cut from Silver Foil Specialty card (#156457) which was backed with Adhesive Sheet (#152334). These were both cut using the Christmas Trees Dies (#156339). The tree was attached to the card with Stampin’ Dimensionals (#104430).

Merry Christmas is from the Peaceful Deer stamp set (#156891) and stamped with Mint Macaron Ink then cut with a Stitched Rectangles Die (#151820). I used Mini Stampin’ Dimensionals (#144108) to attach this to the card.


“Love what you do and share what you love.”


Stay safe & keep crafting!!


Tuesday 28 September 2021

Beauty Of Friendship

Hi & welcome,

Here’s an easy card (after a busy day) using the Beauty Of Friendship Bundle (#155834).


The trunk & branches of the tree were stamped with Soft Suede ink (#147115) onto Basic White card (#159228). The leaves and sentiment were stamped with Old Olive ink (#147090). The tree and sentiment are from the Beauty Of Friendship stamp set (#154983). The tree was matted with Early Espresso card (#121686) and the corners were punched with the Detailed Trio Punch (#146320).

The Beauty Of The Earth Designer Series Paper (#155841) was dry embossed with one of the Greenery Embossing Folders (#152716), then attached to the Basic White base card.

The sentiment and birds were cut with dies from the Beautiful Trees Dies (#155840) and attached to the card with Mini Stampin’ Dimensionals (#144108). I used So Saffron card (#108611) for the birds.

“Love what you do and share what you love.”

Stay safe & keep crafting!!


Monday 27 September 2021

Brilliant Wings

Hi my friends,

For a butterfly lover, I haven’t made a card with a butterfly for a while, however you could replace the butterfly with a variety of images.


I used the Shimmery White Finish Embossing Paste (#154645) with one of the Plenty Of Patterns Decorative Masks (#155553) to create the background on the larger piece of Basic White card (#159228). The smaller Basic White card was dry embossed with the Ornate Floral 3D Embossing Folder (#152725). Both these white cards were matted with Blackberry Bliss card (#133682). The smaller matted card was attached to the card with Stampin’ Dimensionals (#104430).

I wrapped the Metallic Mesh Ribbon (#153550) around the card front then attached it to the Basic White base card. The butterflies were cut with the Brilliant Wings dies (#155523) from Blackberry Bliss card and Silver Foil Specialty (#156457). The Silver butterfly was attached to the base butterfly with Mini Glue Dots (#103683), then taped to the card.

Happy Birthday is from the Artistically Inked stamp set (#154542) and stamped with Blackberry Bliss ink (#147092). I cut this with the die from the Bloom Dies (#155989). The sentiment was attached with Stampin’ Dimensionals.

“Love what you do and share what you love.”

Stay safe & keep crafting!!


Saturday 25 September 2021

Scrapbook page

Hello friends,

Unfortunately I don’t get a lot of time to do much scrapbooking so thought it was time to do a page.


The base page is Very Vanilla 12”x12” cardstock (#144239). I cut a variety of the In Good Taste 12”x12” Designer Series Paper (#152494) with 2 sizes of the Hippo & Friends Dies (#153585) and taped them to the page.

The photo was matted with Night Of Navy card (#106577), the next layer is Crumb Cake card (#121685) followed by another Night Of Navy card.

The Brushed Metallic 12”x12” cardstock (#153524) was cut with the dies from the Layering Hugs (#155860). I cut a label from the Hippo & Friends dies which I will add the journaling to, and this was placed over the detailed die cut. The small leaves and flowers are also cut with dies from the Layering Hugs. I had adhered the Adhesive Sheets (#152334) to the back of the Metallic Foil before cutting. This makes it very easy to attach these fine cut-outs to the page.

“Love what you do and share what you love”

Stay safe & keep crafting!!


Friday 24 September 2021

Sale-a-bration Summer Shadows Dies

Hi my friends,

Sale-a-bration continues till 30th September, but time is running out if you would still like to get some of the beautiful products (with each $90/$180 order in Australia). I have used 2 of the products on this birthday card.


The Beautifully Penned Designer Series Paper (#156630), from Sale-a-bration, was matted with Basic Black card (#121688), then this was attached to the Basic White base card (#159228).

The flowers and leaves are cut with the dies from the Summer Shadows (#156618). These dies are available from Sale-a-bration with a $180 purchase. The card stock used for the flowers and leaves are Pale Papaya (#155669), Pumpkin Pie (#108601), Blushing Bride (#131287), Flirty Flamingo (#141421), So Saffron (#108611), Crushed Curry (#131288), Fresh Freesia (#155614), Highland Heather (#147010), Soft Sea Foam (#147012) and Pear Pizzaz (#131290).


I adhered the Adhesive Sheets (#152334) to the card used on the top of the flowers and leaves before cutting with the dies. The orange and mauve flowers were attached with Stampin’ Dimensionals (104430).

The sentiment is from the Blossoms In Bloom stamp set (#158283). This was stamped with Tuxedo Black Memento ink (#132708) and cut with the Messages Die (#154422) then attached with Mini Stampin’ Dimensionals (#144108).

I added the sparkle on the detailed die-cut flowers with the Clear Wink Of Stella Brush (#141897).

The week end is here again, so stay safe & have a crafty weekend!!

“Love what you do and share what you love.”


Thursday 23 September 2021

Blackberry Beauty Ephemera Pack

Hello,

The Blackberry Beauty Ephemera Pack (#156469), consists of 40 pre-cut pieces including the leafy images and label used on this card.


The Gold Foil Sheet (#132622) was dry embossed with the Tasteful Textile 3D Embossing Folder (#152718), then matted with Blackberry Bliss card (#133682). I wrapped the Gold trim from the Simply Elegant Trim (#155766) around the card front before attaching it to the Basic White base card (#159228).
I taped the smaller leaf image to the card and used Stampin’ Dimensionals (#104430) for the larger leaves.

 I stamped the sentiment from Blossoms In Bloom stamp set (#158283) with Blackberry Bliss ink (#147091) onto the pre-cut label. The bird was also stamped with Blackberry Bliss ink. This bird is from the Beauty Of Tomorrow stamp set (#156459) and there is a co-ordinating die to cut this in the Beautiful Leaves Dies 156468). The bird was attached to the card with Mini Stampin’ Dimensionals (#104430).

I added glitter to the large leaves with the Clear Wink Of Stella Brush (#141897). 

“Love what you do and share what you love.”

Stay safe & keep crafting!!


Wednesday 22 September 2021

Sea Life Dies

 Hello & welcome again my friends,

I have used the Sea Life Dies (#155684) to cut the fish and seaweed on this card.


I dry embossed the Balmy Blue card (#147007) using the Seashells 3D Embossing Folder (#154309). This was matted with Pacific Point card (#116202), then attached to the Basic White card (#159228).

The fish and seaweed were cut from the Ombre Specialty Paper (#155784). The large fish and seaweed were attached to the card with Mini Glue Dots (#103683) and I used Mini Stampin’ Dimensionals (#144108) for the small fish.

“Happy Birthday” is from the Blossoms In Bloom stamp set (#152684) and stamped with Pacific Point ink (#147098). This was then cut with the Messages Die (#154422) and attached to the card with Mini Dimensionals.

The Messages die does co-ordinate with 2 stamp sets - Many Happenings (#155001) and Many Messages (#154510) with a great range of sentiments but also great to cut a variety of sentiments from other sets, so very versatile.


“Love what you do and share what you love.”

Stay safe & keep crafting!!


Tuesday 21 September 2021

So Many Snowflakes

Hi friends,


A lovely sparkly Christmas card using the Be Dazzling 6”x6” Specialty Paper (#155529) which is a free product with a $90 order (in Australia). Sale-a-bration is coming to an end on 30th September so don't miss out.


The base card and card front are Very Vanilla card (#106550). I cut the large snowflake from the So Many Snowflakes Dies (#153560) on the card front, then I dry embossed the card front with one of the Wintry 3D Embossing Folder (#155433). I attached the card front to the Be Dazzling Specialty Paper and also added a strip of this glittery paper towards the bottom of the card.

“Season’s Greetings” from the Merriest Moments stamp set (#156353) was stamped with Night Of Navy Ink (#147110) and cut with an Ornate Frames Die (#150664). This was attached to the card with Stampin’ Dimensionals (#104430).

I also cut snowflakes from Night Of Navy card (#106577) and Balmy Blue card (#147007). Both of these were backed with Adhesive Sheets (#152334) before cutting with the dies. I attached these to the card and added an Elegant Faceted Gem (#152464) to the centre of the snowflakes.

The So Many Snowflake Dies are from the annual catalogue and also co-ordinate with the Snowflake Wishes stamp set (#158267). Don’t forget to check out the Christmas sets in the annual catalogue as well as the Mini Catalogue.

“Love what you do and share what you love.”


Stay safe & keep crafting!!


Sunday 19 September 2021

Intricate Leaves Dies

Hello again my friends,

I have been playing with the Gorgeous Leaves Bundle (#158609) again so this is my latest card.


The detailed dies from the Intricate Leaves Dies (#153566) and Basic White card (#159228) which was backed with an Adhesive Sheet (#152334), were used to cut the leaves for the background. I adhered these to the card front and the edges were daubered with Pumpkin Pie ink (#147086) and attached to the Basic White base card.

The sentiment from Very Versailles stamp set (#149275) was stamped with Pumpkin Pie ink and cut with a Tasteful Labels die (#152886). Stampin’ Dimensionals (#104430) were used to attach this to the card.

The leaves from the Gorgeous Leaves stamp set (#153365) were stamped with Crushed Curry ink (#147087), Old Olive ink (#147090) and Cajun Craze ink (#147085). These were also cut with the Intricate leaves Dies.

The bird is from the Happy Holly-Days stamp set (#156342) and stamped with Pumpkin Pie ink, then fussy cut. The branch was cut from Gold Foil (#132622) backed with Adhesive Sheet, with an Intricate Leaves Die and attached to the card. The bird was attached with Stampin’ Dimensionals. Clear Wink Of Stella (#141897) was used on the bird and the stamped leaves.

“Love what you do and share what you love”

Stay safe & keep crafting!!


Saturday 18 September 2021

Slimline card

Hello my friends,

I have made a slimline card using the Dragonfly Garden Bundle (#156224). I cut the base card 21cm x 21cm and scored at 10.5cm


I stamped the floral image and dragonfly from the Dragonfly Garden stamp set (#154411) with Tuxedo Black Memento ink (#132708) on Basic White card (#159228). I coloured the flowers & leaves with Real Red Stampin’ Blends (#154899), Granny Apple Green Stampin’ Blends (#154885) and Daffodil Delight Stampin’ Blends (#154883).

The dragonfly was punched with the Dragonfly Punch (#154240) and I added some glimmer to it using the Clear Wink Of Stella Brush (#141897).

“Happy Birthday” from the (retired) Many Mates stamp set was stamped with Real Red ink (#147084) and cut with the Messages die (#154422).

I matted the floral image with Real Red card (#106578), then this was attached to the Pattern Party Designer Series Paper (#155426). I wrapped the Metallic Mesh Ribbon (#153550) around the card front, then attached this to the Basic White base card. 

The dragonfly & sentiment were attached to the card with Stampin’ Dimensionals (#104430) and the Silver embellishments are from the Silver & Clear Epoxy Essentials (#155567).

“Love what you do and share what you love.”

Stay safe, keep crafting & have a great weekend!!


Thursday 16 September 2021

Gorgeous Leaves stamp set

Hi everyone,

These leaves are from the Gorgeous Leaves stamp set (#153365) and stamped using the “hinged method” with the Stamparatus (#148187).


I stamped the leaves with Crushed Curry ink (#147087), then inked the edges of the leaves with different inks using a dauber and re-stamped. From left to right the inks used were Cajun Craze (#147085), Soft Suede (#119982), Cherry Cobbler (#147083), Pumpkin Pie (#147086) and Old Olive (#147090). I did one leaf at a time before moving the plate one “hinge” each time.

The Crushed Curry card (#131288) was dry embossed with the Timeworn Type 3D Embossing Folder (#156505) and attached to the Very Vanilla card front (#106550). I also attached a small strip of the Gold from the Gold & Rose Gold 6”x6” Metallic Specialty Paper (#156844) to the card front.

The sentiment is from the Biggest Wish stamp set (#155052). “Birthday” was stamped with Crushed Curry ink and “happy” with Cherry Cobbler ink. This was then cut with a Stitched Rectangles Die (#151820) and attached to the card with Stampin’ Dimensionals (#104430).


“Love what you do and share what you love.”

Stay safe & keep crafting!!


Wednesday 15 September 2021

Gorgeous Leaves Bundle

Hello & welcome,

The Gorgeous Leaves Bundle (#158609) consists of the Gorgeous Leaves stamp set (#153365) and the Intricate Leaves Dies (#153566).


I cut the 3 detailed leaves from Mossy Meadow card (#133683), Merry Merlot card (#147005) and Early Espresso card (#121686). All these were backed with Adhesive Sheets (#152334) before cutting with the Intricate Leaves dies.

The other leaves were stamped with VersaMark (#102283) and heat embossed. For the 2 small leaves I used Gold Emboss Powder and for the larger leaf on the right I used Copper Emboss Powder. For the other 2 leaves I mixed the Gold, Copper and Silver Emboss Powders together and was happy with the results. These Gold, Silver & Copper powders are all included in the Metallics pack (#155555). After setting these leaves with the Heat Tool (#129056) they were cut with the Intricate Leaves Dies.

“Happy Birthday” is from the Artistically Inked stamp set (#154542), stamped with Merry Merlot ink (#147112) and cut with the Messages Die (#154422).

The base card is Very Vanilla (#106550). The 2 pieces of DSP are from the In Good Taste Designer Series Paper (#152494) and Merry Merlot card was used to matt the smaller piece.

The stamped leaves were taped to the card except one small gold leaf which was attached with Stampin’ Dimensionals (#104430). The sentiment was also attached with Dimensionals.

“Love what you do and share what you love.”

Stay Safe & keep crafting!!


Tuesday 14 September 2021

Delicate Dahlias & Be Dazzling

Hi my friends,

I am using 2 Sale-a-bration products again today on this card, which are the Delicate Dahlias stamp set (#156601) and the Be Dazzling Specialty Paper (#156629).


Basic White card (#159228) is used for the base, card front and to stamp the flower, leaves and sentiment.

The flower from the Delicate Dahlias stamp set was stamped with Polished Pink ink (#155712) and the leaves are stamped with Soft Succulent ink (#155778). The flower and the leaves were all fussy cut. Happy Birthday from the Artistically Inked stamp set (#154542) was also stamped with Polished Pink ink, then cut with the label die from the Blooms dies (#155989).

I dry embossed a piece of white card with the Dotty Hearts Embossing Folder (#155434). I attached a strip of the Be Dazzling Specialty Paper to the embossed card then attached this to the card front. The edges of the card front were daubered with Polished Pink ink and attached to the base card.

The flower was attached with Stampin’ Dimensionals (#104430) and the leaves with Mini Glue Dots (#103683). Dimensionals were also used to attach the sentiment and I added the From The Heart Faceted Gems (#151154) to the card.


“Love what you do and share what you love.”

Stay safe & keep crafting!!


Monday 13 September 2021

Sale-a-bration Products

Hello friends,

We all love free products and I have used 3 different sale-a-bration products on this card.


The Sale-a-bration products used are the Beautifully Penned 12”x12” Designer Series Paper (#156630), Summer Shadows Dies (#156618) and the Delicate Dahlias stamp set (#156601).

I dry embossed the Basic White card front (#159228) with one of the Greenery Embossing Folders (#152716). I then attached the piece of the Beautifully Penned DSP to the card front. I wrapped the Real Red Double Stitched Satin Ribbon (#151155) around the card front.

The 2 large flowers were cut with the Summer Shadows Dies using Real Red card (#106578) and Basic Black card (#121688). The Basic Black card was backed with Adhesive Sheets (#152334) before cutting. The leaves were also cut with dies from the same set and cut from Garden Green card (#108605) and Soft Sea Foam card (#147012). There was Adhesive sheets on the back of the Garden green card.

The small flowers are from the Delicate Dahlias stamp set. The outline of the flowers were stamped with Real Red ink (#147084) and the inside of the flower was “stamped off” with Real Red ink. I fussy cut these flowers.

The leaves and 2 of the small flowers were taped to the card and I used Stampin’ Dimensionals (#104430) to attach the other flowers.

“Happy Birthday” is from the Shaded Summer stamp set (#155783) which co-ordinates with the Summer Shadows dies. I stamped the sentiment with Real Red ink and this was cut with the Messages die (#154422). The edges were daubered with Real Red ink, the attached to the card with Dimensionals.

I added the Red Wonderful Gems (#153536) to the centre of the flowers.

Don’t miss out on your Sale-a-bration products. It ends on 30th September.

Love what you do and share what you love.”

Stay safe & keep crafting!!


Saturday 11 September 2021

Shaded Summer stamp set

Hi again my friends,

Sale-a-bration continues till the 30th September, so don't miss out on some free products with each $90 order (in Australia). One of the products with $180 order is the Summer Shadows Dies (#156618) and these co-ordinate with the Shaded Summer stamp set (#155783) in the Annual catalogue.


I stamped the flowers from the Shaded Summer stamp set with Misty Moonlight ink (#153118) and Bumble Bee ink (#153116). I stamped the small leaves with Soft Succulent ink (#155778). These were all cut with the Summer Shadows dies.

The Pattern Party Designer Series Paper (#155426) was attached to the Basic White base card (#159228). I cut the Bumble Bee card (#153082) and the Basic White card with the Stitched So Sweetly dies (#151690) and these were taped to the card front.

The Soft Succulent leaves were attached to the card with Mini Glue Dots (#103683) and the 2 floral images were attached with Stampin’ Dimensionals (#104430).

The sentiment is from the Shaded Summer stamp set and stamped with Bumble Bee ink. This was cut with a Tailor Made Tag (#155563). I threaded some of the Gold Simply Elegant Trim (#155766) through the tag and attached the tag to the card with Stampin’ Dimensionals. The Playing With Patterns Resin Dots (#152467) were added to the card.

“Love what you do and share what you love.”

Stay safe & keep crafting!!


Friday 10 September 2021

Christmas Season

Hello again,

The Christmas Season stamp set (#156293) consists of a variety of leaves and pinecones, some of which have been used on this card.


The Painted Christmas Designer Series Paper (#156292) was matted with Evening Evergreen card (#155575), then attached to the Basic White base card (#159228).

The Soft Succulent card (#155777) was cut with a Scalloped Contours Die (#155560). I cut a piece of the Soft Succulent from the 2021-2023 In Color Shimmer Vellum (#155616) and attached it to the Soft Succulent scalloped card.

The leaves were stamped with Evening Evergreen ink (#155576) and the pinecones with Crumb Cake ink (#147116) and Early Espresso ink (#147114). These were cut with the co-ordinating dies from the Seasonal Labels Dies (#156299).

I attached the Gold Fine Art Ribbon (#154561) to the card, then attached the leaves and pinecones with Mini Glue Dots (#103683) and Stampin’ Dimensionals (#104430). 

“Season’s Greetings” is in the Christmas To Remember stamp set (#156300) and stamped with Soft Succulent ink (#155778). This was cut with a Bloom die (#155989) and also attached with Stampin’ Dimensionals. The embellishment below the sentiment is from the Brushed Metallic Adhesive-Backed Dots (#156506). I also added shimmer to the pinecones and leaves using the Clear Wink Of Stella Brush (#141897)


“Love what you do and share what you love.”

Stay safe, keep crafting and have a great weekend!!


Thursday 9 September 2021

Layering Hugs Dies

Hi,

You can’t go past gold and white combined with beautiful products for an elegant card like this one. It was very easy to make as well.


I taped the beautiful Simply Elegant Specialty Designer Series Paper (#155761) to the Basic White base card (#159228). The detailed “hugs” was cut with a die from the Layering Hugs Dies (#155860) using the Brushed Metallic 12”x12” cardstock (#153524).

I dry embossed a piece of Basic White card with the Timeworn Type 3D Embossing Folder (#156505). This was matted with a piece of Brushed Metallic cardstock. This was then attached to the card front with Stampin’ Dimensionals (#104430).

“Hugs” was attached to the white card with Mini Glue Dots (#103683). “On your special day” from the Sending Hugs stamp set (#155022) was stamped with VersaMark (#102283) and heat embossed with Gold Stampin’ Emboss Powder (#155555) and set with the Heat Tool (#129056). The die from the Layering Hugs was used to cut the sentiment and I also attached this to the card with Mini Glue Dots.

“Love what you do and share what you love.”

Stay Safe & keep crafting!!


Wednesday 8 September 2021

Christmas Season Bundle

Hello my friends,

I have used the Christmas Season Bundle (#156801) for this Christmas card.


The Very Vanilla card front (#106550) was dry embossed with the Merry Melody 3D Embossing Folder (#156392), then matted with Garden Green card (#108605). This was taped to the Very Vanilla base card.

The pine cones and leaves are from the Christmas Season stamp set (#156293). The pine cones were stamped with Crumb Cake ink (#147116) & Soft Suede ink (#147115). The leaves were stamped with Garden Green ink (#147089), Old Olive ink (#147090) and Pear Pizzaz ink (#147104). The pinecones and leaves are all cut from the Seasonal Labels Dies (#156299).

“Merry Christmas” is from the Peaceful Deer stamp set (#156891) and stamped with Garden Green ink. A die from the Seasonal Labels die was used to cut the sentiment. The leaves and small pinecone were taped to the card and the large pinecone and sentiment were attached with Stampin’ Dimensionals (#104430).

You probably can’t see that I used the Clear Wink Of Stella (#141897) on the pinecones and leaves to give a bit of glimmer.

Have you started your Christmas cards yet? There is such a great variety of Christmas products in the Mini catalogue and also some in the Annual catalogue.


“Love what you do and share what you love.”

Stay safe & keep crafting!!


Tuesday 7 September 2021

Sending Hugs Bundle

Welcome everyone,

The Sending Hugs Bundle (#155859) consists of the Sending Hugs stamp set (#155022) and the Layering Hugs Dies (#155860), which I have used on todays card.


I stamped the image from the stamp set with Tuxedo Black Memento ink (#132708) onto Basic White card (#159228). I coloured the image with the following  Stampin’ Blends - Granny Apple Green (#154885), Polished Pink (#155520), Mint Macaron (#154889), Daffodil Delight (#154883) and Flirty Flamingo (#154884).

I cut the detailed leaf/flower/hugs image from the Gold Shimmer Vellum (#156471) and attached it over the stamped image. The vellum was backed with Adhesive sheet (#152334). “Hugs” were cut from the Polished Pink card (#155711) and attached to the card with Stampin’ Dimensionals (#104430). I added some glimmer to “Hugs” with the Clear Wink Of Stella Brush (#141897).

I stamped “birthday” and “& kisses” with Polished Pink ink (#155712) and these were cut with a die also from the Layering Hugs. These were attached with Mini Stampin’ Dimensionals (#144108).

The 2 corners were punched with the Detailed Trio punch (#146320). The card front was then matted with Polished Pink card. The base card is Basic White.

“Love what you do and share what you love.”

Stay safe & keep crafting!!


Monday 6 September 2021

Happy Holly-Days

Hi everyone,


3 cards today with just a slight variation in each. The bird is from the Happy Holly-Days stamp set (#156342).


The Basic White card front was dry embossed with the Star-Crossed Embossing Folder (#156567). The Painted Christmas Designer Series Paper (#156292) was attached to the card front. The holly leaves design on the DSP is on the reverse of the more colourful design. I daubered the edges of the card fronts with Real Red ink and Garden Green ink (#147089).

The bird was stamped with Real Red ink (#147084) onto Basic White card (#159228). This and the Real Red card (#106578) & the Garden Green card (#108605) were cut with a Scalloped Contours die (#155560). The scalloped rectangles were taped together, then attached to the card front with Stampin’ Dimensionals (#104430).

The sentiment on the first card is from the Peaceful Deers stamp set (#156891) and stamped with Real Red ink.
“Seasons Greeting’s” from Merriest Moments stamp set (#156353) and “Merry Christmas” from Peaceful Deers stamp set were both stamped with Garden Green ink.
 The dies to cut the sentiments (in order) are from the Stitched Rectangles dies (#151820), the Ornate Frames Dies (#150664) and the Seasonal Labels Dies (#156299). Each were attached with Stampin’ Dimensionals.

“Love what you do and share what you love.”

Stay safe & keep crafting!!


Sunday 5 September 2021

Cork Specialty Paper & Dragonfly Garden

Hi,

Firstly, a very happy Father’s Day to all fathers. I hope you are having a relaxing day.

I have used the beautiful Cork 12”x12” Specialty Paper (#156393) for the background of this card.


I stamped the image from the Dragonfly Garden stamp set (#154411) on to the Cork Specialty Paper, using Tuxedo Black Memento ink (#132708). I matted this with the Shaded Spruce card (#147006) and attached the card front to the Basic White base card (#159228). The gold & white striped paper is from the Expressions In Ink 12”x12” Specialty Designer Series Paper (#155464).

I stamped the Dragonfly from the Dragonfly Garden Stamp set using VersaMark (#102283) and heat embossed with Gold Stampin’ Emboss Powder (#155555), then set with the Heat Tool (#129056). This was then punched with the Dragonflies Punch (#154240) ands attached to the card with Stampin’ Dimensionals (#104430).

The sentiment from Encircled In Friendship stamp set (#155408) was stamped with Shaded Spruce ink (#147088) and cut with a Bloom Die (#155989). This was attached with Mini Stampin’ Dimensionals (#144108).

“Love what you do and share what you love.”

Stay safe & keep crafting!!


Friday 3 September 2021

Be Dazzling Specialty Paper

Hello friends,

This card is highlighting 2 of the Sale-a-bration products which you can get for free. With each $90 order (in Australia) you can choose 1 free product.


The base card is Very Vanilla (#106550). I dry embossed the Blackberry Bliss card (#133682) with the Wintry 3D Embossing Folder (#155433). There are 2 folders in this set, one with snowflakes which I have used on this card, and the other has pine leaves.

I daubered the Peaceful Prints Designer Series Paper (#156628) from Sale-a-bration with Blackberry Bliss ink (#147092) and attached this to the card.

I cut Blackberry Bliss card with a die from the Delicate Baubles Dies (#156383). The detailed die from the same set was used to cut the Be Dazzling 6”x6” Specialty Paper (#156629), also from Sale-a-bration. I had adhered Adhesive Sheet (#152334) to the back of the Be Dazzling paper before cutting. This was then adhered to the solid bauble, then attached to the card with Stampin’ Dimensionals (#104430).

I punched the ends of the 1/2” strip of Be Dazzling Specialty Paper with the Banners Pick A Punch (#153608). This was taped to the card. The sentiment from the Peaceful Deer stamp set (#156891) was stamped with Blackberry Bliss ink and cut with a Seasonal Labels Die (#156299). Mini Stampin’ Dimensionals (#144108) were used to attach the sentiment.

Sale-bration continues till 30th September, so if there is a product you would like don’t delay in placing your order here lesleyjendra.stampinup.net or email me 

“Love what you do and share what you love.”

Stay safe & keep crafting!!


Thursday 2 September 2021

Peaceful Deer Bundle

Hi & welcome,

A simple card today using the cute deer from the Peaceful Deer Bundle (#156391).


I dry embossed the Soft Succulent Vellum from the 2021-2023 In Color Shimmer Vellum (#155616) with the Evergreen Forest 3D Embossing Folder (#153576). 
The sentiment from the Peaceful Deer stamp set (#156891) was stamped with Soft Succulent ink (#155778). I cut the Very Vanilla card (#106550) with a Stitched So Sweetly Die (#151690), then I taped the vellum to the back of the “frame”. This was then attached to the Soft Succulent base card (#155777).

I stamped the deers with VersaMark (#102283) and heat embossed with Gold Stampin’ Emboss Powder (#155555), then set with the Heat Tool (#129056). These were punched with the Deer Builder Punch (#156390). The 2 deer were attached to the card with Mini Stampin’ Dimensionals (#144108).

“Love what you do and share what you love.”

Stay safe & keep crafting!!