Showing posts with label #wrappedintextureembossingfolder. Show all posts

Tuesday, 24 November 2020

Poinsettia Dies

Hello my friends,

I have chosen to use subtle colours on this Christmas card using the Poinsettia Dies (#153522) to cut the flower.


As well as the Whisper White card (#106549) I have used the Gold from the Brushed Metallic 12” x 12” cardstock. I cut a piece of the white card using one of the Curvy Dies (#154319), then dry embossed the lower piece with one of the Wrapped In Texture Embossing Folders (#153574). Both pieces were then attached to the Gold Metallic card.
I cut the 4 layers of the poinsettia using the Poinsettia Dies and sponged the edges of the petals with Soft Sea Foam ink (#147102). Clear Wink Of Stella (#141897) was brushed onto the petals giving a lovely glimmer. I assembled the flower with Mini Glue Dots (#103683) and then it was attached to the card with Stampin’ Dimensionals (#104430). 
The “berries” were cut with a die from the Poinsettia Dies and the leaves from the Soft Seafoam card (#147012) were cut with a die from the Curvy Dies. All were attached with Mini Glue Dots.
“Merry Christmas” is from the Curvy Christmas stamp set (#p155364). This was heat embossed with VersaMark (#102283) and Gold Stampin’ Emboss Powder (#109129), then set with the Heat Tool (#129056). A die from the Ornate Frames (#150664) was used to cut the sentiment. Mini Stampin’ Dimensionals (#144108) were used to attach the sentiment to the card. A Gilded Gem (#152478) was attached to the centre of the poinsettia.

Have a fantastic day!!

“Love what you do and share what you love”


Wednesday, 18 November 2020

Feels Like Frost Specialty Designer Series Paper

Hello my friends,

I always say that you don't need to do a lot on a card when using many of the beautiful Stampin’ Up! Designer Paper. The scene on this paper from the Feels Like Frost 6”x6” Specialty Designer Series Paper (#150444) is one of those papers.


I dry embossed the Whisper White card (#106549) using the Wrapped In Texture Embossing Folder (#153574). I cut a circle using a Layering Circles Dies (#151770) from the DSP, then attached this to the White card. The Snowflake Splendor 1/4” Ribbon (#153548) was wrapped around the cardfront, then this was attached to the Whisper White base card.
The sentiment from the Wrapped In Christmas stamp set (#153481) was stamped with VersaMark (#102283), then heat embossed with Gold Stampin’ Emboss Powder (#109129) and set with the Heat Tool (#129056). The sentiment and the scalloped circle from the Gold Foil Sheet (#132622) were also cut with Layering Circles Dies. The sentiment was attached to the card with Stampin’ Dimensionals (#104430).
The star and snowflake embellishments are from the Snowflake Sequins (#150443) and glued to the card with the Fine-Tip Glue Pen (#138309).

“Love what you do and share what you love”.

Enjoy your day!!


Tuesday, 3 November 2020

Pine Woods Dies

Hi friends,

This lovely tree was cut with dies from the Pine Woods Dies (#153563).


I cut the solid tree from the Rainbow Glimmer Paper (#153056). The detailed tree was cut from Brushed Metallic 12”x12” cardstock (#153524) which I had adhered the Adhesive Sheets (#152334) to the back before cutting.
The base card is Whisper White (#106549), the next layer is Cherry Cobbler (#121681) then Whisper White again. This was dry embossed with the Texture Textile 3D  Embossing Folder (#152718). The Designer Series Paper is from the Classic Christmas DSP (#155969). This paper is now available for purchase, along with the Curvy Celebration stamp sets and dies. “Merry Christmas” is from the Curvy Christmas stamp set (#155364) and stamped with Cherry Cobbler ink (#147083). This sentiment and the Cherry Cobbler card were punched with the Banners Pick A Punch (#153608). And 
I cut a piece of Whisper White card with a Stitched Nested Labels Die (#149638) and dry embossed it with one of the Wrapped In Christmas Embossing Folder (#153574). The tree was attached to this with Stampin’ Dimensionals (#104430), then the card was finished by adding the Cherry Cobbler rhinestones from the Holiday Rhinestone Basic Jewels (#150457). 

You can check out the Curvy Celebrations here

Enjoy your day,

 “Love what you do and share what you love”.


Friday, 23 October 2020

Graces Garden

Welcome friends,

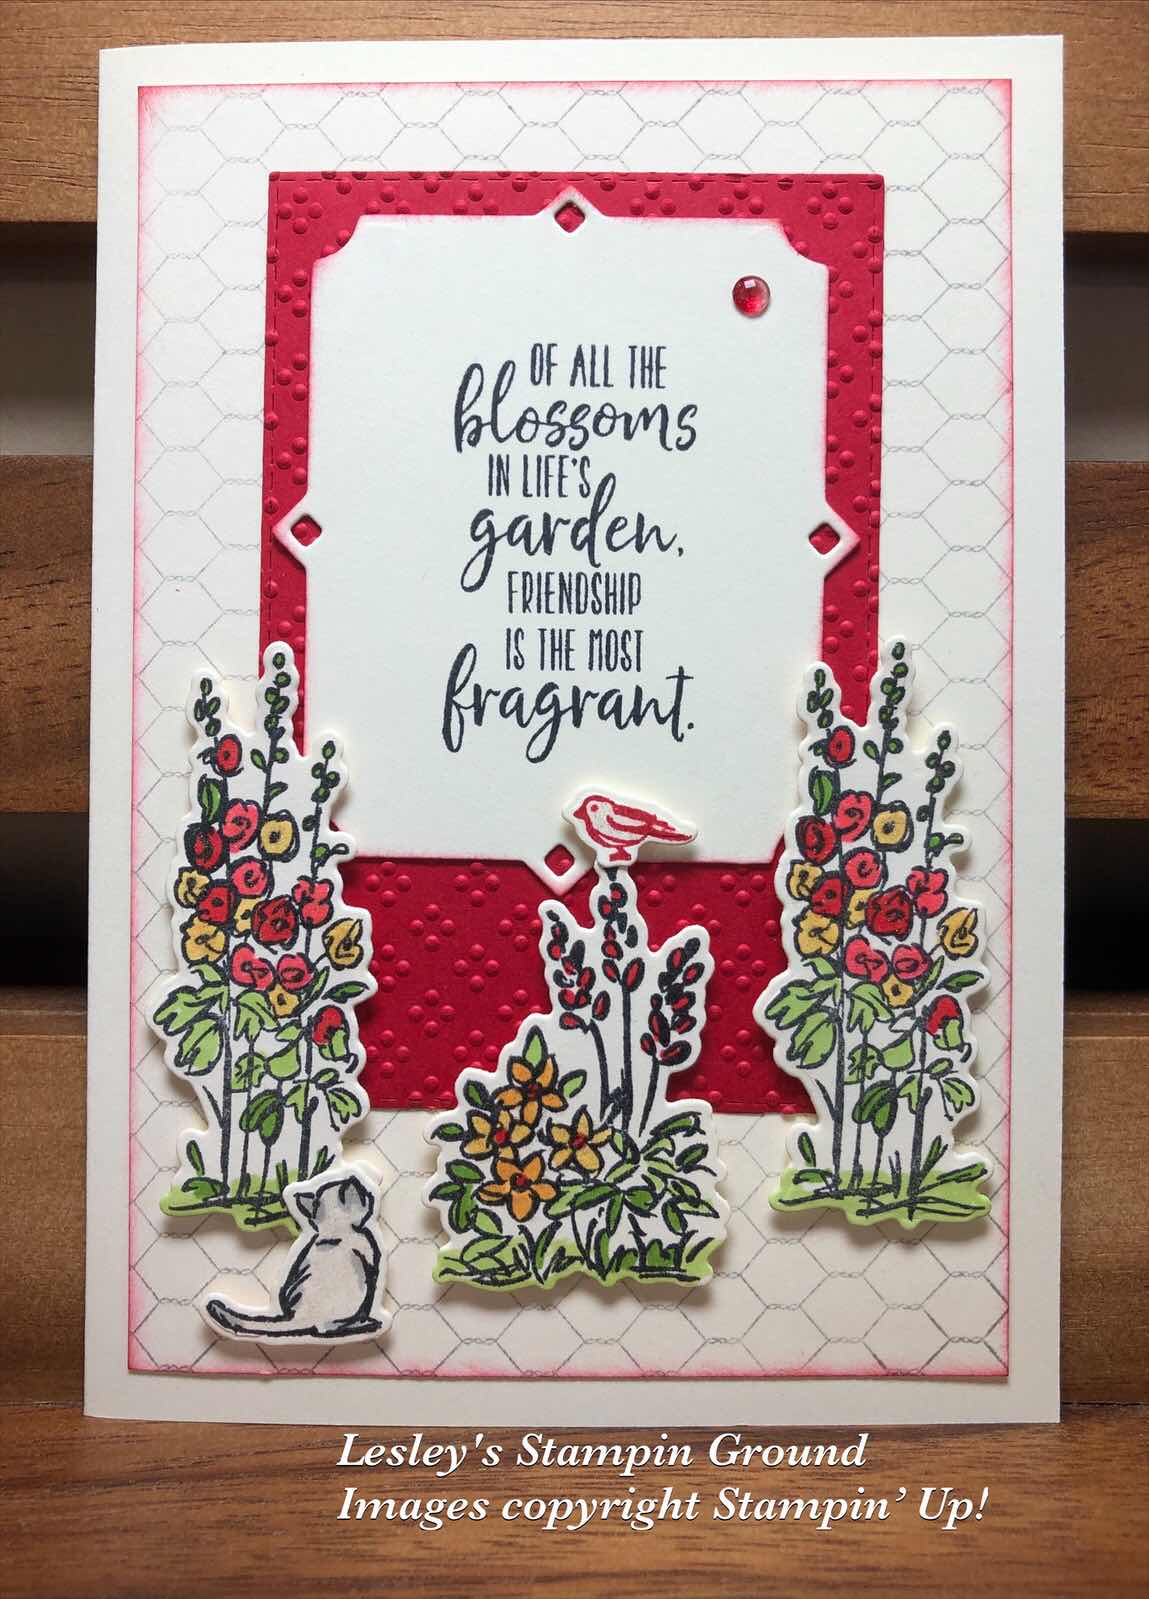
Another challenge for myself today. I chose a stamp and a die which I haven’t used for some time, so my challenge was to use these on a card. The stamp is the All Wired Up background stamp (#149262) and a die from the Beautiful Boughs (#150661).


The cardstock is Very Vanilla (#106650) and Real Red (#106578). I stamped the background with the All Wired Up stamp using Smokey Slate ink (#147113). The Real Red card was cut with a Stitched Rectangles Die (#151820) and dry embossed with one of the Wrapped In Texture Embossing Folder (#153574).
The sentiment, flowers, cat and bird are all images from Graces Garden stamp set (#p151513). I used Tuxedo Black Memento ink (#132708) to stamp the flowers, cat and sentiment. The bird was stamped with Real Red ink (#147084). The sentiment was cut with a die from the Beautiful Boughs dies and the other stamped images were cut with dies from the Garden Gateway Dies (#151512).
The Stampin’ Blends used to colour the images are Real Red (#154899), Mango Melody (#154888), Granny Apple Green (#154885) and Smokey Slate (#154904).
The flowers, bird and cat are attached to the card with Mini Stampin’ Dimensionals (#144108). A red Wonderful Gem (#153536) was added to the sentiment and I added glimmer to the flowers, bird & cat using the Clear Wink Of Stella Glitter Brush (#141897).

I hope your are having a crafty day!!


Sunday, 13 September 2020

Daisy Lane

Hi,

I love the simplicity of the silver and white on this card.


The cardstock I have used is Whisper White (#106549) and Silver Foil Sheets (#132178). I dry embossed the Whisper White cardfront with one of the Wrapped In Texture Embossing Folders (#153574). This was attached to a piece of Silver Foil Sheet. I attached a smaller piece of Silver Foil to the cardfront, then wrapped the 1/2” Metallic Mesh Ribbon (#153550) around this, then attached the whole piece to the Whisper White base card.
I stamped 2 of each of the large and small daisies from the Daisy Lane stamp set (#c149325). These were stamped with VersaMark (#102283) and heat embossed with Silver Stampin’ Emboss Powder (#109131) and set with the Heat Tool (#129056). The large daisies were punched with the Daisy Punch (#143713) and the smaller daisies with the Medium Daisy Punch (#149517). These were all assembled using Mini Glue Dots (#103683) then attached to the card with Stampin’ Dimensionals (#104430). 
I adhered the Adhesive Sheets (#152334) to the back of the Silver Foil Sheet and cut the leaves and flourishes with dies from the Butterfly Beauty Dies (#151819) and adhered these to the card. “Happy Anniversary” from the Many Mates stamp set (#c152633) was also silver embossed and was cut with a Stitched So Sweetly Die (#151690) and attached with Stampin’ Dimensionals. The Clear embellishments from the Frosted & Clear Epoxy Droplets (#147801) were added to the flower, sentiment and card to finish the card.

Have a great day, hopefully with some crafting time.


Tuesday, 1 September 2020

Beautiful Boughs Dies

Hi friends,

A Christmas card using a variety of dies and embossing folders to create texture and layers.


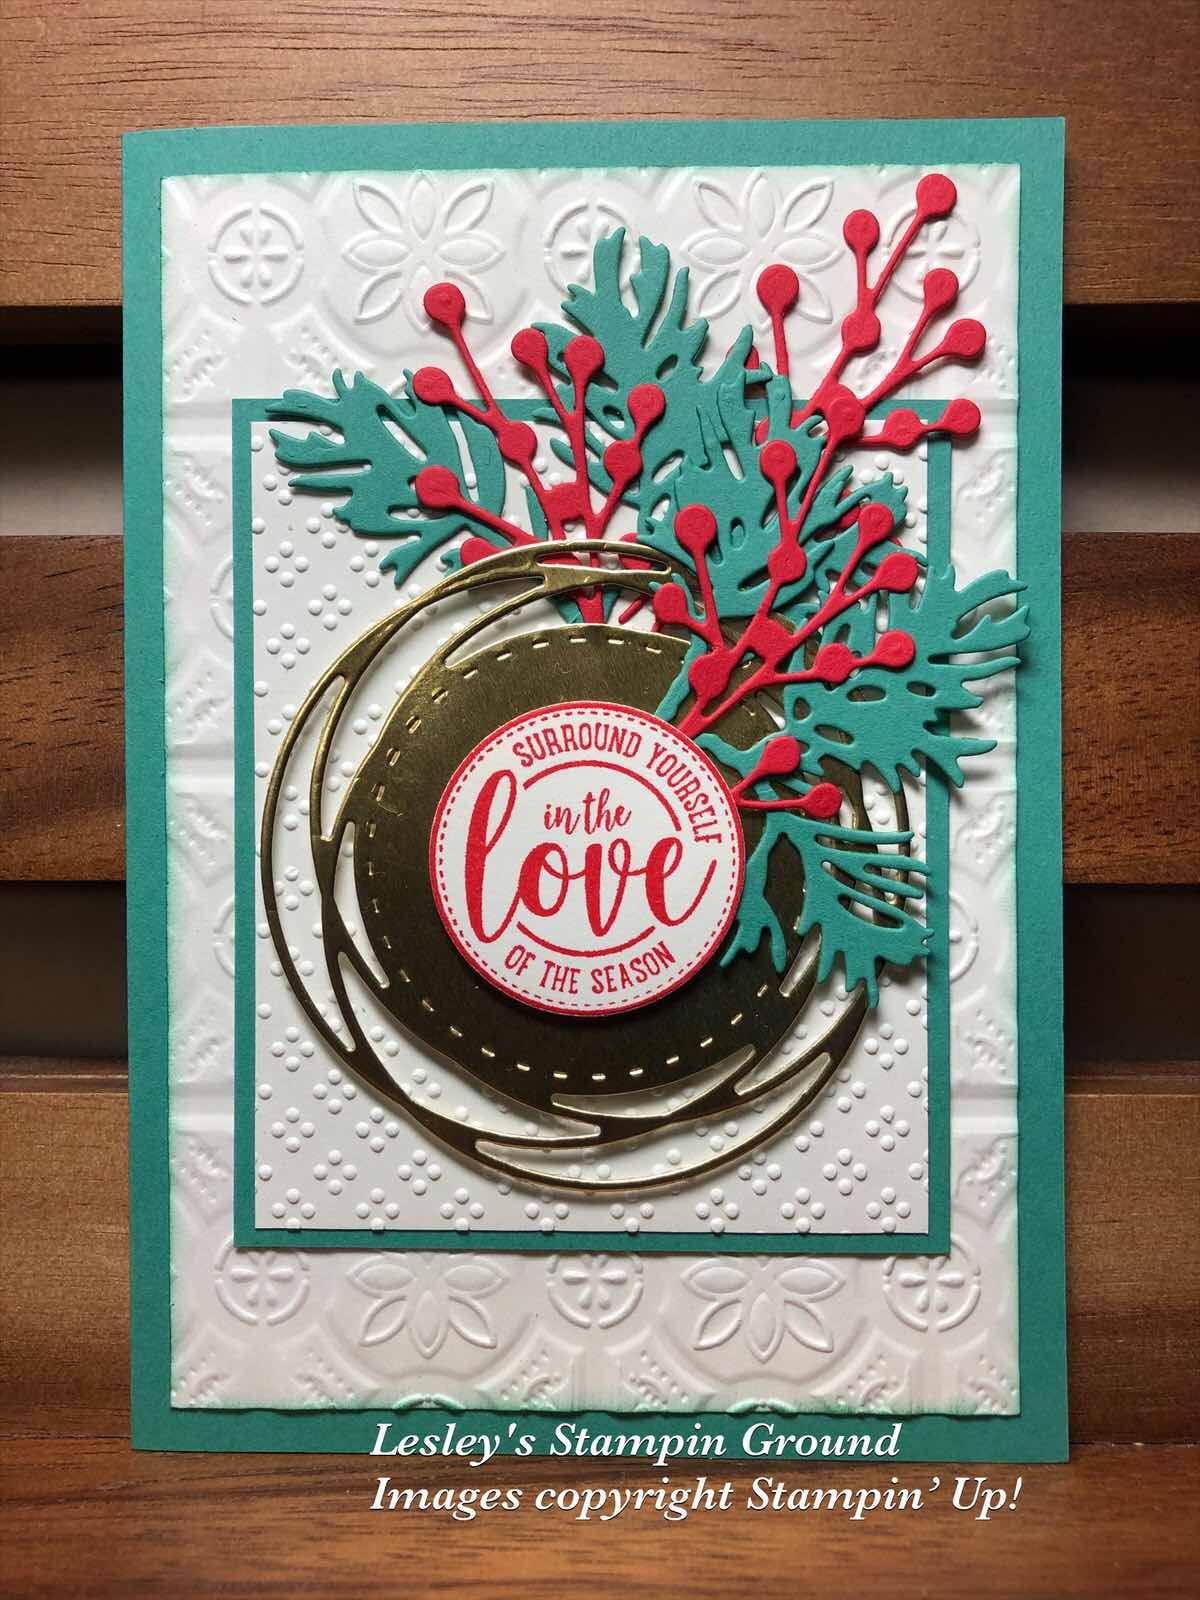
I dry embossed the larger Very Vanilla Card (#106550) using the Tin Tile 3D Embossing Folder (#151801) and the smaller Very Vanilla card with one of the Wrapped In Texture Embossing Folder (#153574). Just Jade card (#153084) is used for the base and to mat the smaller Very Vanilla card. The leaves from the Beautiful Boughs dies (#150661) were also cut from Just Jade card. I used Poppy Parade card (#121694) for the berries from the Poinsettia Dies (#153522). The Gold Foil Sheet (#132622) was used for the detailed circle which you will find in the Painted Poppies Dies (#151605). The sentiment from Wrapped In Christmas stamp set (#c153481) was stamped with Poppy Parade ink (#147050) and cut with a Layering Circles Die (#151770). I attached this and the Gold Foil die cut with Stampin’ Dimensionals (#104430). Mini Glue Dots (#103683) were used to attach the leaves and berries.

Enjoy your day!!