The retiring products used here are Birds & More Dies, In Color Shimmer Vellum, Ombre Specialty Paper and Bloom Where You’re Planted Designer Series Paper.
Thursday, 31 March 2022
Birds & More Dies
Hello again lovely friends,

The retiring products used here are Birds & More Dies, In Color Shimmer Vellum, Ombre Specialty Paper and Bloom Where You’re Planted Designer Series Paper.
I am highlighting more of the retiring products today. Here I have used the Birds & More Dies (#152721).
I backed a piece of the Soft Succulent 2021-2023 In Color Shimmer Vellum (#155616) with Adhesive Sheet (#152334) before cutting with the die with the circular leaves. I then cut it with a circle from the Layering Circles Dies (#151770). I then cut the Mother Of Pearl Specialty Paper (#157666) with a scalloped circle die from the Layering Circles. The Circular leaves were attached to this.
The birds are cut from the Ombre Specialty Paper (#155784) using the Birds & More Dies.
The DSP from Bloom Where You’re Planted Designer Series Paper (#155696) was matted with Soft Succulent Shimmer Vellum, then attached to the Basic White Base card (#159228). “Happy Birthday” from the Blossoms In Bloom Stamp Set (#158283) was stamped with Evening Evergreen ink (#155576) and cut with the label die from the Bloom dies (#155989). I also cut the Mother Of Pearl Specialty paper with this die.
The circle was attached with Stampin’ Dimensionals (#104430) and Mini Glue Dots (#103683) were used to attach the birds. The embellishments are from the (retired) Garden Gems.
The retiring products used here are Birds & More Dies, In Color Shimmer Vellum, Ombre Specialty Paper and Bloom Where You’re Planted Designer Series Paper.
Check out all the retiring products here
“Love what you do and share what you love.”
Wednesday, 30 March 2022
Pattern Party Designer Series Paper
Hello friends,
The serrated edges were cut with one of the Basic Borders dies (#155558). I cut the DSP, Basic Black card (#121688), Real Red card (#106578) and the Basic White base card (#159228) with this die. The Basic Black was attached to the base card, then the DSP attached on top. The Real Red card was attached to the base of the card as seen in the photo.
I coloured the flowers from the DSP with Real Red Stampin’ Blends (#154899). I fussy cut 3 flowers to attach to the Real Red card. “Happy Birthday” from the Expressions Of Friendship stamp set (#158460) was stamped with VersaMark (#102283) and I used the Black Stampin’ Emboss Powder (#155554) which was set with the Heat Tool (#129056). The embellishments are the Matte Black Dots (#154284).
The Pattern Party Designer Series Paper is retiring.
“Love what you do and share what you love.”
Tuesday, 29 March 2022
Bloom Where You’re Planted Designer Series Paper
Hi & welcome friends,
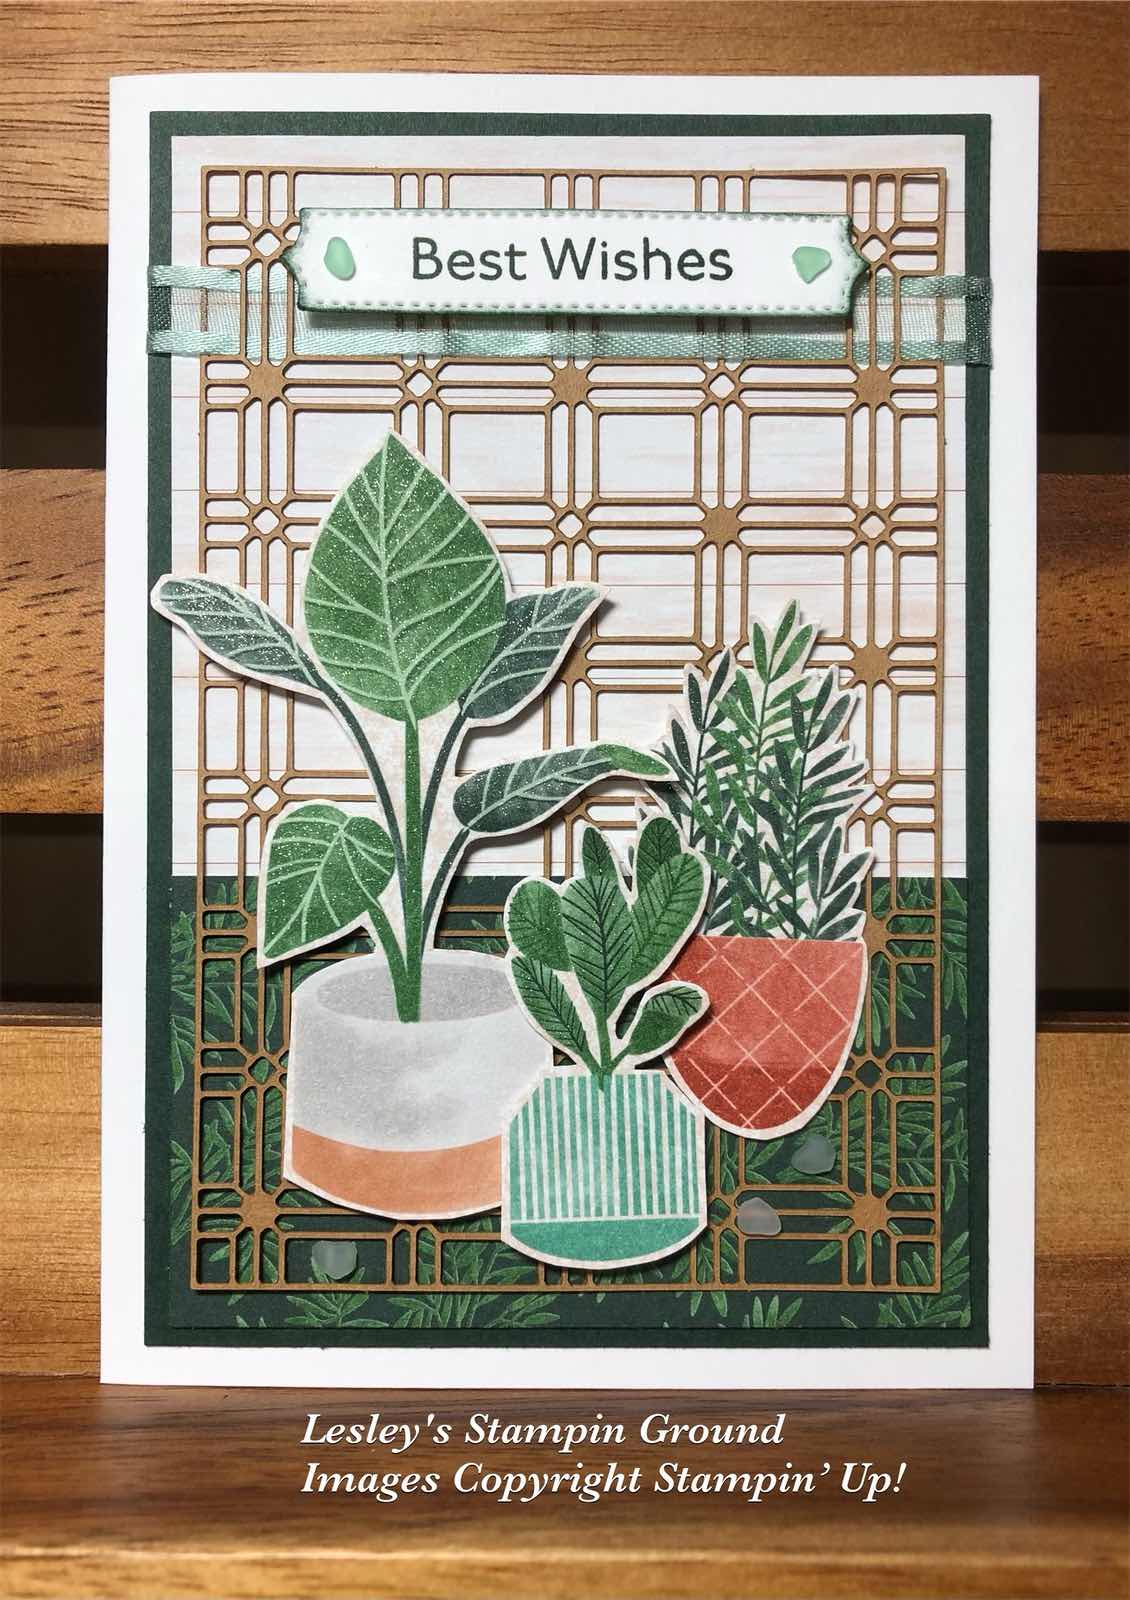
I threaded the Soft Succulent Open Weave Ribbon (#155780) through the Paper Lattice and wrapped it around the card front. “Best Wishes” from the Art Gallery stamp set (#158201) was stamped with Evening Evergreen ink (#155576) and cut with a Potted Succulents die (#154330). I used Stampin’ Dimensionals (#104430) to attach the sentiment. The embellishments are Faux Sea Glass Shapes (#158141).
Bloom Where You’re Planted Designer Series Paper (#155698) is retiring, as is the Paper Lattice (#155697).
The Woodgrain paper, the dark green foliage paper and the plants are all from the Bloom Where You’re Planted DSP. I fussy cut the potted plants.
The base card is Basic White (#159228). I attached the Woodgrain & green DSP to the Evening Evergreen card (#155575). The Paper Lattice was attached on top with Mini Glue Dots (#103683). The plants on the left and in the middle were attached to the card with Mini Stampin’ Dimensionals (#144108) and the 3rd plant was attached with Mini Glue Dots.
I threaded the Soft Succulent Open Weave Ribbon (#155780) through the Paper Lattice and wrapped it around the card front. “Best Wishes” from the Art Gallery stamp set (#158201) was stamped with Evening Evergreen ink (#155576) and cut with a Potted Succulents die (#154330). I used Stampin’ Dimensionals (#104430) to attach the sentiment. The embellishments are Faux Sea Glass Shapes (#158141).
If you haven’t checked out the retiring products click on the link here
“Love what you do and share what you love.”
Monday, 28 March 2022
Sailing Home stamp set
Hi stamping friends,
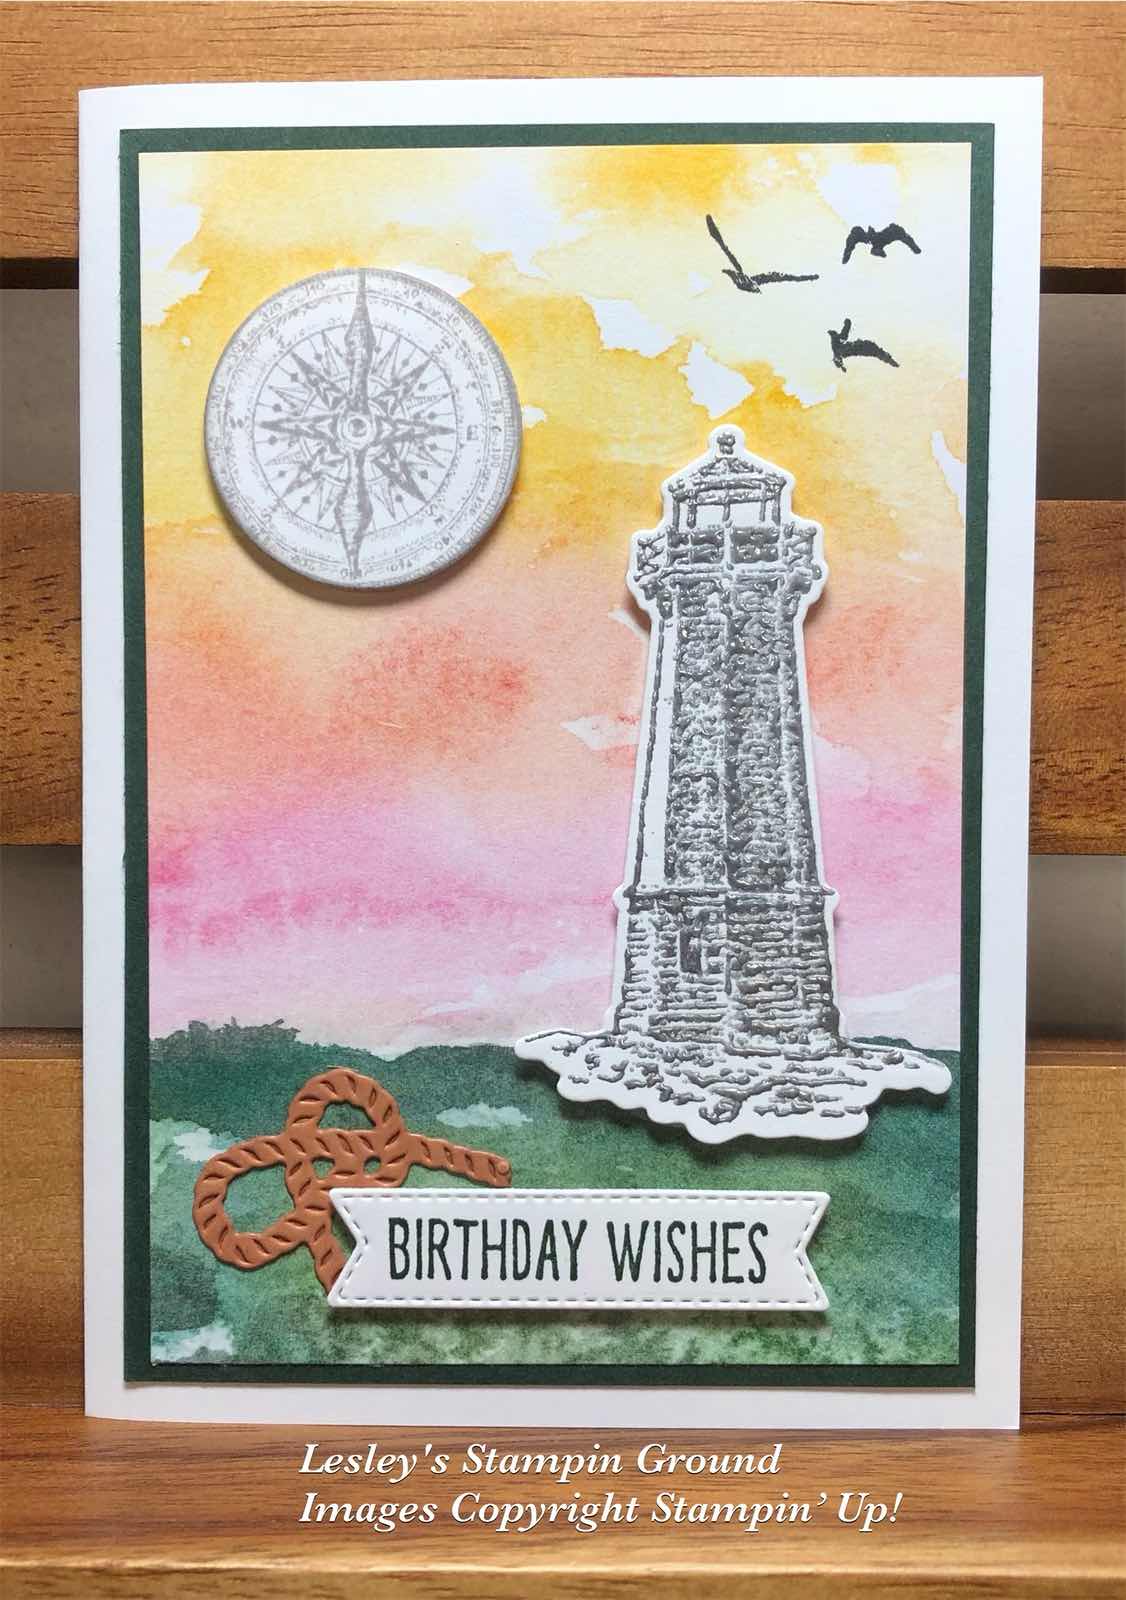
The retiring products here are the Sailing Home stamp set, Smooth Sailing Dies, Bumble Bee card and the Tasteful Labels dies.
Another of my favourite stamp sets is retiring, which is the Sailing Home stamp set (#149457) along with the co-ordinating Smooth Sailing dies (#149576).
I used one of the beautiful papers from the New Horizons 6”x6” Designer Series Paper (#157768) for the background. The birds from the Sailing Home stamp set was stamped with Tuxedo Black Memento ink (#132708) onto the DSP. This was matted with Evening Evergreen card (#155575), then attached to the Basic White base card (#159228).
I stamped the lighthouse from the Sailing Home stamp set with VersaMark (#102283) and heat embossed with Silver Stampin’ Emboss Powder (#155555) which was set with the Heat Tool (#129056). I used dies from the Smooth Sailing Die to cut the lighthouse and the rope. I used Cinnamon Cider card (#153083) for the rope which had Adhesive Sheet (#152334) on the back. The compass is also from the Sailing Home stamp set and stamped with Smoky Slate ink (#147113). I cut this with a Layering Circles Die (#151770).
“Happy Birthday” from the Home & Garden stamp set (#157910) was stamped with Evening Evergreen ink (#155576) and cut with a Tasteful Labels Die (#152886). The compass, lighthouse and sentiment were all attached with Stampin’ Dimensionals (#104330) and Mini Stampin’ Dimensionals (#144108).
“Love what you do and share what you love.”
Sunday, 27 March 2022
Shaded Summer stamp set
Hello friends,


I am continuing to highlight some of the retiring products again on this card.
I attached the Paper Lattice (#155697) using Mini Glue Dots (#103683) to the DSP from In Good Taste Designer Series Paper (#152494). This was then attached to the Basic White base card (#159228).
The stamped floral images are from the Shaded Summer stamp set ($155783). I stamped each image with Granny Apple Green Ink (#147095) and Mango Melody ink (#147093). I cut the images with the dies from the Summer Shadows dies which were from a previous Sale-a-bration. I fussy cut the flowers from the Mango Melody images and attached them on top of the flowers on the Granny Apple Green images with Stampin’ Dimensionals (#104430).
Happy Birthday is also from the Shaded Summer stamp set and stamped with Mango Melody ink. A die from the Bloom Dies (#155989) was used to cut the sentiment. The embellishments are from the Holiday Rhinestone Basic Jewels (#150457) and attached to the flower centres.
The retiring products used are the In Good Taste Designer Series Paper, Paper Lattice and the Holiday Rhinestone Basic Jewels.
“Love what you do and share what you love.”
Saturday, 26 March 2022
Pansy Petals Designer Series Paper
Hi stamping friends,
“Love what you do and share what you love.”
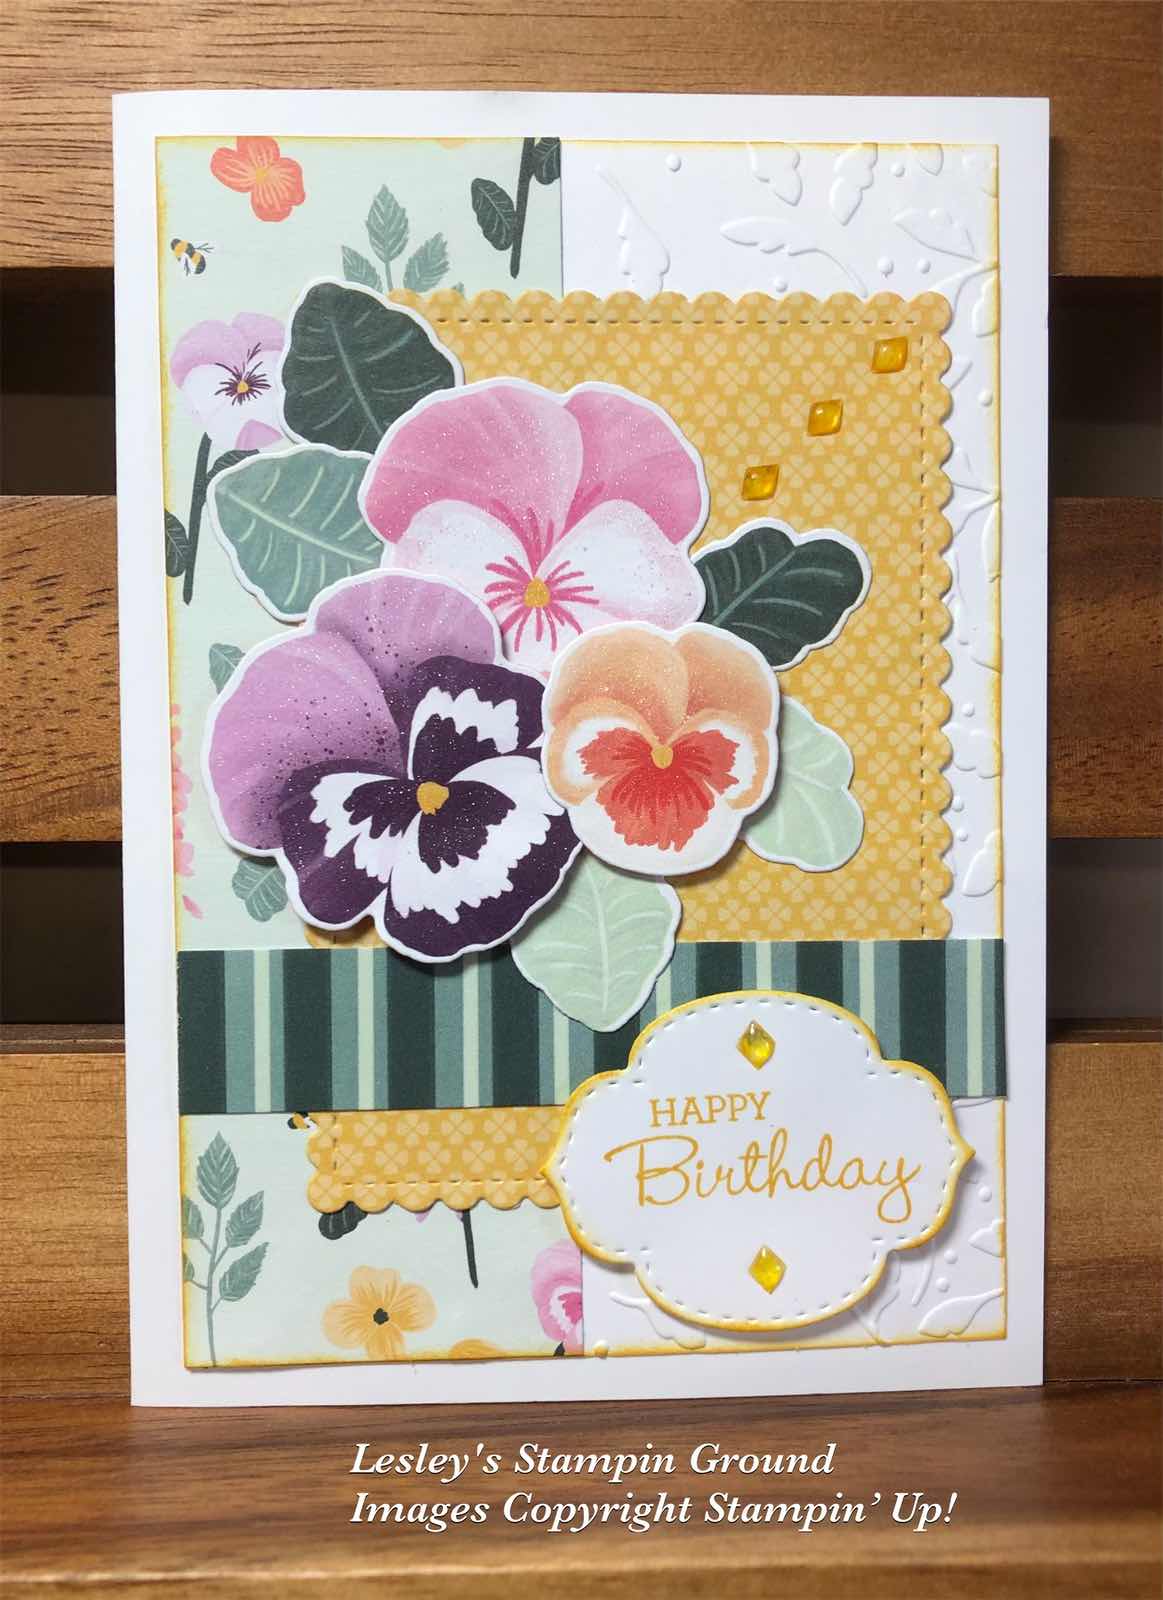
All of the designer papers are retiring from this current Stampin’ Up! annual catalogue, making room for a great range of new papers. I have chosen the beautiful Pansy Petals Designer Series Paper (#155807) for this card.
Some of the designs in this pack co-ordinate with the dies from the Pansy dies (#155680), so the flowers and leaves from the DSP have been cut with these dies.
I dry embossed the Basic White card front (#159228) with one of the Meadow Moments Embossing Folders (#153126), then attached another piece of the DSP to the left side of the card front. I also cut one of the pieces of DSP with a rectangle from the Stitched So Sweetly Dies (#151690). I attached another strip of DSP across the card front. I daubered the edges of the card with Bumble Bee ink and attached the card front to the Basic White base card.
The leaves and pink pansy were taped in place and I used Stampin’ Dimensionals (#104430) & Mini Stampin’ Dimensionals (#144108) to attach the other flowers.
“Happy Birthday” from the Pansy Patch stamp set (#154999) was stamped with Bumble Bee ink (#153116). This was cut with a Stitched So Sweetly die and attached with Stampin’ Dimensionals.
I coloured the embellishments from the Silver & Clear Epoxy Essentials (#155567) with the dark Daffodil Delight Stampin’ Blends (#154883) before attaching to the card.
The Pansy Patch stamp set & Pansy dies will still be available in the next catalogue. The retiring products used here are - Pansy Petals Designer Series Paper, Bumble Bee ink, Stitched So Sweetly dies, Meadow Moments Embossing Folder, and the Silver & Clear Epoxy Essentials.
“Love what you do and share what you love.”
Friday, 25 March 2022
Daisy Lane stamp set
Hi & welcome,
TIP: (1)When colouring ribbons I would usually use white or very vanilla ribbons but this worked with the Pale Papaya being a light colour.
I have used more retiring products on this card and also have used a couple of colouring techniques.
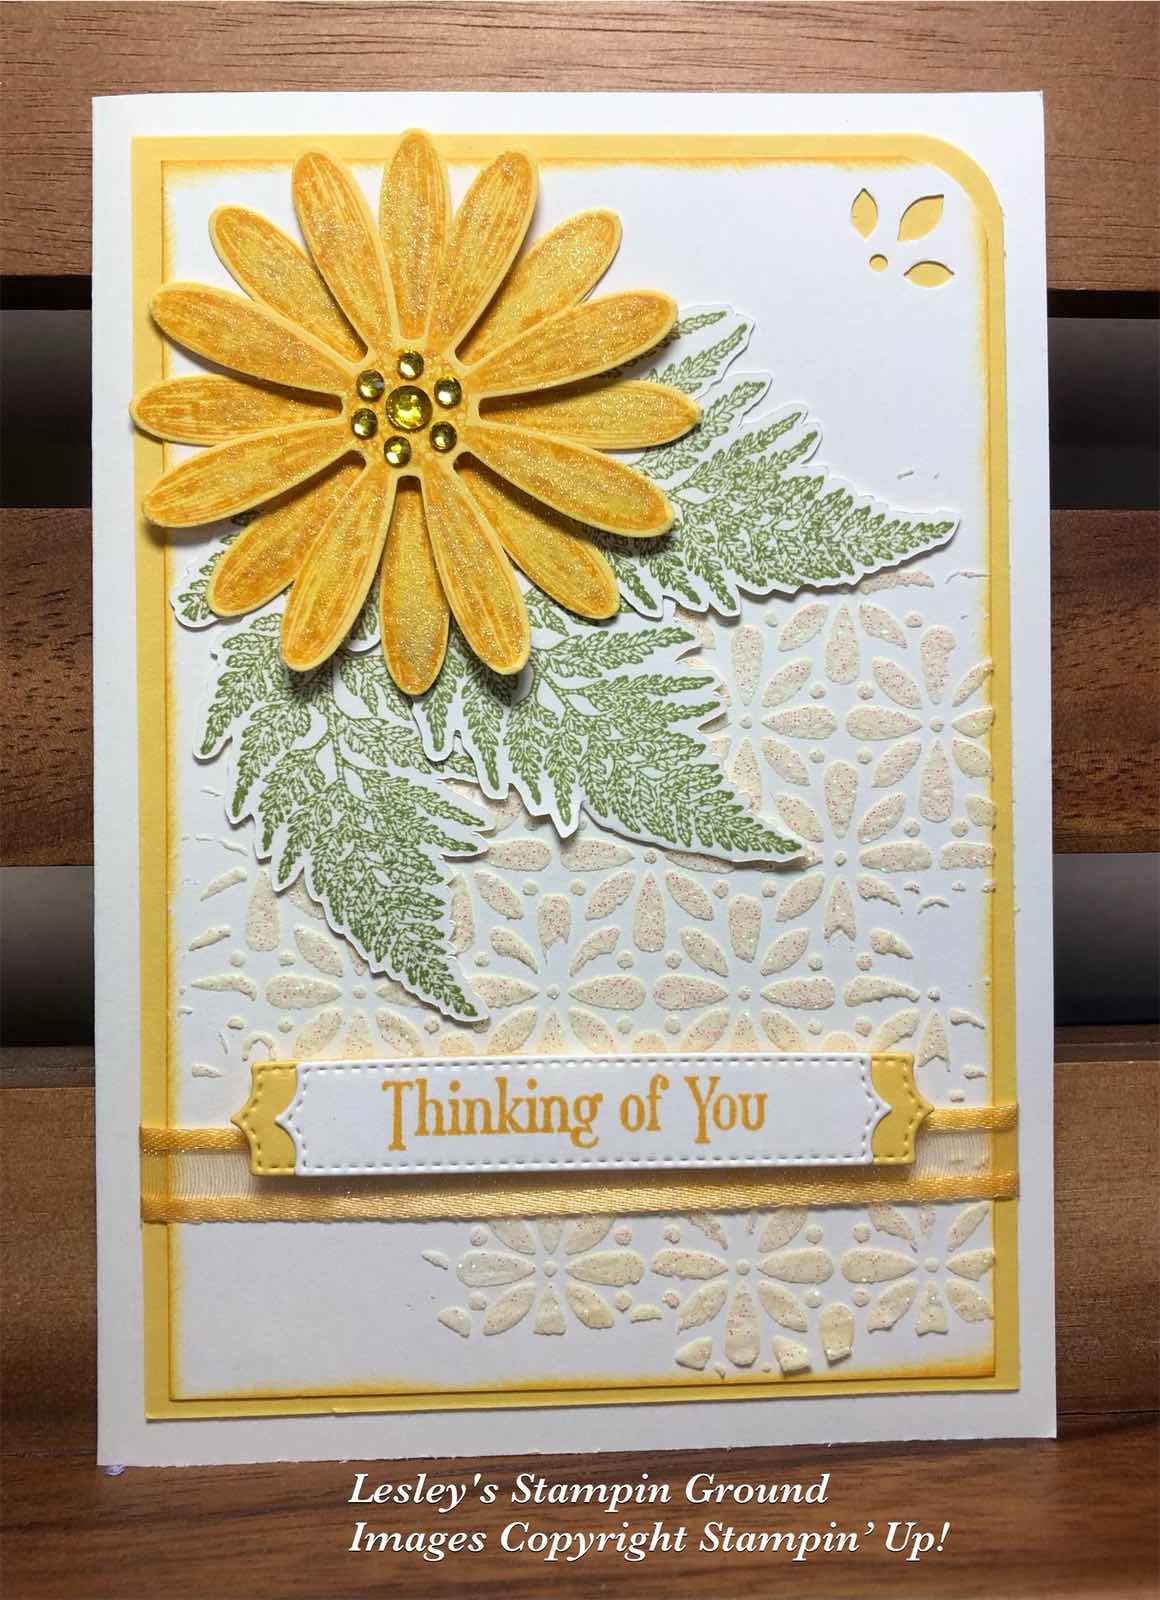
I coloured the Shimmery White Embossing Paste (#145645) with a very small amount of So Saffron ink refill (#105225). A small amount goes a long wag. To mix this I put a small amount of the embossing paste onto a Silicone Craft Sheet (#127853) and gradually added the ink refill till it was the coloured I wanted. Using one of the Butterflies & Flowers Layering Decorative Masks (#158142), I applied the embossing paste with a Palette Knife (#142808) onto the Very Vanilla card (#106550). I didn't want this perfectly embossed.
The daisy and leaves are from the Daisy Lane stamp set (#149325). The flower was stamped twice onto Daffodil Delight card (#121680) with Daffodil Delight ink (#147094). Clear Wink Of Stella (#141897) was added to the petals. These were punched with the Daisy Punch (#143713) and attached with a Stampin’ Dimensional (#104430), offsetting the petals. The leaves were stamped with Pear Pizzaz ink (#147104) and fussy cut.
I punched the corner with the Detailed Trio Punch (#146320), then attached the Very Vanilla card to the Daffodil Delight card. Before wrapping the ribbon around the card, I also coloured this as I didn't have the colour I wanted. I used the Pale Papaya Open Weave Ribbon (#155672) and coloured it with Daffodil Delight ink and a Blending Brush (#153611).
“Thinking Of You” from Quiet Meadow stamp set (#155082) was stamped with Daffodil Delight ink, then cut with a Potted Succulents Die (#154330). I cut the Daffodil Delight card also with the same die, cut it in half then attached it to the back of the sentiment. This was attached with Stampin’ Dimensionals.
The leaves and daisy were attached to the card with Mini Glue Dots (#103683). Before adding the embellishments to the flower centre I also coloured these using the Dark Daffodil Delight Stampin’ Blend (#154883), colouring the Rhinestone Basic Jewels (#144220).
The retiring products used here are the Daisy Lane stamp set, Daisy Punch and the Detailed Trio punch.
Don’t forget to check the retiring list on the following link-
TIP: (1)When colouring ribbons I would usually use white or very vanilla ribbons but this worked with the Pale Papaya being a light colour.
(2)When using coloured embossing paste I usually have extra card ready to use any excess paste, so as not to waste it. If it is used without adding colour it can be returned to the jar.
(3) The embossing paste will set very quickly, so work quickly and wash the mask, palette knife and silicon mat as soon as finished.
“Love what you do and share what you love.”
Thursday, 24 March 2022
Positive Thoughts stamp set
Hello stamping friends,


The retiring list for the soon to be retired Annual Catalogue is now available and you can find all the retiring products on the link below-
You will find some great bargains, but don't delay as they are available while stocks last.
Today’s card is using some retiring products.
I stamped the fern from Positive Thoughts stamp set (#151490) with Soft Sea Foam ink (#147102) onto Very Vanilla card (#106550). The words are also from this stamp set and stamped 3 times with Crumb Cake ink (#147116). I then cut the rectangle using a die from Natures Thoughts Dies (#153586).
I attached the outside “frame” to a piece of Mango Melody card (#147013). Then I attached the inside rectangle with Stampin’ Dimensionals (#104430). This allows you to see a small amount of the Mango Melody card underneath. The card front was attached to the Pear Pizzaz base card (#131290).
The butterfly is stamped with Mango Melody ink (#147093) then cut with the co-ordinating Natures Thoughts Die. A Stampin’ Dimensional was used in the centre of the butterfly to attach this to the card.
The feathers are cut with another of the Natures Thoughts dies using the 3 gold colours from the Brushed Metallic 12”x12” Cardstock (#153524) and attached with Mini Glue Dots (#103683). The embellishments are from the Holiday Rhinestone Basic Jewels (#150457).
The retiring products used here are the Positive Thoughts stamp set, Natures Thoughts Dies and the Holiday Rhinestone Basic Jewels.
“Love what you do and share what you love.”
Wednesday, 23 March 2022
Seas Dies
Hi everyone,
“Love what you do and share what you love.”
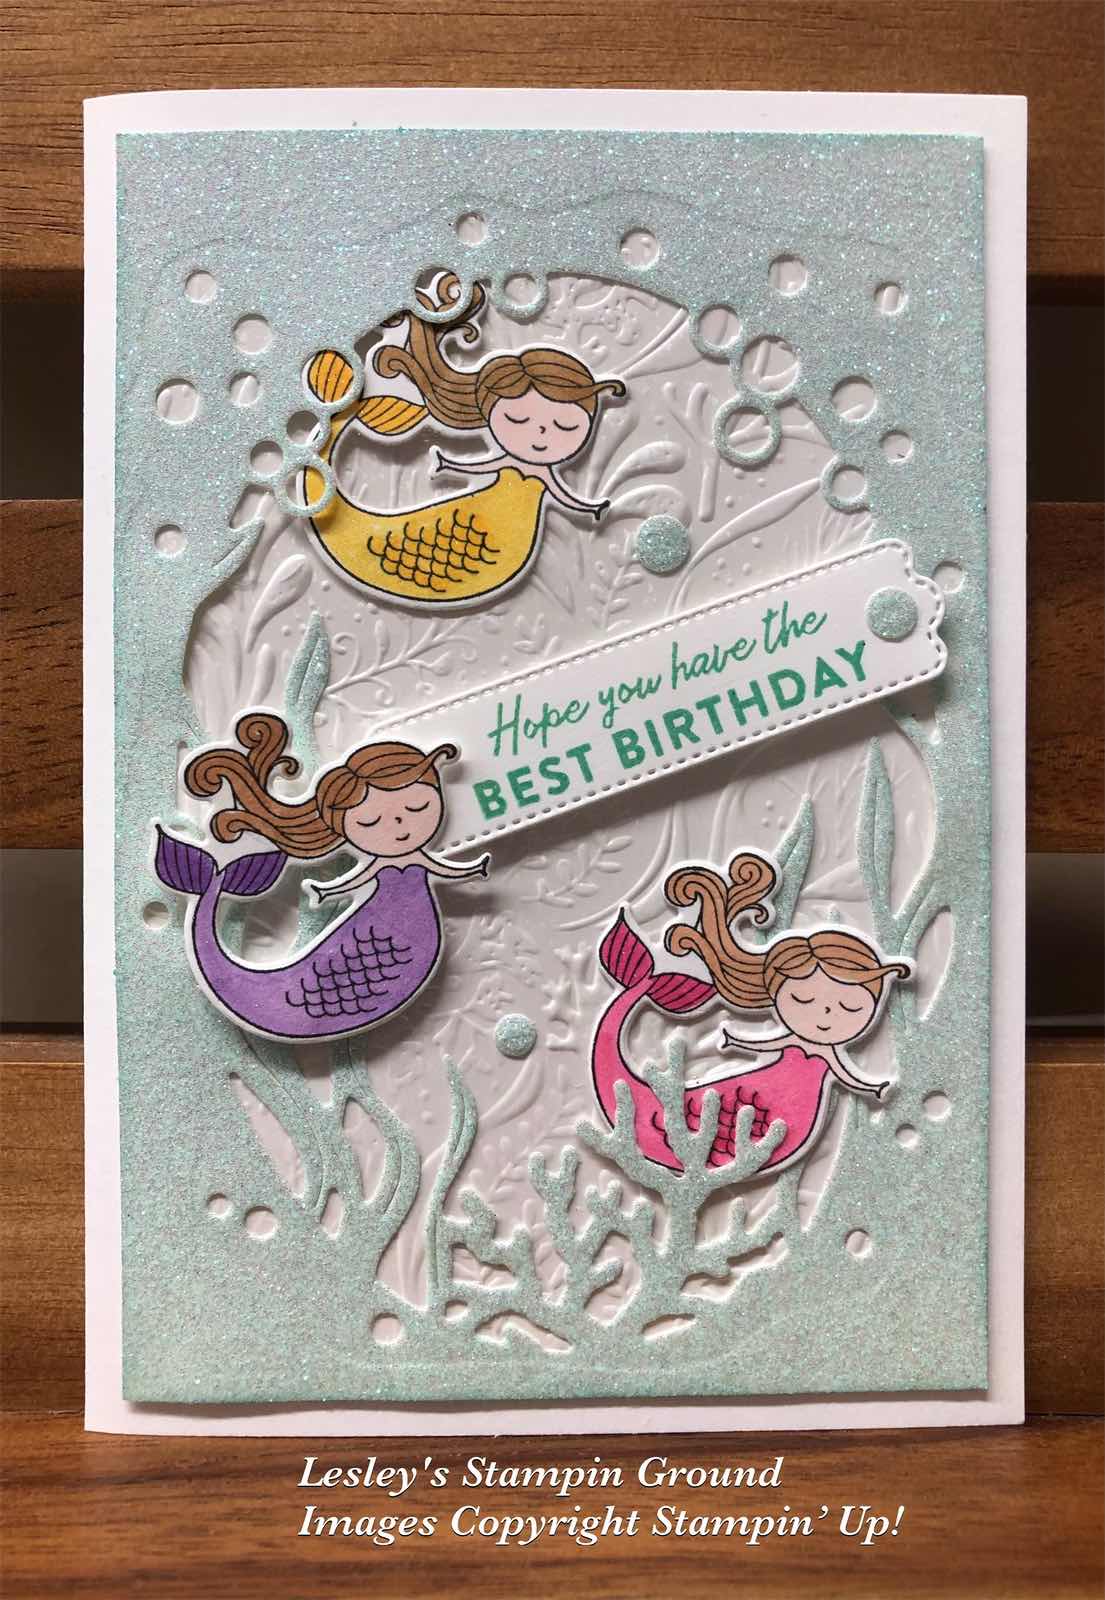
I was asked to make a card with mermaids. These cute mermaids are long retired but thought they were perfect when using with the current Seas Dies (#157857).
The mermaids are from the (retired) Magical Day stamp set. I stamped them using Tuxedo Black Memento ink (#132708) onto Basic White card (#159228). They were coloured with Stampin’ Blends - Polished Pink (#155520), Highland Heather (#154887), Daffodil Delight (#154883) were used for the bodies. I used SU1000 (#158465) for the face and arms, and SU600 (#159462) & SU700 (#159463) for the hair. These colours with the numbers are a variety of “skin tone” colours and range from light to dark. The co-ordinating (retired) Magical Mates Dies were used to cut the mermaids.
I adhered Adhesive sheet (#152334) onto the blue/green Supple Shimmer Specialty Paper (#158068) before cutting this with a Seas die (#157857). I dry embossed the beautiful Mother Of Pearl Specialty Paper (#157666) with the (retired) Seabed Embossing Folder. I attached the Supple Shimmer paper to the Mother Of Pearl card. I daubered the edges with Coastal Cabana ink (#147097) then attached this to the Basic White base card.
I stamped the sentiment from the (retired) Friendly Hello stamp set and cut it with a Pretty Pillowbox Die (#156321). The sentiment and mauve mermaid were attached with Mini Stampin’ Dimensionals (#144108) and the other 2 mermaids with Mini Glue Dots (#103683).
“Love what you do and share what you love.”
Tuesday, 22 March 2022
Symbols Of Fortune Specialty Designer Series Paper
Hello crafty friends,

A simple but elegant card.
I just adore this beautiful designer paper from the Symbols Of Fortune 12”x12” Specialty Designer Series Paper (#157652).
I have used Gold Foil Sheets (#132622) to matt the DSP which co-ordinate with the gold foil accents on one side of this DSP. I cut the DSP with the crane with a die from the Hippo & Friends Dies (#153585). This was attached to the Gold Foil Sheet that I cut with a Stitched Rectangles Die (#151820). I also matted the larger piece of DSP with Gold Foil and attached this to the Basic White base card (#159228).
The sentiment is from the Soaring Swallows stamp set (#157804). I stamped this with VersaMark (#102283) and heat embossed with Gold Stampin’ Emboss Powder (#155555). This needs to be set with the Heat Tool (#129056). A die from the Ornate Frames (#150664) was used to cut the sentiment.
The gold foil behind the crane and the sentiment were attached with Stampin’ Dimensionals (#104430). The Metallic Pearls (#146282) were added to finish the card.
A simple but elegant card.
“Love what you do and share what you love.”
Monday, 21 March 2022
Slim Card Dies
Hello ladies & guys,


Here’s a fairly easy card using the Slim Card Dies (#157965).
I cut the Flowering Fields 12”x12” Designer Series Paper (#157670) with one of the Slim Card dies. I then placed the DSP that is ‘all connected” onto a piece of Gorgeous Grape card, measuring 7.6cm x 20.2cm (3”x8”) as shown below.
I used a post it note to keep this in place, then I glued each of the separate pieces back into it’s original position using the Multipurpose Liquid Glue (#110755). I then removed the “template” piece leaving the glued pieces on the Gorgeous Grape card.
I attached the completed piece to the Very Vanilla Base card (#106550).The sentiment is from the Positive Thoughts stamp set (#151490) and stamped with Gorgeous Grape ink (#147099). A die from the Ornate Layers Dies (#152726) was used to cut the sentiment, then matted with Gorgeous Grape card. Stampin’ Dimensionals (#104430) were used to attach this to the card. I chose the Brushed Brass Butterflies (#158136) for the embellishments.
TIP: The piece of Designer Paper which was used as a template and not used on this card can be used for another card.
“Love what you do and share what you love.”
Sunday, 20 March 2022
Brilliant Wings Dies
Hello friends,

“Love what you do and share what you love.”
The Brilliant Wings Dies (#155523) has a variety of butterflies and the butterfly here is cut with one of these dies.
I used the Ombre Specialty Paper (#155784) for the butterfly. I stamped the verse & the leaves from the Very Versailles stamp set (#149275) onto the Basic White card front (#159228). I used Crumb Cake ink (#147116) for the verse & Granny Apple Green ink (#147095) for the leaves. Then using a Blending Brush (#153611) I coloured the right side of the card front with Daffodil Delight ink (#147094). I dry embossed the left side with the Stripes from the Stripes & Splatters 3D Embossing Folders (#157980). The card front was matted with Granny Apple Green card (#147014), then attached to the Basic White base card.
The sentiment is from the Special Moments stamp set (from saleabration) and stamped with Granny Apple Green ink. I cut this with a Tailor Made Tags die (#155563). The gold trim from the Simply Elegant Trim (#155766) was threaded through the tag. The sentiment and butterfly was attached with Stampin’ Dimensionals (#104430) and Mini Stampin’ Dimensionals (#144108).
Being a butterfly lover I couldn’t resist adding the Brushed Brass Butterflies (#158136) to finish the card.
Saturday, 19 March 2022
Dragonfly Garden Stamp Set
Hello again stamping friends,

“Love what you do and share what you love.”
Sometimes I have a particular idea for a card and it may or may not end the way I first imagined it. Other times I start with no firm ideas and the finished card I feel is much nicer than I expected which is how I felt about this card.
I started by colouring the right side of the Basic White card front (#159228) with Highland Heather ink (#147103), Coastal Cabana ink (#147097) and Polished Pink ink (#155712) using Blending Brushes (#153611). Then I stamped the beautiful flourish from the Sentimental Swirls stamp set (#157996) with VersaMark (#102283) and Embossed with the Silver Stampin’ Emboss Powder (#155555). This was set with the Heat Tool (#129056).
I stamped the flowers and the dragonfly from the Dragonfly Garden stamp set (#154411) with Tuxedo Black Memento ink (#132708) then the dragonfly was punched with the Dragonflies punch (#154240). The flowers were coloured with Stampin’ Blends - Fresh Freesia (#155518), Polished Pink (#155520) and Pool Party (#154894 for the leaves.
I matted the card front with Basic Black card (#121688). The Metallic Mesh Ribbon (#153550) was wrapped around the card front, then the card front was attached to the Basic White card base.
Happy Birthday is from the Special Moments stamp set (from sale-a-bration). This was stamped with VersaMark and heat embossed with the Black Stampin’ Emboss Powder (#155554). A label from the Potted Succulents dies (#154330) was used to cut the sentiment. I used Stampin’ Dimensionals (#104430) to attach this to the card. The Rhinestone Basic Jewels (#144220) were added to finish the card.
“Love what you do and share what you love.”
Friday, 18 March 2022
In Color Shimmer Vellum
Hi friends,


I had this floral image from the Honeybee Home Stamp Set (#157943) left from another project, so rather than wasting it have used it on this card.
The flowers were stamped with Tuxedo Black Memento ink (#132708) and coloured with Fresh Freesia Stampin’ Blends (#155518) and Granny Apple Green Stampin’ Blends (#154885).
I adhered Adhesive sheets (#152334) to the back of the Fresh Freesia vellum from the 2021-2023 In Color Shimmer Vellum (#155616), then dry embossed this with the Gingham Embossing Folder (#157627). This was attached to a piece of Basic White card (#159228).
The Gorgeous Grape card (#147011) was cut with an Ornate Layers Die (#152726), then attached to the cardfront. The Highland Heather Grosgrain Ribbon (#155812) was wrapped around the cardfront. I attached the flowers with Mini Stampin’ Dimensionals (#144108). The Gold Trim is from the Simply Elegant Trim (#155766) and attached with Mini Glue Dots (#103683).
The sentiment from the Friends Are Like Seashells stamp set (#158203) was stamped with Fresh Freesia ink (#155611) and cut with a Sweet Hearts Die (#157623). This was attached with Stampin’ Dimensionals (#104430).
The Brushed Brass Butterflies (#158136) are the embellishments added to the card.
TIP: I used the adhesive sheets on the back of the vellum to avoid tape or glue showing through.
“Love what you do and share what you love.”
Thursday, 17 March 2022
Quiet Meadow stamp set
Welcome everyone,

I have used flowers from 2 different stamp sets on this card - Quiet Meadow (#155082) and the Honeybee Home (#157943).
I stamped the flower images with Tuxedo Black Memento ink (#132708) onto Basic White card (#159228). The flowers were coloured with Daffodil Delight Stampin’ Blends (#154883) and Poppy Parade Stampin’ Blends (#154958). I used Granny Apple Green Stampin’ Blends (#154885) for the leaves. The yellow flowers were cut with the Honeybee Blooms Die (#157951) and the red flowers were fussy cut. The Granny Apple Green card (#147014) was backed with Adhesive Sheet (#152334) before cutting the leaf (behind the flowers)with a Meadow Die (#155852).
The Basic White card front was dry embossed with the Hive 3D Embossing Folder (#157955), then matted with Poppy Parade card (#121694). I cut the Flowering Fields 12”x12” Designer Series Paper (#157670) with a Layering Circles Die (#151770) and attached to the cardfront. I wrapped the Gold Fine Art Ribbon (#154561) around the matted card front. The base card is Basic White.
“Best Wishes” from the Artistically Inked stamp set (#154542) was stamped with Poppy Parade ink (#147050) and cut with a smaller Layering Circles die. The leaf from Dahlia Days stamp set (#157799) was stamped with Granny Apple Green ink (#147095) and attached under the sentiment with Mini Glue Dots (#103683). The sentiment and the flowers were attached to the card with Mini Stampin’ Dimensionals (#144108). The Bumblebee Trinket (#155568) was attached with a Mini Glue Dot.
“Love what you do and share what you love.”
Wednesday, 16 March 2022
Free As A Bird stamp set
Hello stamping friends,

We all love a bargain, so till the 31st March there is 20% off the Mini Stampin’ Cut & Emboss Machine and selected bundles with the discounted prices below-

These birds from the Free As A Bird stamp set (#149468) are still one of my favourite images and can be used for a variety of cards.
I stamped the birds with Tuxedo Black Memento Ink (#132708) on Basic White card (#159228). I coloured the image with Pale Papaya Stampin’ Blends (#155519), Pumpkin Pie Stampin’ Blends (#154897), Mint Macaron Stampin’ Blends (#154889) and Crumb Cake Stampin’ Blends (#154882). This was then fussy cut.
The stitching on the Pale Papaya card (#155669) was achieved with the Stitched Greenery Die (#155451). This was matted with Pumpkin Pie card (#108601), then attached to the Basic White base card.
I cut the triangles with a Stitched Triangles Die (#152710) and attached these to the card front. “Best Wishes” from the Art Gallery stamp set (#158201) was stamped with Pumpkin Pie ink (#147086) and cut with a Tasteful Labels Die (#152886). The birds and sentiment were attached with Mini Stampin’ Dimensionals (#144108). The Clear shapes from the Silver & Clear Epoxy Essentials (#155567) were added to 4 of the triangles.
We all love a bargain, so till the 31st March there is 20% off the Mini Stampin’ Cut & Emboss Machine and selected bundles with the discounted prices below-
#150673 -Mini Stampin’ Cut & Emboss Machine - $83.00
#158382 - All Squared Away Bundle - $69.50
#156227 - Art Gallery Bundle - $77.50
#155834 - Beauty Of Friendship Bundle - $80.75
#154065 - Celebrate Sunflowers Bundle - $79.00
#156220 - Garden Wishes Bundle - $79.00
#159519 - Hydrangea Haven Bundle - $80.75
#155674 - Pansy Patch Bundle - $80.00
#155847 - Quiet Meadow Bundle - $82.25
#158359 - Seascape Bundle - $72.00
#155823 - Sweet As A Peach Bundle - $56.75
#159529 - Welcoming Window Bundle - $77.50
#155845 - What’s Cooking Bundle - $70.25
#155507 - Wild Cats Bundle - $60.00
The Art Gallery Bundle, Celebrate Sunflowers Bundle & Garden Wishes Bundle aren’t currently sold as a bundle but will be during this promotion only.
“Love what you do and share what you love.”
Tuesday, 15 March 2022
Home & Garden Bundle
Welcome my stamping friends,

“Love what you do and share what you love.”
The Home & Garden Bundle (#157919) is great for masculine cards with a range of tools and masculine sentiments.
The spade, clippers and ladder are from the Home & Garden stamp set (#157910). I used Soft Suede ink (#147115) on Soft Suede card (#119982) for the spade & ladder, and Very Vanilla card (#106550) for the clippers. These were cut with the Garden Dies (#157918). The head of the spade was cut with another die from that set and I used the Brushed Metallic cardstock (#153524). This was attached to the spade with Mini Glue Dots (#103683).
The “timber” under the sentiment was stamped with Soft Suede ink on Very Vanilla card. This is from the On The Horizon stamp set (#157770) and cut with the co-ordinating die from the Horizon Dies (#157778). “Happy Birthday” is from the Blossoms In Bloom stamp set (#158283) and stamped with Mossy Meadow ink (#147111).
A piece of Mossy Meadow card (#133683) was attached to the side of the Very Vanilla base card. I used the Stitched Greenery Die (#155451) for the stitching on the Pear Pizzaz card front (#131290). I stamped the grass from the On the Horizon stamp set with Mossy Meadow ink onto the In Good Taste Designer Series Paper (#152494).
The tools & sentiment were attached to the card with Mini Stampin’ Dimensionals (#144108).
“Love what you do and share what you love.”
Sunday, 13 March 2022
New Horizons Designer Series Ppaer
Hi & welcome everyone,
TIP: Sometimes I don't attach a sentiment to the card till I know who I am giving it to, as it may be the wrong sentiment. It’s easy just to add the sentiment later for the appropriate occasion.

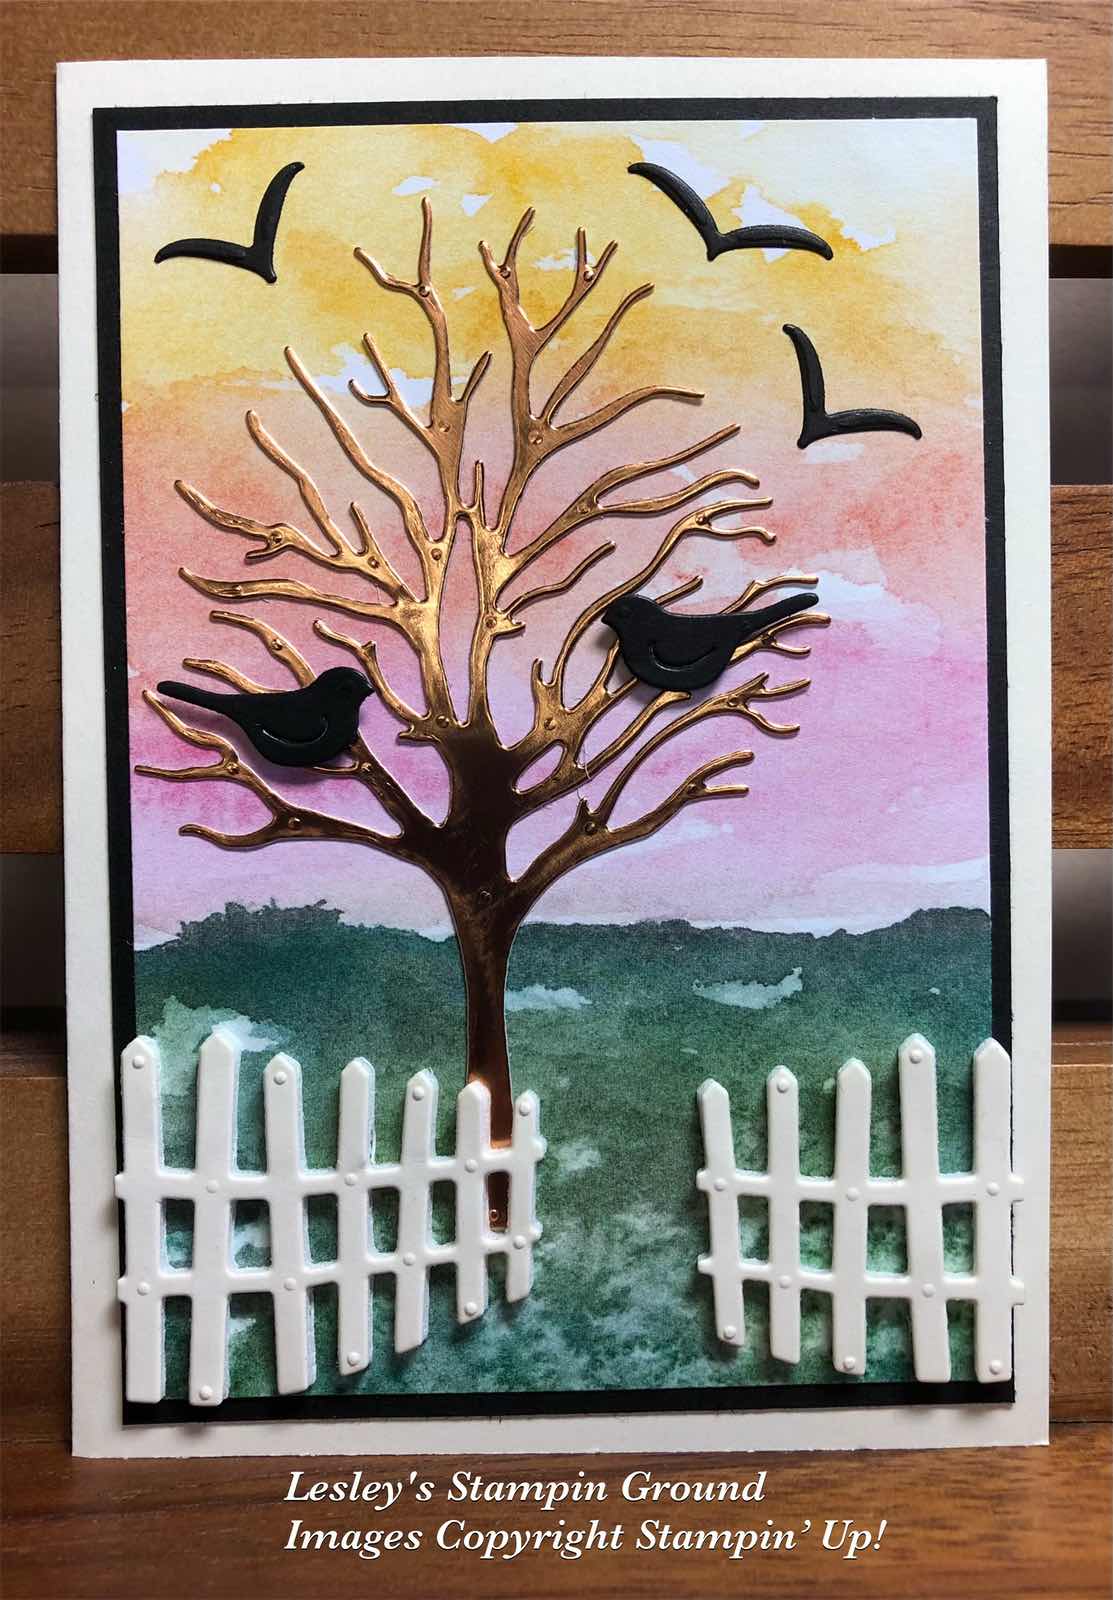
I love how easy it is to make a beautiful scene with the New Horizons Designer Series Paper (#157768). This pack is 6”x6” and has a lovely range of designs.
I matted the DSP with the Basic Black card (#121688) then attached it to the Very Vanilla base card (#106550).
I cut the tree using a Beautiful Trees Die (#155840) from Copper Foil Sheet (#142020). This was backed with Adhesive Sheets (#152334) which makes it easy to adhere the tree to the card.
I attached Very Vanilla card to a piece of Foam Adhesive Sheets (#152815) before cutting the fence with the Horizon Dies (#157778). The Foam Adhesive sheets are double sided foam sheets which is great to give dimension to the card.
I have used Basic Black card for the birds. The birds sitting in the tree are cut with the Beautiful Trees Dies and the flying birds are cut with the Waves Dies (#158840). The birds in the tree were attached with Mini Stampin’ Dimensionals (#144108) and the others had Adhesive Sheet attached to the back of the card.
TIP: Sometimes I don't attach a sentiment to the card till I know who I am giving it to, as it may be the wrong sentiment. It’s easy just to add the sentiment later for the appropriate occasion.
“Love what you do and share what you love.”
Saturday, 12 March 2022
Dahlia Days Bundle
Hello friends,

The Dahlia Days Bundle (#157801) has been used to make this beautiful card.
I cut the Basic White card (#159228) with a Detailed Dahlias Die (#157801) for the detailed background. I cut another piece of Basic White card with a Stitched Rectangles Die (#151820) to create the window. I attached the detailed background behind the window, then attached this to the Copper Foil Sheet (#142020), then to the Basic White base card.
The flowers and leaves are from the Dahlia Days stamp set (#157799). These were stamped with Misty Moonlight ink (#153118), Real Red ink (#147084) and Garden Green ink (#147089). These were cut with the Detailed Dahlias Dies.
“Thinking Of You” from the Expressions Of Friendship stamp set (#158460) was stamped with VersaMark (#102283) and embossed with Copper Stampin’ Emboss Powder (#155555) then set with the Heat Tool (#129056). I cut this with a Seasonal Labels Die (#156299). The edges of the sentiment were daubered with Sahara Sand ink (#147117).
The leaves were attached with Mini Glue Dots (#103683) and I used Stampin’ Dimensionals (#104430) to attach the flowers & sentiment. The embellishment are the Champagne Rhinestone Basic Jewels (#151193).
“Love what you do and share what you love.”
Friday, 11 March 2022
Expressions In Ink Specialty Designer Series Paper
Hello lovely friends,

As I said, a very easy but beautiful card.
There are so many beautiful Stampin’ Up! Designer Papers, it makes it very easy to make an easy but beautiful card like this one.
Both pieces of Designer Paper are from the Expressions In Ink 12”x12” Specialty Designer Series Paper (#155464). This was attached to the Basic White base card (#159228).
The sentiment from Blessings Of Home stamp set (#157930) was stamped with Magenta Madness ink (#153117), then cut with the label die from the Bloom Dies (#155989). The fine Gold die cut piece around the sentiment and the “leaves” are from the Expressions In Ink Ephemera Pack (#155465). These were attached to the card with the Fine-Tip Glue Pen (#138309). The Iridescent Rhinestone Basic Jewels (#158130) were added to the sentiment.
TIP: Most of the designer papers are double sided which gives you great variety of designs. This pack has beautiful gold foiling on one side of each sheet.
“Love what you do and share what you love.”
Thursday, 10 March 2022
Flowing Flowers stamp set
Hello fiends,

Here is a very vibrant coloured card, and I think we can all do with something bright and cheerful at the moment.
I chose the colours for the flowers as they were 2 of the colours in the designer paper used on the background. This is from the Sunshine & Rainbows 6”x6” Designer Series Paper (#158126). This is a Sale-a-bration product and will only be available till 16th March, so don't miss out on getting this beautiful paper.
The DSP is matted with Bermuda Bay card (#131286), then attached to the Basic White base card (#159228).
I stamped the pink flower with Magenta Madness ink (#153117) onto Magenta Madness card (#153085). The other flower was stamped with Bermuda Bay ink (#147096) onto Coastal Cabana card (#131302). These flowers are from the Flowing Flowers stamp set (#157880). The flowers were fussy cut.
The leaves were cut with dies from the Flowers Of Home (#157938). I used Gold Foil (#132622) which had been backed with Adhesive Sheets (#152334).
“Happy Birthday” is from the Flowing Flowers stamp set and stamped with Magenta Madness ink. A Potted Succulent die (#154330) was used to cut the sentiment then it was attached to the card with Stampin’ Dimensionals (#104430). The Iridescent Basic Rhinestones (#158130) were added to the card.
TIP: You can choose a free sale-a-bration product with every $90 you spend on Stampin’ Up! Products (in Australia). However time is running out so place your order before 16th March.
“Love what you do and share what you love.”
Wednesday, 9 March 2022
Hand-Penned Petals
Hi crafty friends,

“Love what you do and share what you love.”
Here is a variation of yesterdays card. I had extra Shimmery White Embossing Paste (#145645) which I had coloured with Fresh Freesia ink refill (#155612), so did a second card front for another card, so here it is.
Check yesterdays post as to how I did the embossing with the Mask from the Butterflies & Flowers Layering Decorative Masks (#158142).
I stamped the floral image from the Hand-Penned stamp set (#155070) with Tuxedo Black Memento ink (#132708). This was coloured with the following Stampin’ Blends - Granny Apple ren (#154885), Flirty Flamingo (#154884), Fresh Freesia (#155518) and Daffodil Delight (#154883). The coloured image & leaves were cut with dies from the Penned Flowers Dies (#155557). I adhered Adhesive Sheet (#152334) to the Granny Apple Green card (#147014) before cutting the leaves. The flowers were attached to the card with Stampin’ Dimensionals (#104330).
The shimmery card is from the Supple Shimmer 12”x12” Specialty Paper (#158068). This was attached to the Basic White base card (#159228).
The sentiment is from the Home & Garden stamp set (#157910) and stamped with Flirty Flamingo ink (#147052). This was cut with a Waves Die (#158840). The White Glittered Organdy Ribbon (#156408) was threaded through the label and wrapped around the cardfront. I used Stampin’ Dimensionals under the sentiment.
“Love what you do and share what you love.”
Tuesday, 8 March 2022
Butterflies & Flowers Layering Decorative Masks
Hi friends,

TIP: When colouring the embossing paste I always mix more paste than I probably need as I want enough without having to mix more colour. I then always have an extra piece of card ready so if I do have extra, I can use the excess paste so it doesn’t go to waste. I then have another piece of card for another project.
I hope that everyone in the flood areas around Sydney are safe . I can’t believe how much these floods have affected so many areas on the East coast of Australia. So devastating for so many. Take care and stay safe everyone.
I am lucky enough not to be in any of the affected flood areas in Brisbane so I can still enjoy my time in the craft room. Here is my latest card.
I cut a circle from a piece of scrap card using the largest die from the Layering Circles Dies (#151770). Then I positioned this on the Basic White card front (#159228) then placed one of the masks from the Butterflies & Flowers Layering Decorative Masks (#158142) on top. I found that using the Stamparatus (#148187) makes it easy to keep these in place with the magnet.
I added a drop of the Fresh Freesia ink (#155612) to a small amount of Shimmery White Embossing Paste (#145645) and mixed this together. I did this on a Silicon Craft Sheet (#127853). Then using a Palette Knife (#142808) I applied the coloured embossing paste over the mask. After removing the mask I was left with a circular image. This doesn’t take long to dry so put the card aside while you do the rest of the elements. However ensure you wash as soon as possible the mask, palette knives and silicon mat.
The flowers from the Honeybee Home stamp set (#157943) were stamped with Tuxedo Black Memento ink (#132708). The flowers were coloured with Stampin’ Blends - Daffodil Delight (#154883), Pale Papaya (#155519), Flirty Flamingo (#154884) & Fresh Freesia (#155518) and Granny Apple Green (#154885) for the leaves. The flowers and the foliage were cut with the Honey Blooms Dies (#157951). I used Granny Apple Green card (#147014) for the foliage. Adhesive Sheets (#152334) were adhered to the Granny Apple Green card before cutting with the dies. The flowers were attached to the card with Stampin’ Dimensionals (#104430).
I punched the corner of the card front with the Detailed Trio punch (#146320), then matted the card front with Fresh Freesia card (#155614). The sentiment is from the Home & Garden stamp set (#157910) and stamped with Fresh Freesia ink (#155611). I cut this with a die from the Waves Dies (#158840). The White Glittered Organdy Ribbon (#156408) was threaded through the label and wrapped around the cardfront. The base card is Basic White.
The purple Playing With Patterns Resin Dots (#152467) were attached to the card.
“Love what you do and share what you love.”
Monday, 7 March 2022
Daffodil Daydream stamp set
Hello all crafting friends,
TIP: To colour the embellishments using Stampin’ Blends, I find it easier to colour with the brush end of the blends. Colour the embellishments while they are still attached to the plastic they are adhered to. Allow them to dry, which doesn’t take long then transfer them to the card. Any clear or white embellishments can be coloured this way.
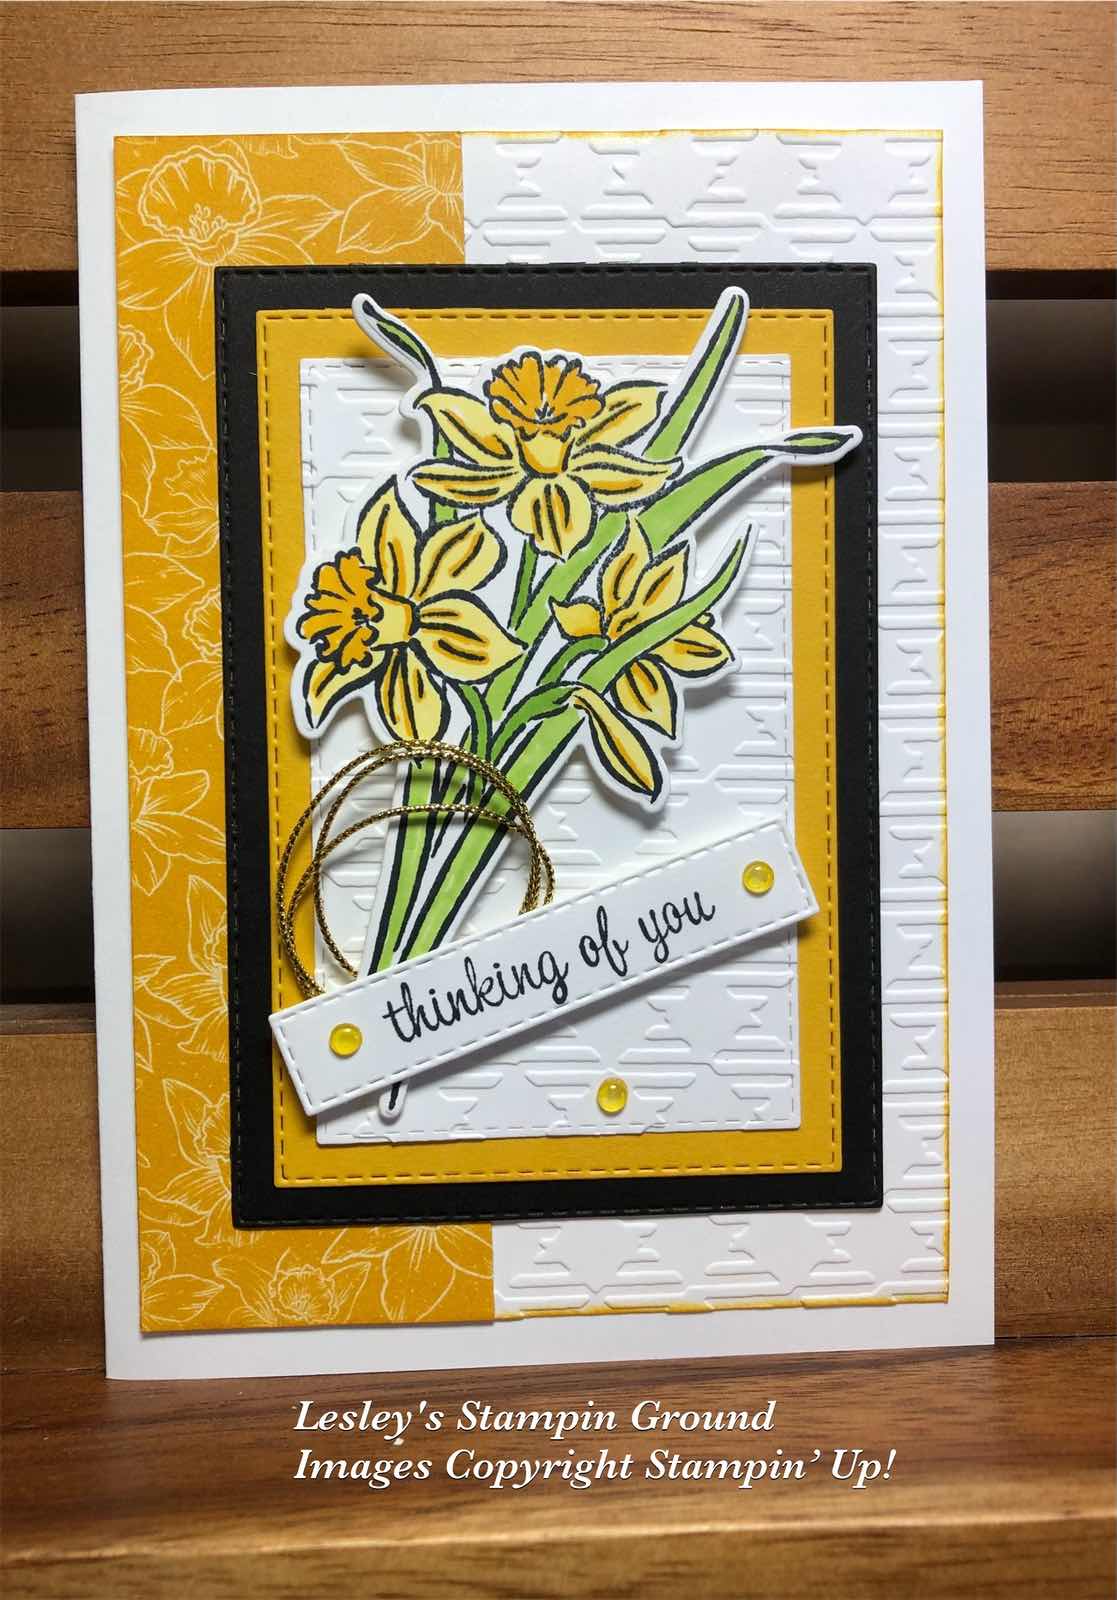
The Daffodil Dream Bundle (#157795) was used on this card and consists of the Daffodil Daydream stamp set (#157786) and the Daffodil Dies (#157794).
The daffodils were stamped with Tuxedo Black Memento ink (#132708) on Basic White card (#159228). The flowers were coloured with Daffodil Delight Stampin’ Blends (#154883) and for the leaves I used Granny Apple Green Stampin’ Blends (#154885). The co-ordinating die from the Daffodil Dies was used to cut the stamped image.
I dry embossed the Basic White card front with the Gingham Embossing Folder (#157627). The designer paper from the Sale-a-bration Daffodil Afternoon 12”x12” Designer Series Paper (#158127) was attached to the card front.
The Basic Black card (#121688), Crushed Curry card (#131288) and the Basic White card were all cut with Stitched Rectangles Dies (#151820). I also dry embossed the small white rectangular card with the Gingham embossing folder. I taped the rectangles together and attached them to the card. The daffodils were attached to the card with Stampin’ Dimensionals (#104430).
The gold trim is from the Simply Elegant Trim (#155766). The sentiment is in the Expressions Of Friendship stamp set (#158460) and stamped with Tuxedo Black Memento ink, cut with another Stitched Rectangles die and attached with Mini Stampin’ Dimensionals (#144108). The embellishments are the Clear Polished Dots (#158134) which were coloured with the Dark Daffodil Delight Stampin’ Blends.
TIP: To colour the embellishments using Stampin’ Blends, I find it easier to colour with the brush end of the blends. Colour the embellishments while they are still attached to the plastic they are adhered to. Allow them to dry, which doesn’t take long then transfer them to the card. Any clear or white embellishments can be coloured this way.
“Love what you do and share what you love.”
Subscribe to:
Comments (Atom)