Showing posts with label #rainbowglimmerpaper. Show all posts

Monday, 22 March 2021

To A Wild Rose

Welcome,

These flowers are from the To A Wild Rose stamp set (#149452) and is a Two-step stamp which allows you to stamp 2 images in different colours. This flower also has a 3rd image which I didn't use as I just let the Basic White card (#159228) be the background, instead of stamping a lighter 3rd colour.


The pink flower was stamped with Magenta Madness ink (#153117). The lighter colour was achieved by ‘stamping off” once onto scrap paper then stamping on the card. The purple flower was stamped with Highland Heather ink (#147103) and Gorgeous Grape (#147099). These flowers were cut with the co-ordinating Wild Rose dies (#149547).

The leaves are from the Forever Fern stamp set (#153559), stamped with Granny Apple Green ink (#147095) and cut with a Forever Flourishing Die (#152714).

The base card and card front are Basic White and I dry embossed the card front with a Meadow Moments Embossing Folder (#153126). There are 2 folders in this set and are suitable for use in the Mini Stampin’ Cut & Emboss Machine (#150673).

I cut the Rainbow Glimmer Paper (#153056) and the Brass Foil Sheet (#153057) with a Curvy Die (#154319).

“Congratulations” is from the Vine Design stamp set (#154488) and the die to cut this is from the Flowering Vine Dies (#154332). This was stamped with Magenta Madness ink. The pink flower and sentiment were attached to the card with Stampin’ Dimensionals (#104430).

The current annual catalogue will be coming to an end on 3rd May and the retiring list will be available soon, so keep an eye out for that. I will let you know when it is available.

Have a great day and I hope you are keeping safe & dry if you are in any of the very wet areas in Australia.

“Love what you do and share what you love.”


Tuesday, 3 November 2020

Pine Woods Dies

Hi friends,

This lovely tree was cut with dies from the Pine Woods Dies (#153563).


I cut the solid tree from the Rainbow Glimmer Paper (#153056). The detailed tree was cut from Brushed Metallic 12”x12” cardstock (#153524) which I had adhered the Adhesive Sheets (#152334) to the back before cutting.
The base card is Whisper White (#106549), the next layer is Cherry Cobbler (#121681) then Whisper White again. This was dry embossed with the Texture Textile 3D  Embossing Folder (#152718). The Designer Series Paper is from the Classic Christmas DSP (#155969). This paper is now available for purchase, along with the Curvy Celebration stamp sets and dies. “Merry Christmas” is from the Curvy Christmas stamp set (#155364) and stamped with Cherry Cobbler ink (#147083). This sentiment and the Cherry Cobbler card were punched with the Banners Pick A Punch (#153608). And 
I cut a piece of Whisper White card with a Stitched Nested Labels Die (#149638) and dry embossed it with one of the Wrapped In Christmas Embossing Folder (#153574). The tree was attached to this with Stampin’ Dimensionals (#104430), then the card was finished by adding the Cherry Cobbler rhinestones from the Holiday Rhinestone Basic Jewels (#150457). 

You can check out the Curvy Celebrations here

Enjoy your day,

 “Love what you do and share what you love”.


Tuesday, 27 October 2020

Feels Like Frost Specialty Designer Series Paper

Hi everyone,

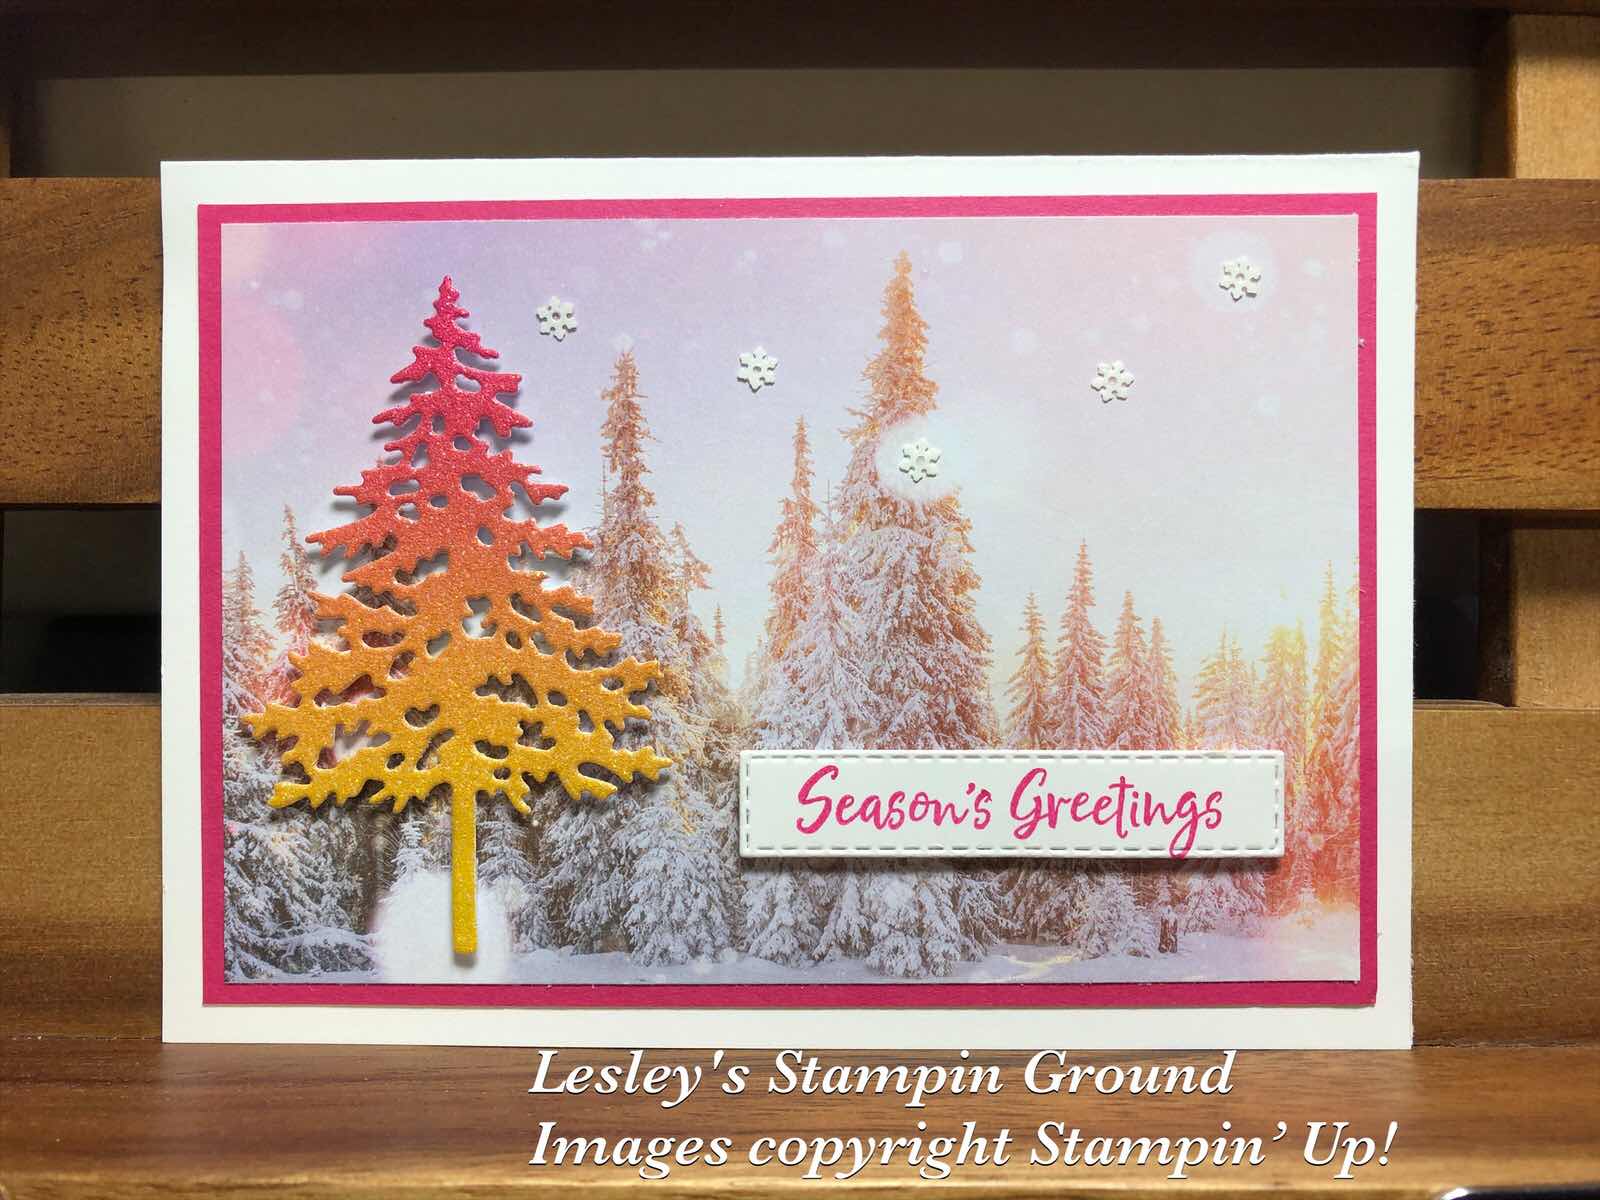
This beautiful Designer Series Paper is part of the Feels Like Frost 6”x6” Specialty Designer Series Paper (#150444). There are photographic images on one side and lovely white and silver foil designs on the reverse.


The designer paper was attached to Melon Mambo card (#119980) and this was attached to the Whisper White base card (#106549).
I thought the Rainbow Glimmer Paper (#153056) worked perfectly with the colours in this DSP, so I used this for the tree which I cut with one of the Pine Woods Dies (#153563). This was attached to the card with Stampin’ Dimensionals (#104430). “Season’s Greetings” from the In The Pines stamp set (#153448) was stamped with Melon Mambo ink (#147051) and cut with a Stitched Rectangles Die (#151820) and attached with Mini Stampin’ Dimensionals (#144108). The snowflakes from the Snowflake Sequins (#150443) were attached to the card with the Fine-Tip Glue Pen (#138309).
This is a very easy card to make especially when you have lots of Christmas cards to make.

Don’t forget the Designer Series Paper sale which ends on 31st October. For all details click here.

Have a fantastic day.


Tuesday, 29 September 2020

Daisy Lane

Hi & welcome,

These daisies are from the Daisy Lane stamp set (#149325).


I stamped 2 of the larger daisies and 2 of the smaller daisies, and when assembling them I offset each to make the daisy. The larger daisy was stamped with So Saffron ink (#147109) onto So Saffron card (#108611). I stamped the smaller daisy with So Saffron ink onto Whisper White card (#106549). They were punched with the Daisy Punch (#143713) and Medium Daisy Punch (#149517). I used Mini Glue Dots (#103683) to assemble the flower. The flower centre was cut with a die from the Poinsettia Dies (#153522). The flower centre and sentiment were cut from the Rainbow Glimmer Paper (#153056) which had Adhesive Sheets (#152334) adhered to the back. The Whisper White card front was dry embossed with the Dainty Diamonds 3D Embossing Folder (#152702), then attached to the So Saffron card (#108611). The Square Vellum Doily (# 152484) was attached to the card front then the daisy was attached on top with a Stampin’ Dimensional (#104430). The leaves from the Forever Fern stamp set (#152559) were stamped with attached and cut with Forever Flourishing Dies (#154094). Happy & Birthday are cut with the Well Written Dies (#151816). The embellishments are from the Sequins For Everything (#153556) and attached with the Fine Tip Glue Pen (#138309). I added glimmer to the petals using the Clear Wink Of Stella Brush (#141897).

Have a fantastic day.


Saturday, 19 September 2020

Friendly Silhouettes Dies

Hello,

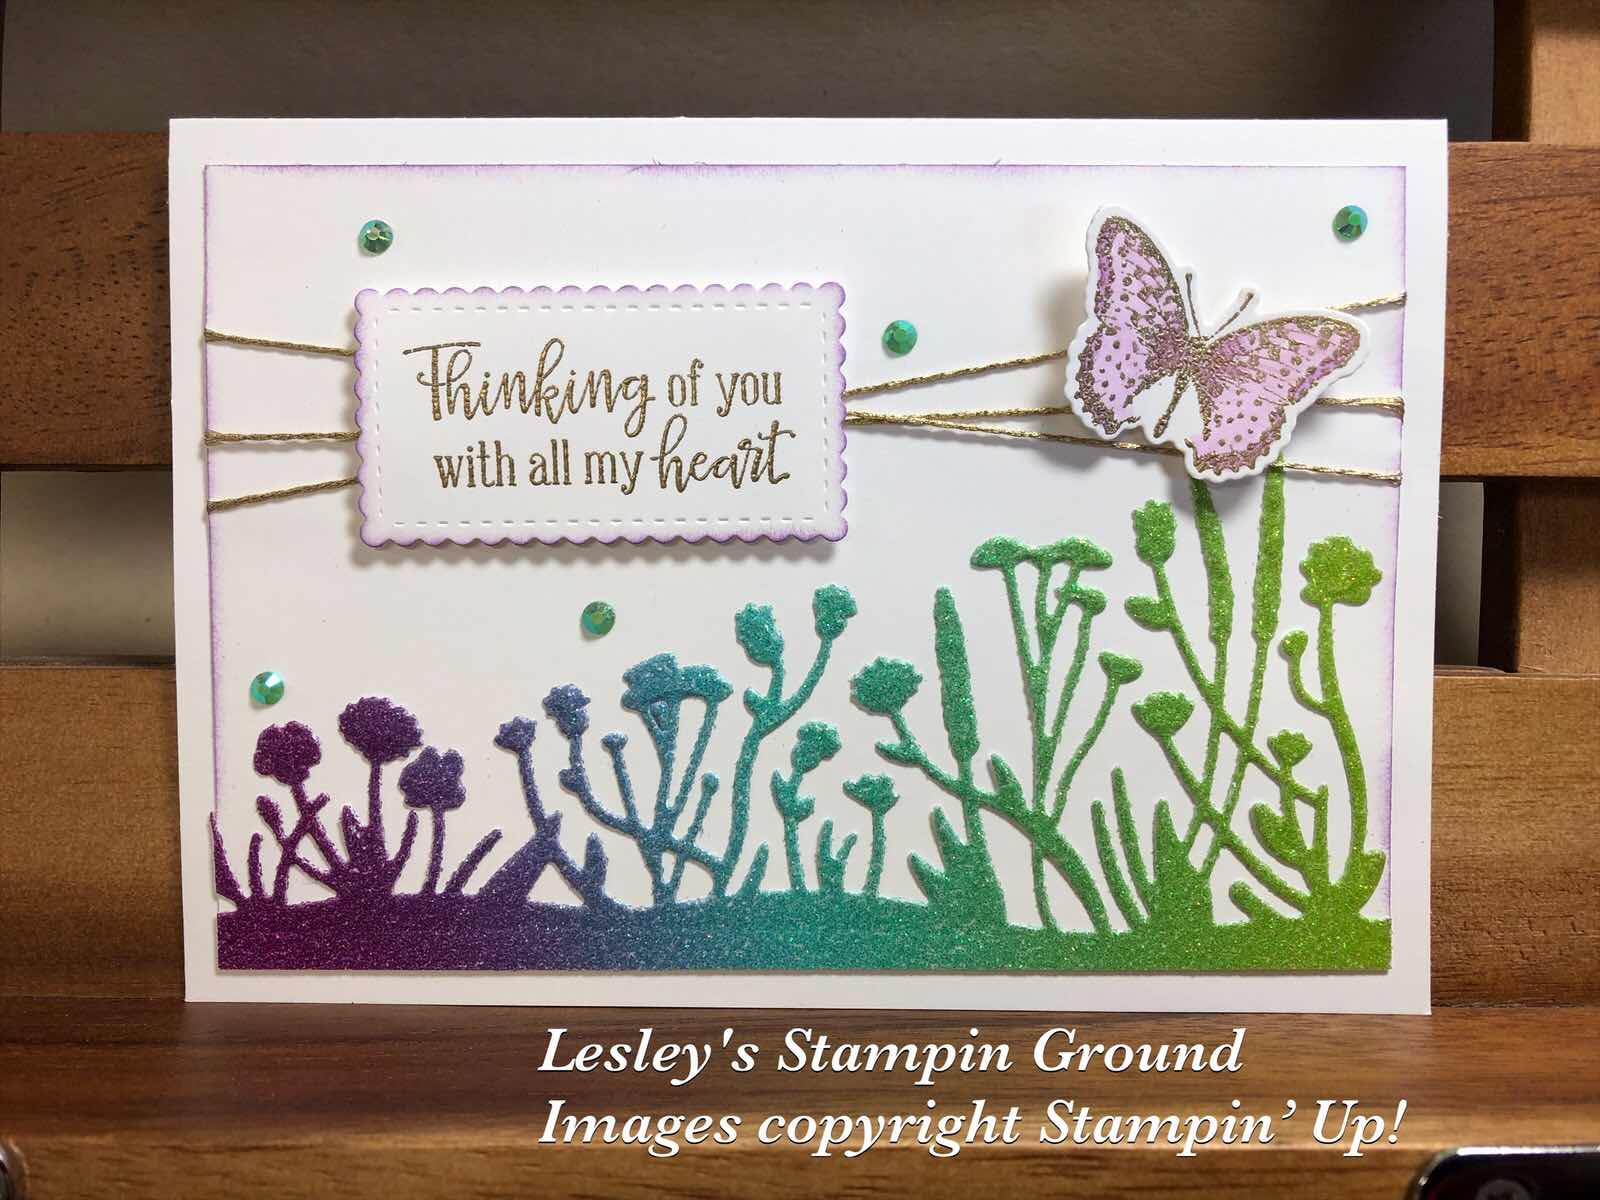
Here’s another card using the gorgeous Rainbow Glimmer Paper (#153056). 


Using Adhesive Sheets (#152334) on the back of the Glimmer Paper, makes it so easy to adhere these more detailed die cuts. The die is from the Friendly Silhouettes Dies (#149546). The cardfront and base are Whisper White card (#106549). I daubered the edge of the cardfront with Highland Heather ink (#147103). The butterfly from the Positive Thoughts stamp set (#151490) and the sentiment from Peaceful Moments stamp set (#151595) were both heat embossed using VersaMark (#102283) and Gold Stampin’ Emboss Powder (#109129). This was set with the Heat Tool (#129056). The sentiment was cut with a Stitched So Sweetly Die (#151690) and the butterfly with a die from the Nature’s Thoughts Dies (#153586). I coloured the butterfly with Purple Posy Stampin’ Blends (#154896). 
I wrapped the Gold Trim from the Forever Greenery Trim Combo Pack (#152475) around the cardfront, then attached the butterfly and sentiment to the card with Stampin’ Dimensionals (#104430). The embellishments are the Flowers For Every Season Gems (#153645). I used the Clear Wink Of Stella Glitter Brush (#141897) on the butterfly for an extra sparkle.

I hope your weekend is a crafty one.


Friday, 18 September 2020

Ornate Borders

Hi and welcome again,


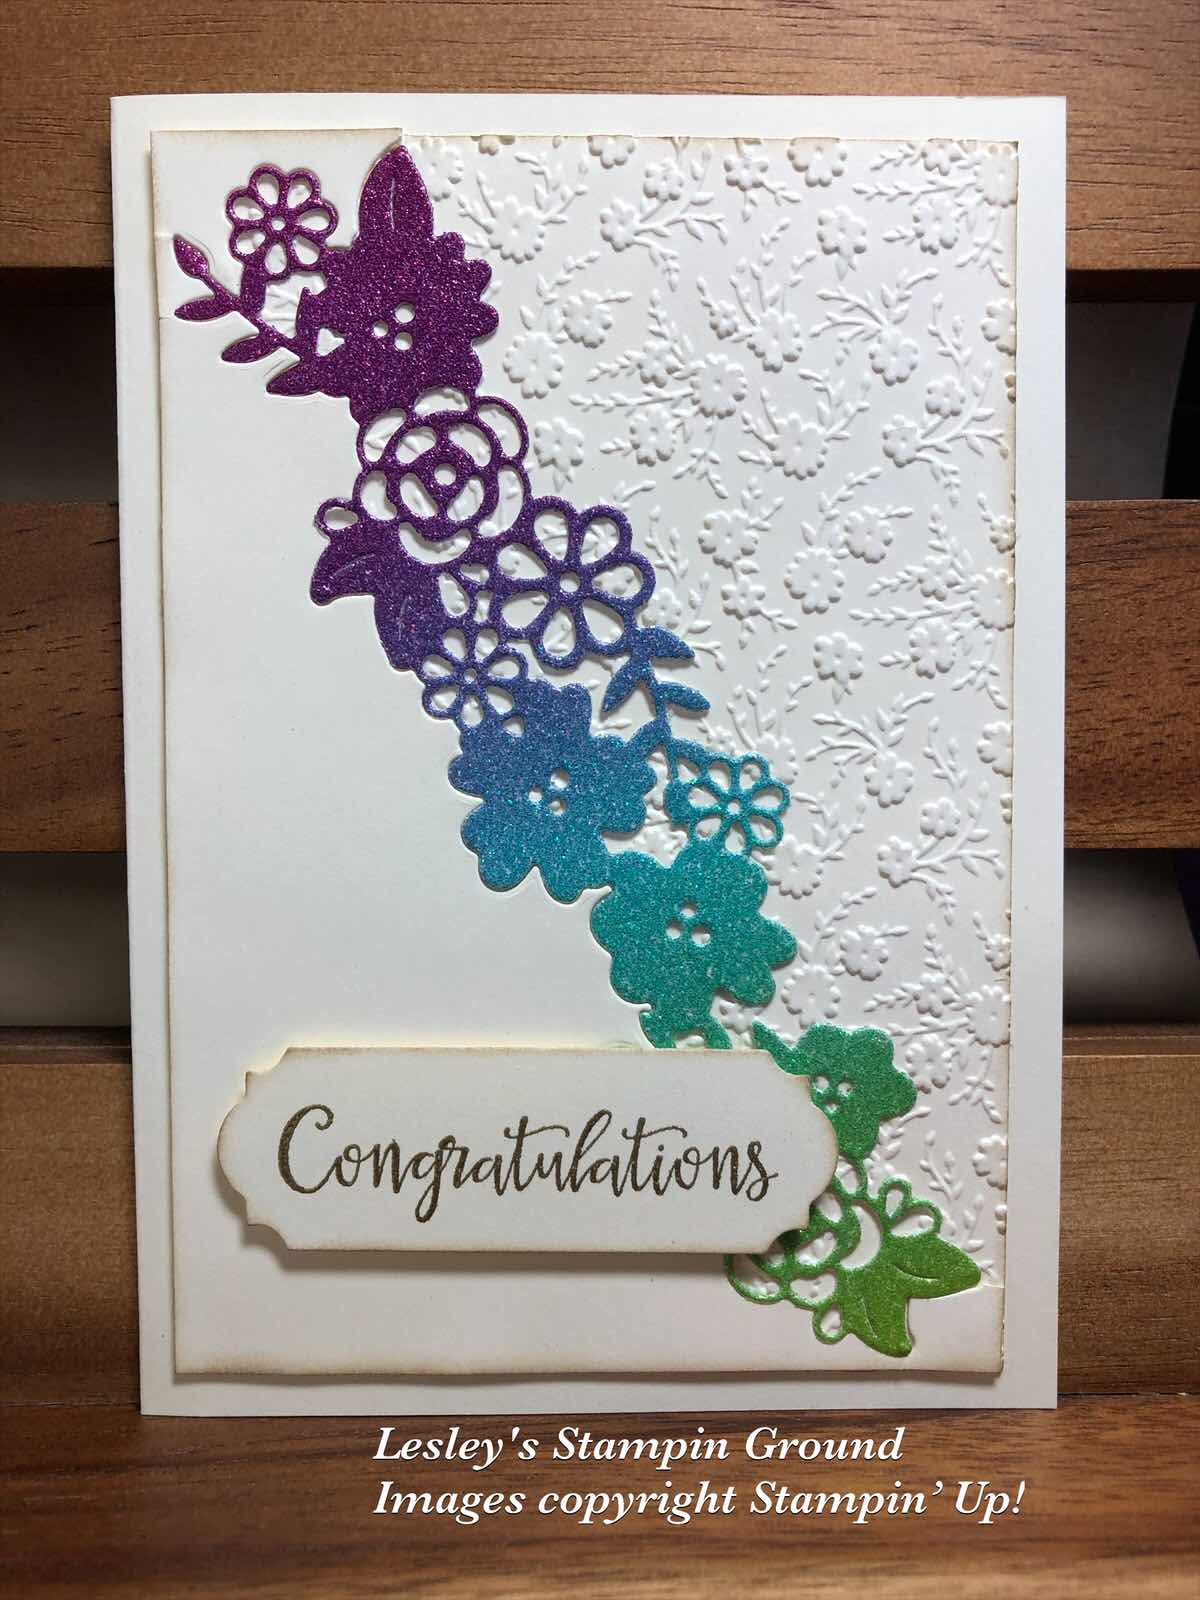
How gorgeous is the Rainbow Glimmer Paper (#153056) which I have used for these flowers cut with the Ornate Borders Dies (#152724). I love the ombré effect.


I dry embossed a piece of Very Vanilla card (#106550) with the Ornate Floral 3D Embossing Folder (#152725). I cut another piece of Very Vanilla card with the Ornate borders dies, but I only wanted to use the blank piece of that card. I will use these flowers on another project. This card was attached to the embossed card. Then I cut the flowers from the Rainbow Glimmer Paper and this was attached to to the card, replacing the cut out flowers from the Very Vanilla card. I used Adhesive Sheets (#152334) on the back of the glimmer paper to make it easy to attach this to the card.
“Congratulations” from the Peaceful Moments stamp set (#151595) was stamped with VersaMark (#102283) and heat embossed with Gold Stampin’ Emboss Powder (#109129) and set with the Heat Tool (#129056). An Ornate Frames Die (#150664) was used to cut the sentiment. The edges were daubered with Crumb Cake ink (#121685) and this was attached to the card with Stampin’ Dimensionals (#104430).

The weekend is upon us again, so enjoy it.


Thursday, 17 September 2020

Many Layered Blossoms

Hello,

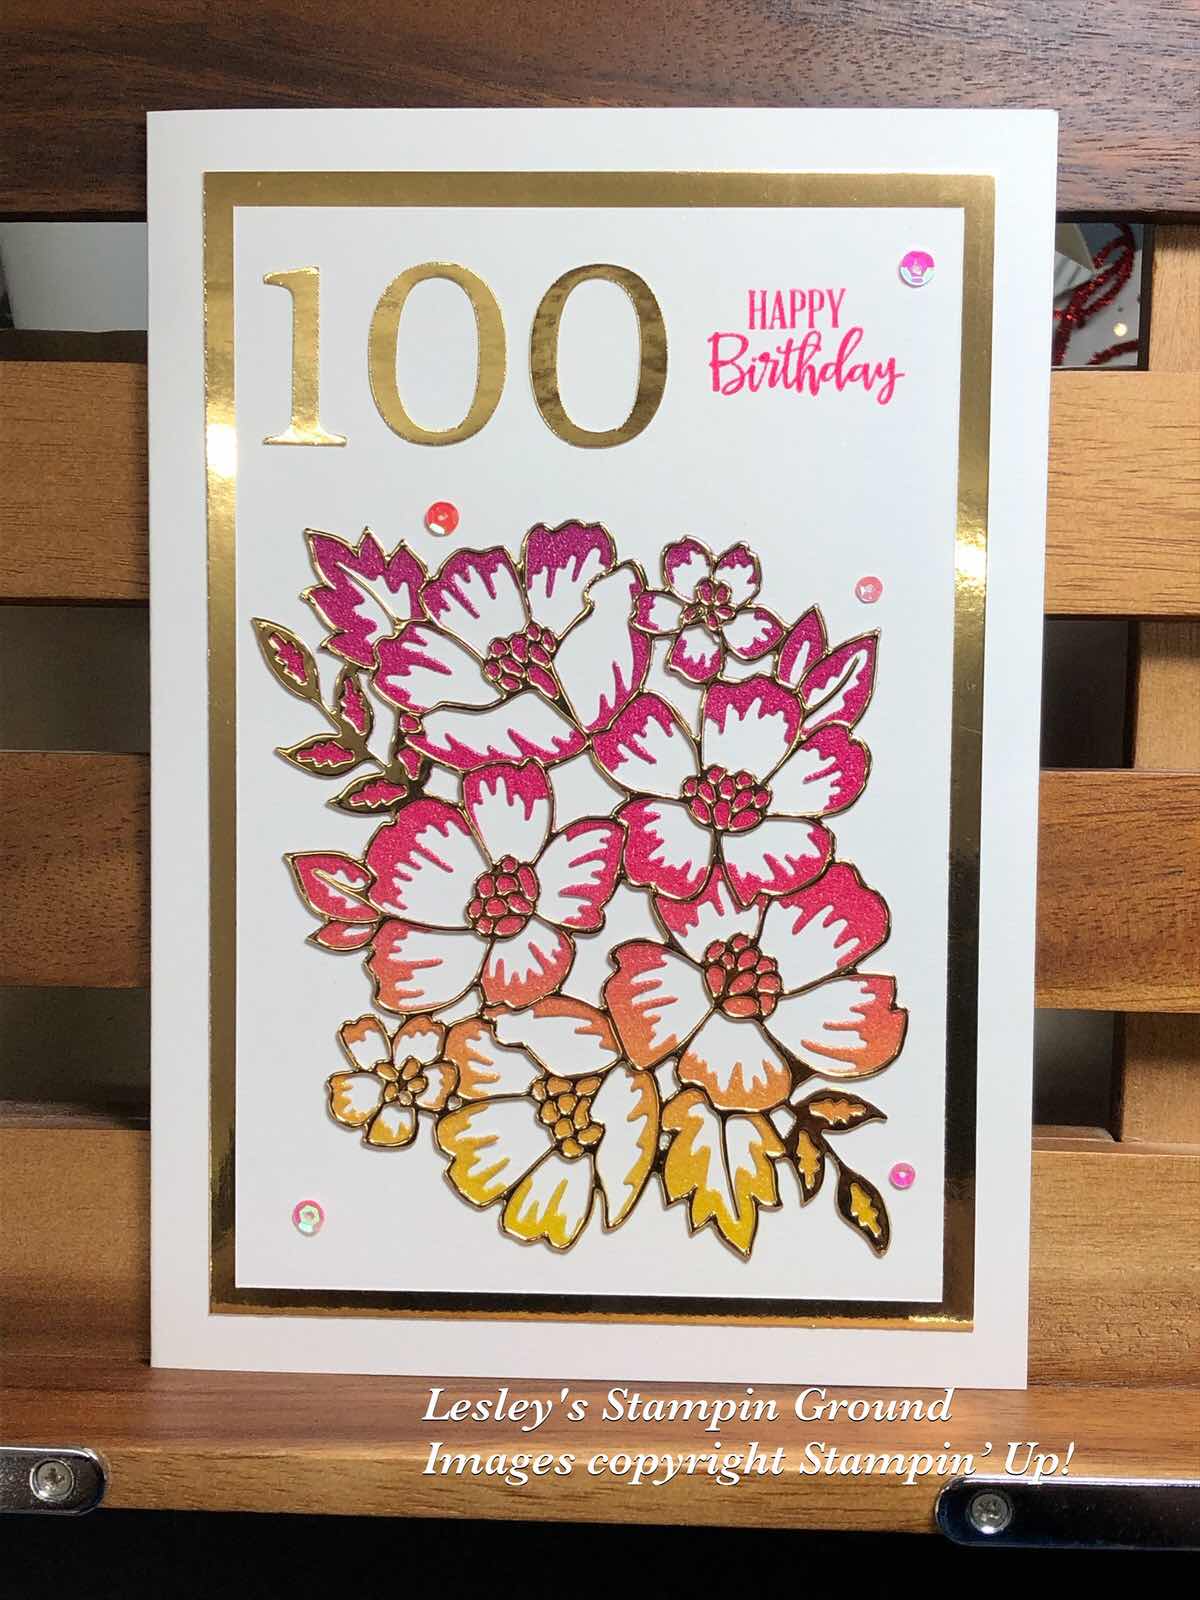
I was asked to make a birthday card for a lady turning 100, so I hope she likes it.


I used the Shimmery White card (#121717), using the whole sheet and folding in half for the base card. I adhered the Adhesive Sheets (#152334) to the back of the Rainbow Glimmer Paper (#153056) and Brass Foil Sheets (#153057) before cutting the flowers using the Many Layered Blossoms Dies (#153582). The sentiment from the Peaceful Moments stamp set (#151595) was stamped with Magenta Madness ink (#153117), then re-stamped with VersaMark (#102283) and Heat embossed with Clear Stampin’ Emboss Powder (#109130) and set with the Heat Tool (#129056). The Stamparatus (#148187) is the perfect tool to be able to heat emboss in any colour like this. The cardfront was attached to a piece of the Brass Foil. Sequins from The Woven Threads Sequin Assortment (#149498) were attached to the card using the Fine-Tip Glue Pen (#138309).

Enjoy your day!!


Monday, 31 August 2020

Poppy Moments Dies

Hello again,

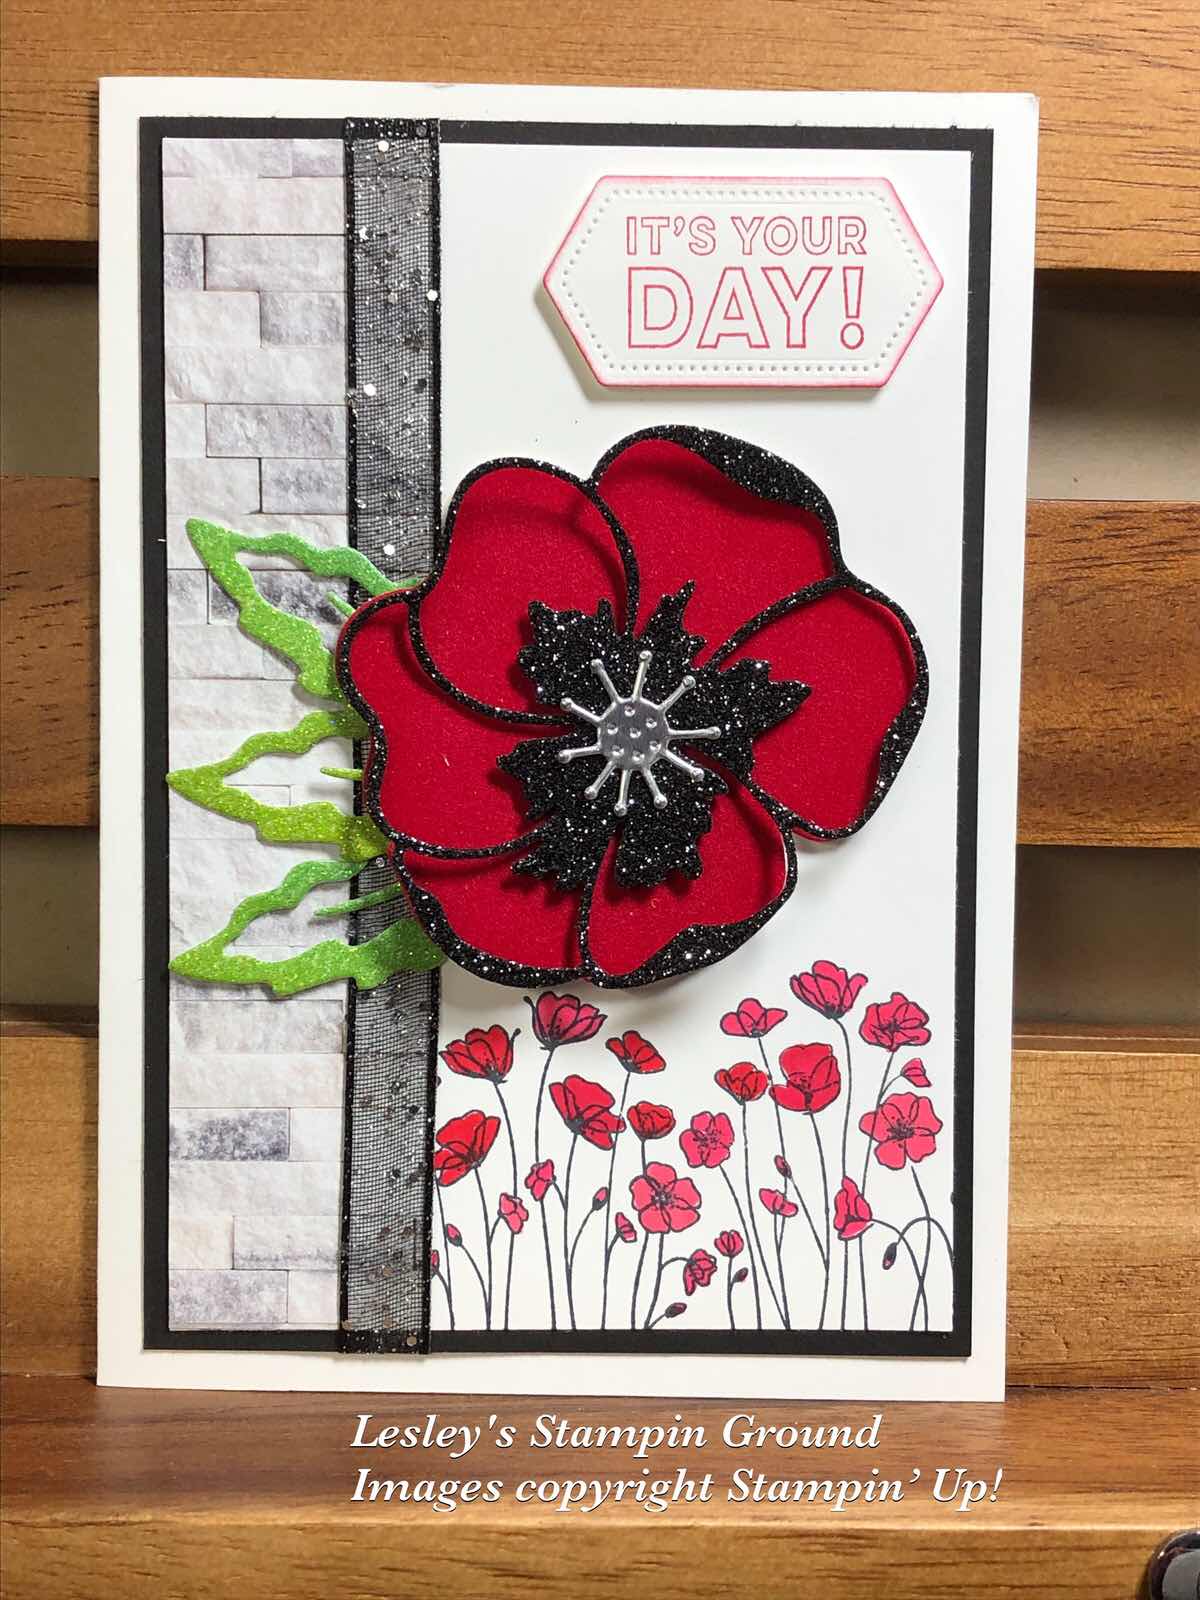
A bright & glittery card with the Black Glitter Paper (#153518), the Rainbow Glimmer Paper (#153056) and the 3/8” Glittered Organdy Ribbon (#147897).


Firstly I stamped the small poppies from the Painted Poppies stamp set (#c151599) using Tuxedo Black Memento ink (#132708). These were coloured with Real Red Stampin’ Blends (#154899) and Poppy Parade Stampin’ Blends (#154958). I attached the piece of In Good Taste Designer Series Paper (#152494) to the Whisper White card (#106549), then this was attached to the Basic Black card (#121688). I wrapped the ribbon around the card before attaching the cardfront the the Whisper White base card. The die cut poppy was cut with the Poppy Moments Dies (#151594). The base was cut from the Red Velvet Paper and the detailed piece was cut from the Black Glitter Paper. These were attached together and onto the card with Stampin’ Dimensionals (#104430). I used Silver Foil Sheet (#132178) for the poppy centre and attached this with Mini Glue Dots (#103683). The leaves were cut from the Rainbow Glimmer Paper and also attached with glue dots. The sentiment is in the Many Mates stamp set (#c152633) and stamped with Real Red ink (#147084). A Stitched Nested Labels die (#149638) was used to cut the sentiment, I sponged the edges with Real Red ink and attached it to the card with Stampin’ Dimensionals. 

Enjoy your day, stay safe and keep crafting!!


Wednesday, 19 August 2020

Beauty Abounds

Hi friends,

I love some sparkle and shine on my cards, so was able to achieve this with the glimmer paper, ribbon, embellishments and Wink of Stella.


I stamped the floral image along the bottom of the Whisper White card front (#106549). This is from the Beauty Abounds stamp set (#c148726) and stamped with the Tuxedo Black Memento ink (#132708). The flowers and leaves were coloured with the following Stampin’ Blends - Granny Apple Green (#154885), Mango Melody (#154888), Magenta Madness (#153106), Highland Heather (#154887), Rich Razzleberry (#154898), Purple Posy (#154896) and Flirty Flamingo (#154884). I added the Clear Wink Of Stella (#141897) to the coloured flowers.  “Best Wishes” from the Borders Abound stamp set (#c152627) was also stamped with Tuxedo Black Memento ink. I wrapped the 3/8” Glittered Organdy Ribbon (#147897) around the White card then attached this to the Magenta Madness card (#153085), then onto the Whisper White base card.
 The 2 layers of the butterfly were cut with the Butterfly Beauty die (#151819). There are 5 butterflies attached on the side dies and I just cut one of the butterflies. I used the Rainbow Glimmer Paper (#153056) for the base of the butterfly and Black Glitter Paper (#153518) for the top. I glued these together with the Fine-Tip Glue Pen (#138309) then attached it to the card with Mini Stampin’ Dimensionals (#104430). The flowers were also cut from the Rainbow Glimmer Paper and the centres from the Black Glitter Paper. The dies for the flowers are from the Cherry Blossoms (#151456). These were attached to the card with Mini Glue Dots (#103683). The trio of Rhinestone Basic Jewels (#144220) were added under the sentiment to finish the card.

Have a great crafty day.

Monday, 10 August 2020

Birds & More Dies

Hi & welcome friends,

I have used The Birds & More dies (#152721) on today’s card. These also co-ordinate with the Birds & Branches stamp set (#p152570), however I have only used the dies here.


I cut the bottom edge of the Very Vanilla card (#106550) with a one of the dies. Then I dry embossed this card with one of the Meadow Moments Embossing Folders (#153126). There are 2 smaller folders in this set with different embossed images. I adhered the Adhesive Sheets (#152334) to some Mint Macaron card (#138344), then cut the branches with the Birds & More Dies and attached the branches to the card front. The birds are also cut with the same set of dies. I used the beautiful Rainbow Glimmer Paper (#153056) for these cute birds. Stampin’ Dimensionals (#104430) were used to attach the birds & sentiment. “Celebrate” is from the Itty Bitty Greetings stamp set (#c151331) and I used an Ornate Frames Die (#150664) to cut this. The Gold Trim from the Forever Greenery Trim Combo Pack (#152475) was attached to the label. The embellishments are from the Holiday Rhinestone Basic Jewels (#150457). The card front was attached to Mint Macron card, then this was attached to the Very Vanilla base card.

Hope you can have a crafty day!!


Sunday, 9 August 2020

Rainbow Glimmer Paper

Hello,

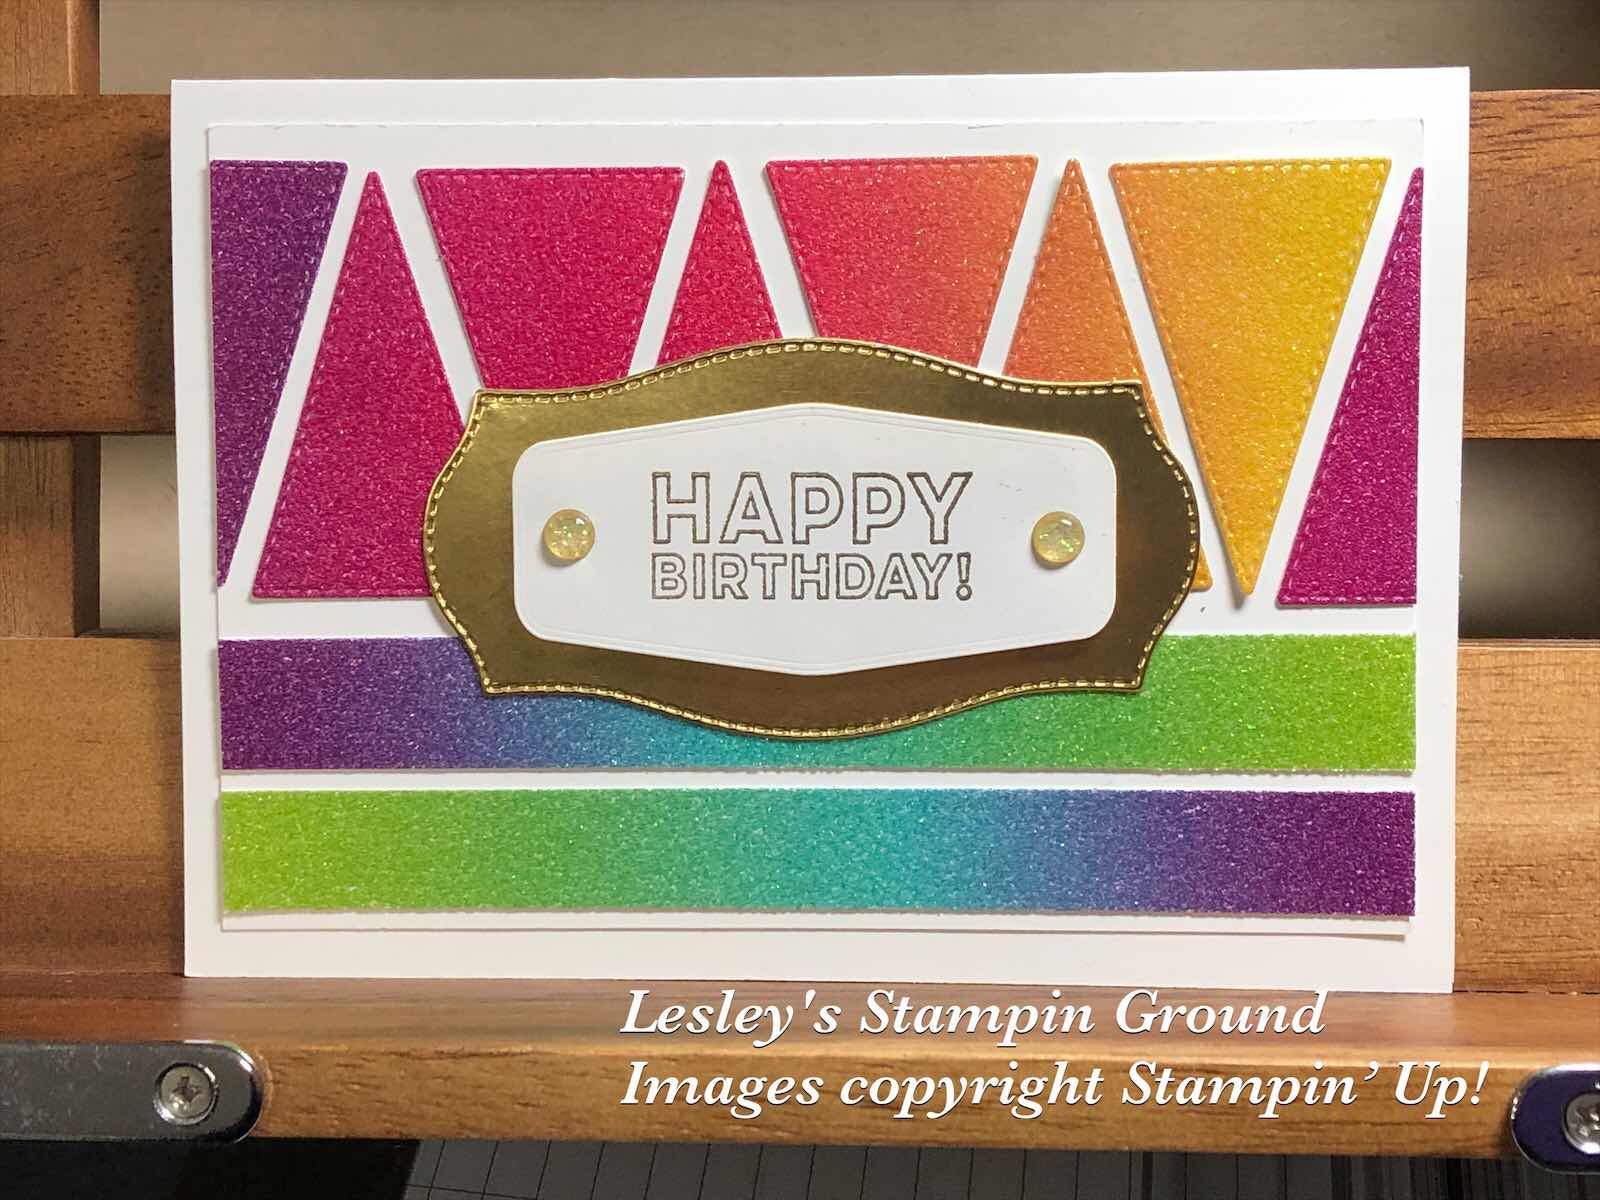
If you like some sparkle on your cards you will love the Rainbow Glimmer Paper (#153056). This paper has a beautiful ombré effect.


I cut the triangles with the Stitched Triangles Dies (#152710) and I cut 2 strips for the bottom of the card. I attached them to a piece of Whisper White card (#106549) which was also attached to the Whisper White Base card. “Happy Birthday” is from the Many Mates stamp set (#c152633) and stamped with VersaMark (#102283) and heat embossed with Gold Stampin’ Emboss Powder (#109129) and set with the Heat Tool (#129056). The sentiment and the Gold Foil Sheet (#132622) were both cut with Tasteful Labels Dies (#152886). The sentiment was attached to the Gold Foil die cut label with Stampin’ Dimensionals (#104430). Gold Glitter Enamel Dots (#152155) added some more glitter to the card.

Well that was easy!!

Have a great week.