Showing posts with label #embossingpaste. Show all posts

Thursday, 6 February 2025

Happy Hibiscus

 Hi friends,

The Happy Hibiscus Bundle (#164880) consists of the Happy Hibiscus stamp set (#164877) and the Happy Hibiscus Hybrid Embossing Folder (#164879). All the Stampin’ Up! hybrid folders includes the embossing folder as well as the dies. One of the dies fits into the embossing folder allowing you to cut and embossing at the same time.


Firstly, using one of  the Linked Together Decorative Masks (#164809), I blended the Summer Splash ink (#163809) using a Blending Brush (#153611) onto the Basic White card (#159228). Using another mask and using a Palette Knife (#142808) I applied Shimmery White Embossing Paste (#145645) on top. This needs to be set aside till it dries. If this is done first, it should be dry by the time you do all the other elements.

I stamped the image with the 3 flowers onto Real Red card (#106578) using Cherry Cobbler ink (#147083). I then placed the die into the embossing folder and line up the stamped image and cut & embossed it. The 3 flowers are cut into individual flowers. I have only used the 2 larger ones on this card. The leaves are cut with dies from the same dies using Summer Splash card (#163798).

I stamped the label with a stamp from the Bright Borders stamp set (#164753) using Summer Splash ink.  “Happy Birthday” from the Loveliest Tree stamp set (#163714) was stamped with Real Red ink (#147084). This was then punched with the co-ordinating To The Point Label Punch (#164568).

Once the card front had dried, I matted it with the Summer Splash card and then Real Red card and attached it to the Basic White base card.

The flowers and sentiment were attached with Stampin’ Dimensionals (#104430) and I used Mini Glue Dots (#103683) for the leaves. Clear Wink Of Stella (#141897) added glimmer to the flowers.


“Love what you do and share what you love.”

INSPIRE. CREATE. SHARE. 


https://www.stampinup.com.au


Friday, 7 January 2022

Butterflies & Flowers Layering Decorative Masks

Hello & welcome,

I am loving the new products in the Mini Catalogue and one of my favourite products (although there are many!) is the  Butterflies & Flowers Layering Decorative Masks (#158142).


I cut a piece of Basic White card (#159228) with a Scalloped Contours Die (#155560).

The Layering masks, as suggested, have 2 masks which allow layering. I used the “background” to colour the flowers. I used 4 colours for these flowers - Polished Pink (#155712), Highland Heather (#147103), Pale Papaya (#155670) and Daffodil Delight (#147094). Each of these colours were applied using the Blending Brushes (#153611). For the smaller flowers you may find it easier to use Sponge Daubers (#133773).

Then I placed the next mask on top and applied the Shimmery White Embossing Paste (#145645) using a Palette Knife (#142808). What a great effect.

The card front is from the Abstract Beauty Specialty Designer Series Paper (#158039). I wrapped the 2 pieces of the Polished Pink Open Weave Ribbon (#155714) around the corner of the card. The scalloped rectangle was attached to the card with Stampin’ Dimensionals (#104430).

“Happy Birthday” from the Art Gallery stamp set (#158201) was stamped with Magenta Madness ink (#153117) and cut with a Seasonal Labels die (#156299). This was also attached with Dimensionals. The trio of Iridescent Rhinestone Basic Jewels (#158130) was added for some extra sparkle.


TIPWash your mask and palette knife as soon as you finish using the embossing paste as this dries very quickly and will be difficult to remove once dried.


“Love what you do and share what you love.”


Saturday, 13 March 2021

Embossing Paste

Hi everyone,

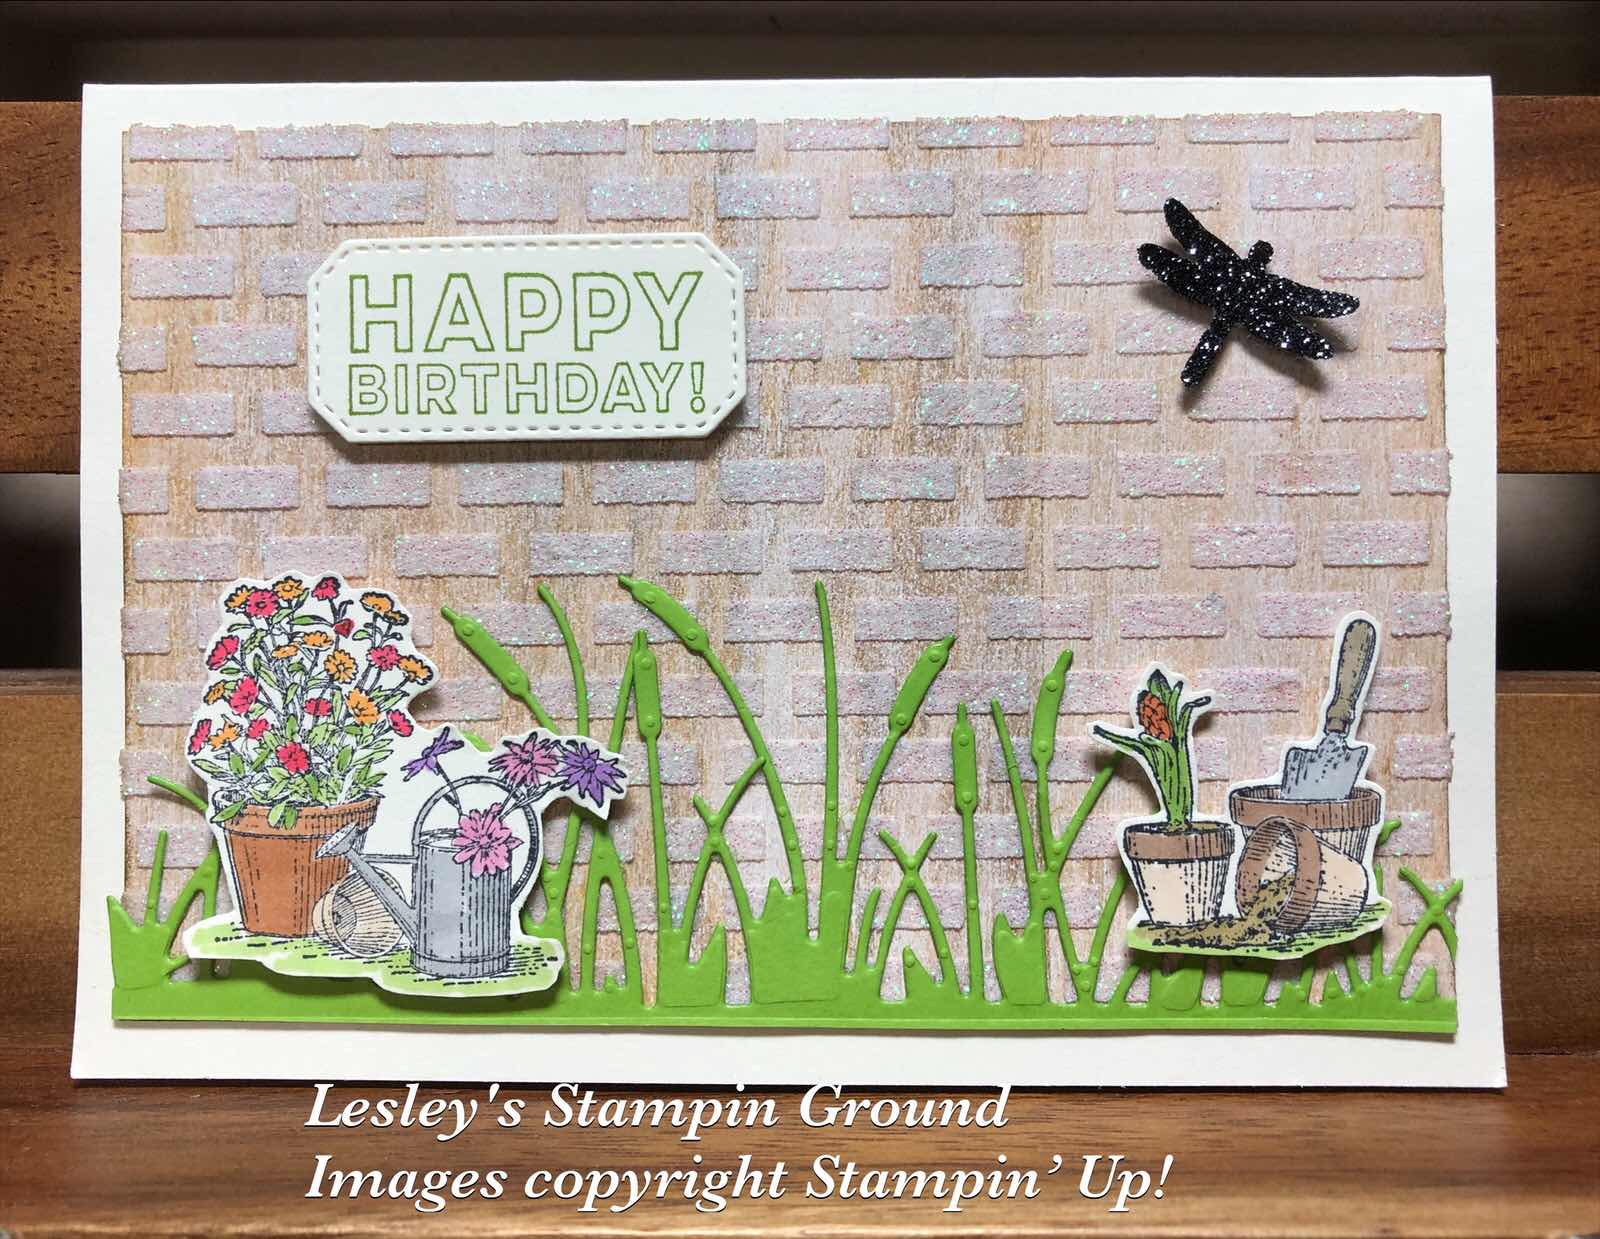
I have created the bricks for the background using the Shimmery White Embossing Paste (#145645).


I used a retired mask for the bricks and applied the Embossing Paste on a piece of In Good Taste Designer Series Paper (#152494). To apply the paste I used a Palette Knife (#142808) and wiped the paste over the mask onto the DSP. This doesn’t take long to dry, so just set it aside till all the other elements are ready to assemble. 
I attached Adhesive Sheet (#152334) to one side of the Granny Apple Green card (#147014) before cutting the grass using a Friendly Silhouettes Die (#149546). The 2 images from the Garden Shed stamp set (#149247) were stamped with Tuxedo Black Memento ink (#132708), then coloured with Stampin’ Blends. The colours are Poppy Parade (#154958), Mango Melody (#154888), Granny Apple Green (#154885), Rococo Rose (#154900), Highland Heather (#154887), Smoky Slate (#154904), Bronze & Ivory (#154922), Soft Suede (#154906), Crumb Cake (#154882) & Pumpkin Pie (#154897). These were fussy cut and attached to the card with Mini Stampin’ Dimensionals (#144108).
Happy Birthday is from the Many Mates stamp set (#152633) and stamped with Granny Apple Green ink (#147095), then cut with a Hippo & Friends Die (#153585). The small dragonfly was punched with the Dragonflies Punch (#154240) from the (retired) Black Glitter Paper.
The base card is Very Vanilla (#106550).

I hope your weekend is a relaxing one (perhaps spending time in the garden)!!

“Love what you do and share what you love.”