Showing posts with label #brushedmetalliccardstock. Show all posts

Wednesday, 15 July 2026

Botanical Glow Sympathy card

 Hi everyone,

I am in need of some Sympathy cards so couldn't go past the Botanical Glow Hot Foil Dies Bundle (#170057). I have also used some retired products.


I used the Botanical Glow Hot Foil Dies (#170056) with Gold Foil (#170066) on Basic White card (#166781). I then stamped the leaves from the Botanical Glow stamp set (#170054) with Soft Sea Foam ink (#147102).

The doves are cut from the retired Peace On Earth dies using (retired) Brushed Metallic Cardstock.

The card front was matted with the Gold card and attached to the Basic White base card.

The sentiment from the (retired) So Sincere stamp set was stamped with VersaMark (#102283) and I added Gold Powder from the Metallics Wow! Embossing Powders (#165678). This was set with the Heat Tool (#129056). The sentiment and the gold card were cut with a Nested Essentials die (#161597). The sentiment and doves were attached to the card with Stampin’ Dimensionals (#104430).

This is a larger card, using A4 card folded in half.


“Love what you did and share what you love.”

INSPIRE. CREATE. SHARE.


https://www.stampinup.com.au


lesley.j.jendra@gmail.com


http://lesleysstampinground.blogspot.com


Wednesday, 5 April 2023

Designer Tags dies

Hi stamping friends,

The Designer Tags Dies (#159165) have been used today on this card. This is another of the retiring products from the Annual catalogue.


These dies were used to cut the floral image on the Basic White card (#159228), the 2 labels and the butterfly. I cut the floral image again with Pear Pizzaz card (#131290) which was backed with Adhesive Sheet (#152334). I attached the Basic White card front to the Merry Merlot card (#147005). Then I added the pieces of the leaves into the corresponding cut outs.

The sentiment from the Peaceful Moment stamp set (#151595) was stamped with Merry Merlot ink (#147112). I used the Brushed Metallic Card stock (#153524) for the detailed die cut label and butterfly. The labels were attached with Mini Glue Dots (#103683) and the butterfly with Mini Stampin’ Dimensionals (#144108). 

The Brushed Brass Butterflies (#158136) were added to the card. The Gold Simply Elegant Trim (#155766) was threaded through the labels.

The retiring products are the Designer Tags Dies, Peaceful Moments stamp set, Merry Merlot card & ink & Pear Pizzaz card.

“Love what you do and share what you love.”

INSPIRE. CREATE. SHARE.


Tuesday, 28 March 2023

Around The Bend dies

Hello again friends,

Todays card is variation of the last card I posted using the Fine Shimmer Paper Pack (#160428) and using a variety of dies for the leaves.


I cut the Gold from the Fine Shimmer pack using an Around The Bend die (#160649), then punched the top left corner with the Very Best Trio Punch (#159878). This was attached to the Very Vanilla base card (#106550). The shimmery green leaves and the shimmery purple flowers & square are also from the Fine Shimmer Paper Pack. For the other leaves I used the Brushed Metallic cardstock (#153524).

The dies for the leaves and flowers are from the Around The Bend dies, Dainty Delight dies (#160674), Framed Florets dies (#160623 and Queen Bee dies (#160484). 

The stamped flower is from the Petal Park stamp set (#160571). This was stamped with Tuxedo Black Memento ink (#132708). I added some Gorgeous Grape from the Assortment 2 Watercolor Pencils (#149014). I used the Clear Wink Of Stella (#141897) to spread some colour toward the tips of the petals. This was punched with the Petal Park Builder Punch (#160576).

All the card for the leaves had Adhesive Sheet (#152334) attached to the back before cutting, to make them easy to attach to the card. The flowers were attached with Stampin’ Dimensionals (#104430). The layers of the mauve & gold flowers were attached with Mini Glue Dots (#103683).

The sentiment is from the Framed Florets stamp set (#161815) and stamped with Highland Heather ink (#147103). This and the mauve card were cut with the Stylish Shapes dies (#159183).

The ribbon is the gold from the Gold & Silver Trim Combo Pack (#161633) and attached with Mini Glue Dots. The embellishments are the Adhesive-Backed Milky Dots (#160582).

“Love what you do and share what you love.”

INSPIRE. CREATE. SHARE.


lesleyjendra.stampinup.net


lesley.j.jendra@gmail.com

Thursday, 8 December 2022

Artistic Dies

Hi everyone,

I was having a mental block today when it came to making a card so I have made my version of a card from Tammy Wilson, from the 2021 Stampin’ Up Design Team. Thanks for the inspiration.


I cut the Basic White card (#159228) with a die from the Artistic Die (#155371) for the floral image. The Soft Sea Foam card (#147012) was dry embossed with the Timber 3D Embossing Folder (#156406), then matted within the Brushed Metallic Cardstock (#153524). The base card is Basic White.

The floral image was attached with Mini Glue dots (#103683). The DSP is from the Design A Daydream Designer Series Paper (#159161) and attached with Stampin’ Dimensionals (#104430). I cut the Gold Foil with a die from the Flowers Of Home dies (#157938) and also attached with Mini Glue dots to the DSP.

“Happy Birthday” is from the Artistically Inked Stamp set (#154542). This was stamped with VersaMark (#102283) and I used Gold Stampin’ Emboss Powder (#155555) which needs to be set with the Heat Tool (#129056). The die from Sending (#159271) was used to cut the sentiment.

I attached the Gold Simply Elegant Trim (#155765) and the Soft Sea Foam Seam Binding Ribbon (#159680) under the sentiment. Stampin’ Dimensionals were used to attach the sentiment to the card. Elegant Faceted Gems (#159189) were also added.


“Love what you do and share what you love.”

INSPIRE. CREATE. SHARE.


Tuesday, 22 November 2022

Twigs & Sprigs Embossing Folder & Die

Hi friends,

The Twigs & Sprigs Embossing Folder & Die (#159168) is a set that can be used together or separately. You can use the embossing folder as normal, or you can fit the die into the embossing folder and you can cut and emboss at the same time. I have used both on this card.


For the Very Vanilla (#106550) background I embossed with the embossing folder. Firstly I inked one side of the folder with Soft Sea Foam ink (#147102) then ran it through the Stampin’ Cut & Emboss Machine (#149653). I chose the de-embossed side as this added the colour nicely to the leaves. This card was attached to the Pear Pizzazz card (#147104) and a piece of Design A Daydream Designer Series Paper (#159161) was added to the side. The Gold & Vanilla Satin-Edged Ribbon (#159555) was wrapped around the cardfront, then attached to the Very Vanilla base card.

The sentiment from the Framed Florets stamp set (#161815) was stamped with Soft Sea Foam Ink (#147102) using the Stamparatus (#148187). I then re-stamped this with VersaMark (#102283) and embossed this with Clear Embossing Powder (#155554) and set it with the Heat Tool (#129056). The Beautiful Shapes Dies (#158046) were used to cut the sentiment and the Pear Pizzazz card underneath.

The gold leaves were cut and embossed with the Twigs & Sprigs Embossing Folder & Dies. The Gold is from the Brushed Metallic 12”x12” Cardstock (#153524). 2 of the leaves and the sentiment were attached with Stampin’ Dimensionals (#104430). The Classic Matte Dots (#158146) were added to finish the card.


“Love what you do and share what you love.”

INSPIRE. CREATE. SHARE.


Saturday, 12 November 2022

Rugged Icons dies

Hi stamping friends,

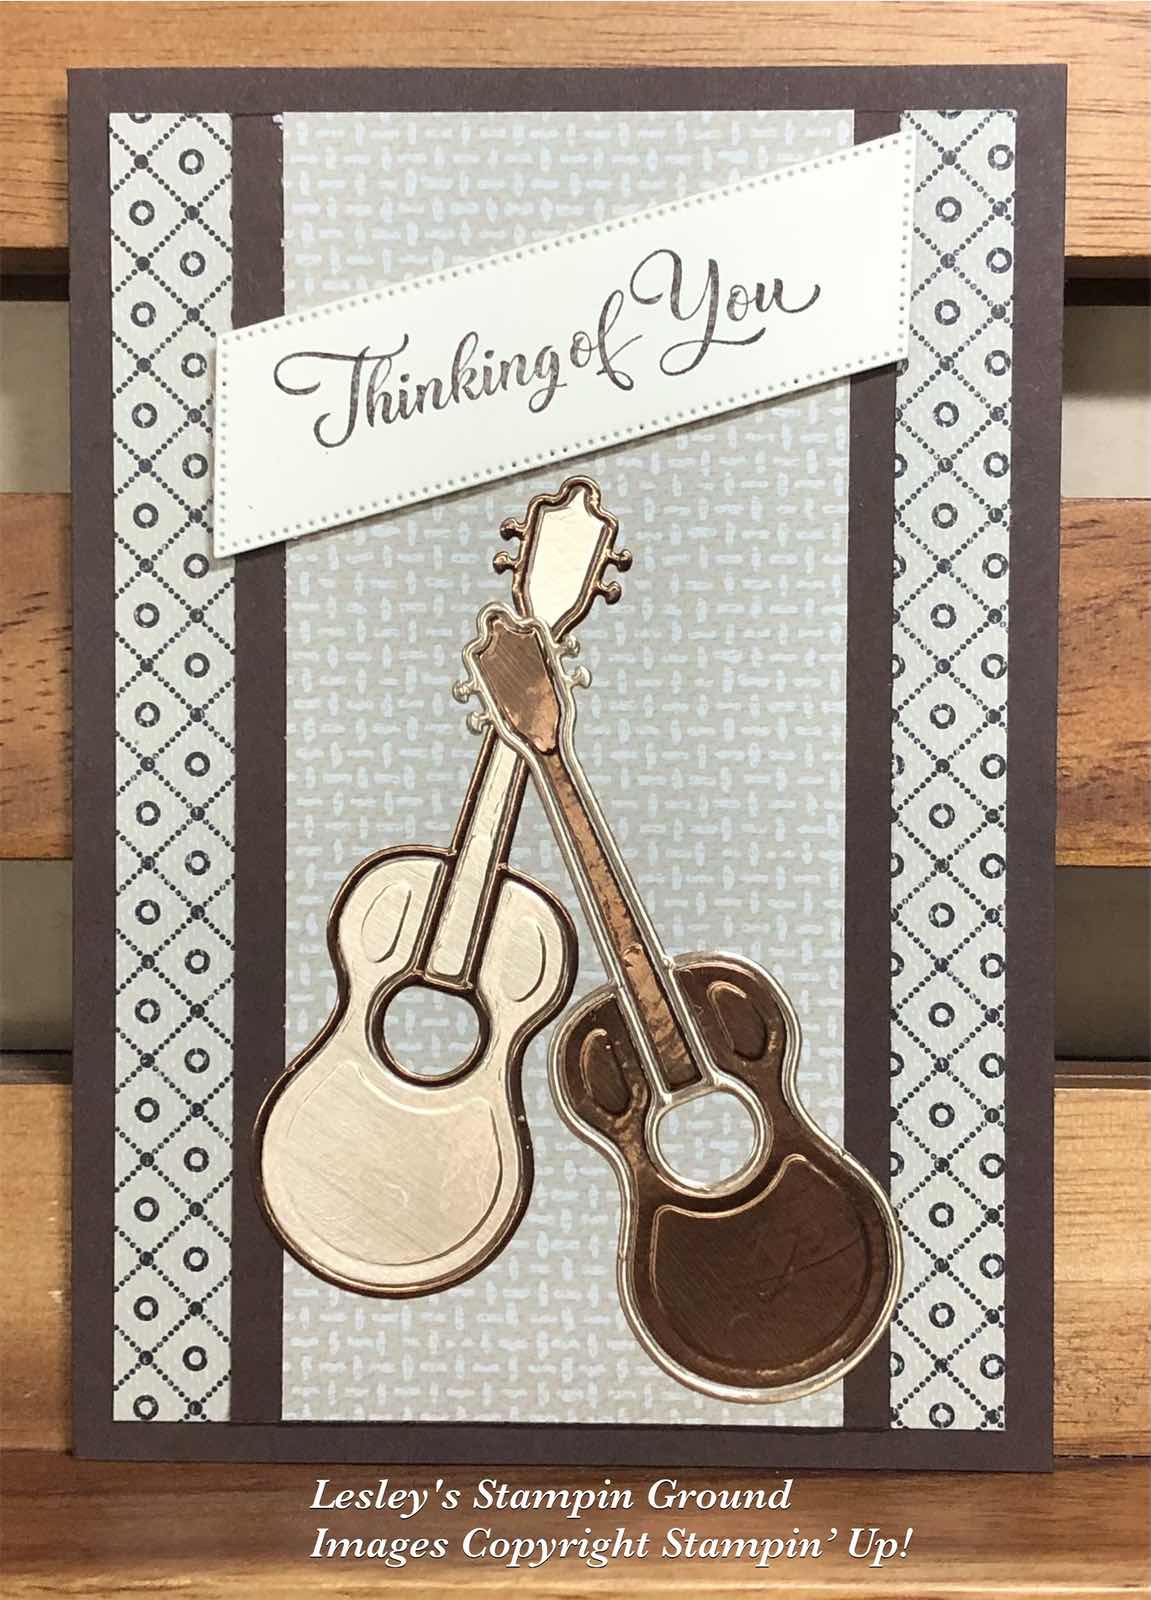
It’s a while since I have made a masculine card so I have used the guitar from the Rugged Icon Dies (#159104) for this card.


The 2 designs of Designer Series Paper is from He’s The Man Specialty (#159068). This was attached to the Early Espresso card (#121686).

I cut 2 guitars from two of the colours from the Brushed Metallic 12”x12” Cardstock (#153524). I had Adhesive Sheet (#152334) adhered to the back first and these were attached to the card. I used the outline of each colour and swapped the colours for the inside.

“Thinking Of You” is from the Go To Greetings stamp set (#158763) and stamped with Early Espresso ink (#147114). A Frosted Flurry Die (#159811) was used to cut the sentiment.

“Love what you do and share what you love.”


Tuesday, 12 April 2022

Wild & Sweet stamp set

Hello crafty friends,

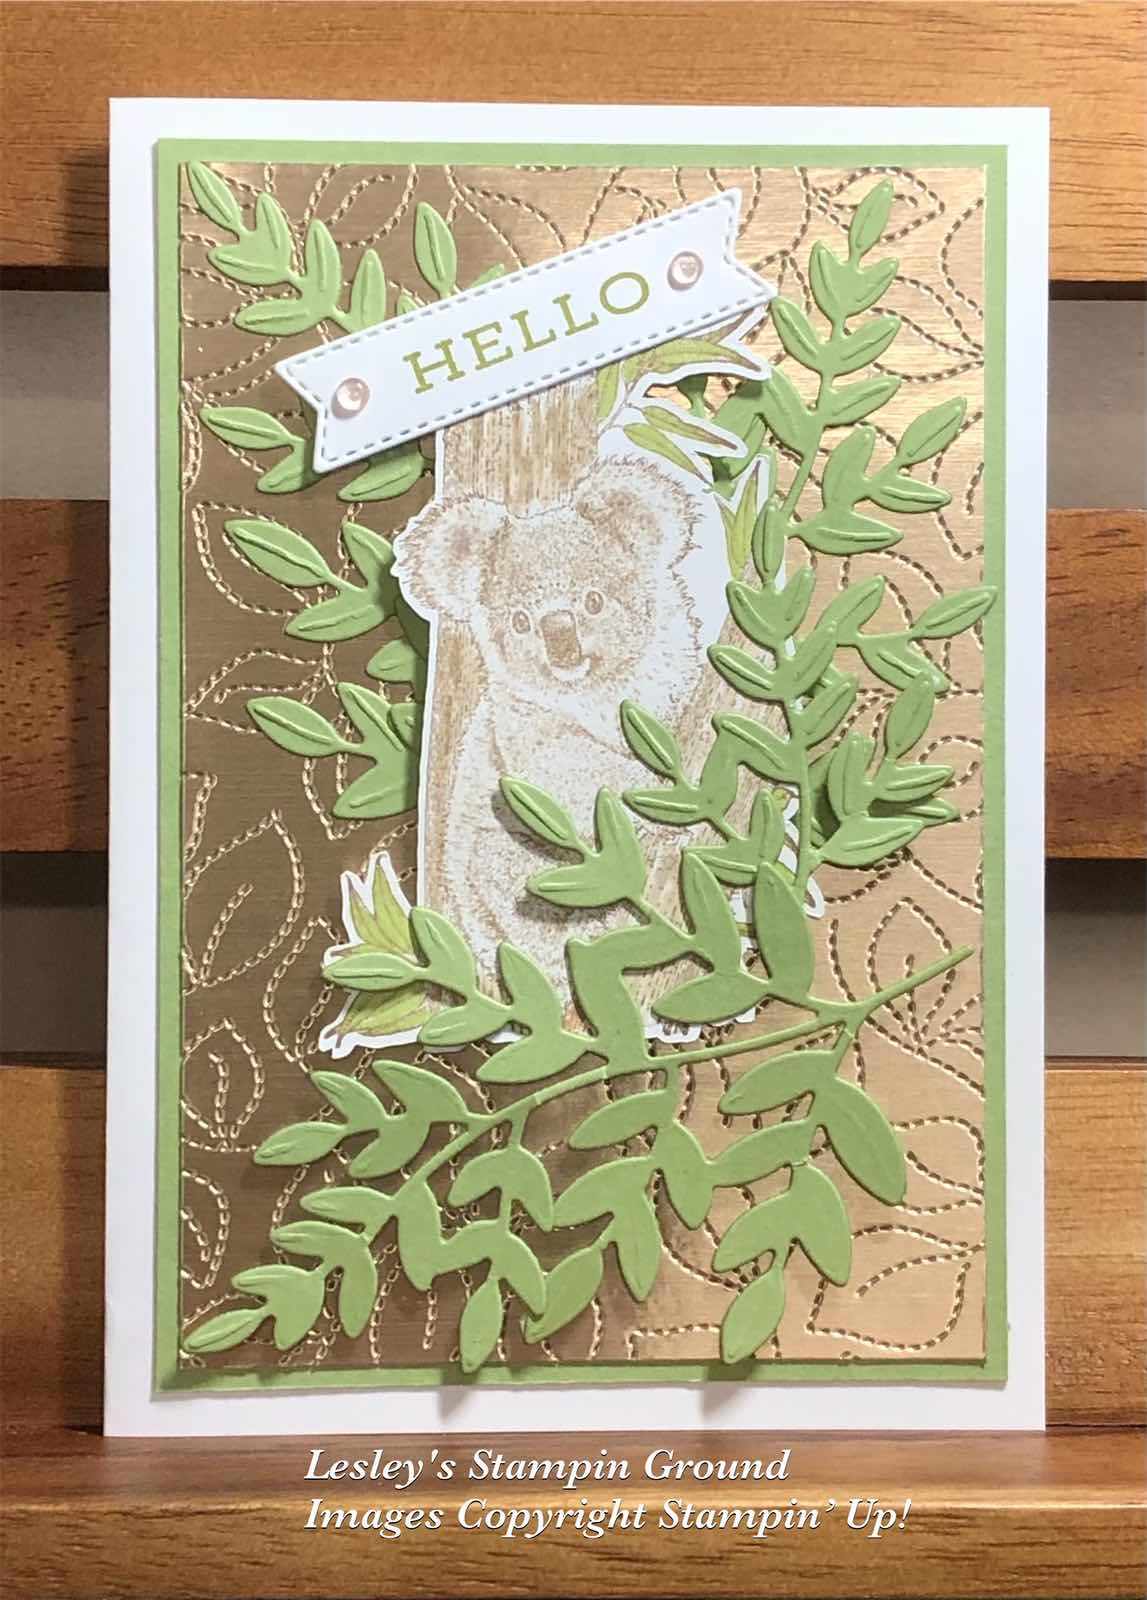
I was so excited to see this very cute koala in the upcoming annual catalogue, so here is a sneak peek of the Wild & Sweet stamp set (#158775).


I stamped the koala with Crumb Cake ink (#147116) onto Basic White card (#159228). I coloured the tree trunk with a Light Crumb Cake Stampin’ Blend (#154882). The leaves were coloured with light Granny Apple Green Stampin’ Blend (#154885). I fussy cut this stamped image. 

I dry embossed the Brushed Metallic Cardstock (#153524) for the background with the Stitched Greenery die (#155451). This was then matted with Pear Pizzaz card (#131290). I backed another piece of Pear Pizzaz card with Adhesive Sheet (#152334) and cut 2 leaves with the Forever Flourishing Dies (#152714) and attached these to the card front. 

The koala was attached to the card with Stampin’ Dimensionals (#104430). I cut a 3rd leaf without the adhesive backing as I was attaching this to the card with Stampin’ Dimensionals.

“Hello” is from the Forever Fern stamp set (#152559), stamped with Pear Pizzaz ink (#147104) and cut with a Tasteful Labels Die (#152886). This was attached with Mini Stampin’ Dimensionals (#144108) and the Polished Dots (#158134) were added to the sentiment. The base card is Basic White card.

I added the Clear Wink Of Stella (#141897) to the koalas but I don’t think this shows in the photo.

The Tasteful Labels Dies are retiring.

“Love what you do and share what you love.”


Wednesday, 26 January 2022

Grassy Grove Bundle

Hi & welcome again,

The Grassy Grove stamp set (#157836) and the Grove Dies (#157844) can be purchased in a bundle - the Grassy Grove Bundle (#157845). You will save 10% on all bundles.


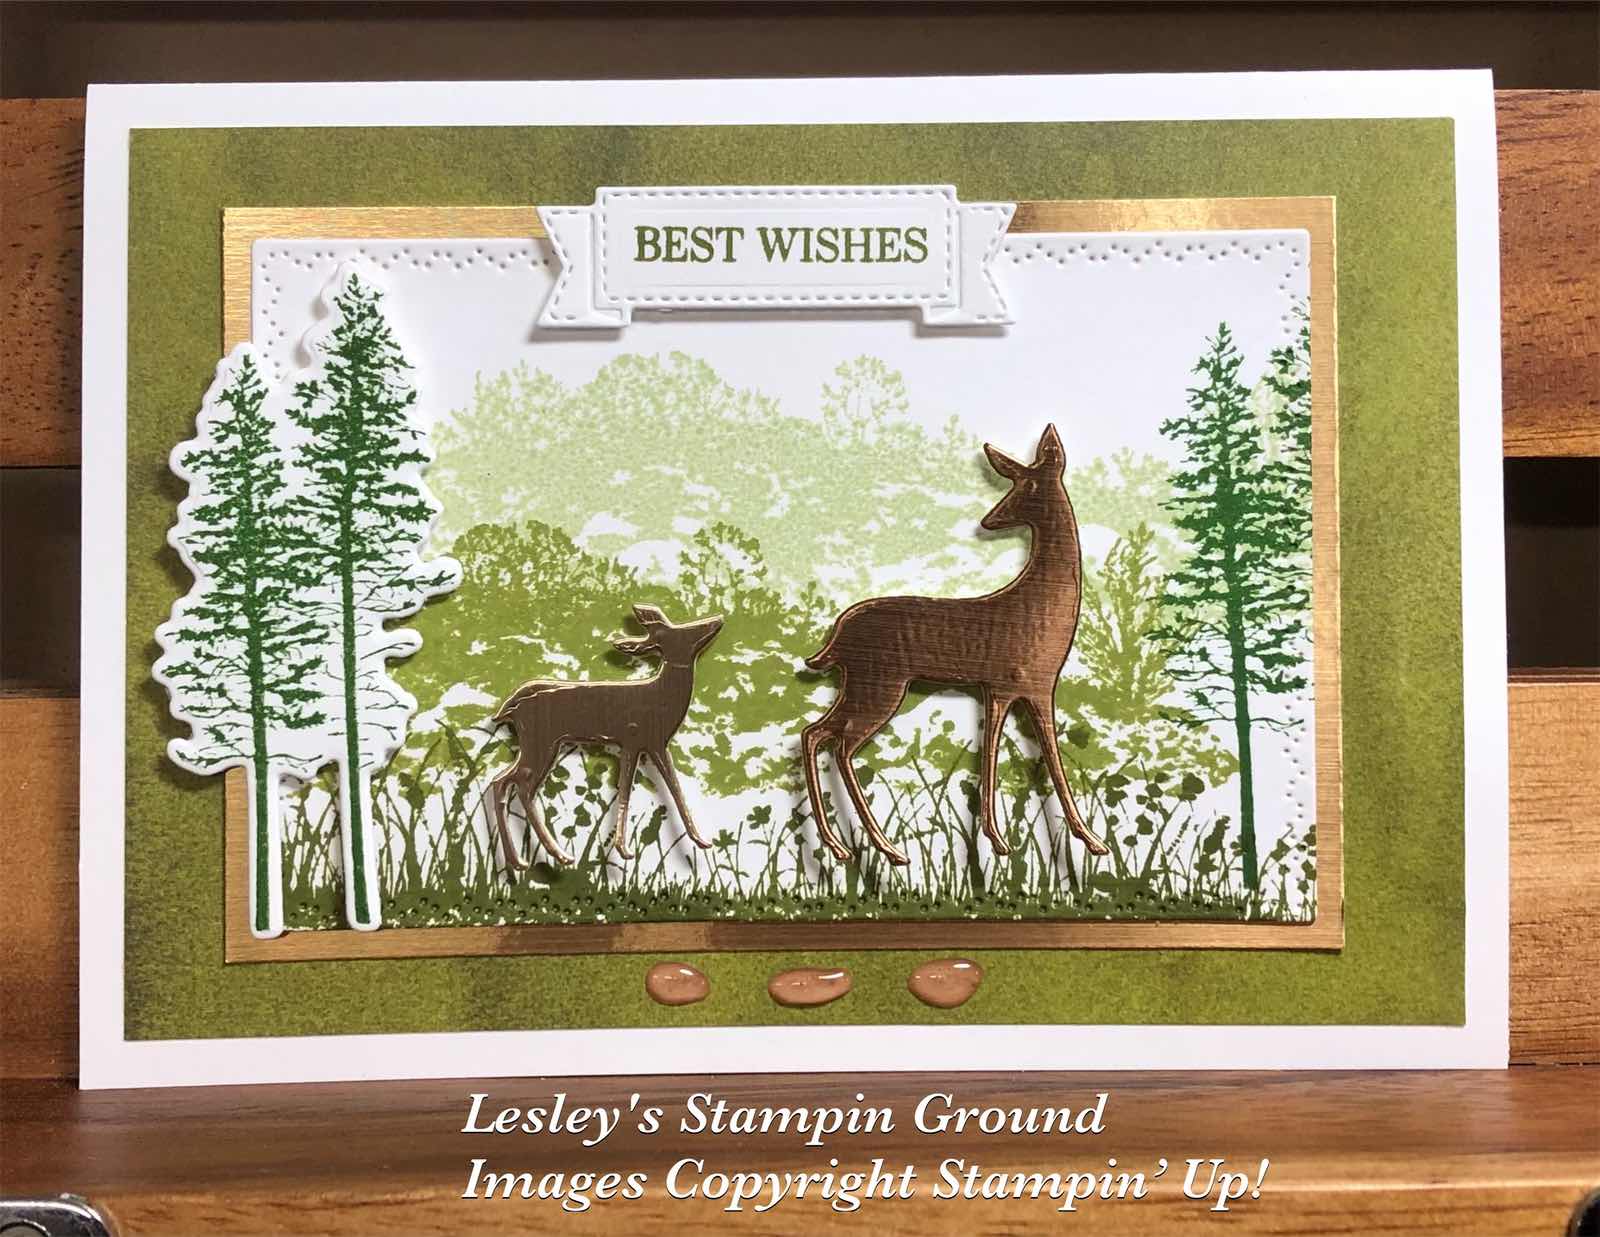
I stamped the bushy image from the Grassy Grove stamp set with Soft Sea Foam ink (#147012) onto Basic White card (#159228), then I re-stamped it with Pear Pizzaz ink (#147104) below the first image. Next I stamped the grassy image with Old Olive ink (#147090). I stamped the tall trees with Garden Green ink (#147089) on the right of the card and stamped a second one on another piece of card and cut this with a Grove Die.

I cut the stamped card with a die from the Nature’s Thoughts (#153586) and matted it with the Brushed Metallic 12”x12” cardstock (#153524). There are 3 colours of gold in this pack and I used the other colours for the deers also cut with Grove dies.

The background is from the Beauty Of The Earth 12”x12” Designer Series Paper (#155841) and this was attached to the Basic White base card.

“Best Wishes” from the Special Moments stamp set (#158081) - a Sale-a-bration set - was stamped with Old Olive ink and was cut with a die from the Smooth Sailing Dies (#149576). The sentiment, cut out trees and the deer are all attached to the card with Stampin’ Dimensionals (#104430) and Mini Stampin’ Dimensionals (#144108). The pebbles are from the Pebbles Enamel Shapes (158141).

“Love what you do and share what you love.”


Monday, 22 November 2021

Strong Of Heart stamp set

Hi friends,

In the August -December Stampin’ Up! Mini catalogue is the Strong Of Heart stamp set (#156376), which I have used on todays card. For each of these sets sold Stampin’ Up! donates $4.25 to support heart health which is a fantastic cause. So if you want to help “make a difference”, please consider ordering this set.


I stamped the heart & flower image with Real Red ink (#147084) onto Basic White card (#159228). I stamped the sentiment from the Positive Thoughts stamp set (#151490) with VersaMark (#102283) and heat embossed with Gold Stampin’ Emboss Powder (#155555). This was set with the Heat Tool (#129056).

The base card is Real Red (#106578) and the 2 pieces of Designer Series Paper is from the beautiful Simply Elegant Specialty pack (#155761). The strip of gold is from the Brushed Metallic 12”x12” cardstock (#153524).

The stamped card was attached to the card with Stampin’ Dimensionals (#104430) and the trio of Red Rhinestone Basic Jewels (#146924) were attached to the card.

We all have some bits & pieces of DSP & specialty papers, so this is an easy way to use them.

“Love what you do and share what you love.”


Saturday, 16 October 2021

Picture This Dies

Hello again my crafty friends,

Stampin’ Up! have such a great range of dies, many of them co-ordinate with stamps and others can be used alone with great results.


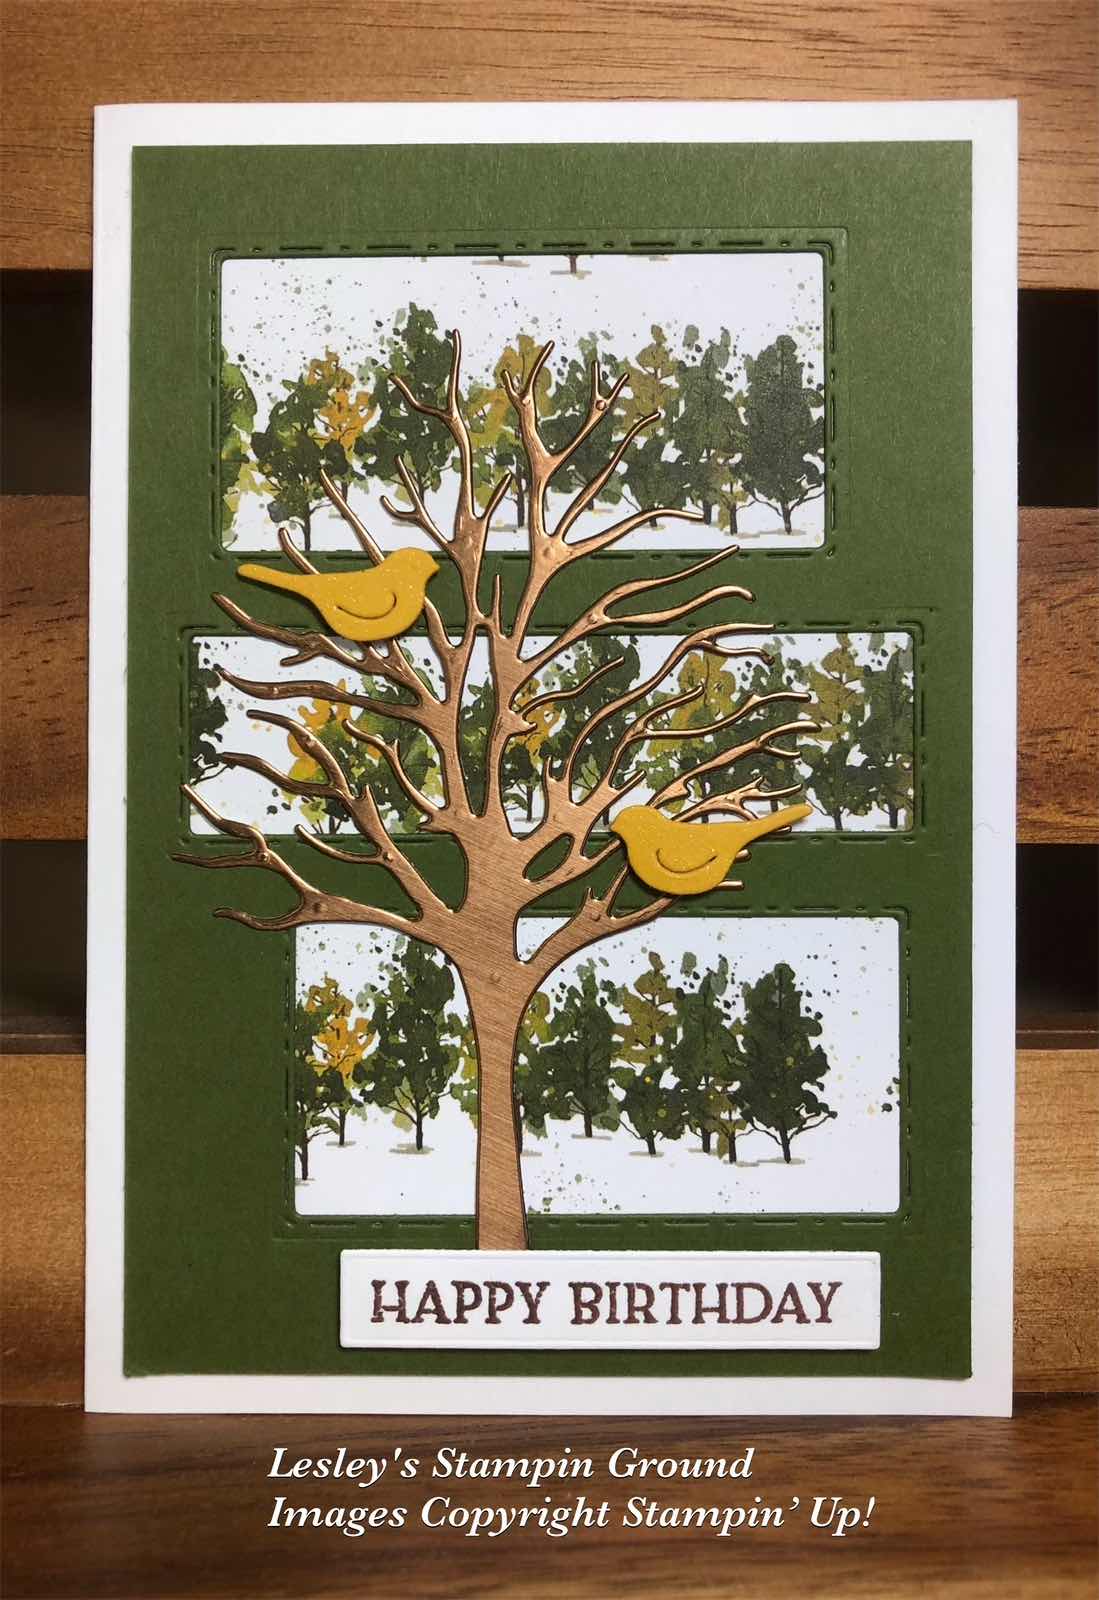
I cut the Mossy Meadow card (#133683) with one of the Picture This Dies (#155559). This was attached to the Beauty Of The Earth Designer Series Paper (#155841), then this was attached to the Basic White base card (#159228).

I cut the tree from Beautiful Trees Dies (#155840) using the darkest of the Brushed Metallic 12”x12” cardstock (#153524) which was backed with Adhesive Sheet (#152334). This makes it easy to attach more detailed pieces to the card.

The birds, also from the Beautiful trees dies were cut from Bumble Bee card (#153082) and attached to the card with Mini Stampin’ Dimensionals (#144108).

“Happy Birthday” is from the Blossoms In Blooms stamp set (#152684) and I stamped this with VersaMark (#102283). I heat embossed this with Copper Stampin’ Emboss Powder (#155555) and set it with the Heat Tool (#129056). The die to cut this is also from the Beautiful Trees dies. I attached the sentiment with Stampin’ Dimensionals (#104430). 

I finished the card by adding glimmer using the Clear Wink Of Stella Brush (#141897) on the birds.

“Love what you do and share what you love.”

Stay safe & keep crafting!!


Thursday, 9 September 2021

Layering Hugs Dies

Hi,

You can’t go past gold and white combined with beautiful products for an elegant card like this one. It was very easy to make as well.


I taped the beautiful Simply Elegant Specialty Designer Series Paper (#155761) to the Basic White base card (#159228). The detailed “hugs” was cut with a die from the Layering Hugs Dies (#155860) using the Brushed Metallic 12”x12” cardstock (#153524).

I dry embossed a piece of Basic White card with the Timeworn Type 3D Embossing Folder (#156505). This was matted with a piece of Brushed Metallic cardstock. This was then attached to the card front with Stampin’ Dimensionals (#104430).

“Hugs” was attached to the white card with Mini Glue Dots (#103683). “On your special day” from the Sending Hugs stamp set (#155022) was stamped with VersaMark (#102283) and heat embossed with Gold Stampin’ Emboss Powder (#155555) and set with the Heat Tool (#129056). The die from the Layering Hugs was used to cut the sentiment and I also attached this to the card with Mini Glue Dots.

“Love what you do and share what you love.”

Stay Safe & keep crafting!!


Sunday, 29 August 2021

Angels Of Peace

Hello my friends,

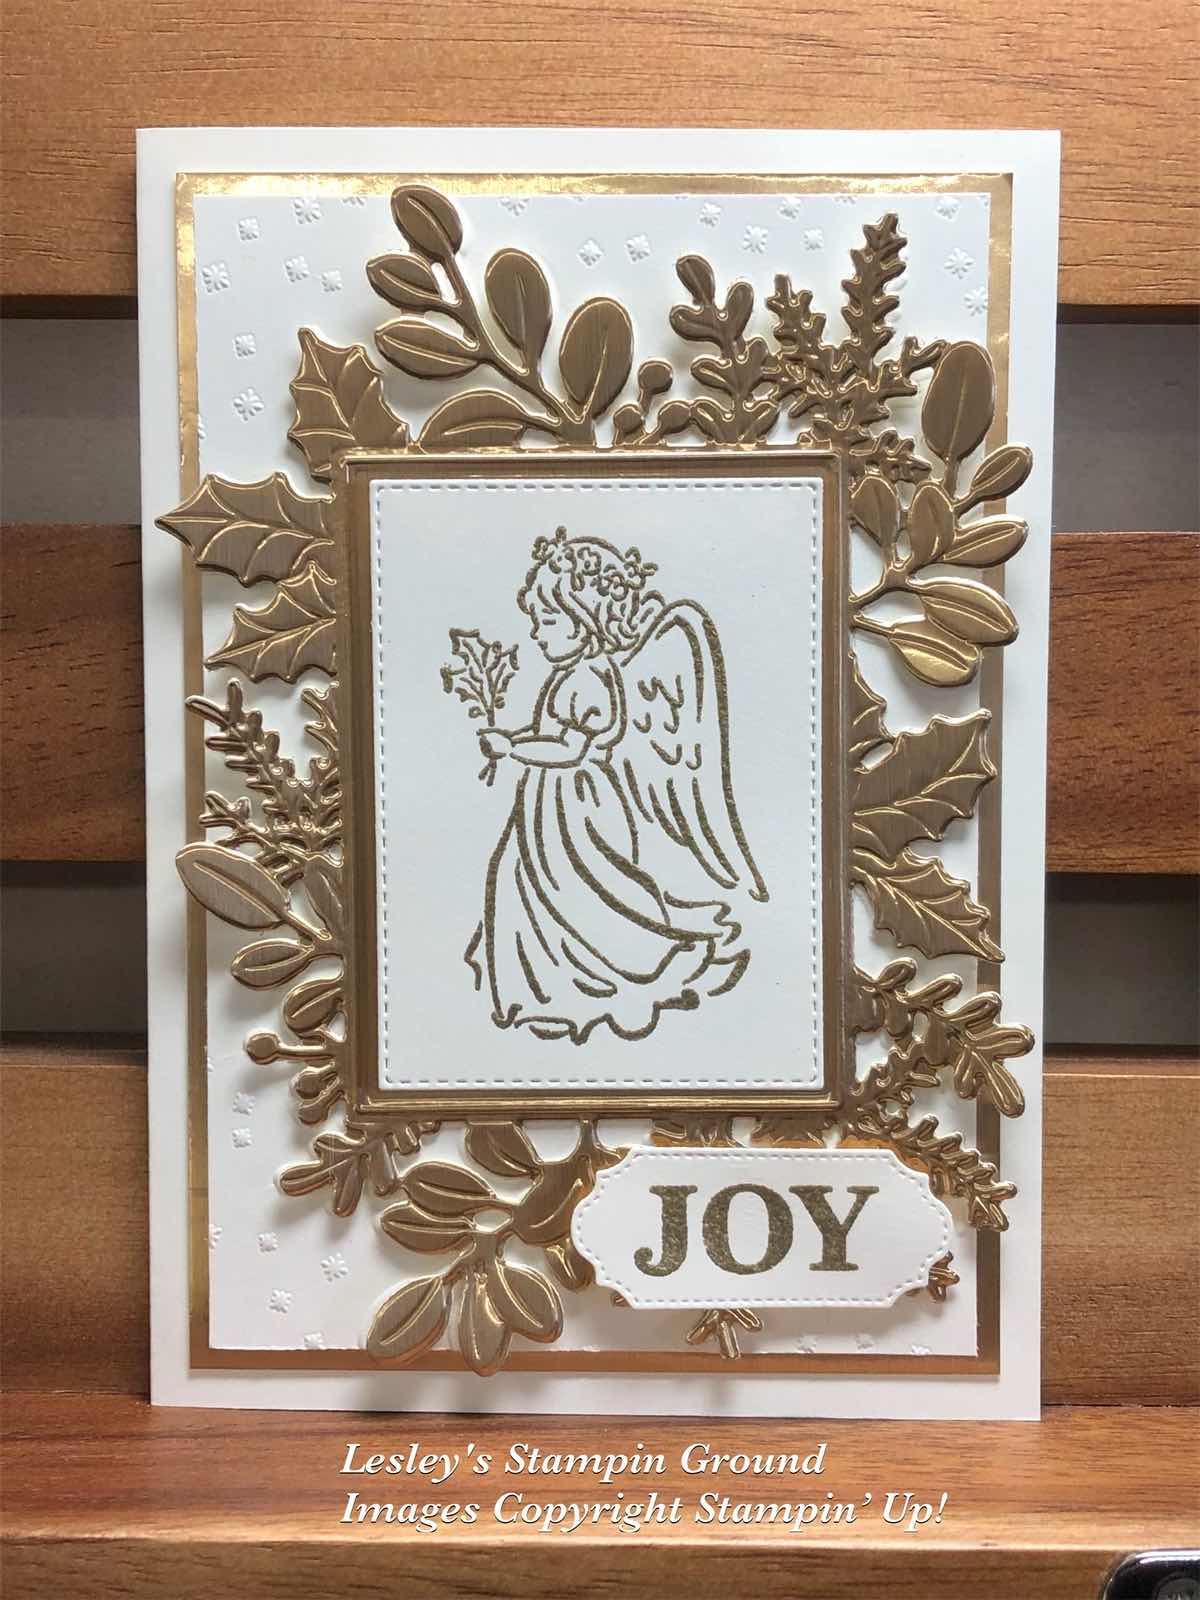
I think this is a stunning card just with Gold & Very Vanilla card.


The card stock is Very Vanilla card (#106550) and Brushed Metallic 12”x12” cardstock (#153524).

I embossed the Very Vanilla cardfront with the Merriest Frames Hybrid Embossing Folder (#156385) and matted this with the Brushed Metallic cardstock. I then cut another piece of the gold metallic card with a die which is included with the Merriest Frames Hybrid Embossing Folder. I then placed this into the folder to emboss the die-cut piece. This was attached to the card front.

I stamped the cute angel from the Angels Of Peace stamp set (#156365) with VersaMark (#102283). This was then heat embossed with Gold Stampin’ Emboss Powder (#155555) and set with the Heat Tool (#129056). This was cut with another Merriest Frames Die.

 “Joy” from the Merriest Moments stamp set (#156353) was also gold embossed. This was then cut with an Ornate Frames Die (#150664). The angel and sentiment were attached to the card with Stampin’ Dimensionals (#104430).


“Love what you do and share what you love.”


Stay safe & Keep crafting!!


Monday, 23 August 2021

Gorgeous Leaves Bundle

Hi again Ladies & Guys,

Here’s a lovely fancy fold card suitable for either the male or female, using the Gorgeous Leaves Bundle (#158609).


The cardstock is Very Vanilla (#106550) and Soft Suede (#119982).

The Very Vanilla base card is 22cm x 10.5 cm and scored at 7cm
The Soft Suede card is 14cm x 9.5cm.
The next Very Vanilla layer is 23cm x 8.5cm and scored at 13cm.
The Very Vanilla card front is 9cm x 7.5cm.
The Soft Suede Neutrals DSP (#155226) is 6cm x 9.5cm.

I stamped inside the card using Soft Sea Foam ink (#147102). The images are from the Gorgeous Leaves stamp set (#153365).
For the card front I stamped the Woodgrain image with Soft Suede ink (#147115) and the spots with Soft Sea Foam ink. I assembled the card as shown above.

“Happy Birthday” from the Peaceful Moments stamp set (#151595) was stamped with Soft Suede ink, then cut with a Hippo & Friends Die (#153585). I attached this to the card with Stampin’ Dimensionals (#104430) under the left half of the sentiment, so that you can tuck the card flap under this.

The leaves were cut with the Intricate Leaves Dies (#153566) from Brushed Metallic 12”x12” Cardstock (#153524). There are 3 colours of Gold in this pack and I used a different one for each leaf. These were backed with Adhesive Sheet (#152334) before cutting. The leaves were then attached to the card.

“Love what you do and share what you love.”

Stay safe & keep crafting!!


Tuesday, 27 July 2021

Encircled In Beauty Dies

Welcome Ladies & Guys,

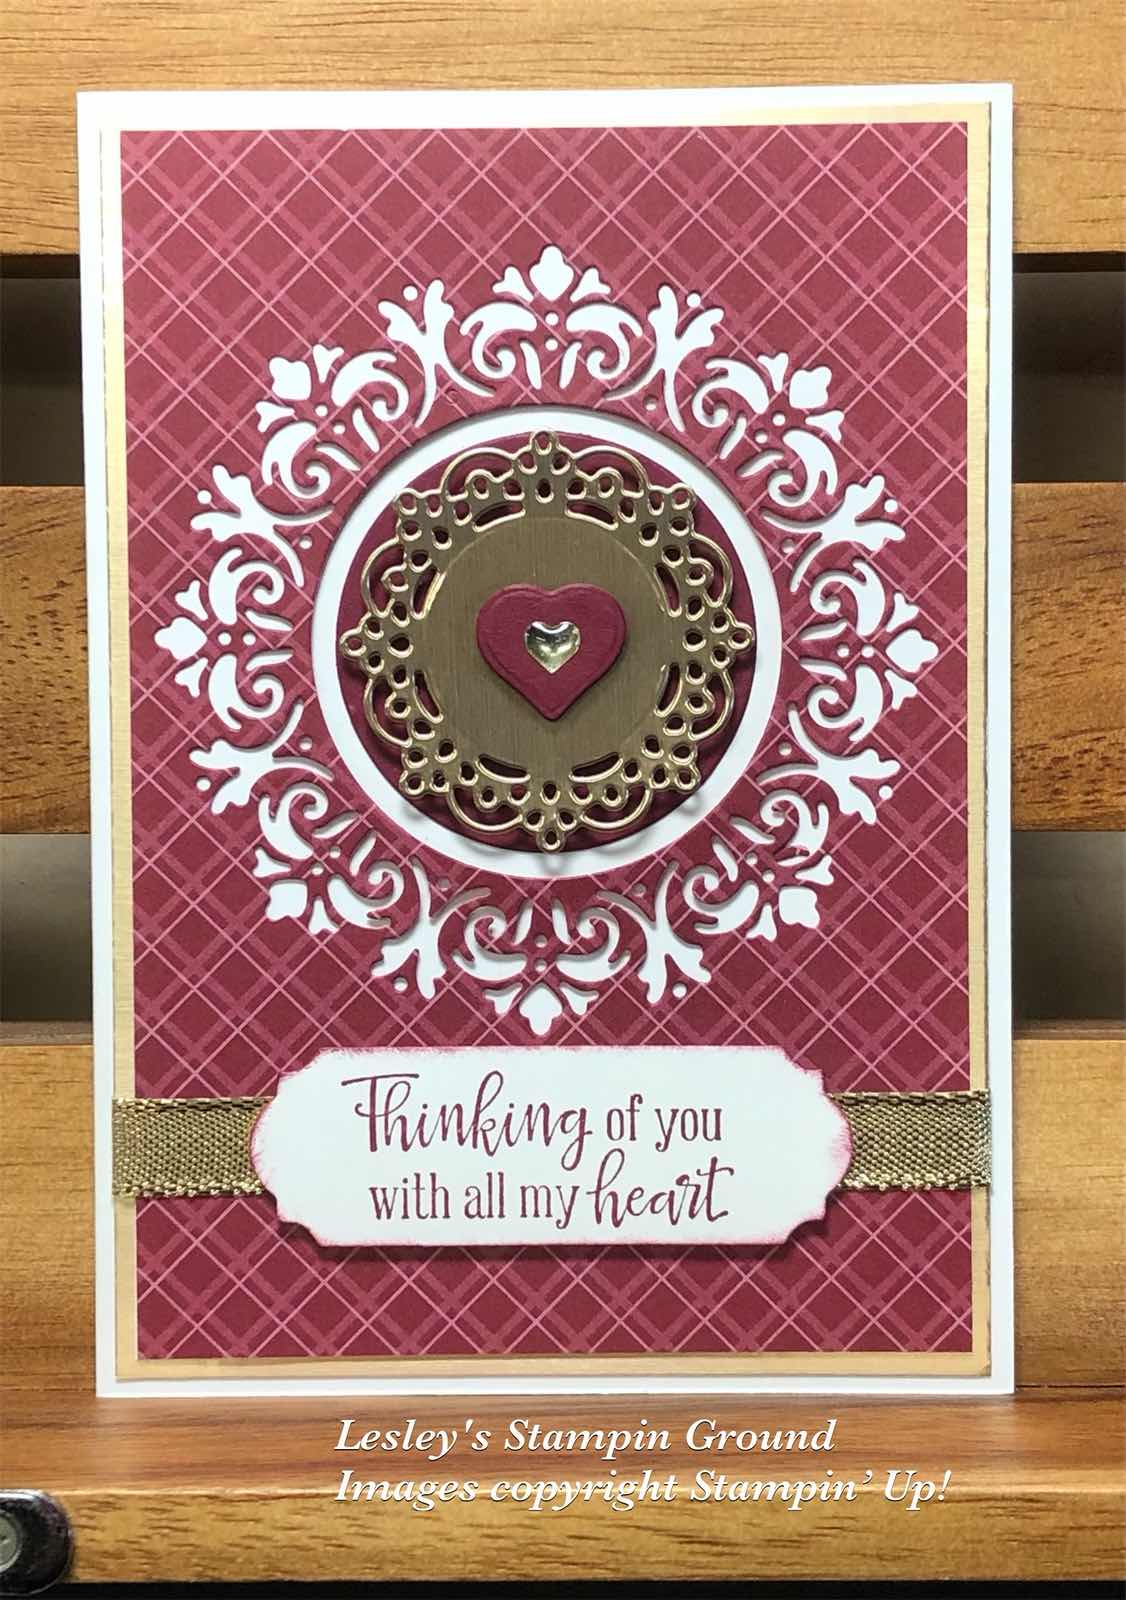
I used the Encircled In Beauty Dies (#155546) to cut the designer paper and gold foil.


The Designer Series Paper is the 6”x6” Neutrals and I used the Merry Merlot colour. After cutting with the Encircled In Beauty Die I attached it to the same size piece of Basic White card (#159228). This was then attached to the Brushed Metallic cardstock (#153524). The Gold Shimmer Ribbon (#156470) was wrapped around the cardfront before attaching this to the Basic White base card.

The sentiment from Peaceful Moments stamp set (#151595) was stamped with Merry Merlot ink (#147112) and cut with an Ornate Frames die (#150664) and attached to the card with Stampin’ Dimensionals (#104430).

I cut a piece of Merry Merlot card (#147005) with a Layering Circles die (#151770) and attached this in the middle of the circle which was cut out by the detailed die. The next layer was also cut with another of these dies with the Brushed Metallic cardstock. This was attached on top of the circle with Stampin’ Dimensionals. I cut the Merry Merlot heart with a die from Warm Wraps (#153521), then added a retired heart embellishment which worked perfectly for this card.

Don’t forget time is running out to order the Designer Papers that are on special till 2nd August. The papers are - 

155841 - Beauty of the Earth - $17

155696 - Bloom Where You’re Planted - $17

155499 - Hand Penned - $17

152494 - In Good Taste - $31.45

155817 - In The Wild - $17

155807 - Pansy Petals - $17

155605 - Sweet Symmetry - $17

155718 - Tidings Of Christmas - $17

155686 - You’re A Peach - $17


“Love what you do and share what you love.”


lesleyjendra.stampinup.net


Tuesday, 24 November 2020

Poinsettia Dies

Hello my friends,

I have chosen to use subtle colours on this Christmas card using the Poinsettia Dies (#153522) to cut the flower.


As well as the Whisper White card (#106549) I have used the Gold from the Brushed Metallic 12” x 12” cardstock. I cut a piece of the white card using one of the Curvy Dies (#154319), then dry embossed the lower piece with one of the Wrapped In Texture Embossing Folders (#153574). Both pieces were then attached to the Gold Metallic card.
I cut the 4 layers of the poinsettia using the Poinsettia Dies and sponged the edges of the petals with Soft Sea Foam ink (#147102). Clear Wink Of Stella (#141897) was brushed onto the petals giving a lovely glimmer. I assembled the flower with Mini Glue Dots (#103683) and then it was attached to the card with Stampin’ Dimensionals (#104430). 
The “berries” were cut with a die from the Poinsettia Dies and the leaves from the Soft Seafoam card (#147012) were cut with a die from the Curvy Dies. All were attached with Mini Glue Dots.
“Merry Christmas” is from the Curvy Christmas stamp set (#p155364). This was heat embossed with VersaMark (#102283) and Gold Stampin’ Emboss Powder (#109129), then set with the Heat Tool (#129056). A die from the Ornate Frames (#150664) was used to cut the sentiment. Mini Stampin’ Dimensionals (#144108) were used to attach the sentiment to the card. A Gilded Gem (#152478) was attached to the centre of the poinsettia.

Have a fantastic day!!

“Love what you do and share what you love”


Thursday, 12 November 2020

Many Layered Blossoms Dies

Hi friends,

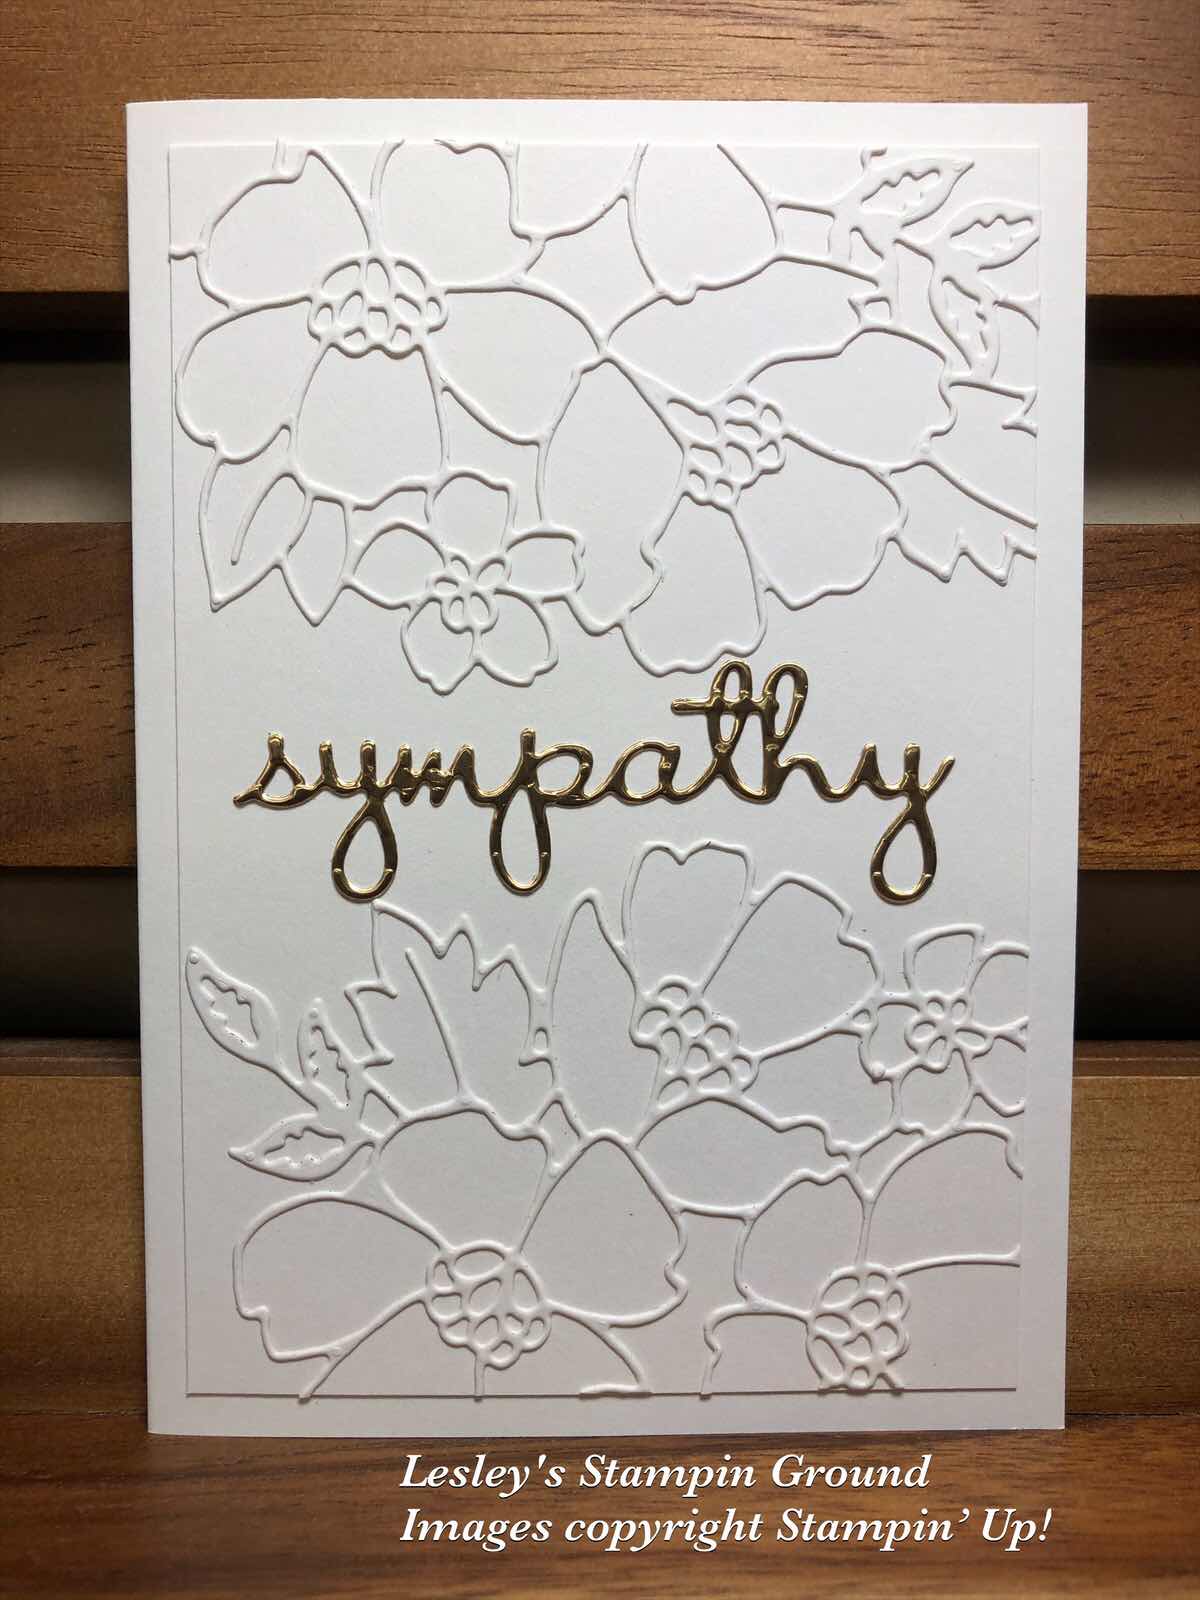
When I make a sympathy card I like to make it simple but elegant, so I have used the beautiful Many Layered Blossoms Dies (#153583) on this card and it is stamp free.


I adhered the Adhesive Sheets (#152334) on the back of the Shimmery White cardstock (#121717) then cut the flowers with a die from the Many Layered Blossoms Dies. I cut the die cut flowers in half and attached the pieces to the Shimmery White card front and trimmed the pieces that extended over the edge.
“Sympathy” is cut with a Well Written Die (#151816) from Brushed Metallic 12”x12” cardstock. This was also backed with Adhesive sheets and attached to the card. The base card is also Shimmery White card.

How easy is that. It could also be used for a wedding or anniversary card just by changing the sentiment.

Have a great day.

“Love what you do and share what you love”.


Tuesday, 3 November 2020

Pine Woods Dies

Hi friends,

This lovely tree was cut with dies from the Pine Woods Dies (#153563).


I cut the solid tree from the Rainbow Glimmer Paper (#153056). The detailed tree was cut from Brushed Metallic 12”x12” cardstock (#153524) which I had adhered the Adhesive Sheets (#152334) to the back before cutting.
The base card is Whisper White (#106549), the next layer is Cherry Cobbler (#121681) then Whisper White again. This was dry embossed with the Texture Textile 3D  Embossing Folder (#152718). The Designer Series Paper is from the Classic Christmas DSP (#155969). This paper is now available for purchase, along with the Curvy Celebration stamp sets and dies. “Merry Christmas” is from the Curvy Christmas stamp set (#155364) and stamped with Cherry Cobbler ink (#147083). This sentiment and the Cherry Cobbler card were punched with the Banners Pick A Punch (#153608). And 
I cut a piece of Whisper White card with a Stitched Nested Labels Die (#149638) and dry embossed it with one of the Wrapped In Christmas Embossing Folder (#153574). The tree was attached to this with Stampin’ Dimensionals (#104430), then the card was finished by adding the Cherry Cobbler rhinestones from the Holiday Rhinestone Basic Jewels (#150457). 

You can check out the Curvy Celebrations here

Enjoy your day,

 “Love what you do and share what you love”.


Monday, 2 November 2020

Dove Of Hope Bundle

Hello,

Welcome to the start of a new week. Before we know it Christmas will be here, so today I have another Christmas card.


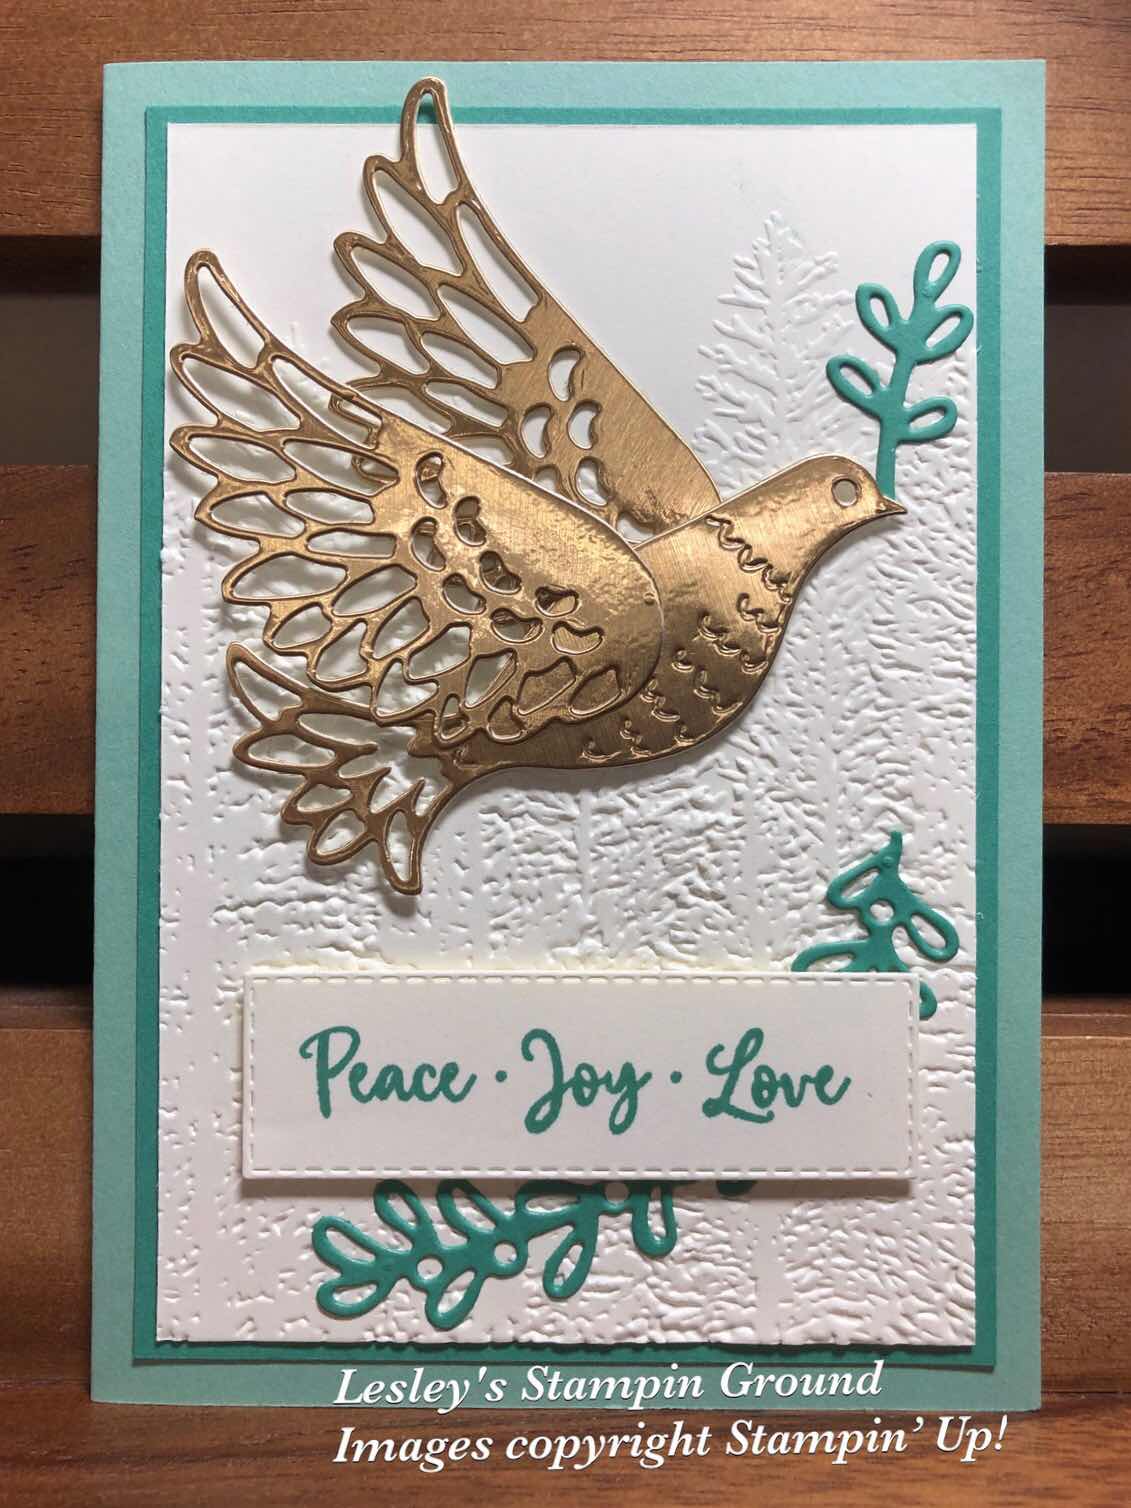
I just adore the doves in the Dove of Hope Bundle (#c155158). This dove is cut with the Detailed Dove Dies (#153526) and are cut from the Brushed Metallic 12”x12” cardstock (#153524). This pack of Metallic cardstock has 3 colours - Bronze, Copper & Gold. I have used the bronze but the dove would look great in any of the colours 
The base card is Mint Macaron (#138344), the next layer is Just Jade card (#153084). The top layer is Very Vanilla (#106550) and this was dry embossed with the Evergreen Forest 3D Embossing Folder (#153576).
The sentiment from the Dove Of Hope stamp set (#153406) was stamped with Just Jade ink (#153115) and I used the Stitched Rectangles Dies (#151820) to cut this. The branches are cut from Just Jade card which had been backed with the Adhesive Sheets (#152334) before cutting with the Detailed Dove Dies, then adhered to the card. The sentiment was attached using Stampin’ Dimensionals (#104430). 
I used Mini Glue Dots (#103683) to attach the first wing to the card. The body was attached with Mini Stampin’ Dimensionals (#144108), then the top wing was attached to the body with Mini Glue Dots.

Have a great day.

“Love what you do and share what you love”


Thursday, 1 October 2020

Many Medallions

Hi everyone,

These poinsettias were cut from the Red & Green Foil Sheets (#153510) so gives a beautiful shine to these flowers.


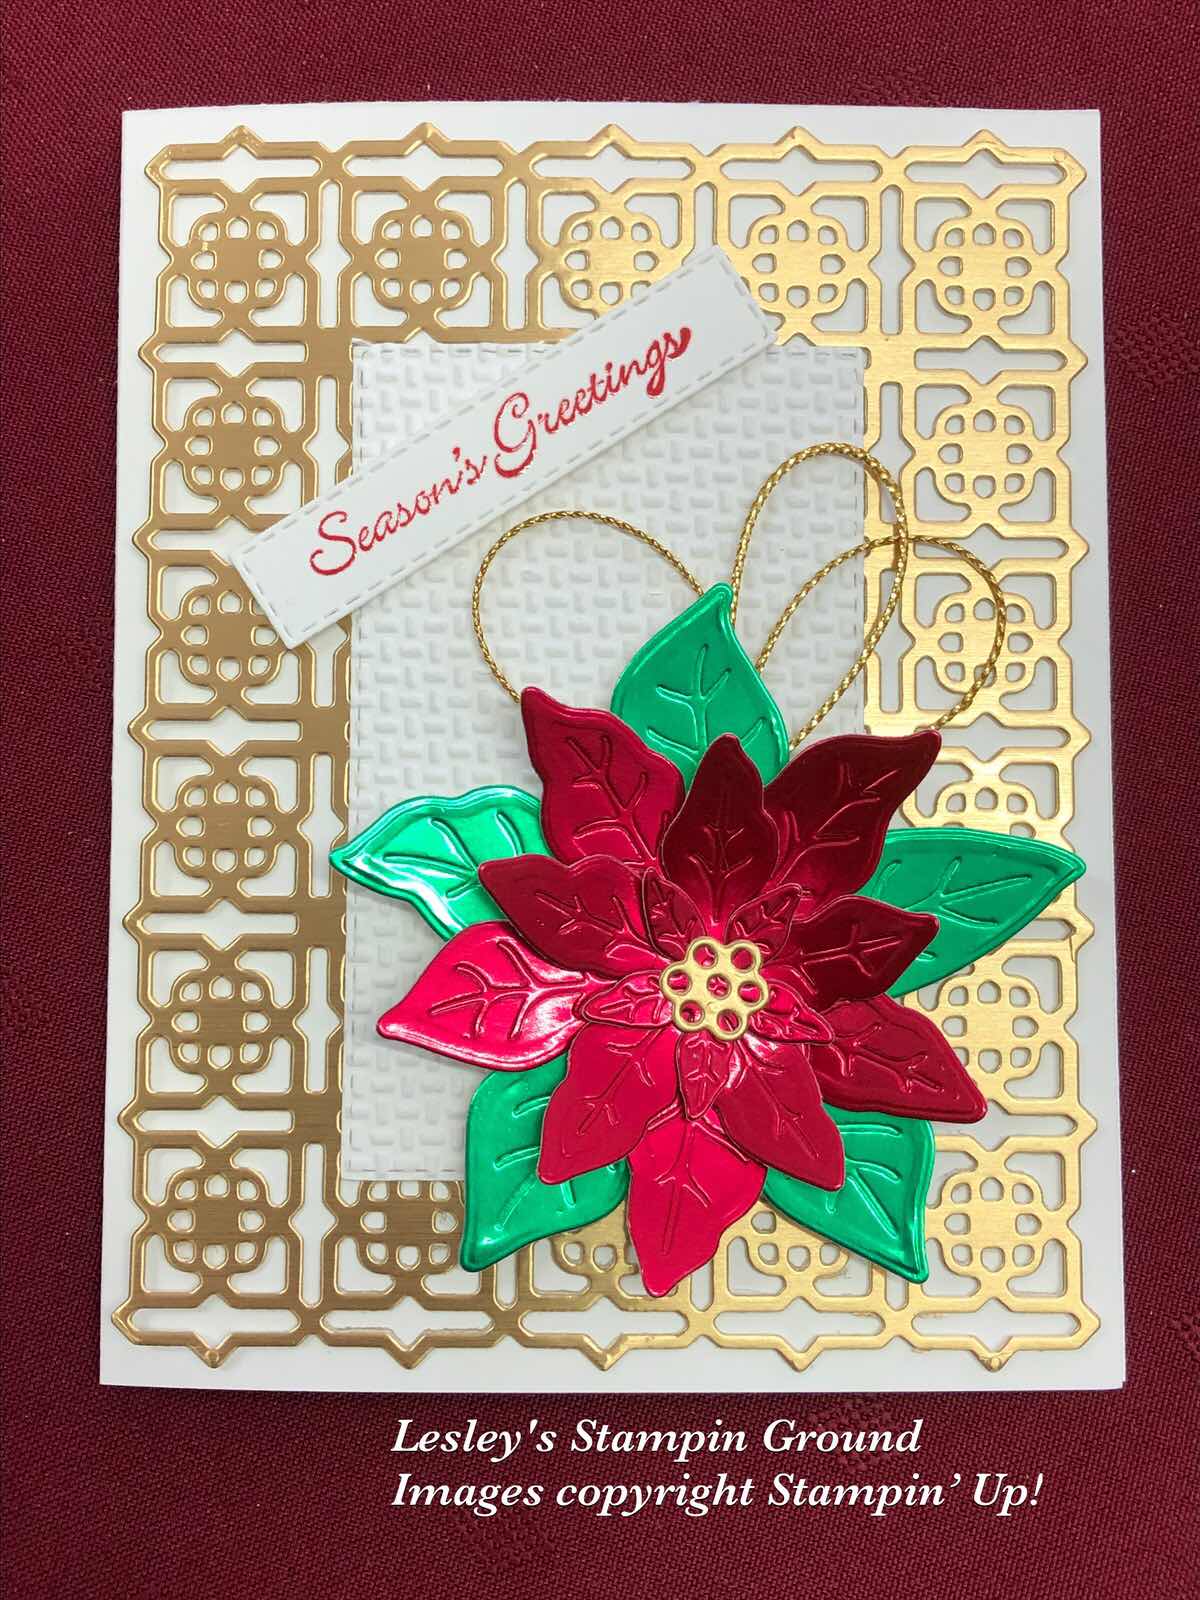
Using the Poinsettia Dies (#153522), I cut the largest petals from the Green Foil and the other 3 layers from the Red Foil. The flower centre was cut from  the Gold from the Brushed Metallic 12”x12” cardstock. This was also used for the background which was cut using the Many Medallions Dies (#153584). I used Mini Glue Dots (#103683) to attach this to the Whisper White card base (#106549). As this die-cut piece is slightly different in size to a normal card, I cut the card 14cm x 22cm and scored at 11cm on the long side. This gives a more uniform border around the card.
The Whisper White rectangle was cut with a Stitched Rectangles Die (#151820), then dry embossed with one of the Wrapped In Christmas Embossing Folders (#153574). This was attached to the die cut piece. The poinsettia was assembled using Mini Glue Dots and attached to the card with Stampin’ Dimensionals (#104430). “Seasons Greetings” is from the Itty Bitty Christmas stamp set (#c150513). I stamped this with Real Red ink (#147084), then re-stamped again with VersaMark (#102283) and heat embossed with Clear Stampin’ Emboss Powder (# 109130) and set with the Heat Tool (#129056). I cut the sentiment with a Stitched Rectangles Die and attached it to the card with Stampin’ Dimensionals. The Gold Trim is part of the Wonder Of The Season Ribbon Combo Pack (#153537).

For the month of October, Stampin’ Up! have 15% off selected variety of Designer Series Paper, so check them out here and stock up and save.

Have a great day!!

Tuesday, 25 August 2020

Dove Of Hope Bundle

Hi & welcome,

This beautiful dove is cut with the Detailed Dove Dies (#153526) and is part of the Dove Of Hope Bundle (#c155158).


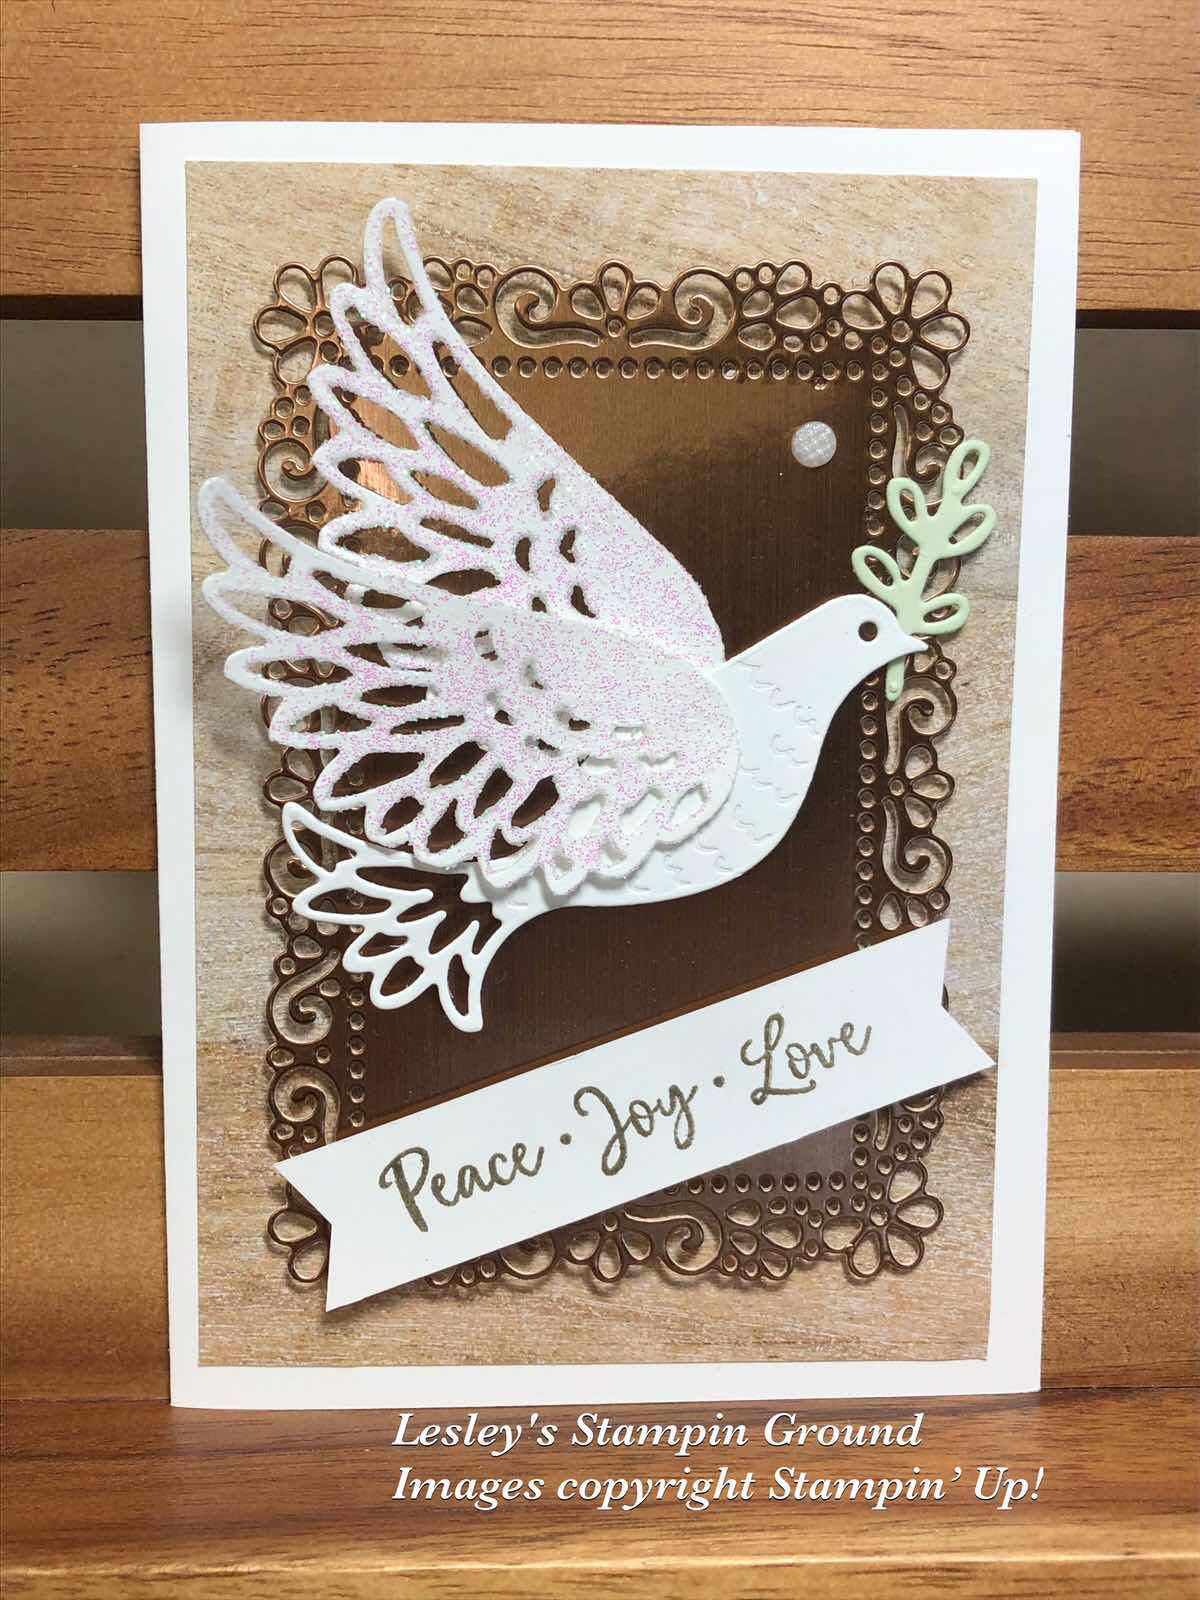
The wings and body of the dove were cut from Whisper White card (#106549). I applied some Shimmery White Embossing Paste (#145645) to the wings, giving them a lovely shimmery texture. I assembled the dove using Mini Glue Dots (#103683) and Stampin’ Dimensionals (#104430). I attached the In Good Taste Designer Series Paper (#152494) to the Whisper White base card (#106549). The Bronze card from the Brushed Metallic 12”x12” cardstock (#153524) was cut with an Ornate Layers Die (#152726), then attached to the DSP with Stampin’ Dimensionals. The dove was attached to this also with Dimensionals. I cut the branch from Soft Sea Foam card (#147012) and this was attached to the card with Mini Glue Dots. The sentiment from the Dove Of Hope stamp set (#153406) was stamped with VersaMark (#102283), heat embossed with Gold Stampin’ Emboss Powder (#109129) and set with the Heat Tool (#129056). I used the Banners Pick A Punch (#153608) to cut each end of the banner. An Elegant Faceted Gem (#152464) was added to the card.

Have a great day and stay safe!!