Showing posts with label #hammeredmetal3dembossingfolder. Show all posts

Wednesday, 9 June 2021

Masculine card

Hello again friends,

An easy masculine card today using the Well Suited Designer Series Paper (#154562).


The card base and card front are Basic White (#159228). I embossed the card front with the Hammered Metal 3D Embossing Folder (#150646). This was attached to the Cajun Craze card (#121683).
The Cajun Craze for the banners are cut 6.5cm, 7.5 cm and 8.5 cm long and 2cm wide.
The Well Suited DSP were cut 5.9cm, 6.9cm & 7.9cm and 1.2cm wide.
I punched each end of the banners with the Banners Pick A Punch (#153608). This punch will punch 3 different widths and 2 different ends.
“Happy Birthday” is from the Artistically Inked stamp set (#154542) and stamped with Night Of Navy ink (#147110), then I used a Die from the Art In Bloom Dies (#158368) to cut the sentiment. I used Mini Stampin’ Dimensionals (#144108) to attach the sentiment to the card.

“Love what you do and share what you love.”

Have a great day.


Sunday, 26 July 2020

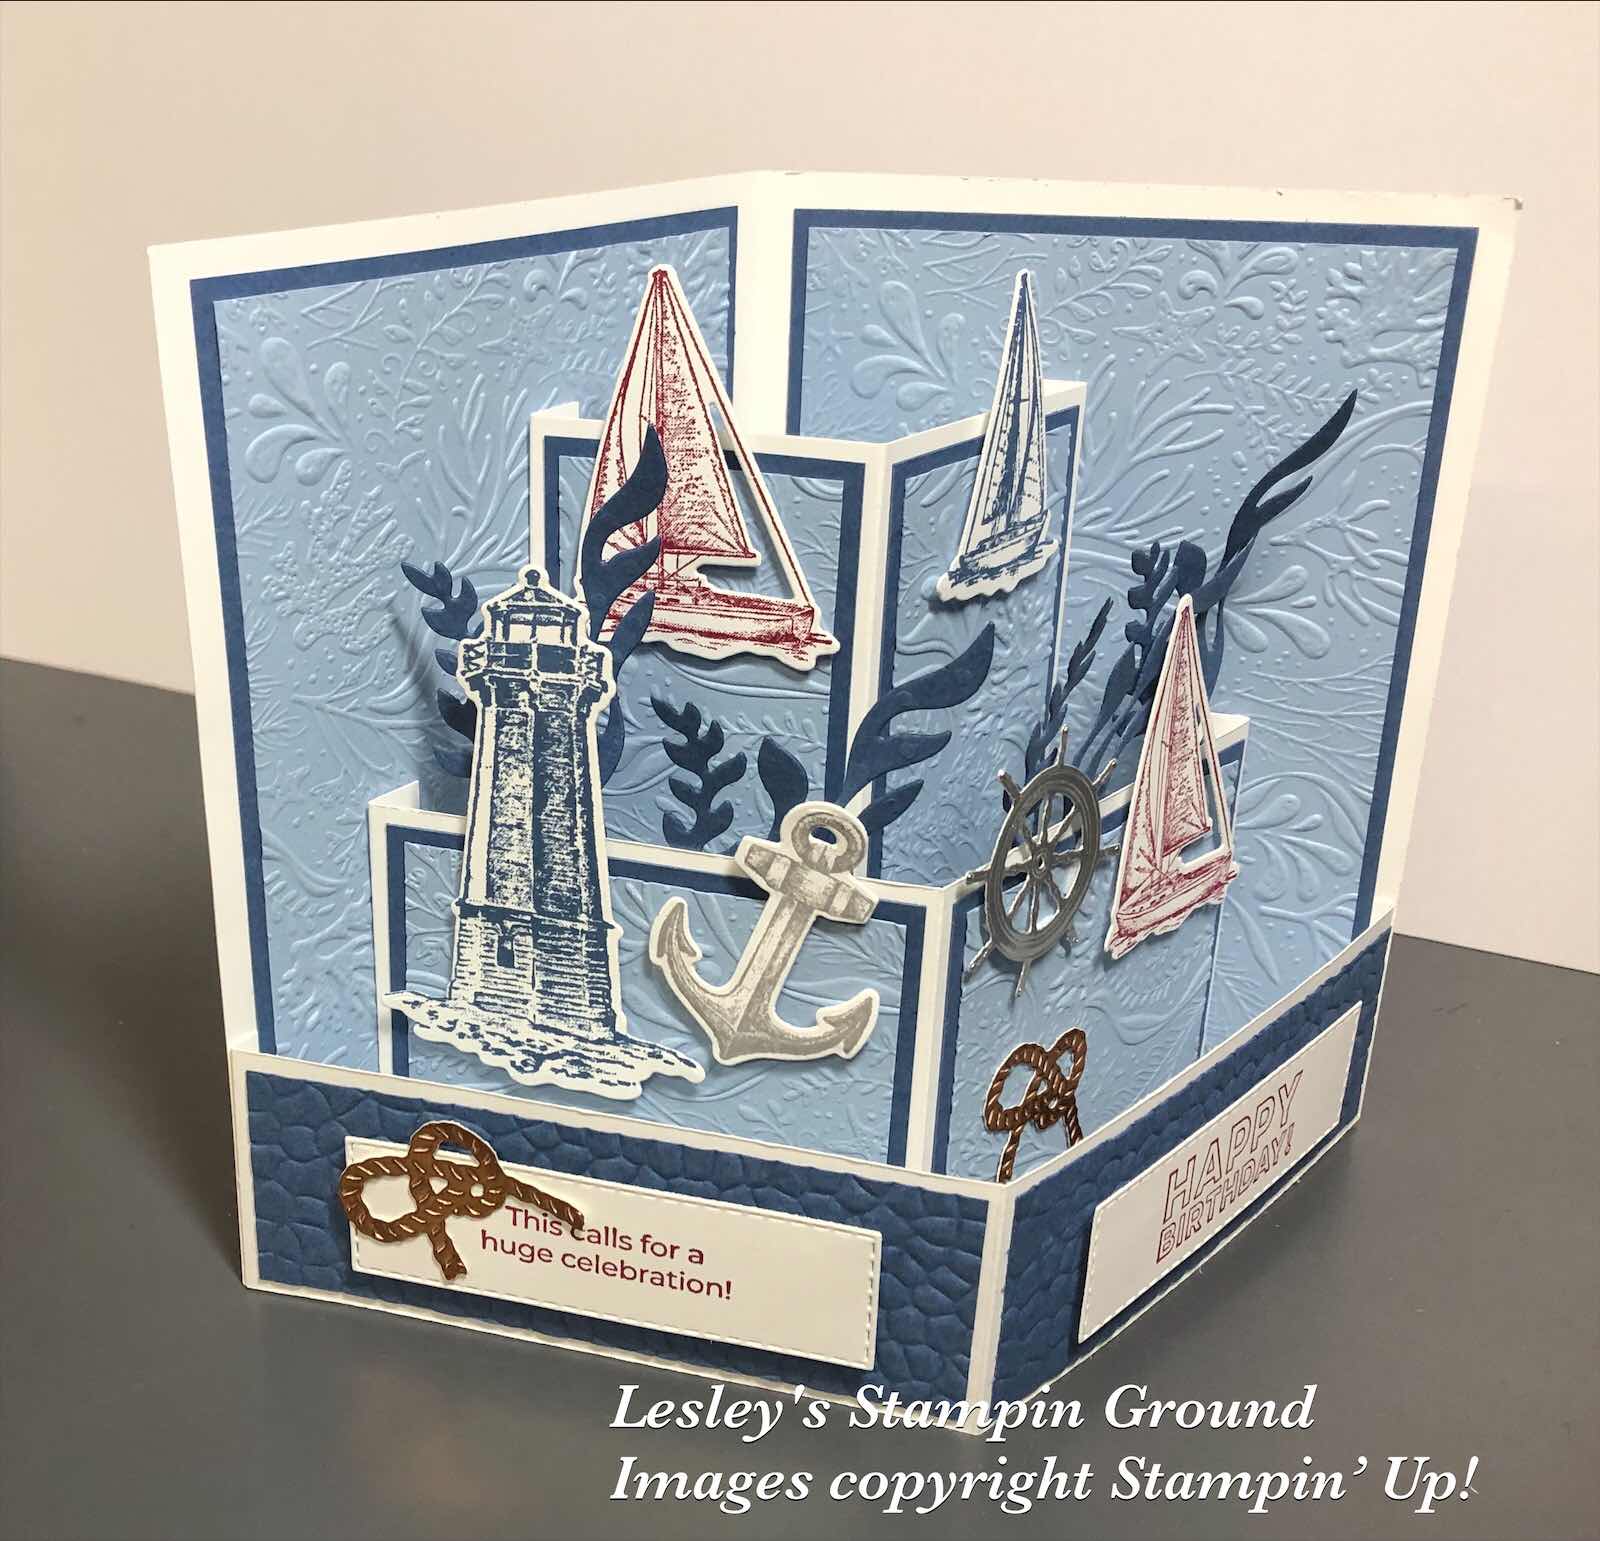
Sailing Home fancy fold card

Hello friends,

Here’s a fancy fold masculine card using the Sailing Home stamp set (#c149457).


The cardstock I have used is Whisper White (#106549), Misty Moonlight (#153086) and Seaside Spray (#150889). There is quite a lot of cutting for this card.
The base card is the normal size card - 14.9cm x 10.5cm.

The Whisper White card at the front is 23cm x 4cm and scored in half (11.5cm) on the long side and 1cm at each end.
The middle white layer is 18cm x 7cm and scored in half  (9cm) on the long side and 1cm at each end.
The back white layer is 12cm x12cm and scored in half (6cm) and 1 cm at each end.

The Misty Moonlight card sizes are as follows and 2 required for each size - 
3.5cm x 10cm 
6.5cm x 7.5cm 
11.5cm x 4.5cm 
13.9cm x 9.5cm 

Seaside Spray card sizes as follows and 2 required of each size -
6cm x 7cm
11cm x 4cm 
13.4cm x 9cm 

I stamped the lighthouse and small boat with Misty Moonlight ink (#153118), the larger boats and sentiments with Merry Merlot ink (#147112) and the anchor with Basic Gray ink (#147118). The Seaside Spray cards were all dry embossed with the Seabed 3D Embossing Folder (#152700) and the Misty Moonlight card on the front layer with the Hammered Metal 3D embossing folder (#150646).
Each of the stamped images were cut with the Smooth Sailing Dies (#149576). I also cut the wheel from Silver Foil (#132178) and the rope from Copper Foil (#142020) and the seaweed from Misty Moonlight card. The sentiment is from the Many Mates stamp set (#c152633) and cut with the Stitched Rectangles Dies (#151820). I used Stampin’ Dimensionals (#104430) and Mini Glue Dots (#103683) to attach all the elements to the card.


Have a great day.

Tuesday, 17 December 2019

Detailed Peacock Dies

Hi and Welcome,

I was having a play with the Pigments Sprinkles (#149663) today and created this beautiful background. These are watercolour pigment crystals which you cam mix with water for unique backgrounds. The colours in the pack are Bermuda Bay, Daffodil Delight, Granny Apple Green, Gorgeous Grape, Mango Melody and Melon Mambo.
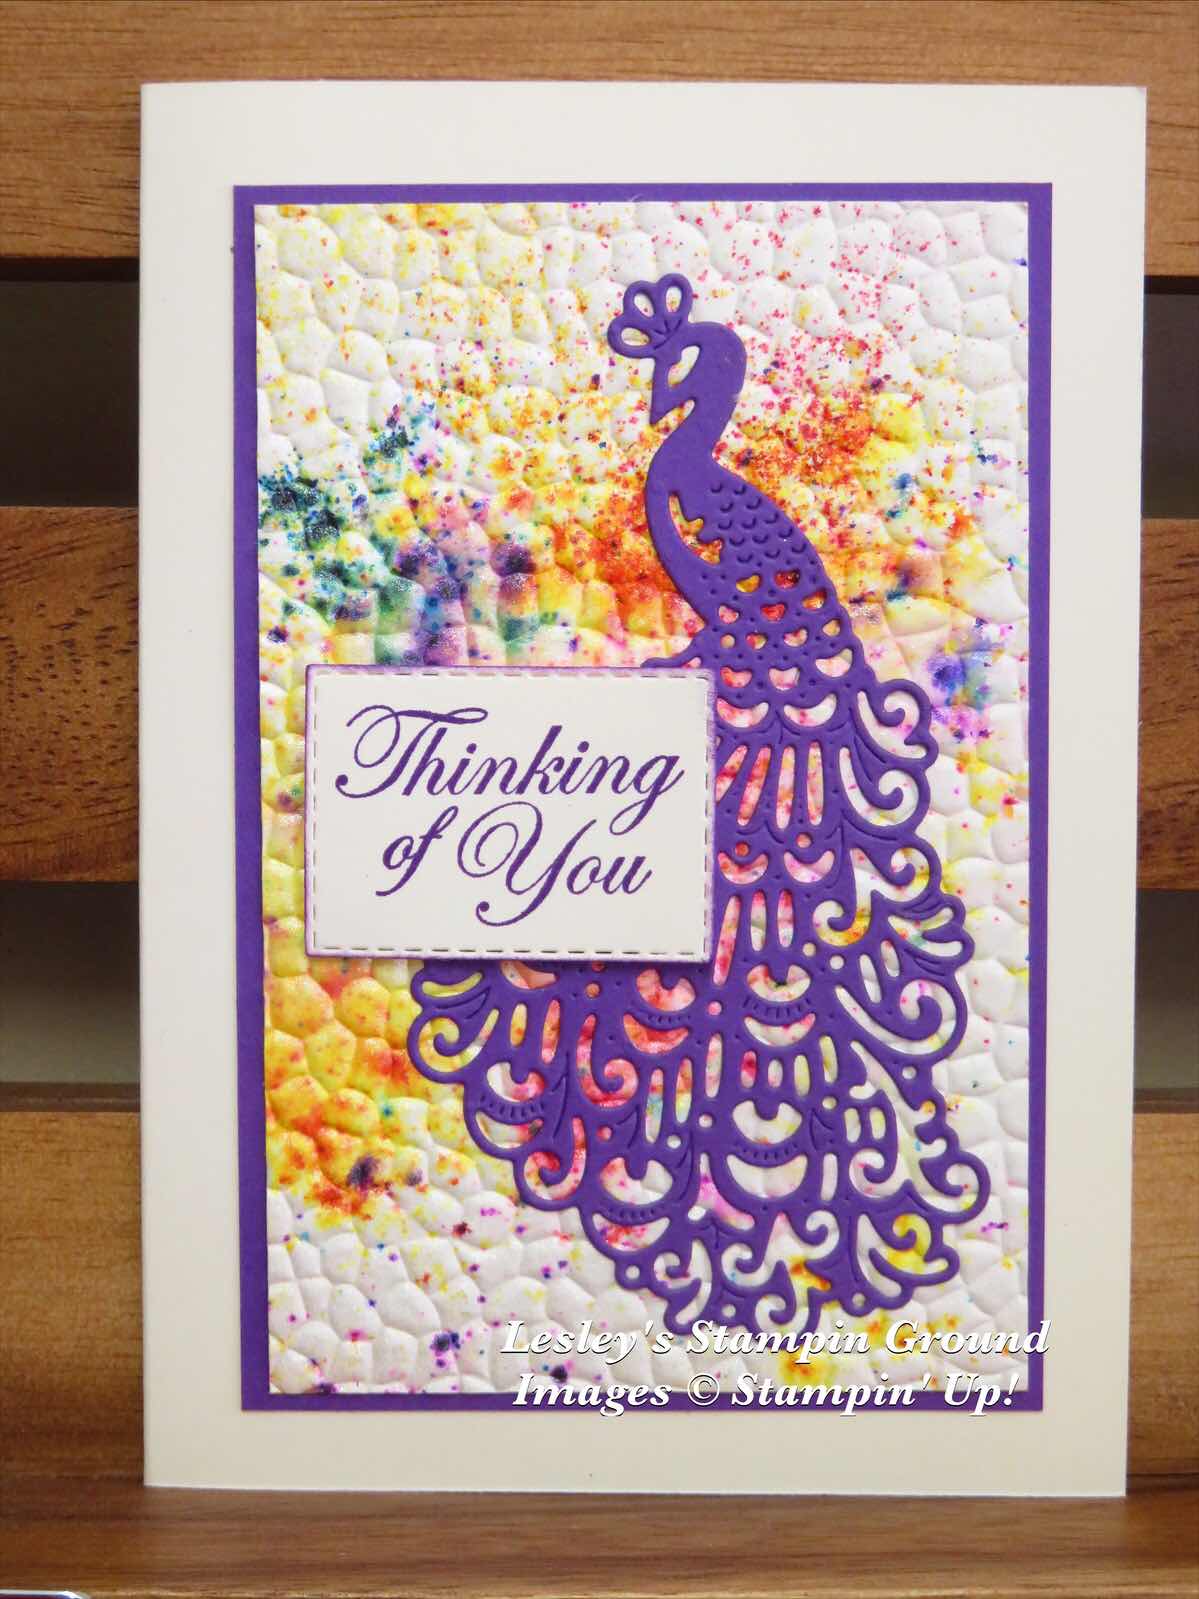


There are various methods you can use, but I very lightly sprinkled each of the 6 colours onto the Fluid 100 Watercolor Paper (#149612). A little goes a long way. Usually you would then spray it lightly with water but I decided to try using Frost White Shimmer Paint (#147046) which I had in a Stampin’ Spritzer (#126185) which was mixed with rubbing alcohol. I was very happy with the results as it helped disperse the colours as well as giving the lovely shimmer on the card. The more you spritz the card the more the colours will mix and blend. After the card was dried - I used the Heat Tool (#129056), but you can let it dry naturally - I embossed it with the Hammered Metal 3D Embossing Folder (#150646). The peacock was cut with a Detailed Peacock Die (#149582) from Gorgeous Grape card (#147011). This was glued to the card with Multipurpose Liquid Glue (#110755) using a Stampin’ Sponge (#141337). For this method I squeezed some glue onto a Silicon Craft Sheet (#127853), and dabbed the sponge onto the glue. Then I gently dabbed the glue all over the back of the peacock which is placed onto the craft sheet. This ensures you have glue on all the detailed pieces so is easy to glue to the card. The sentiment from Good Morning Magnolia stamp set (#149298) was stamped with Gorgeous Grape ink (#147099) onto Very Vanilla card (#106550) and cut with a Stitched Rectangles Die (#148551), then attached to the card with Stampin’ Dimensionals (#104430). The base card is also Very Vanilla and the cardfront was matted with Gorgeous Grape card.

Have a great day.


Wednesday, 9 October 2019

Heirloom Frames Dies & 3D Embossing Folder

Welcome,

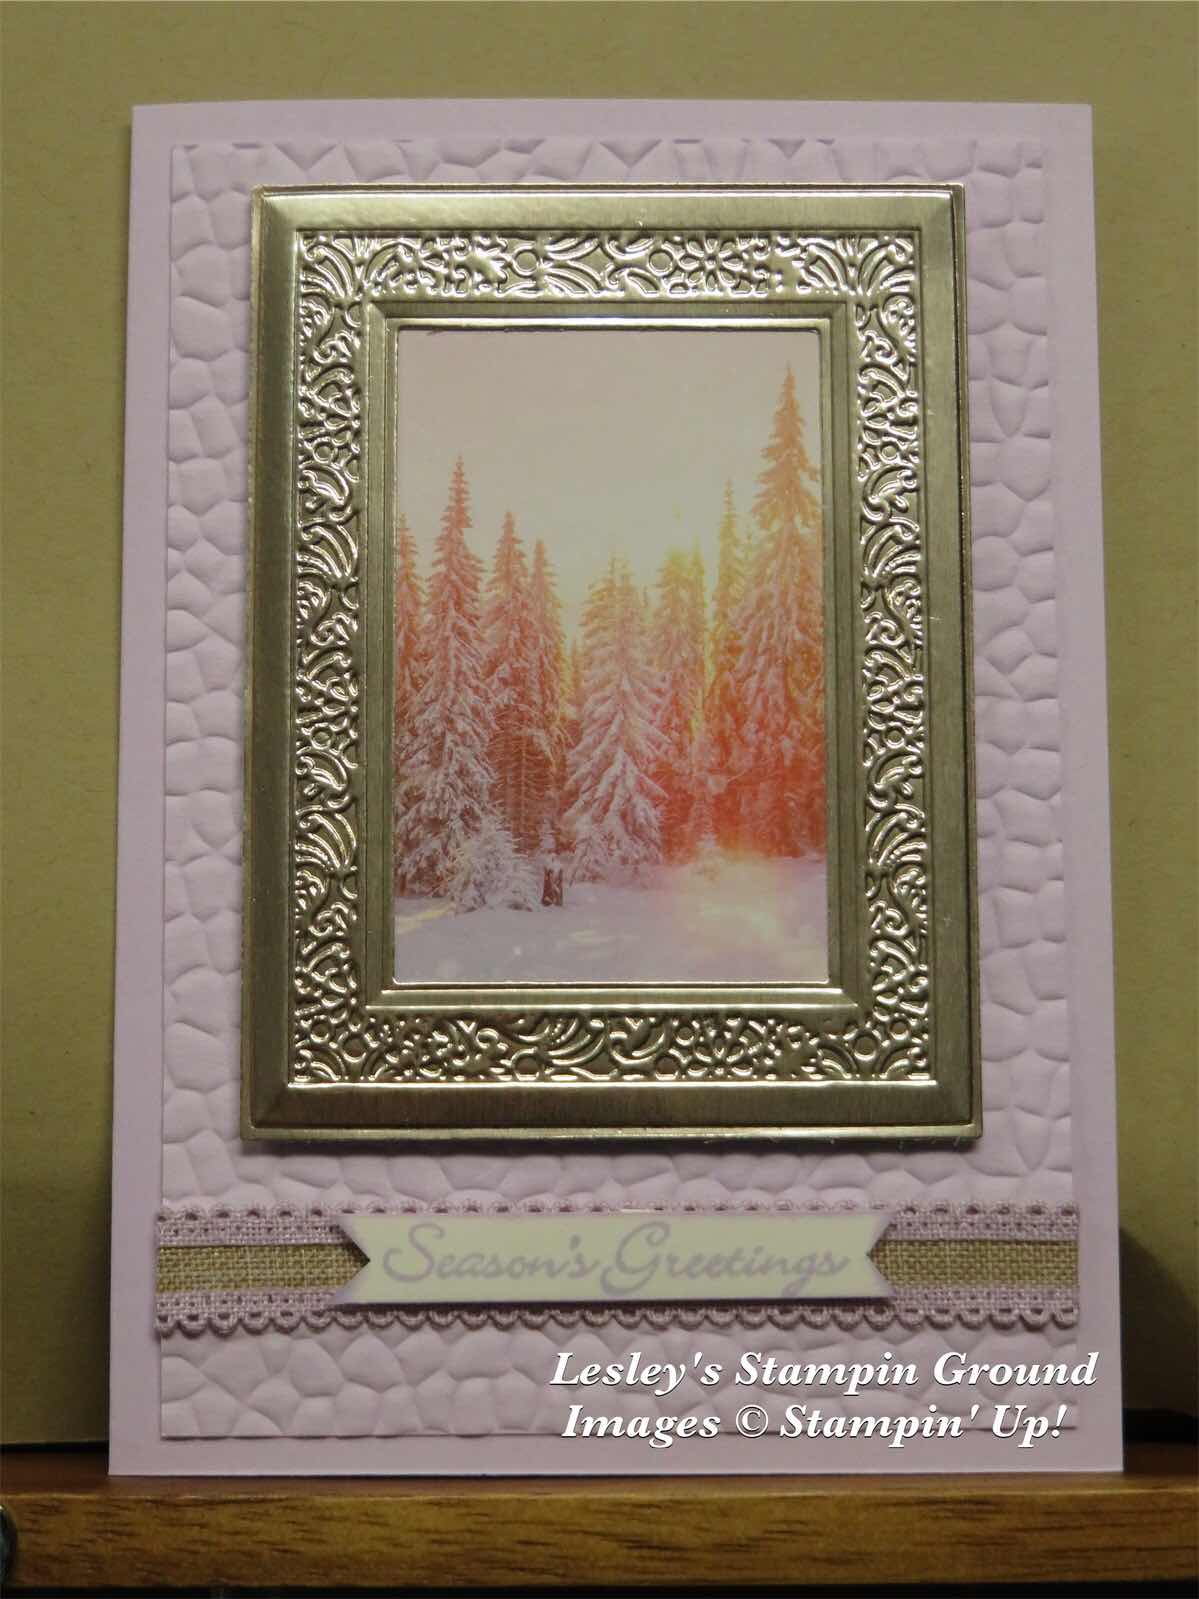
The frame on this card was cut and embossed with the Heirloom Frames Dies & 3D Embossing Folders (#152325). There is also an oval frame in this set. I cut the frame from Champagne Foil Sheets (#144748). You will find it easier to cut the frame first, then emboss it. 
(Apologies, but for some reason I had a lot of trouble photographing this card to give the real colours.)


The base card and card front are Purple Posy (#150887) and I embossed the card front with the Hammered Metal 3D Embossing Folder (#150646). The Designer Series Paper is from the beautiful Feels Like Frost 6”x6” Specialty DSP (#150444). The frame was attached to the card with Stampin’ Dimensionals (#104430). I attached the Purple Posy 1/2” Scalloped Ribbon (#149706) to the card. The sentiment is from the Itty Bitty Christmas stamp set (#c150513) and stamped with Purple Posy ink (#150084) on Whisper White card (#106549) and attached with Mini Stampin’ Dimensionals (#144108). 

Have a great day.


Tuesday, 24 September 2019

Snowfall Accents Puff Paint

Hello Friends,

I had my first “play” with the Snowfall Accents Puff Paint (#150691) today. To use, just apply the paint to your project and heat set with the Heat Tool (#129056), which puffs up the paint for a 3D textured effect.


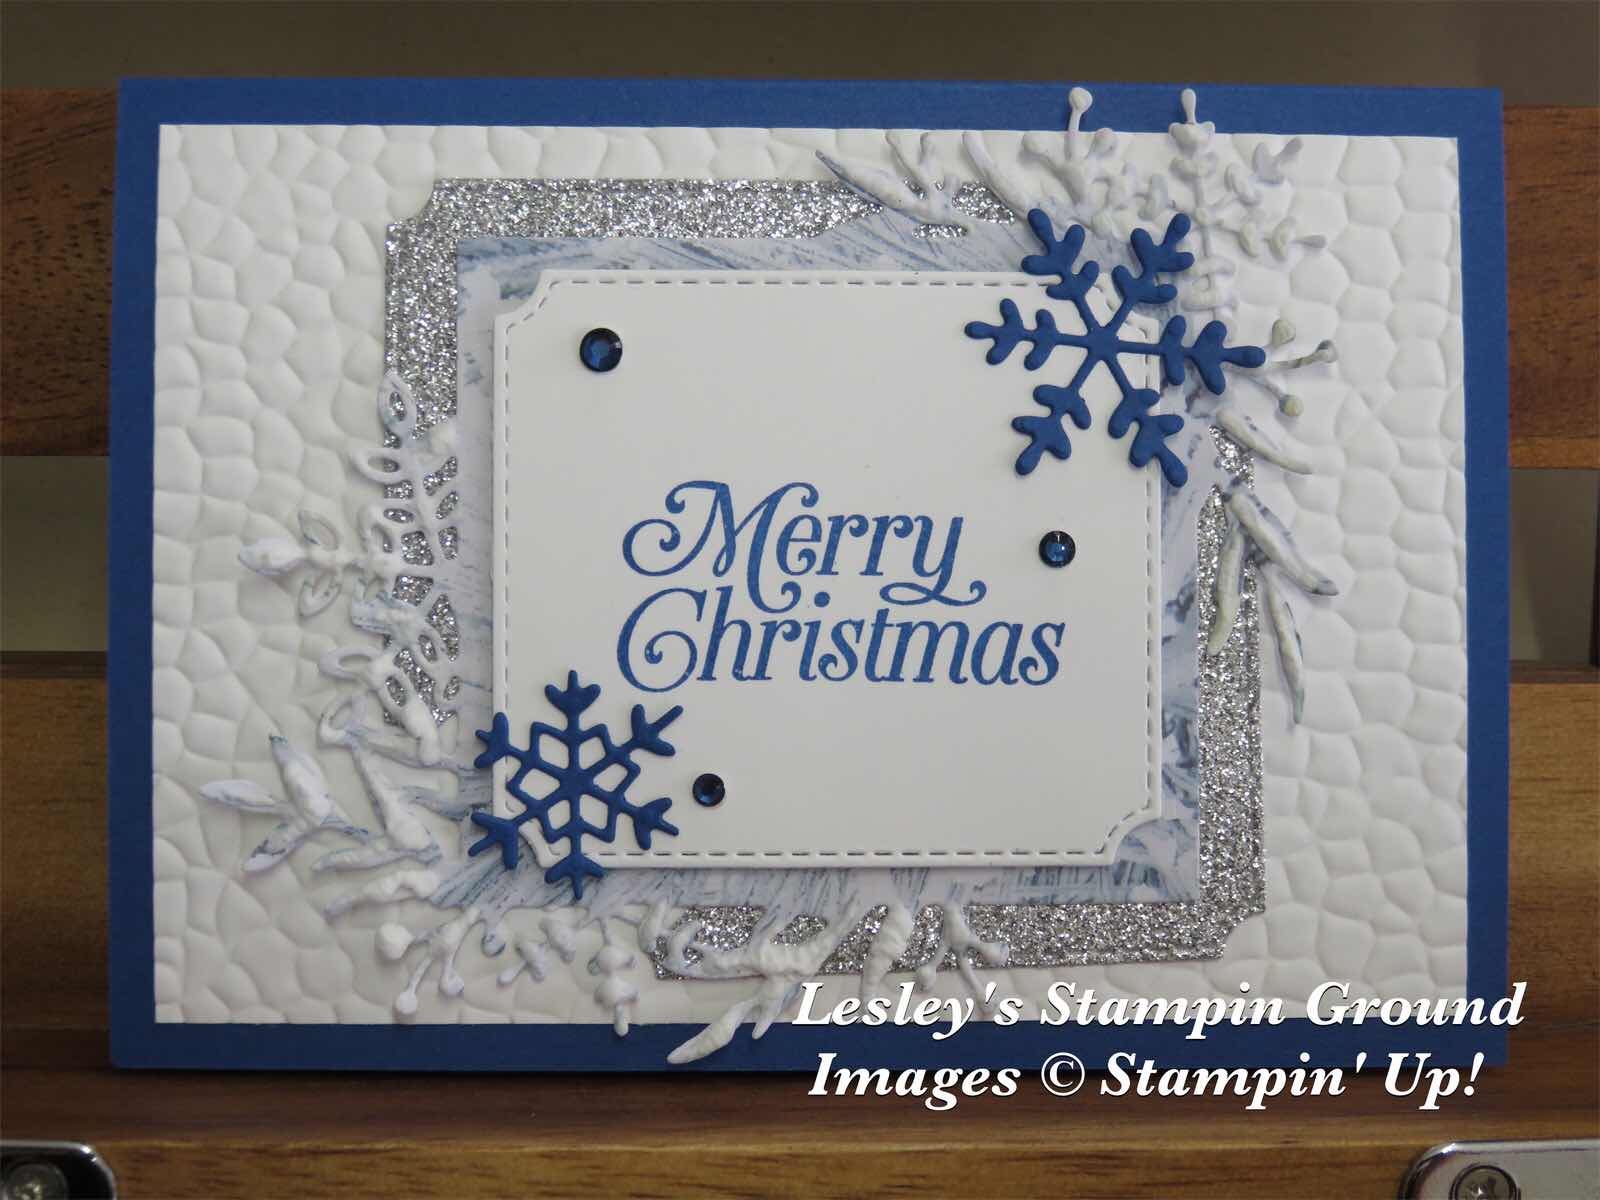
I cut a piece of the Feels Like Frost 6”x6” Specialty Designer Series Paper (#150444) with a die from the Frosted Frames Dies (#150658), then added the Snowfall Accents Puff Paint to the leaves. I stamped “Merry Christmas” from the Perfectly Plaid stamp set (#p149418), using Blueberry Bushel ink (#147138) on Whisper White card (#106549). This white card and Silver Glimmer Paper (#146960) were cut with another die from the Frosted Frames Dies. I cut the Silver Paper diagonally and attached it behind the Feels Like Frost DSP. I used Stampin’ Dimensionals (#104430) to attach the White card with the sentiment. The snowflakes are cut from Blueberry Bushel card (#146991), also with dies from the same die set. The base card is Blueberry Bushel and the Whisper White card front was embossed with the Hammered Metal 3D Embossing Folder (#150646). The embellishments are from the Holiday Rhinestone Basic Jewels (#150457).

Have a great day.