Showing posts with label #redvelvetpaperpack. Show all posts

Friday, 6 November 2020

Poinsettia Dies with Red Velvet Paper Pack

Hi everyone,

Today I have had the opportunity to attend “Stampin’ Up! Onstage At Home” which is instead of the normal get together for demonstrators where we gather together, this one is on line. It is always so inspirational and fun to create cards together and learn heaps of new things. One great thing about being a demonstrator is that you get to see and purchase new products early, so I have already seen the upcoming catalogue that will be released in January and have ordered some new exciting goodies, so can’t wait to share them with you soon. If you would like to be part of the fun and become a demonstrator (and live in Australia), please contact me.

Now to todays card. It is a Christmas card using the gorgeous Red Velvet Paper (#153490) for the poinsettia.


The 3 layers of the poinsettia flower were cut and embossed with the Poinsettia Dies (#153522) from the Red Velvet Paper. The leaf, berries and flower centre were cut from the Brass Foil Sheets (#153057), also using the Poinsettia Dies. The flower was assembled using Mini Glue Dots (#103683). The flower centre and berries had Adhesive Sheets (#152334) adhered to the back before cutting.
The base card and card front are Whisper White (#106549). I dry embossed the card front with the Tasteful Textile 3D Embossing Folder (#152718), then attached the Ornate Garden Specialty Designer Series Paper (#152488) to the card. The Real Red 3/8” Sheer Ribbon (#153535) was wrapped around the cardfront.
The poinsettia was attached to the card with Stampin’ Dimensionals (#104430). The greeting from the Itty Bitty Christmas stamp set (#c150513) was stamped with Real Red ink (#147084) and cut with a Stitched Shapes Die (#152323) and also attached with Stampin’ Dimensionals. The trio of Red Rhinestone Basic Jewels (#146924) were added to finish the card.

“Love what you do and share what you love.”

Have a fantastic day!!


Wednesday, 28 October 2020

Poinsettia Dies

Hi everyone,

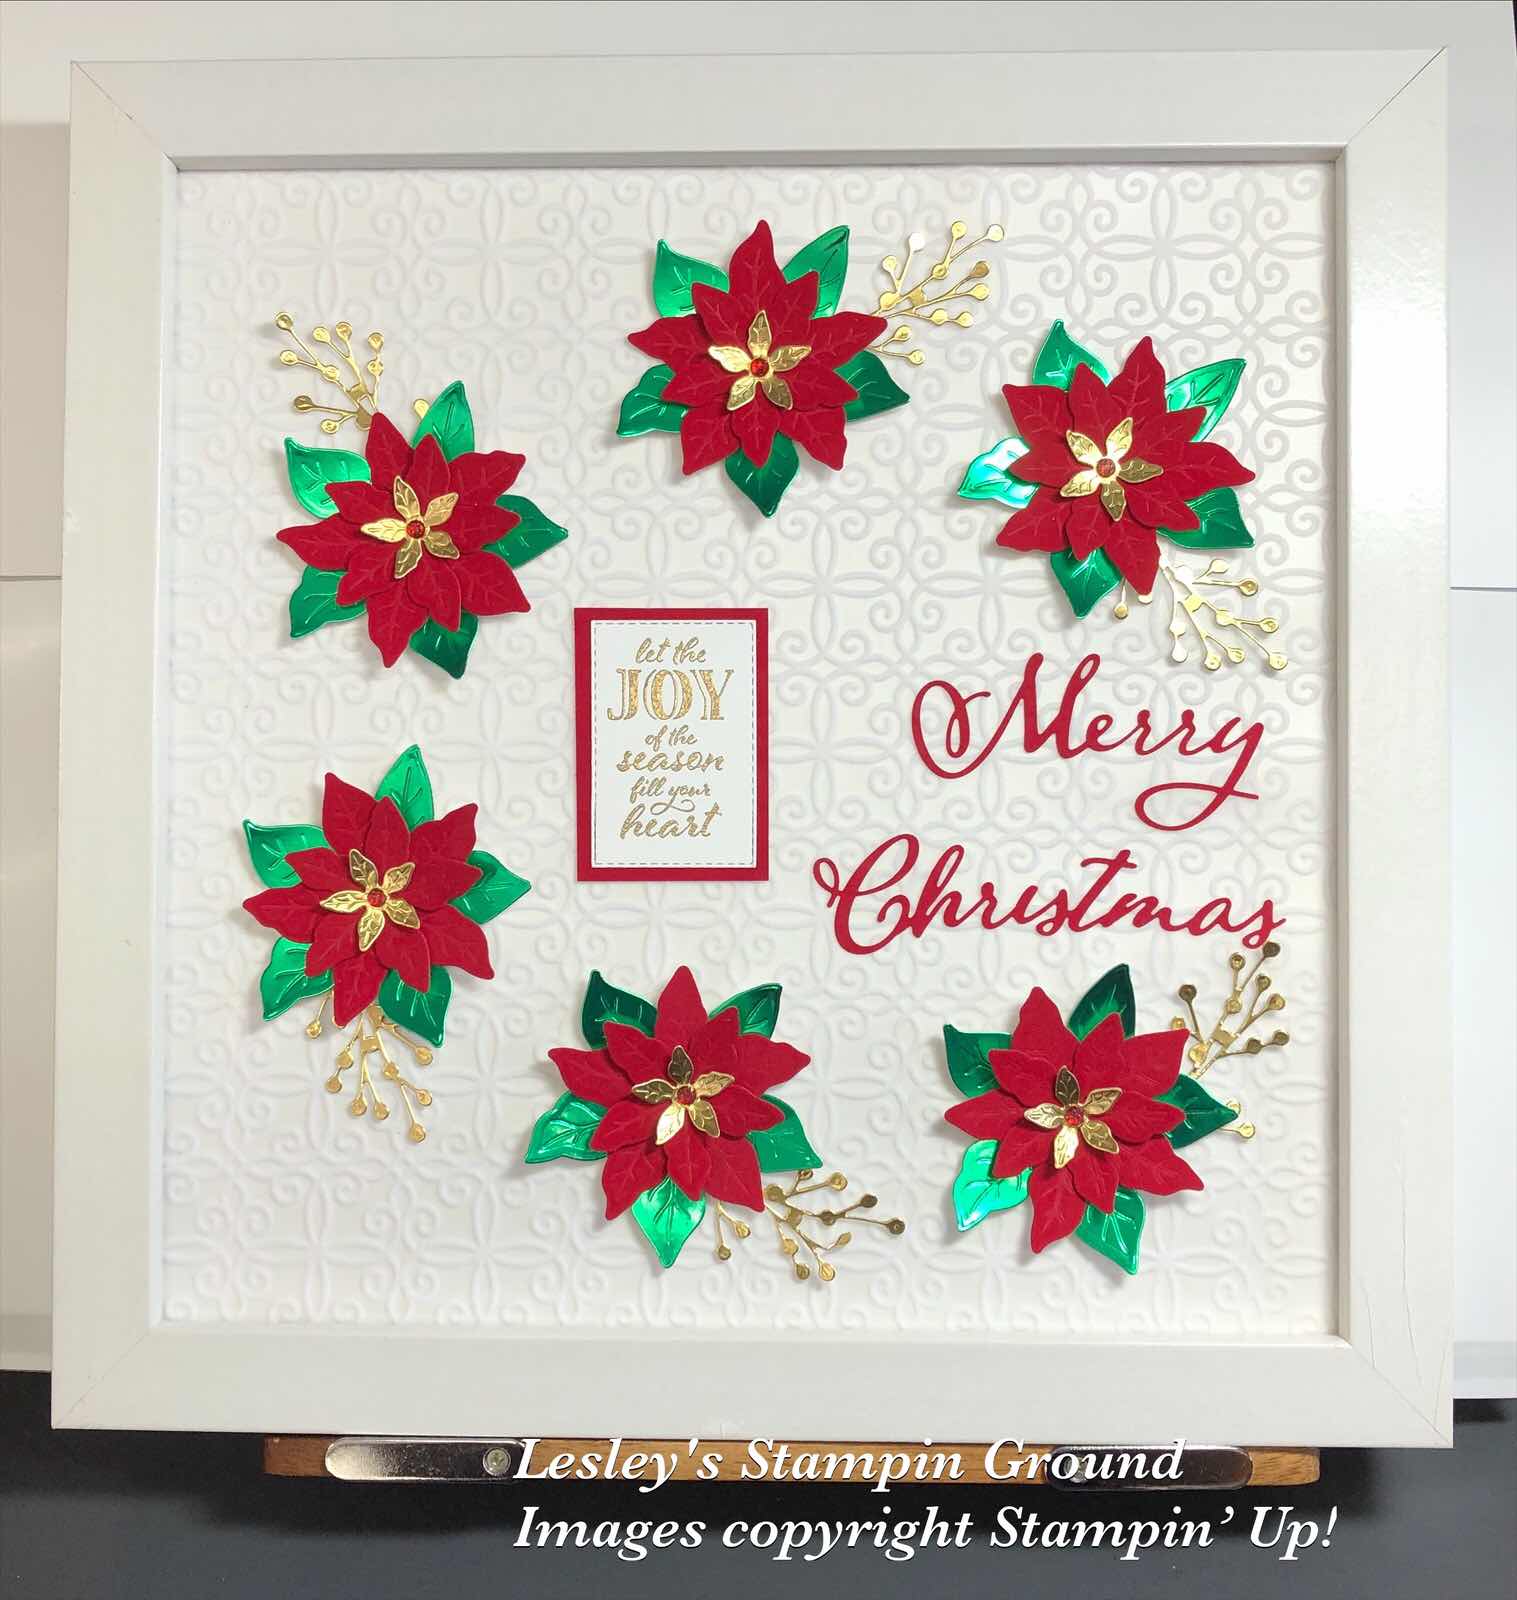
I love the Poinsettias from the Poinsettia Place Suite and was wanting to make a Christmas Frame so I have finally had a chance to make one and this was quite easy to make.


The background paper is from the Plush Poinsettia Specialty Paper (#153486) and I attached this to a piece of 12”x12” Whisper White cardstock (#124302).
The flowers and berries were all cut from the Poinsettia Dies (#153522).  I used the Green Foil from the Red & Green Foil Sheets (#153510) for the base of the flowers. The red layers were cut from the Red Velvet Paper Pack (#153490). I used Gold Foil Sheets (#132622) for the top layer of the flowers and for the berries. The flowers were assembled using Mini Glue Dots (#103683) and attached to the base with Stampin’ Dimensionals (#104430). The berries were attached with Mini Glue dots.
I used a retired die for Merry Christmas and this was also cut with the Red Velvet and glued using the Fine-Tip Glue Pen (#138309).
The greeting from Wrapped In Christmas stamp set (#153481) was stamped with VersaMark (#102283) and heat embossed with Gold Stampin’ Emboss Powder (#109129), then set with the Heat Tool (#129056). This was cut with a Stitched Rectangle die (#151820), then attached to a piece of Red Velvet. 
The red gems from the Wonderful Gems (#153536) were attached to the centre of the poinsettias.

Have a great day.

Monday, 31 August 2020

Poppy Moments Dies

Hello again,

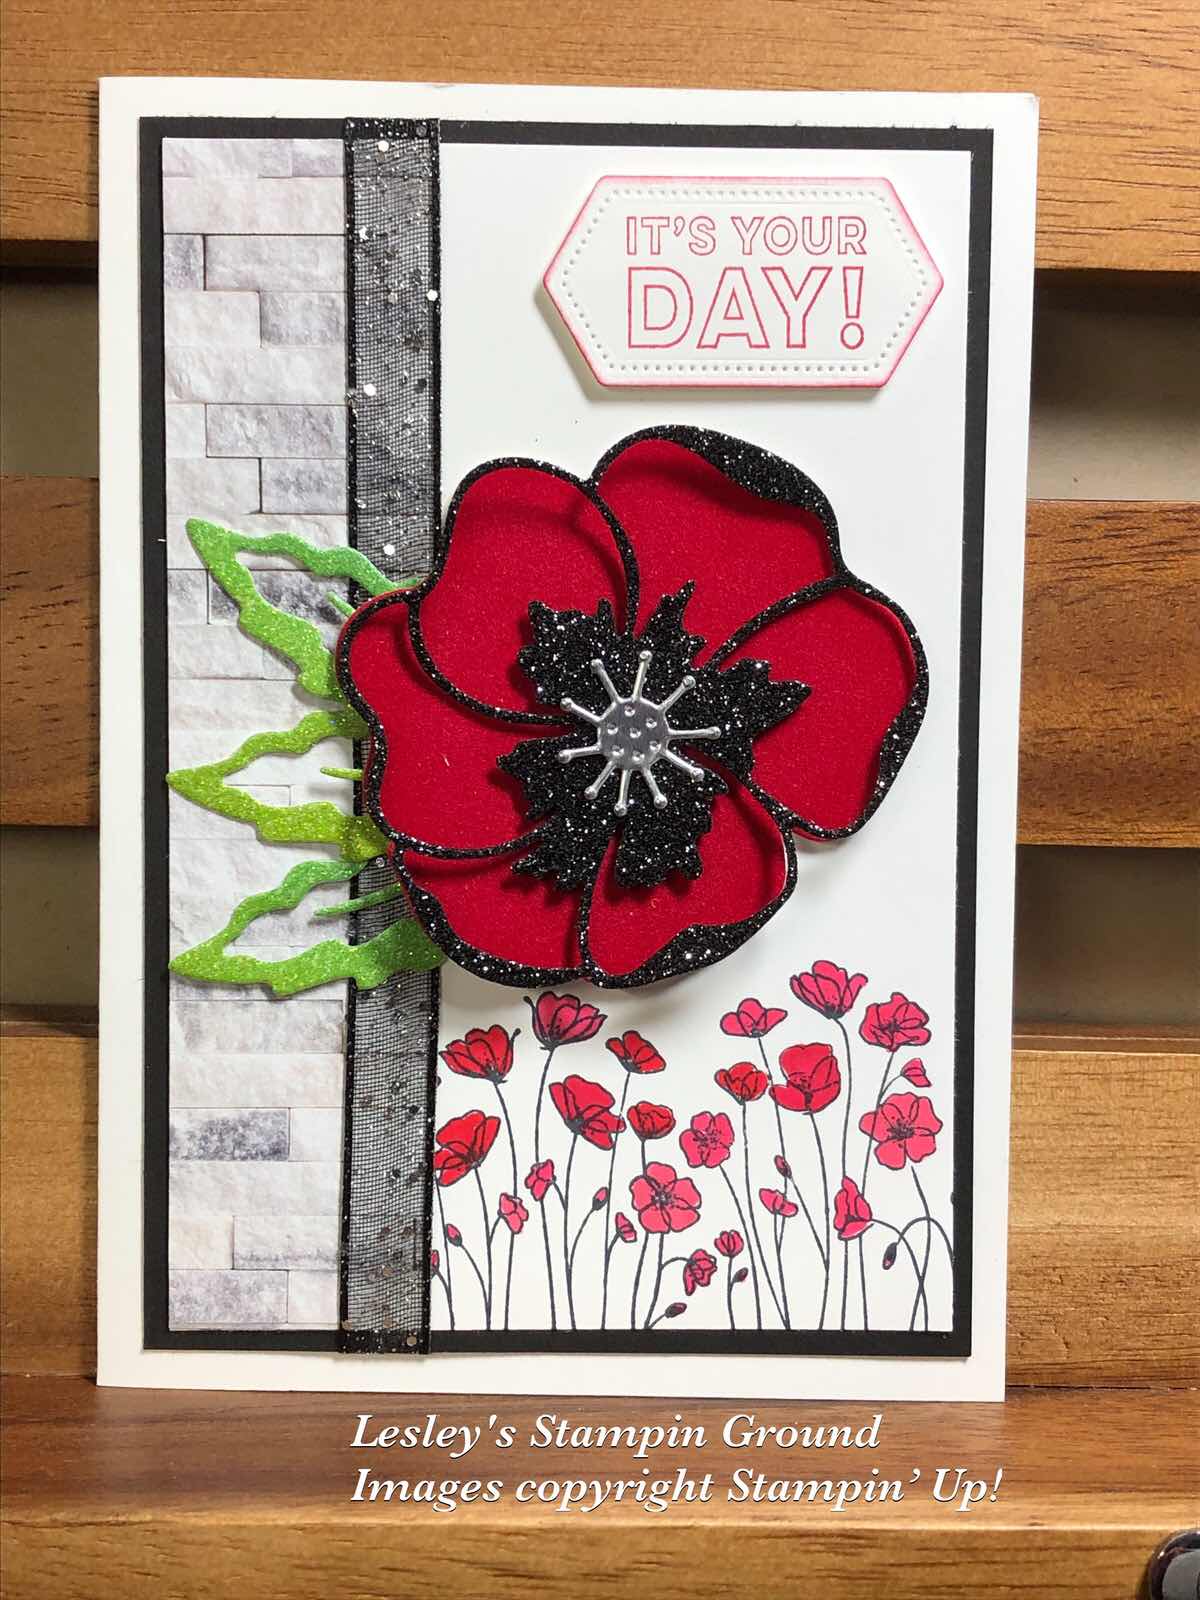
A bright & glittery card with the Black Glitter Paper (#153518), the Rainbow Glimmer Paper (#153056) and the 3/8” Glittered Organdy Ribbon (#147897).


Firstly I stamped the small poppies from the Painted Poppies stamp set (#c151599) using Tuxedo Black Memento ink (#132708). These were coloured with Real Red Stampin’ Blends (#154899) and Poppy Parade Stampin’ Blends (#154958). I attached the piece of In Good Taste Designer Series Paper (#152494) to the Whisper White card (#106549), then this was attached to the Basic Black card (#121688). I wrapped the ribbon around the card before attaching the cardfront the the Whisper White base card. The die cut poppy was cut with the Poppy Moments Dies (#151594). The base was cut from the Red Velvet Paper and the detailed piece was cut from the Black Glitter Paper. These were attached together and onto the card with Stampin’ Dimensionals (#104430). I used Silver Foil Sheet (#132178) for the poppy centre and attached this with Mini Glue Dots (#103683). The leaves were cut from the Rainbow Glimmer Paper and also attached with glue dots. The sentiment is in the Many Mates stamp set (#c152633) and stamped with Real Red ink (#147084). A Stitched Nested Labels die (#149638) was used to cut the sentiment, I sponged the edges with Real Red ink and attached it to the card with Stampin’ Dimensionals. 

Enjoy your day, stay safe and keep crafting!!


Monday, 3 August 2020

Poinsettia Petals Bundle

Hello friends,

I am enjoying playing with the beautiful Poinsettia Petals Bundle (#p155148) which is now available from the August-December 2020 Mini Catalogue.


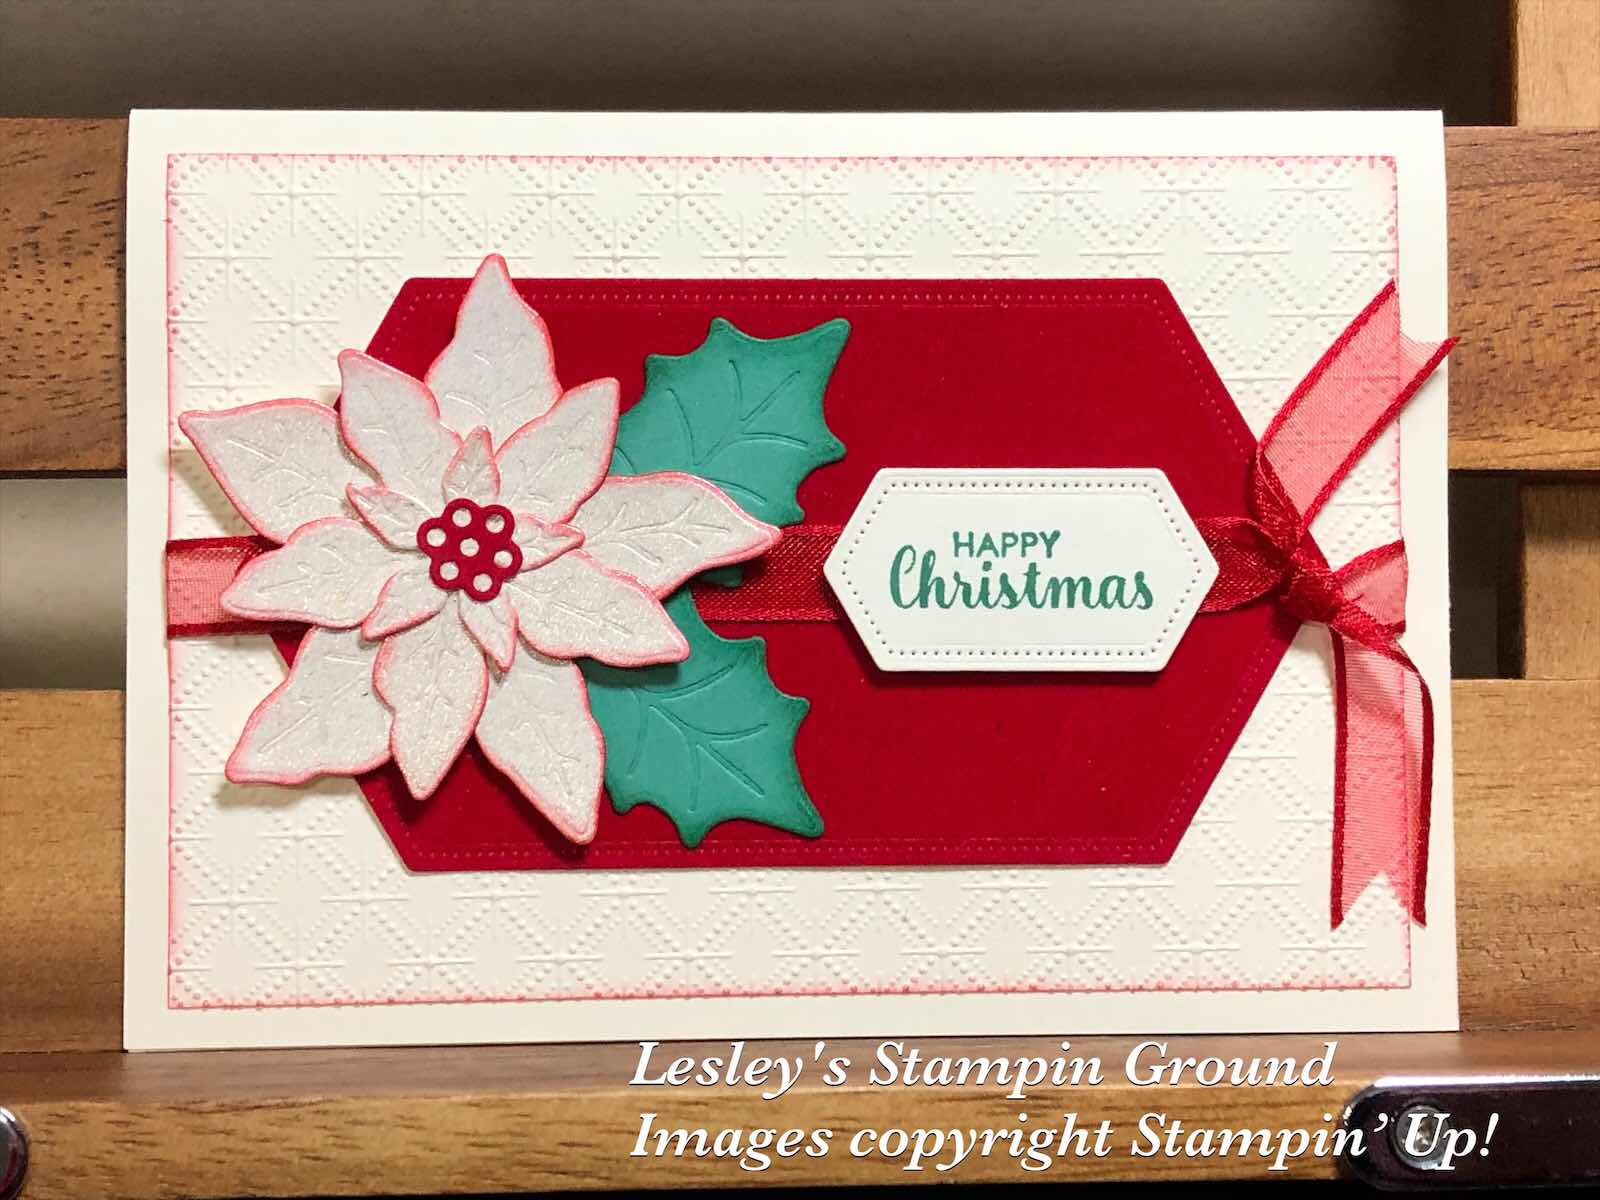
I have used Very Vanilla card (#106550) for the base and card front. I dry embossed the card front with the Dainty Diamonds 3D Embossing Folder (#152702) which is currently my favourite embossing folder. I sponged the edges with Real Red ink (#106578). I cut the Red Velvet Paper (#153490) with a Stitched Nested Labels Die (#149638) and attached this to the card. I wrapped the Real Red 3/8” Sheer Ribbon (#153535) around the card. Before cutting the Poinsettias I sprayed the Champagne Mist Shimmer Paint (#147044) on some Very Vanilla card. I cut 3 layers of the petals to make up the Poinsettia using the Poinsettia Dies (#153522). I used Just Jade card (#153084) for the leaves. I sponged the edges of the flower with Real Red ink and Just Jade ink (#153115) for the leaves. I also used the Red Velvet Paper for the flower centre. I assembled the flower with Mini Glue Dots (#103683) and attached the flower to the card with Stampin’ Dimensionals (#104430). “Happy Christmas” is from the Itty Bitty Christmas stamp set (#c150513) and stamped with Just Jade ink and cut with a Stitched Nested Labels die and attached with Dimensionals.

There are so many exciting new products in the new mini catalogue. If you live in Australia and would like one please contact me.

Have a great day.


Saturday, 25 July 2020

Poinsettia Petals Bundle

Hello,

Here’s another sneak peek using the Poinsettia Petals Bundle (#p155148) from the upcoming August-December 2020 Mini Catalogue. Products will be available to order from 4th August.


The basecard and card front are Whisper White (#106549). I dry embossed the card front with the Tasteful Textile 3D Embossing Folder (#152718). The Designer Series Paper is from the Ornate Garden Specialty DSP (#152488). I wrapped the Real Red 3/8” Sheer Ribbon (#153535) around the card front. I cut the 3 layers of the flower from Red Velvet Paper (#153490) using the Poinsettia Dies (#153522). I used Brass Foil Sheet (#153057) for the flower centre, the leaf and berries. The dies to cut these are also from the Poinsettia Dies. I used Mini Glue Dots (#103683) to assemble the flower. The flower was attached to the card with Stampin’ Dimensionals (#104430) and the brass foil pieces were glued with the Fine-Tip Glue Pen (#138309). The sentiment is from the Itty Bitty Christmas stamp set (#c150513) and I stamped this with Real Red ink (#147084) then cut it with a Stitched Shapes Die (#152323). Stampin Dimensionals were used to attach the sentiment and I finished the card by adding the trio of Red Rhinestone Basic Jewels (#146924).

Enjoy the rest of your weekend.