Showing posts with label #tastefultextile3dembossingfolder. Show all posts

Saturday, 29 January 2022

Friendly Hello & Honeybee Home

Hello friends,

I have combined the Friendly Hello stamp set (#159990) with the Honeybee Home stamp set (#157943) for this card.
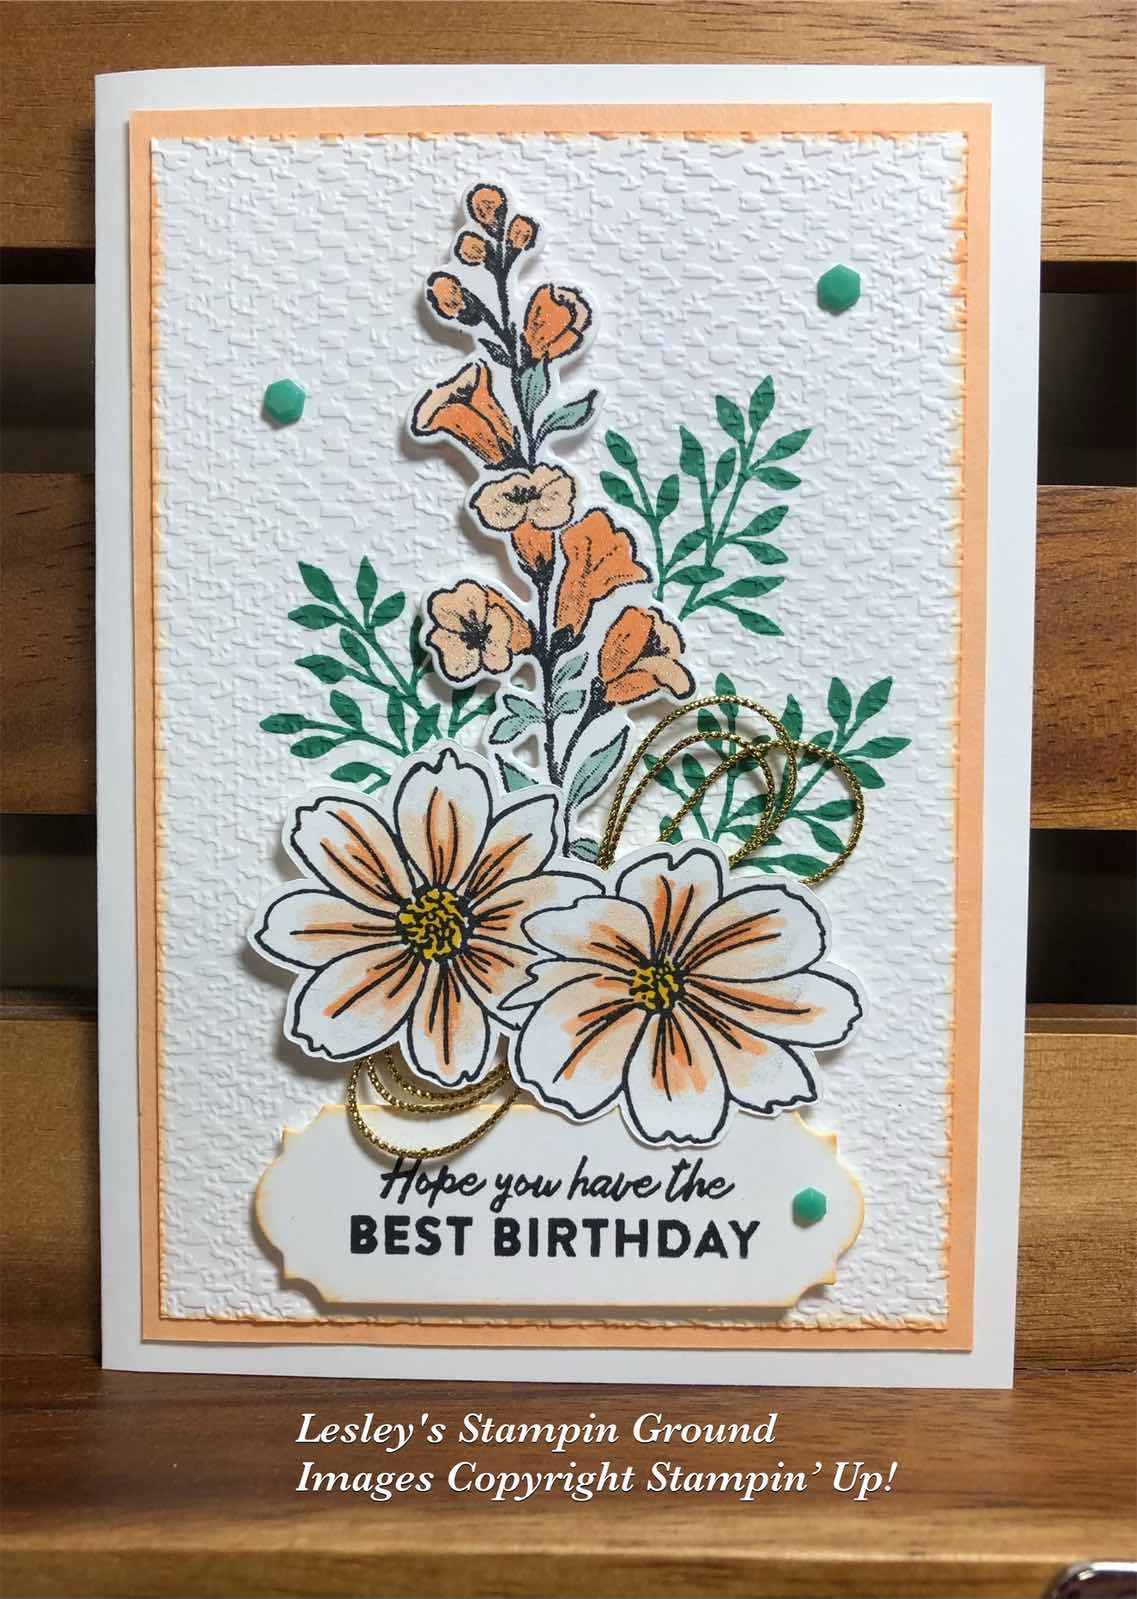


I stamped the leaves from the Friendly Hello stamp set onto Basic White card (#159228) using Just Jade ink (#153115). Then I dry embossed this with the Tasteful Textile 3D Embossing Folder (#152718). This was matted with Pale Papaya card (#155669) then attached to the Basic White base card.

The 2 larger flowers from the Friendly Hello stamp set and the smaller flowers from the Honeybee Home stamp set were stamped with Tuxedo Black Memento ink (#132708). The 2 larger flowers were fussy cut and the small flowers were cut with the Honeybee Blooms Dies (#157951). All the flowers were coloured with Pale Papaya Stampin’ Blends (#155519) and the leaves with Soft Succulent Stampin’ Blends (#155521). 

The Gold trim from the Simply Elegant Trim (#155766) was attached to the card front and the flowers were attached with Mini Stampin’ Dimensionals (#144108). The sentiment is also from the Friendly Hello stamp set and stamped with Tuxedo Black Memento ink, then cut with a die from the Ornate Frames (#150664). This was attached with Stampin’ Dimensionals (#104430). The Adhesive Backed Hexagons (#158148) were added to the card. Clear Wink Of Stella (#141897) was used on all the flowers to add that bit of sparkle.

TIP: When stamping and dry embossing on the same piece of card, it is usually best to stamp first, then emboss. If you emboss first you won’t get the best stamping image. However I have very occasionally embossed first for a different effect, depending on the stamp. It’s always worth experimenting.


“Love what you do and share what you love.”


Wednesday, 14 July 2021

Angels Of Peace

Hi,

Here is a sneak peak from the upcoming mini catalogue and the my first Christmas card this year.


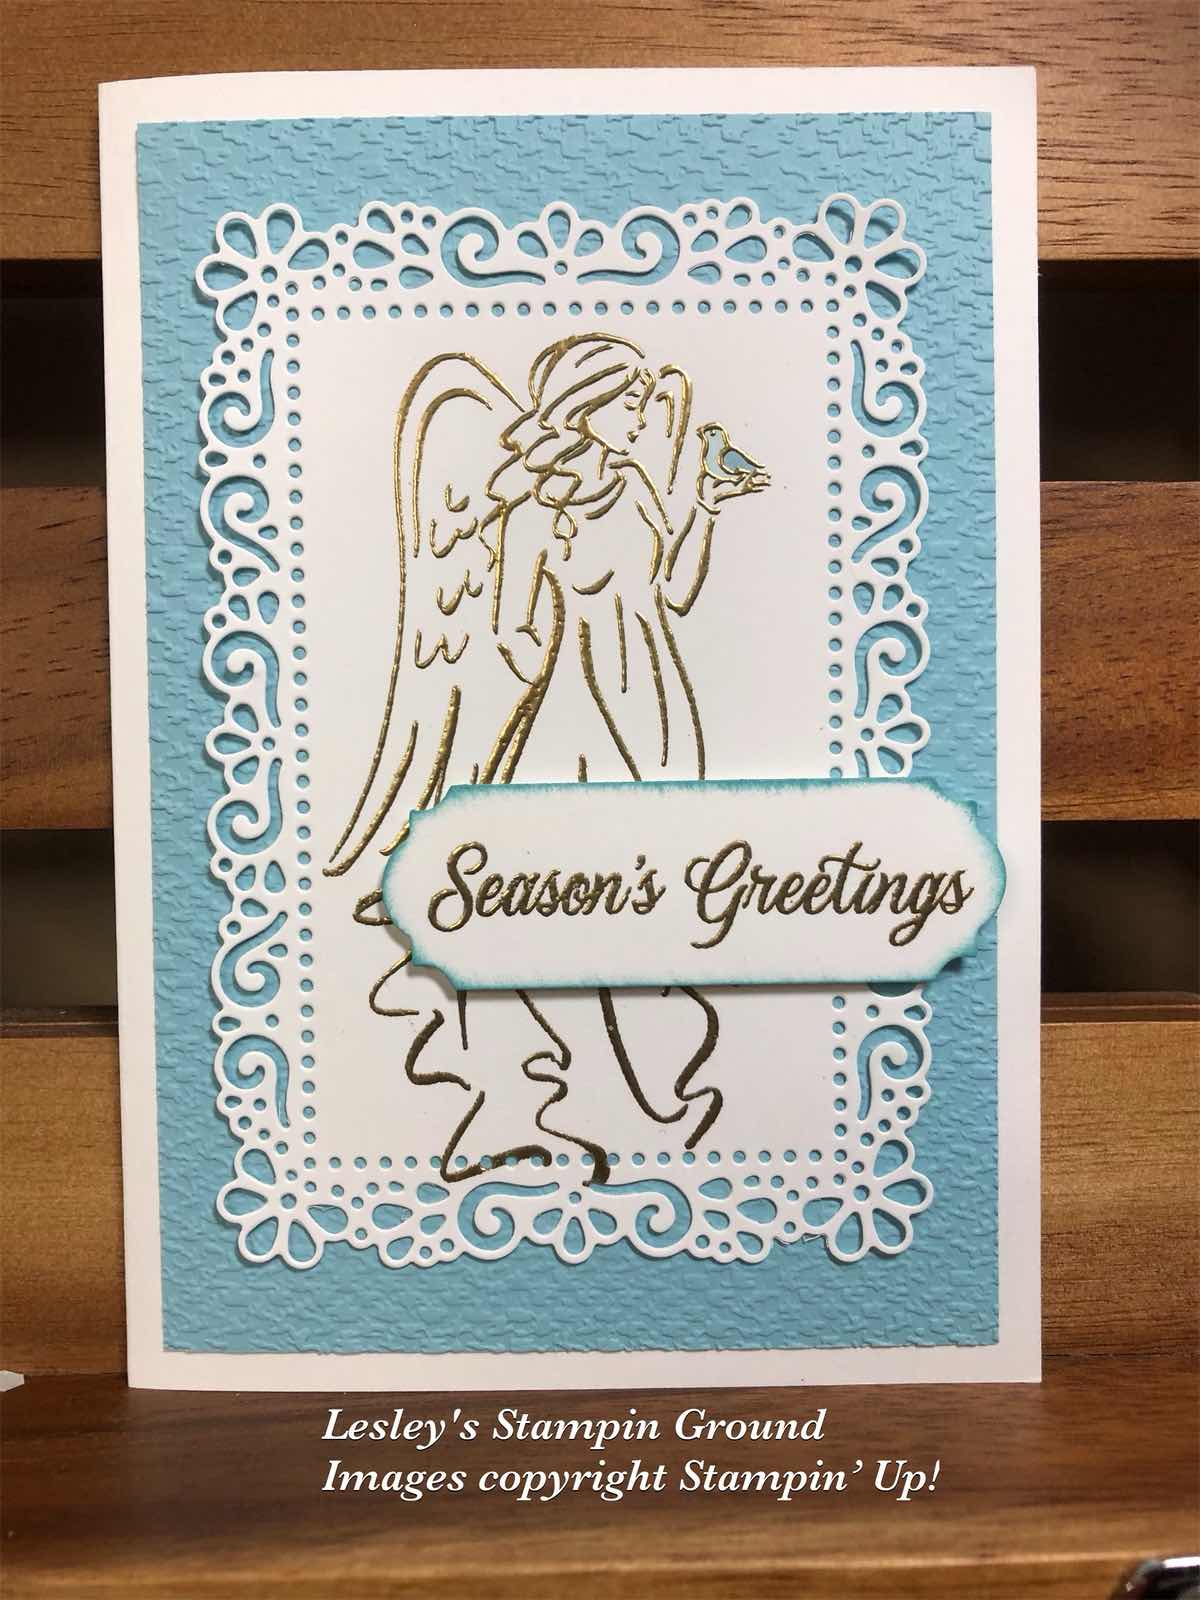
The angel from the Angels Of Peace stamp set (#156365) was stamped with VersaMark (#102283). This was then heat embossed with Gold Embossing Powder from the Metallics pack (#155555) and set with the Heat Tool (#129056). I cut this Basic White card (#159228) with a die from the Ornate Layers Dies (#152726). The Balmy Blue card (#147007) was embossed with the Tasteful Textile 3D Embossing Folder (#152718), then attached to the Basic White base card.

Season’s Greetings is from the Merriest Moments stamp set (#156353) and also Gold embossed. This was cut with an Ornate Frames Die (#150664), daubered the edges with Balmy Blue ink (#14710) and attached it to the card with Stampin’ Dimensionals (#104430). I coloured the bird with the Balmy Blue Stampin’ Blends (#154830).

There is a great variety of new products in the new catalogue which will be available to order from 3rd August.

Meanwhile there are some great bargains on many of the Designer Papers from the Annual catalogue till the 2nd August, which include the following packs-

155841 - Beauty of the Earth - $17

155696 - Bloom Where You’re Planted - $17

155499 - Hand Penned - $17

152494 - In Good Taste - $31.45

155817 - In The Wild - $17

155807 - Pansy Petals - $17

155605 - Sweet Symmetry - $17

155718 - Tidings Of Christmas - $17

155686 - You’re A Peach - $17


“Love what you do and share what you love.”


lesleyjendra.stampinup.net


Saturday, 7 November 2020

Forever Greenery Designer Series Paper

Hello,

“On Stage At Home” online event which I mentioned yesterday is now sadly over but I have learnt so much from all the presenters and looking forward to the new and exciting products which will be available soon.

There are however so many exciting products available in the 2 current catalogues and one of my very favourites is the Forever Greenery Suite (#154143). This suite consists of a Stamp & Die Bundle, Gold Laser-cut Specialty Paper, Designer Series Paper, Ribbon & Trim combo and Gold Hoops Embellishments. All these are also a available separately.


The card base is Whisper White (#106549) and I also stamped the sentiment on Whisper White. The sentiment from the Positive Thoughts stamp set (#151490) was stamped with VersaMark (#102283) and Heat Embossed with Gold Stampin’ Emboss Powder (#109129). I cut this with a Stitched Be Mine Die (#151814).
I cut the leaves with a die from the Forever Flourishing Dies (#152714) from Gold Foil Sheets (#132622) which were backed with Adhesive Sheets (#152334) for ease of placement onto the card. This was attached to the Vellum cardstock (#106584) which I dry embossed with the Tasteful Textile 3D Embossing Folder (#152718). This was then attached to the Forever Greenery Designer Series Paper (#152492), using Mini Glue Dots (#103683). I attached these dots under the leaves so they would not show through the vellum.
I wrapped the Shaded Spruce Ribbon and the Gold Cord, both from the Wonder Of The Season Ribbon Combo Pack (#153537) around the cardfront, then this was attached to the card base. The sentiment was attached to the card with Stampin’ Dimensionals (#104430) and the Gold Sequins from the Sequins For Everything (#153556) were added using the Fine-Tip Glue Pen (#138309).

“Love what you do and Share what you love.”


Have a fantastic day.


Friday, 6 November 2020

Poinsettia Dies with Red Velvet Paper Pack

Hi everyone,

Today I have had the opportunity to attend “Stampin’ Up! Onstage At Home” which is instead of the normal get together for demonstrators where we gather together, this one is on line. It is always so inspirational and fun to create cards together and learn heaps of new things. One great thing about being a demonstrator is that you get to see and purchase new products early, so I have already seen the upcoming catalogue that will be released in January and have ordered some new exciting goodies, so can’t wait to share them with you soon. If you would like to be part of the fun and become a demonstrator (and live in Australia), please contact me.

Now to todays card. It is a Christmas card using the gorgeous Red Velvet Paper (#153490) for the poinsettia.


The 3 layers of the poinsettia flower were cut and embossed with the Poinsettia Dies (#153522) from the Red Velvet Paper. The leaf, berries and flower centre were cut from the Brass Foil Sheets (#153057), also using the Poinsettia Dies. The flower was assembled using Mini Glue Dots (#103683). The flower centre and berries had Adhesive Sheets (#152334) adhered to the back before cutting.
The base card and card front are Whisper White (#106549). I dry embossed the card front with the Tasteful Textile 3D Embossing Folder (#152718), then attached the Ornate Garden Specialty Designer Series Paper (#152488) to the card. The Real Red 3/8” Sheer Ribbon (#153535) was wrapped around the cardfront.
The poinsettia was attached to the card with Stampin’ Dimensionals (#104430). The greeting from the Itty Bitty Christmas stamp set (#c150513) was stamped with Real Red ink (#147084) and cut with a Stitched Shapes Die (#152323) and also attached with Stampin’ Dimensionals. The trio of Red Rhinestone Basic Jewels (#146924) were added to finish the card.

“Love what you do and share what you love.”
Have a fantastic day!!


Monday, 29 June 2020

Birds & Branches

Hi everyone,

If you love cute little birds you will love this Birds & Branches Bundle (#154107).


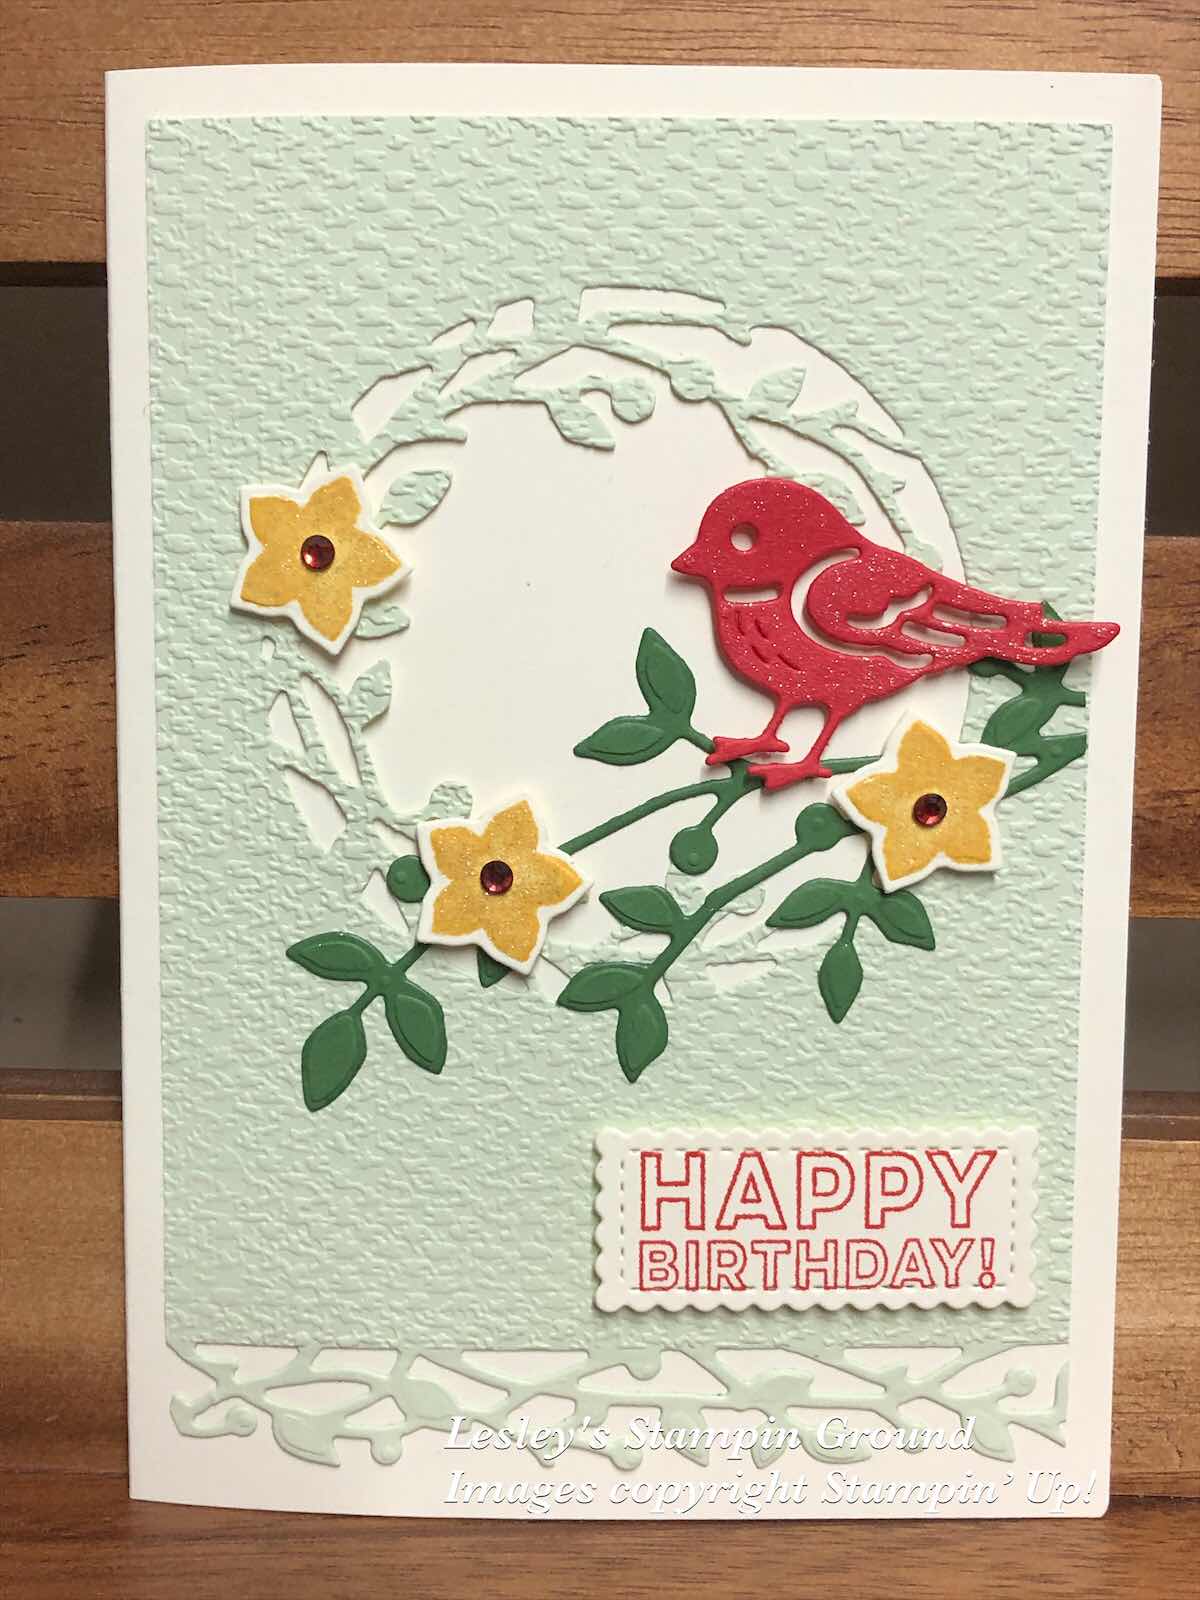
The Soft Sea Foam card (#147012) was cut with 2 dies from the Birds & More Dies (#152721), then embossed with the Tasteful Textile 3D Embossing Folder (#152718). The branch, flowers and bird were also all cut with these dies. I used Garden Green card (#108605) for the branch and Poppy Parade card (#121694) for the bird. I stamped the flowers from the Birds & Branches stamp set (#152570) using Bumble Bee ink (#153116) and added the Red Rhinestone Basic Jewels (#144220) to the flower centres. I used the Adhesive Sheet (#152334) on the back of the Garden Green card before cutting the branch. I am so pleased to see the return of adhesive sheets as it makes it so easy to attach more detailed die cuts to your project. “Happy Birthday” is from the Many Mates stamp set (#c152633) and stamped with Poppy Parade ink (#147050), then cut with a Stitched So Sweetly Die (#151690). The sentiment, bird and flowers were all attached with Stampin’ Dimensionals (#104430) and Mini Stampin’ Dimensionals (#144108). I couldn’t resist adding sparkle to the bird and flowers using the Clear Wink Of Stella Glitter Brush (#141897).

Have a great day.


Saturday, 20 June 2020

Ornate Layers Dies

Hi & welcome,

The Ornate Layers Dies (#152726) consist of 8 dies with beautiful detailed cutouts and are part of the Ornate Style Bundle (#c154119).


I cut the border at the bottom of the Whisper White card front (#106549), then I embossed above this with the Tasteful Textile 3D Embossing Folder (#152718). The Seaside Spray 1/4” Metallic Ribbon (#150446) was wrapped around the card front, then this Whisper White card was attached to the Seaside Spray base card (#150889). I cut a piece of Seaside Spray card with a Stitched Rectangles Die (#151820) then embossed this with the Subtle 3D Embossing Folder (#151775). The next layer is Silver Foil Sheet (#132178) which was cut with an Ornate Layers Die. I stamped the sentiment from the Positive Thoughts stamp set (#c151490). This was stamped with Seaside Spray ink (#150085), followed by VersaMark (#102283) and adding Clear Stampin’ Emboss Powder (#109130) and set with the Heat Tool (#129056). This was also cut with a Stitched Rectangles Die. The butterfly from Positive Thoughts stamp set was heat embossed with Silver Embossing Powder (#109131) and cut with the co-ordinating die from the Natures Thoughts Dies (#153586). The Frosted & Clear Epoxy Droplets (#147801) were added to the card and butterfly.

I hope you are enjoying the weekend.