Showing posts with label #artgallerystampset. Show all posts

Friday, 25 February 2022

Art Gallery

Hello stamping friends,

It’s always nice to re-visit some products in the annual catalogue. It’s so easy to play with all the new products once the mini catalogue arrives but there are still so many exciting products in the annual catty. These flowers and sentiment are from the Art Gallery stamp set (#158201).
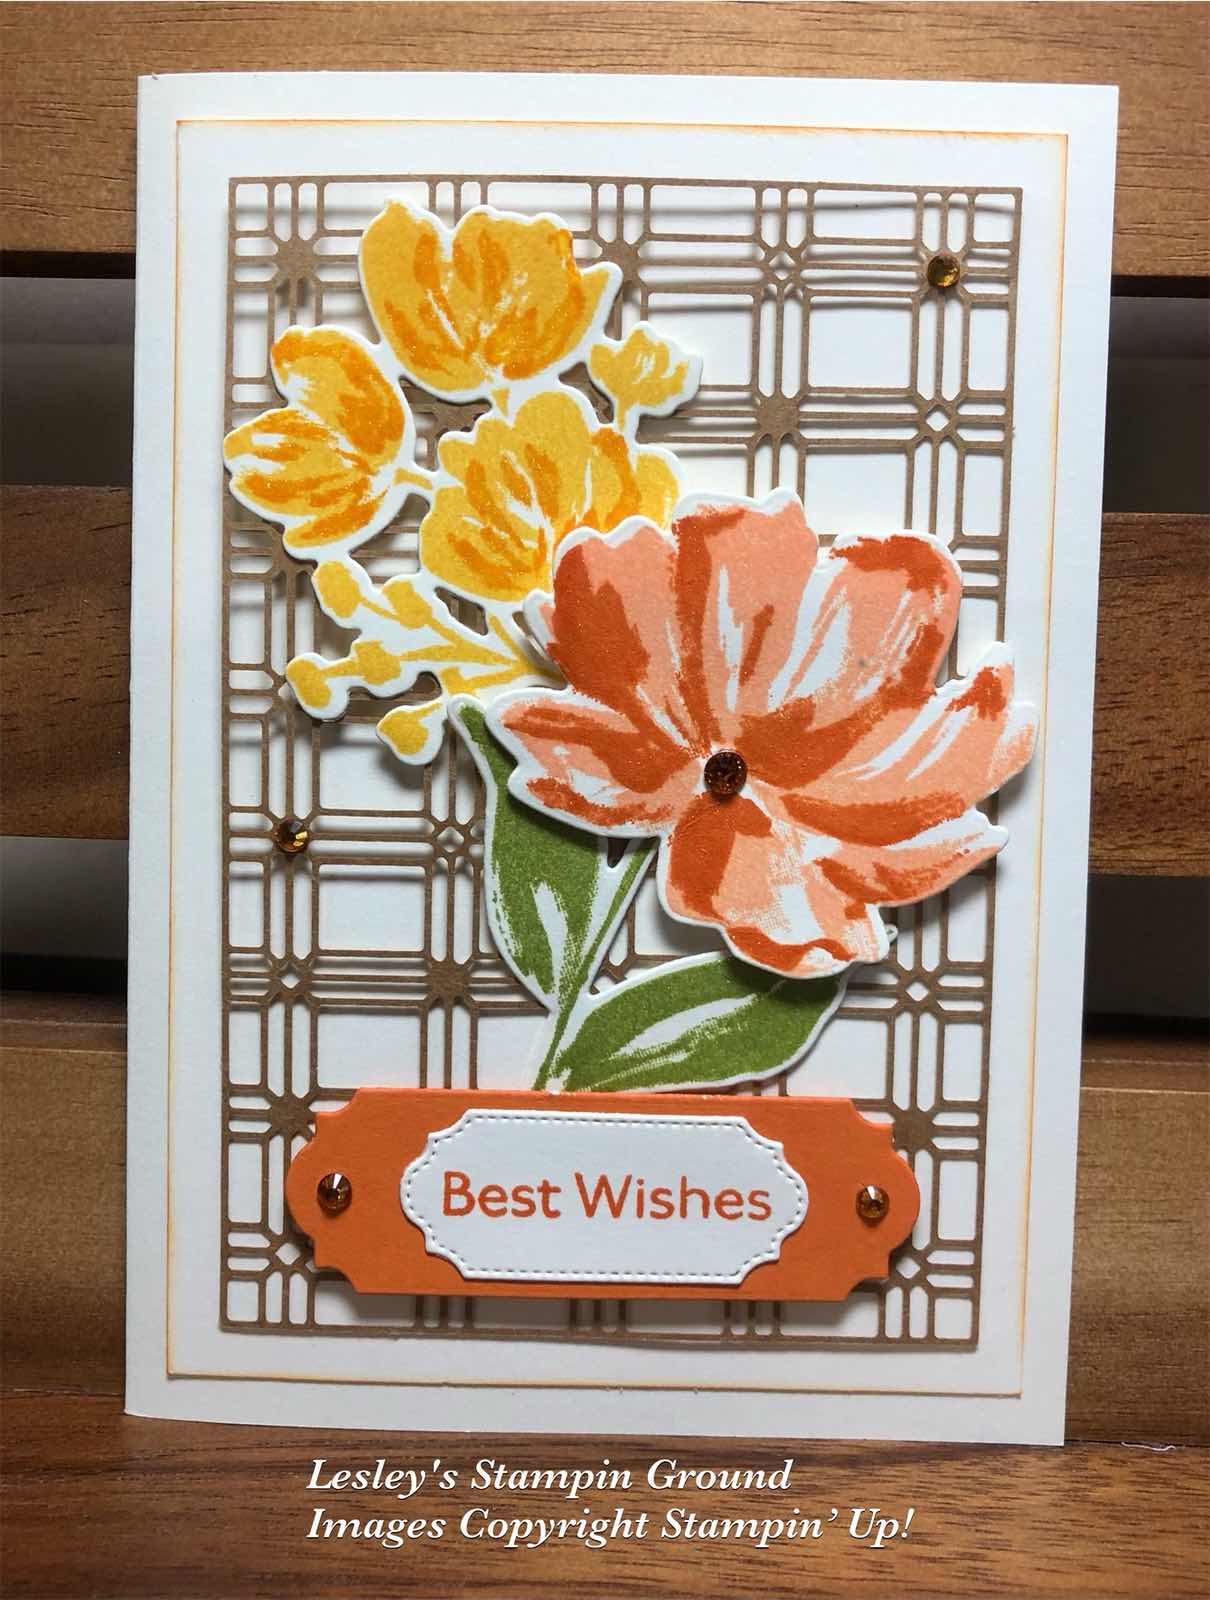


This stamp set is a Two-Step set which means you can stamp 2 images with different colours. For the single flower I stamped the darker colour with Pumpkin Pie ink (#147086), then stamped the lighter colour with Pale Papaya ink (#155670). The group of small flowers was stamped with Daffodil Delight ink (#147094) for the background and Mango Melody ink (#147093) for the darker colour. The leaves were stamped with Pear Pizzaz ink (#147104). All these stamped images were then cut with dies from the co-ordinating Floral Gallery dies (#154316).

I attached the Paper Lattice (#155697) to the Very Vanilla card front (#106550) using Mini Glue Dots (#103683). The yellow flowers and leaves were also attached with Mini Glue Dots and the orange flower with Stampin’ Dimensionals (#104430).

The sentiment was stamped with Pumpkin Pie ink. The sentiment and the label under it were cut with Ornate Frames Dies (#150664). Stampin’ Dimensionals were used to attach this to the card. I daubered the edges of the card front with Pumpkin Pie ink, then this was attached to the Very Vanilla base card. The embellishments are from the Holiday Rhinestone Basic Jewels (#150457).

TIP: When I attached the Paper Lattice, I used adhesive under areas which would not be visible on the finished card - under the flowers and sentiment.

“Love what you do and share what you love.”


For those in any areas flooding in Queensland, please stay safe. This is a good excuse to stay home & craft if you are out of flood areas.


Sunday, 17 October 2021

Stitched Greenery Die

Hello friends,

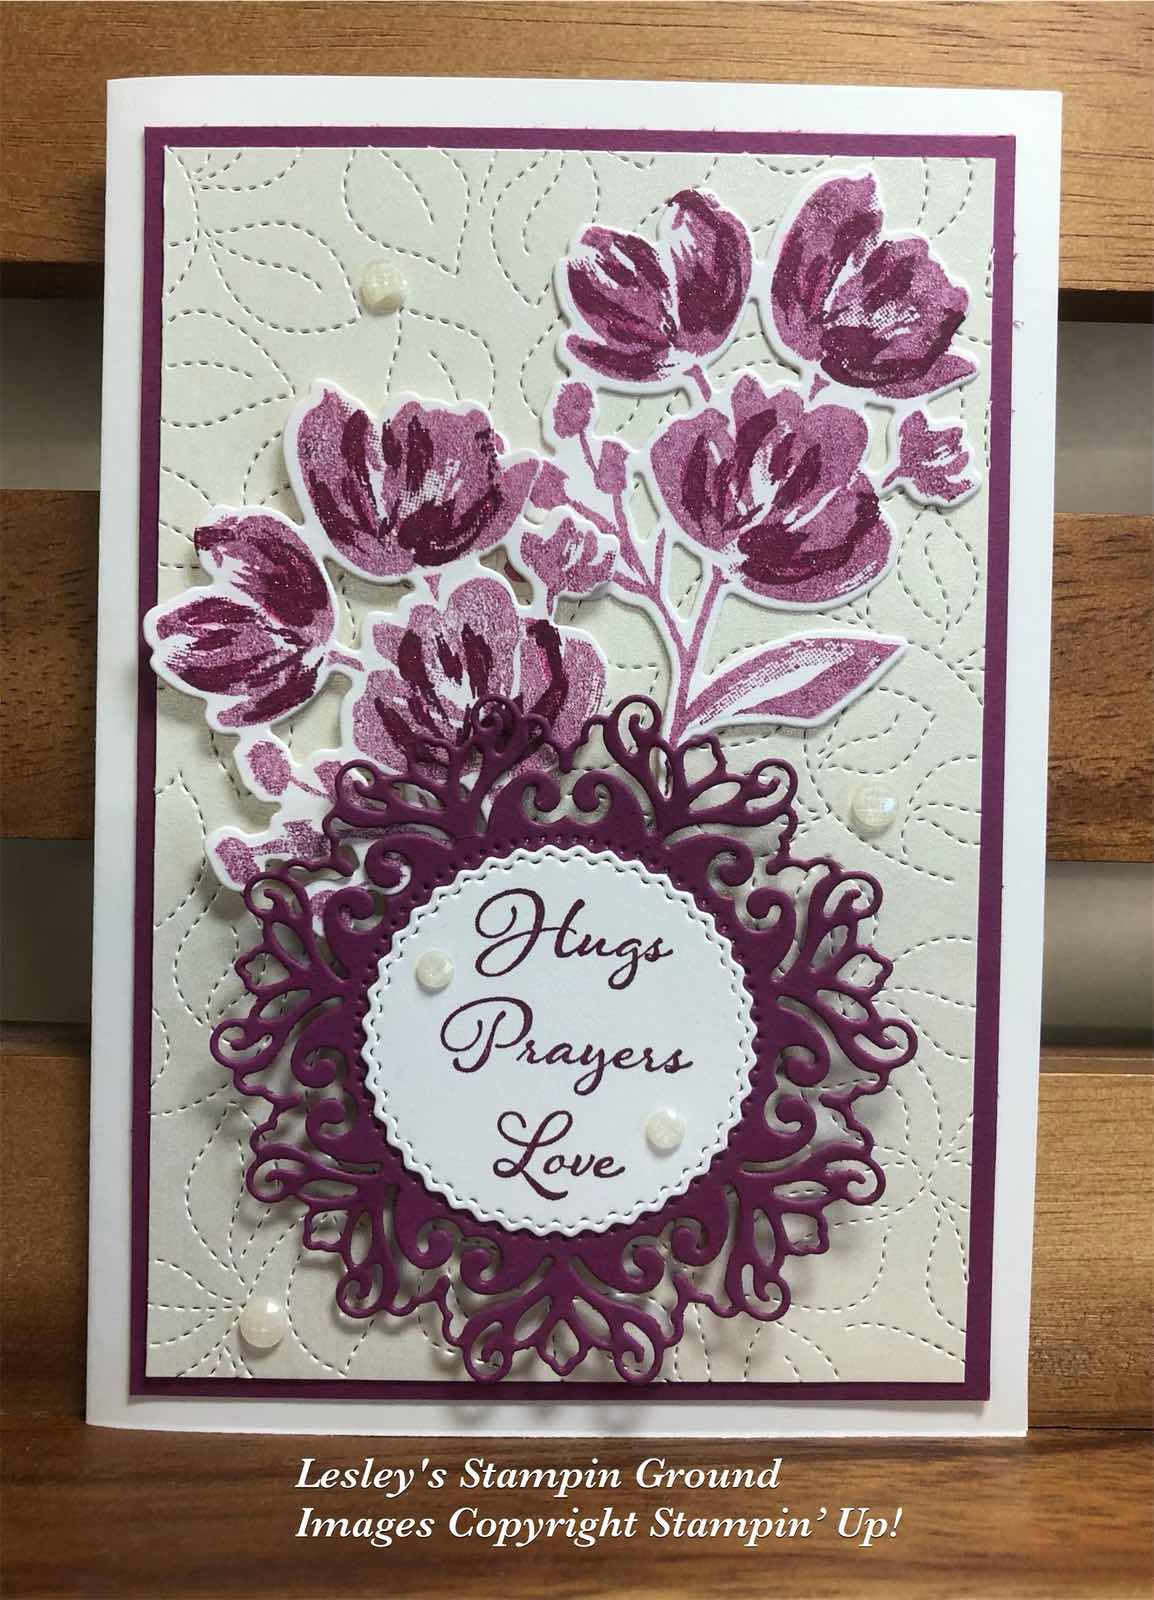
I am loving this Stitched Greenery Die (#155451) which is great for backgrounds. I am sure it will be used on many of my cards in the future. Not sure why it took so long to get it.


I used this die on the Pearlescent Specialty Paper (#154291) and matted it with the Rich Razzleberry card (#119981). The base card is Shimmery White card (#121717). 

I stamped the floral images from the Art Gallery stamp set (#158201) using Rich Razzleberry ink (#147091) on Shimmer White card. I used the stamping off method to stamp the background of the flowers for a lighter image and the darker areas are stamped normally. These were cut with the co-ordinating Floral Gallery dies (#154316). I taped the flowers on the right side of the card and used Stampin’ Dimensionals (#104430) to attach the other flowers.

The detailed “circle” was cut with a die from the Encircled In Beauty Dies (#155546) using Rich Razzleberry card. The sentiment is from the Positive Thoughts stamp set (#151490) and also stamped with Rich Razzleberry ink. I used a Tasteful Labels Die (#152886) to cut this. The Rich Razzleberry cut-out was attached to the card with Stampin’ Dimensionals. The Elegant Faceted Gems (#152464) were added to the card.

“Love what you do and share what you love.”

Stay safe & keep crafting!!


Sunday, 14 March 2021

Art Gallery Bundle

Hi my friends,

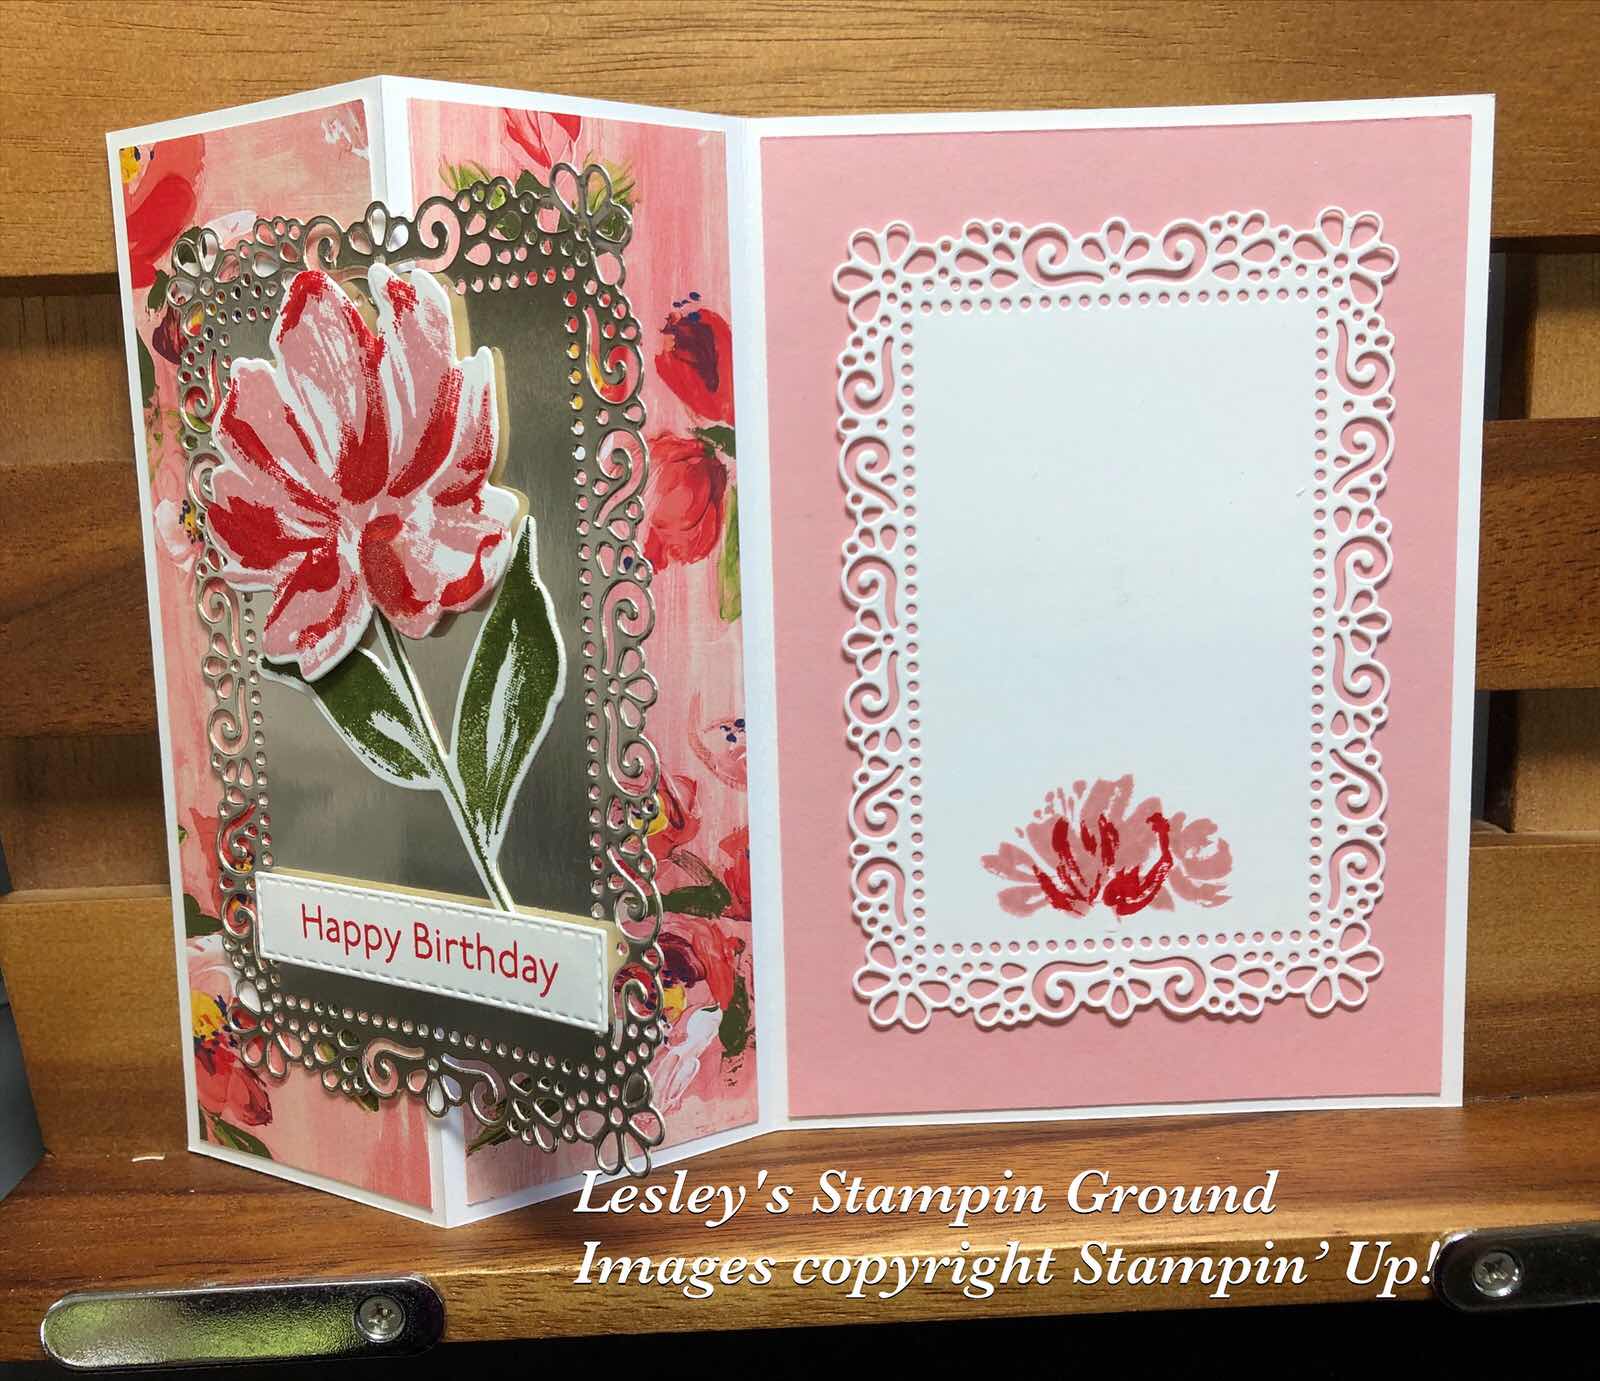
I like fancy fold cards and especially easy ones as this one is.


The card is a normal size card then I scored and folded the card front in half, bending it back towards the “spine”. I cut 2 pieces of Fine Art Floral Designer Series Paper (#154558) and placed them on the card as shown above. A piece of Blushing Bride card (#131287) was attached to the other side of the card.
I cut the Basic White card (#159228) and Silver Foil sheet (#132178) with the same Ornate Layers Die (#152726). The flower from the Art Gallery stamp set (#154421) was stamped with Blushing Bride ink (#147100) and Poppy Parade ink (#147050) onto the Basic White card. I attached the white card to the Blushing Bride card. Then with the front of the card folded, I placed the Silver Foil cut out in place, directly over the white card, making sure you only have adhesive on the left side of the cut out.
The flower and leaves on the front of the card are also from the Art Gallery stamp set using Blushing Bride ink & Poppy Parade ink for the flower and Mossy Meadow ink (#147111) for the leaves. The flower and leaves were cut with the Floral Gallery Dies (#154316). Happy Birthday is also from the Art Gallery stamp set using Poppy parade ink. I used a Stitched Rectangles die (#151820) to cut the sentiment. The sentiment was attached with Mini Stampin’ Dimensionals (#144108) and the flower with Stampin’ Dimensionals (#104430).


Have a fantastic day!!

“Love what you do and share what you love.”


Monday, 11 January 2021

Fine Art Floral Designer Series Paper

Hello and welcome,

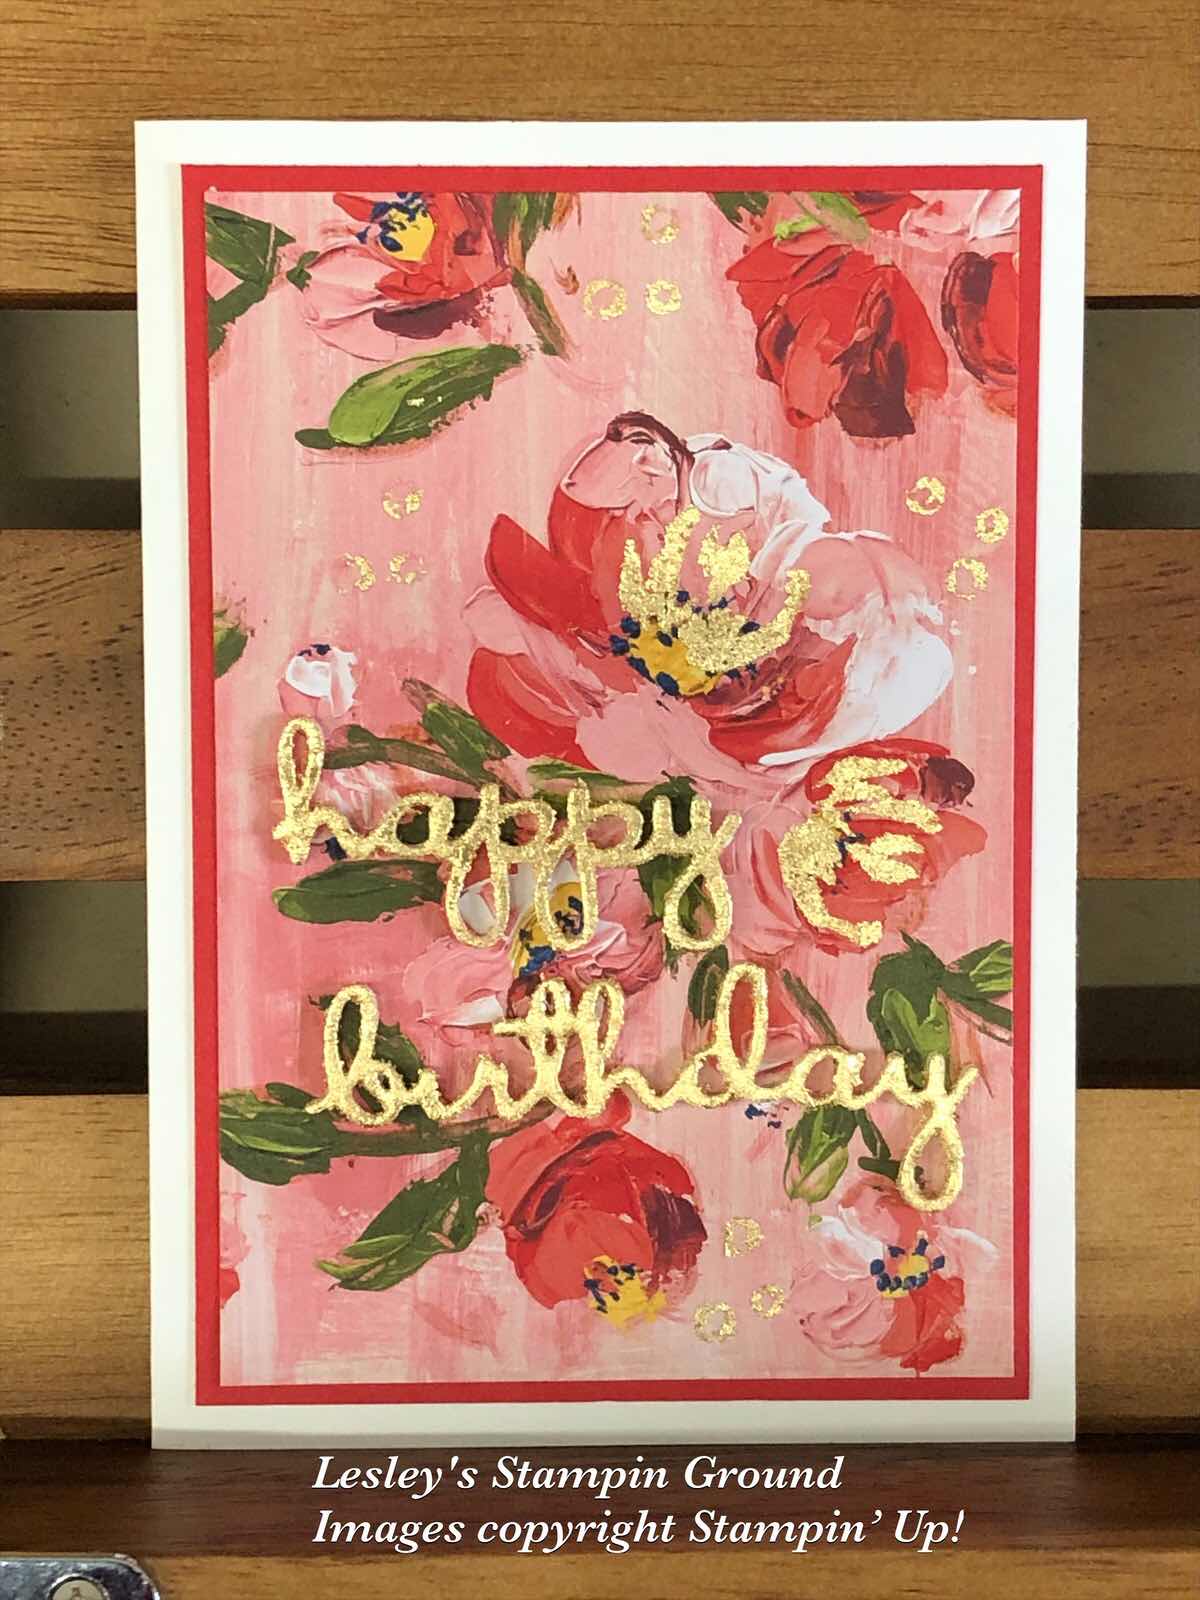
I love the bright colours on the Fine Art Floral Designer Series Paper (#154558). As usual there are more subtle colours and designs on the reverse but I have chosen to use the beautiful red design for this card.


This designer paper co-ordinates with the Art Gallery stamp set (#154421), so I have added some gold to 2 of the flowers using the Gilded Leafing (#154560). I stamped the part flower image from the Art Gallery Stamp set onto the flowers and some circles from the Comfort & Hope Stamp set (#152509) randomly on the DSP. These were stamped with VersaMark (#102283), then the Heat and Stick Powder (#156110) is sprinkled over the stamped images. Remove the excess powder, then heat with the Heat Tool (#129056). This doesn’t take long. Once it becomes shiny it is ready and it will stay sticky. Gently place the Gilded Leafing over the top and press firmly. Using a firm brush or sponge remove the excess gilded leaf and this can be returned to the remainder of the leaf so it’s not wasted.
I cut “happy birthday” using the Well Written Dies (#151816). These were cut from the Foam Adhesive Sheets (#152815). As these have adhesive on both sides. I attached the words to the card, then after removing the release paper from the top I added the Gilded Leafing on top. I pressed the gilded leafing firmly onto the foam adhesive then using a firm brush removed the excess.
The DSP was attached to the Poppy Parade card (#121694), then to the Whisper White Base card.

Stay safe, stay home & keep crafting!!

“Love what you do and share what you love.”