Showing posts with label #encircledinbeautydies. Show all posts

Monday, 7 February 2022

Calming Camellia

Hi again my friends,

Sale-a-bration is a great time of the year when you can earn free products when placing a qualifying Stampin’ Up! order ($90 or $180 in Australia). There has been an extension of Sale-a-bration in Australia till 16th March so still time to get some fantastic products. The Calming Camellia stamp set (#158117) is a Sale-a-bration host set which you can earn by hosting a party or placing a personal order of $500. I have used this stamp set on this card.
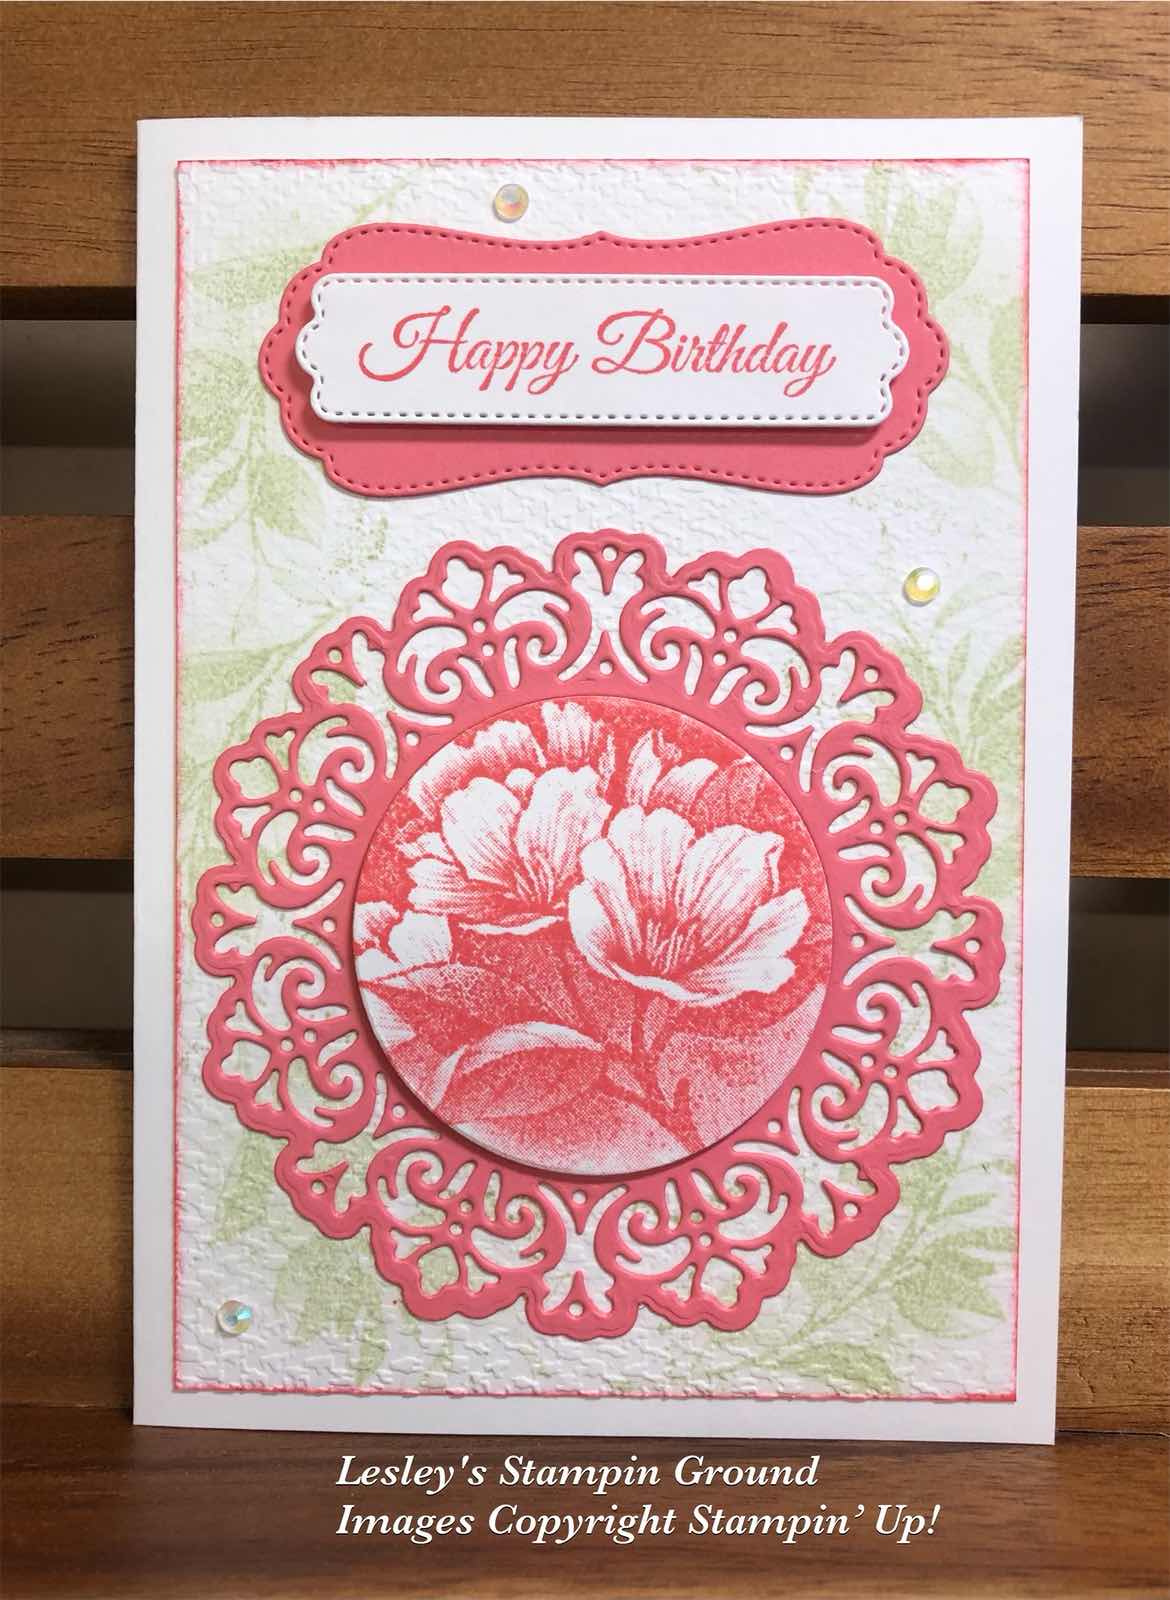


I stamped the leaves with Soft Sea Foam ink (#147102) onto the Basic White card front (#159228). I then dry embossed this with the Tasteful Textile 3D Embossing Folder (#152718). The edges were daubered with Flirty Flamingo ink (#147052), then attached to the Basic White base card.

I stamped the flowers with Flirty Flamingo ink and cut it with a die from the Encircled In Beauty Dies (#155546). I only used the circle from the cut out. I then cut the Flirty Flamingo card (#141421) which was backed with Adhesive Sheet (#152334) with the same die for the outside detailed cut-out. This was attached to the card, then the circle with the stamped flower was attached with Stampin’ Dimensionals (#104430).

“Happy Birthday” is also from the Calming Camellia stamp set and stamped with Flirty Flamingo ink. I used a label die from the Pretty Pillow Box dies (#156321) to cut the sentiment and a die from the Potted Succulents Dies (#154330) was used to cut the Flirty Flamingo card under the sentiment. The sentiment was attached to the card with Stampin’ Dimensionals. The beautiful Iridescent Rhinestone Basic Jewels (#158130) were added to finish the card.

TIP: The adhesive sheet is ideal for adhering cut outs when using detailed dies. Just adhere it to the back of the card before cutting with a die. Remove the backing and attach to your card. So simple!!

“Love what you do and share what you love.”


Saturday, 27 November 2021

Encircled In Beauty Dies

Hello my friends,

I have cut the Shaded Spruce card (#147006) with the Encircled In Beauty Dies (#155546) to get this beautiful detailed “doilie”.


The Very Vanilla card front (#106550) was dry embossed with the Timber 3D Embossing Folder (#156406). I attached a piece of the Expressions In Ink 12”x12” Specialty Designer Series Paper (#155464) to the card front, then wrapped the Old Olive/Pretty Peacock Reversible Ribbon (#149496) around. This was attached to the Very Vanilla Base card.

I adhered Adhesive Sheets (#152334) to the back of the Shaded Spruce card before cutting with the detailed die and the outline die to cut the outside. The inside circle cuts at the same time and I cut a small amount from the circle with a Layering Circles Die (#151770) as I wanted it a bit smaller. I find the adhesive sheets so convenient and easy for adhering any detailed cuts outs like this one.

The butterfly was cut with one of the Brilliant Wings Dies (#155523) from Gold Foil Sheet (#132622). I used Mini Stampin’ Dimensionals (#144108) to attach this to the card. The sentiment is from the Art Gallery Stamp Set (#158201) and stamped with Shaded Spruce ink (#147088). A Seasonal Labels Die (#156299) was used to cut the sentiment and it was also attached with Mini Stampin’ Dimensionals. The Genial Gems (#155500) were added to the card, butterfly & sentiment.

“Love what you do and share what you love.”


Sunday, 17 October 2021

Stitched Greenery Die

Hello friends,

I am loving this Stitched Greenery Die (#155451) which is great for backgrounds. I am sure it will be used on many of my cards in the future. Not sure why it took so long to get it.


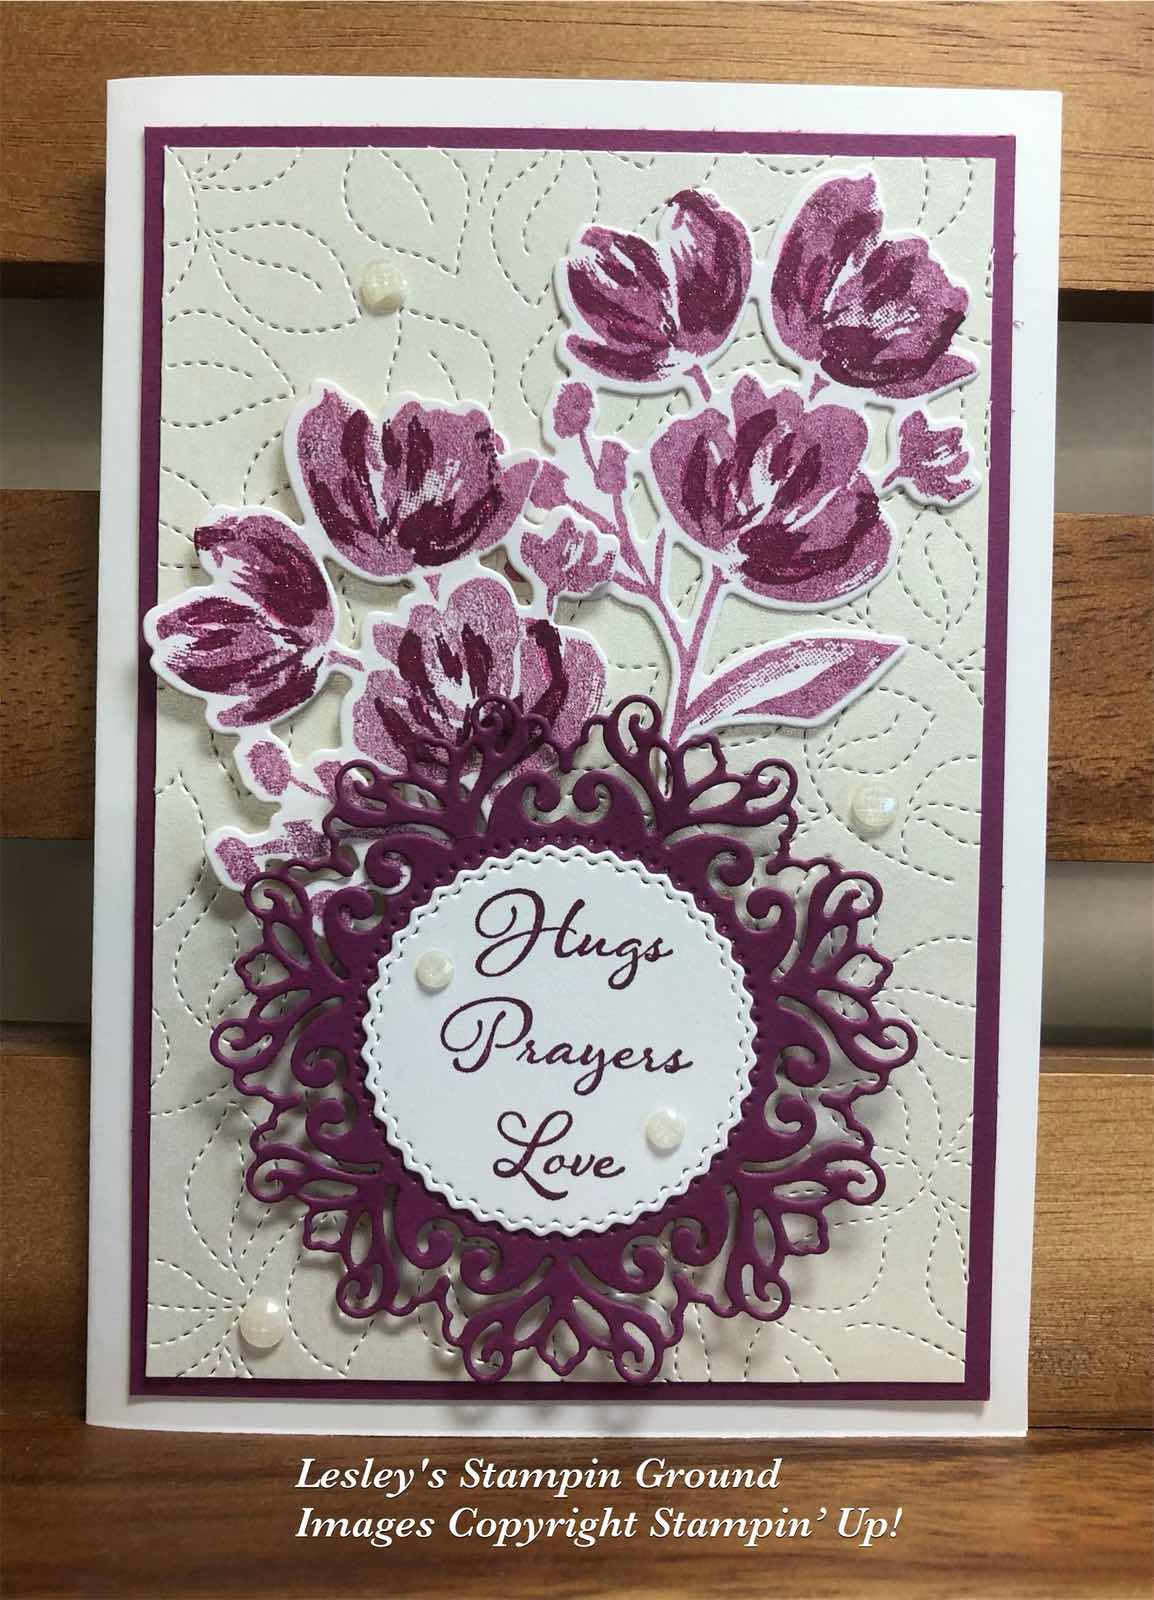
I used this die on the Pearlescent Specialty Paper (#154291) and matted it with the Rich Razzleberry card (#119981). The base card is Shimmery White card (#121717). 

I stamped the floral images from the Art Gallery stamp set (#158201) using Rich Razzleberry ink (#147091) on Shimmer White card. I used the stamping off method to stamp the background of the flowers for a lighter image and the darker areas are stamped normally. These were cut with the co-ordinating Floral Gallery dies (#154316). I taped the flowers on the right side of the card and used Stampin’ Dimensionals (#104430) to attach the other flowers.

The detailed “circle” was cut with a die from the Encircled In Beauty Dies (#155546) using Rich Razzleberry card. The sentiment is from the Positive Thoughts stamp set (#151490) and also stamped with Rich Razzleberry ink. I used a Tasteful Labels Die (#152886) to cut this. The Rich Razzleberry cut-out was attached to the card with Stampin’ Dimensionals. The Elegant Faceted Gems (#152464) were added to the card.

“Love what you do and share what you love.”

Stay safe & keep crafting!!


Tuesday, 27 July 2021

Encircled In Beauty Dies

Welcome Ladies & Guys,

I used the Encircled In Beauty Dies (#155546) to cut the designer paper and gold foil.


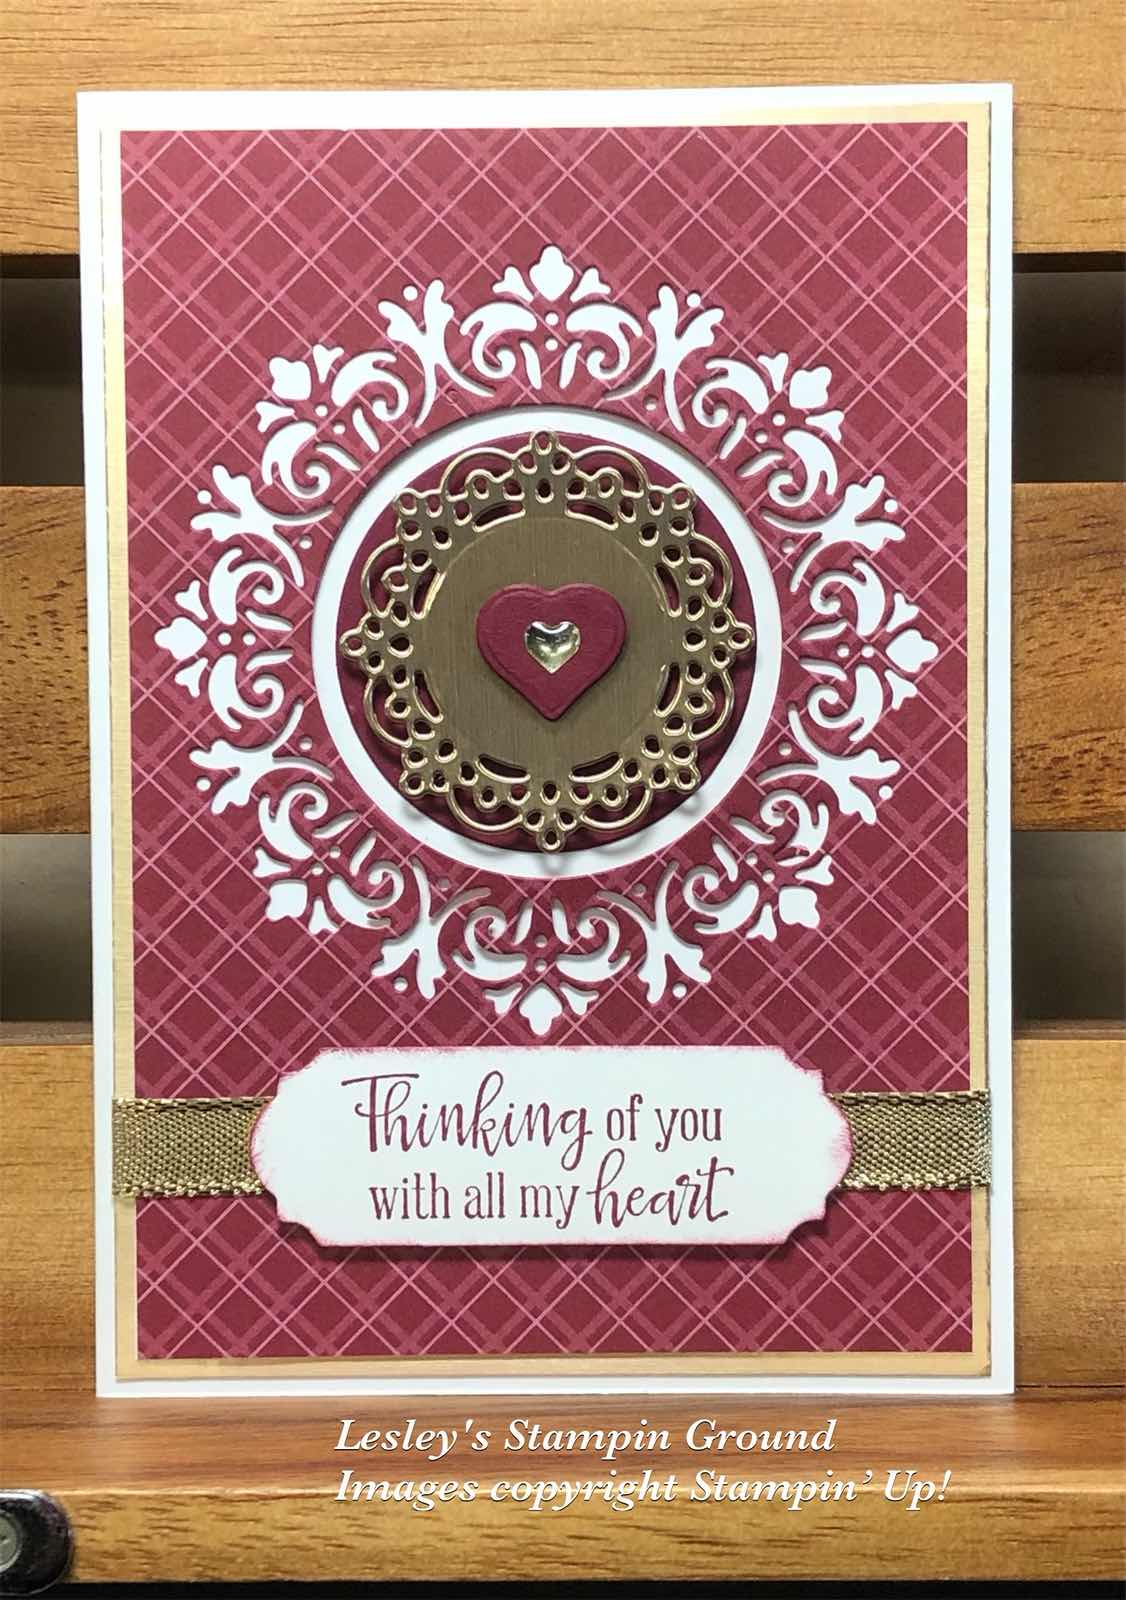
The Designer Series Paper is the 6”x6” Neutrals and I used the Merry Merlot colour. After cutting with the Encircled In Beauty Die I attached it to the same size piece of Basic White card (#159228). This was then attached to the Brushed Metallic cardstock (#153524). The Gold Shimmer Ribbon (#156470) was wrapped around the cardfront before attaching this to the Basic White base card.

The sentiment from Peaceful Moments stamp set (#151595) was stamped with Merry Merlot ink (#147112) and cut with an Ornate Frames die (#150664) and attached to the card with Stampin’ Dimensionals (#104430).

I cut a piece of Merry Merlot card (#147005) with a Layering Circles die (#151770) and attached this in the middle of the circle which was cut out by the detailed die. The next layer was also cut with another of these dies with the Brushed Metallic cardstock. This was attached on top of the circle with Stampin’ Dimensionals. I cut the Merry Merlot heart with a die from Warm Wraps (#153521), then added a retired heart embellishment which worked perfectly for this card.

Don’t forget time is running out to order the Designer Papers that are on special till 2nd August. The papers are - 

155841 - Beauty of the Earth - $17

155696 - Bloom Where You’re Planted - $17

155499 - Hand Penned - $17

152494 - In Good Taste - $31.45

155817 - In The Wild - $17

155807 - Pansy Petals - $17

155605 - Sweet Symmetry - $17

155718 - Tidings Of Christmas - $17

155686 - You’re A Peach - $17


“Love what you do and share what you love.”


lesleyjendra.stampinup.net


Saturday, 12 June 2021

Encircled In Friendship Bundle

Welcome,


One of the 2021-2023 In Colors is Fresh Freesia which I have used on this card along with Basic White card (#159228).


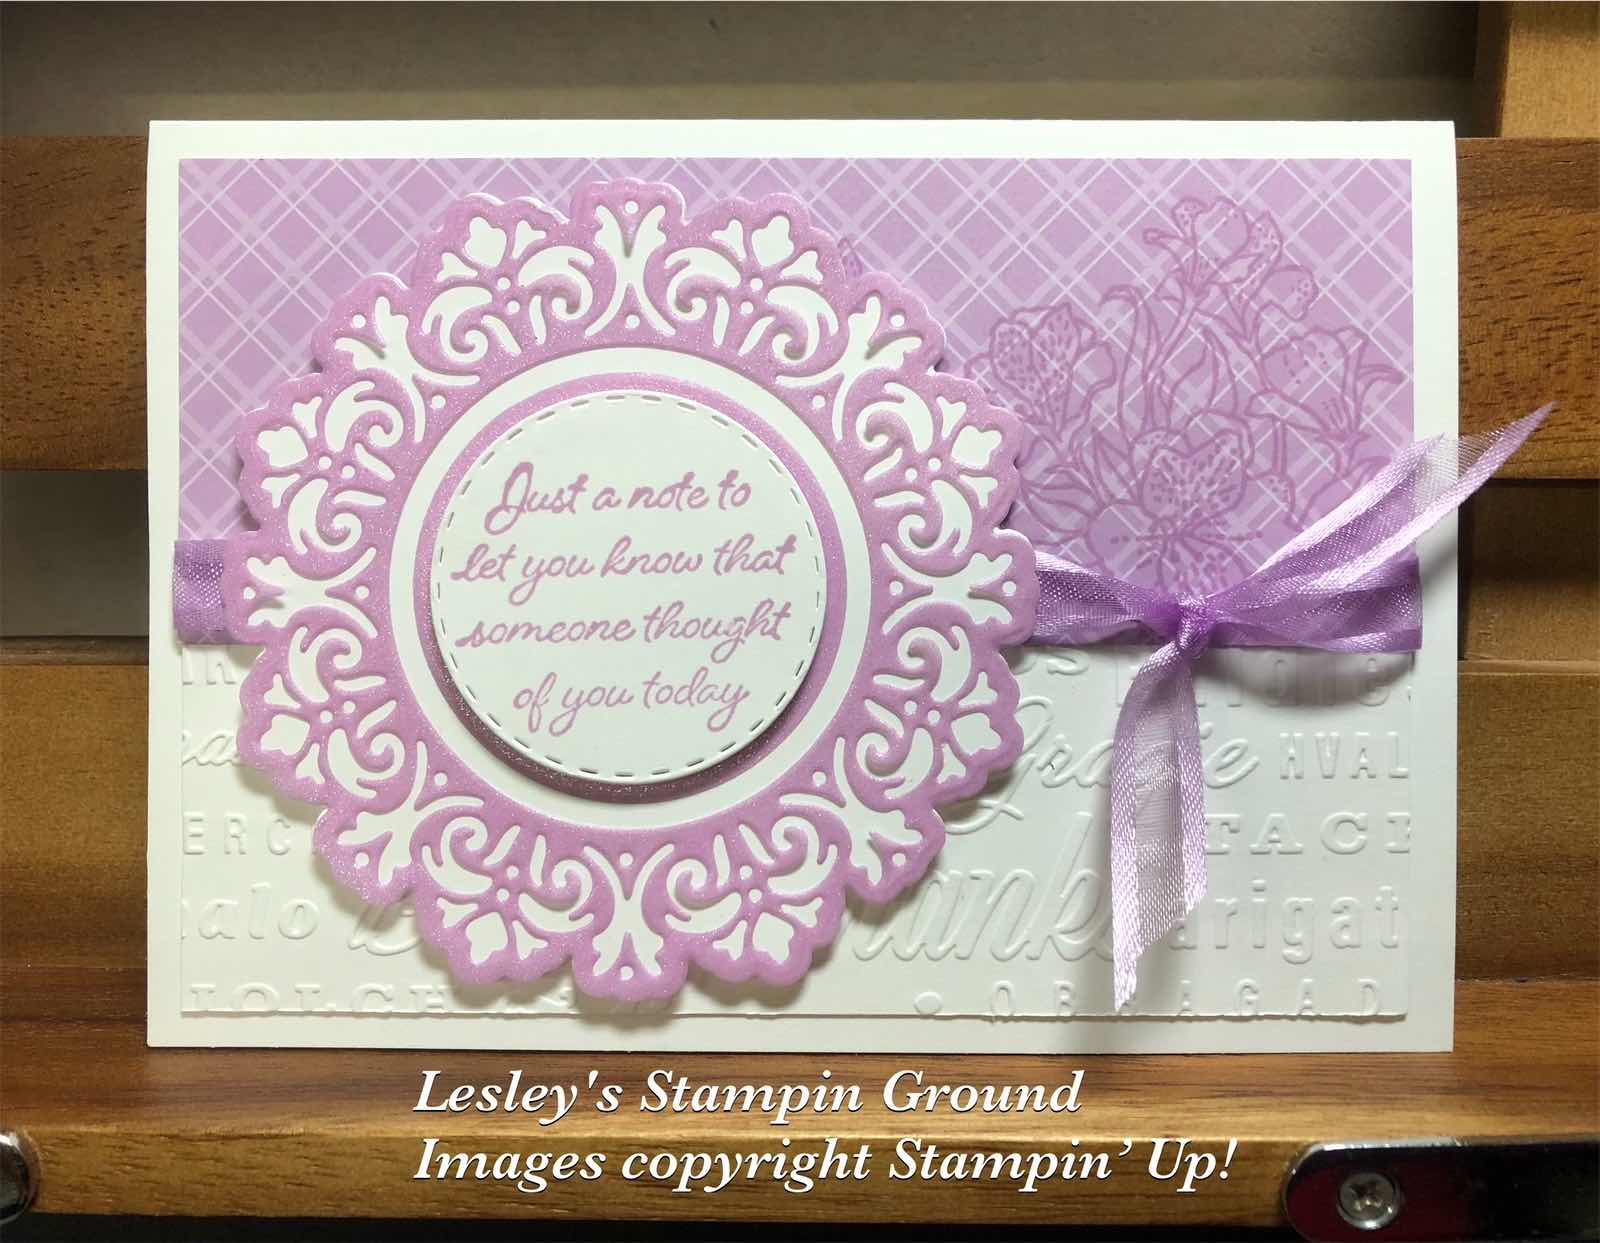
I used one of the dies from the Encircled In Beauty Dies (#155546) to cut the Fresh Freesia 2021-2023 In Colour Shimmer Vellum (#155616). I had attached an Adhesive Sheet (#152334) to the back of the vellum before cutting. I then cut a piece of Basic White card with the outline die and attached the Vellum to this. The sentiment is from the Encircled In Friendship stamp set (#155408) and stamped with Fresh Freesia ink (#155611). I cut the circle for the sentiment using a die from the Picture This Dies (#155559). The circle that was cut from the middle of the “doilie” was re-cut with a Layering Circles die (#151770) to make it slightly smaller but slightly larger than the sentiment. The sentiment was attached to the vellum with Stampin’ Dimensionals (#104430).

The flowers from the Encircled In Friendship stamp set were stamped onto the 2021-2023 In Colour Designer Series Paper (#155641). I embossed a piece of Basic White card with a Thanks & Hello Embossing folder (#155430). I attached the DSP and embossed card together, then wrapped the Fresh Freesia Open Weave Ribbon (#155615) around the card front. This was then attached to the Basic White base card. The “doilie” was attached to the card with Stampin’ Dimensionals.

I hope you are having a great weekend!!

“Love what you do and share what you love.”