Showing posts with label #fancyfoldcard. Show all posts

Saturday, 13 June 2026

Geared Up Garage

 Hello everyone,

I have made this fancy fold card for my grandson who loves cars, so I have used the retired Geared Up Garage stamp set for the car.


I stamped the car with VersaMark (#102283) and added the Copper powder from the Metallics Wow! Embossing Powders (#165678) which was set with the Heat Tool (#129056). This was cut with a Garage Gears die (also retired).

The base card is 15cm x 29.7cm (the length of an A4 card). Along the long side, I scored this at 4.9, 9.8, 14.7 & 19.6. The Country Woods Designer Series Paper (#163393) was attached to the panels.

I cut another piece of Basic White card (#166781) 17 x 10cm and scored in half at 8.5. This was attached to the 1st & 4th panels. The Earthen Toned Metallic Specialty Paper (#165901) and a piece of Basic White card were dry embossed with the (retired) Timber Embossing folder and attached to the Basic White card.

I used stamps from the Gears & Textures stamp set (#166851) for the “inside” of the card using Pecan Pie ink (#161665), Early Espresso (#147114), Crumb Cake (#147116) and Night Of Navy ink (#147110).  The numbers are also cut from the Earthen Toned Metallic Specialty Paper.

The sentiment from the Notes Of Spring stamp set (#167979) was also Copper embossed. This was cut with a Perennial Postage dies (#162607). The car and sentiment were attached to the card with Stampin’ Dimensionals (#104430).


“Love what you do and share what you love.”

INSPIRE. CREATE. SHARE.


https://www.stampinup.com.au


lesley.j.jendra@gmail.com


http://lesleysstampinground.blogspot.com


Thursday, 24 July 2025

Fancy fold card

 Hello friends,

Today I have a fancy fold card using the Artistic Leaves stamp set (#166162). I think this is called a side step fancy fold card.


Below are the measurements for the cutting & score lines. This base card is the normal size - 21cm x 14.9cm.


The card base is Very Vanilla (#166785). The Designer Series Paper is from the Country Woods (#163393). The DSP was attached to the Cherry Cobbler card (#121681).

Another piece of Very Vanilla card was dry embossed with the Plaster Painting Embossing Folder (#164656). This was also matted with Cherry Cobbler card.

The leaves are from the Artistic Leaves stamp set, and stamped with Cherry Cobbler ink (#147083) and Daffodil Delight ink (#147094). The leaves were fussy cut.

“Thank You” is from the Beautiful Motifs stamp set (#165198), and stamped with Cherry Cobbler ink. This was cut with a Framed Scenes die (#165396).

The sentiment and larger leaf were attached with Mini Stampin’ Dimensionals (#144108). Mini Glue Dots (#103683) were used to attach the small leaves.


“Love what you do and share what you love.”

INSPIRE. CREATE. SHARE.


Monday, 13 May 2024

Round We Go Dies

 Hi again friends,

This is an easy fancy fold card and I have made the rosette using the Round We Go dies (#163729).


I cut 3 pieces with the die for the rosette from the Peach Pie from the 2042-2026 In Color Designer Series Paper Assortments pack (#163777). These were folded & attached together to make the rosette. I punch a circle and glued it to the back of the rosette to keep it in place. I then cut a circle with the Stylish Shapes dies (#159183) from Peach Pie card (#163800) and glued that to the front. The glue used is the Multipurpose Liquid Glue (#110755).

The butterfly from the Paper Butterfly Accents (#162612) was coloured with Peach Pie ink (#163810) and I used Clear Wink Of Stella (#141897) to add glimmer to the butterfly. The embellishments are from the 2024-2026 In Color Shimmer Gems (#163781) and attached to the centre of the butterfly. The butterfly was attached to the card with Mini Glue Dots (#103683).

The Basic White card (#159228) was cut with a Spotlight On Nature die (#163580) for the larger circle and the rosette was glued to this.

The base card is 13cm square and I scored the front for the fancy fold. I cut the triangles for the card front from Peach Pie card and Nature’s Sweetness Specialty Designer Series Paper (#162616).

When attaching the circle to the card front only attach half the circle so it is only attached to the bottom triangle.

“Happy Birthday” from the Translucent Florals stamp set (#162243) was stamped with Peach Pie ink and cut with a Spotlight On Nature die. This was attached to the card with Mini Stampin’ Dimensionals (#144108). I stamped a butterfly from the Sketched Butterflies stamp set (#163490) inside the card.


“Love what you do and share what you love.”

INSPIRE. CREATE. SHARE. 


Friday, 22 December 2023

Lifetime Of Love Bundle

Hi friends,

I am highlighting more of the new products from the upcoming Mini catalogue and Sale-a-bration. I was given a beautiful card recently from a friend (thanks Judy) using this fancy fold so just had to make one.


The card base is the normal size - 21cm x 14.9cm. This was scored along the long side - 6.5cm from the left and 4 cm from the right. The Designer Series Paper is from the gorgeous Forever Love 12”X12” Specialty DSP (#162573) and attached to the front flaps.

I cut the Pretty Peacock card (#150886) and Very Vanilla card (#106550) with Scalloped Contours dies (#155560). I dry embossed the Very Vanilla card with the Softly Sophisticated Embossing Folder (#162947). This is part of the Softly Sophisticated bundle which also includes a stamp set and a free Sale-a-bration product.

I stamped the floral images from the Lifetime Of Love stamp set (#162574) with Tuxedo Black Memento ink (#132708). These were coloured with Stampin’ Blends - Flirty Flamingo (#154884), Lost Lagoon (#161680), Daffodil Delight (#154883) and Ivory (#154922).

The flowers and leaves were cut with the Lifetime Of Love dies (#162583). I used Lost Lagoon card (#133686) for the leaves.

“Happy Birthday” from the Go To Greetings stamp set (#158763) was stamped with Flirty Flamingo ink (#147052), then cut with a retired Pretty Pillowbox die.

The sentiment & flowers were attached to the card with Stampin’ Dimensionals (#104430) and the leaves with Mini Glue Dots (#103683). Clear Wink Of Stella (#141897) was used to add glimmer to the flowers.


“Love what you do and share what you love.”

INSPIRE. CREATE. SHARE. 


Friday, 20 October 2023

Stepper card

Hello friends,

I do love fancy fold cards so today I have made a stepper card which is an easy one to make. This does fold flat for posting but I will have to make an envelope to fit. Thought this card would be great for all ages and I will be making more with different stamp sets.


The Basic White base card (#159228) is 28cm x 15.2cm (11” x 6”) and this was scored along the long side at 7.6cm, 15.2cm, 19cm, 22.8 & 25.4cm (3”, 6”, 7&1/2”, 9” & 10”).  I cut 3 pieces of Basic White card -14.5 x 7cm, 14.5 x 3.2cm & 14.5 x 2cm (5&3/4” x 2&3/4”, 5&3/4” x 1&1/4” & 5&3/4” x 3/4”)

The 3 pieces of Blueberry Bushel card (#146991) are 10.5cm square (4&1/8” square), 8cm square (3&1/8” square) and 6cm square (2&3/8” square).

The Glorious Gingham Designer Series Paper (#163170) is 9.8cm square (3&7/8” square), 7.3cm square (2&7/8” square). The Basic White card is 5.5cm square (2&1/8” square).

I dry embossed the Basic White pieces of card with one of the Basics Embossing Folders (#161598). The edges of these were daubered with Blueberry Bushel ink (#147138) then attached to the card.

The balloons from the Beautiful Balloons stamp set (#161450) were stamped with Sweet Sorbet ink (#159216), Lemon Lime Twist ink (#147145) and Daffodil Delight ink (#147094). These were cut with the co-ordinating Beautiful Balloons dies (#161456).

I taped the diamond shapes to the card, then attached the balloons with Mini Glue Dots (#152334). Happy Birthday was cut with dies from Wanted To Say dies (#161594). The Basic White card for the sentiment was backed with Adhesive Sheet (#152334) and the Blueberry Bushel card was attached with Mini Glue Dots.

“Love what you do and share what you love.”

INSPIRE. CREATE. SHARE.


https://www.stampinup.com.au


lesley.j.jendra@gmail.com


http://lesleysstampinground.blogspot.com


Wednesday, 20 September 2023

Wedding card

Hi folks,

I needed a wedding card and have gone back to some of my retired products as well as current ones for this gorgeous card which I am sure the happy couple will love.


I have used the Holographic Trio Specialty Paper (#161744) again on todays card. The heart was cut with a retired die from the Hearts Collection then embossed with the (retired) Bouquet Of Love Hybrid Embossing Folder. I cut another heart the same size using Thick Basic White card (#159230) and taped the 2 hearts together as I wanted to make this a bit firmer.

The Basic White card (#159228) for the front of the card were dry embossed with the Exposed Brick 3D Embossing Folder (#161600) and matted with the Holographic Trio Paper. The inside Basic White card was embossed with the Bouquet Of Love Hybrid Embossing Folder and also matted with the Holographic Trio Paper.

The 2 sentiments were stamped with VersaMark (#102283) and I used Silver Stampin’ Emboss Powder (#155555) which was set with the Heat Tool (#129056). “Congratulations” from the (retired) Peaceful Moments stamp set was cut with a Countryside Corners die (#161471). The other sentiment from the (retired) Dandelion Wishes stamp set was cut with a Labels Aglow die (#159551). These were attached to the card with Stampin’ Dimensionals (#104430).

When attaching the heart ensure you only use adhesive where the heart touches the bottom triangle, otherwise you won’t be able to have the fancy fold.

The size of the finished card is 14cm x14cm.

“Love what you do and share what you love.”

INSPIRE. CREATE. SHARE.


Saturday, 29 July 2023

Trucking Along

Hi & welcome everyone,

I have made these masculine cards today using the Trucking Along Bundle (#162306) in 3 different colours.


The colours I have used are Very Vanilla with Misty Moonlight, Pretty Peacock & Pecan Pie.

The Very Vanilla card sizes are - 22cm x 10.5cm and scored at 7cm. 
                                                   - 23cm x 8.5cm and scored at 13cm
                                                   - 8cm x 6.5 (for the front)
The coloured card - 14cm x 9.5cm
                              - 9cm x7.5cm
Designer Series Paper - 9.5cm x 6cm
You also need smaller pieces for the sentiment and the truck.

I stamped the truck from the Trucking Along stamp set (#162299) with Versa Mark (#102283) and I used the Black Stampin’ Emboss Powder (#155554) which was set with the Heat Tool (#129056). I used Misty Moonlight card (#153086), Pretty Peacock card (#150886) and Pecan Pie card (#161726). The truck was punched with the Trucking Along Builder Punch (#162305). The stamp set & punch are available together as the Trucking Along Bundle (#162306) and these are all available from the Online Exclusives.

I stamped the “road” with Tuxedo Black Memento ink (#132708). This is from the Inked & Tiled stamp set (#161158). After stamping the “road” I embossed this Very Vanilla card. The embossing folders I used on the 3 cards are Basics (#161598), Timber (#156406) and Painted Texture (#154317).

I stamped the presents, flowers & tree with Tuxedo Black Memento ink and coloured them with a variety of Stampin’ Blends. These images were fussy cut and I attached these and the truck with Stampin’ Dimensionals (#104430).

The DSP for the Misty Moonlight card & Pecan Pie card are from Let’s Go Fishing (#161534). For the Pretty Peacock card I used Earthen Elegance DSP (#161503).

“Happy Birthday” is from the Inked & Tiled stamp set. I used Misty moonlight ink (#153118), Pretty Peacock ink (#150083) and Pecan Pie ink (#161665). The dies to cut the sentiments are Stylish Shapes dies (#159183) for the Misty Moonlight & Pretty Peacock cards and Nested Essentials dies (#161597) for the Pecan Pie card. When attaching the sentiment I used Stampin’ Dimensionals on the left side only allowing the flap to tuck under the sentiment.

“Love what you do and share what you love.”

INSPIRE. CREATE. SHARE.


Sunday, 25 June 2023

Beautiful Balloons Fancy Fold card

Hello everyone,

I am sure my 11 year old grand-daughter will love this fancy fold card made with the Beautiful Balloons Bundle (#161457).


Thus is an easy fancy fold card. The Berry Burst base card (#144249) is cut at 29cm x 14.5cm and scored at 14.5cm, making a square card. I scored the card front from the top right corner to the bottom left corner. I cut a piece of the Bright & Beautiful Designer Series Paper  (#161449) 13.5cm x 13.5cm and cut in half diagonally and attached to the front of the card. 

I cut another piece of the DSP 8cm square and matted this with Berry Burst (9cm square). This was attached to the bottom part of the triangle only.

The balloons from the Beautiful Balloons stamp set (#161450) were stamped with Berry Burst ink (#147143) and Bubble Bath ink (#161664) and cut with the Beautiful Balloons dies (#161456). These were attached to the card with Stampin’ Dimensionals (#104430) and Mini Glue Dots (#103683).

The sentiments are from the Beautiful Balloons stamp set & stamped with Berry Burst ink. The sentiment on the front was cut with a retired Frosted Flurry die and the inside sentiment with a Beautiful Balloons die.

I dry embossed the inside Bubble Bath card (#161727) with a retired Bouquet Of Love Embossing Folder. The Happy Birthday label was attached with Stampin’ Dimensionals. This holds the card in place as shown in the first photo.

I cut the Silver Foil (#156457) hearts & stars using dies from the Cracker & Treat Box (#159182). These were backed with Adhesive Sheet (#152334) and attached to the card.

“Love what you do and share what you love.”

INSPIRE. CREATE. SHARE.


https://www.stampinup.com.au


lesley.j.jendra@gmail.com


http://lesleysstampinground.blogspot.com

Wednesday, 25 January 2023

Vintage Tools

Hello crafty friends,

I made this card yesterday for my husband to distract me while he was having knee surgery. He is a handyman so I have used the Vintage Tools stamp set (#159098) and I made a “tool box”.


I used Smokey Slate card (#131291) for the “tool box”. I cut a piece 9cm x 29.5 cm. I scored each end at 1.5cm, 3cm, 4.5cm, 6cm & 7.5cm. I cut 2 pieces 14.5cm x 9cm and these were attached inside the box and this is where I attached the tools.

The tools were stamped with Crumb Cake ink (#147116), Basic Gray ink (#149165), Soft Suede ink (#147115), Smokey Slate ink (#147113), Tuxedo Black memento ink (#132708) and Cherry Cobbler ink (#147083). These tools were fussy cut and attached to the card. The sentiments were also stamped with Cherry Cobbler ink. “Thinking Of You” is from the Go To Greetings stamp set (#158763) and “Feel Better Real Soon” is from the Cottage Rose stamp set (#159040). These were cut with Stitched Rectangles dies (#151820).
I dry embossed the Silver Foil (#156457) with the Metal Plate 3D Embossing Folder (#160766). I matted the piece for the front with Cherry Cobbler card (#147083) and attached the other piece to the Smokey Slate card for the back. This piece measures 14.5cm x 15cm. The corners were punched with the Very Best Trio Punch (#159878).

The sentiments and the planer on the front were attached to the card with Stampin’ Dimensionals (#104430). The nails were attached with Mini Glue Dots (#103683). 


“Love what you do and share what you love.”


INSPIRE. CREATE. SHARE.


Friday, 29 April 2022

Flowering Fields Designer Series Paper

Hello friends,

If you are like me you always have bits & pieces of designer paper left from previous projects, and it’s easy to make a beautiful card with these “leftovers”. 


This is an easy fancy fold card. The Very Vanilla base card (#106550) measures 22cm x 10.5cm and scored at 7cm from the left. I attached the Mango Melody card (#147013) to the base card. The next flap is also Very Vanilla and measures 23cm x 8.5cm, and scored at 10cm from the right. This was attached on top of the Mango Melody card.

The Flowering Fields Designer Series Paper (#157670) was attached to the flaps. Happy Birthday from the Celebrating You stamp set (#158028) was stamped with Mango Melody ink (#147093). This was cut with a die from the Ornate Frames (#150664). This was attached on the left side of the label with Stampin’ Dimensionals (#104430) to allow the card to be tucked under.

The Brushed Brass Butterflies (#158136) were my choice of embellishment.


The Ornate Frames Dies are retiring. 

Don’t forget time is running out for the retiring products from the Annual Catalogue which finishes on 2nd May. Check out what is retiring here - lesleyjendra.stampinup.net


“Love what you do and share what you love.”


Monday, 18 October 2021

Angels Of Peace

Hello everyone,

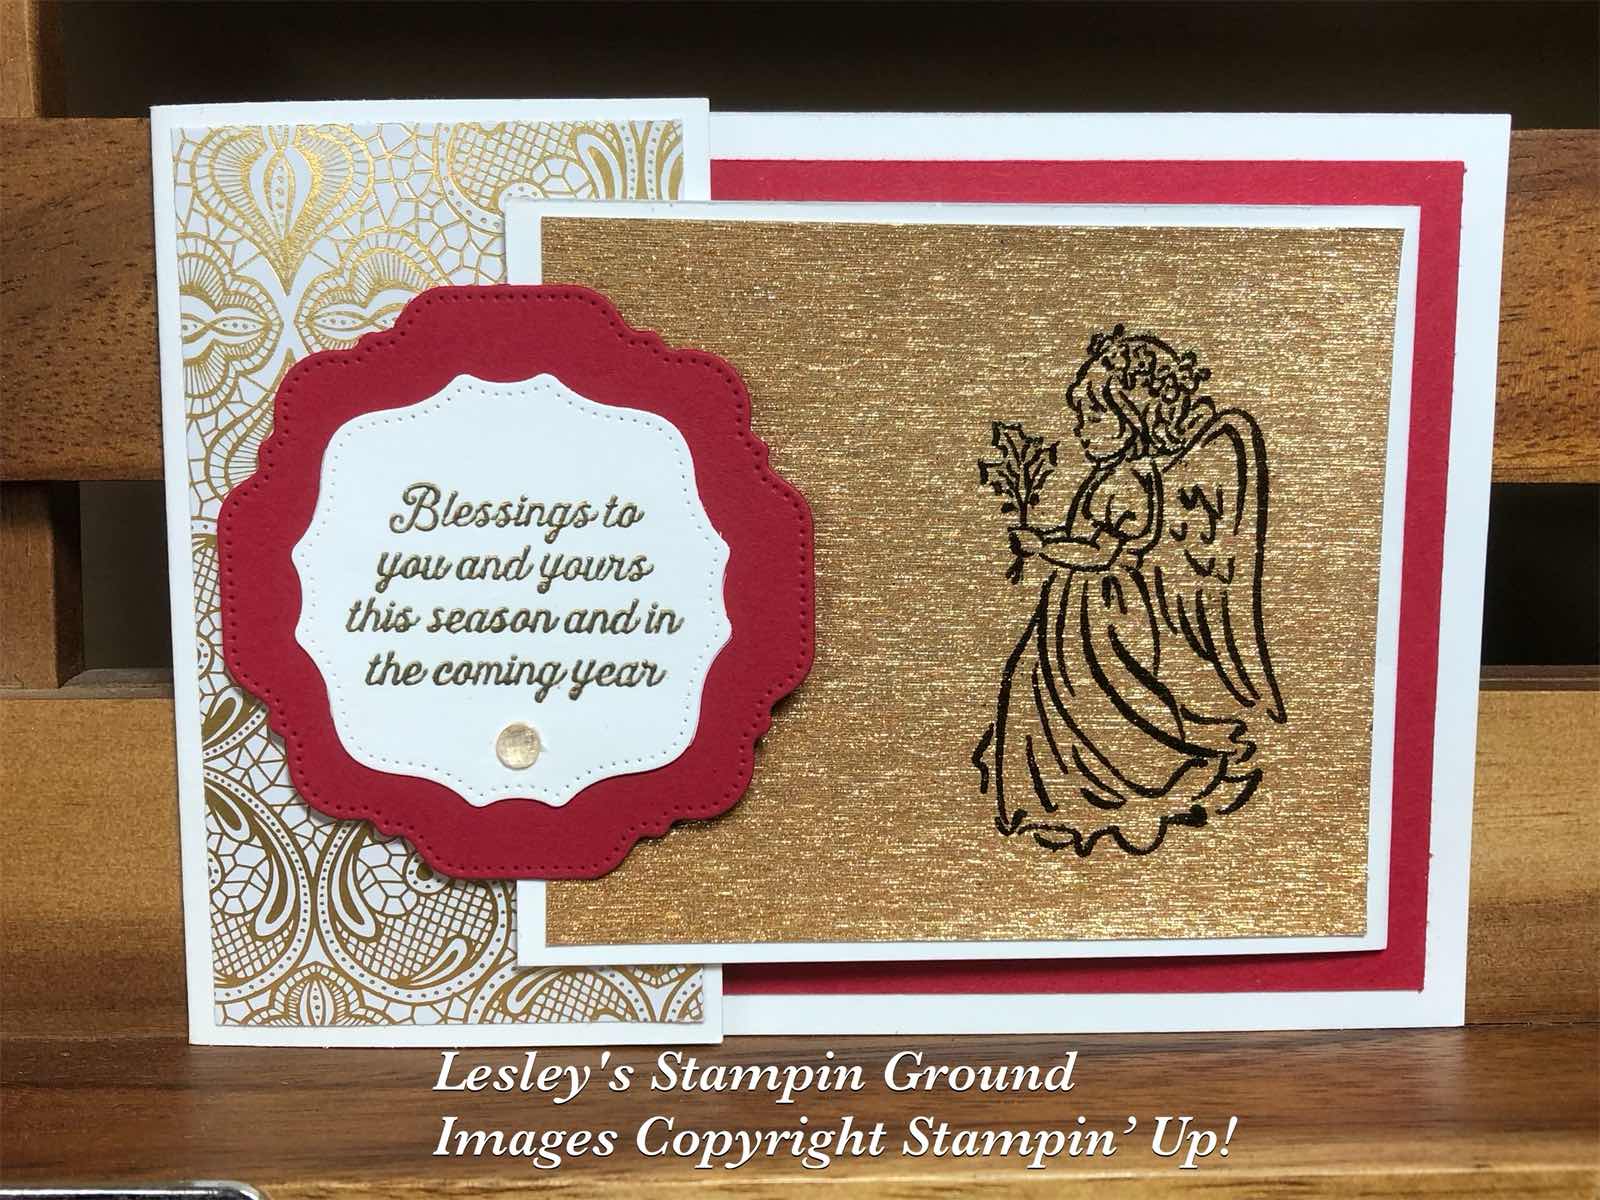
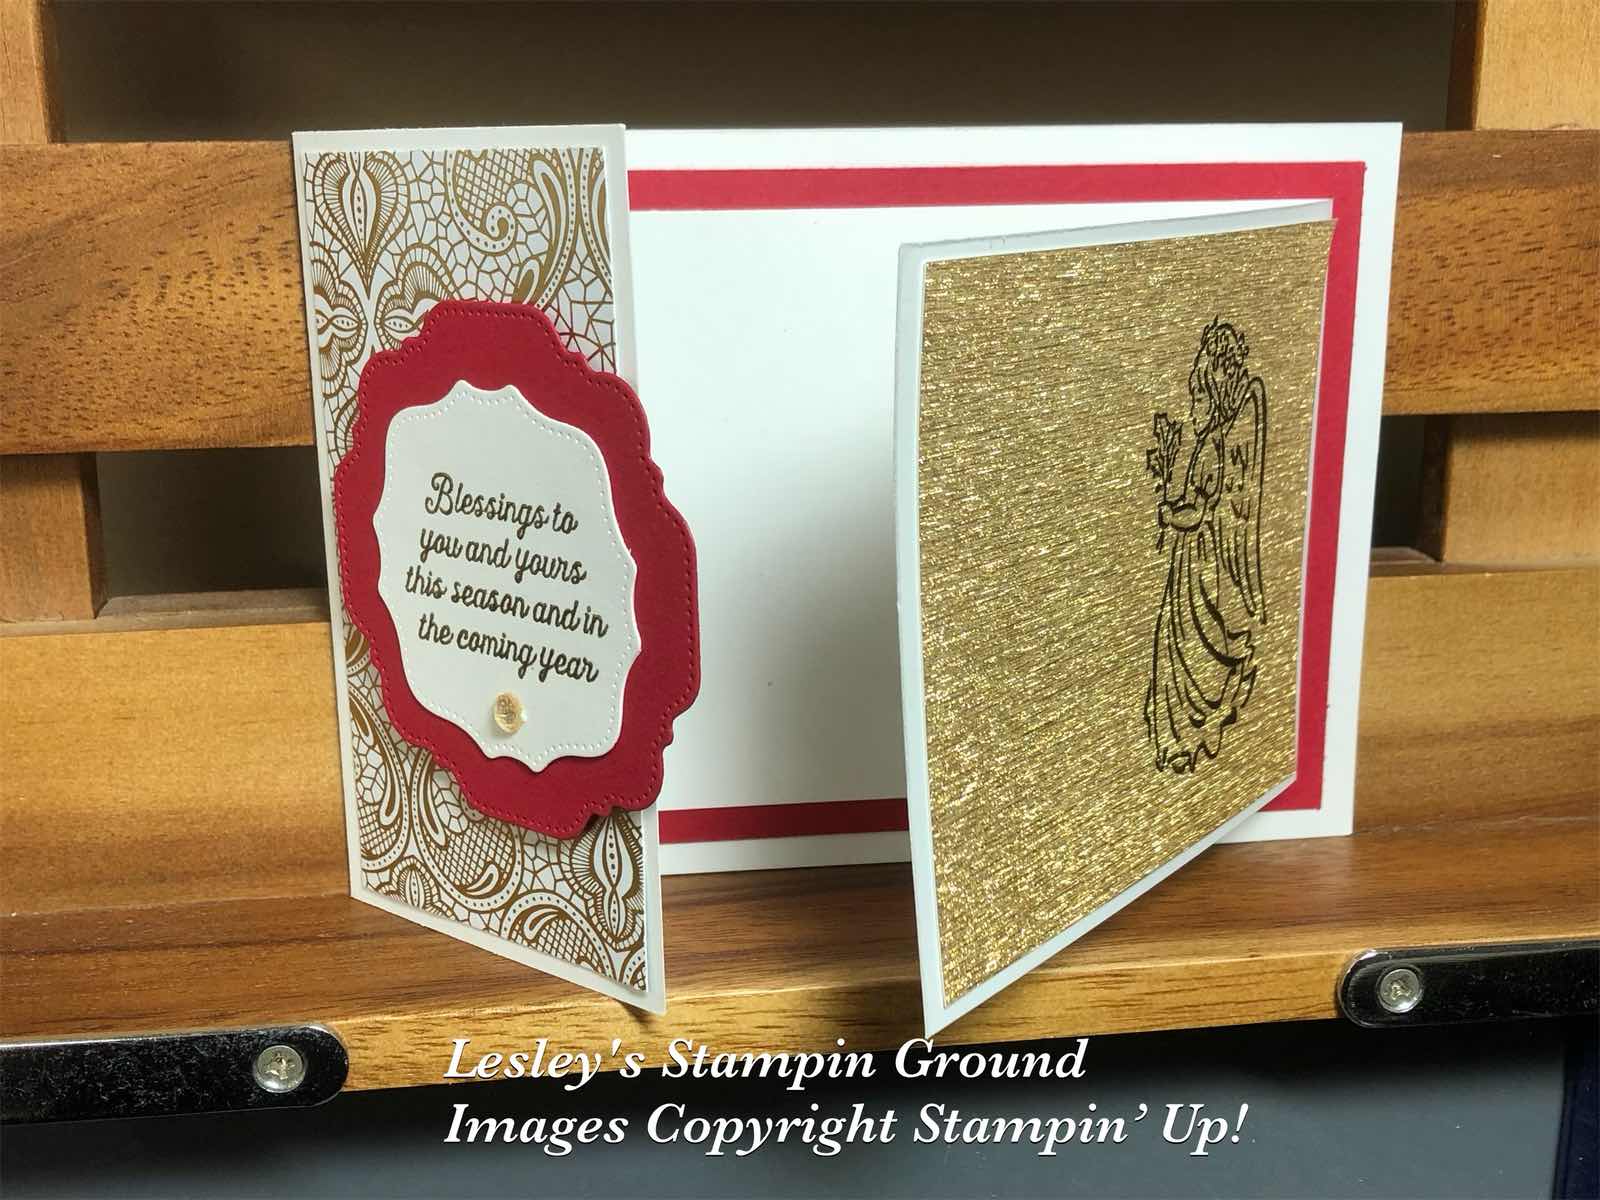
I love this fancy fold card which I have made for a special Christmas card using the Angels Of Peace stamp set (#156365).


The Basic White base card (#159228) measures 21cm x 10.5cm and scored at 6cm for the flap on the left side of the card. The Real Red card (#106578) measures 14cm x 9.5cm and was attached to the base card. The next layer of Basic White card measures 23cm x 8.5cm and scored at 13cms, then placed over the red card with the flap on the right side of the card.

The gold card from the Gold & Rose Gold 6”x6” Metallic Specialty Paper (#156844) measures 9.5cm x8cm. I stamped the angel with VersaMark (#102283) and sprinkled it with the Black Stampin’ Emboss Powder (#155554), then set it with the Heat Tool (#129056). The gold was attached to the flap on the right side of the card. I then attached the Simply Elegant Specialty Designer Series Paper (#155761) to the flap on the left side of the card.

The sentiment from the Angels Of Peace stamp set was heat embossed with VersaMark & Gold Stampin’ Emboss Powder (#155555). The dies to cut this and the Real Red card under the sentiment are from the Hippo & Friends Dies (#153585). I used Stampin’ Dimensionals (#104430) under the left side of the sentiment which allows you to tuck the flap under .

A Genial Gem (#155500) was attached under the sentiment.

“Love what you do and share what you love.”

Stay safe & keep crafting!!


Monday, 23 August 2021

Gorgeous Leaves Bundle

Hi again Ladies & Guys,

Here’s a lovely fancy fold card suitable for either the male or female, using the Gorgeous Leaves Bundle (#158609).


The cardstock is Very Vanilla (#106550) and Soft Suede (#119982).

The Very Vanilla base card is 22cm x 10.5 cm and scored at 7cm
The Soft Suede card is 14cm x 9.5cm.
The next Very Vanilla layer is 23cm x 8.5cm and scored at 13cm.
The Very Vanilla card front is 9cm x 7.5cm.
The Soft Suede Neutrals DSP (#155226) is 6cm x 9.5cm.

I stamped inside the card using Soft Sea Foam ink (#147102). The images are from the Gorgeous Leaves stamp set (#153365).
For the card front I stamped the Woodgrain image with Soft Suede ink (#147115) and the spots with Soft Sea Foam ink. I assembled the card as shown above.

“Happy Birthday” from the Peaceful Moments stamp set (#151595) was stamped with Soft Suede ink, then cut with a Hippo & Friends Die (#153585). I attached this to the card with Stampin’ Dimensionals (#104430) under the left half of the sentiment, so that you can tuck the card flap under this.

The leaves were cut with the Intricate Leaves Dies (#153566) from Brushed Metallic 12”x12” Cardstock (#153524). There are 3 colours of Gold in this pack and I used a different one for each leaf. These were backed with Adhesive Sheet (#152334) before cutting. The leaves were then attached to the card.

“Love what you do and share what you love.”

Stay safe & keep crafting!!


Sunday, 14 March 2021

Art Gallery Bundle

Hi my friends,

I like fancy fold cards and especially easy ones as this one is.


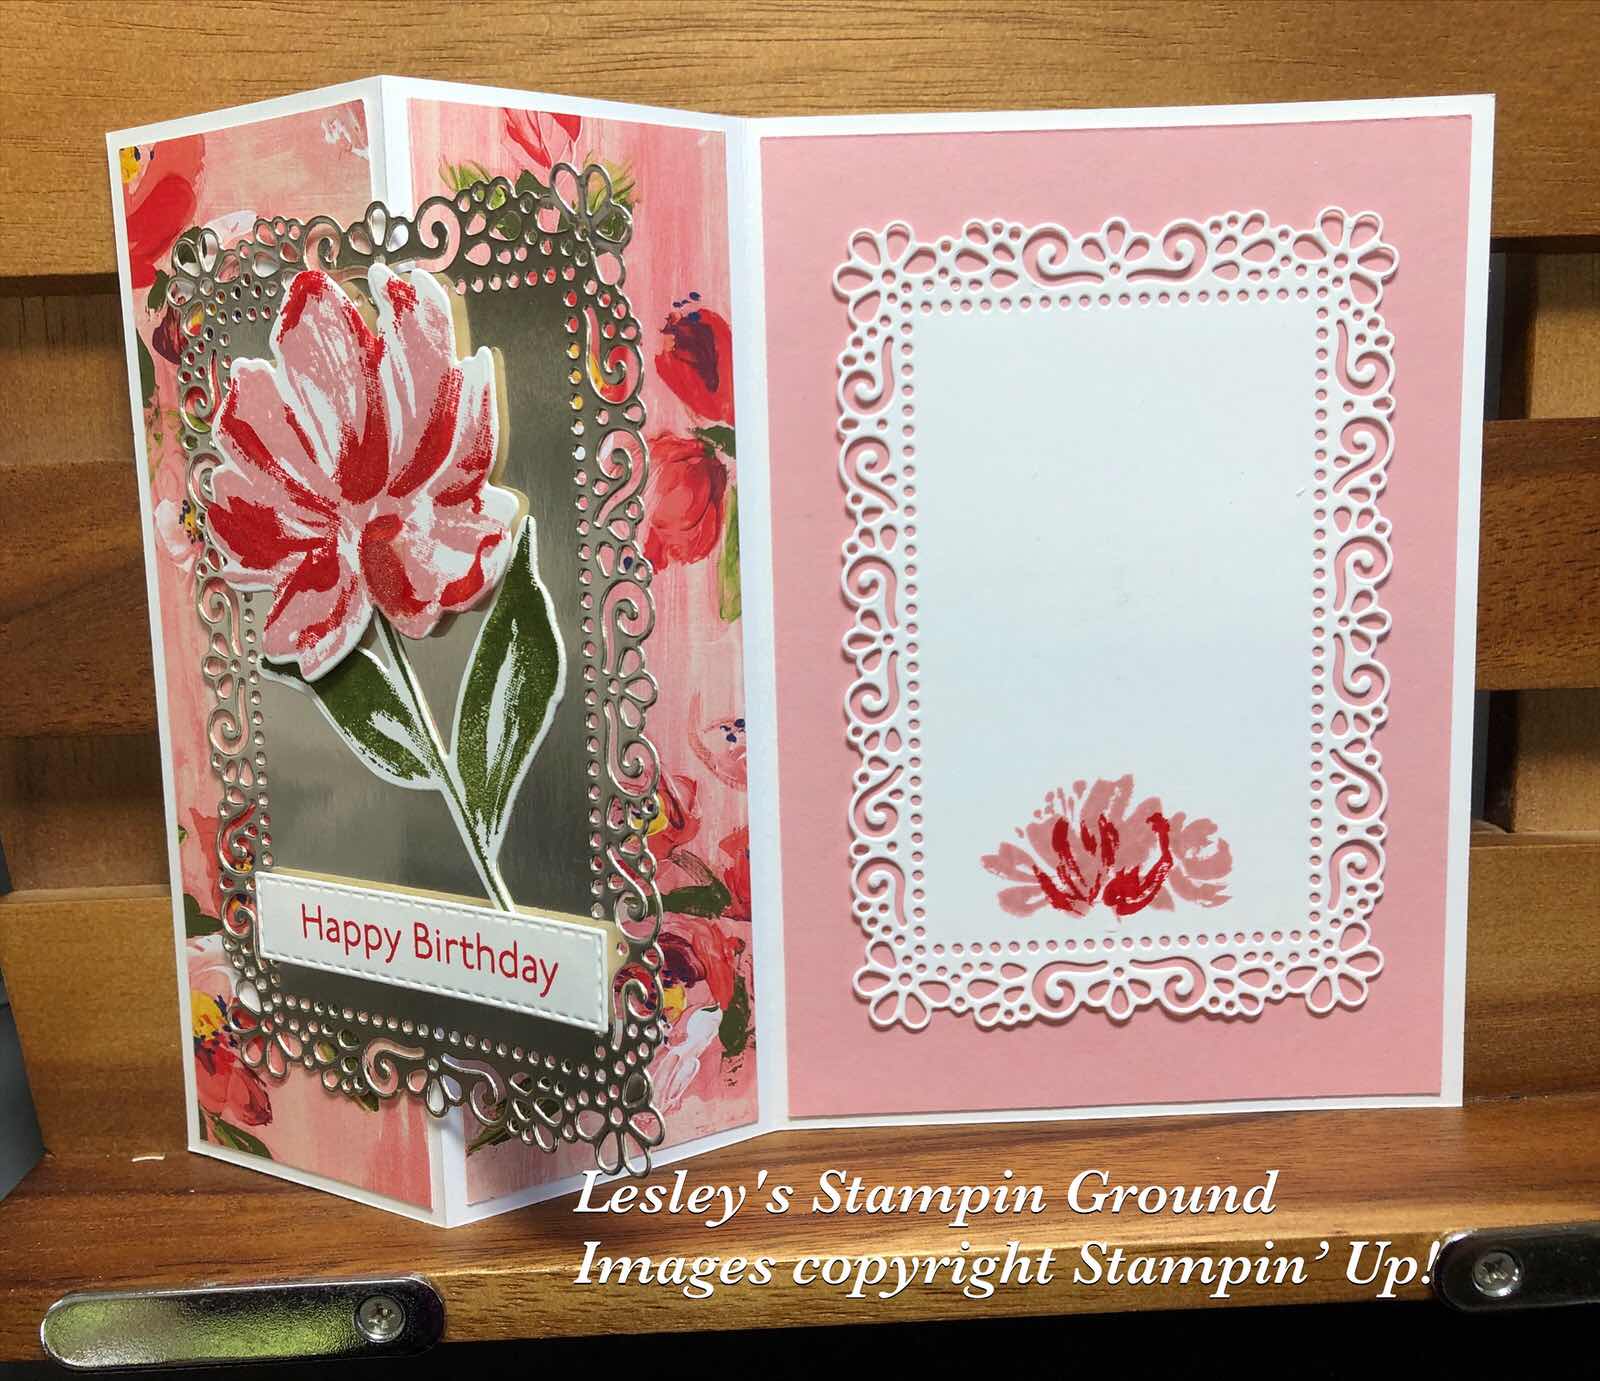
The card is a normal size card then I scored and folded the card front in half, bending it back towards the “spine”. I cut 2 pieces of Fine Art Floral Designer Series Paper (#154558) and placed them on the card as shown above. A piece of Blushing Bride card (#131287) was attached to the other side of the card.
I cut the Basic White card (#159228) and Silver Foil sheet (#132178) with the same Ornate Layers Die (#152726). The flower from the Art Gallery stamp set (#154421) was stamped with Blushing Bride ink (#147100) and Poppy Parade ink (#147050) onto the Basic White card. I attached the white card to the Blushing Bride card. Then with the front of the card folded, I placed the Silver Foil cut out in place, directly over the white card, making sure you only have adhesive on the left side of the cut out.
The flower and leaves on the front of the card are also from the Art Gallery stamp set using Blushing Bride ink & Poppy Parade ink for the flower and Mossy Meadow ink (#147111) for the leaves. The flower and leaves were cut with the Floral Gallery Dies (#154316). Happy Birthday is also from the Art Gallery stamp set using Poppy parade ink. I used a Stitched Rectangles die (#151820) to cut the sentiment. The sentiment was attached with Mini Stampin’ Dimensionals (#144108) and the flower with Stampin’ Dimensionals (#104430).


Have a fantastic day!!

“Love what you do and share what you love.”


Saturday, 16 January 2021

Baby card

Hello everyone,

I needed a baby card, so thought animals would be cute for a baby boy. Some time ago I saw a “balcony card” with 2 levels and decided to make a larger one with 3 levels and have since made many variations of this card for different occasions. It’s always a hit.


The Whisper White base card is the normal card size - 21cm x 14.9 cm and scored at 10.5cm.
The White card at the front is 23cm x 4cm and scored at 11.5cm as well as 1cm at each end.
The middle white layer is 18cm x 7cm and scored at 9cm and 1 cm at each end.
The back white layer is 12cm x 12cm, scored at 6cm and 1cm at each end.
The 1cm flaps on each end is where each piece attaches to the card.

The Granny Apple Green card (#147014) is cut as follows and you require 2 of each size.
The front layer is 10cm x 3.5cm
The middle layer is 6.5 x 7.5 cm
The back layer is 11.5cm x 4.5cm
The base is 13.9cm x 9.5 cm.

The DSP is from the Oh So Ombre Designer Series Paper (#155225) from Sale-a-bration. Again you need 2 of each and are cut the following sizes-
Middle layer - 11cm x 4cm
Back Layer - 11cm x 4cm
Base - 13.4cm x 9cm.
I dry embossed the DSP with the retired Layered Leaves Embossing folder.

I stamped the sentiments onto Whisper White card then cut with the Stitched Rectangles Dies (#151820). “Sweetest Baby” is from the Wildly Happy Stamp set (#149408). The elephant and foxes are from the same set. “Congratulations” is from the Peaceful Moments stamp set (#151595). The sentiments were stamped with Granny Apple Green ink (#147095).

The Zebra is from the Zany Zebras stamp set (#152536) and the giraffes, rhino and kangaroo are from the retired Animal Outing stamp set. All the animals were stamped with Tuxedo Black Memento ink (#132708). I have coloured the animals with the following Stampin’ Blends - Smokey Slate (#154904), Crumb Cake (#154882), Pumpkin Pie (#154897) and Ivory (#154922). I used the Clear Wink Of Stella Glitter Brush (#141897) on parts of the animals.
 The rhino, giraffes and kangaroo were cut with the co-ordinating Animal Friends dies (retired) and the others were fussy cut.

The leaves are cut with dies from the Forever Flourishing dies (#152714) and dies from the Boho Indigo Product Medley (#153132).

When attaching each layer onto the card I find the easiest way is to lay the card flat. Have all the pieces assembled for the layers. Use a bone folder on all the scored lines and attach the 1cm flaps to the card using Tear & Tape Adhesive (#138995). The animals and leaves were attached after the rest of the card was assembled. I have used Stampin’ Dimensionals (#104430) and Mini Glue Dots (#103683) to attach the animals, leaves and sentiments to the card.
The card will lay flat when completed.

Have a great day!!

“Love what you do and share what you love.”


Thursday, 3 December 2020

Feels Like Frost Designer Series Paper

Hi again,

I have used some of my favourites again on todays card - butterflies, purple/mauve and this easy fancy fold card.


I have used Whisper White card (#106549) and Highland Heather card (#147010). The Designer Series Paper is from the Feels Like Frost DSP (#150444).
The size of the base card is 21cm x 10.5cm and scored at 6cm from the left.
The Highland Heather card was cut at 9.5cm x 14cm for the inside of the card and 9.5cm x 5.5cm for the piece on the front of the card. I dry embossed the smaller card with the Wrapped In Texture Embossing Folder (#153574).
The other white card with the flap is 23cm x 8.5cm and scored at 10cm from the right.
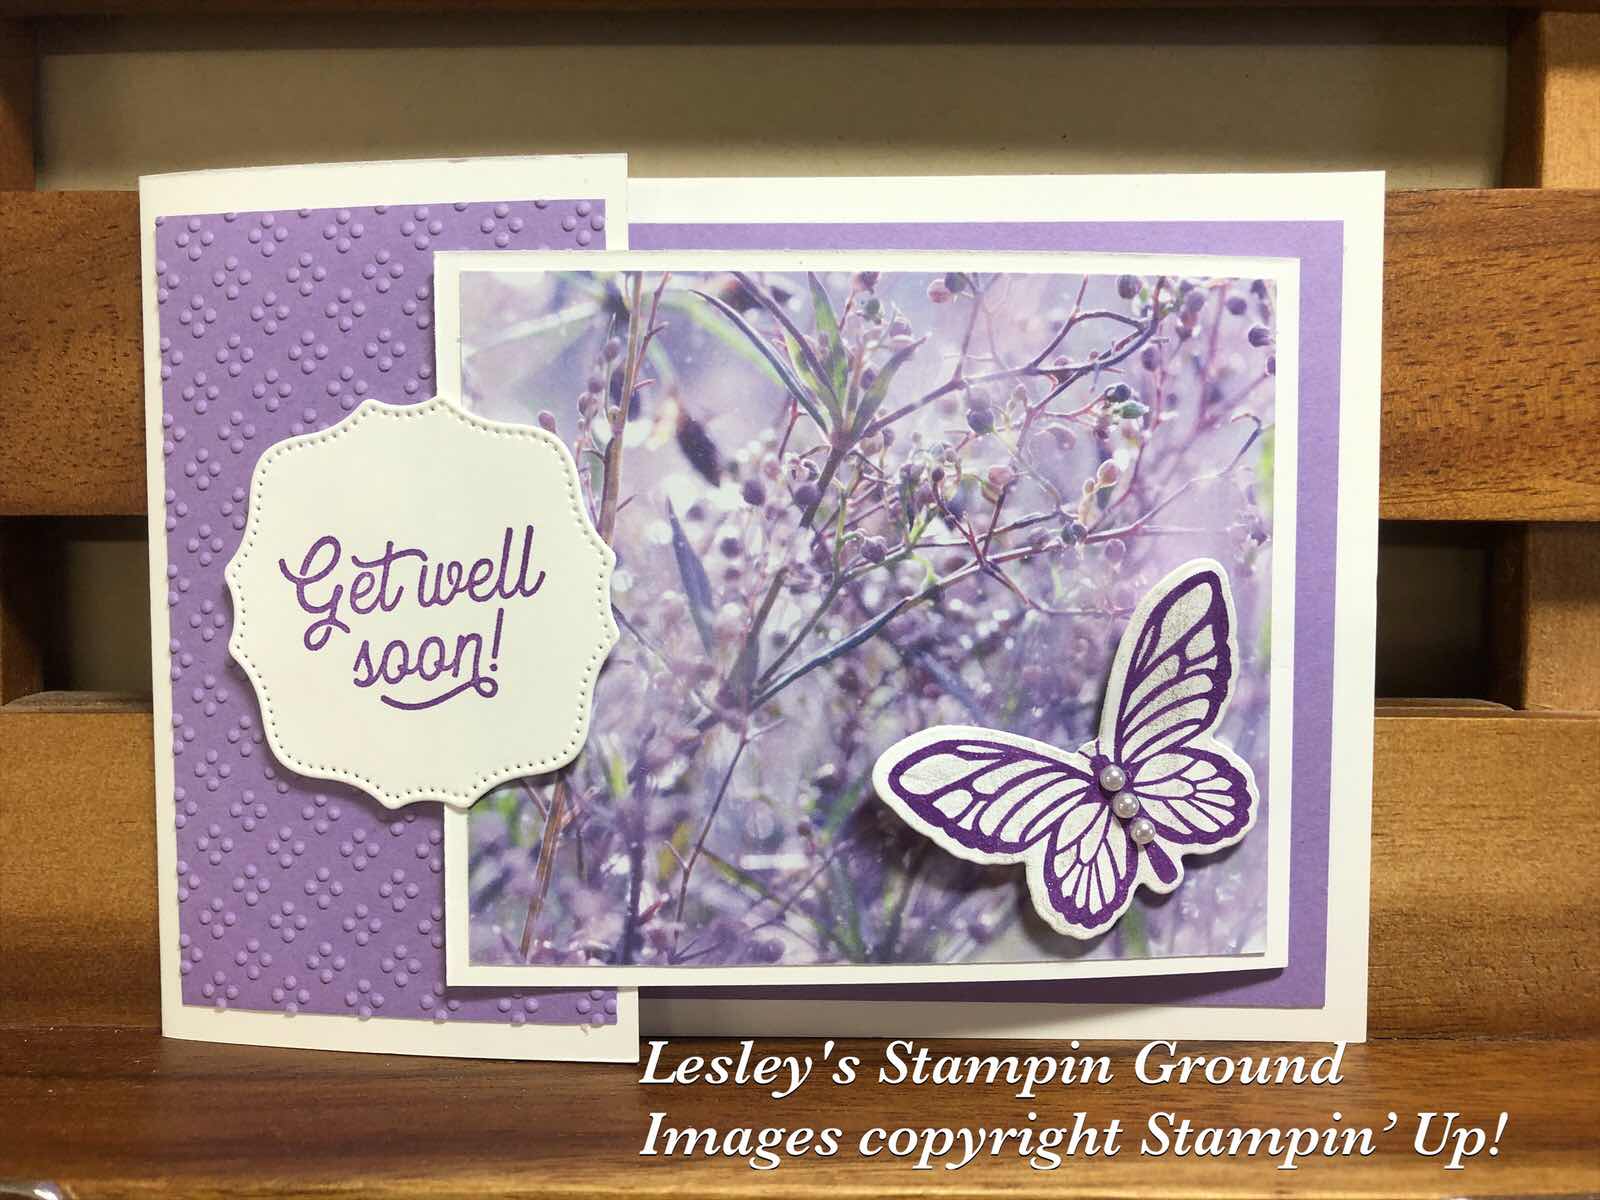
“Get Well Soon” is from the Many Mates stamp set (#152633) and I stamped this with Highland Heather ink (#147103). This was cut with a die from the Hippo & Friends dies (#153585). I attached the sentiment with Stampin’ Dimensionals (#104430). You need to only attach the Dimensionals on the left side of the sentiment to allow you to tuck the flap under the right side.
The butterfly on the outside and inside of the card were stamped with an image from the Floating & Fluttering stamp set (#154424). This is a sneak peek from the upcoming Mini catalogue available from 5th January. I stamped this with Gorgeous Grape ink (#147099) and cut the butterflies with dies from the co-ordinating Fluttering Dies (#154318). I wanted to add some glitter to the butterfly, but some inks tend to run as did this Gorgeous Grape ink. So I added some Clear Wink Of Stella (#141897) to Whisper White card, then stamped the butterfly, so no problem with it “bleeding”. The butterfly on the front was attached with Mini Stampin’ Dimensionals (#144108).
To finish the card Pearl Basic Jewels (#144219) were added to the body of the butterfly.

Hope you are having a great day!

“Love what you do and share what you love.”


Tuesday, 23 June 2020

Under My Umbrella

Hello friends,

Here’s a pretty card using the Under My Umbrella stamp set (#p151518). All the stamped images are from this set.


Not sure what this fancy fold card is called but it is very easy to make and is one of my favourites. I have used Whisper White card (#106549) and Poppy Parade card (#121694). The base card measures 21cm x 10.5cm and scored at 6cm. The Poppy Parade card is 14cm x 9.5cm. The next layer of White card is 23cm x 8.5cm and scored at 13cm. I embossed the right hand flap with the Ornate Floral 3D Embossing Folder (#152725). I stamped the raindrops with VersaMark (#102283) and embossed with White Stampin’ Emboss Powder (#109132), which was set with the Heat Tool (#129056). I sponged the edges of this piece of Whisper White card with Poppy Parade ink (#147050) and attached it to the left front flap of the card. The sentiment was stamped with Poppy Parade ink and cut with a die from the Tasteful Labels Dies (#152886). I then cut the Poppy Parade card with the same dies and glued it to the sentiment. I attached this to the card with Stampin’ Dimensionals (#104430). Ensure to only add the Dimensionals to the left side of the circle so you can tuck the flap under the right side. I stamped the 2 umbrellas with VersaMark and White Stampin’ Emboss Powder onto Poppy Parade card and punched these with the Umbrella Builder Punch (#151293). The handles were stamped with Poppy Parade ink. I used Tuxedo Black Memento Ink (#132708) for the flowers. These were coloured with Stampin’ Blends - Poppy Parade (#154958), Mint Macaron (#154889) and Mango Melody (#154888). I added glitter to the umbrellas, flowers and the Poppy Parade circle with the Clear Wink Of Stella Glitter Brush (#141897).


Have a crafty day!!