TIP: The Summer Shadows Dies were available during a previous Sale-a-bration so you may already have these, but if not there is great news, they will be available again in the next Annual catalogue. They also co-ordinate with the Shaded Summer stamp set (#155783).
Showing posts with label #ornatelayersdies. Show all posts
Thursday, 7 April 2022
Slim Card Dies
Welcome everyone,

TIP: The Summer Shadows Dies were available during a previous Sale-a-bration so you may already have these, but if not there is great news, they will be available again in the next Annual catalogue. They also co-ordinate with the Shaded Summer stamp set (#155783).
I love making slimline cards and I have used the Slim Card dies (#157965) for the scalloped edge on this card.
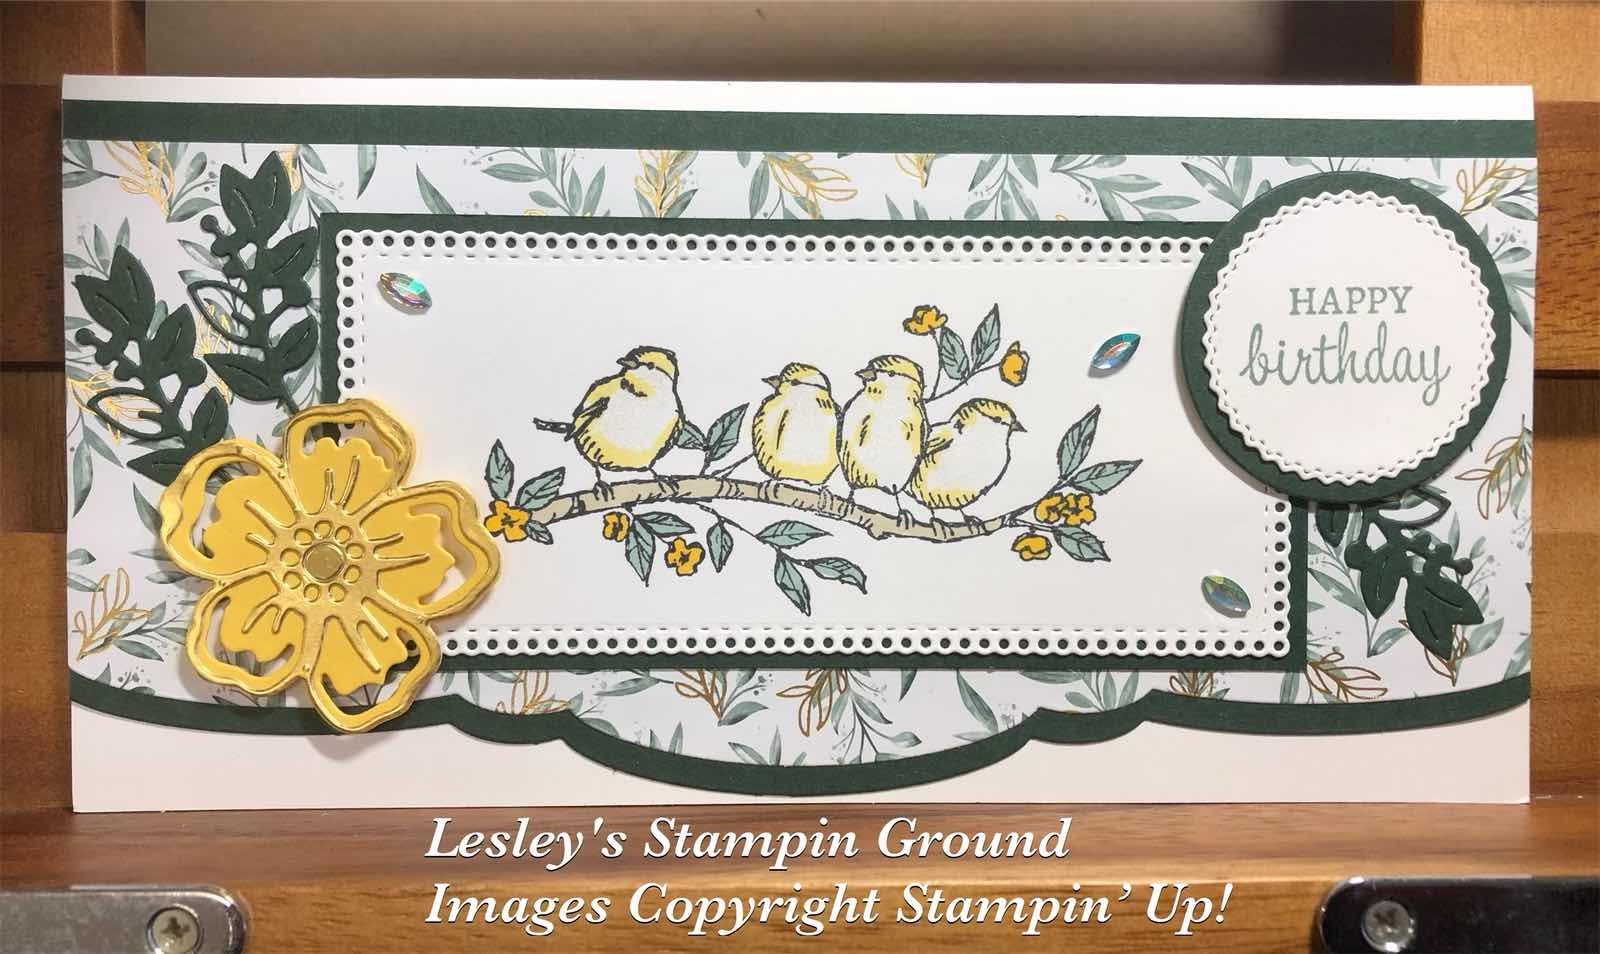
I cut the Evening Evergreen card (#155575) and the Ever Eden Specialty Designer Series Paper (retired) with the scalloped die. I matted the top & bottom of the DSP with the Evening Evergreen card and attached it to the Basic White base card (#159228).
The birds from Free As A Bird stamp set (#149468) were stamped with Tuxedo Black Memento ink (#132708). The Stampin’ Blends to colour this image are Daffodil Delight (#154883), Soft Succulent (#155521) and Crumb Cake (#154882). I added Clear Wink Of Stella (#141897) to give some sparkle to the birds. This was then cut with an Ornate Layers Die (#152726) and attached to a slightly larger piece of Evening Evergreen card.
The sentiment is from the Expressions Of Friendship stamp set (#158460) and stamped with Soft Succulent ink (#155778). The die to cut this is from the Tasteful Labels dies (#152886) and the Evening Evergreen card under the sentiment was cut with a Layering Circles Die (#151770). The flower was cut with the Summer Shadows Dies (#156618) using Daffodil Delight card (#121680) and Gold Foil Sheet (#132622). The gold foil was backed with Adhesive Sheet (#152334) so it was easy to attach to the base flower. The sentiment and flower were attached to the card with Stampin’ Dimensionals (#104430).
I cut the 3 leaves from Evening Evergreen card, backed with Adhesive Sheet, with a die from the Eden Dies (#157831). The (retired) Garden Gems were added to the card for some bling.
TIP: The Summer Shadows Dies were available during a previous Sale-a-bration so you may already have these, but if not there is great news, they will be available again in the next Annual catalogue. They also co-ordinate with the Shaded Summer stamp set (#155783).
“Love what you do and share what you love.”
Saturday, 2 April 2022
Free As A Bird stamp set
Hello friends,

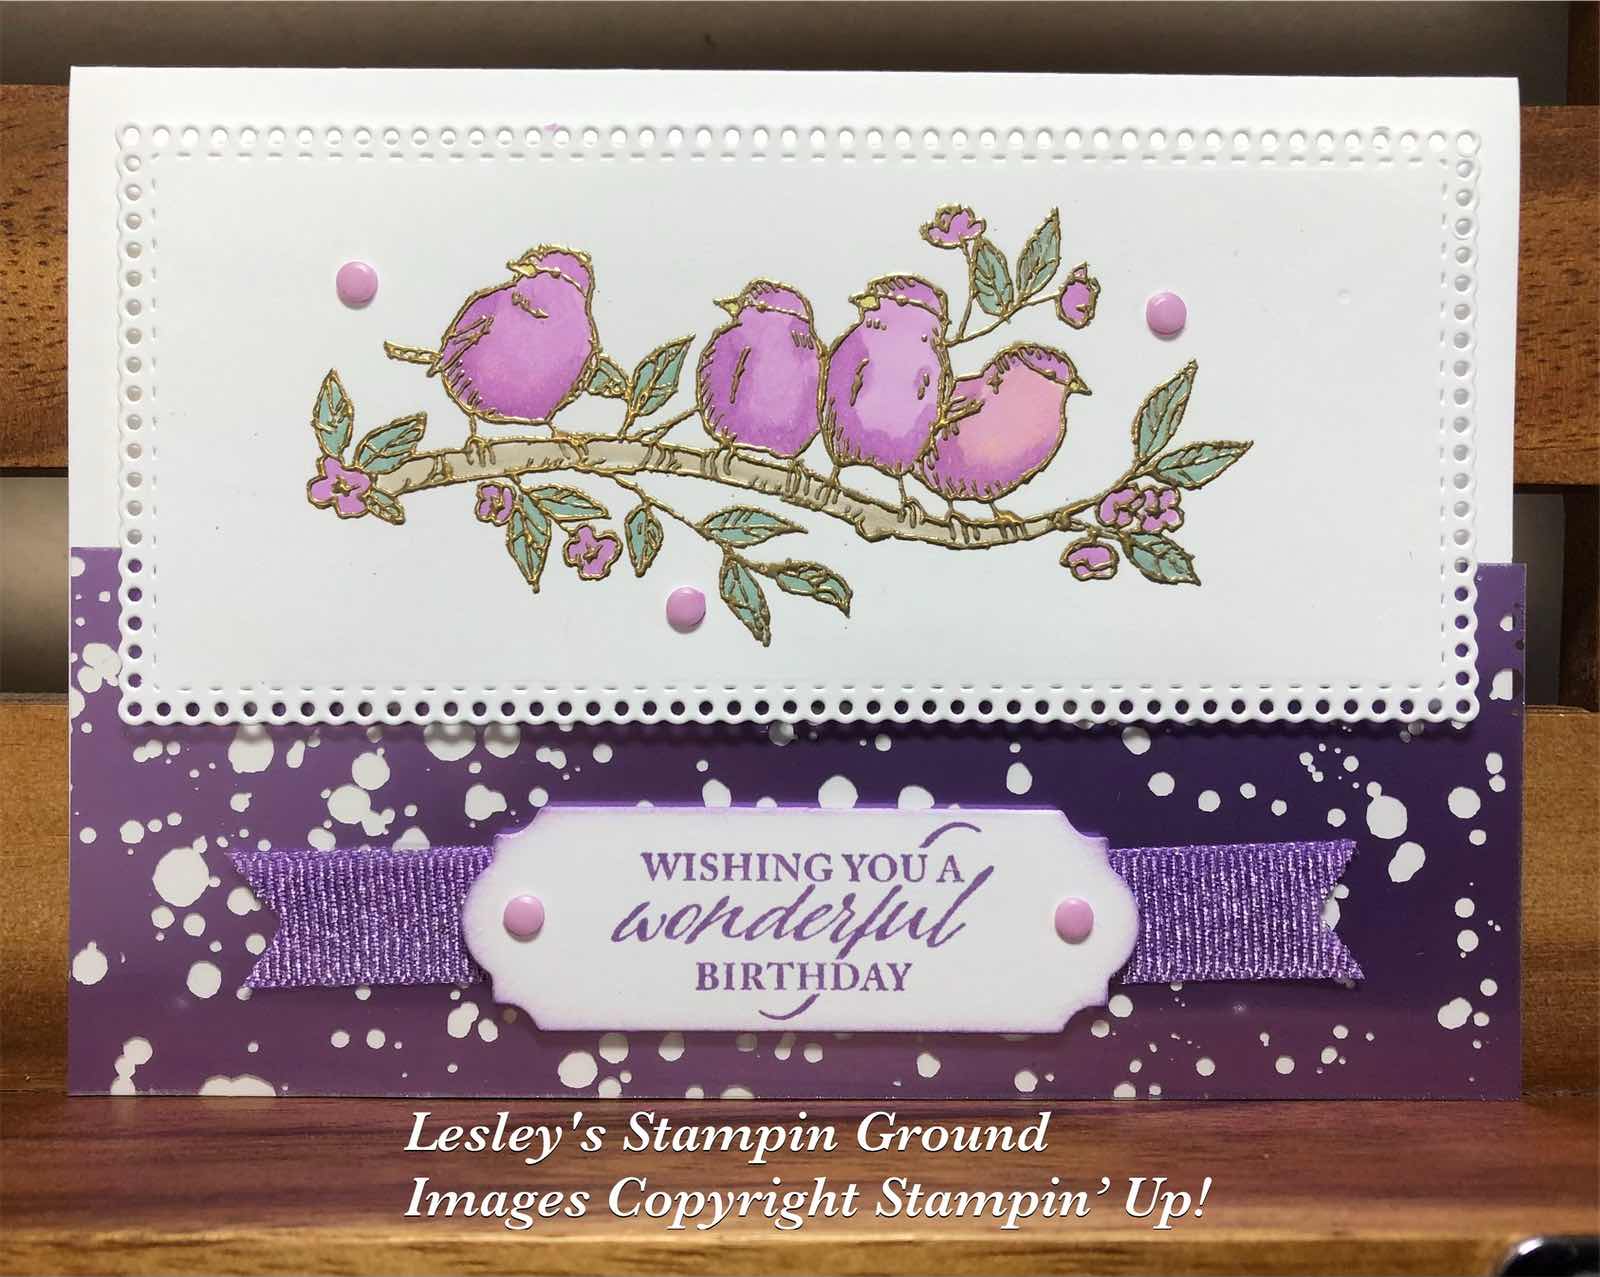
The retiring products used on this card are the Free As A Bird stamp set, Ornate Layers dies, Ornate Frames Dies, Elegantly Said stamp set, Hydrangea Hill Mercury Glass Designer Acetate, Highland Heather Grosgrain Ribbon and Playing With Patterns Resin Dots.
Unfortunately the beautiful Free As A Bird stamp set (#149468) is amongst the retiring products. I will miss this stamp set as I love these cute little birds.
I stamped the birds with VersaMark (#102283) and embossed with Gold Stampin’ Emboss Powder (#155555) which was set with the Heat Tool (#129056). I coloured the image with the Stampin’ Blends - Fresh Freesia (#155518), Crumb Cake (#154882) and Soft Succulent (#155521). I used one of the dies from the Ornate Layers (#152726) to cut this.
I attached a piece of Hydrangea Hill Mercury Glass Designer Acetate (#154574) to the Basic White base card (#159228). The birds were attached to the card with Stampin’ Dimensionals (#104430). The ribbon under the sentiment is Highland Heather Grosgrain (#155812).
The sentiment is from the Elegantly Said stamp set (#155095) and stamped with Highland Heather ink (#147103), then cut with an Ornate Frames die (#150664). The embellishments are Playing With Patterns Resin Dots (#152467). I coloured these Purple Posy dots with Fresh Freesia Stampin’ Blends to add some extra colour to the dots.
The retiring products used on this card are the Free As A Bird stamp set, Ornate Layers dies, Ornate Frames Dies, Elegantly Said stamp set, Hydrangea Hill Mercury Glass Designer Acetate, Highland Heather Grosgrain Ribbon and Playing With Patterns Resin Dots.
“Love what you do & share what you love.”
Friday, 18 March 2022
In Color Shimmer Vellum
Hi friends,


I had this floral image from the Honeybee Home Stamp Set (#157943) left from another project, so rather than wasting it have used it on this card.
The flowers were stamped with Tuxedo Black Memento ink (#132708) and coloured with Fresh Freesia Stampin’ Blends (#155518) and Granny Apple Green Stampin’ Blends (#154885).
I adhered Adhesive sheets (#152334) to the back of the Fresh Freesia vellum from the 2021-2023 In Color Shimmer Vellum (#155616), then dry embossed this with the Gingham Embossing Folder (#157627). This was attached to a piece of Basic White card (#159228).
The Gorgeous Grape card (#147011) was cut with an Ornate Layers Die (#152726), then attached to the cardfront. The Highland Heather Grosgrain Ribbon (#155812) was wrapped around the cardfront. I attached the flowers with Mini Stampin’ Dimensionals (#144108). The Gold Trim is from the Simply Elegant Trim (#155766) and attached with Mini Glue Dots (#103683).
The sentiment from the Friends Are Like Seashells stamp set (#158203) was stamped with Fresh Freesia ink (#155611) and cut with a Sweet Hearts Die (#157623). This was attached with Stampin’ Dimensionals (#104430).
The Brushed Brass Butterflies (#158136) are the embellishments added to the card.
TIP: I used the adhesive sheets on the back of the vellum to avoid tape or glue showing through.
“Love what you do and share what you love.”
Monday, 21 February 2022
Calming Camellia
Hello friends,

“Love what you do and share what you love.”
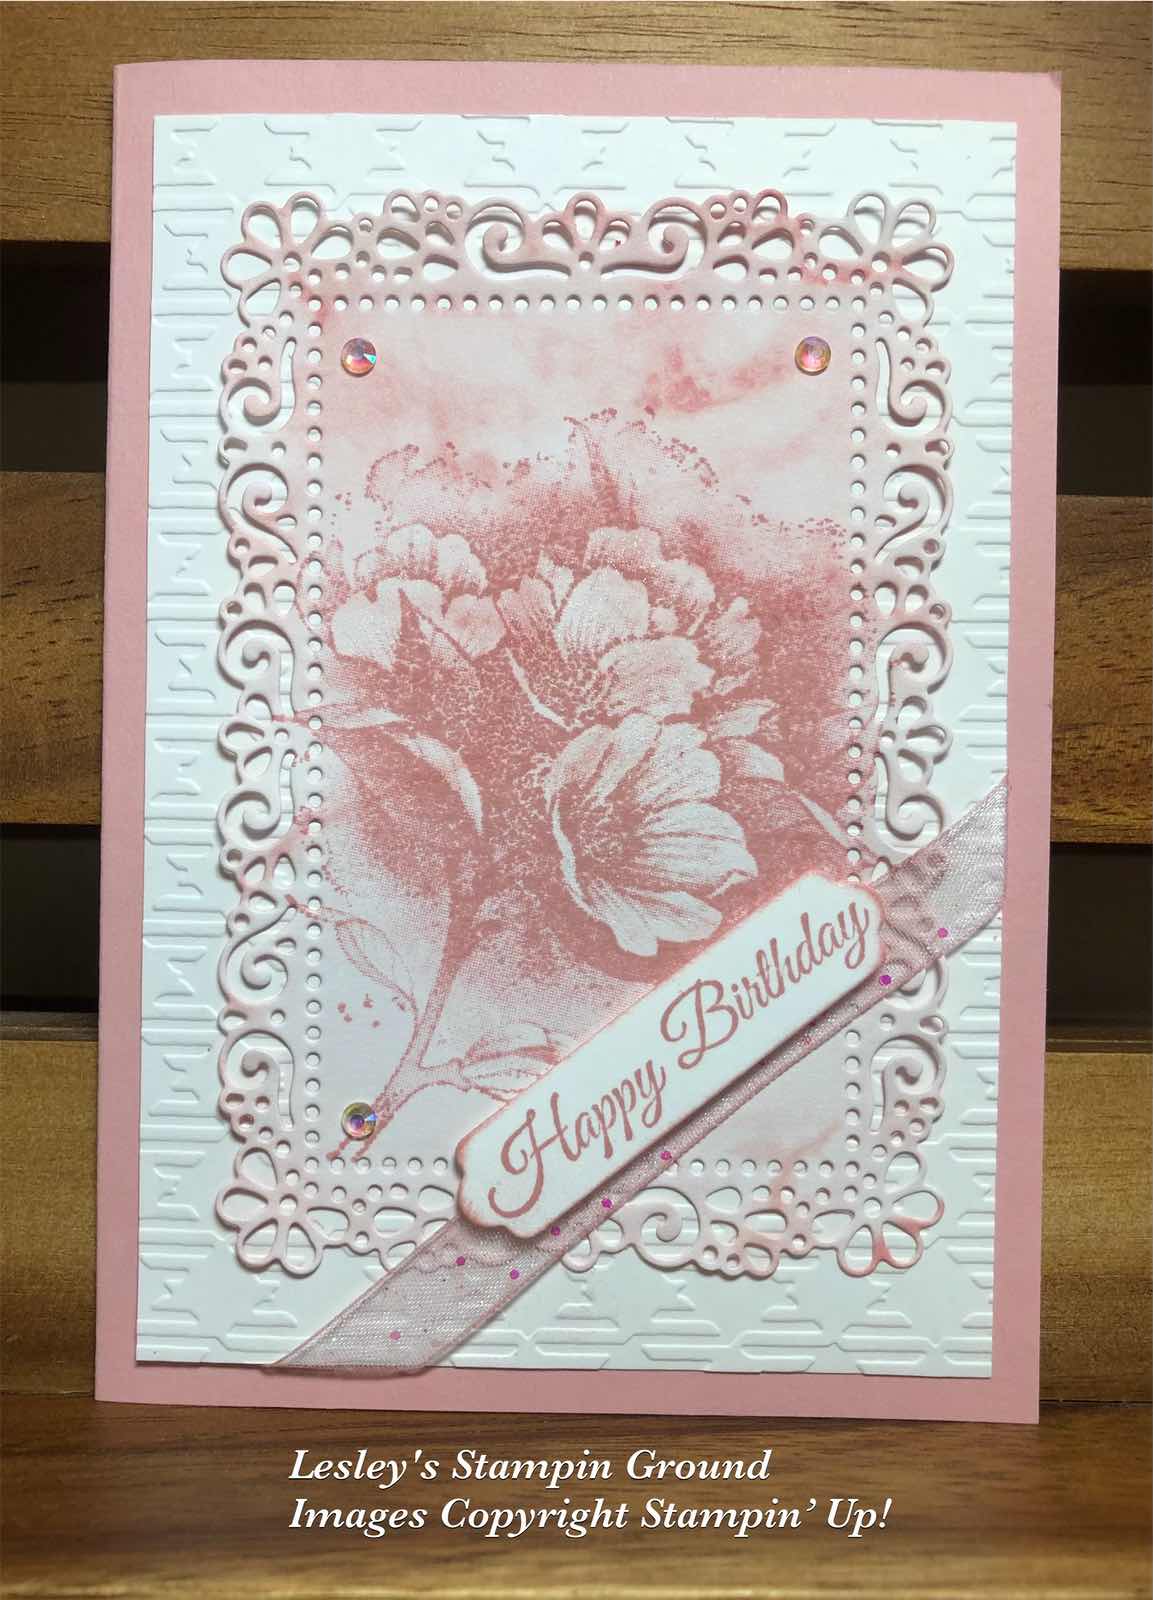
The Calming Camellias stamp set (#158117) is a free Host set from Sale-a-bration and this stamped flower is from that set.
I used Blushing Bride ink (#147100) to stamp the flower onto another Sale-a-bration product - Simply Marbleous Designer Series Paper (#158128). I used the Blushing Bride colour of the DSP. This was cut with an Ornate Layers Die (#152726).
The Basic White card front (#159228) was dry embossed with the Gingham Embossing Folder (#157627). The stamped & die cut piece was attached to the card front and the White Glittered Organdy ribbon (#156408) was wrapped around the corner of the card. Before attaching the ribbon I coloured it with a dauber and Blushing Bride ink. The base card is Blushing Bride (#131287).
“Happy Birthday” is from the Calming Camellia stamp set and also stamped with Blushing bride ink. A Seasonal Labels Die (#156299) was used to cut the sentiment then attached with Mini Stampin’ Dimensionals (#144108). The Iridescent Rhinestone Basic Jewels (#158130) were added to the card.
Wednesday, 16 February 2022
Daffodil Daydream Bundle
Hi stamping friends,


What a pretty card for Mother’s Day or for any special person or occasion, using the Daffodil Daydream Bundle (#157795) and some beautiful DSP & specialty paper.
The daffodil image from the Daffodil Daydream stamp set (#157786) was stamped with Tuxedo Black Memento ink (#132708) onto Basic White card (#159228). This was cut with the co-ordinating die from the Daffodil Dies (#157794). I used the Daffodil Delight (#154883) and Granny Apple Green (#154885) Stampin’ Blends to colour the flowers & leaves.
The sentiment is also from the same stamp set and stamped with Daffodil Delight ink (#147094) and cut with a die from the Tasteful Labels Dies (#152886). I used Daffodil Delight card (#121680) for the butterfly which was cut with a Daffodil die. I added Clear Wink Of Stella (#141897) to the butterfly and attached it to the sentiment with a Mini Glue Dot (#103683).
The striped DSP is from the Abstract Beauty 4”x6” Specialty Designer Series Paper (#158039) and attached to the Basic White base card. I cut the Mother Of Pearl 12”x12” Specialty Paper (#157666) with an Ornate Layers Die (#152726). The Daffodils were attached to the card with Stampin’ Dimensionals (#104430). The White Glittered Organdy Ribbon (#156408) was attached to the card under the sentiment and the sentiment was attached with Mini Stampin’ Dimensionals (#144108).
The beautiful Brushed Brass Butterflies (#158136) were added to the card.
“Love what you do and share what you love.”
Friday, 12 November 2021
Angels Of Peace
Hello,

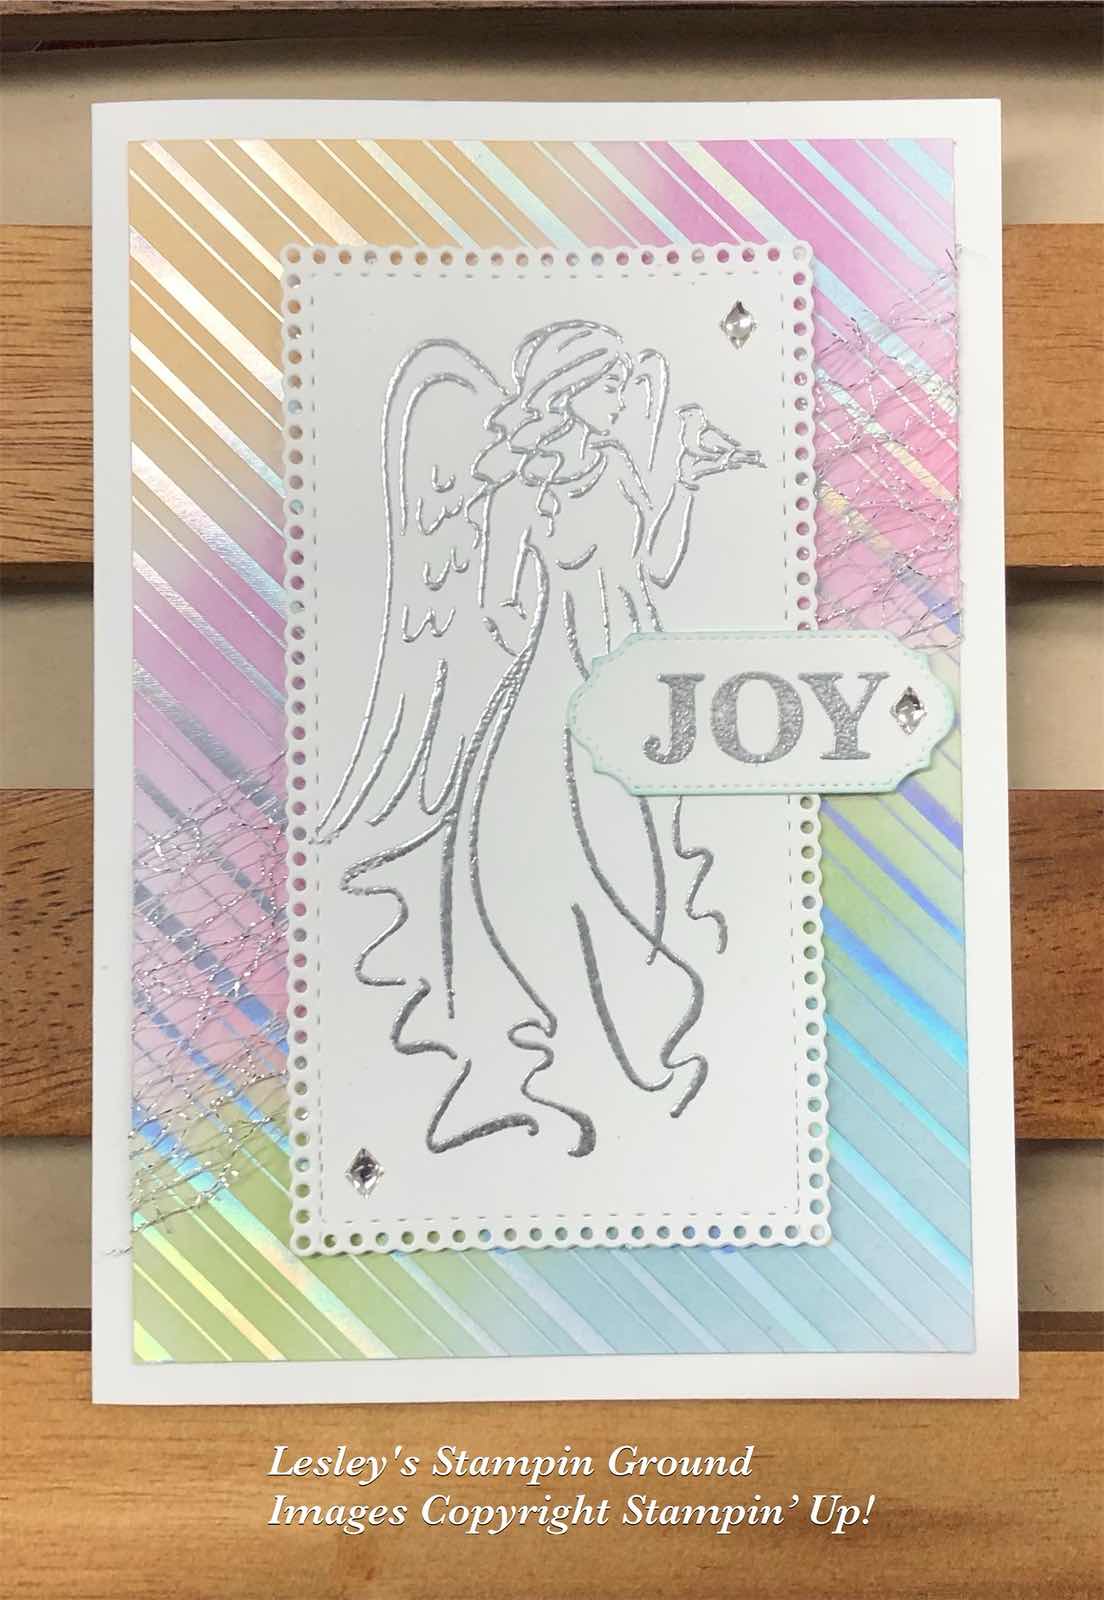
I coloured the DSP from the Whimsy & Wonder Specialty Designer Series Paper (#156329) using Balmy Blue ink (#147105), Granny Apple Green ink (#147095), Polished Pink ink (#155712), Fresh Freesia ink (#155611) and Pale Papaya ink (#155670).
It’s amazing were inspiration comes from sometimes. Yesterday I said it was very difficult to photograph the card as the silver DSP was picking up other colours, so that gave me idea to colour it using ink & the Blending Brushes (#153611). The inks colour the white areas and the silver resists the colour, but again on the photo it shows other colours. I hope you get the idea though.
I coloured the DSP from the Whimsy & Wonder Specialty Designer Series Paper (#156329) using Balmy Blue ink (#147105), Granny Apple Green ink (#147095), Polished Pink ink (#155712), Fresh Freesia ink (#155611) and Pale Papaya ink (#155670).
The Metallic Mesh Ribbon (#153550) was wrapped around the card front, then I attached this to the Basic White base card (#159228).
The Angel from the Angels Of Peace stamp set (#156365) was stamped with VersaMark (#102283) and heat embossed with Silver Stampin’ Emboss Powder (#155555) and set with the Heat Tool (#129056). I used an Ornate Layers Die (#152726) to cut the angel. This die cuts a longer rectangle so after cutting the angel, I repositioned the die to cut the bottom and make the rectangle cut out a bit smaller.
“Joy” is from the Merriest Moments stamp set (#156353) and also Silver Embossed. This was cut with an Ornate Frames Die (#150664). The angel and sentiment were attached to the card with Stampin’ Dimensionals (#104430). The gems are from the Silver & Clear Epoxy Essentials (#155567).
“Love what you do and share what you love.”
Stay safe & keep crafting!!
Monday, 8 November 2021
Hand-Penned Petals
Hello everyone,

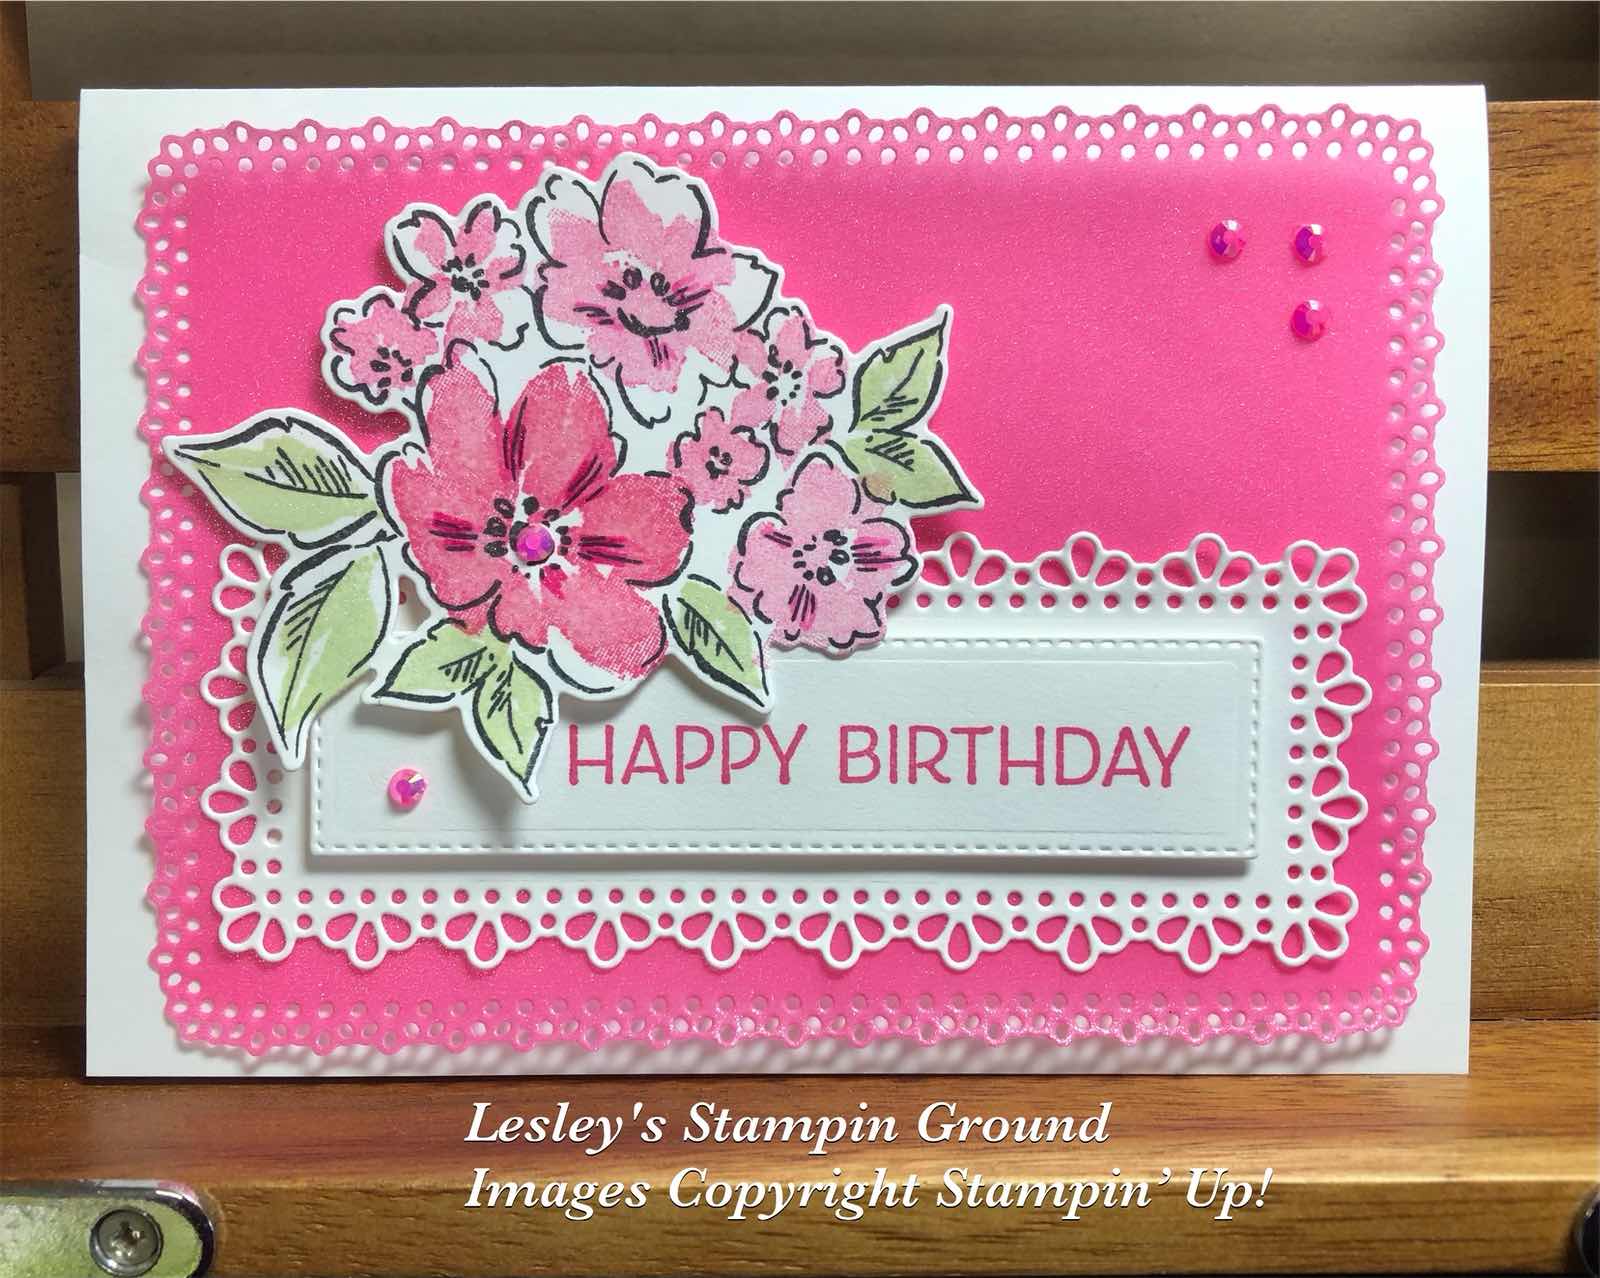
The sentiment and the flowers were attached to the card with Stampin’ Dimensionals (#104430). When I attached the Vellum to the Basic White base card, I used tape behind the sentiment and flowers and Mini Glue dots (#103683) behind the embellishments, so it doesn’t show through the vellum. The Polished Pink embellishments are from the 2021-2023 In Color Jewels (#155571).
A vibrant card using the Polished Pink 2021-2023 In Color Shimmer Vellum (#155616).
I used the Ornate Layers Dies (#152726) to cut the Shimmer Vellum, the sentiment and the detailed cut out under the sentiment. The sentiment from Artistically Inked stamp set (#154542) was stamped with Polished Pink ink (#155712).
The floral image from the Hand-Penned Petals (#155070) was stamped with Tuxedo Black Memento ink (#132708) on Basic White card (#159228). The flowers were stamped with Polished Pink ink, using the stamping off method for the lighter colour. The leaves were stamped with Soft Sea Foam ink (#147102). This was then cut with the co-ordinating die from the Penned Flowers dies (#155557). I used the Polished Pink Stampin’ Blends (#155520) to add extra colour to the flowers.
The sentiment and the flowers were attached to the card with Stampin’ Dimensionals (#104430). When I attached the Vellum to the Basic White base card, I used tape behind the sentiment and flowers and Mini Glue dots (#103683) behind the embellishments, so it doesn’t show through the vellum. The Polished Pink embellishments are from the 2021-2023 In Color Jewels (#155571).
“Love what you do and share what you love.”
Stay safe & keep crafting!!
Tuesday, 26 October 2021
Bloom Hybrid Embossing Folder
Hi everyone,

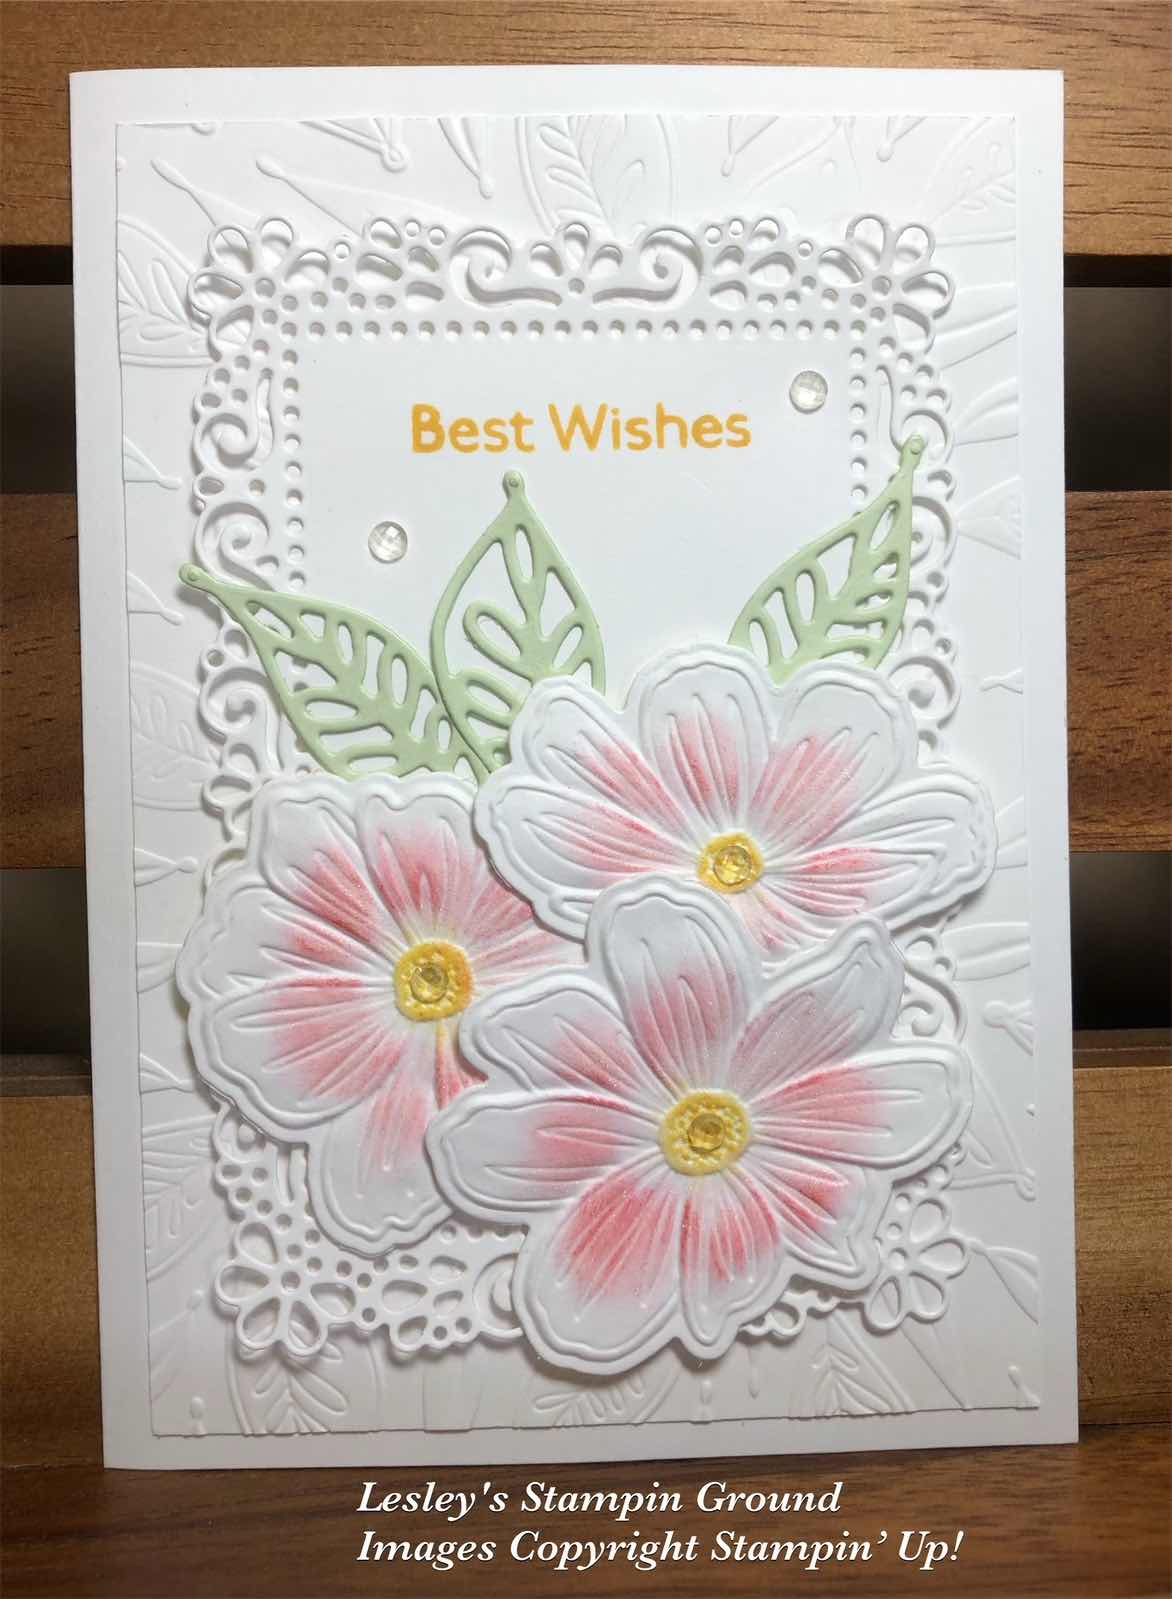
I love the subtle colours and textures on this card using the Bloom Hybrid Embossing Folder (#158368). This folder also includes the Dies and can be used together or separately.
I dry embossed a piece of Basic White card (#159228), without the dies, for the card front. Next I positioned the die to cut the flowers in the folder then the card is embossed and the flowers are cut at the same time and I used these flowers. I lightly daubered the flowers with Real Red ink (#147084) and Daffodil Delight ink (#147094) for the centres. I used the Clear Wink Of Stella (#141897) on the areas I coloured.
I cut a piece of Basic White card using an Ornate Layers Dies (#152726). Best Wishes from the Art Gallery stamp set (#158201) was stamped with Daffodil Delight ink, then I attached this card to the card front. The leaves were cut with the dies from the Bloom dies using Soft Sea Foam card (#147012) which was backed with Adhesive Sheet (#152334).
The flowers were all attached with Stampin’ Dimensionals (#104430). The card was finished by adding the Elegant Faceted Gems (#152464) to the flower centres and the card.
“Love what you do and share what you love.”
Stay safe & keep crafting!!
Friday, 30 July 2021
Artistic Dies
Hello,

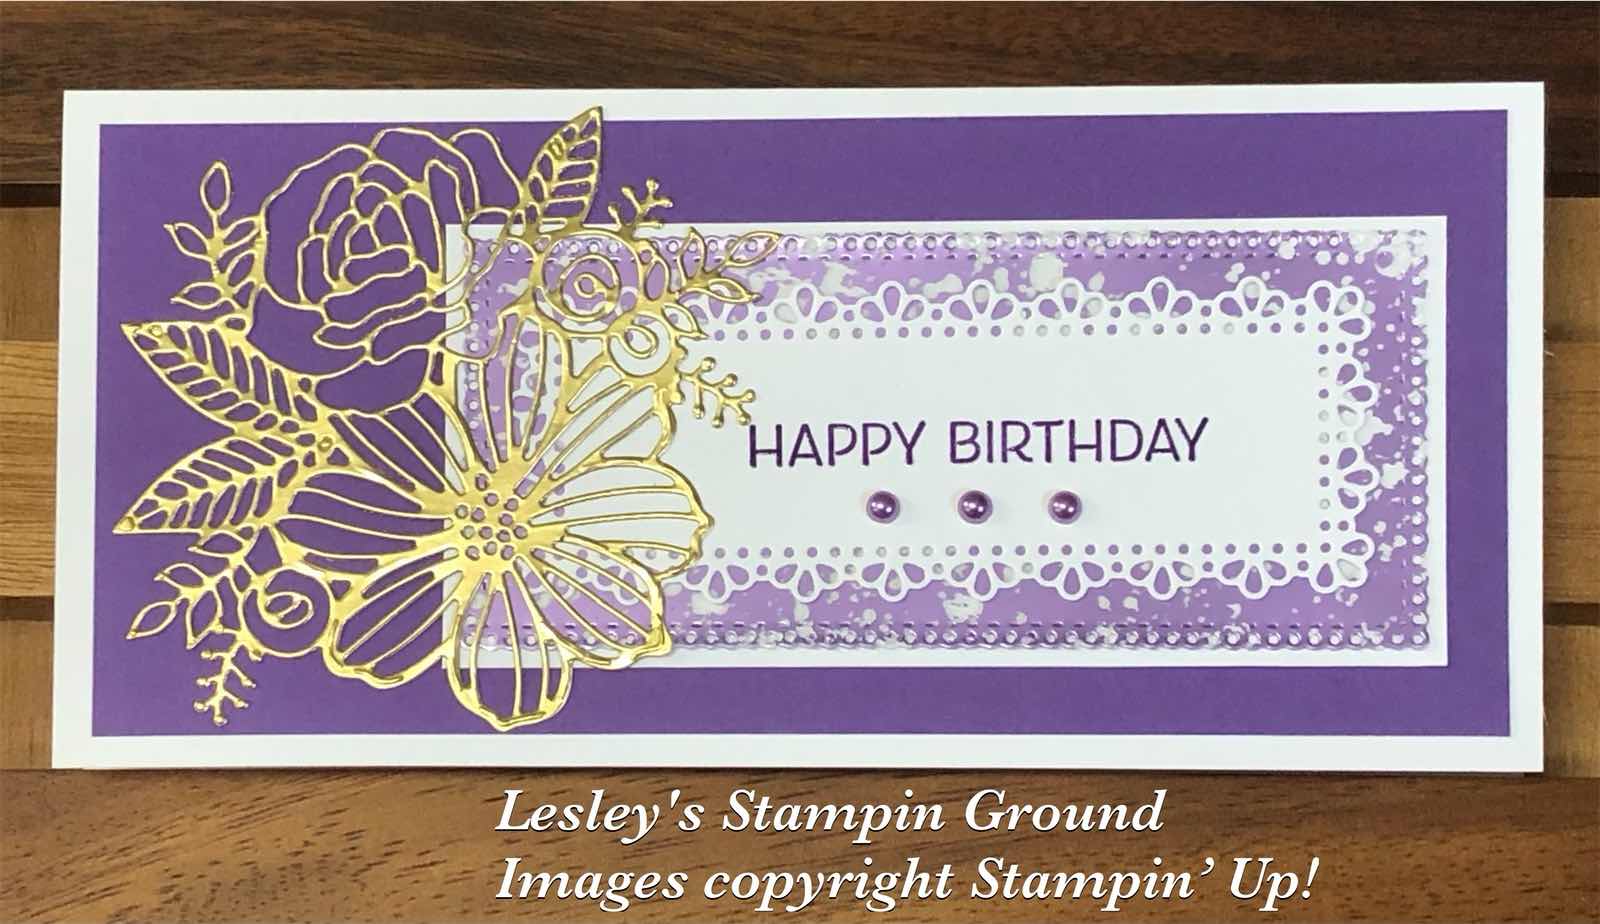
I do love mauve and gold together, so teamed them up today for this slim-line card.
The base card is Basic White (#159228) with Gorgeous Grape card (#147011) for the following layer. The finished size of this card is 21x10cm. I cut the Hydrangea Hill Mercury Glass Designer Acetate (#154574) with a die from the Ornate Layers Dies (#152726). This was attached to a slightly larger piece of Basic White card.
“Happy Birthday” from the Artistically Inked stamp set (#154542) was stamped with Gorgeous Grape ink (#147099). I used the Stamparatus (#14817), so without moving the card or stamp, I re-stamped with VersaMark (#102283) and added Clear Stampin’ Emboss Powder (#155554) and set it with the Heat Tool (#129056). This gives an embossed image, so it can be done with any colour not just the embossing powder colours we have available. I cut the sentiment with another Ornate Layers die and attached it to the designer acetate.
The Gold Foil (#132622) was cut with a die from the Artistic Dies (#155371). For ease of adhering this detailed cut-out to the card, I had Adhesive Sheet (#152334) attached to the back of the gold foil before cutting. The Pastel Pearls (#154571) were added under the sentiment.
“Love what you do and share what you love.”
Thursday, 22 July 2021
Ornate Layers dies
Hello friends,

I do love dies as they make cardmaking easy with beautiful results.
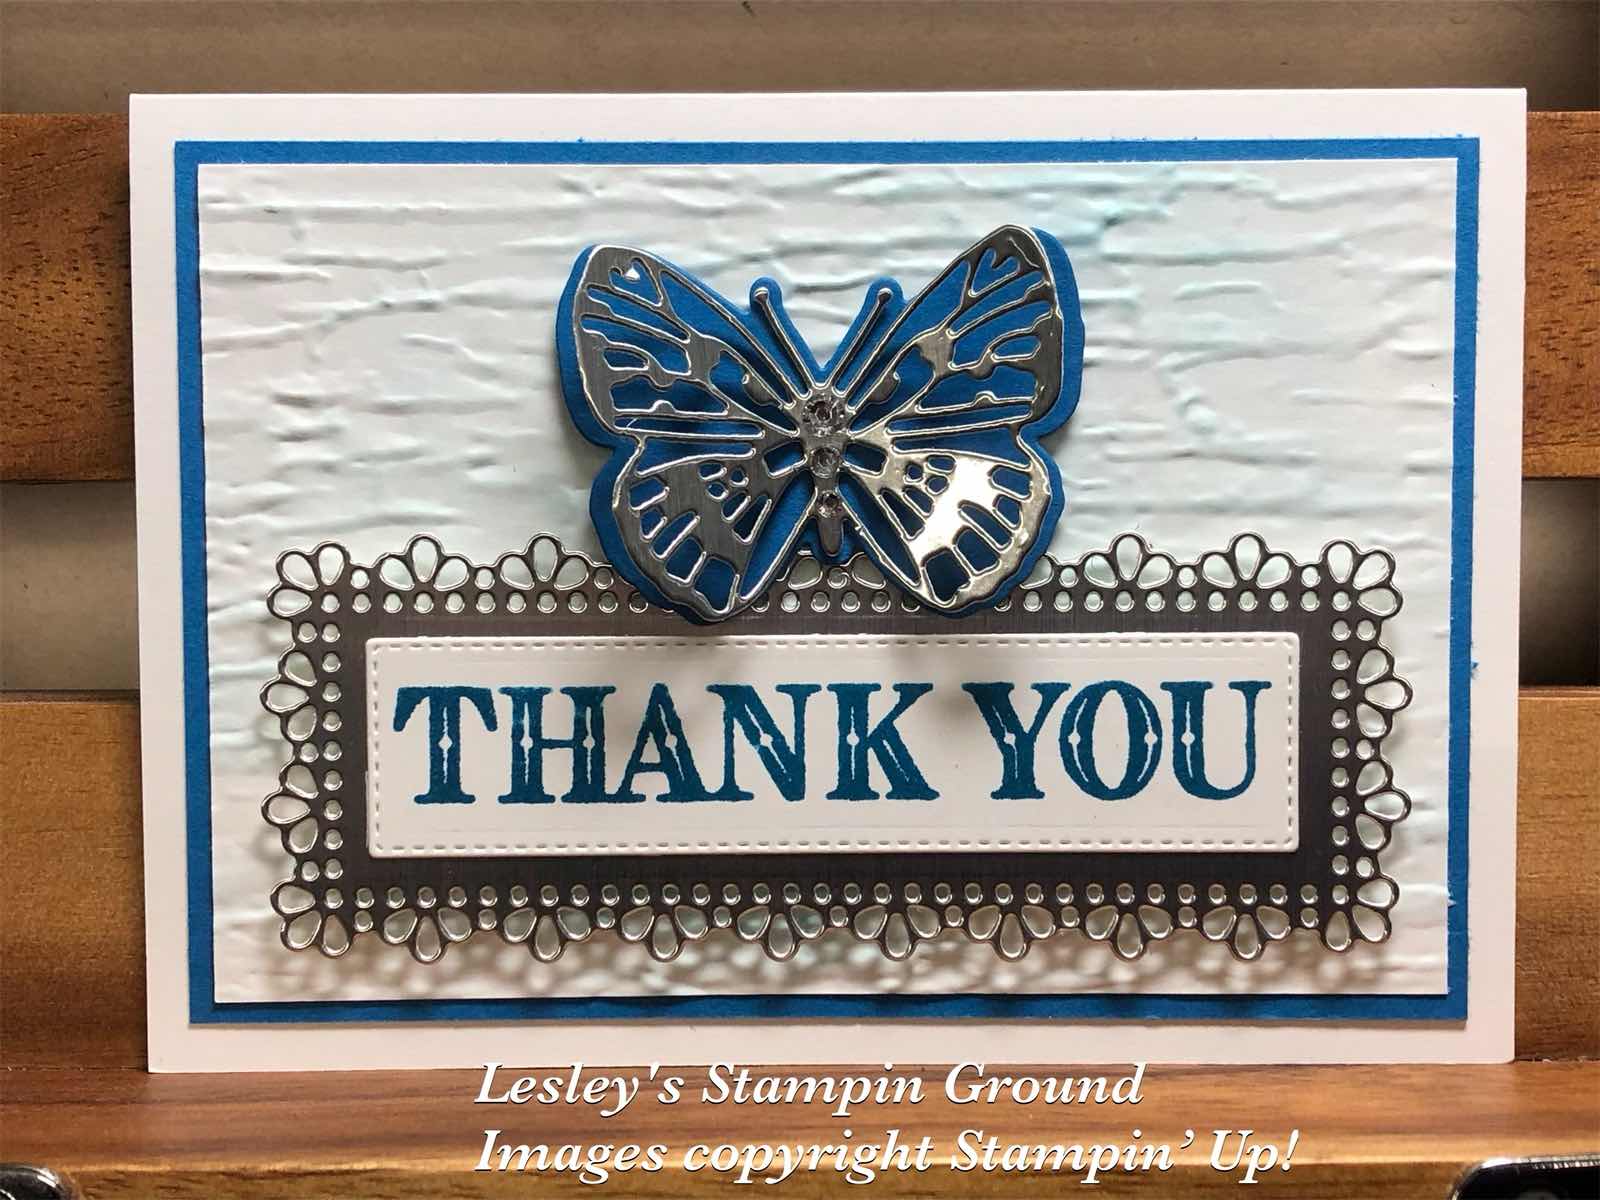
I cut the butterflies using the Brilliant Dies (#155523). Pacific Point card (#116202) was used for the solid base butterfly and Silver Foil 12”x12” Specialty Pack (#156457) for the detailed butterfly on top. This foil is from the upcoming Mini catalogue and consists of 3 sheets - 1 brushed finish, 1 matt finish and 1 mirrored foil finish.
“Thank you” was stamped with Pacific Point ink (#147098). This sentiment is from the Ornate Thanks stamp set (#158301). The sentiment and silver foil underneath were cut with dies from the Ornate Layers (#152726).
I dry embossed the Basic White card front (#159228) using the Bark 3D Embossing Folder (#155431). Using a Blending Brush (#153611) I lightly coloured the embossed card, then attached it to the Pacific Point card.
The sentiment and butterfly were attached to the card using Stampin’ Dimensionals (#104430) and I added Rhinestone Basic Jewels (#144220) to the body of the butterfly.
“Love what you do and share what you love.”
Wednesday, 14 July 2021
Angels Of Peace
Hi,

Meanwhile there are some great bargains on many of the Designer Papers from the Annual catalogue till the 2nd August, which include the following packs-

Here is a sneak peak from the upcoming mini catalogue and the my first Christmas card this year.
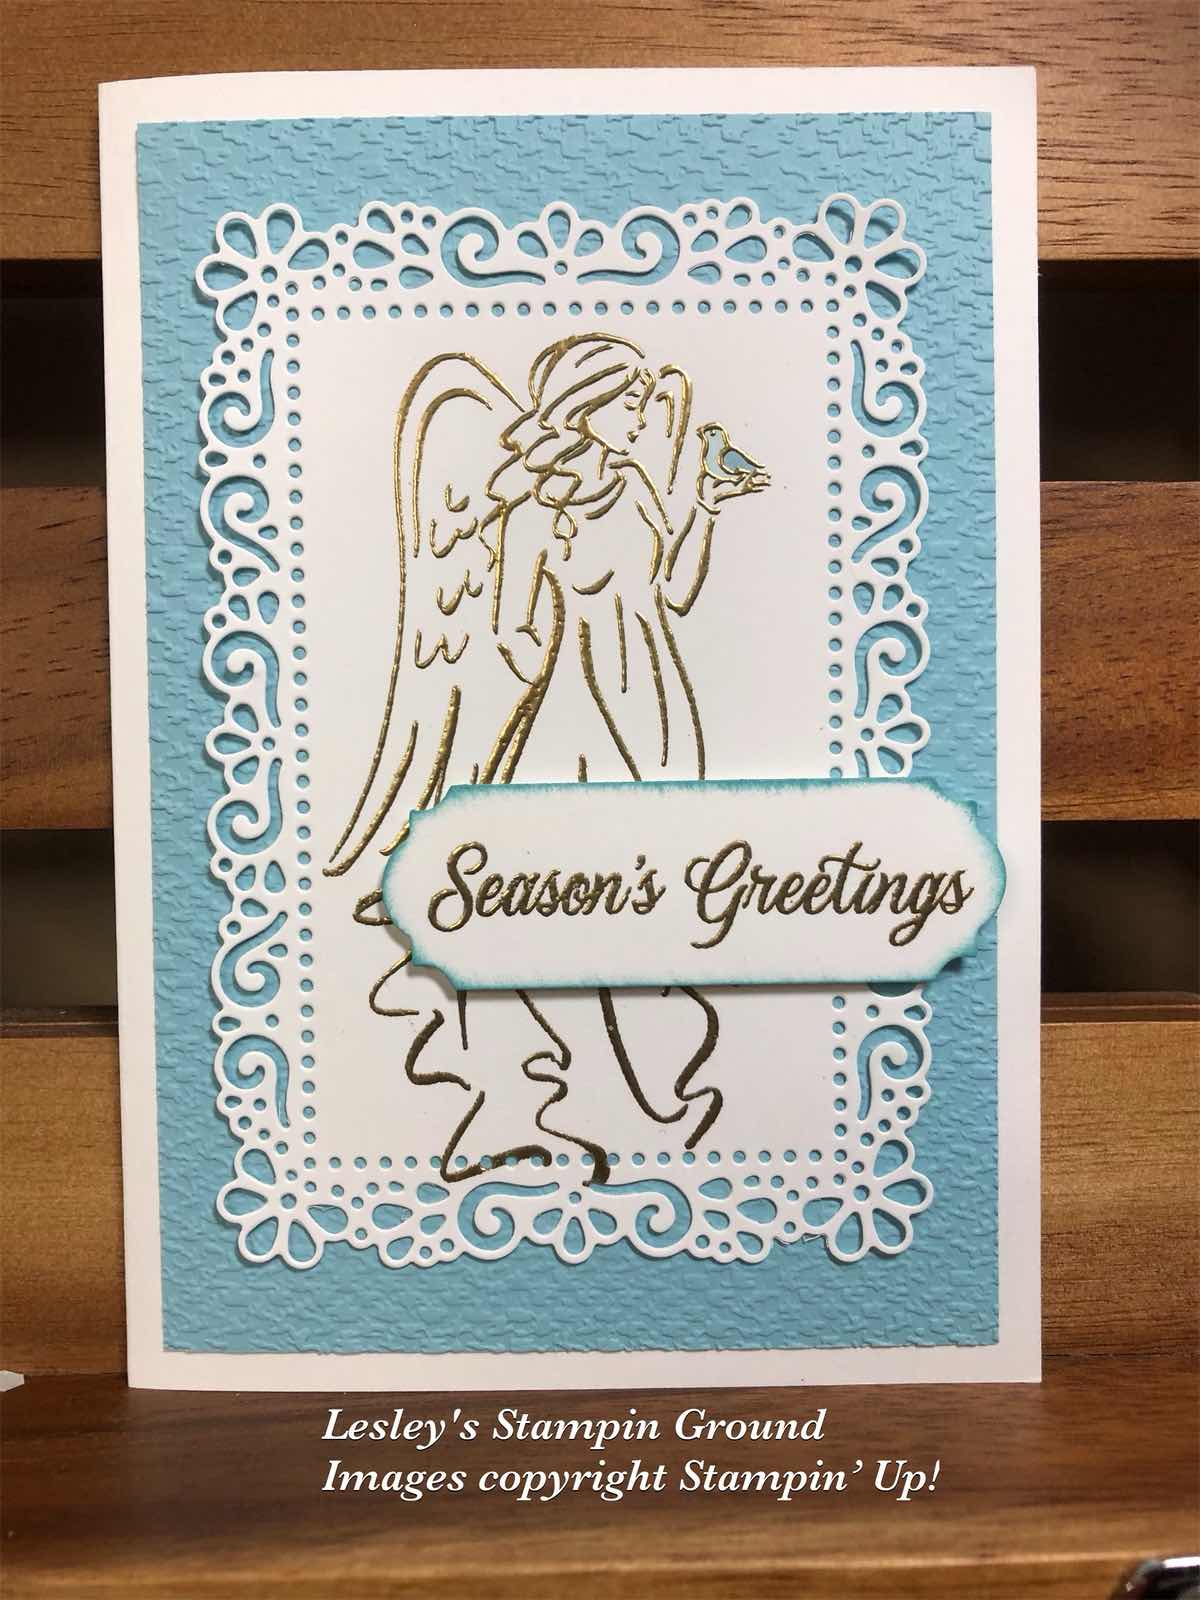
The angel from the Angels Of Peace stamp set (#156365) was stamped with VersaMark (#102283). This was then heat embossed with Gold Embossing Powder from the Metallics pack (#155555) and set with the Heat Tool (#129056). I cut this Basic White card (#159228) with a die from the Ornate Layers Dies (#152726). The Balmy Blue card (#147007) was embossed with the Tasteful Textile 3D Embossing Folder (#152718), then attached to the Basic White base card.
Season’s Greetings is from the Merriest Moments stamp set (#156353) and also Gold embossed. This was cut with an Ornate Frames Die (#150664), daubered the edges with Balmy Blue ink (#14710) and attached it to the card with Stampin’ Dimensionals (#104430). I coloured the bird with the Balmy Blue Stampin’ Blends (#154830).
There is a great variety of new products in the new catalogue which will be available to order from 3rd August.
Meanwhile there are some great bargains on many of the Designer Papers from the Annual catalogue till the 2nd August, which include the following packs-
155841 - Beauty of the Earth - $17
155696 - Bloom Where You’re Planted - $17
155499 - Hand Penned - $17
152494 - In Good Taste - $31.45
155817 - In The Wild - $17
155807 - Pansy Petals - $17
155605 - Sweet Symmetry - $17
155718 - Tidings Of Christmas - $17
155686 - You’re A Peach - $17
“Love what you do and share what you love.”
Saturday, 27 March 2021
Ornate Garden Specialty Designer Series Paper
Hello,

The retiring products used on this card are-
This beautiful Ornate Garden Specialty Designer Series Paper (#152488) is another of the retiring products from the annual catalogue.
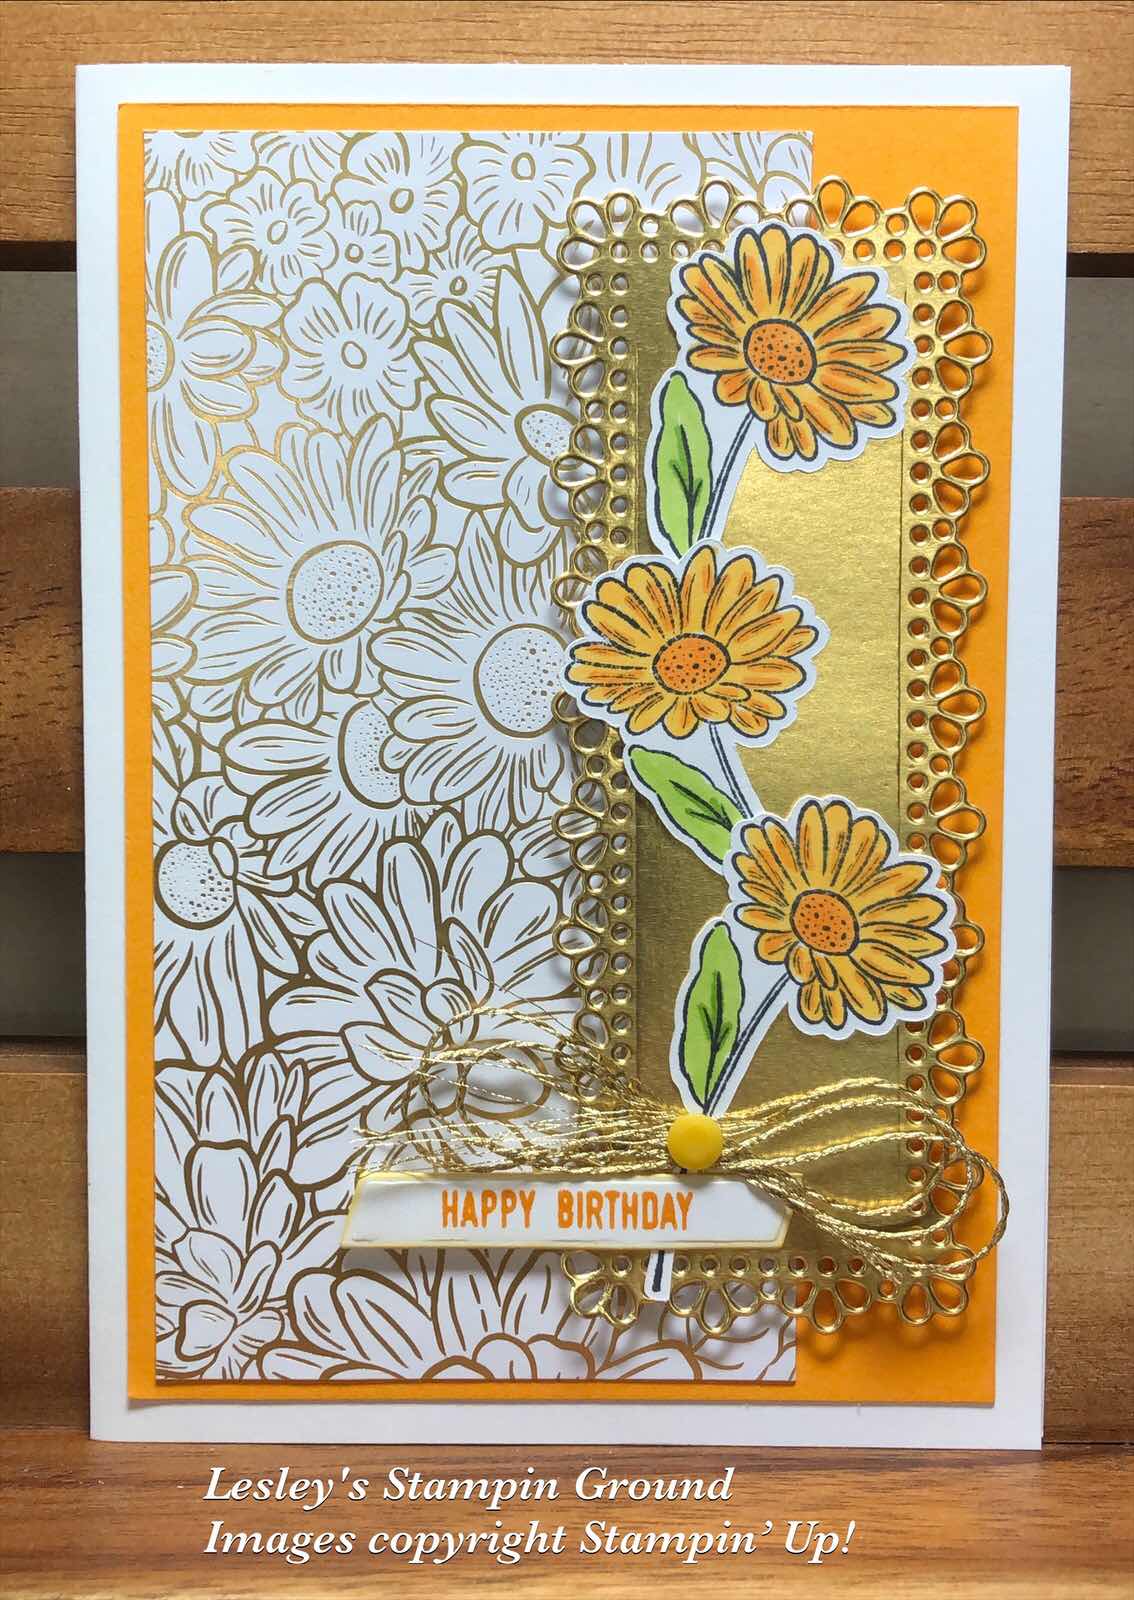
The base card is Basic White (#159228), then I added Mango Melody card (#147013) followed by the Designer Series Paper. I cut the Gold Foil Sheet (#132622) with a die from the Ornate Layers Dies (#152726) and attached this to the card with Stampin’ Dimensionals (#104430).
The flowers from the Ornate Style stamp set (#152572) were stamped with Tuxedo Black Memento ink (#132708) on Basic White card. These were coloured with Mango Melody Stampin’ Blends (#154888) and Granny Apple Green Stampin’ Blends (#154885), then fussy cut. I attached these to the gold foil.
“Happy Birthday” is from the Itty Bitty stamp set (#151331) and stamped with Mango Melody ink (#147093). The die to cut this is from the Always Dies (#154307). The gold trim is from the Forever Greenery Trim Combo Pack (#152475) and attached with a Mini Glue Dot (#103683), then I added the Playing With Patterns Resin Dot (#152467) on top of the trim.
Ornate Garden Specialty Designer Series Paper
Ornate Style stamp set
Itty Bitty stamp set
Mango Melody Stampin’ Blends
Forever Greenery Trim Combo Pack.
Some products are selling out quickly so check out what products are still available here - lesleyjendra.stampinup.net
Enjoy your weekend!!
“Love what you do and share what you love.”
Wednesday, 17 March 2021
True Love Designer Series Paper with Stampin’ Blends
Hello friends,

Enjoy whatever you are doing today!!
After fussy cutting these flowers from the True Love Designer Series Paper (#154281), I coloured them with Stampin’ Blends.
The colours used are Granny Apple Green (#154885), Daffodil Delight (#154883), Highland Heather (#154887) and Poppy Parade (#154958).
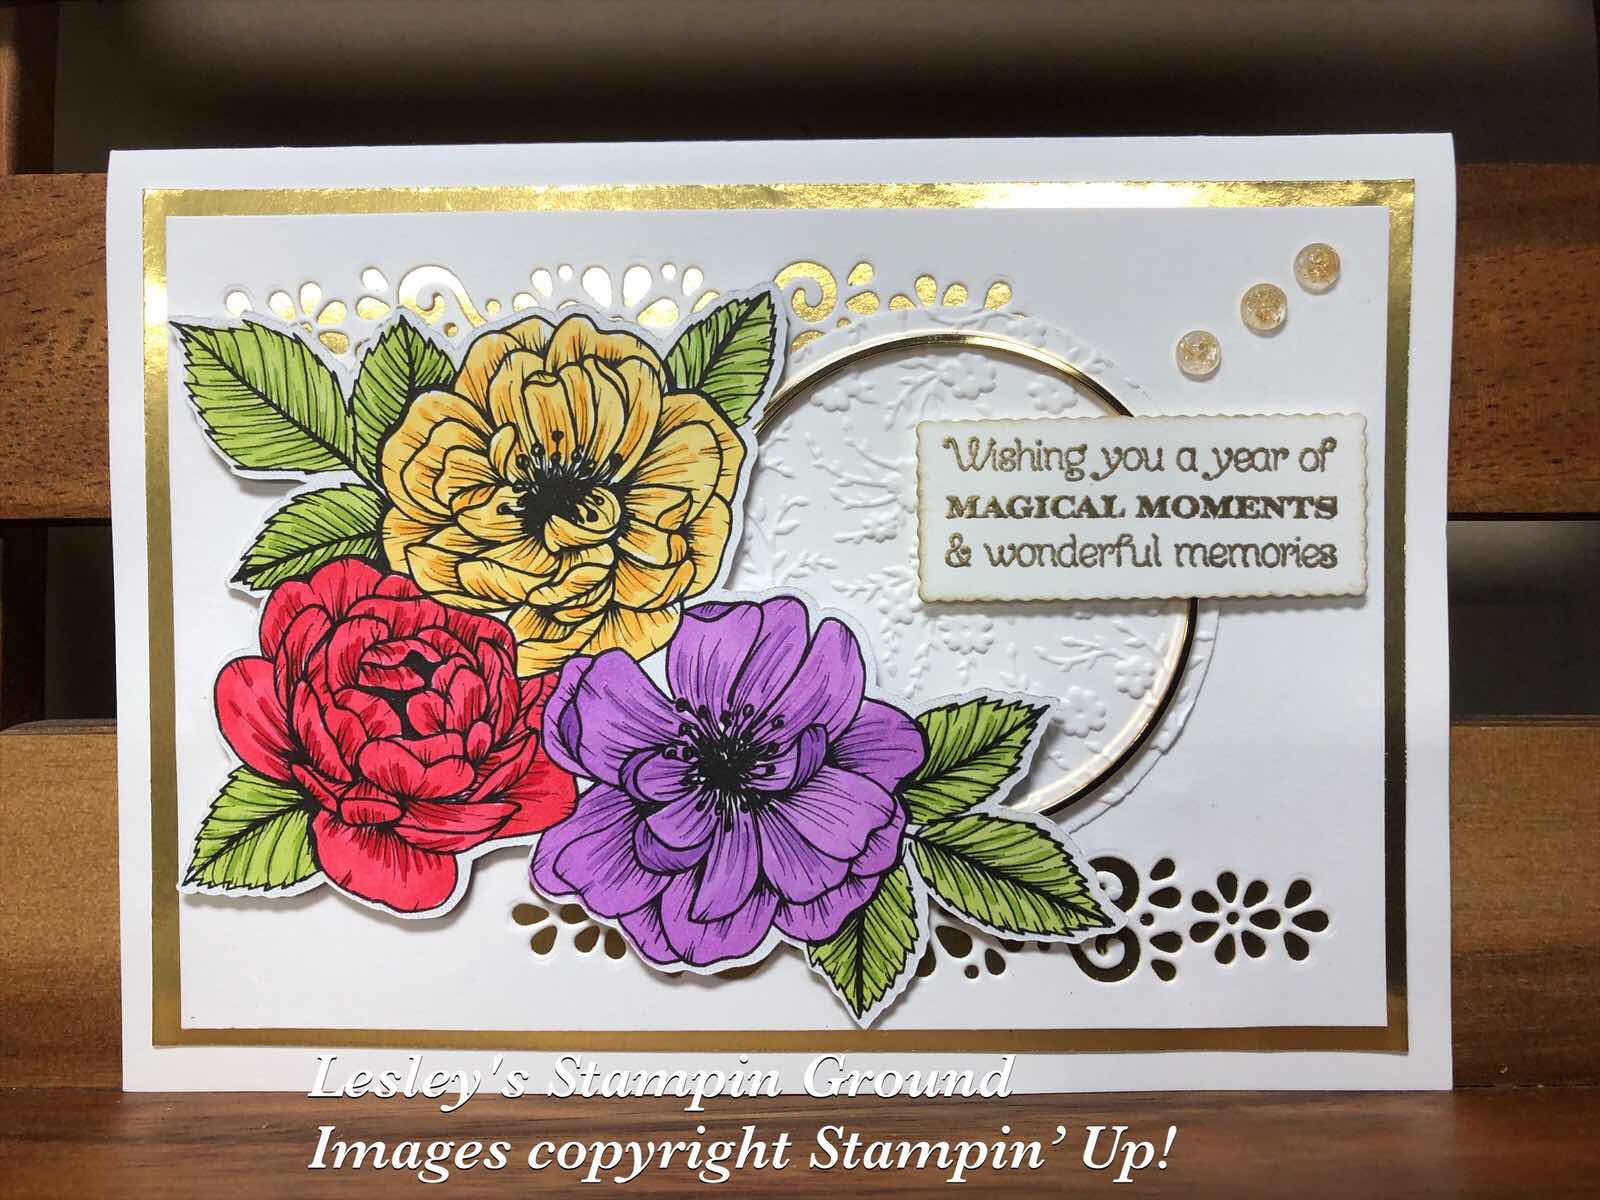
The base card is Basic White (#159228), with Gold Foil Sheet (#132622) as the next layer. I used one of the dies from the Ornate Layers Dies (#152726) to cut the detailed border at the top & bottom of the Basic White card front.
I cut a circle using a Layering Circles Die (#151770) and then dry embossed this with the Ornate Floral 3D Embossing Folder (#152725). I attached a Gold Hoop Embellishment (#152474) to the circle using Mini Glue Dots (#103683), making sure these would be under the flowers and sentiment so as not to be visible.
The sentiment is from the Many Messages stamp set (#154510) and cut with the Messages Die (#154422). This was stamped with VersaMark (#102283) and heat embossed with Gold Stampin’ Emboss Powder (#109129), and set with the Heat Tool (#129056). I lightly daubered the edge of the sentiment with Crumb Cake ink (#147116).
The flowers and sentiment were attached to the card with Stampin’ Dimensionals (#104430) and the card was completed by adding the (retired) Wonderful Gems.
Enjoy whatever you are doing today!!
“Love what you do and share what you love.”
Sunday, 14 March 2021
Art Gallery Bundle
Hi my friends,


Have a fantastic day!!
I like fancy fold cards and especially easy ones as this one is.
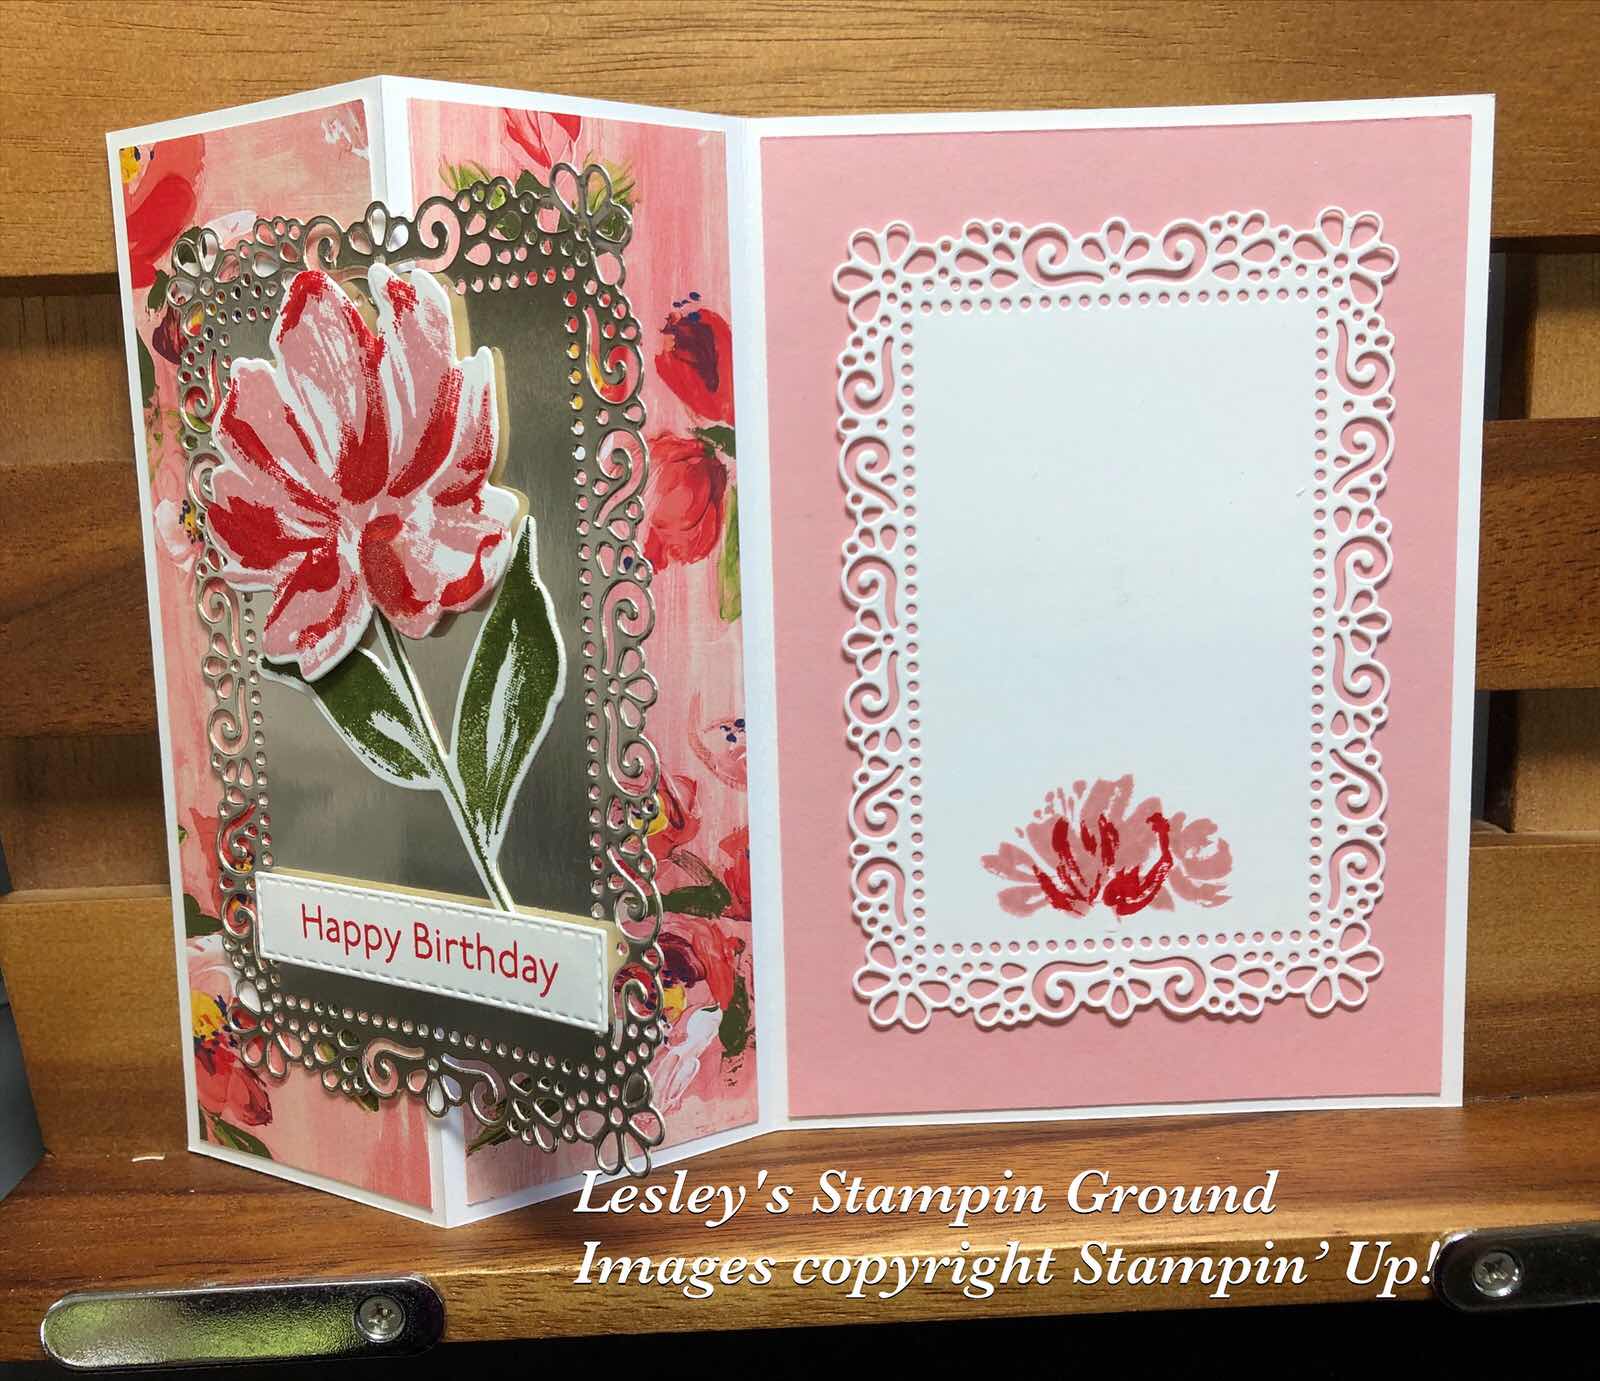
The card is a normal size card then I scored and folded the card front in half, bending it back towards the “spine”. I cut 2 pieces of Fine Art Floral Designer Series Paper (#154558) and placed them on the card as shown above. A piece of Blushing Bride card (#131287) was attached to the other side of the card.
I cut the Basic White card (#159228) and Silver Foil sheet (#132178) with the same Ornate Layers Die (#152726). The flower from the Art Gallery stamp set (#154421) was stamped with Blushing Bride ink (#147100) and Poppy Parade ink (#147050) onto the Basic White card. I attached the white card to the Blushing Bride card. Then with the front of the card folded, I placed the Silver Foil cut out in place, directly over the white card, making sure you only have adhesive on the left side of the cut out.
The flower and leaves on the front of the card are also from the Art Gallery stamp set using Blushing Bride ink & Poppy Parade ink for the flower and Mossy Meadow ink (#147111) for the leaves. The flower and leaves were cut with the Floral Gallery Dies (#154316). Happy Birthday is also from the Art Gallery stamp set using Poppy parade ink. I used a Stitched Rectangles die (#151820) to cut the sentiment. The sentiment was attached with Mini Stampin’ Dimensionals (#144108) and the flower with Stampin’ Dimensionals (#104430).
“Love what you do and share what you love.”
Monday, 15 February 2021
Forever & Always
Hello again,

I guess I should have made this card yesterday for Valentine’s Day but there is no reason why you couldn’t give it to that special person anytime.
The base card is Basic White (#159228). I dry embossed another piece of Basic White using one of the Meadow Moments Embossing Folders (#153126) and sponged the edges with Rococo Rose ink (#150080), then attached this to the base card. I also dry embossed a piece of the Rococo Rose from Love You Always Foil Sheet (#154286). I cut another piece of Basic White card with a die from the Ornate Layers Dies (#152726). The Love You Always Specialty Designer Series Paper (#154280) was also cut with a die from the Ornate Layers, and attached to the White die cut.
The flowers are from the Forever & Always stamp set (#154343) and stamped with Tuxedo Black Memento ink (#132708). These were coloured with Rococo Rose Stampin’ Blends (#154900). The flowers and “love” were cut with Always Dies (#154307). I had attached Adhesive Sheet (#152334) to the back of the Basic Black card (#121688) before cutting “love” with the die. The larger flower was attached to the card with Stampin’ Dimensionals (#104430). I brushed the Clear Wink of Stella Glitter (#141897) over the flowers.
I hope your day has been great!!
“Love what you do and share what you love.”
Tuesday, 19 January 2021
Hey Girlfriend
Hello friends,

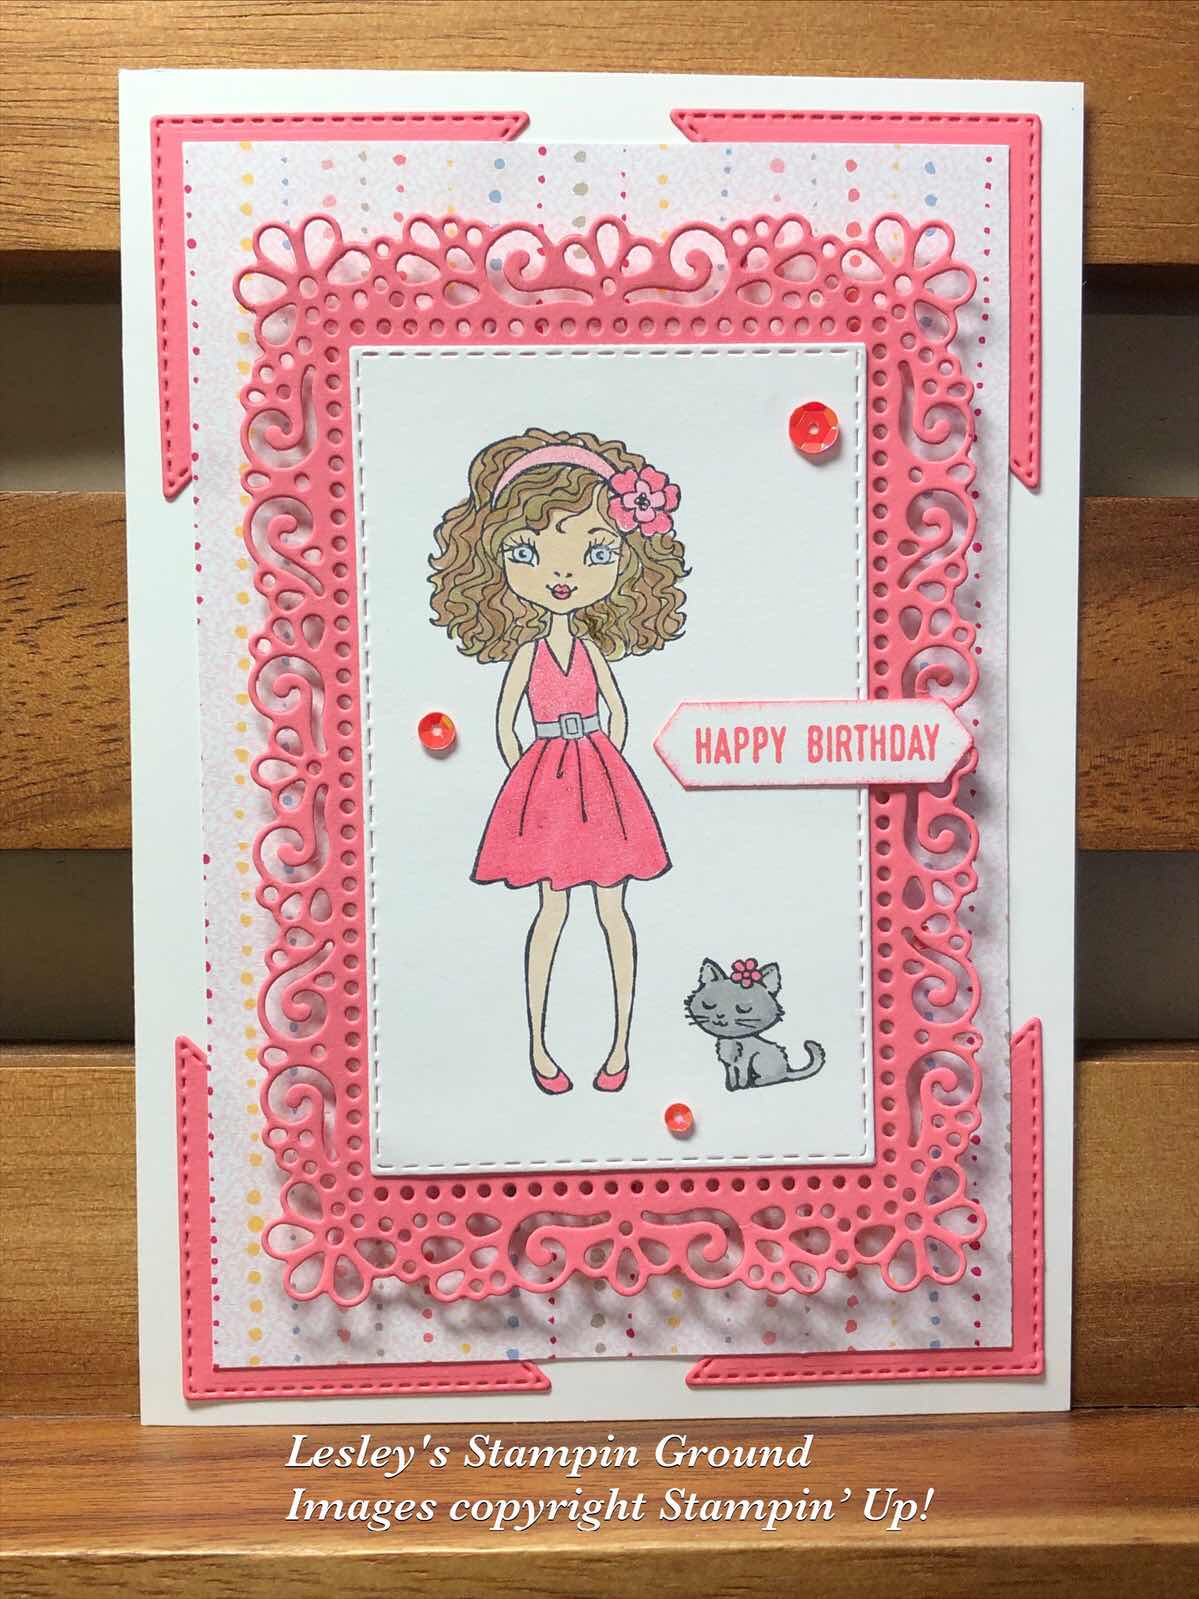
The girls from the Hey Girlfriend stamp set (#154516) are so cute and I have used one of them on this card.
I stamped the girl and cute little cat with Tuxedo Black Memento ink (#132708) onto Basic White card (#159228). These were then coloured with the Stampin’ Blends with the following colours - Flirty Flamingo (#154884), Ivory & Bronze (#154922), Crumb Cake (#154882), Seaside Spray (#154901) and Smokey Slate (#154904). I also used the Clear Wink Of Stella Glitter Brush (#141897) on the dress, headband, lips and shoes. I used the Stitched Rectangles Dies (#151820) to cut this White card. This was attached to the Flirty Flamingo card (#141421) which I cut with the Ornate Layers Dies (#152726). Stampin’ Dimensionals (104430) were used to attach the Flirty Flamingo card to the DSP.
I cut the triangles using the Stitched Triangles Dies (#152710) and attached these to the corners of the Sand & Sea Designer Series Paper (#154288) then attached this to the Basic White base card.
“Happy Birthday” is from the Itty Bitty Greetings Stamp Set (#151331) and stamped with Flirty Flamingo ink (#147052). This was punched with the Classic Label punch (#141491). The Woven Threads Sequin Assortment embellishments (#149498) were glued to the card using the Fine-Tip Glue Pen (#138309).
Have a great day!!
“Love what you do and share what you love.”
Wednesday, 9 December 2020
Poinsettia Place designer Series Paper
Hello,

If you are needing a card at the last minute this is a very easy one.
The base card is Garden Green (#108605) and the DSP is from the beautiful Poinsettia Place Designer Series Paper (#153487). I cut a piece of the Copper Foil Sheet (#142020) and the Whisper White card (#106549) for the sentiment using the Ornate Layers Dies (#152726). I stamped “Merry Christmas” from the Poinsettia Petals stamp set (#153475) using Garden Green ink (#147089). I attached the copper foil cut out to the card with Stampin’ Dimensionals (#104435).
Well that was easy wasn’t it!
Don’t forget that there are many products retiring from the current Mini catalogue to make way for the new Mini catalogue which will be available from 5th January. Many of the retiring products are discounted and are only available while stocks last so don’t delay in placing an order today.
Here is the list of retiring products-
Have a fantastic day!
“Love what you do and share what you love”.
Monday, 7 December 2020
Ornate Layers Dies
Hello friends,

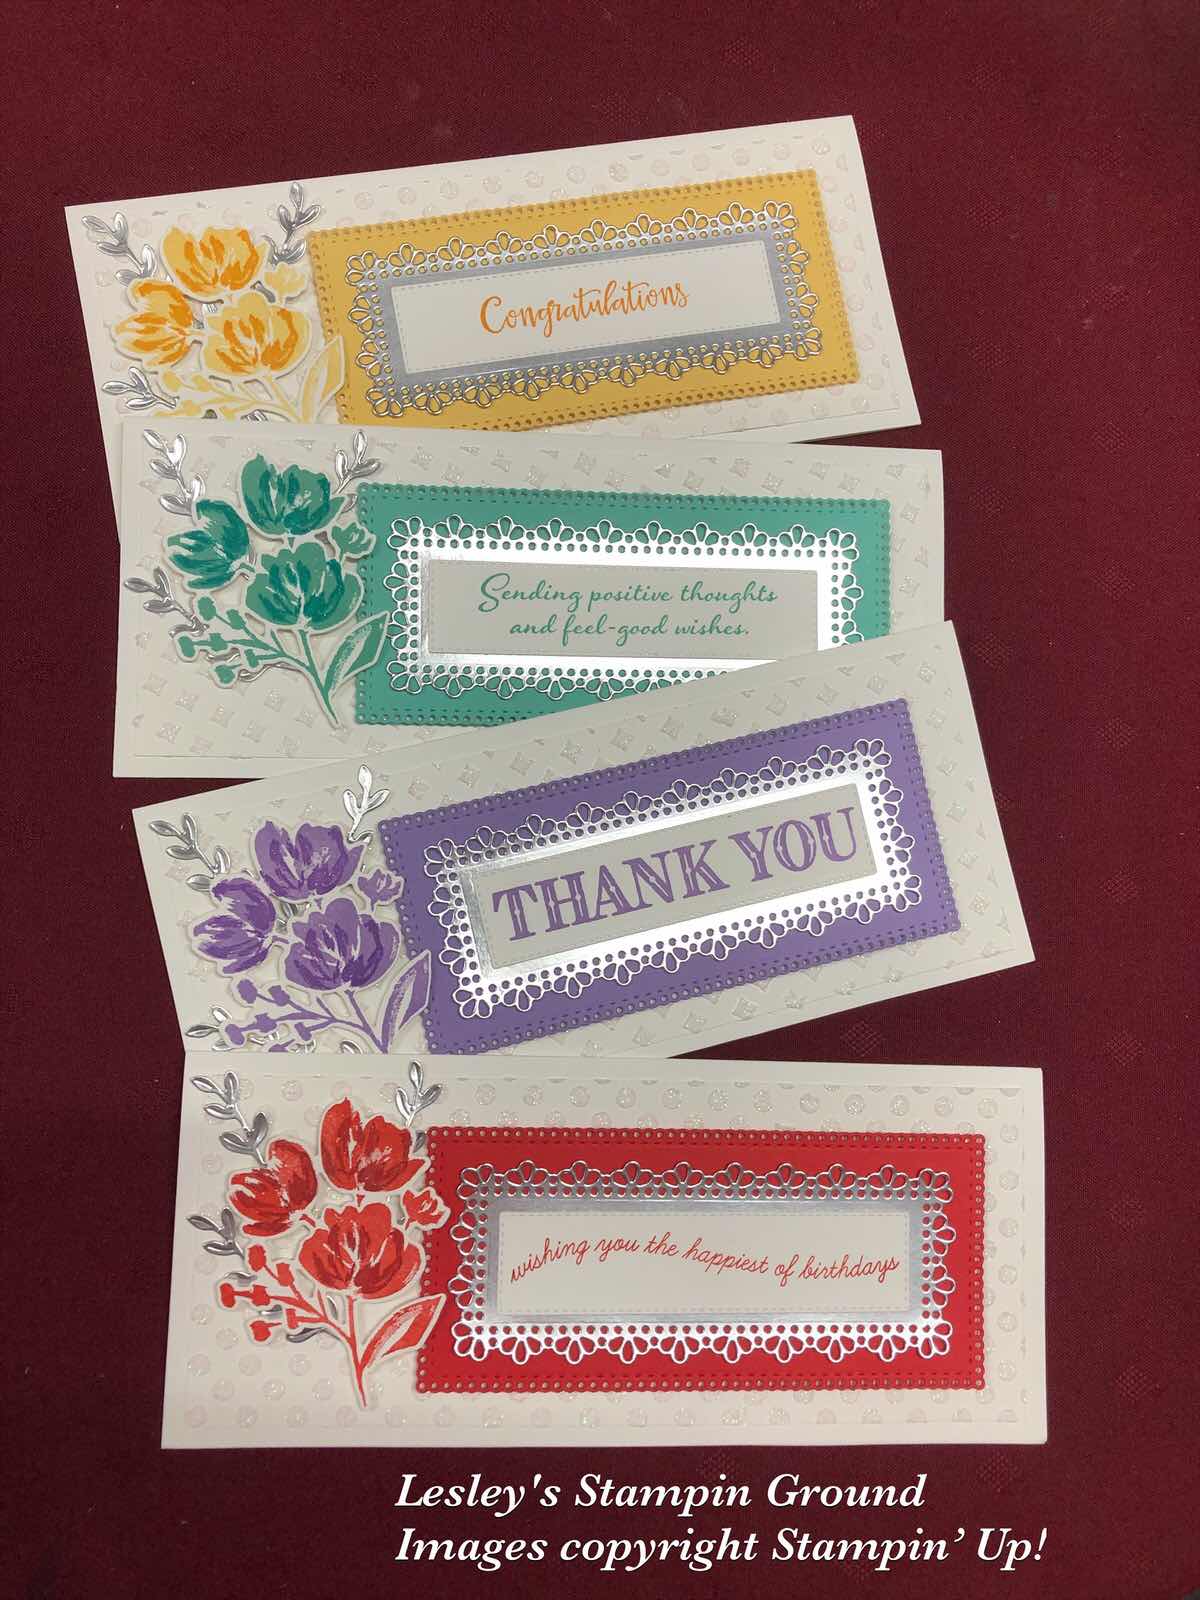
Today I have made 4 cards all the same, just using different colours and sentiments. I love how this worked with a slimline card.
The Whisper White base cards (#106549) were cut at 21cmx18cm and scored at 9cm.
I applied the Shimmery White Embossing Paste (#145645) to the card fronts using Decorative Masks (#150697) and a Palette Knife (#142808)
The flowers were stamped with the floral image from the Art Gallery stamp set (#154421). This is a Two-Step stamp, so I stamped the lighter image for the base of the flowers and the darker colour on top, then cut them with a co-odinating die from the Floral Gallery Dies (#154316). These are available as the Art Gallery bundle (#156227) and will be available from 5th January.
I used the Ornate Layers dies (#152726) to cut the coloured card, the Silver Foil (#132178) and the sentiment.
The colours I have used for the top card are So Saffron ink (#147109) and Mango Melody ink (#147093) with So Saffron card (#108611).
The next card is Coastal Cabana ink (#147097) and Bermuda Bay ink (#147096) with Coastal Cabana card (#131302)
The 3rd card is Highland Heather ink (#147103) and Gorgeous Grape ink (#147099) with Highland Heather card (#147010).
The 4th card is Poppy Parade ink (#147050) and Cherry Cobbler ink (#147083) with Poppy Parade card (#121694).
“Congratulations” is from the Peaceful Moments stamp set (#151595).
“Sending Positive Thoughts” is from the Positive Thoughts stamp set (#151490).
“Thank You” is from the Ornate Thanks stamp set (#149471).“Wishing you the Happiest of Birthdays” is from the Quite curvy stamp set (#154430).
The Silver Foil leaves are cut with a Curvy Die (#154319). I used the Adhesive sheet (#152334) on the back of the foil before cutting the leaves and I used Stampin’ Dimensionals (#104430) and Mini Stampin’ Dimensionals (#144108) to attach the sentiment and flowers to the card.
I hope your day has been amazing!!
“Love what you do and share what you love.”
Monday, 30 November 2020
Boho Indigo
Hi ladies & guys,


The Pearl Basic Jewels (#144219) were added to the flower centres and also the flowers on the vase.

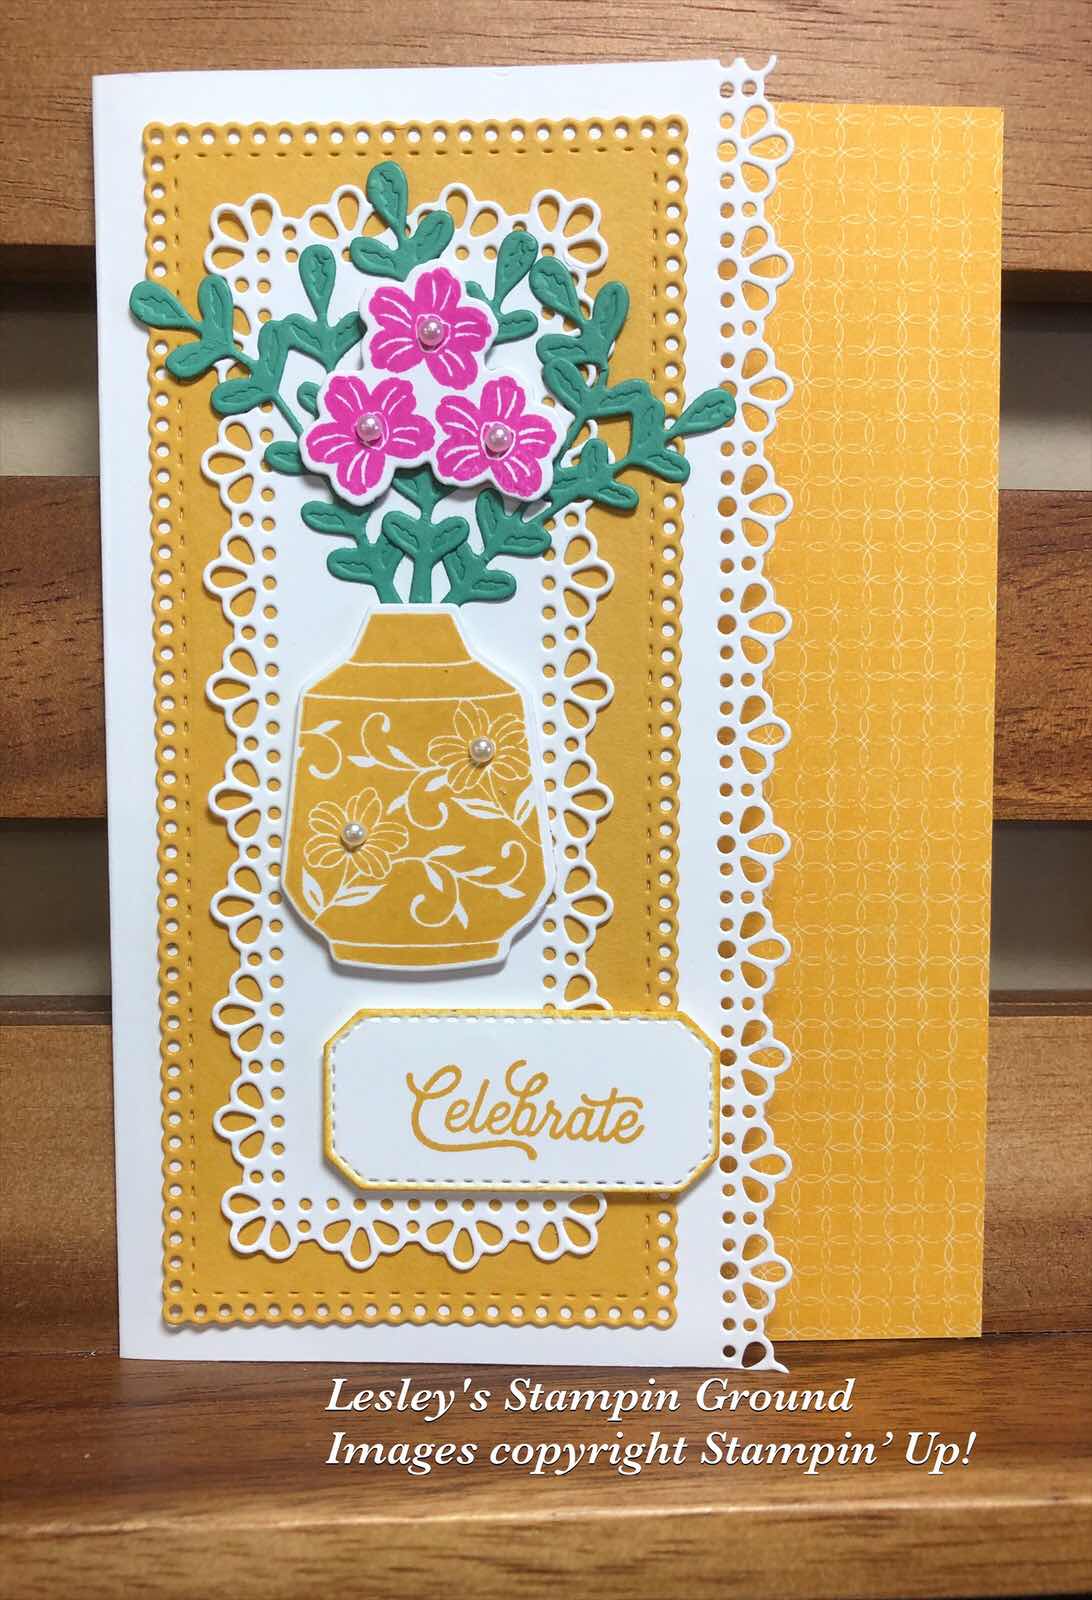
Did you realise that one of Ornate Border Dies (#152724) matches with the Ornate Layers Dies (#152726)? I love when so many products co-ordinate. I have used both on this card.
I cut a piece from the right side of the Whisper White card front (#106549) using a die from the Ornate Borders Dies giving the lovely scalloped detail down the edge of the card. Then I cut the Bumblebee card (#153082) and another piece of Whisper White card with the Ornate Layers Dies. These were attached to the card front.
The vase and flowers are stamped with images from the stamp set which is included in the Boho Indigo Product Medley (#153132). The vase was stamped with Bumblebee ink (#153116) and the flowers with Magenta Madness ink (#153117). The leaves, vase and flowers are all cut with the dies from the Boho Indigo Product Medley dies. The leaves are Just Jade card (#153084) which had Adhesive Sheet (#152334) adhered to the back before cutting.
The sentiment is from the Many Mates stamp set (#152633) and stamped with Bumblebee ink. The die to cut the sentiment is from the Hippo & Friends dies (#153585). The vase, flowers and sentiment were attached with Stampin’ Dimensionals (#104430).
I attached a piece of the Flowers For Every Season 6”x6” Designer Series Paper (#152486) to the card as shown below.
The Pearl Basic Jewels (#144219) were added to the flower centres and also the flowers on the vase.
Have a great day!
“Love what you do and share what you love.”
Monday, 19 October 2020
Ornate Layers Dies
Hi & welcome,

The Ornate Layers Dies (#152726) have been used for these beautiful ornate die cuts on this card.
The cut out on the Very Vanilla card (#106550) was done twice along the bottom of the card front. I attached a piece of the Red Foil from the Red & Green Foil Sheets (#153510) to the Very Vanilla base card, then attached the card front on top. The Brushed Metallic 12”x12” cardstock was cut with another die from the Ornate Layers.
“Merry Christmas” from the Poinsettia Petals stamp set (#p153475) was stamped with Real Red ink (#147084) and cut with another die from the Ornate Layers dies. The sentiment was attached to the Brushed Metallic card, then attached to the card with Stampin’ Dimensionals (#104430). The poinsettia from the Poinsettia Petals Designer Series Paper (#153487) was cut with a co-ordinating die from the Poinsettia Dies (#153522) and also attached with Dimensionals. Isn’t it great when there are co-ordinating dies to cut images from Designer Paper. I coloured some Pearl Basic Jewels (#144219) using a Dark Daffodil Delight Stampin’ Blend (#154883) and attached them to the flower.
As usual I couldn’t resist adding some sparkle on the poinsettia using the Clear Wink Of Stella Brush (#141897).
Enjoy your day!!
Subscribe to:
Posts (Atom)