Showing posts with label #delicatedahliasstampset. Show all posts

Tuesday, 14 September 2021

Delicate Dahlias & Be Dazzling

Hi my friends,

I am using 2 Sale-a-bration products again today on this card, which are the Delicate Dahlias stamp set (#156601) and the Be Dazzling Specialty Paper (#156629).


Basic White card (#159228) is used for the base, card front and to stamp the flower, leaves and sentiment.

The flower from the Delicate Dahlias stamp set was stamped with Polished Pink ink (#155712) and the leaves are stamped with Soft Succulent ink (#155778). The flower and the leaves were all fussy cut. Happy Birthday from the Artistically Inked stamp set (#154542) was also stamped with Polished Pink ink, then cut with the label die from the Blooms dies (#155989).

I dry embossed a piece of white card with the Dotty Hearts Embossing Folder (#155434). I attached a strip of the Be Dazzling Specialty Paper to the embossed card then attached this to the card front. The edges of the card front were daubered with Polished Pink ink and attached to the base card.

The flower was attached with Stampin’ Dimensionals (#104430) and the leaves with Mini Glue Dots (#103683). Dimensionals were also used to attach the sentiment and I added the From The Heart Faceted Gems (#151154) to the card.


“Love what you do and share what you love.”

Stay safe & keep crafting!!


Monday, 13 September 2021

Sale-a-bration Products

Hello friends,

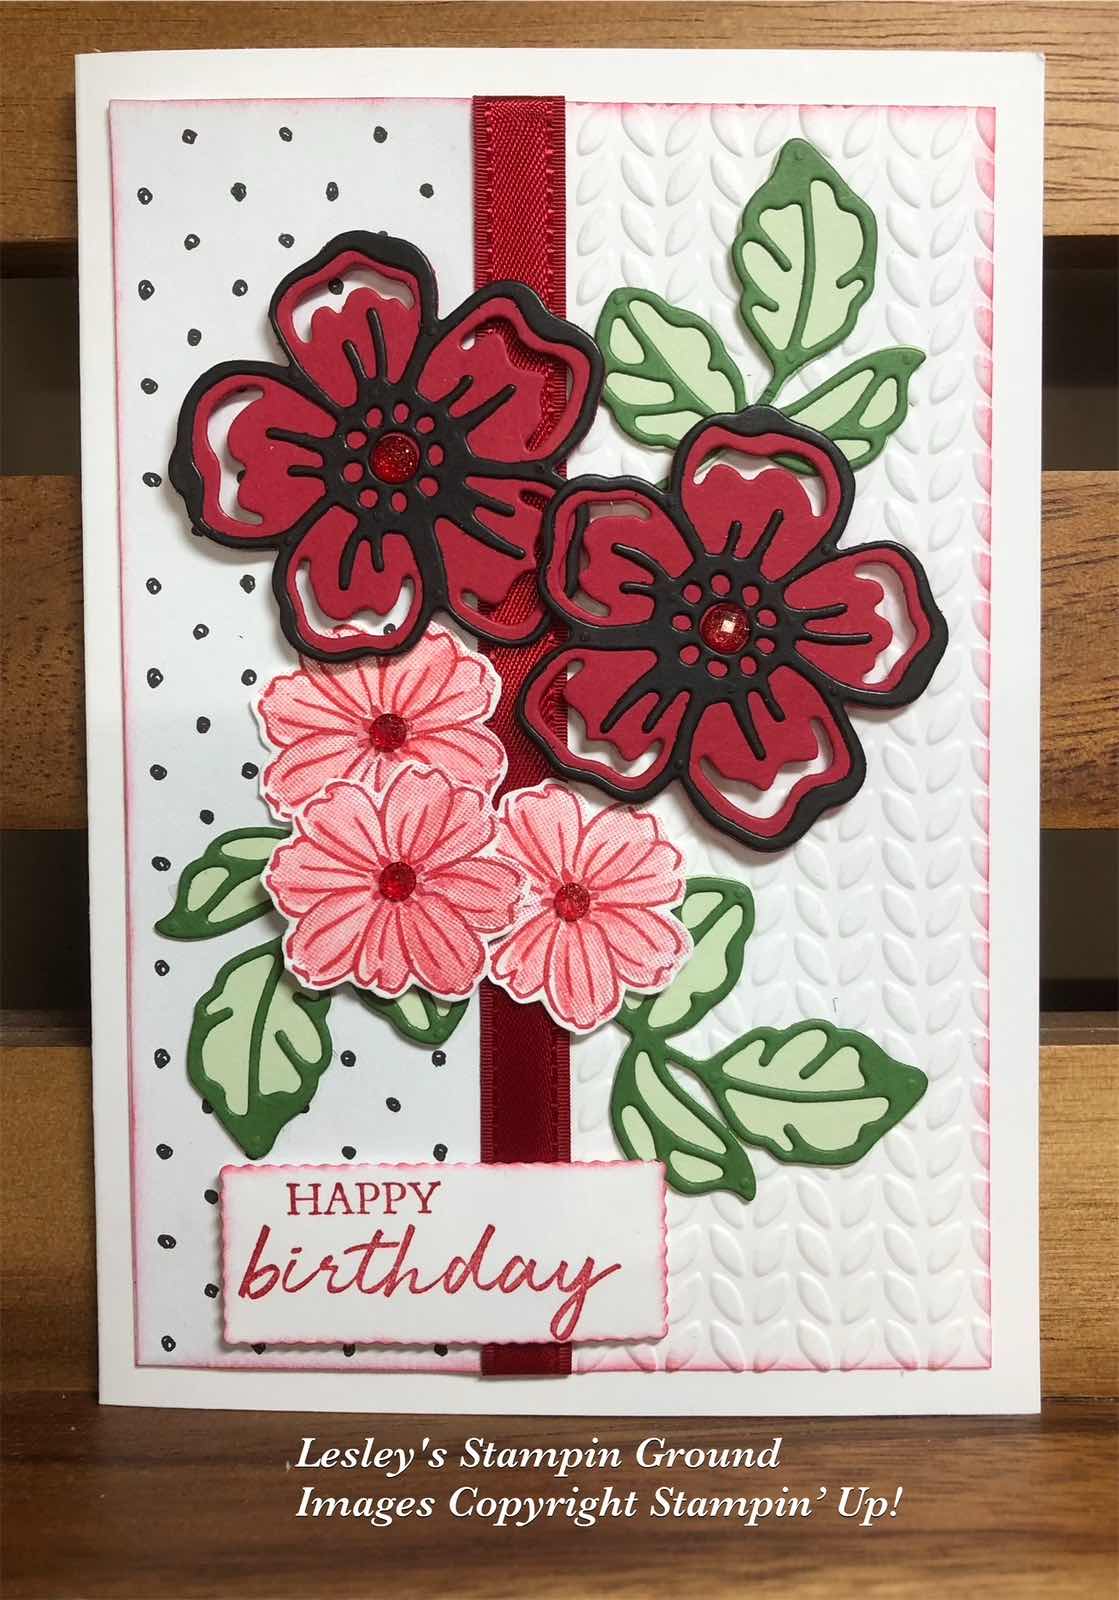
We all love free products and I have used 3 different sale-a-bration products on this card.


The Sale-a-bration products used are the Beautifully Penned 12”x12” Designer Series Paper (#156630), Summer Shadows Dies (#156618) and the Delicate Dahlias stamp set (#156601).

I dry embossed the Basic White card front (#159228) with one of the Greenery Embossing Folders (#152716). I then attached the piece of the Beautifully Penned DSP to the card front. I wrapped the Real Red Double Stitched Satin Ribbon (#151155) around the card front.

The 2 large flowers were cut with the Summer Shadows Dies using Real Red card (#106578) and Basic Black card (#121688). The Basic Black card was backed with Adhesive Sheets (#152334) before cutting. The leaves were also cut with dies from the same set and cut from Garden Green card (#108605) and Soft Sea Foam card (#147012). There was Adhesive sheets on the back of the Garden green card.

The small flowers are from the Delicate Dahlias stamp set. The outline of the flowers were stamped with Real Red ink (#147084) and the inside of the flower was “stamped off” with Real Red ink. I fussy cut these flowers.

The leaves and 2 of the small flowers were taped to the card and I used Stampin’ Dimensionals (#104430) to attach the other flowers.

“Happy Birthday” is from the Shaded Summer stamp set (#155783) which co-ordinates with the Summer Shadows dies. I stamped the sentiment with Real Red ink and this was cut with the Messages die (#154422). The edges were daubered with Real Red ink, the attached to the card with Dimensionals.

I added the Red Wonderful Gems (#153536) to the centre of the flowers.

Don’t miss out on your Sale-a-bration products. It ends on 30th September.

Love what you do and share what you love.”

Stay safe & keep crafting!!


Wednesday, 25 August 2021

Delicate Dahlias

Hi again my friends,

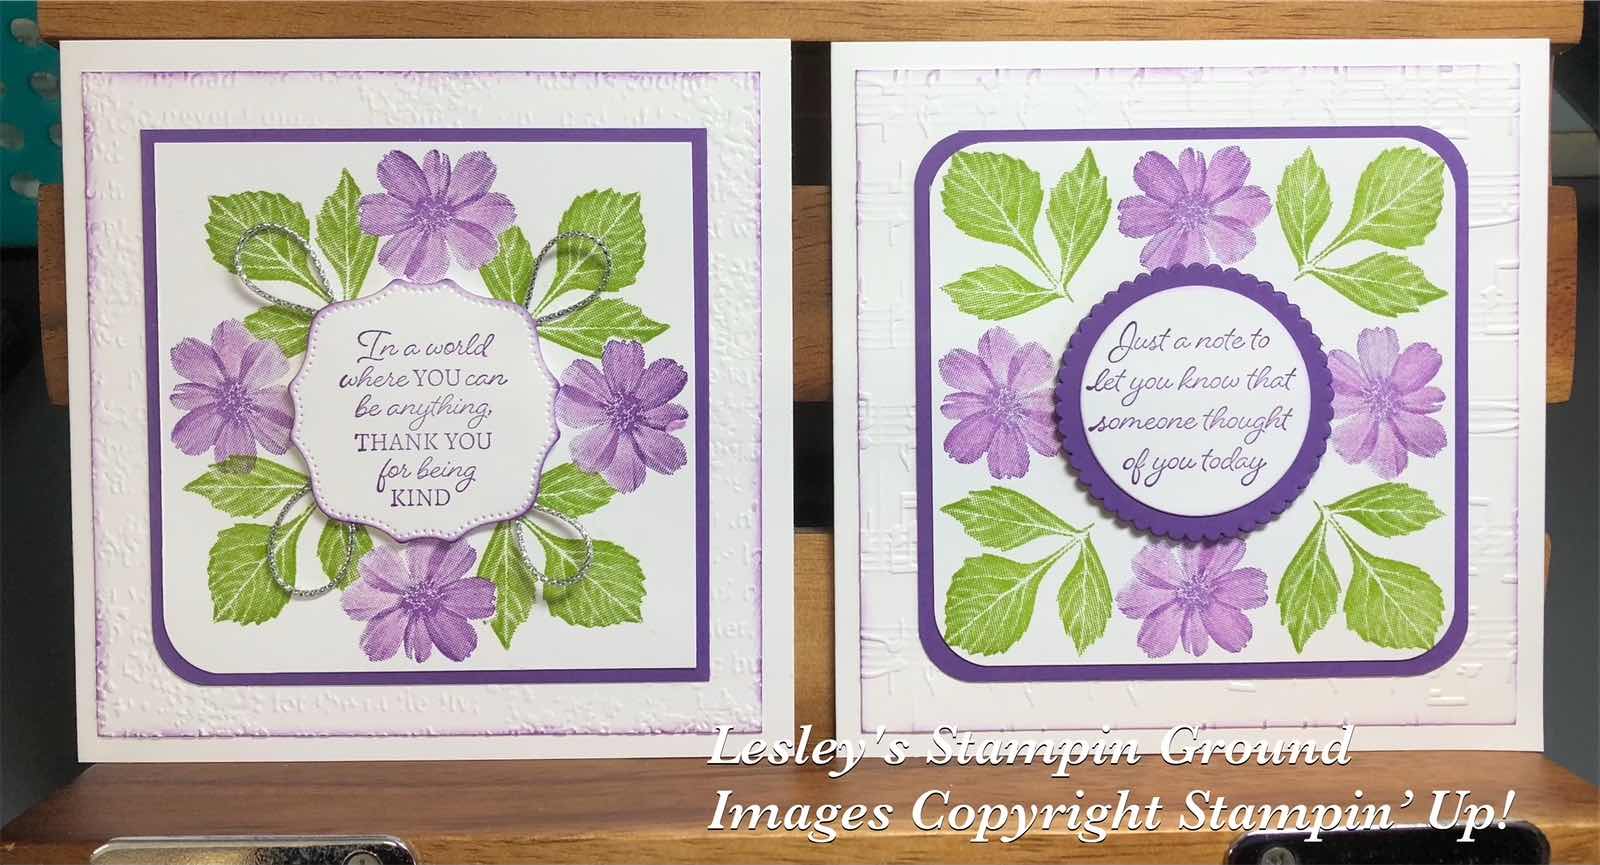
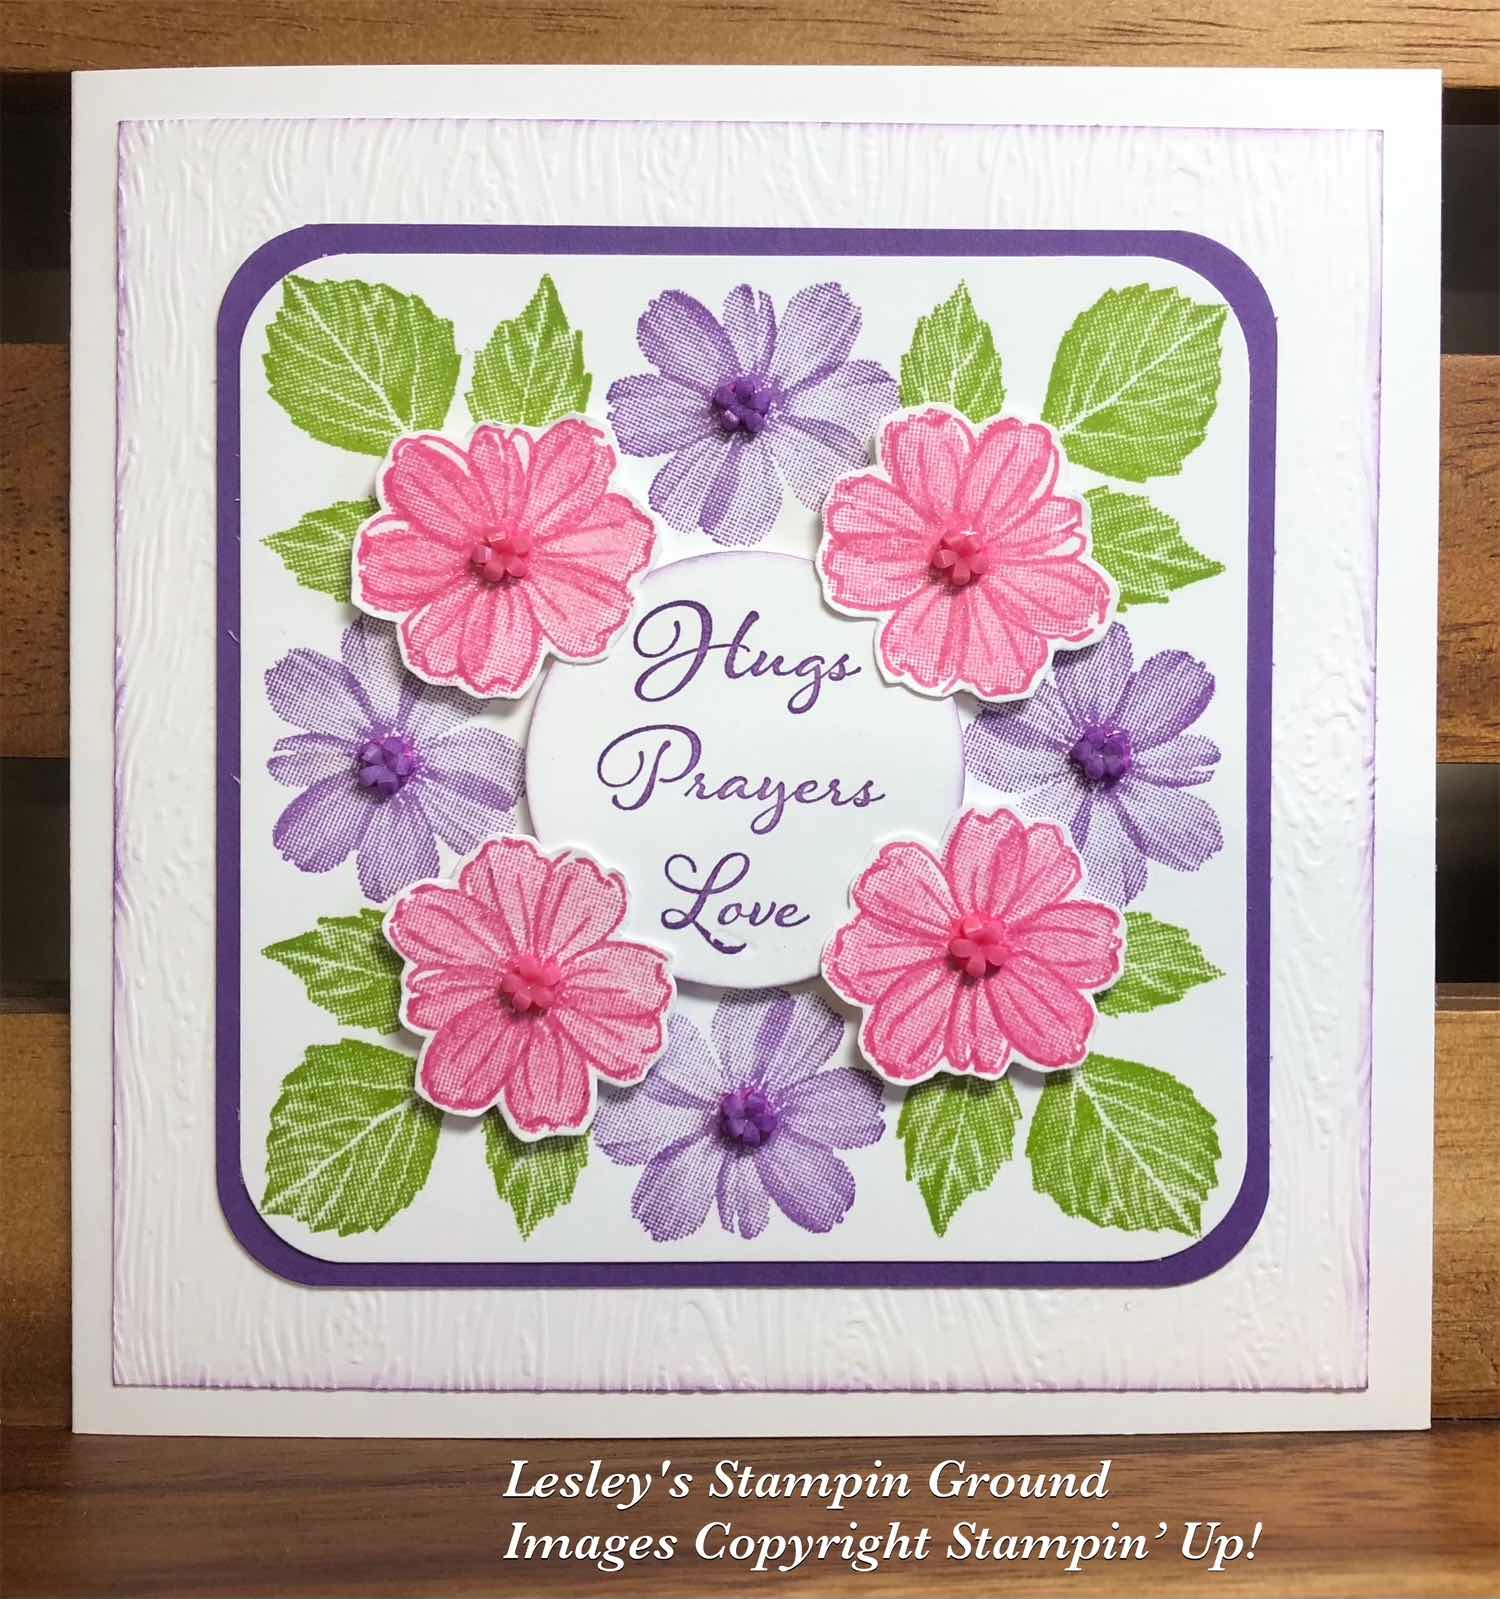
I love the large dahlia in the Delicate Dahlias stamp set (#156601) but I also love the small flower in this Sale-a-bration set. I have made 3 variations of this card today using the small flower and leaves.


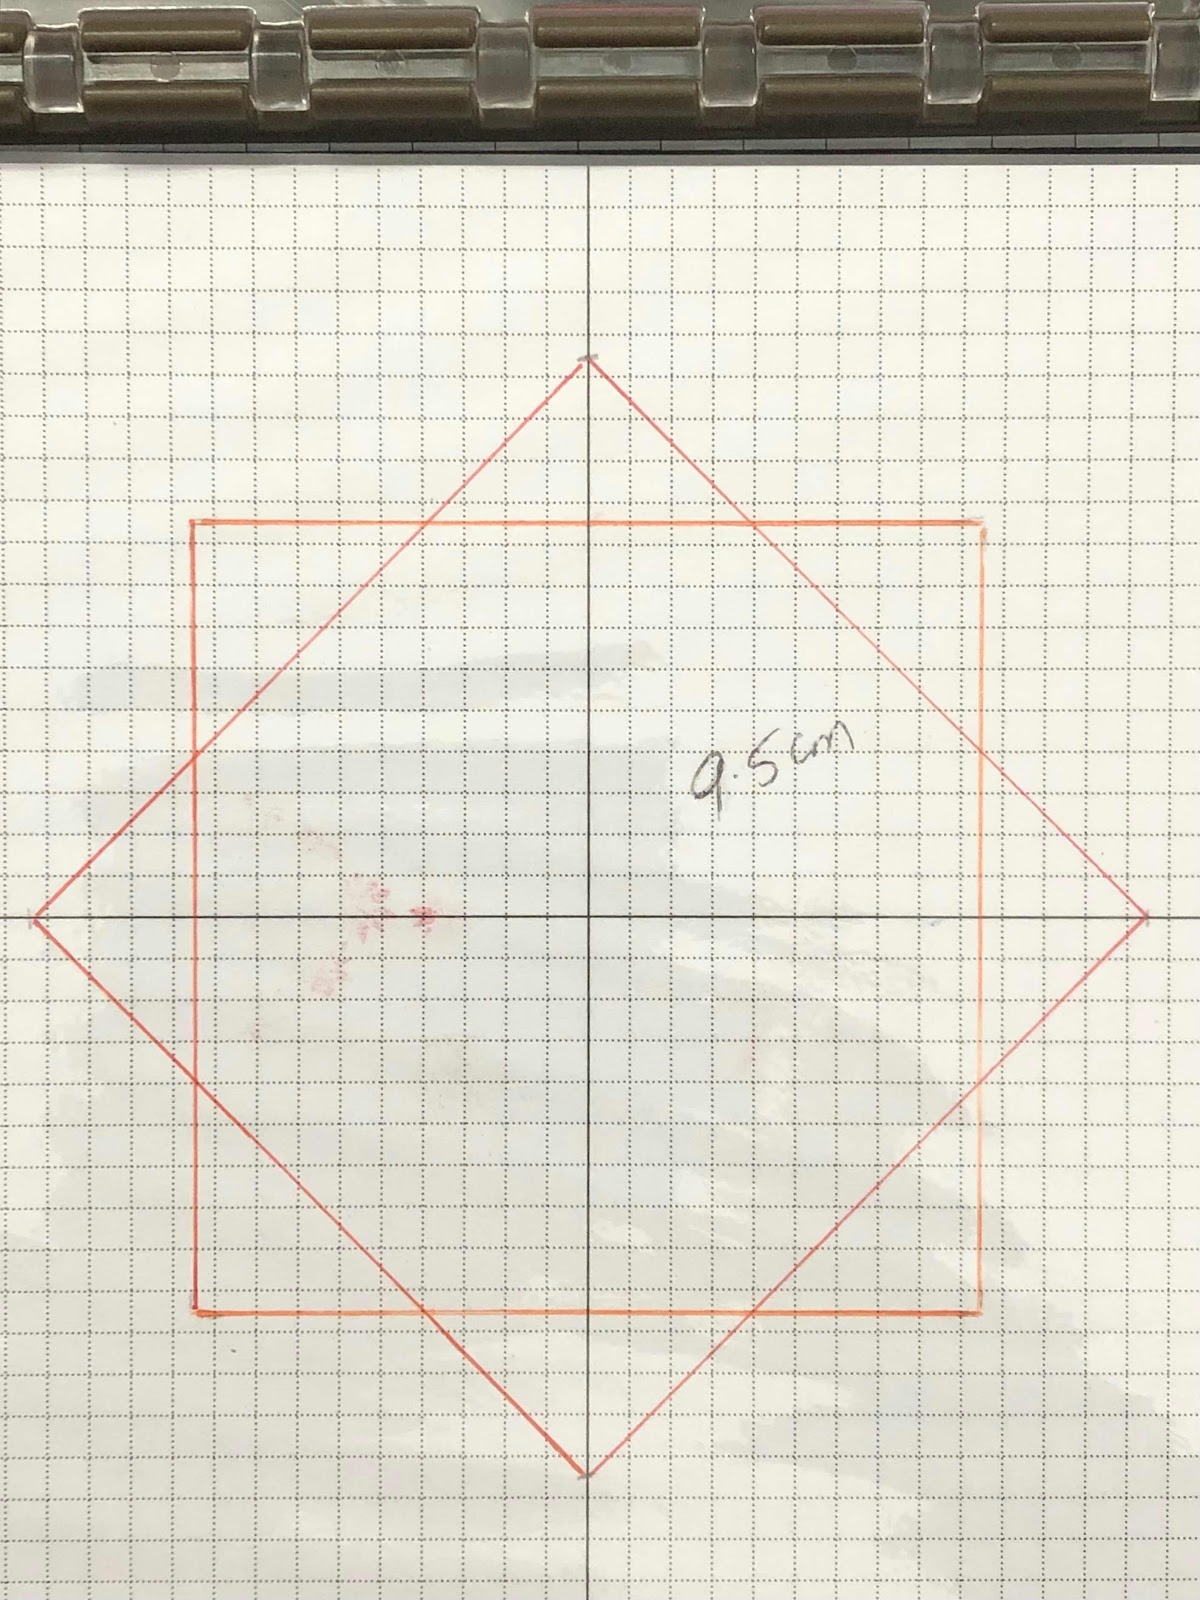
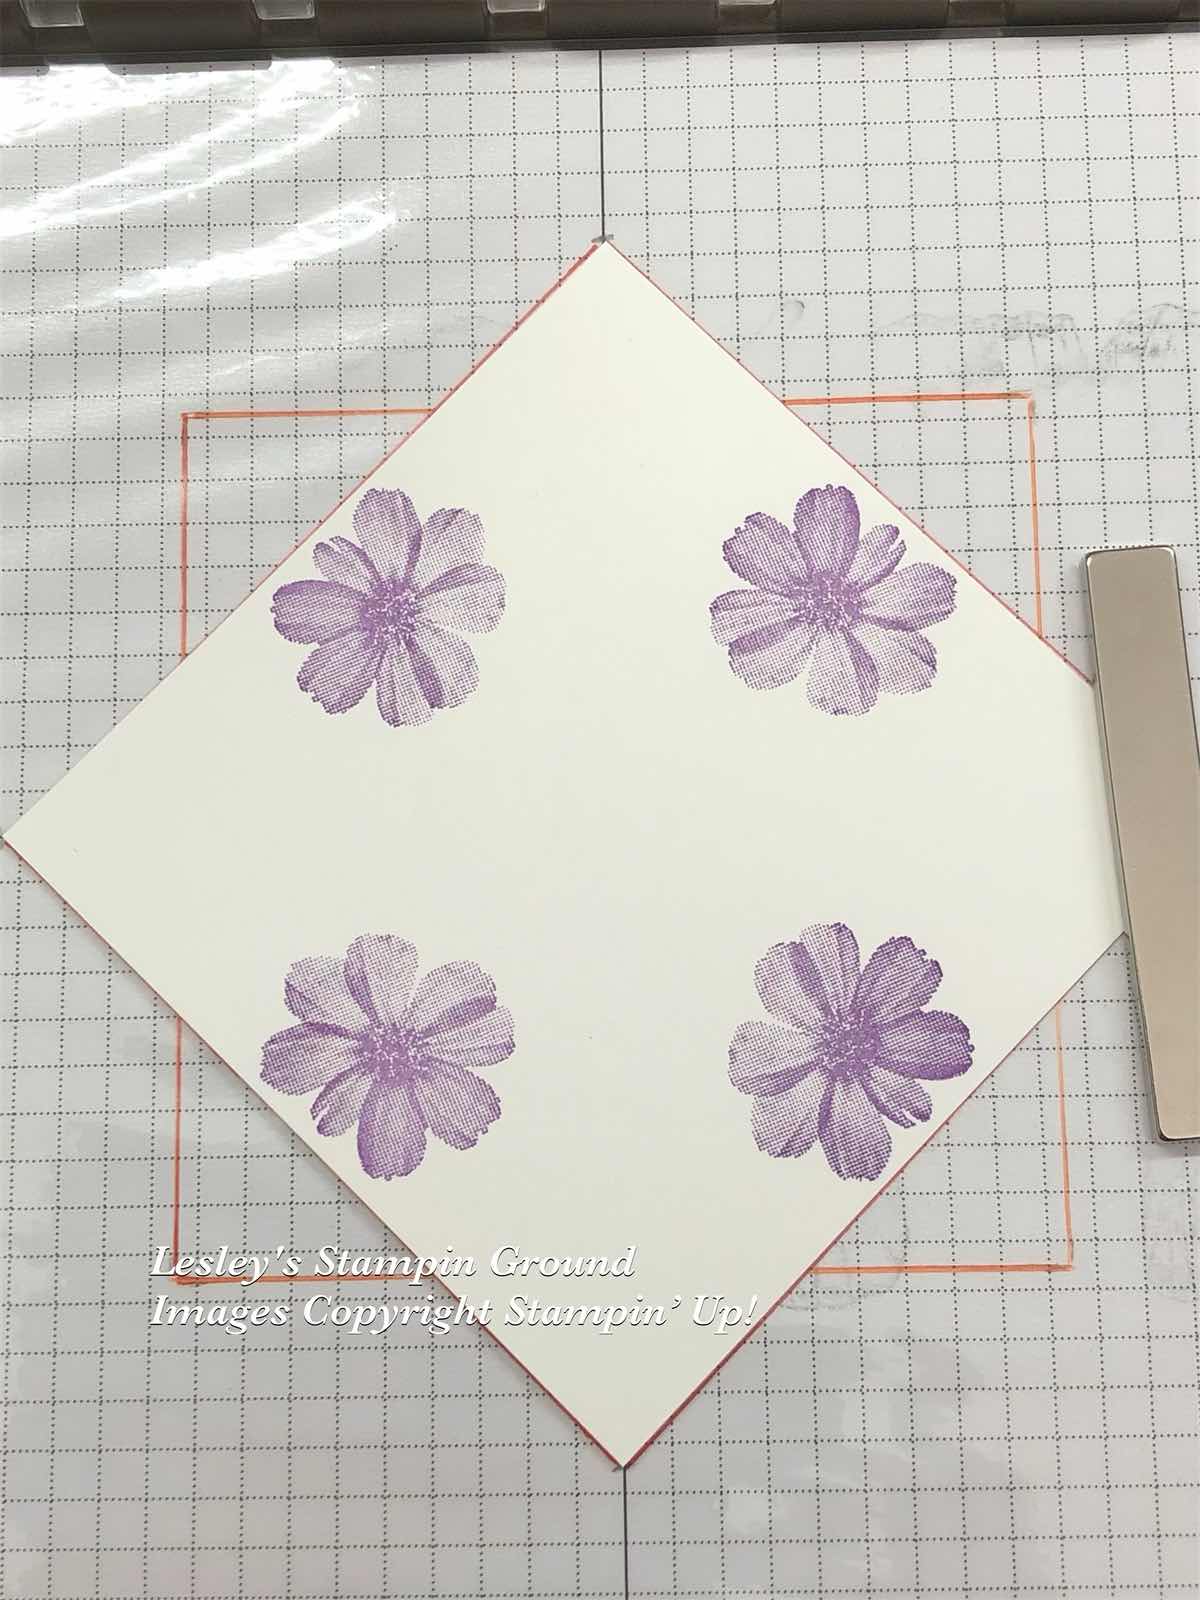
I stamped the flowers and leaves using the Stamparatus (#148187) as shown below. I marked out a 9.5cm square and diamond on a piece of grid paper and used  a piece of Basic White card (#159228) 9.5cm x 9.5cm.


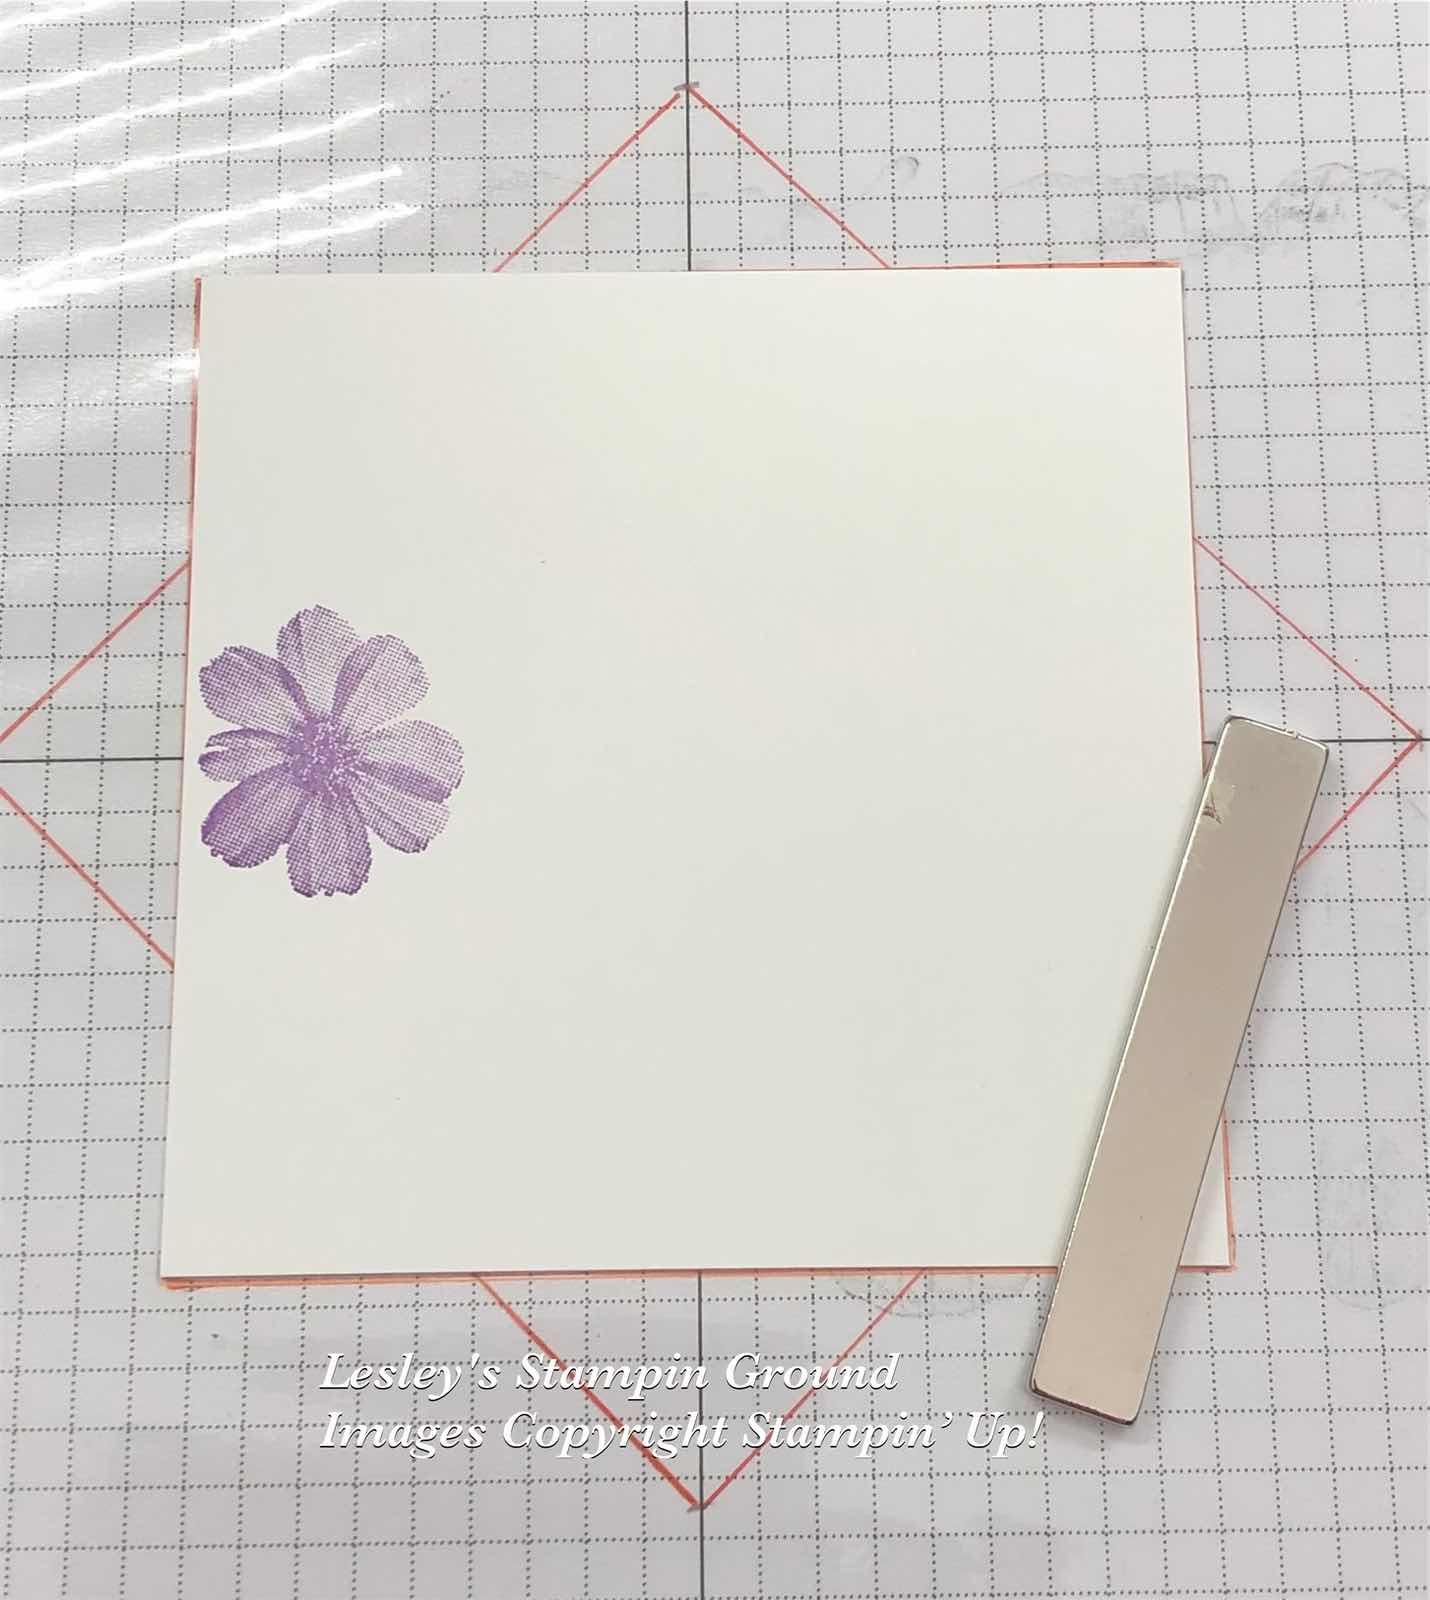
I placed the card onto the square with the grid paper on the Stamparatus and stamped the first flower with Gorgeous Grape ink (#147099).


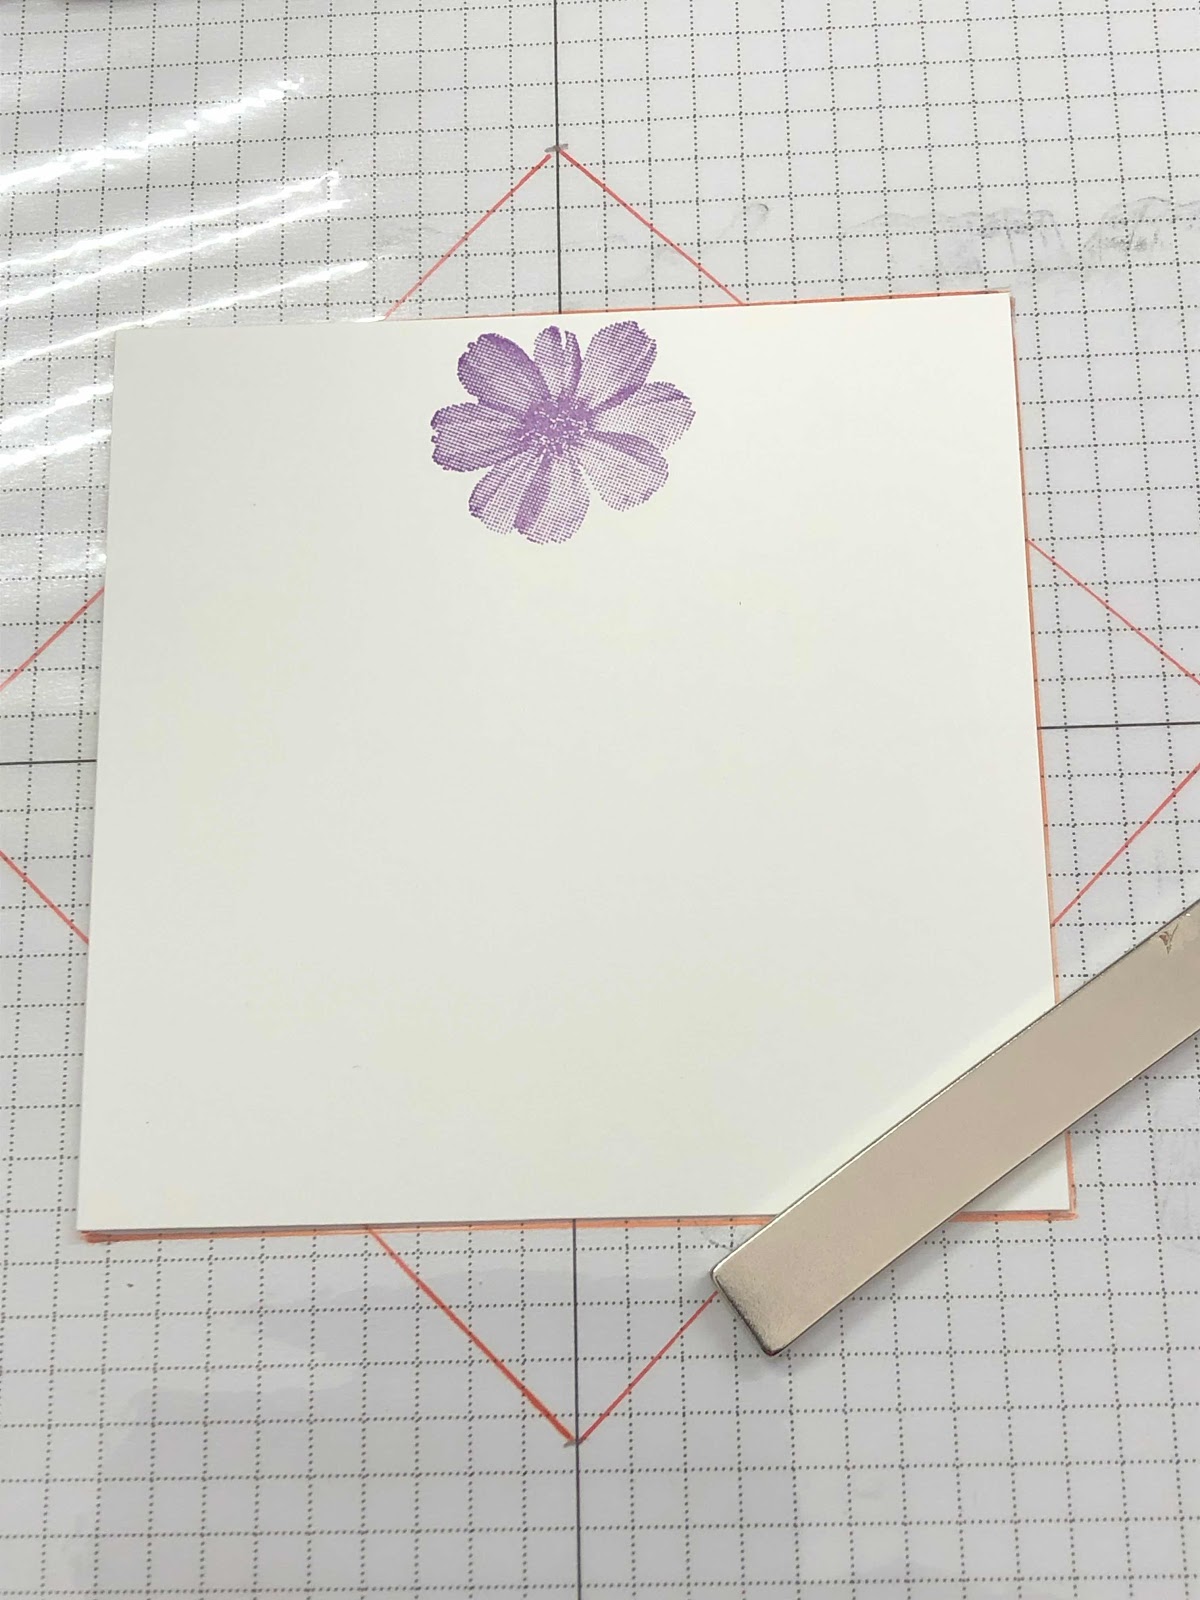
I turned the paper as shown below and stamped the 2nd flower. I repeated this till I stamped 4 flowers.


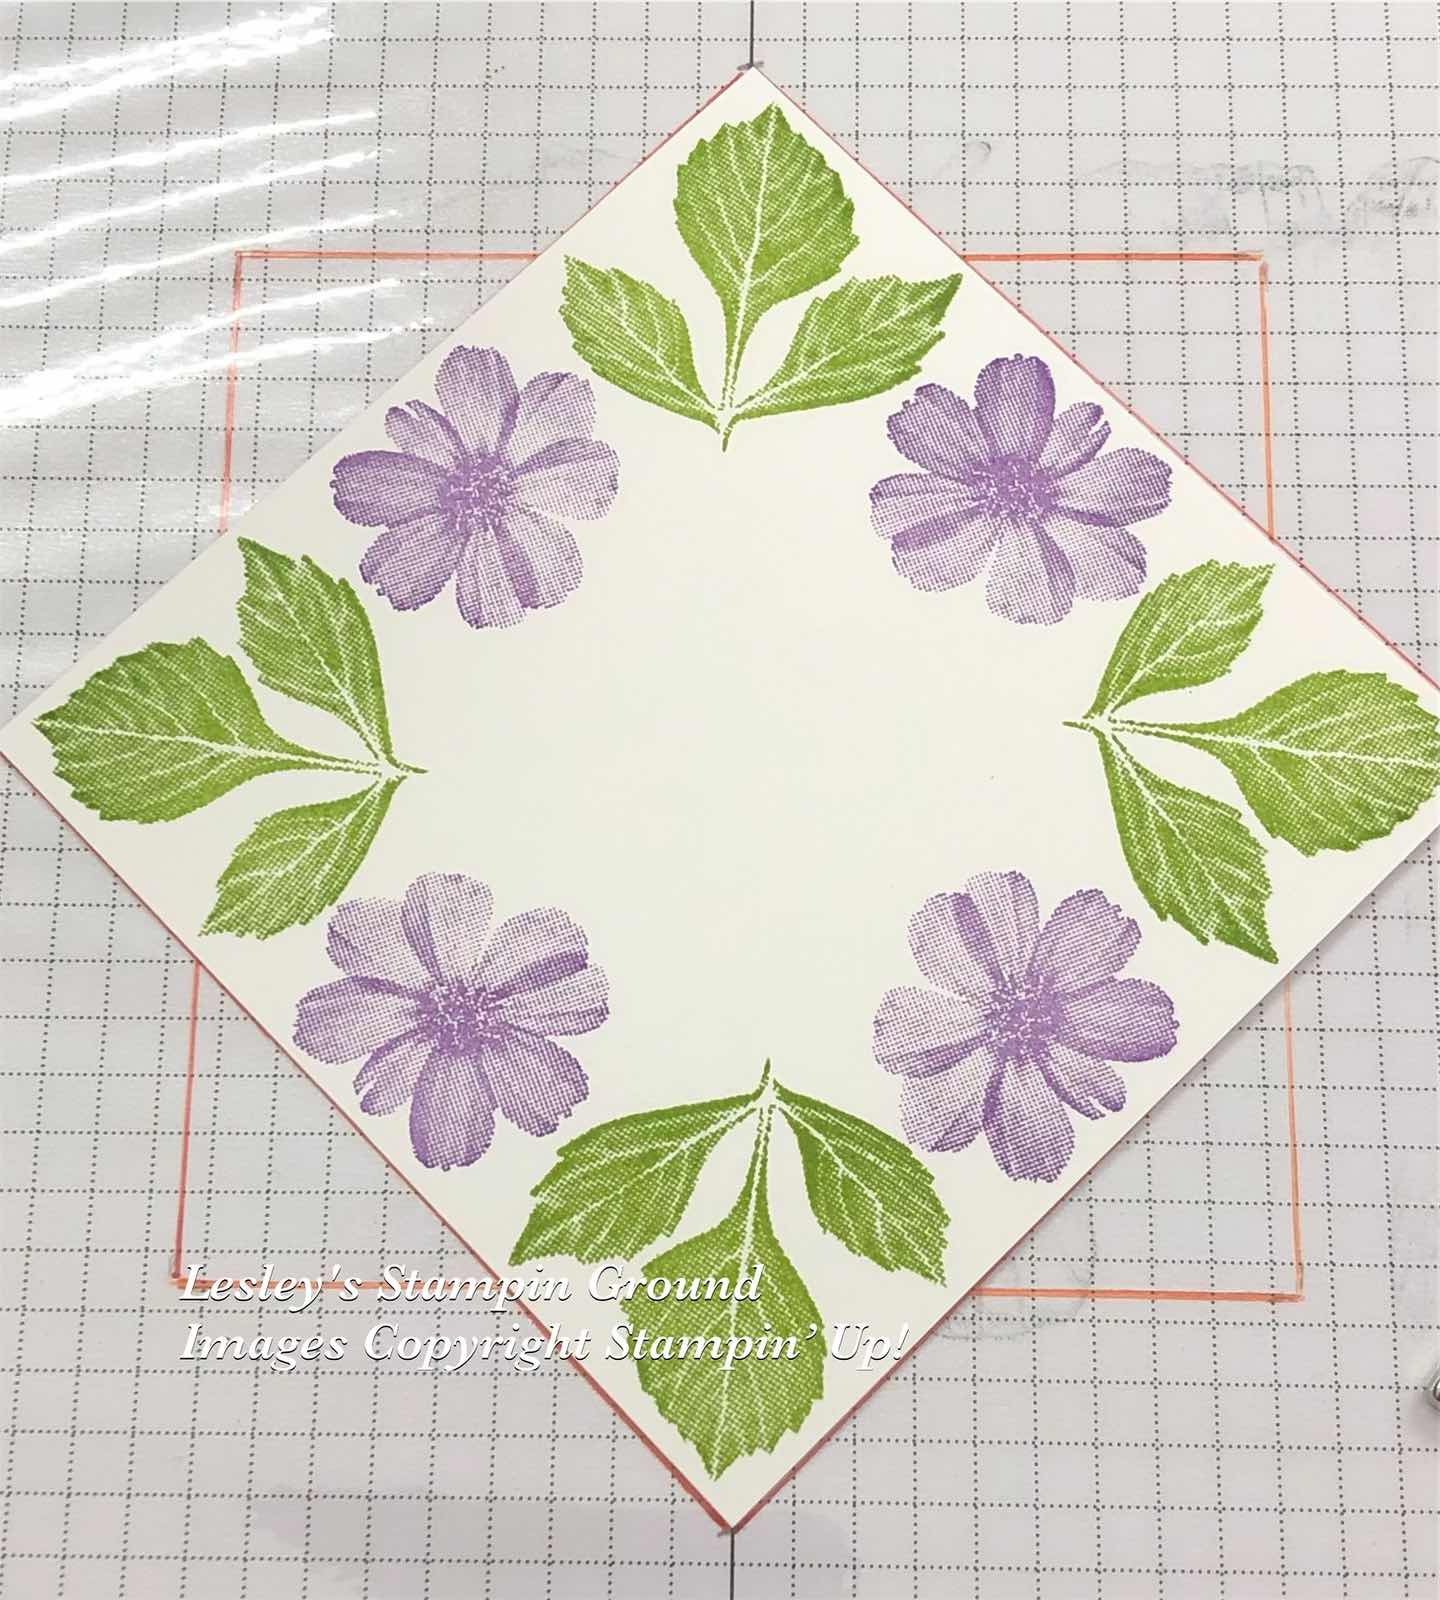
I then placed the card on the diamond to stamp the leaves with Granny Apple Green ink (#147095), moving the card after each leaf was stamped.


On the 2nd card at the top, I moved the leaves slightly away from the edge of the card. I also masked the flowers to avoid the leaves overlapping the flowers. On the first card I also stamped the flowers with Polished Pink ink (#155712), using both the outline stamp and the fill colour, then I fussy cut these flowers. 

I used the Detailed Trio Punch (#146320) to round the corners of the Basic White card and the Gorgeous Grape card (#147011). The “Hugs Prayers Love” is from the Positive Thoughts stamp set (#151490) and the other 2 sentiments are from the Encircled In Friendship stamp set (#155408). All the sentiments were stamped with Gorgeous Grape ink. The dies to cut the sentiments are from the Layering Circles (#151770) and Hippo & Friends (#153585). 

Stampin’ Dimensionals (#104430) were used to add the sentiments and the Polished Pink flowers to the card. I added the silver Simply Elegant Trim (#155766) to the 2nd card. I added the Loose Flower Flourishes (#155808) to the centre of the flowers on the first card. I did colour the purple flowers embellishments with the Dark Highland Heather Stampin’ Blend (#154887) to make them darker before adding them to the card with the Fine-Tip Glue Pen (#138309).

I embossed the cards under the Gorgeous grape card with the Timber 3D Embossing Folder (#156406), the Timeworn Type 3D Embossing Folder (#156505) and the Merry Melody 3D Embossing Folder (#156392).

The finished size of the card is 13cm x13cm.

“Love what you do and share what you love.”


Stay safe and keep crafting!!


Saturday, 21 August 2021

Delicate Dahlias Sale-a-bration

Hi again my friends,

There is a range of free products (with a qualifying order) from Sale-a-bration and one of my favourites is the Delicate Dahlias stamp set (#156601).


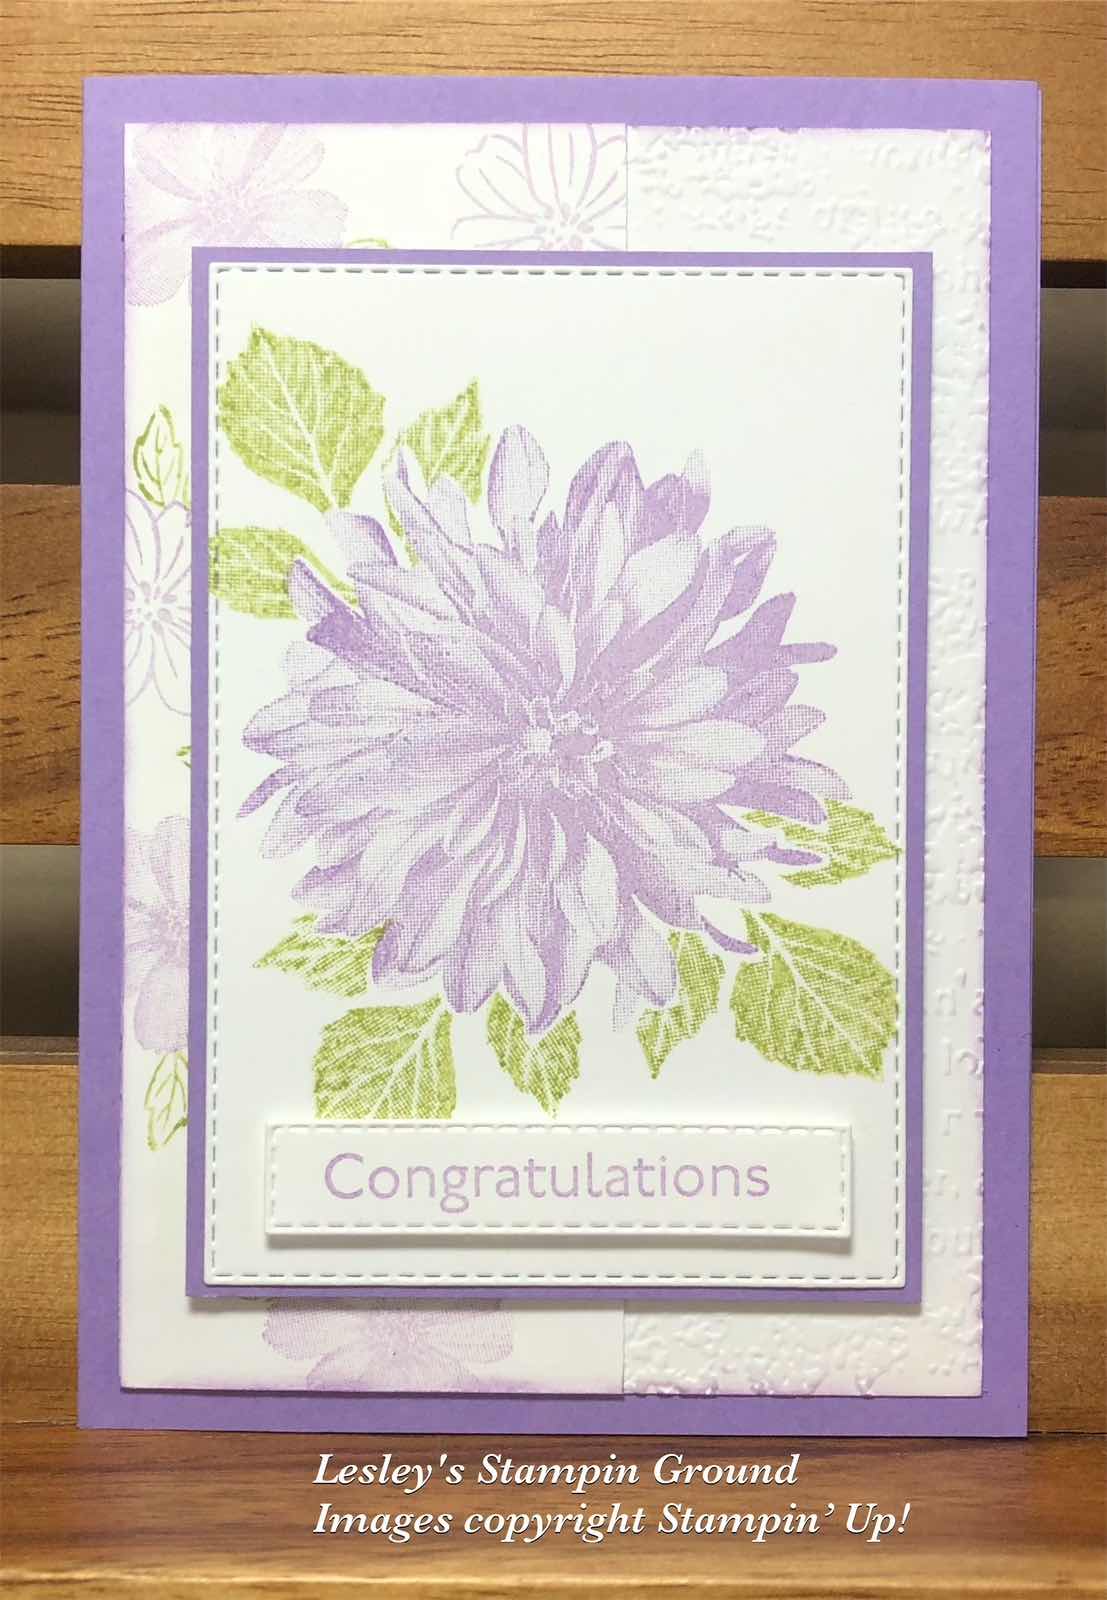
I stamped the dahlia with Highland Heather ink (#147103). I had a mask which I had made previously by stamping on a post-it note and cut around the image. This was the placed over the stamped image on the Basic White card (#159228). I then stamped the leaves with Pear Pizzaz ink (#147104) after stamping off on scrap paper for a lighter colour. Masking allows you to stamp two or more images and gives a layered look. I cut this with a Stitched Rectangles Die (#151820) and matted this with Highland Heather card (#147010).

I then stamped the smaller flowers and leaves from the Delicate Dahlias stamp set on a strip of Basic White card. This was attached to the card front which had been dry embossed with the Timeworn Type 3D Embossing Folder (#156505). The base card is Highland Heather.

The matted dahlia image was attached to the card with Stampin’ Dimensionals (#104430). Congratulations is from the Art Gallery stamp set (#158201) and stamped with Highland Heather ink then cut with a Stitched Rectangles Die.

“Love what you do and share what you love.”


Stay safe & keep crafting!!


Monday, 16 August 2021

Sale-a-bration Delicate Dahlias

Hi again,

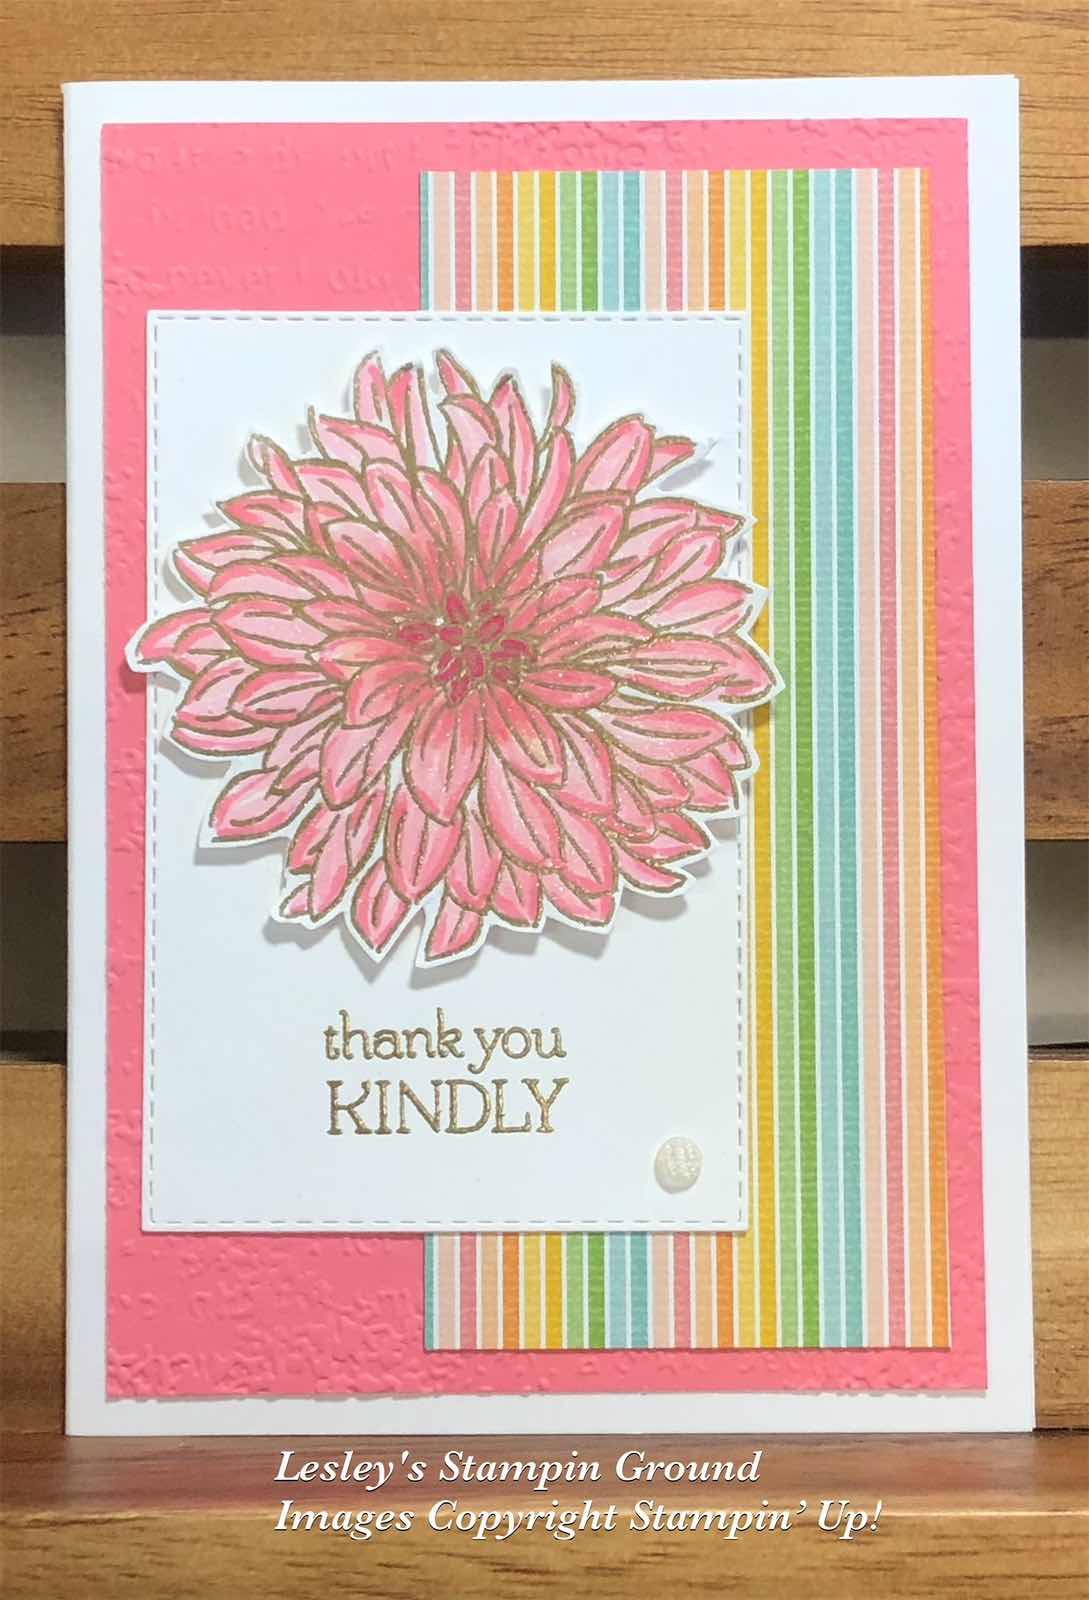
I hope you have seen the beautiful Delicate Dahlias stamp set (#156601) which is a free product from Sale-a-bration (with a $180 order). This is a 2 step stamping set, however I used Stampin’ Blends to colour this dahlia.


I stamped the outline image with VersaMark (#102283) and heat embossed this with Gold Stampin’ Emboss Powder (#155555) and set this with the Heat Tool (#129056). I then coloured the flower with Flirty Flamingo Stampin’ Blends (#154884) and Light Cherry Cobbler (#154880) - for the centre. The flower was then fussy cut.

The base card is Basic White (#159228). The Flirty Flamingo card (#141421) was dry embossed with the Timeworn Type 3D Embossing Folder (#156505). The next layer is Pattern Party 12”x12” Designer Series Paper (#155426). The Basic White card on top was cut with a Stitched Rectangles Die (#151820). The sentiment from the Delicate Dahlias stamp set was also Gold heat embossed.

I used Clear Wink Of Stella (#141897) on the dahlia and attached it to the card with Stampin’ Dimensionals (#104430). The embellishment in the corner is an Elegant Faceted Gem (#152464).

“Love what you do and share what you love.”


Stay safe & keep crafting!!


Wednesday, 11 August 2021

Delicate Dahlias

Hello,

All the images stamped on the card front are from the Delicate Dahlias stamp set (#156601) and is a sale-a-bration product for a $180 order.


I stamped the dahlia with Polished Pink ink (#155712). This was stamped using the 2 step method. The large leaves were stamped with Soft Succulent ink (#155778) and the small leaves with Evening Evergreen ink (#155576). I used Fresh Freesia ink (#155611) and Pale Papaya ink (#155670) to stamp the small flowers. 

I wrapped the Polished Pink Open Weave Ribbon (#155714) around the card front. This Basic White card front (#159228) was attached to the Polished Pink base card (#155711). The sentiment is from the Art Gallery stamp set (#158201), stamped with Polished Pink ink and cut with a Tasteful Labels Die (#152886), then attached to the card with Mini Stampin’ Dimensionals (#144108).

A tip when stamping the whole background is to stamp the larger images first and the smallest image last.

“Love what you do and share what you love.”

Stay safe & keep crafting!!


Saturday, 7 August 2021

Delicate Dahlias from Sale-a-bration

Hello my friends,

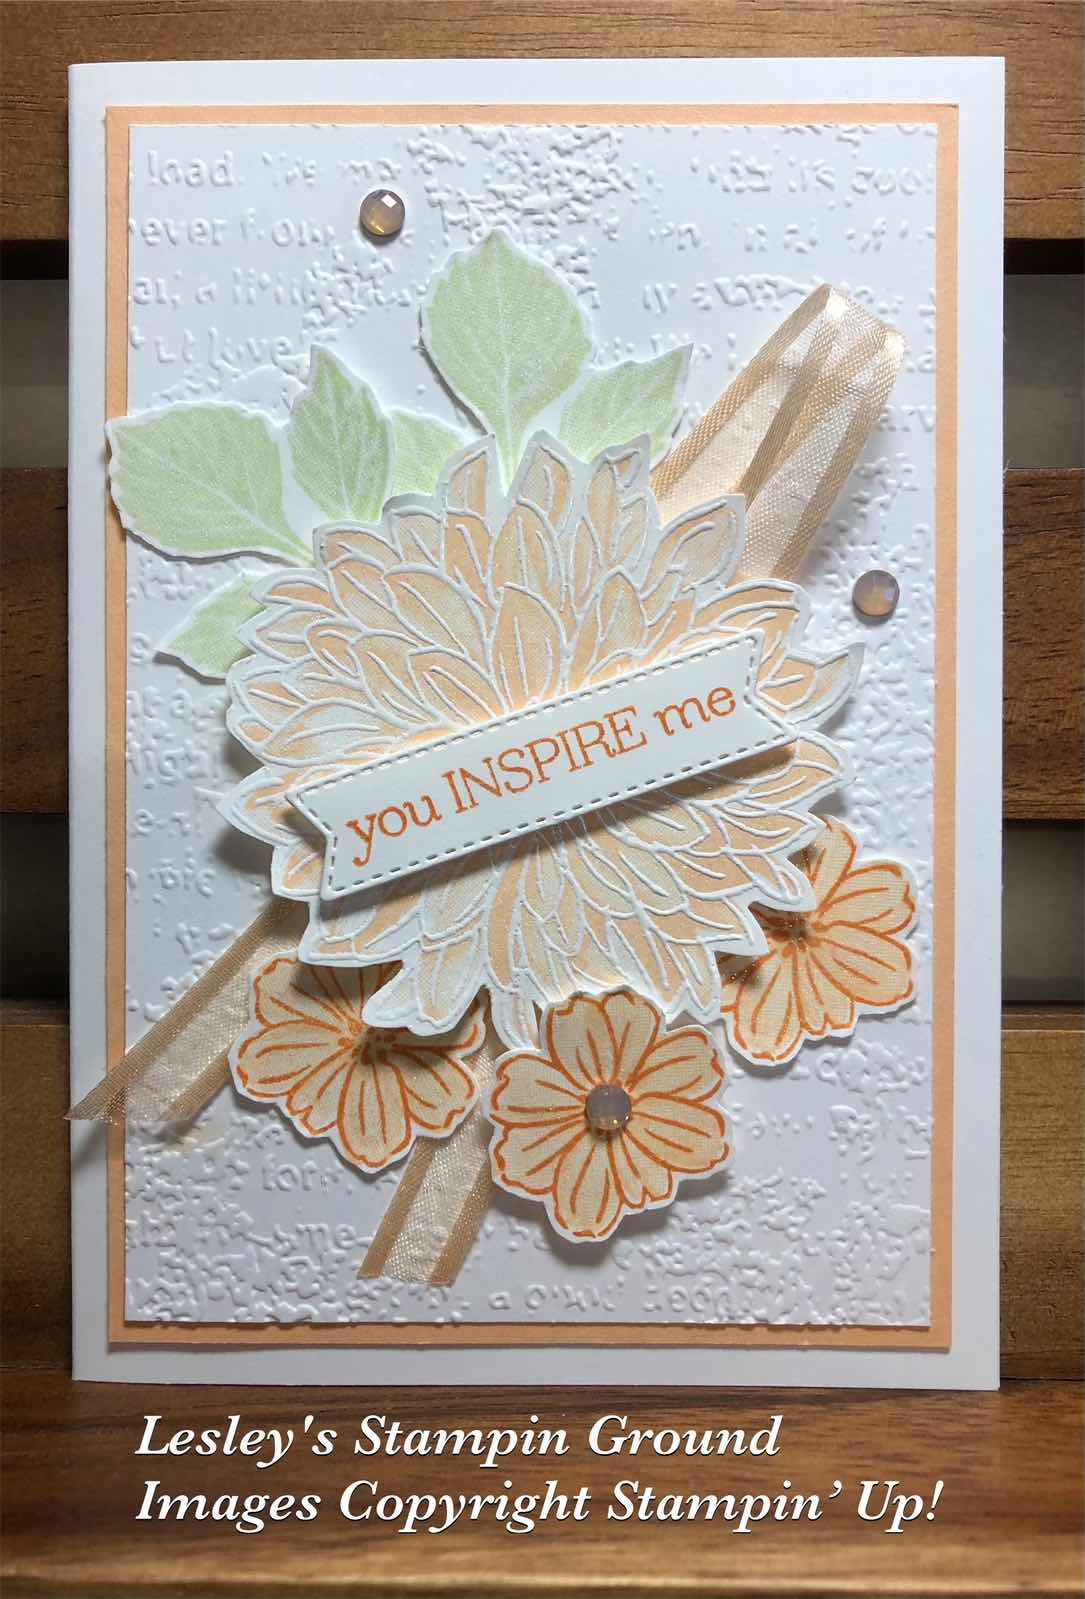
Here is a lovely subtle coloured card using the beautiful Delicate Dahlias stamp set (#156601) which is a free product from Sale-a-bration with a $180 order. This is a 2 step stamp set.


For the large dahlia, I stamped it with Pale Papaya ink (#155670) first, then stamped the outline image with VersaMark (#102283) and used White Stampin’ Emboss Powder (#155554) which was set with the Heat Tool (#129056). The small flowers were stamped with Pumpkin Pie ink (#147086) and Pale Papaya ink. The leaves were stamped with Soft Sea Foam ink (#147102). All the images were fussy cut,

The Basic White card front (#159228) was embossed with the Timeworn Type 3D Embossing Folder (#156505) and this was matted with the Pale Papaya card (#155669), then attached to the Basic White base card.

The Pale Papaya Open Weave Ribbon (#155672) was attached to the card front, then the flowers and leaves were attached using Stampin’ Dimensionals (#104430) and Mini Glue Dots (#103683). The sentiment is also from the Delicate Dahlias stamp set and cut with a die from Tasteful Labels (#152886). This was stamped with Pale Papaya ink and attached with Mini Stampin’ Dimensionals (#144108). I used the Clear Wink Of Stella (#141897) to add glitter the the flowers and leaves. The card was finished with the Elegant Faceted Gems (#152464).

“Love what you do and share what you love.”


Stay safe and keep crafting!!


Wednesday, 21 July 2021

Delicate Dahlias

Hello friends,

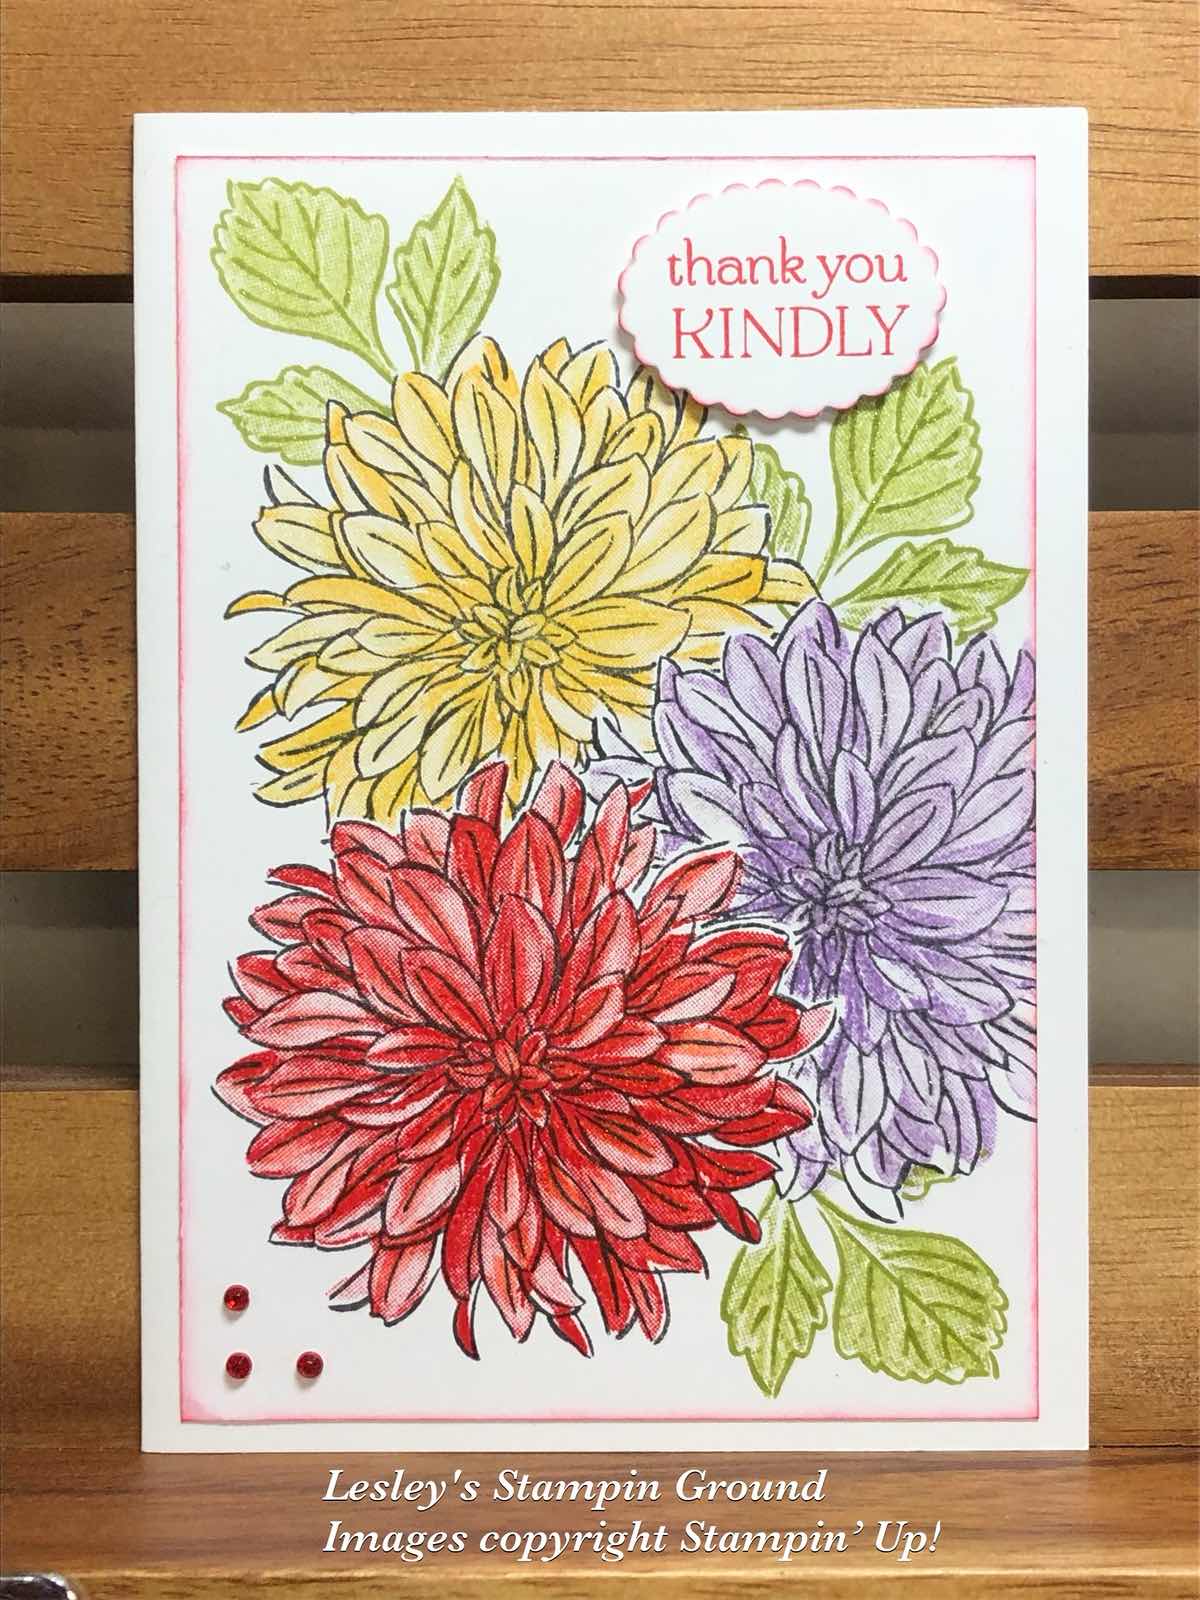
I have a sneak peek today of one the Sale-a-bration products which will be available from 3rd August, free with a $90 order. This stamp set is Delicate Dahlias (#156601) and is a 2 step stamping set.


I stamped the first flower in the bottom left corner. I stamped the outline image with Tuxedo Black Memento ink (#132708), then stamped the coloured image with Poppy Parade ink (#147050). The other 2 flowers are stamped using the masking method. To do this I stamped the outline image on 2 pieces of post-it notes and cut the image very close to the line. I then placed one of these cut images over the Poppy Parade dahlia and stamped the flower with Memento ink and Highland Heather ink (#147103). This was repeated with the Daffodil Delight (#154883) dahlia, this time covering both the Poppy Parade and Highland Heather flowers. I then stamped the leaves also using the masking technique. The outline leaves were stamped with Pear Pizzaz ink (#147104) and the inside colour was also stamped with Pear Pizzaz but I “stamped off” first to give a lighter colour.

The sentiment is from the same stamp set and stamped with Poppy Parade ink. This was cut with the Messages Die (#154422) and attached to the Basic White card front (#159228). I daubered the edges of the card front with Poppy Parade ink and this was attached to the Basic White base card. The Red Rhinestone Basic Jewels (#146924) were attached to finish the card.

The masking technique is a great way to have 2 or more images but not stamping over the other images and giving more dimension to the card.

“Love what you do and share what you love.”