Showing posts with label #timeworntypeembossingfolder. Show all posts

Tuesday, 25 April 2023

Timeless Arrangements

Hello my friends,

Today I have finally had time to play with some new products in the new catalogue which will be available from 2nd May. I have used the Timeless Arrangements Bundle (#161526).


I stamped the circles from the Timeless Arrangements stamp set (#161521) onto the Very Vanilla card (106550) using VersaMark (#102283). I added Heat & Stick powder (#156110) and heated this with the Heat Tool (#129056). This becomes sticky which allows you to adhere the Gold Gilded Leafing (#154560). Press the leafing onto the card then  brush off the excess leafing. I then dry embossed this card with the Timeworn Type 3D Embossing Folder (#156505). The corner was punched with the Very Best Trio Punch (#159878) and attached to the Lost Lagoon card (#133686).

The Gold Ribbon from the Gold & Silver Trim Combo Pack (#161633) was wrapped around the card, then the card front was attached to the Very Vanilla Base card. 

“Happy Birthday” is from the Go To Greetings stamp set (#158763). This was stamped with VersaMark & I used Gold Stampin’ Emboss Powder (#155555) which was set with the Heat Tool. 

The Timeless Arrangements dies (#161525) were used to cut the leaves from the Lost Lagoon card and the Pretty Peacock card (#150886) which were both backed with Adhesive sheet (#152334). These were attached to the card front then the sentiment was attached with Stampin’ Dimensionals (#104430).

The Iridescent Pearl Basic Jewels (#158987) were added to the card.

There are no retiring products used on this card.

“Love what you do and share what you love.”


INSPIRE. CREATE. SHARE.


Tuesday, 18 April 2023

Enchanting Details Dies

Hello again my friends,

This beautiful detailed die-cut is cut with an Enchanting Details die (#159166) on Basic White card (#159228).


The white card was backed with Adhesive Sheet (#152334) before cutting with the die. The Polished Pink card (#155711) was dry embossed with the Timeworn Type Embossing Folder (#156505) and the corner was punched with the Very Best Trio punch (#159878). The card front was attached to the Basic White base card.

The butterfly is another one left from a previous card a few days ago. (Check out the post on the 13th April for details). I attached the butterfly with Stampin’ Dimensionals (#104430).

“Happy Birthday” from Pansy Patch stamp set (#154999) was stamped with Polished Pink ink (#155712) and cut with a Potted Succulents die (#154330). This was attached with Mini Stampin’ Dimensionals (#144108). The Pastel Adhesive-Backed Sequins (#160387) were added to the card.


The retiring products here are the Enchanting Details dies, Polished Pink card & ink, Pastel Adhesive-Backed Sequins, Potted Succulents dies, Butterfly Brilliance stampset & Brilliant Wings dies.

“Love what you do and share what you love.”


INSPIRE. CREATE. SHARE.


Sunday, 19 March 2023

Elegant Borders Dies

Hello everyone,

This pretty border is from the Elegant Borders Dies (#161593). There are 4 border dies in this set as shown below.


I have cut the Basic White card (#159228) with the die. The sentiment from the Dainty Delight stamp set (#161078) was stamped with Orchid Oasis ink (#159214).

I dry embossed the Orchid Oasis card (#159265) with the Timeworn Type 3D Embossing Folder (#156505). The corners of this card and the Basic White card were punched with the Very Best Trio Punch (#159878).

I stamped the flowers from the Petal Park stamp set (#160571) twice. First I stamped the outline with Orchid Oasis ink, then stamped the inside again with Orchid Oasis ink but I stamped off first so I had a lighter colour. These flowers were then punched with the Petal Park Builder Punch (#160576).

The flowers were attached to the card with Stampin’ Dimensionals (#104430) and Mini Glue Dots (#103683). The White Opaque Adhesive-Backed gems (#160412) were attached to the centre of the flowers.

“Love what you do and share what you love.”


INSPIRE. CREATE SHARE.


Wednesday, 13 April 2022

Bottled Happiness stamp set

Hi friends,

Here is another sneak peek of another new stamp set in the upcoming Annual catalogue using the Bottled Happiness stamp set (#158684).


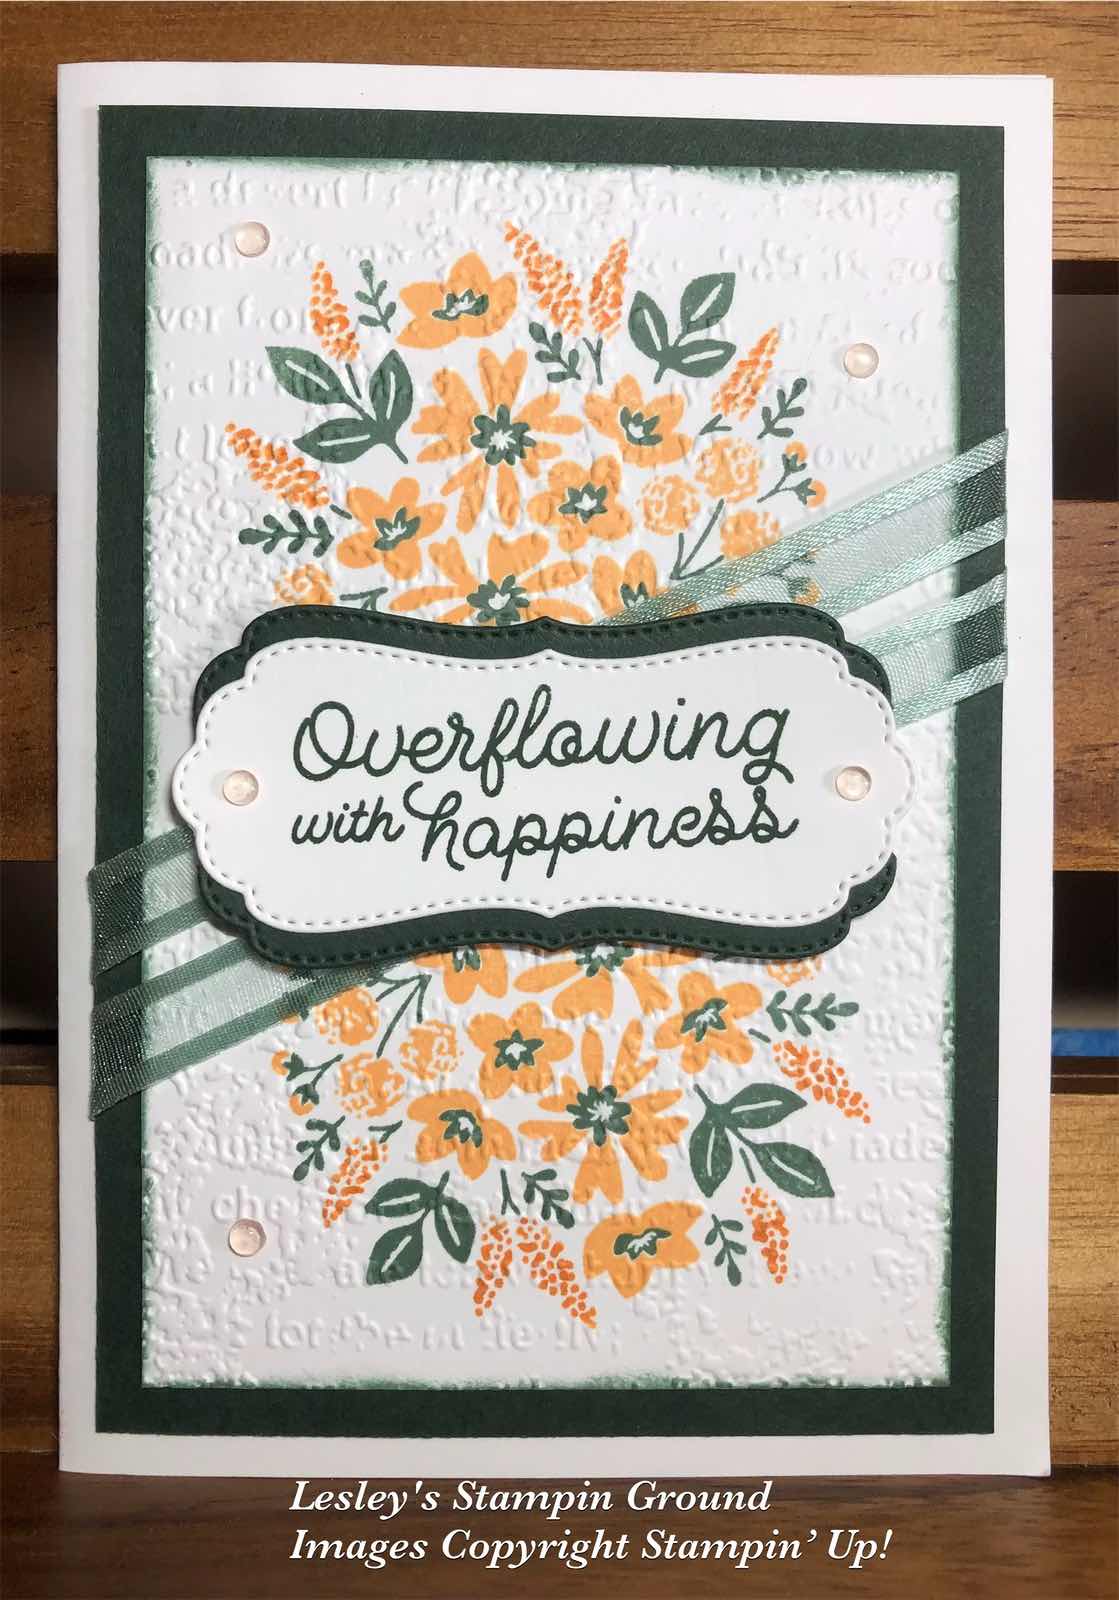
This is a Two-step stamping set ( but I added an extra step.) I stamped the flowers with Pale Papaya ink (#155670) onto the Basic White card (#159228) using the Stamparatus (#148187). I then used the Pumpkin Pie Stampin’ Write Marker from the Regals (#147155) to add some extra colour to “stem of buds” and re-stamped this. Then I stamped the leaves with Soft Succulent ink (#155778). These are very easily to lined up with the photopolymer stamps. I stamped these images at the top & bottom of the card front. I then dry embossed this with the Timeworn Type 3D Embossing Folder (#156505).

The sentiment is from the same stamp set and I used Evening Evergreen ink (#155576). A die from the Potted Succulent dies (#154330) was used to cut the sentiment. I also cut a piece of Evening Evergreen card (#155575) with the same die. This was cut in half and matted the sentiment.

The cardfront was also matted with Evening Evergreen card. Two pieces of the Soft Succulent Open Weave Ribbon (#155780) were wrapped around the card front. The sentiment was attached to the card with Stampin’ Dimensionals (#104430). The Polished Dots (#158134) were added to finish the card.

“Love what you do and share what you love.”


Sunday, 10 April 2022

Pansy Patch Bundle

Hello stampers,

The Pansy Patch Bundle (#155674) consists of the Pansy Patch stamp set (#154999) and the Pansy Dies (#155680). As usual a bundle means you will save 10% and you will find this continues as a bundle in the next Annual catalogue.


All the pansies are stamped with the Pansy Patch stamp set. This is a Two-step stamp set which allows you to stamp with 2 colours. The purple pansy on the left was stamped with Gorgeous Grape ink (#147099) and Highland Heather ink (#147103). The other flowers were stamped with the same ink for each flower but using the stamping off method to achieve the lighter colour. The inks used are Daffodil Delight (#147094). Polished Pink (#155712) and Rich Razzleberry (#147091).

The Pansy dies were used to cut the pansies and the leaves. For the leaves I used Soft Succulent card (#155777) and Evening Evergreen card (#155575).

I dry embossed the Basic White card (#159228) with the Timeworn Type 3D Embossing Folder (#156505). The check DSP from the Pansy Petals Designer Series Paper (#155807) was attached to the White card, then this was matted with Evening Evergreen card. The base card is Basic White.

The leaves and the pansies on the left & right were taped to the card, and the other pansies were attached with Stampin’ Dimensionals (#104430). “Happy Birthday” from the Pansy Patch stamp set was stamped with Evening Evergreen ink (#155576) and cut with a Sweet Hearts Die (#157623). This was attached with Mini Stampin’ Dimensionals (#144108).

I added some shimmer to the pansies with the Clear Wink Of Stella Brush (#141897) and the Holiday Rhinestone Basic Jewels (#150457) were added to the centre of the pansies.

TIP: When stamping the pansies I found it easier to stamp the darker image first and it was then much easier to line up the second image.

“Love what you do and share what you love.”


Wednesday, 6 April 2022

All Together Designer Series Paper

Hello stamping friends,

The All Together 6”x6” Designer Series Paper (#160039) has a beautiful range of black & white images which could be coloured. I have just chosen to leave them as is for this card.


I chose 7 different designs and cut them with the Layering Circles Dies (#151770). These were attached to the Basic White card front (#159228) which was dry embossed with the Timeworn Type 3D Embossing Folder (#156505). This was matted with the Basic Black card (#121688) then attached to the Basic White base card.

I cut the leaves with a die from the Artistic Dies 155371) using the Silver Foil from the Blue Foils (#159983). This pack is available for a limited time. I had Adhesive Sheet (#152334) adhered to the back of the foil before cutting with the die to make it easy to attach the fine detailed die cut to the card. 

The sentiment is from the Encircled In Friendship Stamp Set (#155408) and stamped with Tuxedo Black Memento ink (#132708). The sentiment & silver foil under the sentiment were cut with Layering Circles Dies and attached to the card with Stampin’ Dimensionals (#104430).


TIP: Adhesive Sheets are great to attach a detailed cut out to your card. Just adhere the adhesive sheet to the back of the card you are using to cut with the die before cutting, then remove the backing of the adhesive and attach the die cut to the card.


“Love what you do and share what you love.”


Monday, 13 December 2021

Blackberry Beauty Designer Series Paper

Hello again,

The Blackberry Beauty 12”x12” Specialty Designer Series Paper (#156471) and the Gold 12”x12” Shimmer Vellum (#156471) are two of many of the products retiring from the current Mini catalogue.


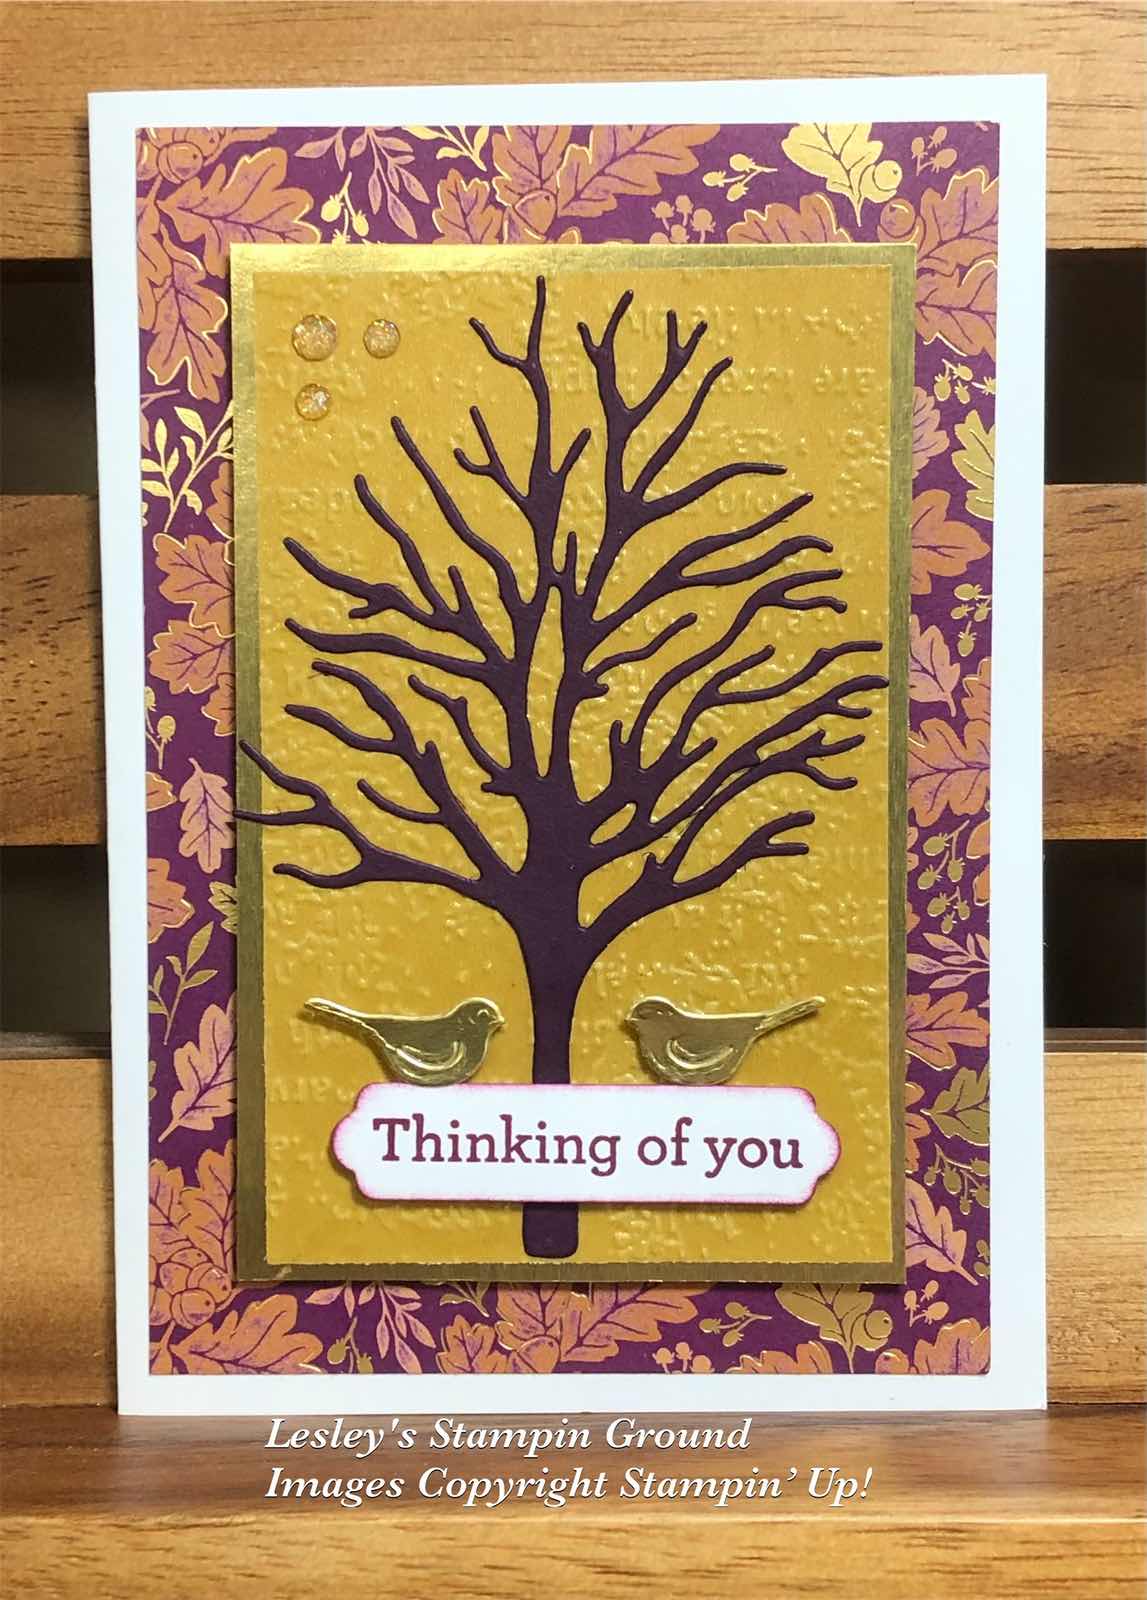
I attached Adhesive Sheet (#152334) to the Gold Shimmer Vellum and Rich Razzleberry card (#119981). Then I dry embossed the gold vellum with the Timeworn Type 3D Embossing Folder (#156505) and attached this to a piece of Gold Foil Sheet (#132622). I cut the tree from the Rich Razzleberry card with the Beautiful Trees Dies (#155840) and attached this to the Gold Shimmer Vellum. The birds are from the same die set and I used Gold Foil sheet for these cute birds.

The DSP was attached to the Basic White base card (#159228) and the gold foil was attached with Stampin’ Dimensionals (#104430). “Thinking Of You” is from the Beauty Of Friendship stamp set (#154983) and I stamped this with Rich Razzleberry ink (#147091). A Seasonal Labels Die (#156299) was used to cut the sentiment. The birds and sentiment were attached to the card with Mini Stampin’ Dimensionals (#144108). The Genial Gems (#155500) were added to finish the card.


“Love what you do and share what you love.”


Tuesday, 30 November 2021

Blessings Of Home Pinwheel Tower card

Hello again,

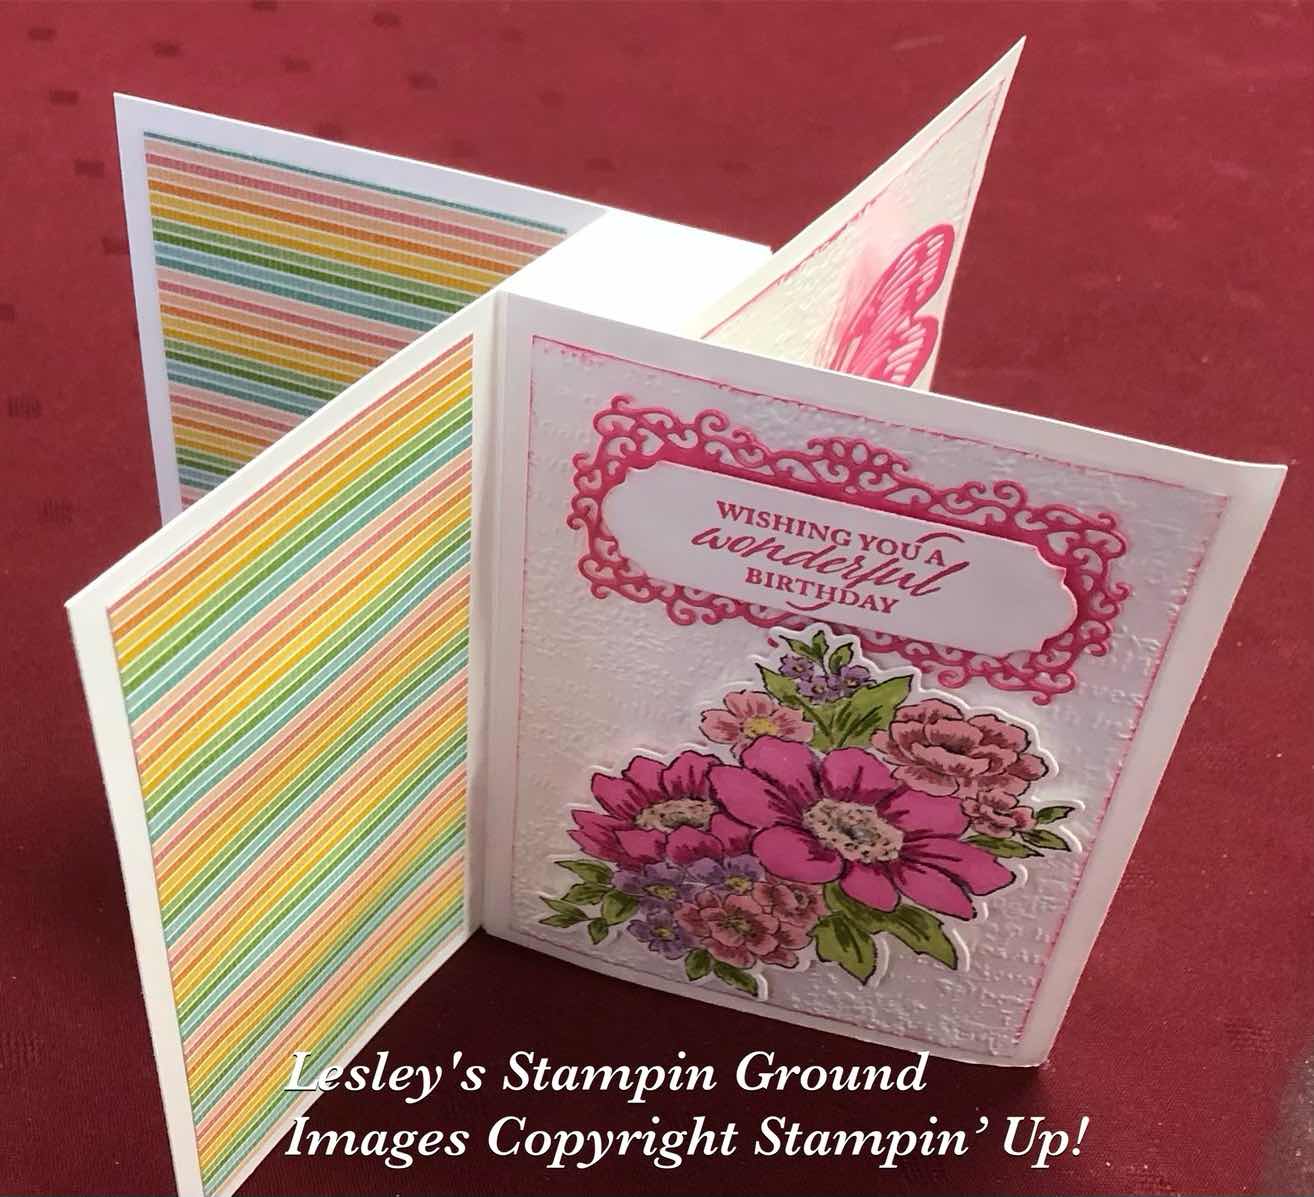
Recently I made a small pinwheel tower card so this one today is a larger one with the finished size approximately 21cm x 15cm when flattened out. I am using the Blessings Of Home Bundle (#157939) which is a sneak peek from the upcoming Mini catalogue available from 4th January 2022.


The Basic White card (#159228) measurements for the basic card shape are as follows-
1 piece - 20.5 x 14.9cm and scored at 2.5cm, 5cm,7.5cm and 10cm along the long side.
3pieces - 14.9 x 10.5 cm
The other measurements are-
3 pieces Basic White - 13.9 x 9.5cm. These were embossed with the Timeworn Type 3D Embossing Folder (#156505).
4 pieces of Pattern Party Designer Series Paper (#155426) - 7cm x 13.9cm and 1 piece - 5cm x 13.9cm
1 piece of Basic White card 6cm x 13.9 cm


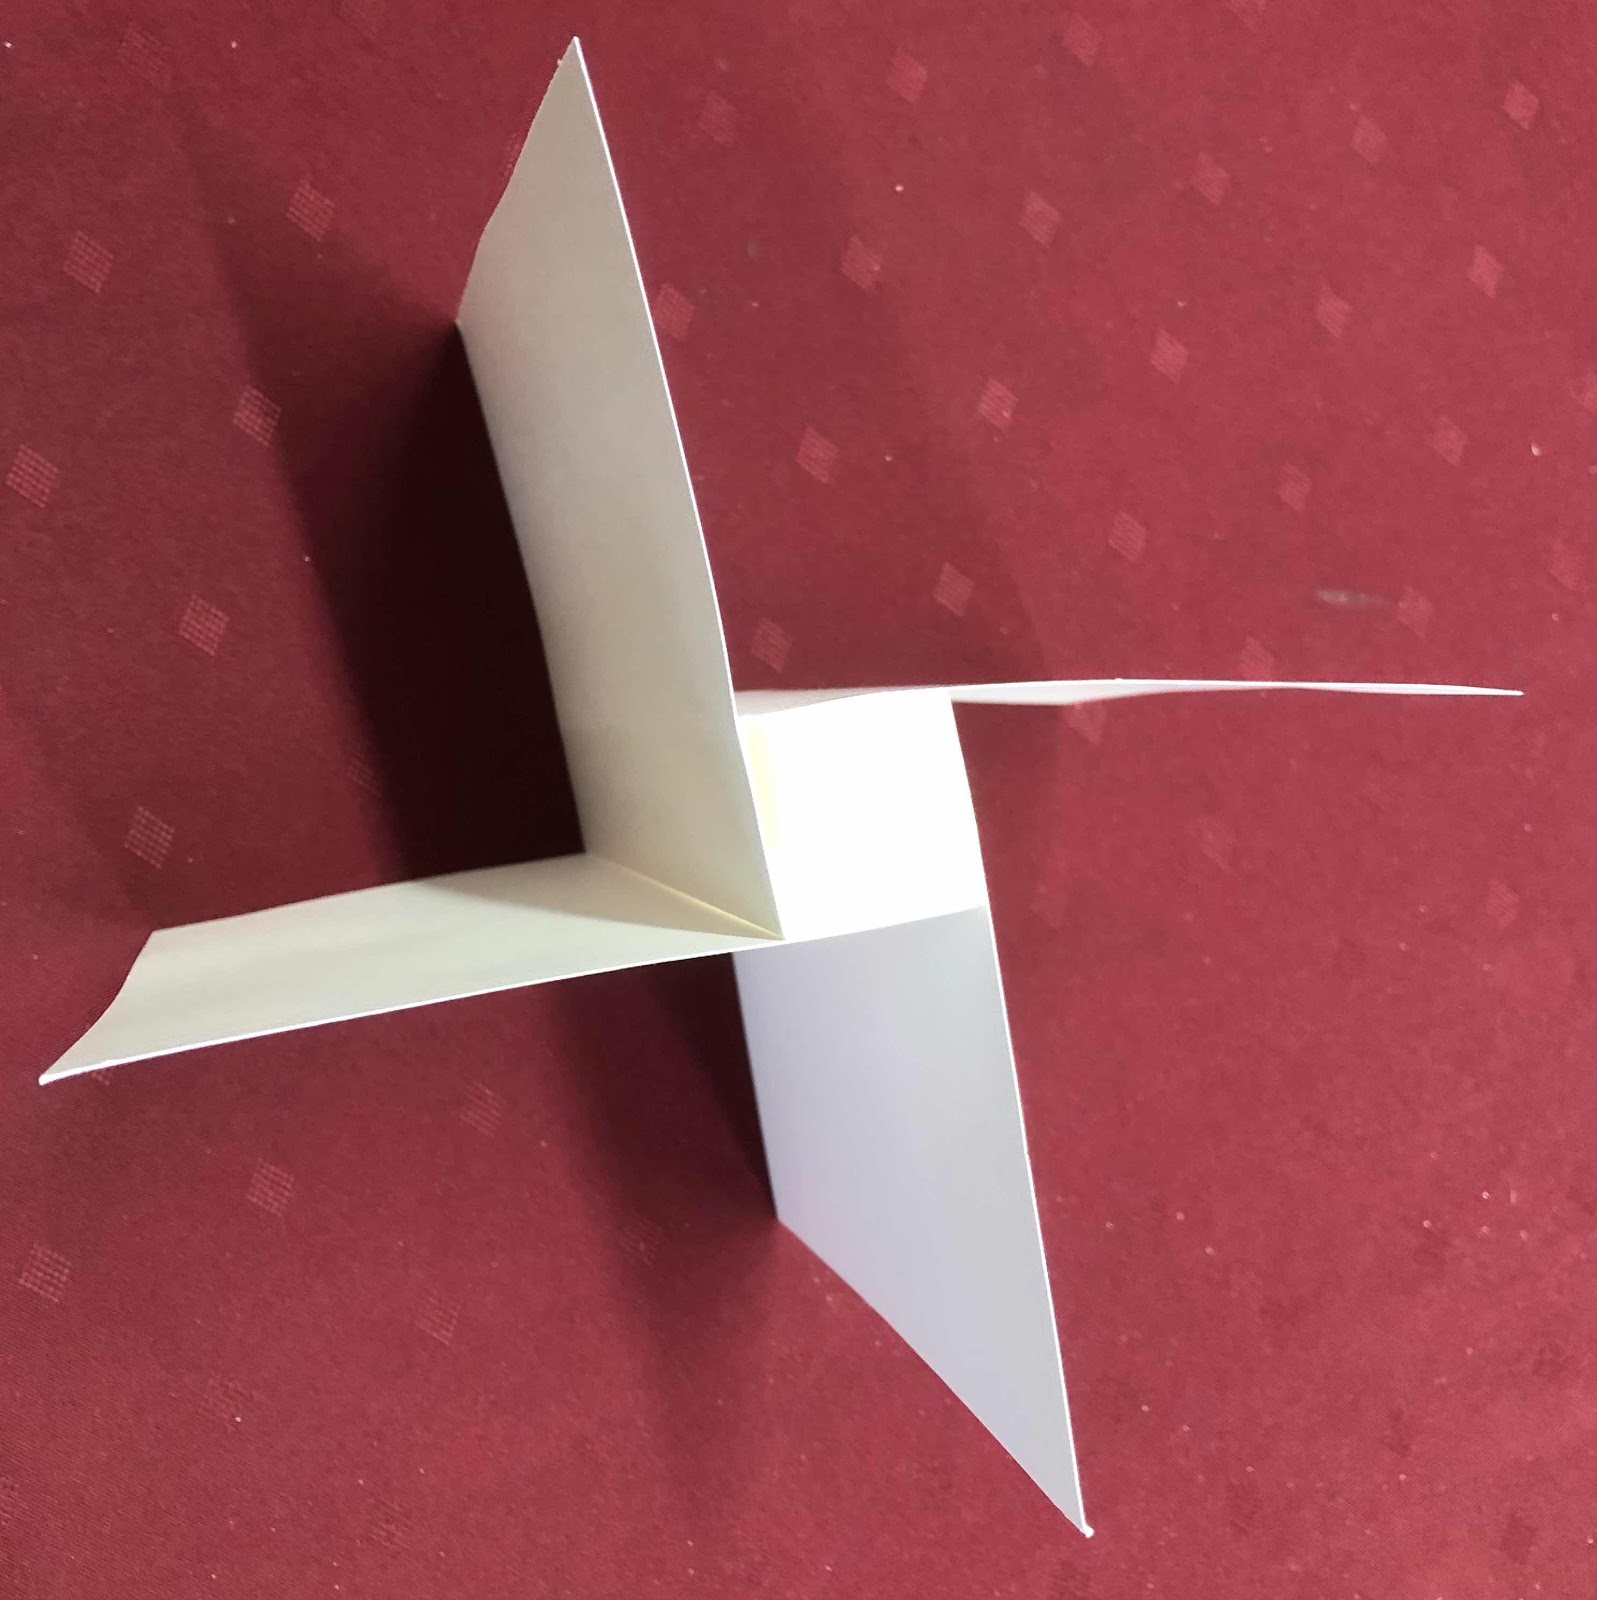
Fold each of the scored lines, to form a square. Apply glue or tape to the end of the “square” as shown below. Fold the left side over to the piece on the right.


You will continue adding glue or tape to one side of the “square”, and place a piece of the 14.9cm x 10.5cm on the right side and fold the left side onto this. (This is very hard to describe so I hope you can understand what to do).


The final base card looks like this from above-


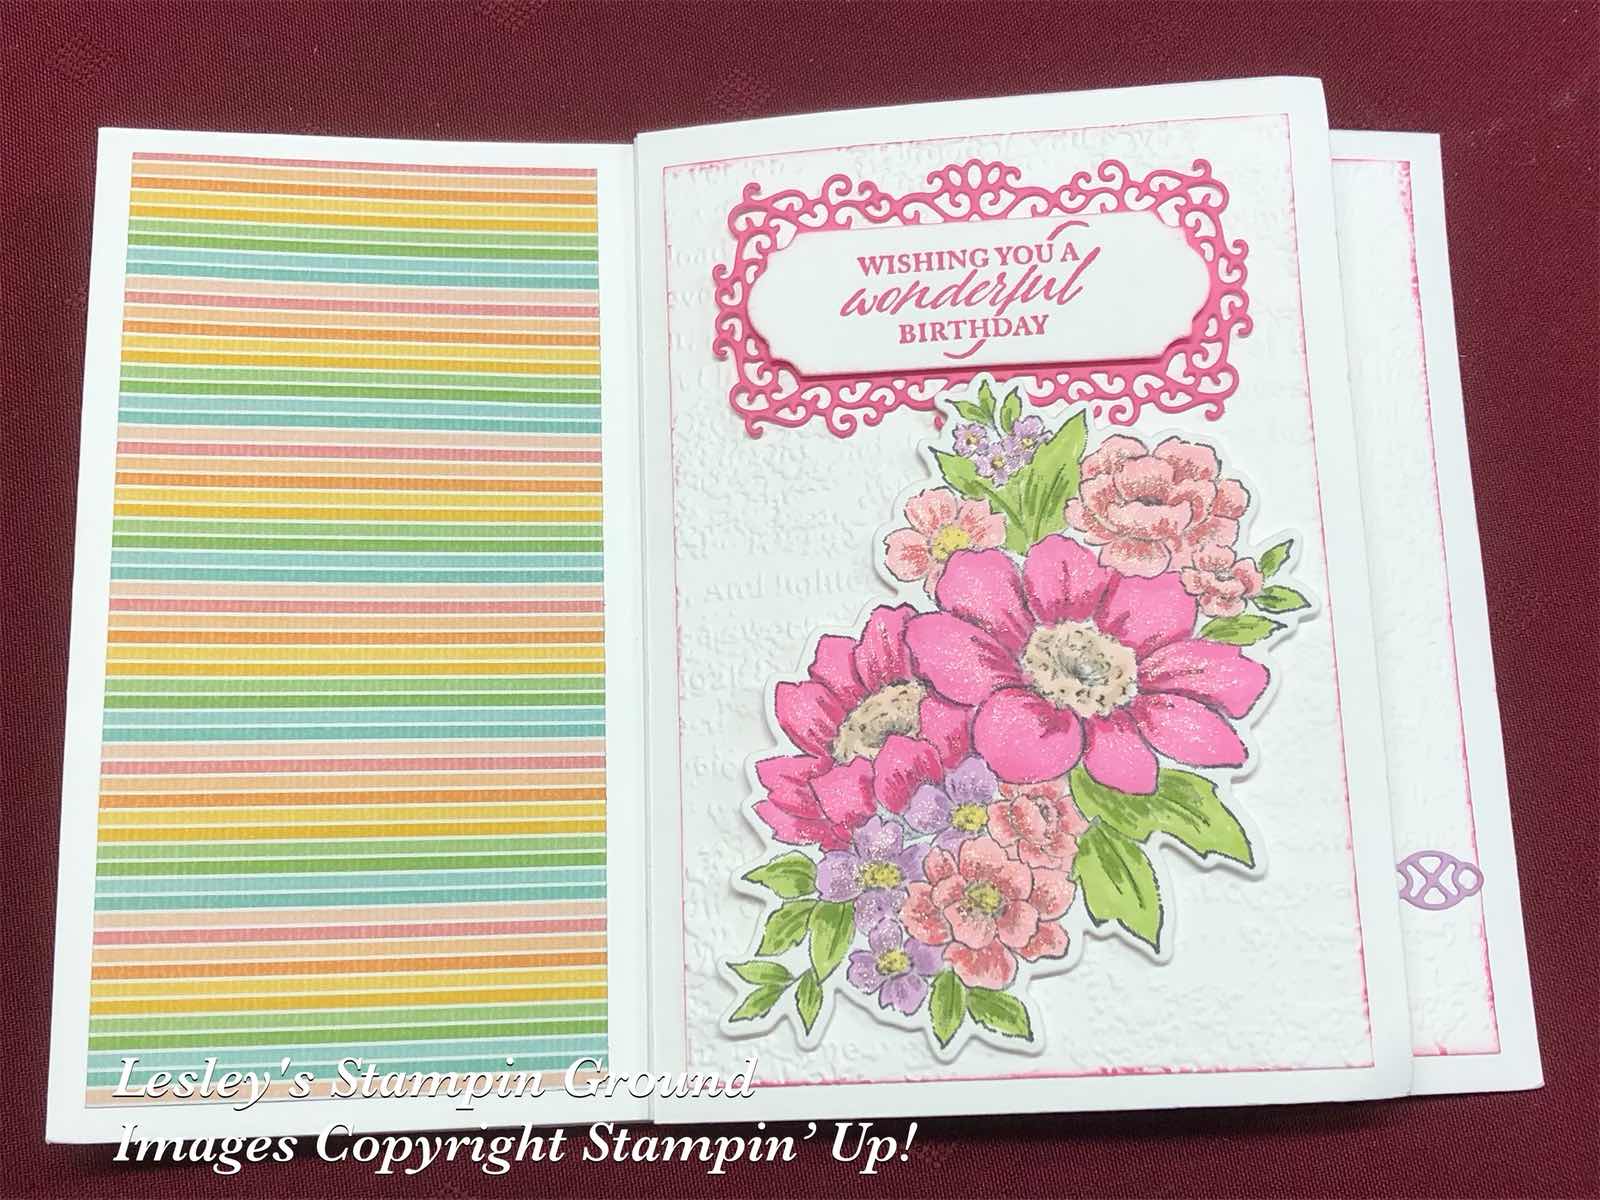
I stamped the larger floral image and I stamped 2 of the smaller floral images from the Blessings Of Home stamp set (#157930) using Tuxedo Black Memento ink (#132708). These were coloured with Stampin’ Blends - Polished Pink (#155520), Flirty Flamingo (#154884), Fresh Freesia (#155518), Granny Apple Green (#154885) & So Saffron (#154905). These were cut with the Flowers Of Home Dies (#157938).


“Wishing You a Wonderful Birthday” from Elegantly Said stamp set (#155095) was stamped with Polished Pink ink (#155712). I used Ornate Frames Dies (#150664) to cut the sentiment and the Polished Pink card (#155711) under the sentiment. This and the larger floral image were attached to one of the dry embossed cards.


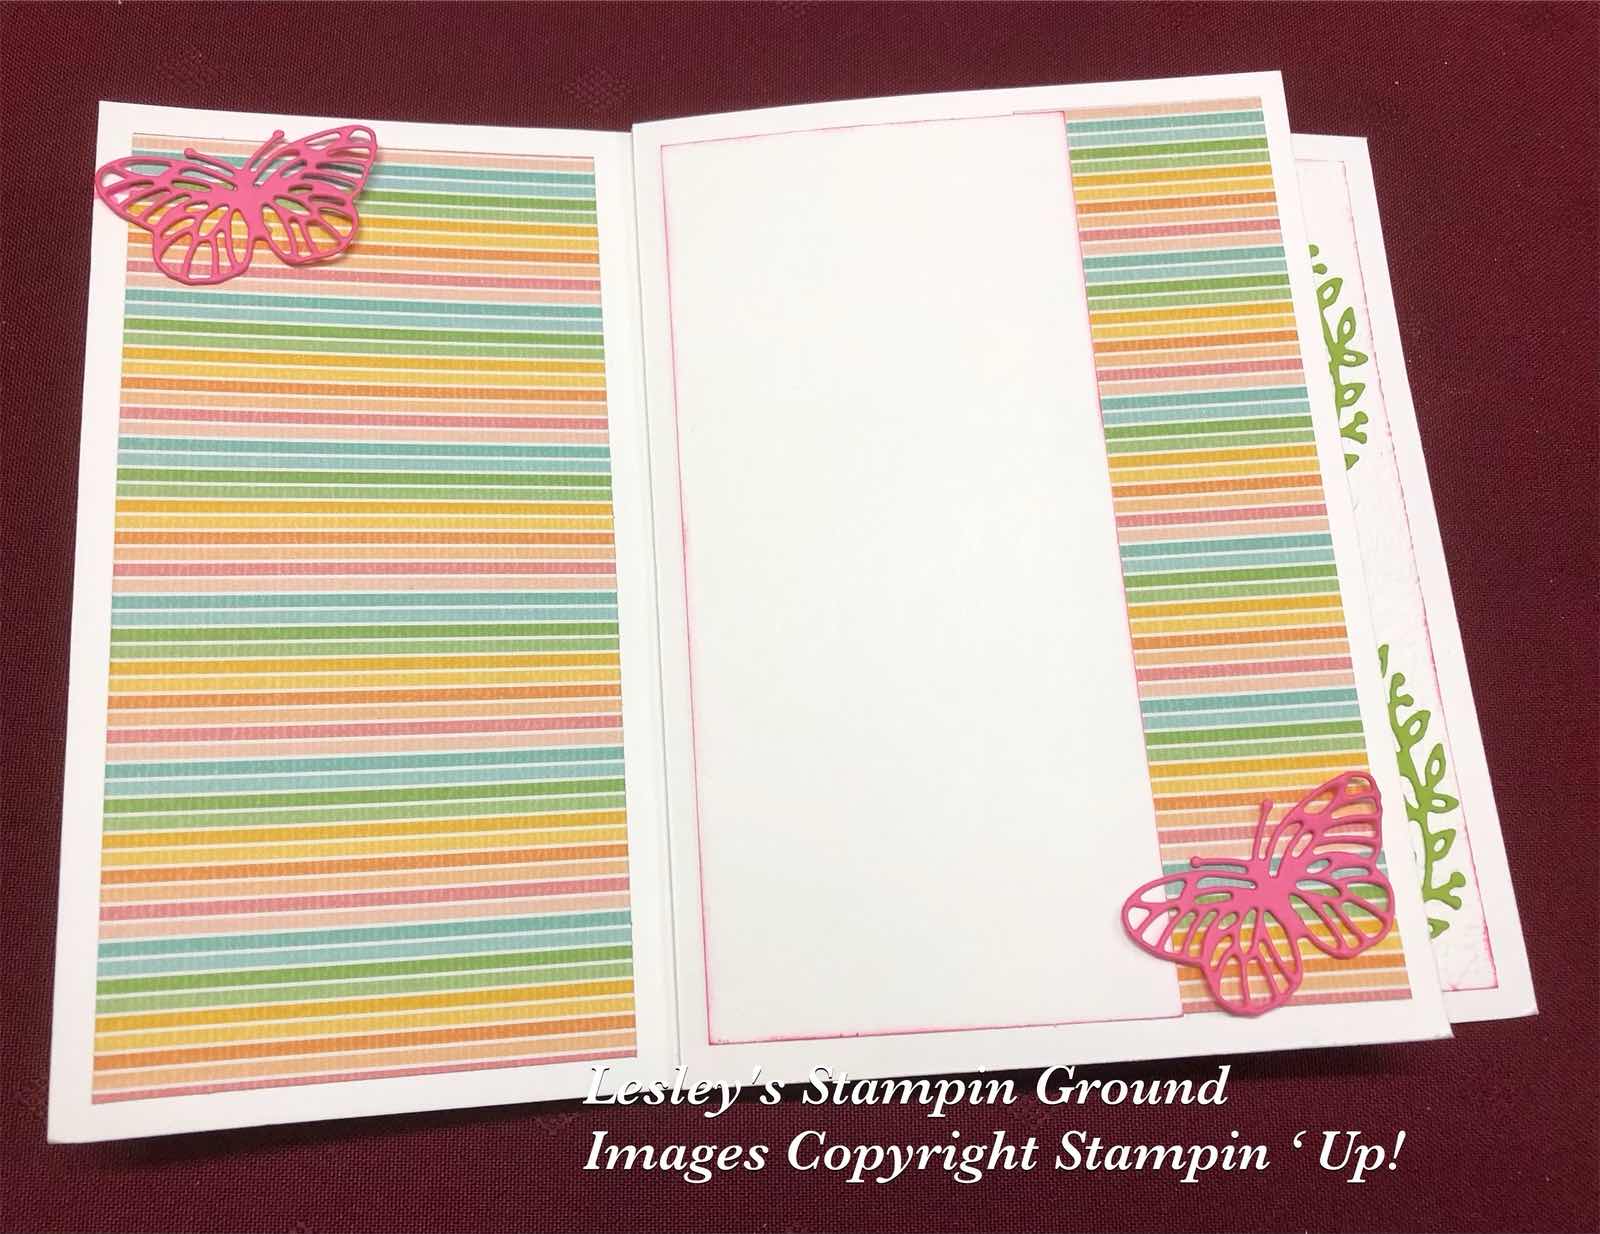
Next I cut the butterflies with the Brilliant Wings Dies (#155523) from Polished Pink card and Fresh Freesia card (#155614). The detailed border under the sentiment is cut with a Nature’s Thoughts die (#153586). The Fresh Freesia card was backed with Adhesive Sheet (#152334) before cutting this border. The sentiment on this opening is from the Pansy Patch stamp set (#154999) and also stamped with Polished Pink ink. The butterflies and sentiment were added to another of the dry embossed cards with Stampin’ Dimensionals (#104430).


On the next side I attached a larger piece of Designer Series Paper on the left side and the smaller piece on the right side. The smaller Basic White card (6cm x13.9cm) was attached and this is where you will write your personal greeting. I attached 2 more butterflies cut from Polished Pink card. These were attached to the card with Mini Glue Dots (#103683).


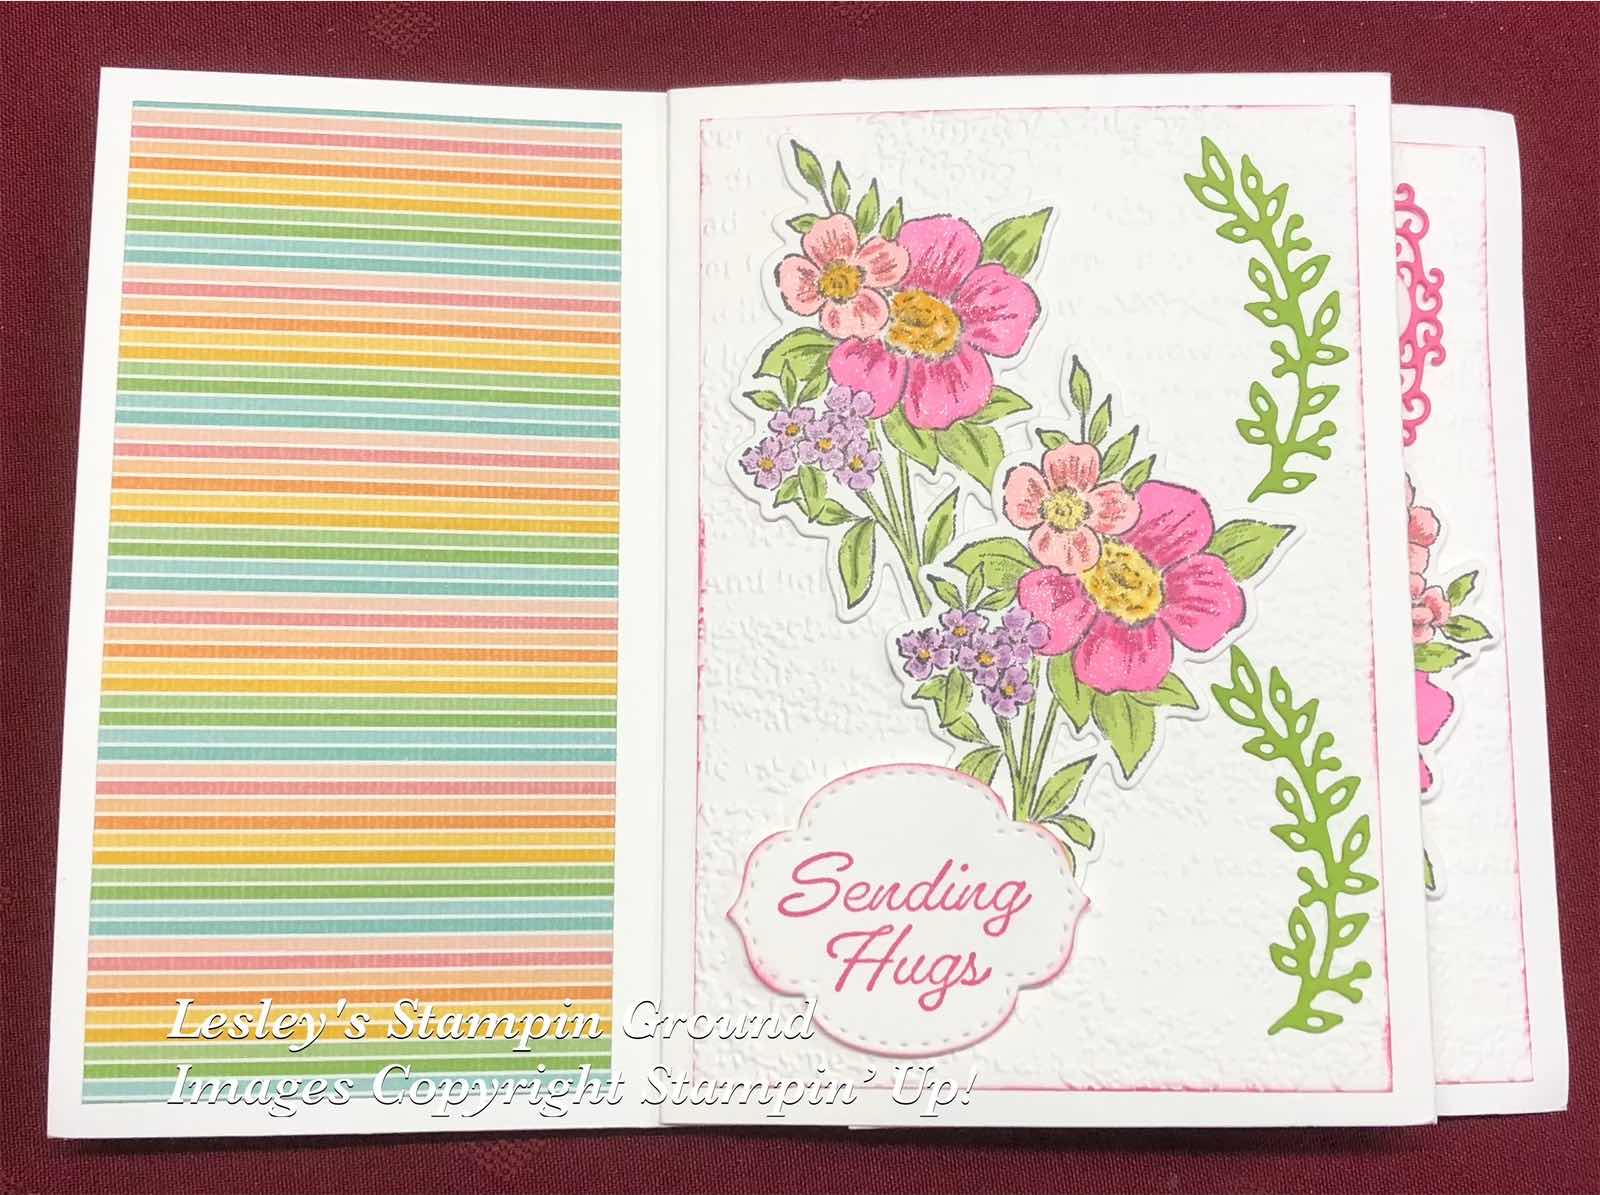
On this side I added the 2 smaller floral images to another of the dry embossed cards. Using Adhesive Sheet on the back of the Granny Apple Green card (#147014), I cut the leaves with a Flowers Of Home die. “Sending Hugs” is from the Eden’s Garden stamp set (#157823), stamped with Polished Pink ink and cut with a Stitched So Sweetly die (#151690).

I attached the DSP to each of the left sides of each “opening”.
 

“Love what you do and share what you love.”


lesleyjendra.stampinup.net


lesley.j.jendra@gmail.com


Sunday, 14 November 2021

Blessings Of Home

Hello friends,

I have just enjoyed 3 days of fun with the Stampin’ Up community (online) and having the chance of playing with new products which will be available in the January-June Mini catalogue. One of the bundles which will be available is the Blessings Of Home (#157939) and I love this gorgeous set. Here is the first of many cards using this product.


There are 2 floral images in the Blessings Of Home stamp set (#157930) and I stamped the smaller one onto Shimmery White card stock (#121717) which is used for the card front. I stamped the larger one on another piece of Shimmery White card and this was cut with a die from the Flowers Of Home Dies (#157938). Both images were stamped with Tuxedo Black Memento ink (#132708).

I used a variety of Stampin’ Blends to colour the images including Granny Apple Green (#154885), Daffodil Delight (#154883), Flirty Flamingo (#154884), Petal Pink (#154893), Pool Party (#154894), Fresh Freesia (#155518), Pale Papaya (#155519), Ivory (#154922) & Pumpkin Pie (#154897). 

After colouring the flowers on the card front, I dry embossed the card with the Timeworn Type 3D Embossing Folder (#156505). I daubered the edges with Daffodil Delight ink.

I attached some Adhesive Sheet (#152334) to Granny Apple Green card (#147014) before cutting the small leaves from the Flowers Of Home Dies. I attached the  leaves and Gold Trim from the Simply Elegant Trim (#155766) the the card, then attached the large die cut floral image with Stampin’ Dimensionals (#104430). As usual I used the Clear Wink Of Stella (#141897) on the flowers, but it never seems to show in the photo.

“Thinking Of You” from the Blossoms In Bloom stamp set (#158283) was stamped with Daffodil Delight ink (#147094), then cut with a die from the Ornate Frames (#150664). The Gold Trim was threaded through the tag and attached with Mini Dimensionals (#144108). The Genial Gems (#155500) finishes off this beautiful card.

“Love what you do and share what you love”


Thursday, 16 September 2021

Gorgeous Leaves stamp set

Hi everyone,

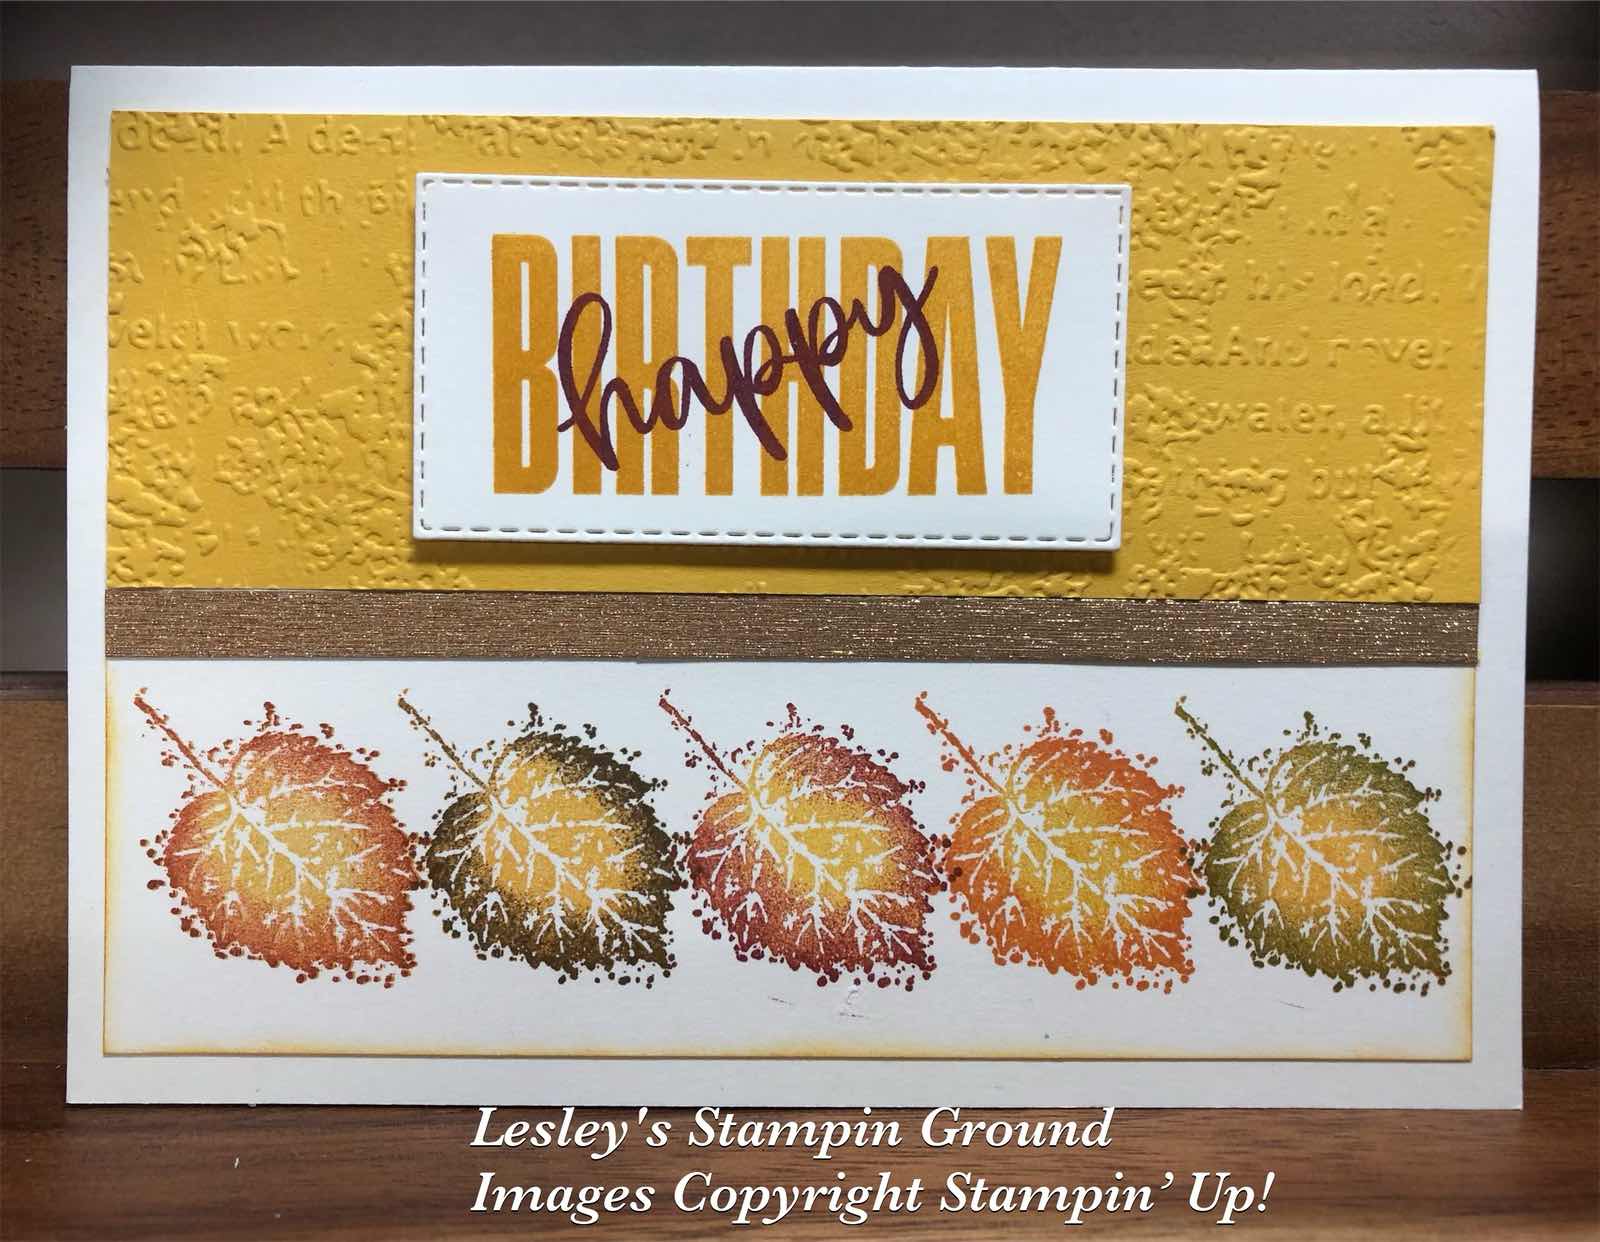
These leaves are from the Gorgeous Leaves stamp set (#153365) and stamped using the “hinged method” with the Stamparatus (#148187).


I stamped the leaves with Crushed Curry ink (#147087), then inked the edges of the leaves with different inks using a dauber and re-stamped. From left to right the inks used were Cajun Craze (#147085), Soft Suede (#119982), Cherry Cobbler (#147083), Pumpkin Pie (#147086) and Old Olive (#147090). I did one leaf at a time before moving the plate one “hinge” each time.

The Crushed Curry card (#131288) was dry embossed with the Timeworn Type 3D Embossing Folder (#156505) and attached to the Very Vanilla card front (#106550). I also attached a small strip of the Gold from the Gold & Rose Gold 6”x6” Metallic Specialty Paper (#156844) to the card front.

The sentiment is from the Biggest Wish stamp set (#155052). “Birthday” was stamped with Crushed Curry ink and “happy” with Cherry Cobbler ink. This was then cut with a Stitched Rectangles Die (#151820) and attached to the card with Stampin’ Dimensionals (#104430).


“Love what you do and share what you love.”

Stay safe & keep crafting!!


Saturday, 21 August 2021

Delicate Dahlias Sale-a-bration

Hi again my friends,

There is a range of free products (with a qualifying order) from Sale-a-bration and one of my favourites is the Delicate Dahlias stamp set (#156601).


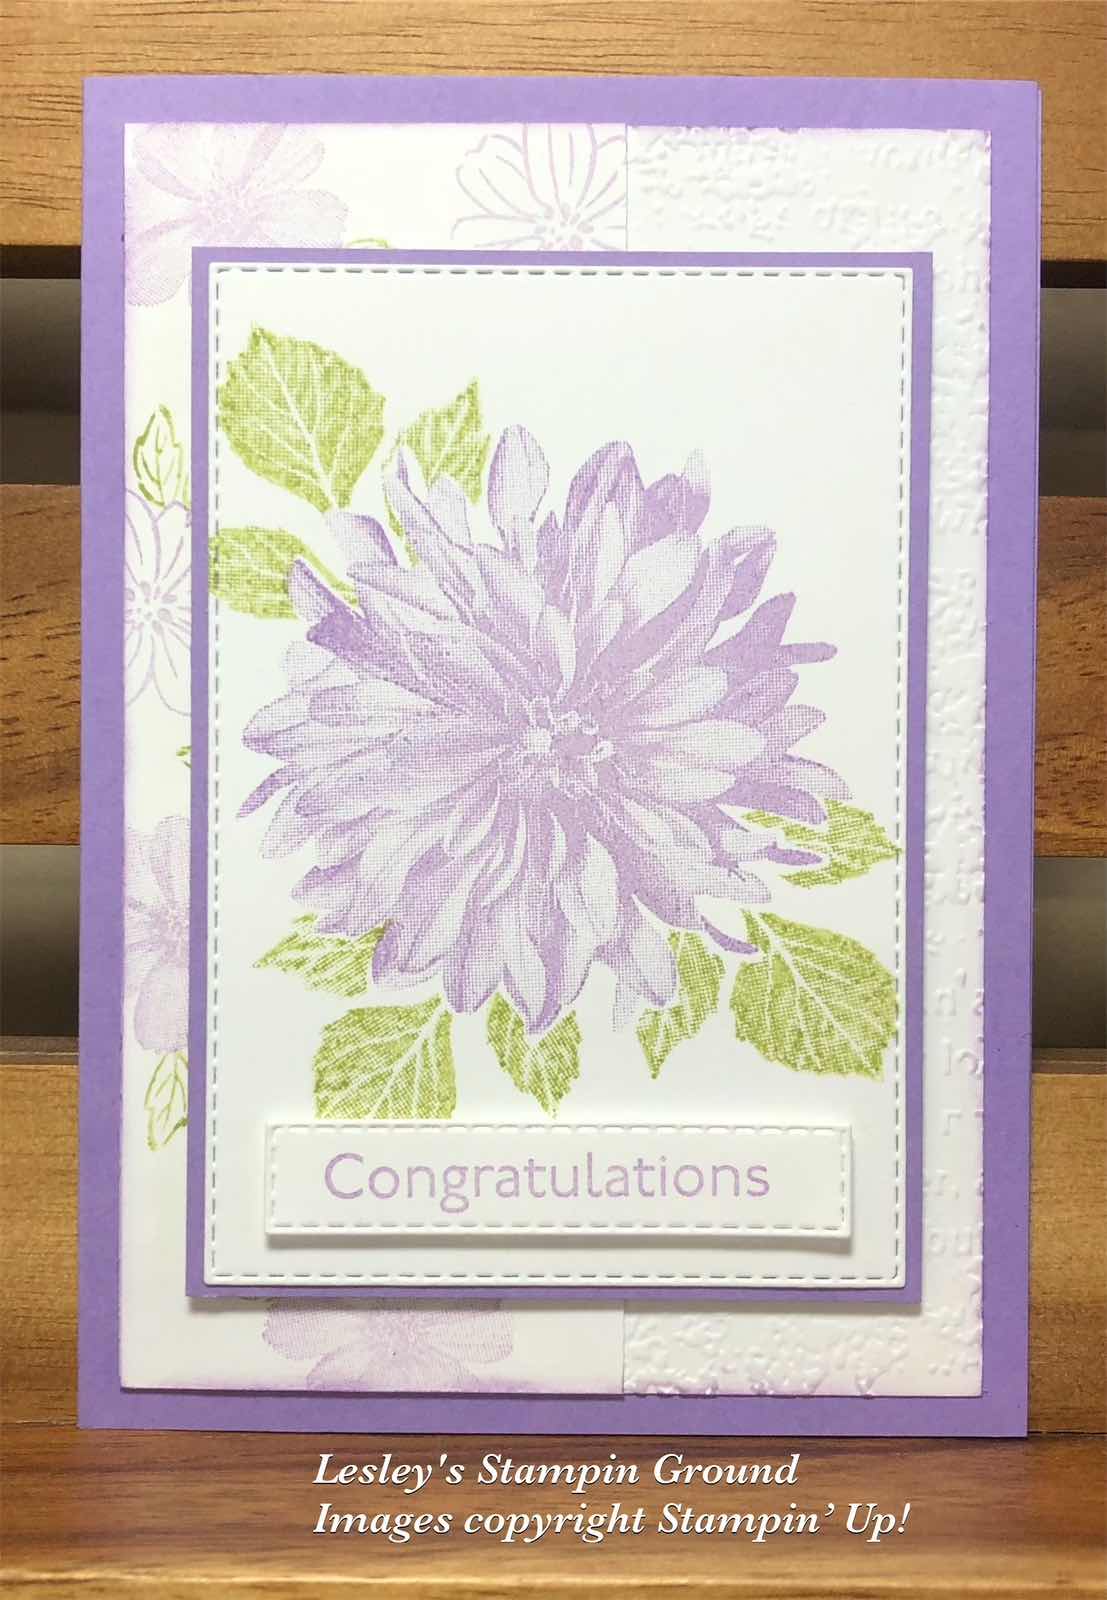
I stamped the dahlia with Highland Heather ink (#147103). I had a mask which I had made previously by stamping on a post-it note and cut around the image. This was the placed over the stamped image on the Basic White card (#159228). I then stamped the leaves with Pear Pizzaz ink (#147104) after stamping off on scrap paper for a lighter colour. Masking allows you to stamp two or more images and gives a layered look. I cut this with a Stitched Rectangles Die (#151820) and matted this with Highland Heather card (#147010).

I then stamped the smaller flowers and leaves from the Delicate Dahlias stamp set on a strip of Basic White card. This was attached to the card front which had been dry embossed with the Timeworn Type 3D Embossing Folder (#156505). The base card is Highland Heather.

The matted dahlia image was attached to the card with Stampin’ Dimensionals (#104430). Congratulations is from the Art Gallery stamp set (#158201) and stamped with Highland Heather ink then cut with a Stitched Rectangles Die.

“Love what you do and share what you love.”


Stay safe & keep crafting!!


Saturday, 7 August 2021

Delicate Dahlias from Sale-a-bration

Hello my friends,

Here is a lovely subtle coloured card using the beautiful Delicate Dahlias stamp set (#156601) which is a free product from Sale-a-bration with a $180 order. This is a 2 step stamp set.


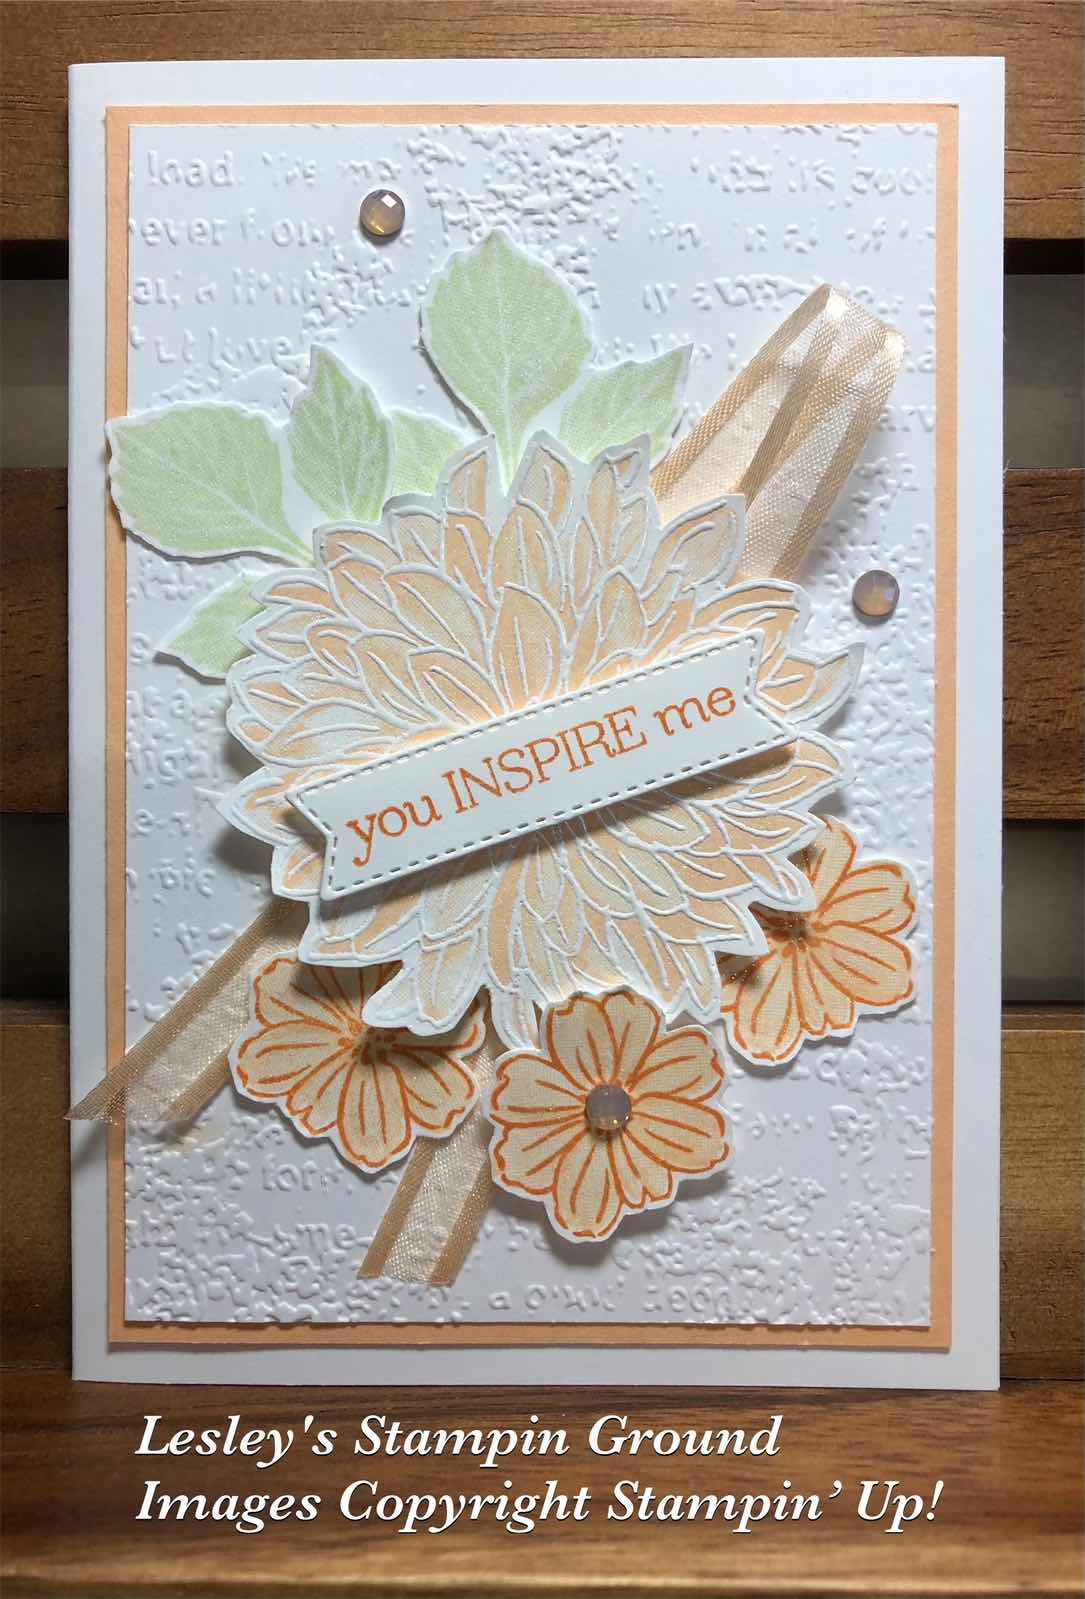
For the large dahlia, I stamped it with Pale Papaya ink (#155670) first, then stamped the outline image with VersaMark (#102283) and used White Stampin’ Emboss Powder (#155554) which was set with the Heat Tool (#129056). The small flowers were stamped with Pumpkin Pie ink (#147086) and Pale Papaya ink. The leaves were stamped with Soft Sea Foam ink (#147102). All the images were fussy cut,

The Basic White card front (#159228) was embossed with the Timeworn Type 3D Embossing Folder (#156505) and this was matted with the Pale Papaya card (#155669), then attached to the Basic White base card.

The Pale Papaya Open Weave Ribbon (#155672) was attached to the card front, then the flowers and leaves were attached using Stampin’ Dimensionals (#104430) and Mini Glue Dots (#103683). The sentiment is also from the Delicate Dahlias stamp set and cut with a die from Tasteful Labels (#152886). This was stamped with Pale Papaya ink and attached with Mini Stampin’ Dimensionals (#144108). I used the Clear Wink Of Stella (#141897) to add glitter the the flowers and leaves. The card was finished with the Elegant Faceted Gems (#152464).

“Love what you do and share what you love.”


Stay safe and keep crafting!!


Monday, 26 July 2021

Many Layered Blossoms

Hi,

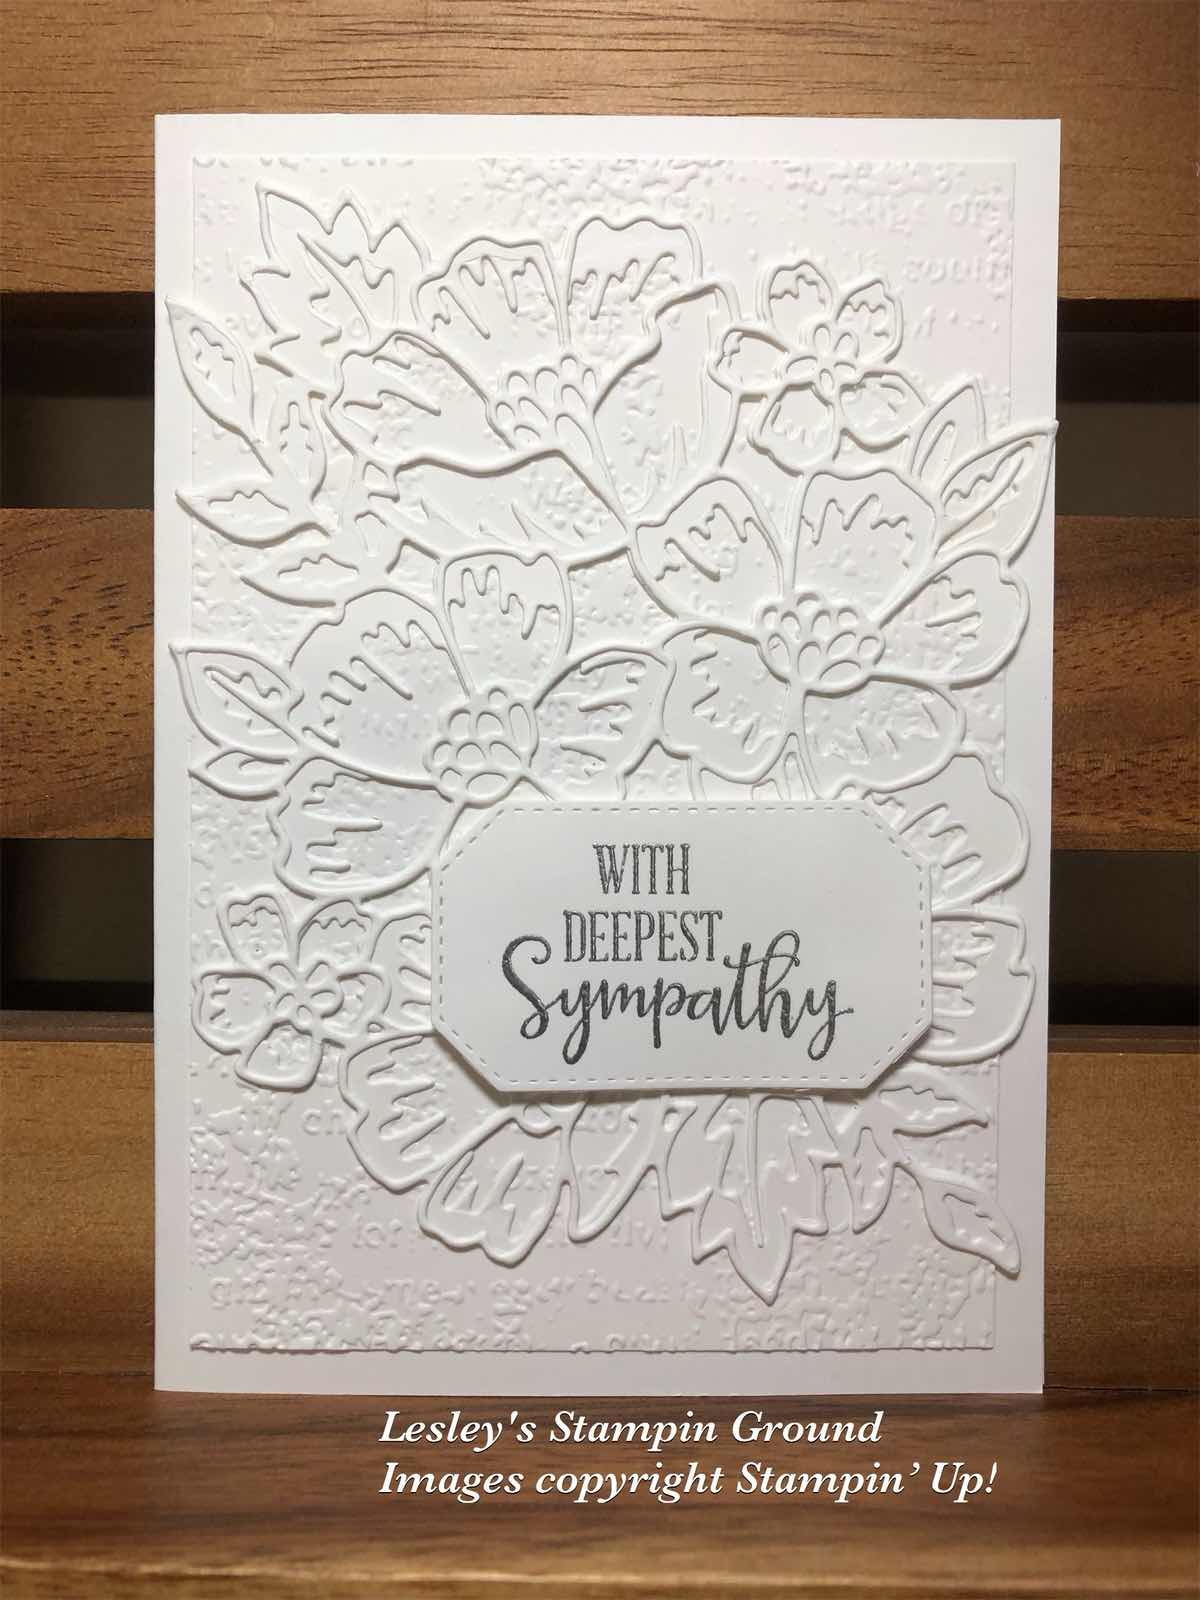
Something different with an all white card, except for the sentiment, for this beautiful sympathy card.


The card stock is Basic White (#159228). I embossed the cardfront with the Timeworn Type 3D Embossing Folder (#156505) which will be available from the new Mini catalogue from 3rd August. I then attached an Adhesive Sheet (#152334) to the back of another piece of Basic White card and cut the 2 floral images using dies from the Many Layered Blossoms (#153582) and attached them together, then to the card.

The sentiment is from the Peaceful Moments stamp set (#151595) and stamped with VersaMark (#102283) and heat embossed with Silver Stampin’ Emboss Powder (#155555) and set with the Heat Tool (#129056). This was cut with a Hippo & Friends Die (#153585) and attached to the card with Stampin’ Dimensionals (#104430).

“Love what you do and share what you love.”