Sunday, 3 January 2021

Dandy Garden Designer Series Paper

Hello,

We all have bits and pieces of Designer Series Paper and they are great for a quick and easy card with very little stamping.


I attached a piece of Whisper White card (#106549) to the Whisper White base card. I had daubered the edges first with Bumble Bee ink (#153116). Then I attached 2 pieces of the Dandy Garden 6”x6” Designer Series Paper (#154297) to the cardfront. Another piece of DSP was attached to a piece of Bumble Bee card (#153082) and this was attached to the card.
The sentiment is from the Dragonfly Garden stamp set (#154411) and stamped with Bumble Bee ink. The labels for the sentiment were cut with dies from the Potted Succulents Dies (#154330). These were attached with Stampin’ Dimensionals (#104430).

Yes, a very easy card.

Have a great day!!


“Love what you do and share what you love.”


Saturday, 2 January 2021

Seashells 3D Embossing Folder

Welcome friends,

I love when there is so much versatility in a suite, like the Sand and Sea Suite (#155980). This suite collection includes a stamp set, dies, embossing folder, designer series paper, specialty paper and embellishments, including stickers.
On this card I have chosen to use the embossing folder for the background. However you could cut with dies, stamp and emboss the same image, so it’s very versatile.


I dry embossed the Pearlescent Specialty Paper (#154291) using the Seashells 3D Embossing Folder (#154309). Then I lightly daubered the shells and seaweed using the following inks - So Saffron (#147109), Seaside Spray (#150085), Crumb Cake (#147116), Blushing Bride (#147100) and Soft Sea Foam (#147102). This embossed card was then attached to the Brushed Metallic 12”x12” Cardstock (#153524), then attached to the Soft Sea Foam card base (#147012).
I stamped the sentiment with Pear Pizzaz ink (#147104) and the star fish were stamped with Soft Sea Foam ink. Both these images are from the Friends Are Like Seashells stamp set (#p154368). The starfish were cut with a Seaside Seashells die (#156095) and the sentiment with an Ornate Frames Die (#150664).
The Gold Trim from the Forever Greenery Trim Combo Pack (#152475) was attached to the card, then the sentiment was attached with Stampin’ Dimensionals (#104430). The starfish were attached with Mini Stampin’ Dimensionals (#144108) and Mini Glue Dots (#103683).


I hope you are having a crafty day!!

“Love what you do and share what you love.”


Friday, 1 January 2021

Floating & Fluttering

Hello and Happy New Year,

I hope you all had a relaxing Christmas and New Year. I was able to spend some time with some family, then I spent time cleaning and sorting my craft room - a never ending job. Now it’s all sorted, time to get back into making cards (and I guess mess it up again).

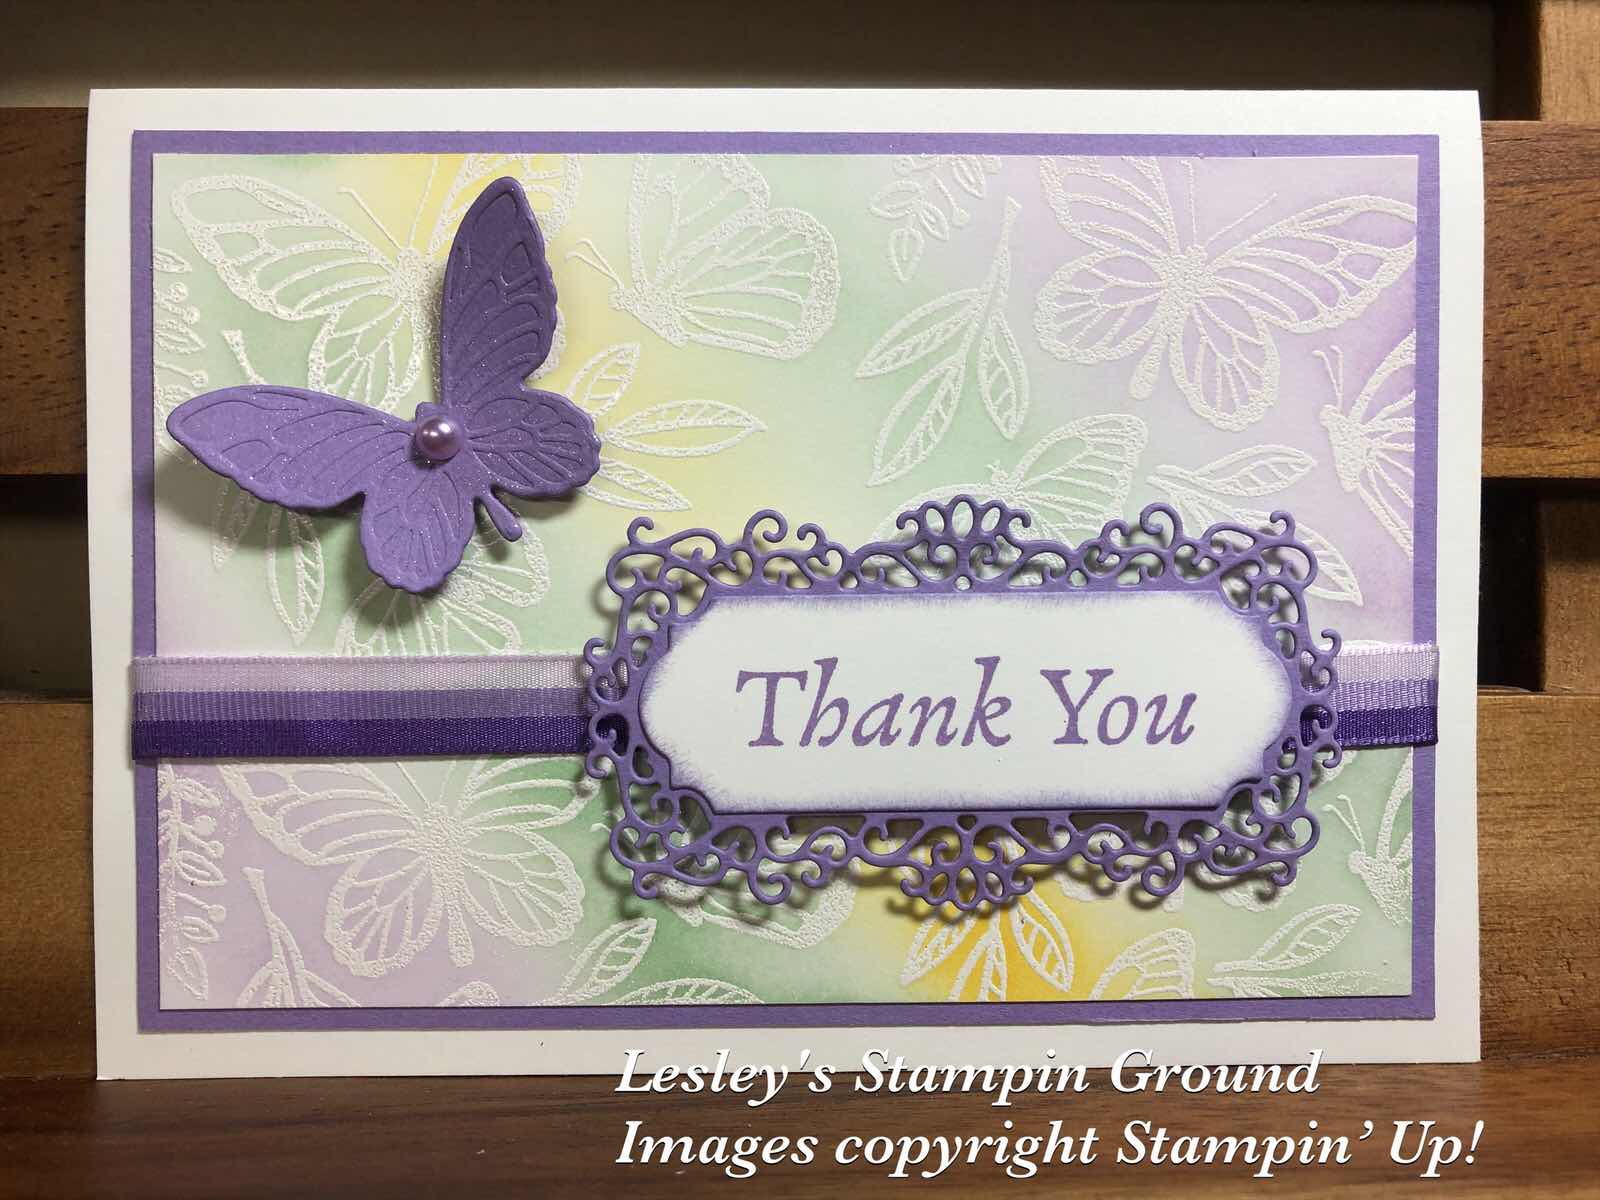
With the new Mini catalogue only days away, here is a card using new products with my favourites- mauve/purple and butterflies!!


The stamp set I have used for the background is Floating & Fluttering (#154424). There are 3 butterflies and 3 leaves grouped together on this one stamp, so I have stamped 4 images onto the Whisper White card (#106549). I stamped these with VersaMark (#102283), then added White Stampin’ Emboss Powder (#109132) which was set with the Heat Tool (#129056). I added the colours using the new Blending Brushes (#153611). These beautifully velvety soft brushes blend the colours easily. I used Highland Heather ink (#147103), Mint Macaron ink (#147106) and Daffodil Delight ink (#147094). The embossed areas resist the colouring. You can add as much or as little colour as you desire. Start by only applying a lighter colour then you can always add more, but you can’t remove it if you add too much first.
The cardfront was then attached to the Highland Heather card (#147010). The purple 3/8” Tricolor Ribbon (#149708) was wrapped around the cardfront, then this was attached to the Whisper White base card.
“Thank You” is from the Happy Thoughts stamp set (#c154507) and stamped with Highland Heather ink. The Ornate Frames Dies (#150664) were used to cut the sentiment and the Highland Heather card under the sentiment. Stampin’ Dimensionals (#104430) were used to attach this to the card. 
The butterfly was cut and embossed with a die from the Fluttering Dies (#154318) and I added a Pastel Pearl (#154571) to the body of the butterfly. The butterfly was attached with Mini Stampin’ Dimensionals (#144108) and I added some glitter using the Clear Wink Of Stella Glitter Brush (#141897) over the entire butterfly.

“Love what you do and share what you love”.

Enjoy your day!!


lesleyjendra.stampinup.net


lesleyjendra@bigpond.com.au


Wednesday, 23 December 2020

Dragonfly Garden

Hello again friends,

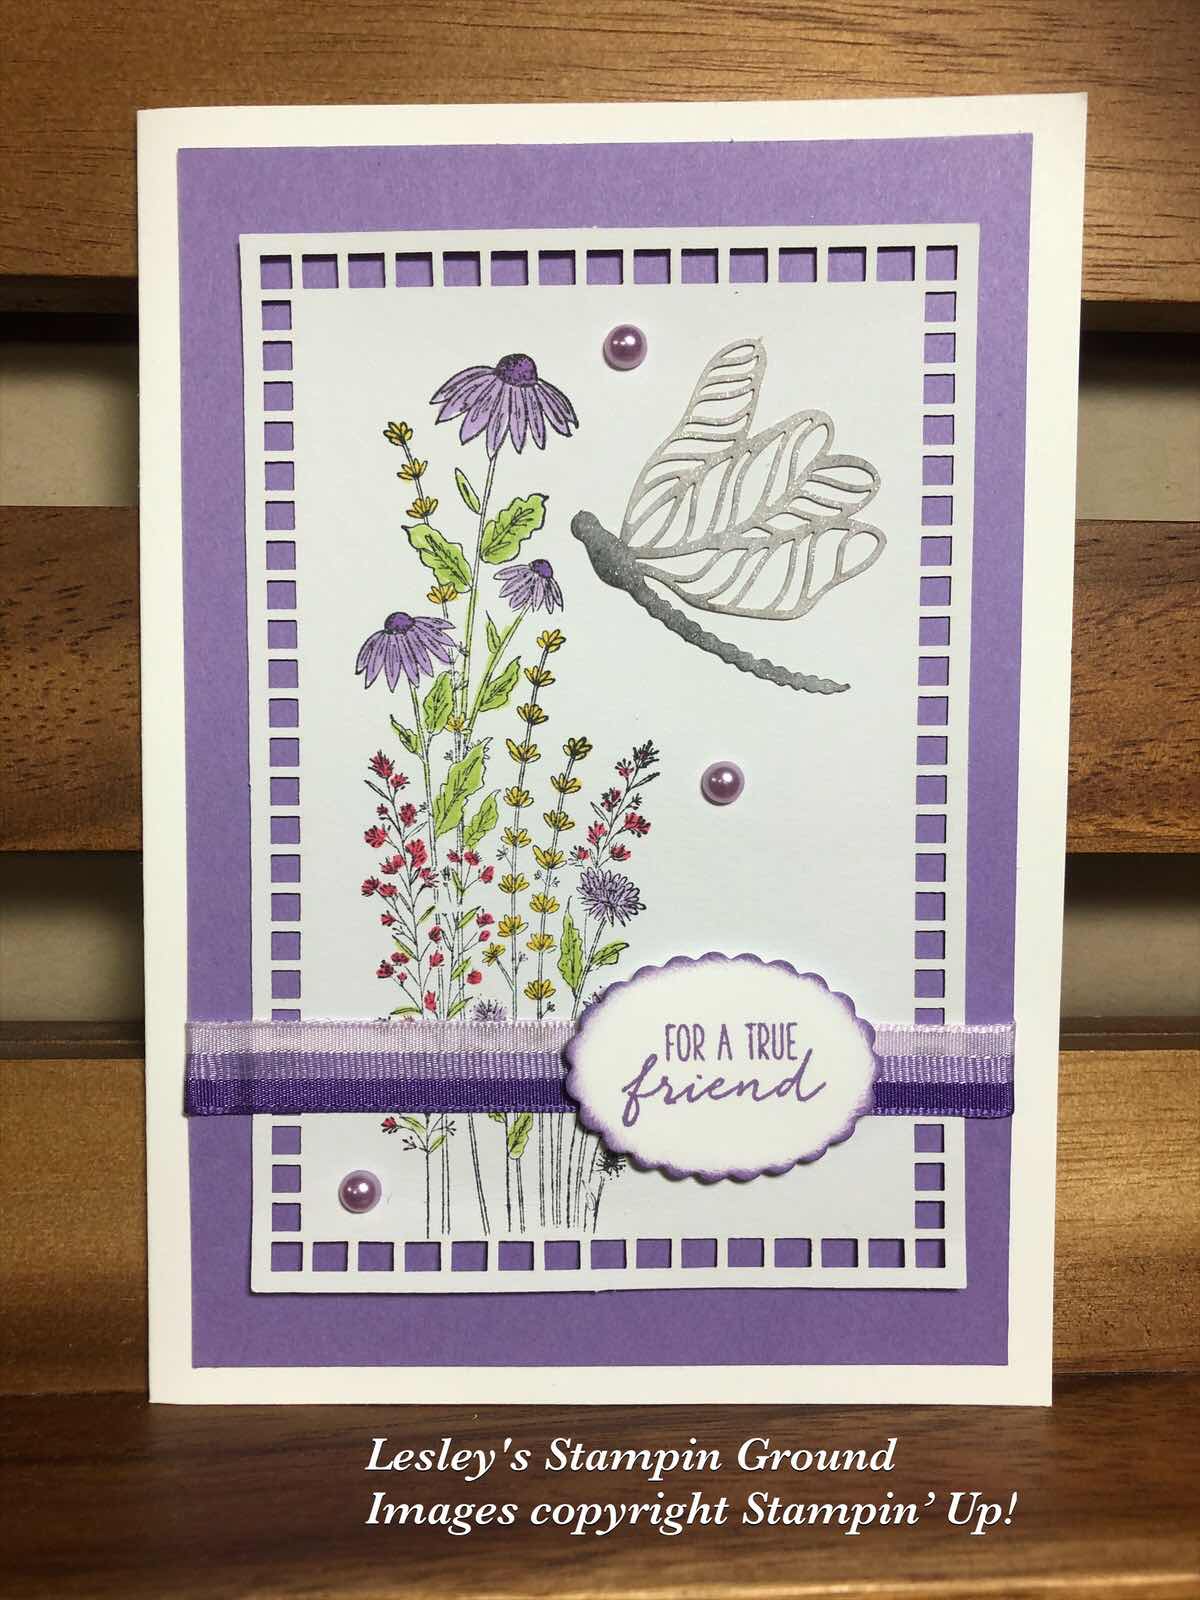
I have another sneak peek today, using 2 products from the Dandy Garden Suite (#155981). I chose this set today as I was looking out my window this morning and I couldn’t believe the number of dragonflies flying around the garden.


I stamped the flowers from the Dragonfly Garden stamp set (#c154411) using Tuxedo Black Memento ink (#132708). This was stamped onto a card front from the Dandy Laser-Cut Paper (#154300). I coloured the image with Stampin’ Blends - Highland Heather (#154887), Granny Apple Green (#154885), Daffodil Delight (#154883) and Poppy Parade (#154958). The cardfront was attached to the Highland Heather card (# 147010), then I wrapped the 3/8” Tricolor Ribbon (#149708) around these 2  cards. This was attached to the Whisper White base card (#106549). The sentiment is also from the Dragonfly Garden stamp set and stamped with Highland Heather ink (#147103). I cut this with the Messages die (#154422). This is a large die with various shaped cutouts. There is also a co-ordinating stamp set for this die, but I find that many sentiments can be cut with this die. I used the Mini Stampin’ Dimensionals (#144108) to attach the sentiment to the card.
The dragonfly is also from the Dandy Laser-Cut Paper. I daubered Smokey Slate ink (#147113) on the wings and Black Memento ink on the body, then added glitter using the Wink Of Stella Glitter Brush (#141897). This was glued to the card with the Fine-Tip Glue Pen (#138309). The Pastel Pearls (#154571) were added to the card.

I am going to have a week or so off as it’s a busy time of the year with getting together with (some) family & friends.  So I would like to wish you all a very Merry Christmas and I should be back before the New Year.

Stay safe, relax and hopefully you can catch up with family & friends too.

“Love what you do and share what you love.”


Tuesday, 22 December 2020

Simply Succulents Bundle

Hello friends,

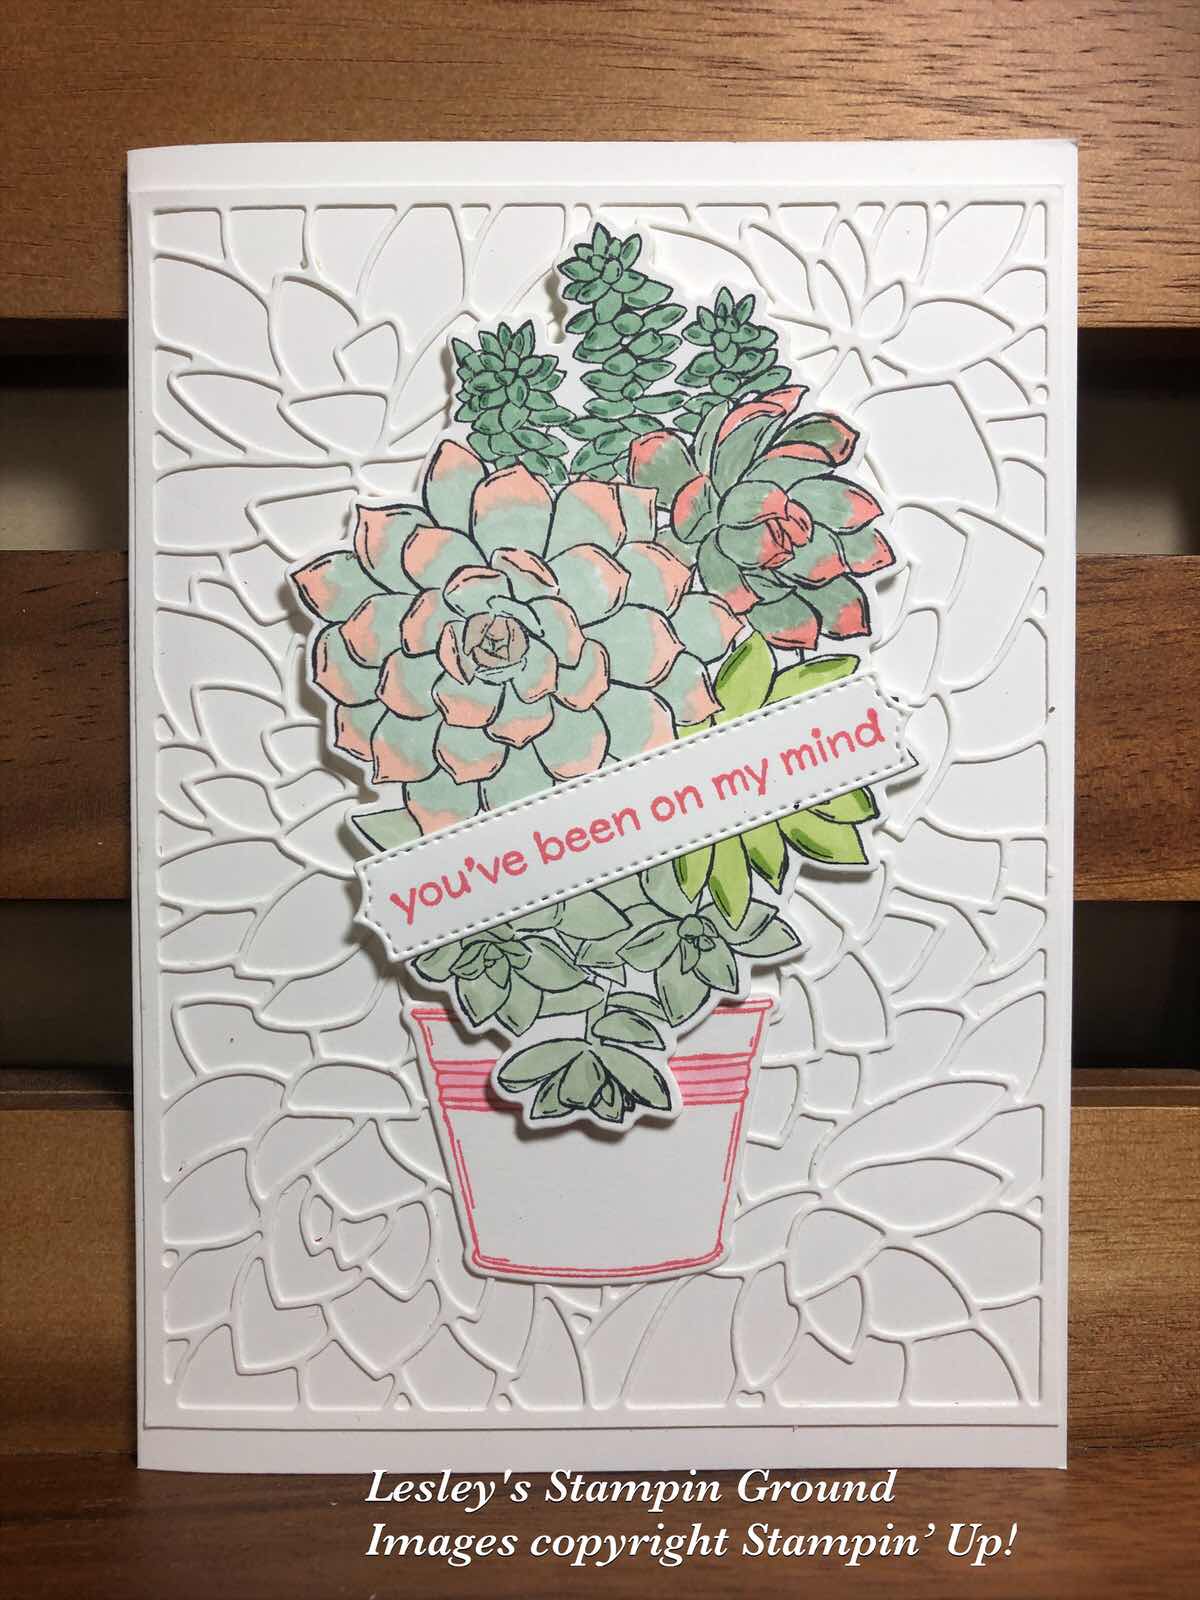
After yet another busy day, I have enjoyed sitting and colouring these succulents from the Simply Succulents stamp set (#154480) which are from the upcoming January-June Mini catalogue.


I stamped the image onto Whisper White card (#106549) using Tuxedo Black Memento ink (#132708). The Stampin’ Blends used are Mint Macaron (#154889), Just Jade (#153107), Granny Apple Green (#154885), Soft Sea Foam (#154902), Petal Pink (#154893) and Flirty Flamingo (#154884).
The pot was stamped with Flirty Flamingo ink (#147052) and I coloured the band of the pot using Flirty Flamingo Stampin’ Blends. 
The sentiment, also from the Simply Succulents stamp set was stamped with Flirty Flamingo ink, then cut with a die from the Potted Succulents Dies (#154330).
The background was also cut with a die from the same die set. I glued this to the Whisper White base card using the Mulitpurpose Liquid Glue (#110755). I used a sponge to dab the glue to the back of the die cut piece. The other option would have been to adhere Adhesive Sheet (#152334) to the back of the card before cutting.
The pot was taped to the card and the succulents were attached using Stampin’ Dimensionals (#104430), then the sentiment was taped on top.

Have a great day!!

“Love what you do and share what you love.”


Monday, 21 December 2020

Sympathy card

Hello again,

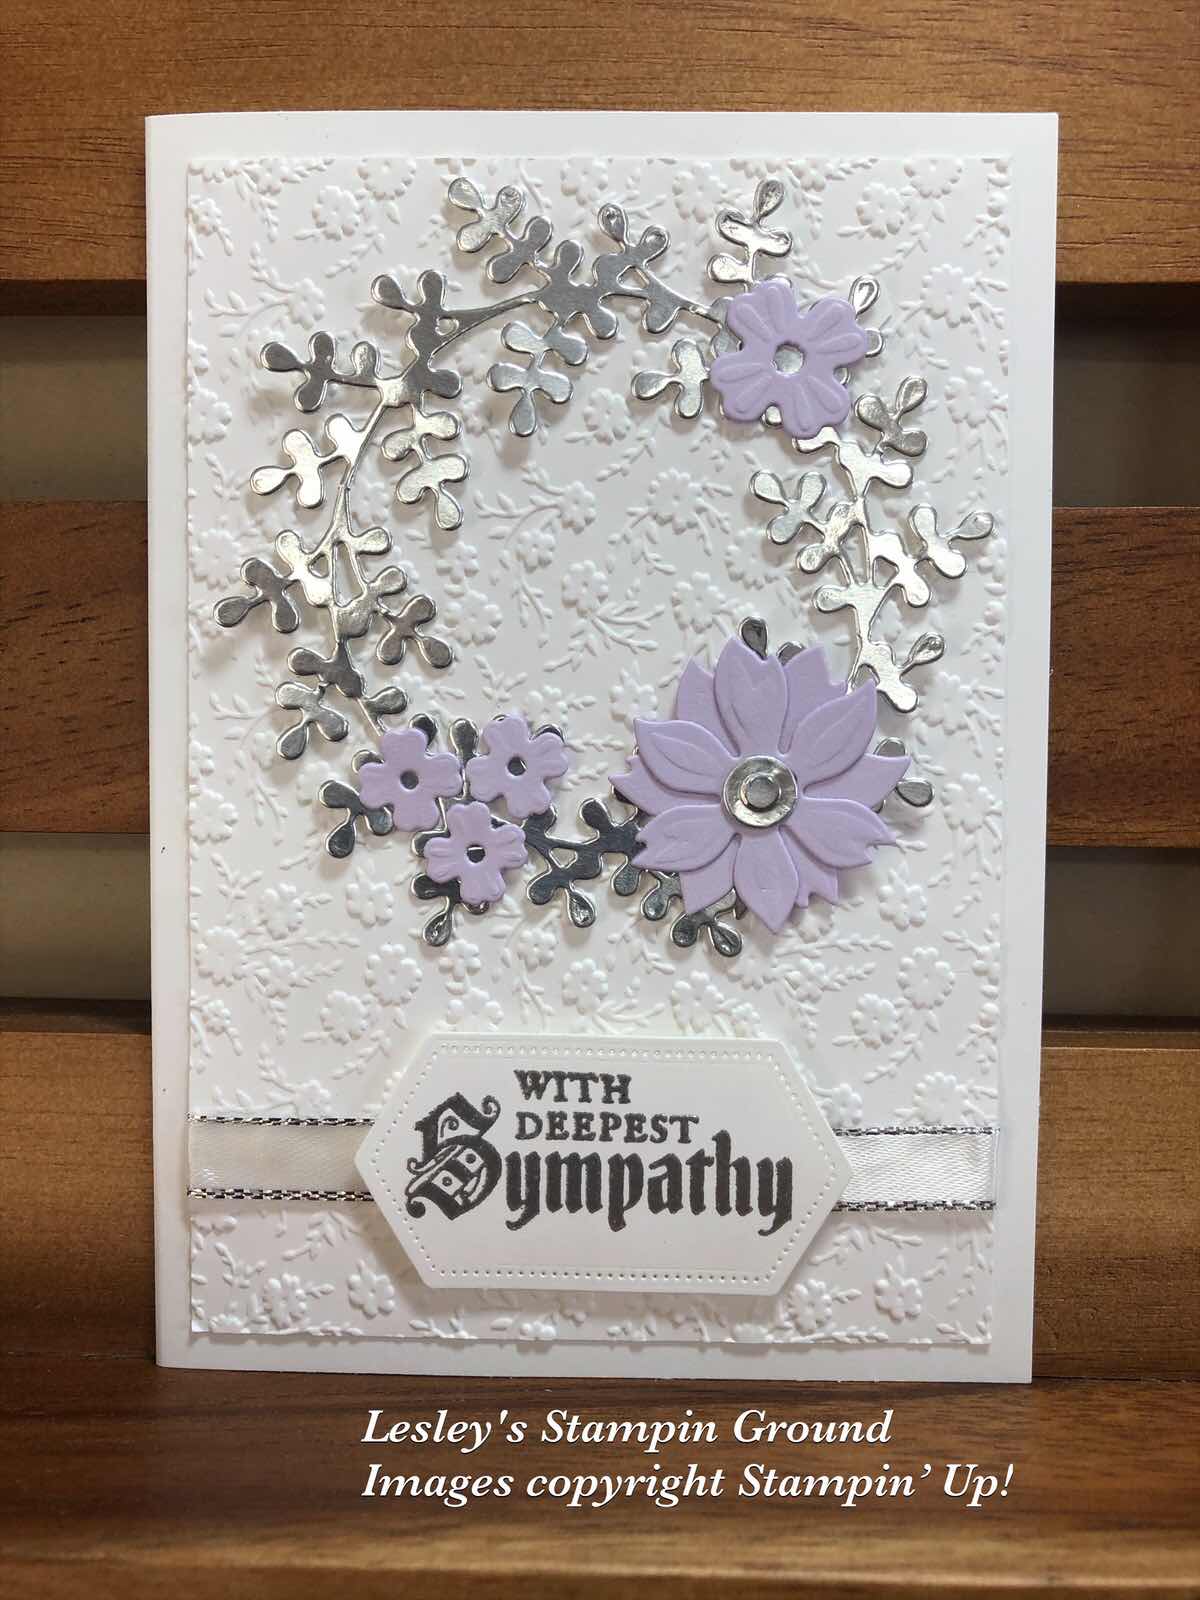
Unfortunately I needed a Sympathy card so have used the Wreath Builder Dies (#152722) for this card.


The base card and card front are Whisper White (#106549). I dry embossed the card front with the Ornate Floral 3D Embossing Folder (#152725), then wrapped the Silver 3/8” Metallic-Edge Ribbon (#144213) around the card. The sentiment is from a retired stamp set (Painted Glass) but I like this as it is very elegant. This was stamped with VersaMark (#102283) and I used the Silver Stampin’ Emboss Powder (#109131) and set it with the Heat Tool (#129056). I then cut this with the Stitched Nested Labels (#149638) and attached it to the card with Mini Stampin’ Dimensionals (#144108).
The wreath was cut from Silver Foil (#132178) using a die from the Wreath Builder dies (#152722). The flowers, also from the same die set were cut from Purple Posy card (#150887). The wreath and flowers were all attached with Mini Glue Dots (#103683).

Have a great day. Hopefully you won’t  be too busy with Christmas only days away.

“Love what you do and share what you love”.


Saturday, 19 December 2020

Classic Christmas Designer Series Paper

Hello,

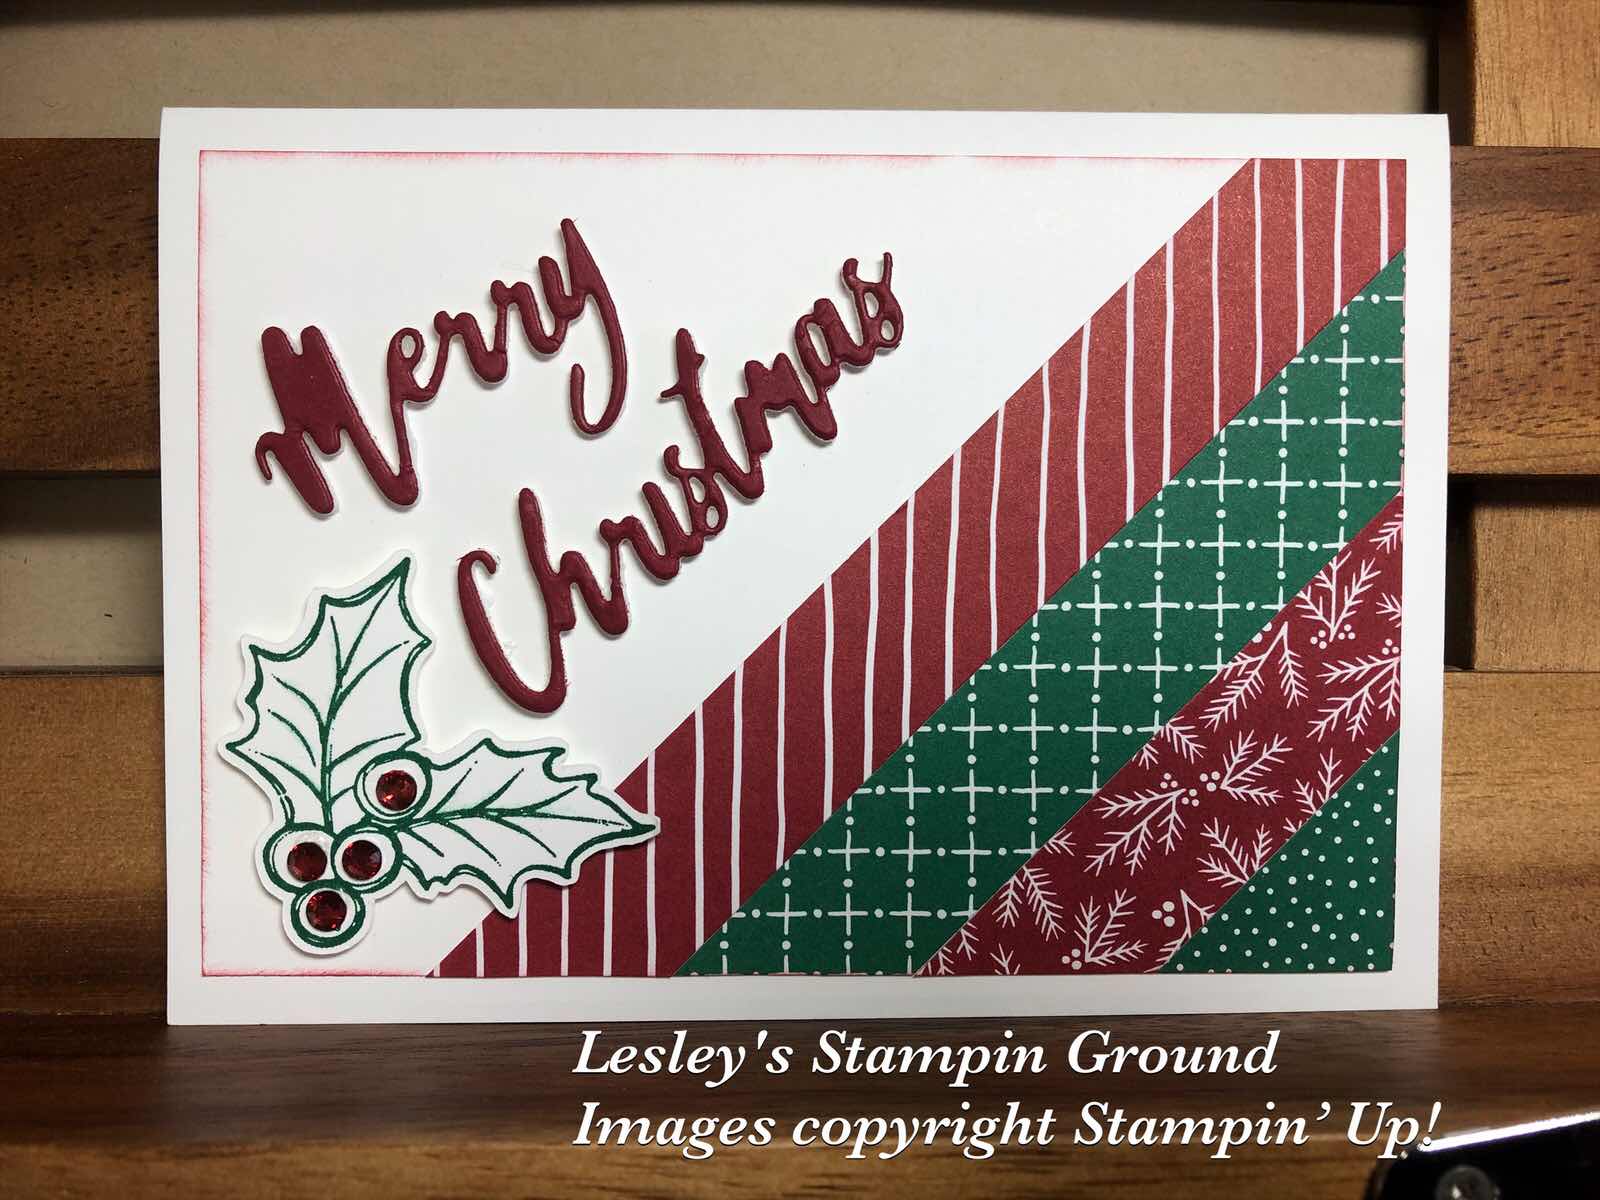
I usually have so many scraps of Designer Paper, which of course I don’t want to throw away, and often wonder what I am going to do with them. Well, on today’s card I have used some strips of the Classic Christmas Designer Series Paper (#155969).


I attached the 4 strips of designer paper to the Whisper White card front (#106549). The easiest way to do this is have the pieces longer than needed and cut level with the card front after they are taped to the card.
I attached a piece of Cherry Cobbler card (#121681) to the Foam Adhesive Sheets (#152815), then cut “Merry Christmas” with the Word Wishes Dies (#149629). These Foam Adhesive Sheets have adhesive on both sides and can be cut with scissors or open dies and great when you want to add dimension easily to smaller pieces.
The holly leaves are from the Christmas Gleaming stamp set (#150464) and stamped with Shaded Spruce ink (#147088). These were fussy cut before attaching to the card using Stampin’ Dimensionals (#104430). I added the Cherry Cobbler Holiday Rhinestone Basic Jewels (#150457) to the “berries”. The edges of the card front were sponged with Cherry Cobbler ink (#147083) before attaching it to the Whisper White base card.

Hopefully you have finished all your Christmas cards now, but if not this is an easy one to make.

Enjoy your weekend!!


“Love what you do and share what you love.”