Showing posts with label #blendingbrushes. Show all posts

Monday, 7 October 2024

Enduring Beauty

 Hello again my friends,

I have used the Enduring Beauty stamp set (#162670), the Enduring Beauty dies (#162672) and the Enduring Beauty Decorative Masks (#162673) for this very pretty card.


I stamped the floral image with VersaMark (#102283) and added the Gold from the Metallics Wow! Embossing Powder (#165678). This was set with the Heat Tool (#129056). I then coloured the image using the Decorative Masks. For the flowers I used Pretty In Pink ink (#163807) and I used Summer Splash ink (#163809) for the leaves with Blending Brushes (#153611). As I only wanted very soft colours, I very gently added the colour. You can always add more colour but you can’t take it away if you start too dark. When I used the second mask for the flowers & leaves I added slightly more ink for the slightly darker colour but still used the same inks.

I cut this floral image & the Gold Foil (#132622) for the leaves with the Enduring Beauty dies. The Gold Foil was backed with Adhesive Sheet (#152334).

I attached a piece of the Pretty In Pink from the 2024-2026 In Color Designer Series Paper Assortments (#163777) to a piece of Basic White card (#159228), then cut this with the die from the Citrus Blooms (#163294). This was dry embossed with the So Swirly Embossing Folder (#163791). I also cut a piece of Pretty In Pink card (#163794) with the same die. I cut this in half to allow me to matt the top & bottom of the white card. This was taped to the Basic White base card.

The floral image was attached to the card with Stampin’ Dimensionals (#104430) and the leaves were attached easily with the Adhesive Sheet on the back.

The sentiment from the Regal Flora stamp set (#164157) was stamped with Summer Splash ink. A die from the Delicate Forest Dies (#162679) was used to cut the sentiment. This was taped to the flowers. The embellishments are the Iridescent Foil Gems (#162842). I added Wink Of Stella (#141897) to the flowers for the shimmer.

“Love what you do and share what you love.”

INSPIRE. CREATE. SHARE. 


Friday, 23 August 2024

Wild Ferns

 Hello & welcome,

I am back from my short holiday and straight back into classes, so very busy again. For today’s card I have used the Wild Ferns stamp set (#162648) and Wild Ferns dies (#162654).


I used a retired decorative mask and Blending Brush (#153611) with Pecan Pie ink (#161665) to create the  background on the Very Vanilla card (#106550). I then stamped a fern from the Wild Ferns stamp set using Mossy Meadow ink (#147111). I dry embossed this card with the Timber 3D Embossing Folder (#156406). I attached this to a piece of Mossy Meadow card (#133683). I wrapped a piece of retired ribbon around the card.

I dry embossed another piece of Very Vanilla card with the So Swirly Embossing Folder (#163791), daubered the edges with Mossy Meadow ink and attached it to the Very Vanilla base card.

I attached the smaller card with Stampin’ Dimensionals (#104430). “Just For You” from the So Sincere stamp set (#162283) was stamped with Mossy Meadow ink and cut with a Deckled Circles die (#162286).

The leaves from the Wild Ferns stamp set were stamped with Old Olive ink (#147090) and cut with a co-ordinating Wild Ferns die. The leaves & sentiment were attached to the card with Mini Glue Dots (#103683).

The Pecan Pie gems from the Pecan Pie & Clear Ribboned Adhesive-Backed Dots (#164204) were added to the card.

“Love what you do and share what you love.”

Saturday, 17 December 2022

Blessings Of Home

Hi everyone,

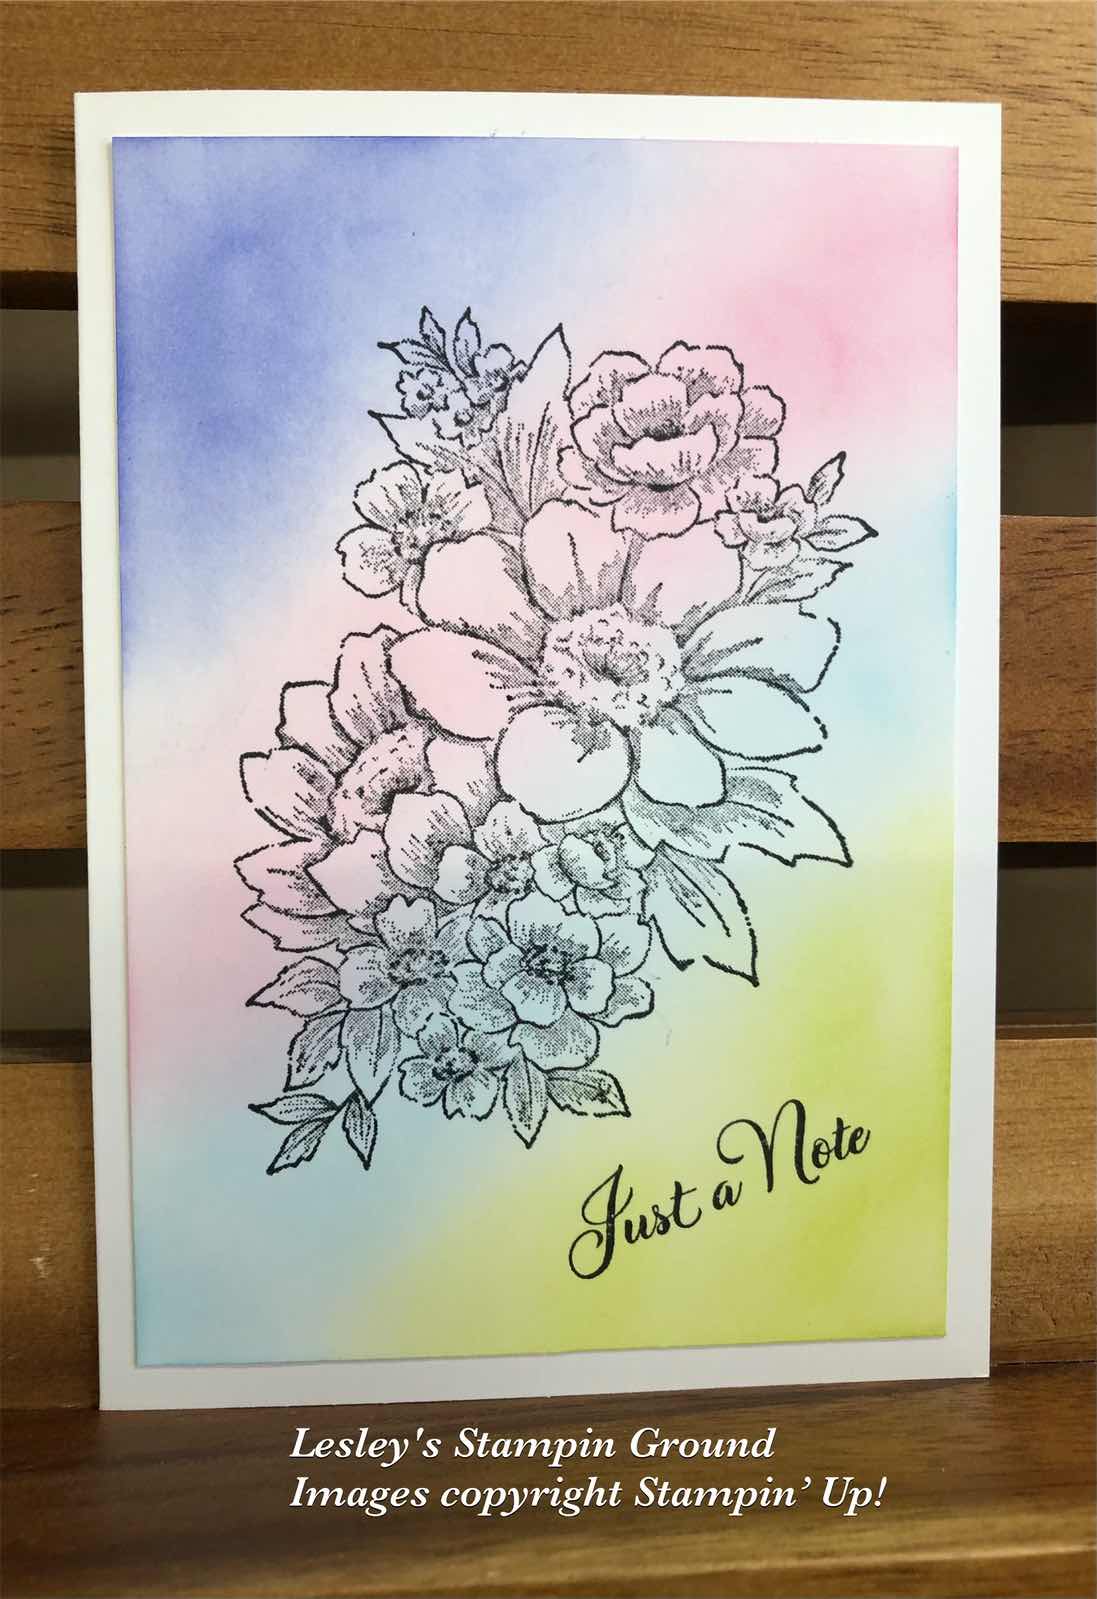
It’s very unusual for me to do a card with “simple stamping”. I think you know I like to use dies, punches, embossing folders, embossing powders etc. However if you are just starting card making, want something simple or are in a rush to make a card you can still achieve lovely results with basic supplies.


I coloured the Basic White card (#159228) for the background using Blending Brushes (#153611) with Orchid Oasis Ink (#159214), Polished Pink ink (#155712), Tahitian Tide ink (#159210) and Parakeet Party ink (#159208).

Next I stamped the beautiful floral image from the Blessings Of Home stamp set (#157930) with Tuxedo Black Memento ink (#132708). The sentiment from the Go To Greetings stamp set (#158763) was also stamped with this ink. The card front was attached to the Basic White base card. 

How simple is that!!

TIP: If you have trouble getting your sentiment straight on your card, stamp it on an angle, as I have done here, and it will look great.


“Love what you do and share what you love”.


INSPIRE. CREATE. SHARE.


Saturday, 19 March 2022

Dragonfly Garden Stamp Set

Hello again stamping friends,

Sometimes I have a particular idea for a card and it may or may not end the way I first imagined it. Other times I start with no firm ideas and the finished card I feel is much nicer than I expected which is how I felt about this card.


I started by colouring the right side of the Basic White card front (#159228) with Highland Heather ink (#147103), Coastal Cabana ink (#147097) and Polished Pink ink (#155712) using Blending Brushes (#153611). Then I stamped the beautiful flourish from the Sentimental Swirls stamp set (#157996) with VersaMark (#102283) and Embossed with the Silver Stampin’ Emboss Powder (#155555). This was set with the Heat Tool (#129056).

I stamped the flowers and the dragonfly from the Dragonfly Garden stamp set (#154411) with Tuxedo Black Memento ink (#132708) then the dragonfly was punched with the Dragonflies punch (#154240). The flowers were coloured with Stampin’ Blends - Fresh Freesia (#155518), Polished Pink (#155520) and Pool Party (#154894 for the leaves.

I matted the card front with Basic Black card (#121688). The Metallic Mesh Ribbon (#153550) was wrapped around the card front, then the card front was attached to the Basic White card base.

Happy Birthday is from the Special Moments stamp set (from sale-a-bration). This was stamped with VersaMark and heat embossed with the Black Stampin’ Emboss Powder (#155554). A label from the Potted Succulents dies (#154330) was used to cut the sentiment. I used Stampin’ Dimensionals (#104430) to attach this to the card. The Rhinestone Basic Jewels (#144220) were added to finish the card.

“Love what you do and share what you love.”


Thursday, 3 March 2022

Dragonfly Garden

Hi friends,

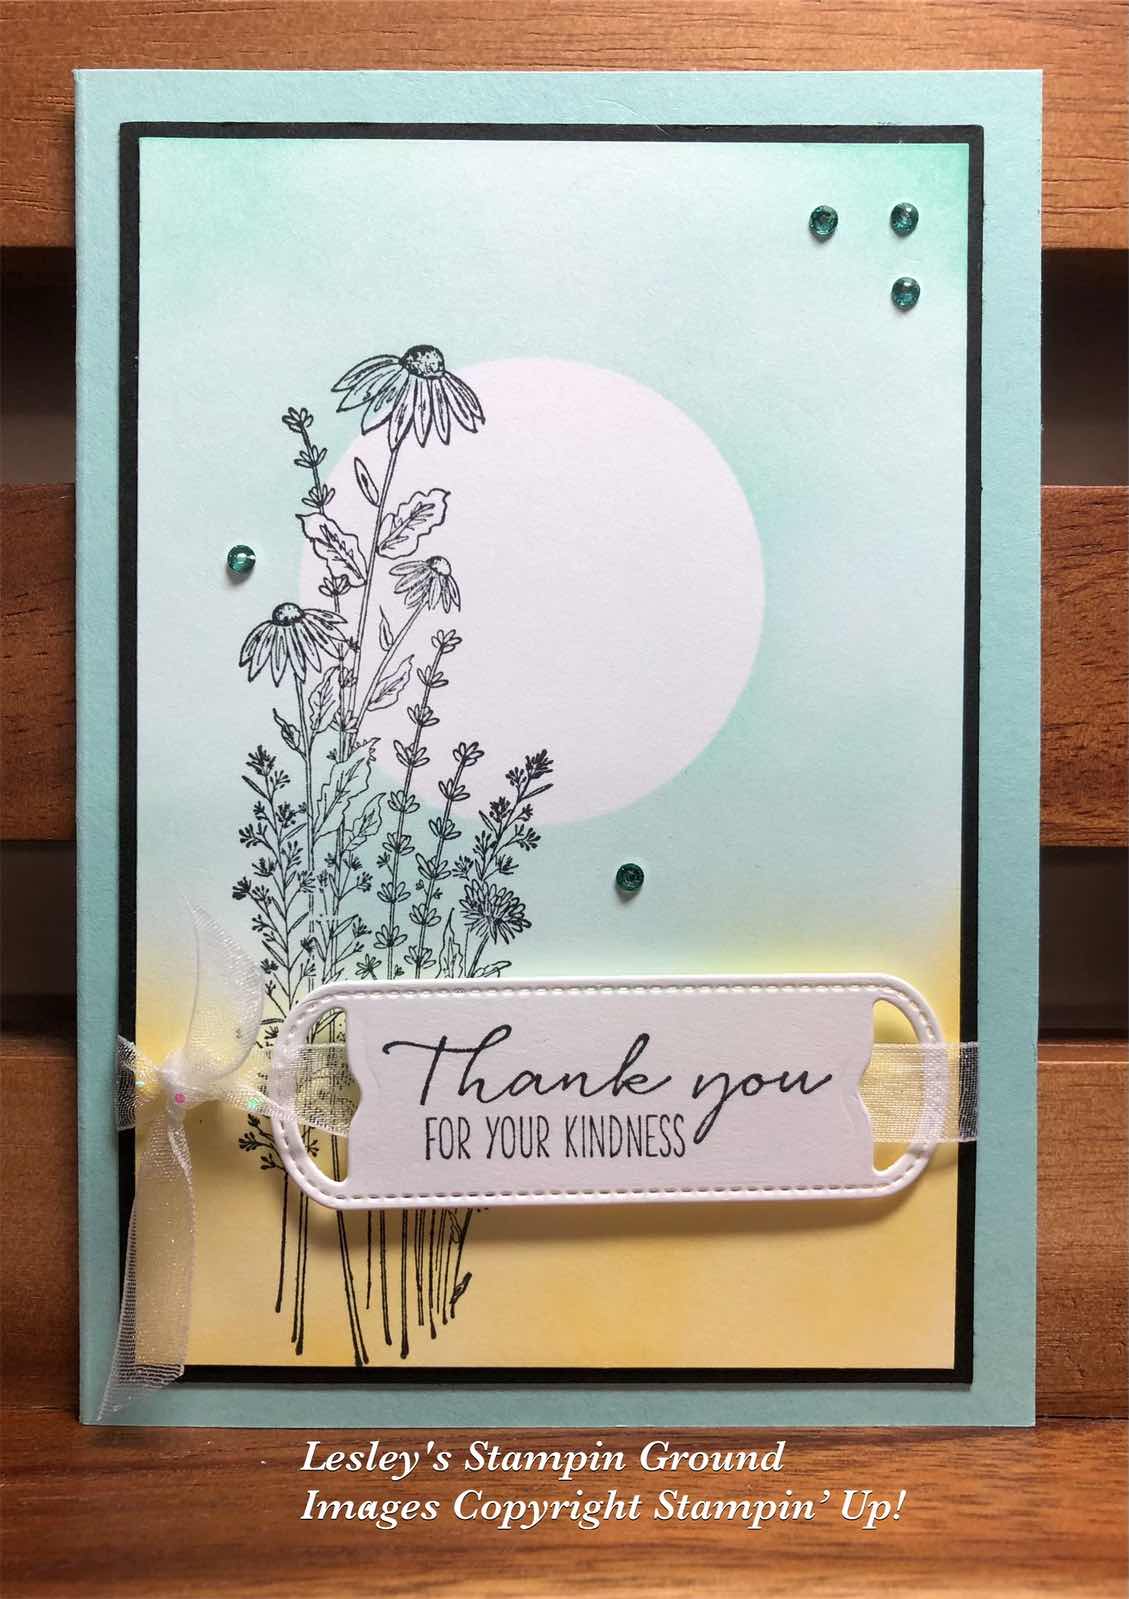
A simple masking technique was used for the circle on this card.


I punched a 2”circle from a post it note and placed it on the Basic White card front (#159228). The circle was created by blending Pool Party ink (#147107) with a Blending Brush (#153611) onto the white card. I then used Daffodil Delight ink (#147094) at the bottom of the card.

I stamped the floral image and sentiment from the Dragonfly Garden stamp set (#154411) with Tuxedo Black Memento ink (132708). The sentiment was cut with a Waves Die (#158840). I threaded the White Glittered Organdy Ribbon (#156408) through the sentiment label and wrapped it around the card front. The sentiment was attached with Stampin’ Dimensionals (#104430). The card front was matted with Basic Black card (#121688).

The base card is Pool Party (#124391) and the embellishments are from the new Rhinestone Waves Basic Jewels (#159396).

TIP: Post it notes are great for making masks as it is a thin paper and it has the sticky area so you can attached it to the card and remove it easily.

“Love what you do and share what you love.”


Saturday, 3 July 2021

Basic Borders Dies

Hi my friends,

I am loving this detailed floral die from the Artistic dies (#155371).


I stamped “Happy Birthday” from the Artistically Inked stamp set (#154542) with Polished Pink ink (#155712) at the base of the card front. I cut the Basic White card front  (#159228) with a Basic Borders Die (#155558), then attached this to the Polished Pink card (#155711)

Using the Blending Brushes (#153611), I coloured a piece of Basic White card using Polished Pink ink (#155712), Fresh Freesia ink (#155611), Pale Papaya ink (#155670) and Granny Apple Green ink (#147095). This was then cut with the Artistic die. I had attached a piece of Adhesive Sheet (#152334) to the back of the card before cutting for ease of attaching the detailed cut out to the card.

I added the Clear Wink Of Stella (#141897) to the detailed cut out but as usual doesn’t show on the photo. The Pastel Pearls (#154571) were added to finish the card. 


“Love what you do and share what you love.”


Friday, 12 March 2021

Dandy Laser Cut Paper

Hello,


The beautiful background is from the Dandy Laser-Cut Paper (#154300) and I have coloured it using the Blending Brushes (#153611).


The inks used to colour the background are Bumble Bee (#153116), Balmy Blue (#147105), Old Olive (#147090) and Pumpkin Pie (#147086). I punched the circle with the 2” Circle Punch (#133782) from So Saffron card (#108611). One of the Meadow Moments Embossing Folders (#153126) was used to dry emboss the circle.
The dragonfly from the Dragonfly Garden stamp set (#154411) was stamped with Tuxedo Black Memento ink (#132708) and punched with the Dragonflies Punch (#154240). I coloured the wings of the dragonfly with So Saffron Stampin’ Blends (#154905) and Mango Melody Stampin’ Blends (#154888), then added glitter using the Clear Wink Of Stella Glitter Brush (#141897). I attached the dragonfly to the circle with Mini Stampin’ Dimensionals (#144108).
The Glittered Organdy Ribbon (#147897) was wrapped around the laser-cut paper. “Happy Birthday” from the Art Gallery stamp set (#154421) was stamped with Memento ink and cut with a Floral Gallery Die (#154316), then attached with Mini Stampin’ Dimensionals.
The laser-cut background was glued with the Fine Tip Glue Pen (#138309) on the corners and under the circle and sentiment.

Have a great day!!

“Love what you do and share what you love.”


Tuesday, 2 March 2021

Butterfly Brilliance Bundle

Hi friends,

For the butterfly lovers, Butterfly Bouquet is now available to order. This includes a stamp set, dies and designer paper with butterflies everywhere.


There are 6 butterflies on one stamp and there is a die to cut the butterflies separately. There are also dies to cut the more detailed butterflies which I have used on this card.
The butterflies from the Butterfly Brilliance stamp set (#155092) were stamped onto Basic White card (#159228) with Tuxedo Black Memento ink (#132708). Then I sponged around each of the stamped butterflies using Blending Brushes (#153611) with these inks - Highland Heather (#147103), Pacific Point (#147098), Poppy Parade (#147050), Crushed Curry (#147087), Bermuda Bay (#147096) and Magenta Madness (#153117).
I then cut out the detailed butterflies with the Brilliant Wings Dies (#155523). The card used is Highland Heather (#147010), Pacific Point (#116202), Poppy Parade (#121694), Crushed Curry (#131288), Coastal Cabana (#131302) and Magenta Madness (#153085). These were attached over the co-ordinating stamped butterflies using Mini Glue Dots (#103683). I added glitter to each butterfly using the Clear Wink Of Stella Brush (#141897). I cut the butterflies level with the edge of the cardfront then attached this to the Basic Black (#121688) base card.
“Happy Birthday” from the Itty Bitty Greetings stamp set (#151331) was stamped with Gorgeous Grape ink (#147099) and punched with the Classic Label punch (#141491). I attached this with Mini Stampin’ Dimensionals (#144108).


Have a great day!!

“Love what you do and share what you love.”


Monday, 8 February 2021

True Love DSP and Stampin’ Blends

Hello again,

I have had so much fun colouring the flowers from the True Love Designer Series Paper (#154281) and I have made so many beautiful cards with them.


I fussy cut the flowers and coloured them with Stampin’ Blends - Highland Heather (#154887), Flirty Flamingo (#154884) and Granny Apple Green (#154885).
The Basic White card (#159228) for the background was coloured using the Blending Brushes (#153611). The inks used were Flirty Flamingo (#147052), Daffodil Delight (#147094) and Highland Heather (#147103). The leaves from the Vines Design stamp set (#154488) was stamped with Granny Apple Green ink (#147095). I then dry embossed the card with the Painted Texture 3D Embossing Folder (#154317).
I attached this card to the Flirty Flamingo card (#141421) then to the Basic White base card.
I attached the Metallic Mesh Ribbon (#153550) to the card and the flowers were placed on top using Stampin’ Dimensionals (#104430). “Celebrate” is from the Itty Bitty Greetings stamp set (#151331) and stamped with Flirty Flamingo ink and also attached with Stampin’ Dimensionals. I added the Pearl Basic Jewels (#144219) to the card.

Enjoy your day!!

“Love what you do and share what you love.”


Tuesday, 2 February 2021

Free As A Bird

Hi & welcome friends,

Today’s card is a variation from yesterday’s card. I used the Very Vanilla card (#106550) that was left after cutting the oval for the sentiment for that card. This oval was cut with a Layering Ovals Die #(151771).


I stamped part of the image from the Beauty Abounds Stamp set (#148726) around the edges of the card. This was stamped with Soft Suede ink (#147115). I blended the Crumb Cake ink (#147116) and Soft Suede ink using a Blending Brush (#153611) around the Very Vanilla card.
On another piece of Very Vanilla card I stamped the birds from Free As A Bird stamp set  (#149468) using Tuxedo Black Memento Ink (#132708). To colour this I used the following Stampin’ Blends - Seaside Spray (#154901), Petal Pink (#154893), So Saffron (#154905), Purple Posy (#154896), Pumpkin Pie (#154897), Granny Apple Green (#154885) and Crumb Cake (#154882)
Using 2 of the Layering Ovals Dies I cut the scalloped oval from the Gold Foil Sheet (#132622) and attached this over the cut out oval of the Very Vanilla card. I attached this card onto a piece of Gold Foil with the middle removed. I attached the card front to the card with the birds using Stampin’ Dimensionals (#104430), then attached the whole piece to the Very Vanilla base card.
Happy Birthday is from the Itty Bitty Greetings stamp set (#151331) and stamped with Soft Suede ink. An Ornate Frames die (#150664) was used to cut the sentiment and attached to the card with Stampin’ Dimensionals. A retired piece of gold trim was attached to the label.

Enjoy your day!!

“Love what you do and share what you love.”


Friday, 1 January 2021

Floating & Fluttering

Hello and Happy New Year,

I hope you all had a relaxing Christmas and New Year. I was able to spend some time with some family, then I spent time cleaning and sorting my craft room - a never ending job. Now it’s all sorted, time to get back into making cards (and I guess mess it up again).

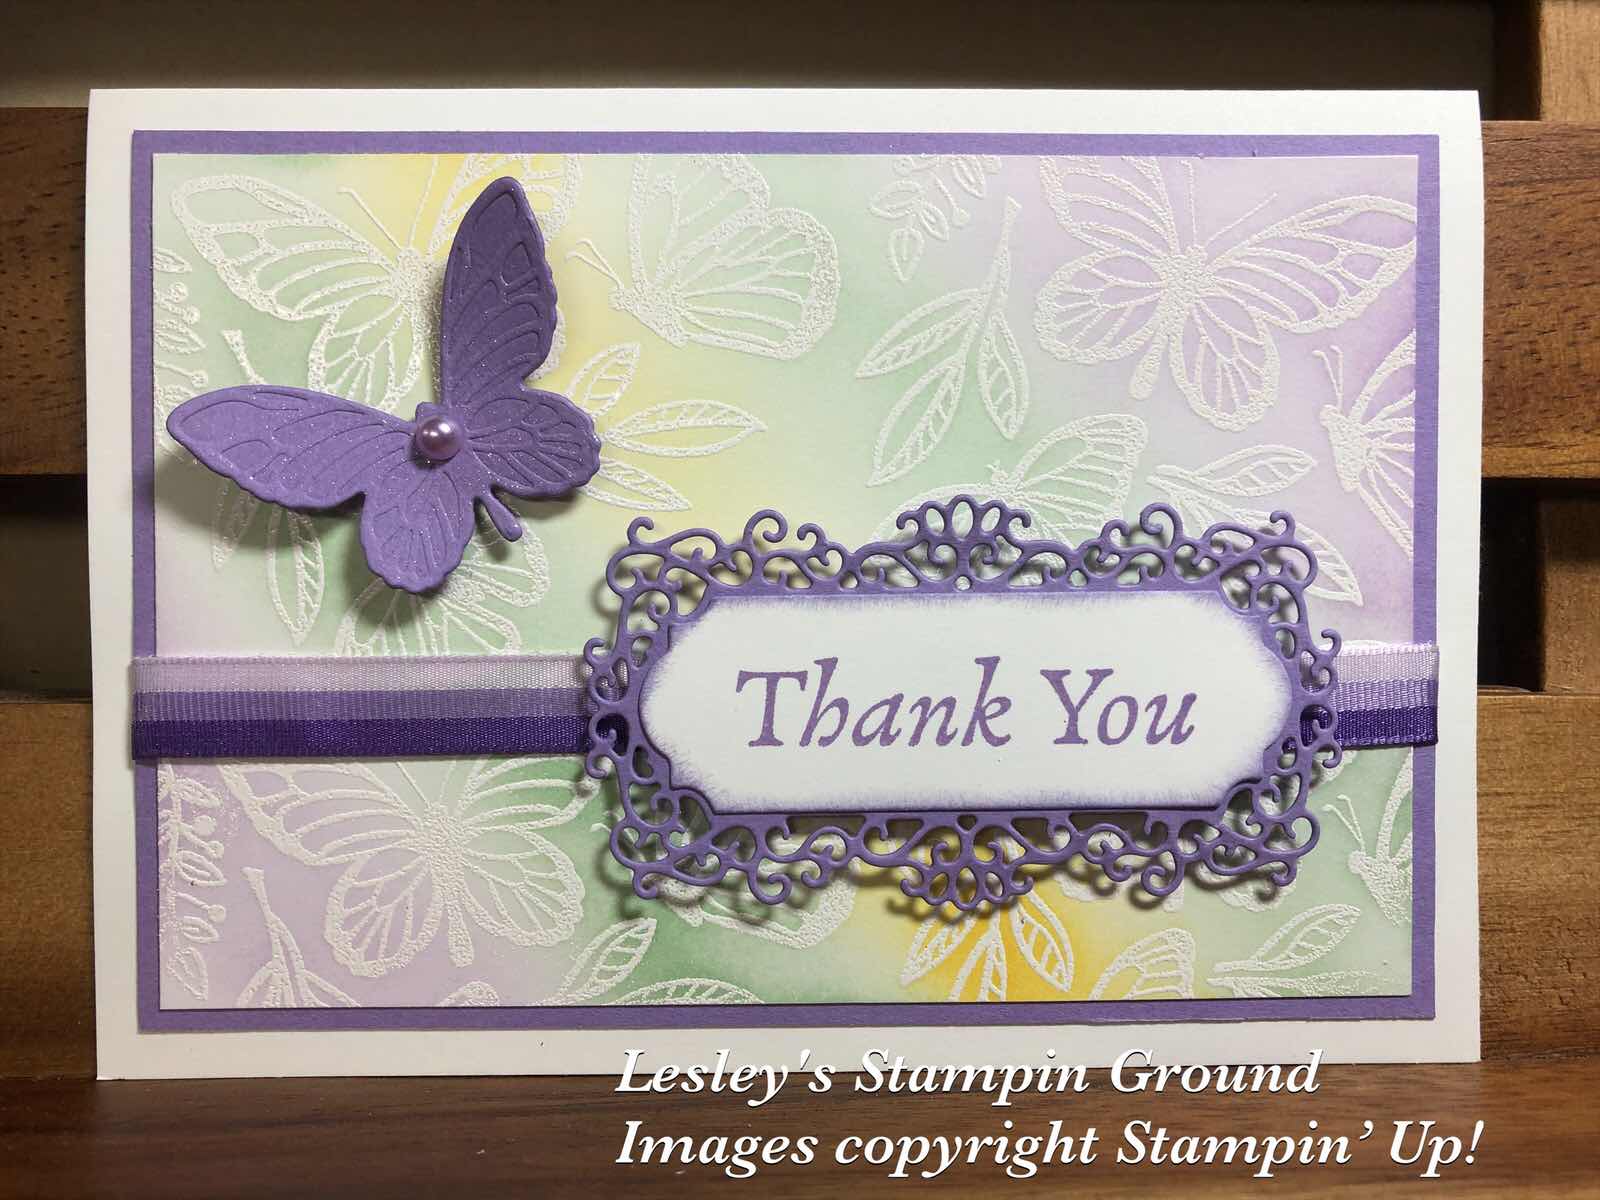
With the new Mini catalogue only days away, here is a card using new products with my favourites- mauve/purple and butterflies!!


The stamp set I have used for the background is Floating & Fluttering (#154424). There are 3 butterflies and 3 leaves grouped together on this one stamp, so I have stamped 4 images onto the Whisper White card (#106549). I stamped these with VersaMark (#102283), then added White Stampin’ Emboss Powder (#109132) which was set with the Heat Tool (#129056). I added the colours using the new Blending Brushes (#153611). These beautifully velvety soft brushes blend the colours easily. I used Highland Heather ink (#147103), Mint Macaron ink (#147106) and Daffodil Delight ink (#147094). The embossed areas resist the colouring. You can add as much or as little colour as you desire. Start by only applying a lighter colour then you can always add more, but you can’t remove it if you add too much first.
The cardfront was then attached to the Highland Heather card (#147010). The purple 3/8” Tricolor Ribbon (#149708) was wrapped around the cardfront, then this was attached to the Whisper White base card.
“Thank You” is from the Happy Thoughts stamp set (#c154507) and stamped with Highland Heather ink. The Ornate Frames Dies (#150664) were used to cut the sentiment and the Highland Heather card under the sentiment. Stampin’ Dimensionals (#104430) were used to attach this to the card. 
The butterfly was cut and embossed with a die from the Fluttering Dies (#154318) and I added a Pastel Pearl (#154571) to the body of the butterfly. The butterfly was attached with Mini Stampin’ Dimensionals (#144108) and I added some glitter using the Clear Wink Of Stella Glitter Brush (#141897) over the entire butterfly.

“Love what you do and share what you love”.

Enjoy your day!!


lesleyjendra.stampinup.net


lesleyjendra@bigpond.com.au