Showing posts with label #floweringfieldsdesignerseriespaper. Show all posts

Friday, 29 April 2022

Flowering Fields Designer Series Paper

Hello friends,

If you are like me you always have bits & pieces of designer paper left from previous projects, and it’s easy to make a beautiful card with these “leftovers”. 


This is an easy fancy fold card. The Very Vanilla base card (#106550) measures 22cm x 10.5cm and scored at 7cm from the left. I attached the Mango Melody card (#147013) to the base card. The next flap is also Very Vanilla and measures 23cm x 8.5cm, and scored at 10cm from the right. This was attached on top of the Mango Melody card.

The Flowering Fields Designer Series Paper (#157670) was attached to the flaps. Happy Birthday from the Celebrating You stamp set (#158028) was stamped with Mango Melody ink (#147093). This was cut with a die from the Ornate Frames (#150664). This was attached on the left side of the label with Stampin’ Dimensionals (#104430) to allow the card to be tucked under.

The Brushed Brass Butterflies (#158136) were my choice of embellishment.


The Ornate Frames Dies are retiring. 

Don’t forget time is running out for the retiring products from the Annual Catalogue which finishes on 2nd May. Check out what is retiring here - lesleyjendra.stampinup.net


“Love what you do and share what you love.”


Thursday, 28 April 2022

Hello Ladybug

Hello & welcome,

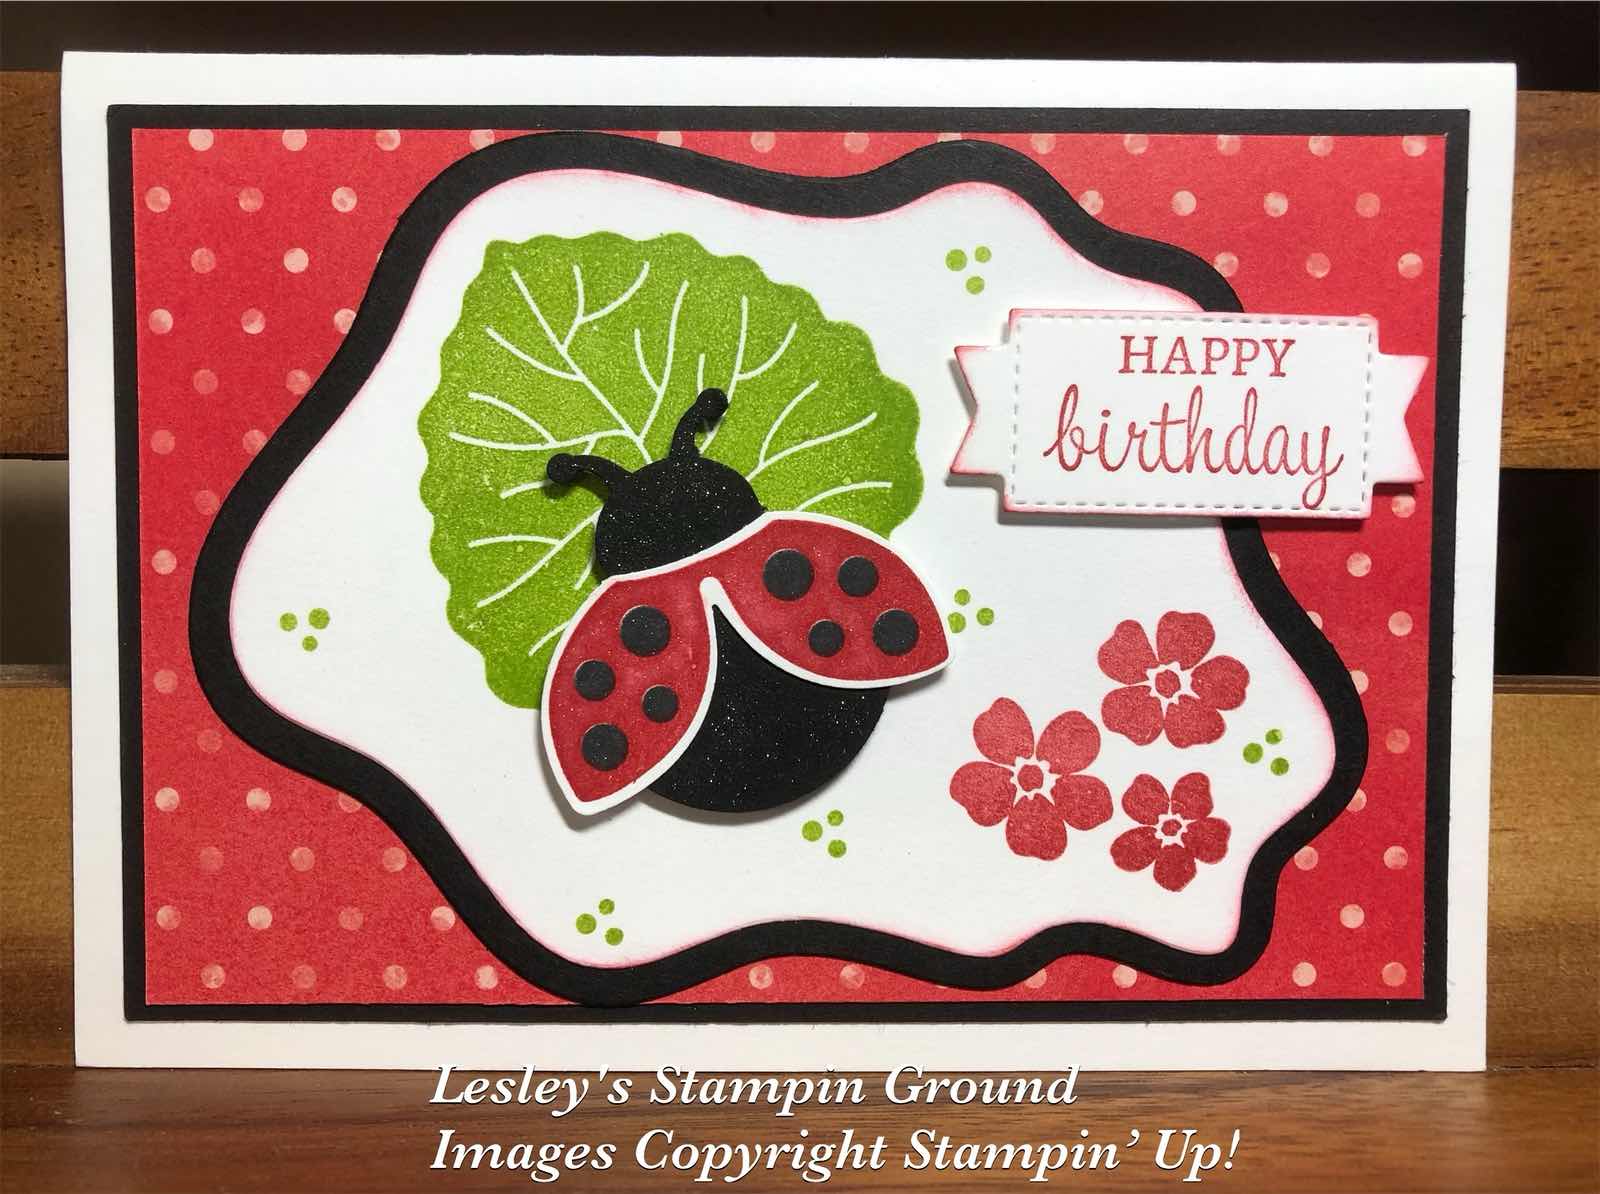
Isn’t this ladybug cute. I am sure it will be great for people of all ages.


I cut the Basic White card (#159228) and the Basic Black card (#121688) with the Layering Diorama Dies (#155565). I stamped the leaf, flowers and dots from the Hello Ladybug stamp set (#157693) using Granny Apple Green (#147095) and Real Red ink (#106578). The white & black die cuts were attached to the Flowering Fields Designer Series Paper (#157670). This was matted with Basic Black card and attached to the Basic White base card.

I stamped the wings of the ladybug with Real Red ink and Tuxedo Black Memento ink (#132708). The wings and body were punched with the Ladybug Builder Punch (#157698). I added glimmer to the body & wings with the Clear Wink Of Stella Brush (#141897). The ladybug was attached to the card with Mini Stampin’ Dimensionals (#144108). The wings were attached with Mini Glue Dots (#103683).

“Happy Birthday” is from the Expressions Of Friendship stamp set (#158460), stamped with Real Red ink and cut with the Messages Die (#154422). This was attached to the card with Stampin’ Dimensionals (#104430).


“Love what you do and share what you love.”


Monday, 21 March 2022

Slim Card Dies

Hello ladies & guys,

Here’s a fairly easy card using the Slim Card Dies (#157965).


I cut the Flowering Fields 12”x12” Designer Series Paper (#157670) with one of the Slim Card dies. I then placed the DSP that is ‘all connected” onto a piece of Gorgeous Grape card, measuring 7.6cm x 20.2cm (3”x8”) as shown below.


I used a post it note to keep this in place, then I glued each of the separate pieces back into it’s original position using the Multipurpose Liquid Glue (#110755). I then removed the “template” piece leaving the glued pieces on the Gorgeous Grape card.

I attached the completed piece to the Very Vanilla Base card (#106550).The sentiment is from the Positive Thoughts stamp set (#151490) and stamped with  Gorgeous Grape ink (#147099). A die from the Ornate Layers Dies (#152726) was used to cut the sentiment, then matted with Gorgeous Grape card. Stampin’ Dimensionals (#104430) were used to attach this to the card. I chose the Brushed Brass Butterflies (#158136) for the embellishments.

 TIP: The piece of Designer Paper which was used as a template and not used on this card can be used for another card.

“Love what you do and share what you love.”


Thursday, 17 March 2022

Quiet Meadow stamp set

Welcome everyone,

I have used flowers from 2 different stamp sets on this card - Quiet Meadow (#155082) and the Honeybee Home (#157943).


I stamped the flower images with Tuxedo Black Memento ink (#132708) onto Basic White card (#159228). The flowers were coloured with Daffodil Delight Stampin’ Blends (#154883) and Poppy Parade Stampin’ Blends (#154958). I used Granny Apple Green Stampin’ Blends (#154885) for the leaves. The yellow flowers were cut with the Honeybee Blooms Die (#157951) and the red flowers were fussy cut. The Granny Apple Green card  (#147014) was backed with Adhesive Sheet (#152334) before cutting the leaf (behind the flowers)with a Meadow Die (#155852).

The Basic White card front was dry embossed with the Hive 3D Embossing Folder (#157955), then matted with Poppy Parade card (#121694). I cut the Flowering Fields 12”x12” Designer Series Paper (#157670) with a Layering Circles Die (#151770) and attached to the cardfront. I wrapped the Gold Fine Art Ribbon (#154561) around the matted card front. The base card is Basic White.

“Best Wishes” from the Artistically Inked stamp set (#154542) was stamped with Poppy Parade ink (#147050) and cut with a smaller Layering Circles die. The leaf from Dahlia Days stamp set (#157799) was stamped with Granny Apple Green ink (#147095) and attached under the sentiment with Mini Glue Dots (#103683). The sentiment and the flowers were attached to the card with Mini Stampin’ Dimensionals (#144108). The Bumblebee Trinket (#155568) was attached with a Mini Glue Dot. 

“Love what you do and share what you love.”


Saturday, 12 February 2022

Flowering Tulips stamp set

Hello friends,

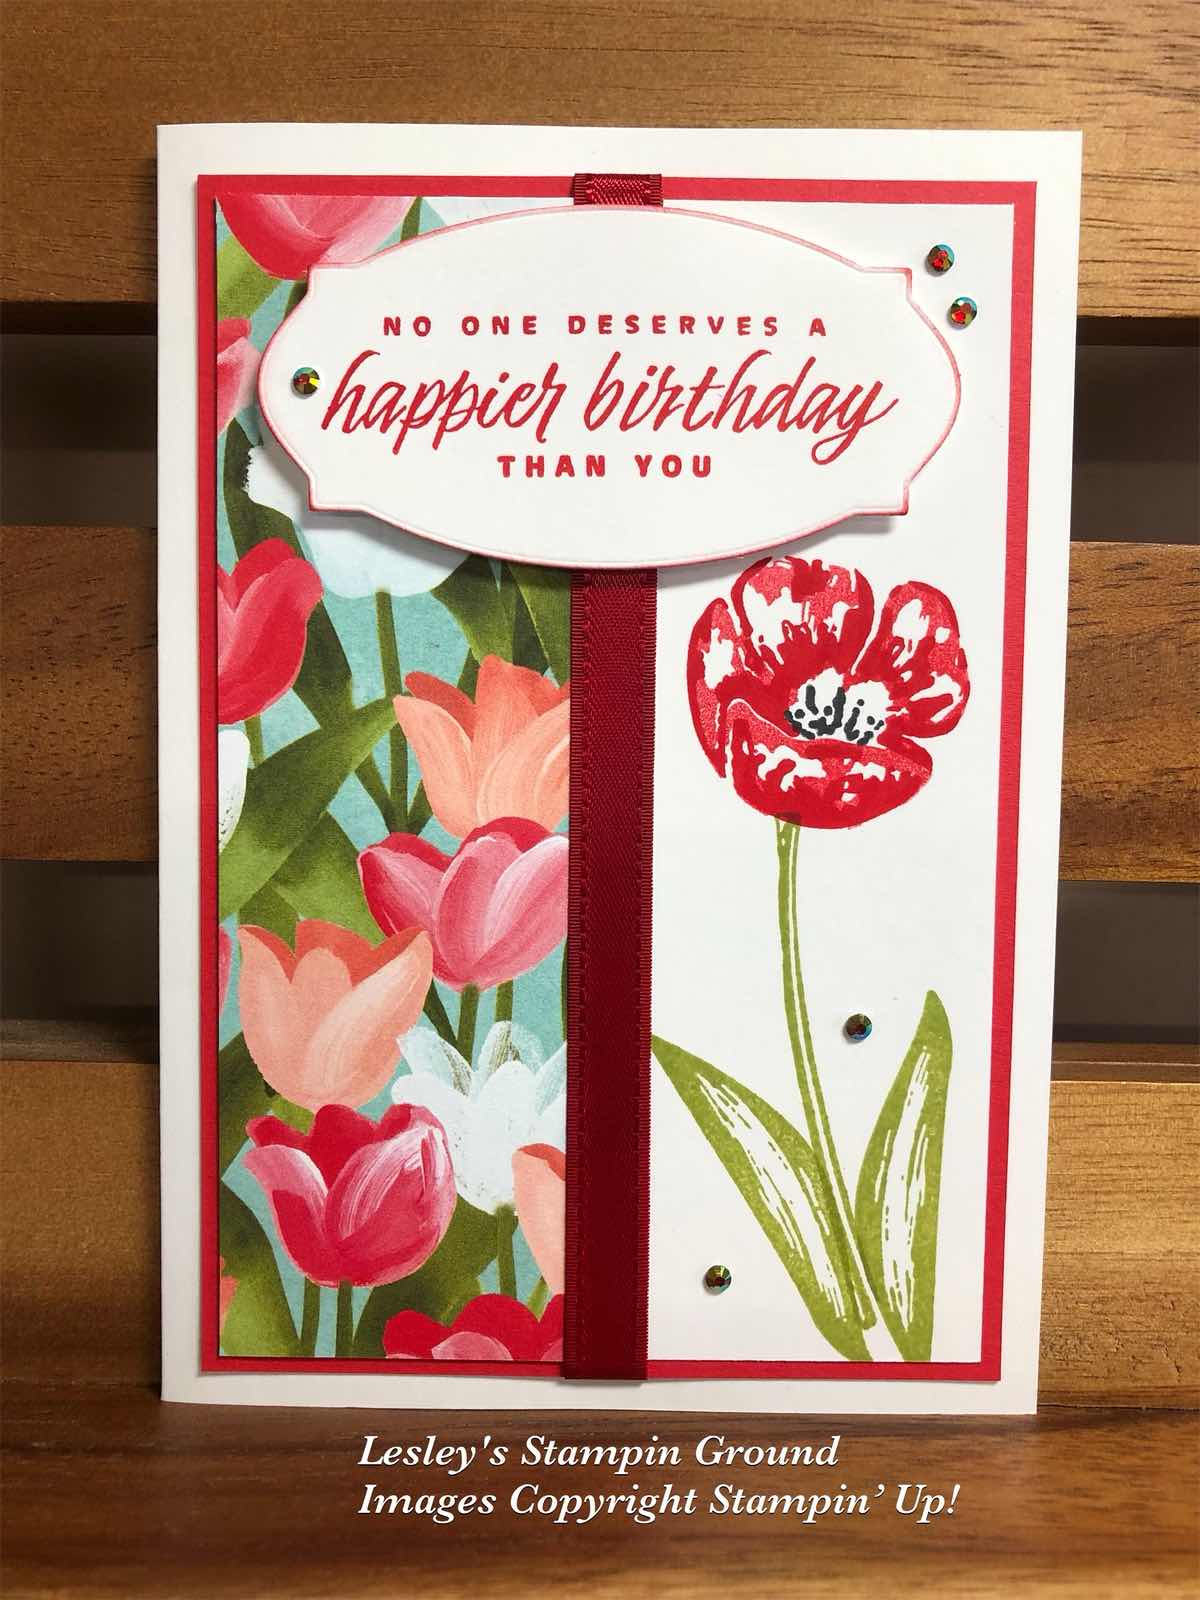
I have used the Flowering Tulips stamp set (#157672) and the beautiful Flowering Fields Designer Series Paper (#157670) for this easy card.


I stamped the stem and leaves from the Flowering Tulips stamp set using Pear Pizzaz ink (#147104) onto the Basic White card (#159228). The flower is a 2 step stamp and I used Poppy Parade ink (#147050). To get the lighter red colour I used the stamping off method. The centre of the flower was stamped with Tuxedo Black Memento ink (#132708). I attached the Designer paper to the white card, then matted this with Poppy Parade card (#121694). The Real Red Double Stitched Satin Ribbon (#151155) was wrapped around the card, then this was attached to the Basic White base card.

The sentiment is from the same stamp set and stamped with Poppy Parade ink. A die from the Seasonal Labels (#156299) cut the sentiment and attached to the card with Stampin’ Dimensionals (#104430). I chose the Garden Gems (no longer available) for the embellishments.

TIP: For the stamping off method, ink your stamp as usual, then lightly stamp onto scrap paper, then stamp onto the card. This gives a lighter colour. I find this works better with darker colours but it’s always worth trying it with any colour.

“Love what you do and share what you love.”


Thursday, 10 February 2022

Flowering Tulips Bundle

Hi friends,

These beautiful tulips are made using the Tulip Dies (#157677) and the Simply Marbleous 6”x6” Designer Series Paper (#158128).


Below are the dies I used to make the tulips. The mauve & yellow ones are made with the first set of dies and the pink tulip with the second set of dies.


The first die for each flower is different but the other 2 pieces are the same. The larger part of the flower which forms the outside of the tulips has score lines to allow you to fold it to form the flowers. I used both sides of the Simply Marbleous DSP to give dimension to the flowers with the dark and lighter colours.

I cut the scalloped rectangle with a die from the Stitched So Sweetly dies (#151690). The stems and leaves were stamped with Pear Pizzaz ink (#147104) using the images from the Flowering Tulips stamp set (#157672). The flowers were attached with Stampin Dimensionals (#104430).

The sentiment is also from the Flowering Tulips stamp set and stamped with Mango Melody ink (#147093). The die to cut this is from the Seasonal Labels (#156299). I attached the scalloped rectangle to the DSP from the Flowering Fields 12”x12” Designer Series Paper (#157670), then attached the sentiment with Stampin’ Dimensionals.  I chose the Iridescent Rhinestone Basic Jewels (#158130) to add some bling to the card.

TIP: Have a play with these dies and see what combinations you can come up with. I am sure the way I have made these isn’t the only way.

“Love what you do and share what you love.”