Showing posts with label #brilliantwingsdies. Show all posts
Monday, 24 April 2023
Radiating Stitches Dies
Hi again,

INSPIRE. CREATE. SHARE.
I have been playing with the Butterfly Brilliance stamp set (#155092) again before it retires.
I coloured the Basic White card (#159228) with Blending Brushes (#153611) and a variety of inks - Tahitian Tide (#159210), Pale Papaya (#155670, Flirty Flamingo (#147052) and Daffodil Delight (#147094). The butterfly was stamped with VersaMark (#102283) and I embossed this with Silver Stampin’ Emboss Powder (#155555). The Brilliant Wings die (#155523) was used to cut the butterfly.
I used 3 of the dies from the Radiating Stitches Dies (#161595) to cut 2 of the Silver Foils from the Silver Foil Specialty Pack (#156457) and the top layer from the Naturally Gilded Specialty Designer Series Paper (#161639). These were taped together then attached to the Basic White base card.
The sentiment from Nested Friends stamp set (#160322) was stamped with Balmy Blue ink (#147105) then cut with another die from the Radiating Stitches Dies. The sentiment & butterfly were attached to the card with Stampin’ Dimensionals (#104430). The embellishments are from the Festive Pearls (#159963).
The retiring products used on this card are the Butterfly Brilliance stamp set, the Brilliant Wings dies and the Nested Friends stamp set.
Time is running out for you to get any of the remaining retiring products. Check out what is available here - lesleyjendra.stampinup.net
“Love what you do and share what you love.”
Tuesday, 18 April 2023
Enchanting Details Dies
Hello again my friends,

This beautiful detailed die-cut is cut with an Enchanting Details die (#159166) on Basic White card (#159228).
The white card was backed with Adhesive Sheet (#152334) before cutting with the die. The Polished Pink card (#155711) was dry embossed with the Timeworn Type Embossing Folder (#156505) and the corner was punched with the Very Best Trio punch (#159878). The card front was attached to the Basic White base card.
The butterfly is another one left from a previous card a few days ago. (Check out the post on the 13th April for details). I attached the butterfly with Stampin’ Dimensionals (#104430).
“Happy Birthday” from Pansy Patch stamp set (#154999) was stamped with Polished Pink ink (#155712) and cut with a Potted Succulents die (#154330). This was attached with Mini Stampin’ Dimensionals (#144108). The Pastel Adhesive-Backed Sequins (#160387) were added to the card.
The retiring products here are the Enchanting Details dies, Polished Pink card & ink, Pastel Adhesive-Backed Sequins, Potted Succulents dies, Butterfly Brilliance stampset & Brilliant Wings dies.
“Love what you do and share what you love.”
INSPIRE. CREATE. SHARE.
Friday, 14 April 2023
Butterfly Brilliance & Brilliant Wings
Hello again,


I am using one of the butterflies left from yesterdays card and I love the lovely subtle colours on this card.
If you didn't see yesterdays card just check it so you can see how I coloured & stamped the butterflies. I had some extra card which I used to cut the leaves. The dies to cut theses leaves are from the Flowers Of Home dies (#157938).
I used Basic White card (#159228) for everything on this card. I dry embossed a piece with one of the Basic Embossing Folders (#161598). I used another piece which I backed with Adhesive Sheet (#152334) before cutting with an Organic Beauty Die (#158983) for the diamond design. I attached this to the dry embossed card.
The 3 circles were cut with the Stylish Shapes Dies (#159183). “Sending Hugs” from Eden’s Garden stamp set (#157823) was stamped with Pale Papaya ink (#155670). The circles & leaves were attached with Mini Glue Dots (#103683) and the butterfly was attached with Stampin Dimensionals (#104430). The embellishments are the Flat Adhesive-Backed Pearls (#160449).
The retiring products used today are the Butterfly Brilliance stamp set, Brilliant Wings dies, Organic Beauty Dies, Flowers Of Home dies & Pale Papaya ink.
“Love what you do and share what you love.”
INSPIRE. CREATE. SHARE.
Thursday, 13 April 2023
Butterfly Brilliance
Hello stampin’ friends,


The retiring products are the Butterfly Brilliance stamp set, Brilliant Wings dies, Gingham Embossing Folder & Pretty Pillowbox dies.
I love butterflies so a little disappointed that the Butterfly Brilliance stamp set (#155092) and co-ordinating Brilliant Wings dies (#155523) are retiring.
Firstly I added colour to a piece of Basic White card (#159228) using Blending Brushes (#153611) with Pale Papaya ink (#155670), Flirty Flamingo ink (#147052), Tahitian Tide ink (#159210) and Highland Heather ink (#147103). I then stamped the butterflies with VersaMark (#102283) and used the White Stampin’ Emboss Powder (#155554) which was set with the Heat Tool (#129056). The butterflies were cut with a Brilliant Wings die. There are 6 butterflies so will use the others for another project.
I dry embossed the Flirty Flamingo card (#141421) with the Gingham Embossing Folder (#157627) and attached this to the Basic White base card. I used a die from the Irresistible Blooms (#161149) to cut the Silver Foil Specialty Paper (#156457). This was backed with Adhesive Sheet (#152334) so it makes it easy to attach it to the card front.
“Thinking Of You” is from the Go To Greetings stamp set (#158763) and I stamped this with Flirty Flamingo ink. A die from the Pretty Pillowbox dies (#156321) was used to cut the sentiment.
The butterflies and sentiment were all attached to the card with Stampin’ Dimensionals (#104430). The Flat Adhesive-Backed Pearls (#160449) were added to the centre of the butterflies.
The retiring products are the Butterfly Brilliance stamp set, Brilliant Wings dies, Gingham Embossing Folder & Pretty Pillowbox dies.
“Love what you do and share what you love.”
INSPIRE. CREATE. SHARE.
Wednesday, 8 March 2023
Brilliant Wings
Hello again,

“Love what you do and share what you love.”
I seem to be making so many cards lately with flowers so decided it was time to get the butterflies out as I haven’t used them for a while ( and I do love butterflies). This butterfly is from the Brilliant Wings Dies (#155523).
The green paper is from the Fine Shimmer Paper Pack (#160428) and I dry embossed this with one of the Basics Embossing Folders (#161598). There are 3 different folders in this pack. I then matted this with the Calypso Coral Card (#124392) and attached it to the Basic White base card (#159228).
I cut 3 strips of DSP is from the Fancy Flora Designer Series Paper (#160413) and attached them to the card front. The sentiment from the Go To Greetings stamp set (#158763) was stamped with Calypso Coral ink (#147101), then cut with a die from the Stitched Rectangles (#151820). I used Stampin’ Dimensionals (#104430) to attach the sentiment to the card.
The butterflies were cut from the Gold from the Fine Shimmer Paper Pack and Calypso Coral card. The two butterflies were attached together with Mini Glue Dots (#103683) then the butterfly was attached with Stampin’ Dimensionals.
A Brushed Brass Butterfly (#158136) was attached to the sentiment and the Adhesive-Backed Milky Dots (#160582) were attached to the centre of the butterfly.
“Love what you do and share what you love.”
INSPIRE. CREATE. SHARE.
Friday, 22 July 2022
Artisan Additions dies
Hi & welcome,

“Love what you do and share what you love.”
I do love dies and I have used 3 different sets on this card. There are many that co-ordinate with stamp sets and there are others that don’t have a stamp set so are very versatile.
The Basic White card (#159228) was backed with Adhesive Sheet (#152334), then cut with a die from the Artisan Additions Dies (#159172). This was attached to the Soft Succulent from the Brushstroke 12”x12” Specialty Paper (#159250. This was attached to the Basic White base card.
The butterflies were cut with the Brilliant Wings Dies (#155523). I used Pale Papaya card (#155669) for the base and Copper Foil (#142020) for the detailed butterfly. I attached the butterfly together with Mini Stampin’ Dimensionals (#144108) and taped it to the card.
“Happy Birthday” is from my favourite sentiment stamp set - Go To Greetings (#158763). I stamped this with VersaMark (#102283) and embossed with Copper Stampin’ Embossing Powder (#155555) and set with the Heat Tool (#129056). The sentiment and Gold Foil banner underneath were cut with the Stylish Shapes Dies (#159183) and attached with Stampin’ Dimensionals (#104430).
I added the Fine Sparkle Adhesive-Backed Gems (#159967) to the centre of the butterfly.
“Love what you do and share what you love.”
Wednesday, 8 June 2022
Designer Tags Dies
Hi crafty friends,

“Love what you do and share what you love.”
2 of the Designer Tags Dies (#159165) have been used on this card today.
I cut the Orchid Oasis from the 2022-2024 In-Color Designer Series Paper (#159253) with a die from the Designer Tags. I stamped “Thank You” from the Go To Greetings stamp set (#158763) with Orchid Oasis ink (#159214) on Basic White card (#159228). This was cut with another Designer Tags Die.
The base card is Basic White. I dry embossed the Basic White card front with the Quaterfoil Tile Embossing Folder (#158655) then matted it with Orchid Oasis card (#159265). I threaded the Orchid Oasis Metallic Woven Ribbon (#159199) through the label, then I attached the label to the card with Stampin’ Dimensionals (#104430).
The butterfly was cut using a die from the Brilliant Wings Dies (#155523) from the Brushed Metallic Cardstock (#153524). This was attached using Stampin’ Dimensionals on the body of the butterfly. This allows you to bend the wings up.
“Love what you do and share what you love.”
Sunday, 20 March 2022
Brilliant Wings Dies
Hello friends,

“Love what you do and share what you love.”
The Brilliant Wings Dies (#155523) has a variety of butterflies and the butterfly here is cut with one of these dies.
I used the Ombre Specialty Paper (#155784) for the butterfly. I stamped the verse & the leaves from the Very Versailles stamp set (#149275) onto the Basic White card front (#159228). I used Crumb Cake ink (#147116) for the verse & Granny Apple Green ink (#147095) for the leaves. Then using a Blending Brush (#153611) I coloured the right side of the card front with Daffodil Delight ink (#147094). I dry embossed the left side with the Stripes from the Stripes & Splatters 3D Embossing Folders (#157980). The card front was matted with Granny Apple Green card (#147014), then attached to the Basic White base card.
The sentiment is from the Special Moments stamp set (from saleabration) and stamped with Granny Apple Green ink. I cut this with a Tailor Made Tags die (#155563). The gold trim from the Simply Elegant Trim (#155766) was threaded through the tag. The sentiment and butterfly was attached with Stampin’ Dimensionals (#104430) and Mini Stampin’ Dimensionals (#144108).
Being a butterfly lover I couldn’t resist adding the Brushed Brass Butterflies (#158136) to finish the card.
Friday, 11 February 2022
Flowing Flowers
Hello stamping friends,

TIP: When I make a mask for this technique, I stamp the image on a post-it note and cut around the image without leaving any margin outside the outline of the image. This allows the next image to stamp as close as possible to the masked image. Also, I use a post-it note as it thinner than cardstock and has a sticky area to allow it to stick to the card.
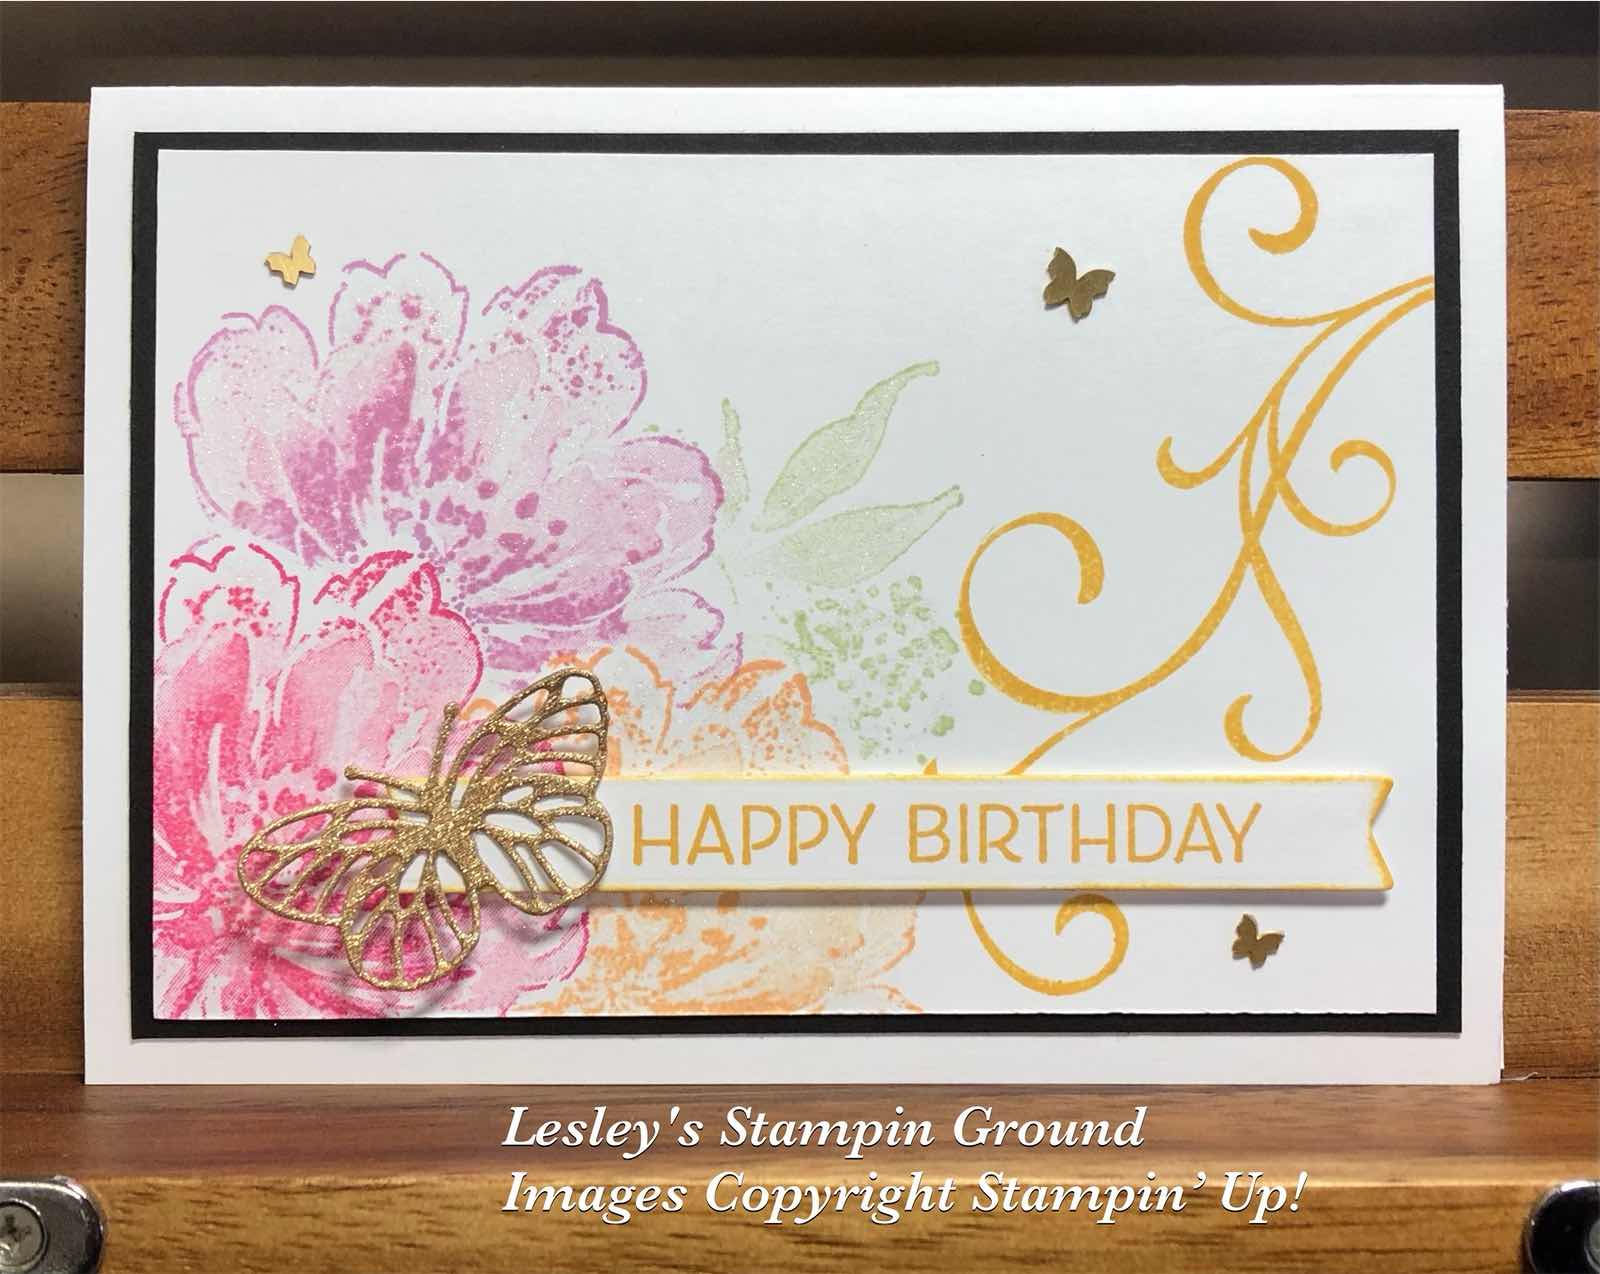
I have stamped the flowers from the Flowing Flowers stamp set (#157880) using the masking technique.
First I stamped the Polished Pink (#155712) flower, then using a mask on the pink flower I stamped the next flower with Pale Papaya ink (#155670). I added a mask over this flower as well and stamped the 3rd flower with Fresh Freesia ink (#155611). I stamped the leaves with Soft Sea Foam ink (#147102), also using masks on the flowers.
The swirl from the Sentimental Swirls stamp set (#157996) was stamped with So Saffron ink (#147109). I matted this Basic White card (#159228) with Basic Black card (#121688), then attached the card front to the Basic White base card.
“Happy Birthday” is from the Artistically Inked stamp set (#154542) and also stamped with So Saffron ink. The label die from the Bloom dies (#155989) was used to cut the sentiment. I attached this to the card with Stampin’ Dimensionals (#104430). The butterfly was cut with a Brilliant Wings Die (#155523) using the gold from the Gold & Rose Gold 6”x6” Metallic Specialty Paper (#156844) and a Mini Glue Dot (#103683) was used to attach this to the sentiment. The Brushed Brass Butterflies (#158136) were also added to the card.
TIP: When I make a mask for this technique, I stamp the image on a post-it note and cut around the image without leaving any margin outside the outline of the image. This allows the next image to stamp as close as possible to the masked image. Also, I use a post-it note as it thinner than cardstock and has a sticky area to allow it to stick to the card.
“Love what you do and share what you love.”
Tuesday, 30 November 2021
Blessings Of Home Pinwheel Tower card
Hello again,


“Love what you do and share what you love.”

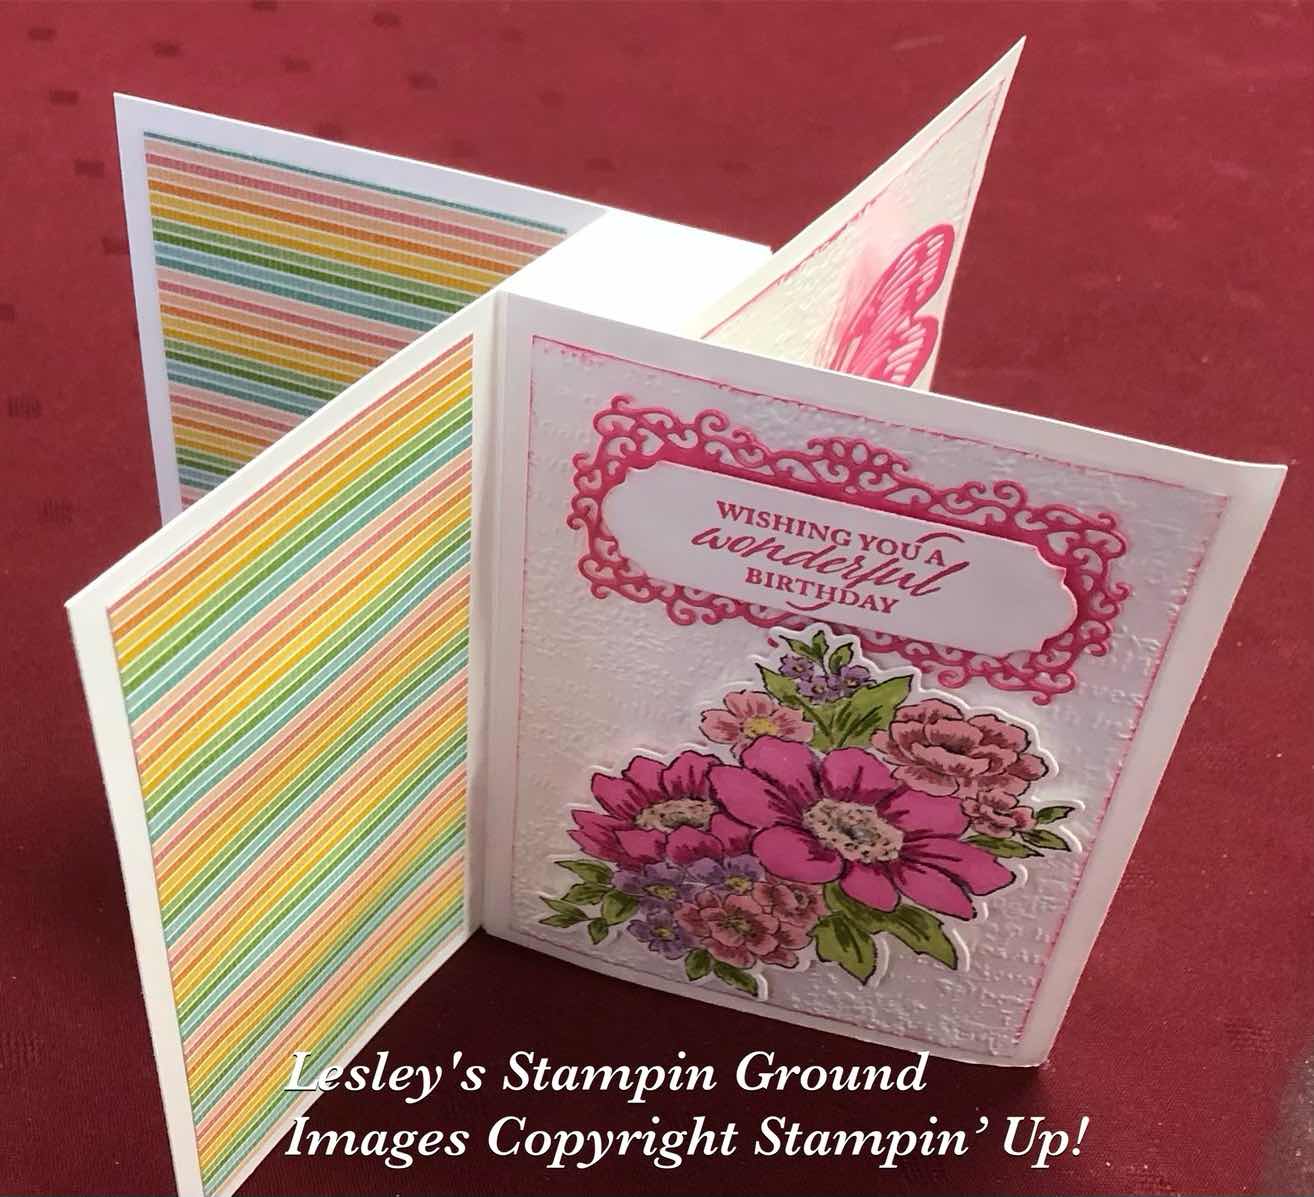
Recently I made a small pinwheel tower card so this one today is a larger one with the finished size approximately 21cm x 15cm when flattened out. I am using the Blessings Of Home Bundle (#157939) which is a sneak peek from the upcoming Mini catalogue available from 4th January 2022.
The Basic White card (#159228) measurements for the basic card shape are as follows-
1 piece - 20.5 x 14.9cm and scored at 2.5cm, 5cm,7.5cm and 10cm along the long side.
3pieces - 14.9 x 10.5 cm
The other measurements are-
3 pieces Basic White - 13.9 x 9.5cm. These were embossed with the Timeworn Type 3D Embossing Folder (#156505).
4 pieces of Pattern Party Designer Series Paper (#155426) - 7cm x 13.9cm and 1 piece - 5cm x 13.9cm
1 piece of Basic White card 6cm x 13.9 cm
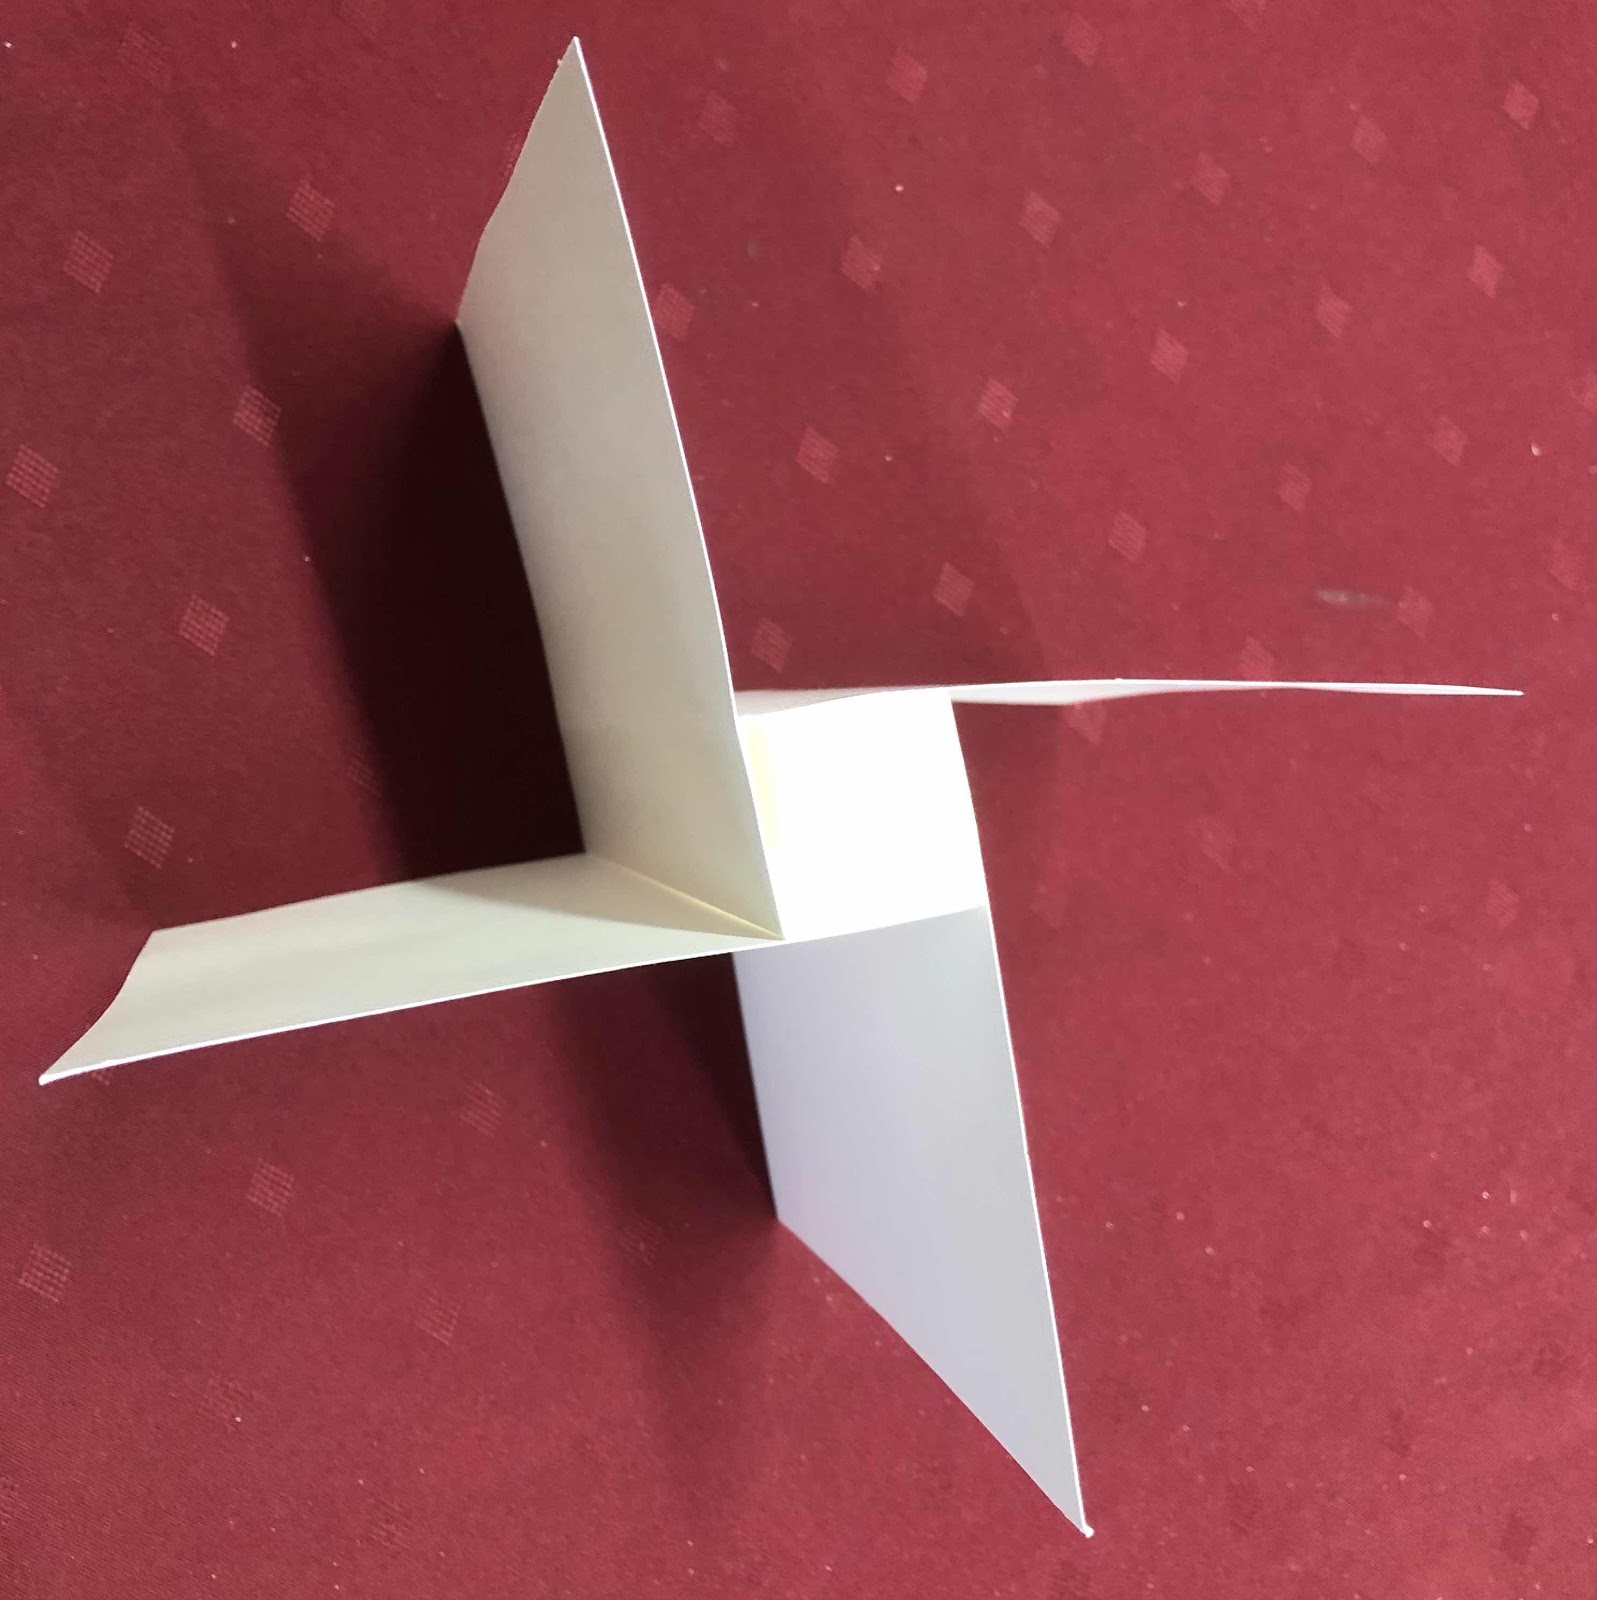
Fold each of the scored lines, to form a square. Apply glue or tape to the end of the “square” as shown below. Fold the left side over to the piece on the right.
You will continue adding glue or tape to one side of the “square”, and place a piece of the 14.9cm x 10.5cm on the right side and fold the left side onto this. (This is very hard to describe so I hope you can understand what to do).
The final base card looks like this from above-
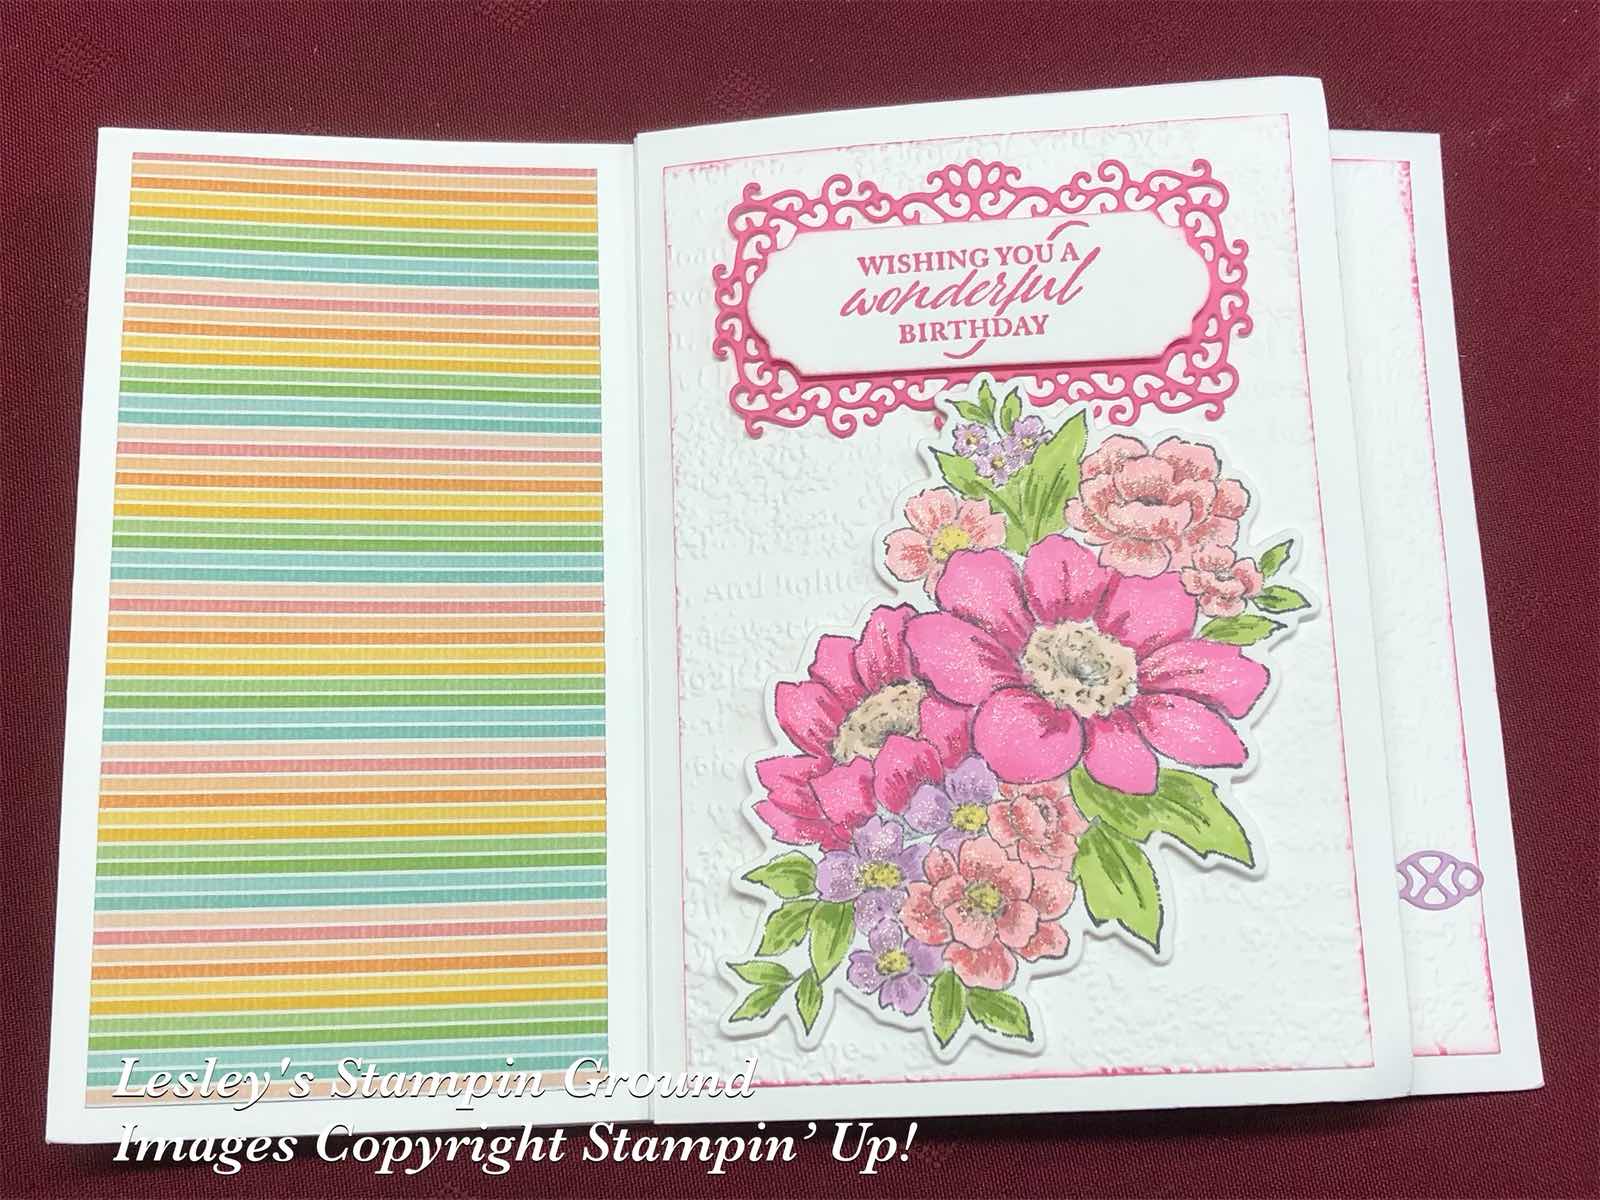
I stamped the larger floral image and I stamped 2 of the smaller floral images from the Blessings Of Home stamp set (#157930) using Tuxedo Black Memento ink (#132708). These were coloured with Stampin’ Blends - Polished Pink (#155520), Flirty Flamingo (#154884), Fresh Freesia (#155518), Granny Apple Green (#154885) & So Saffron (#154905). These were cut with the Flowers Of Home Dies (#157938).
“Wishing You a Wonderful Birthday” from Elegantly Said stamp set (#155095) was stamped with Polished Pink ink (#155712). I used Ornate Frames Dies (#150664) to cut the sentiment and the Polished Pink card (#155711) under the sentiment. This and the larger floral image were attached to one of the dry embossed cards.
Next I cut the butterflies with the Brilliant Wings Dies (#155523) from Polished Pink card and Fresh Freesia card (#155614). The detailed border under the sentiment is cut with a Nature’s Thoughts die (#153586). The Fresh Freesia card was backed with Adhesive Sheet (#152334) before cutting this border. The sentiment on this opening is from the Pansy Patch stamp set (#154999) and also stamped with Polished Pink ink. The butterflies and sentiment were added to another of the dry embossed cards with Stampin’ Dimensionals (#104430).
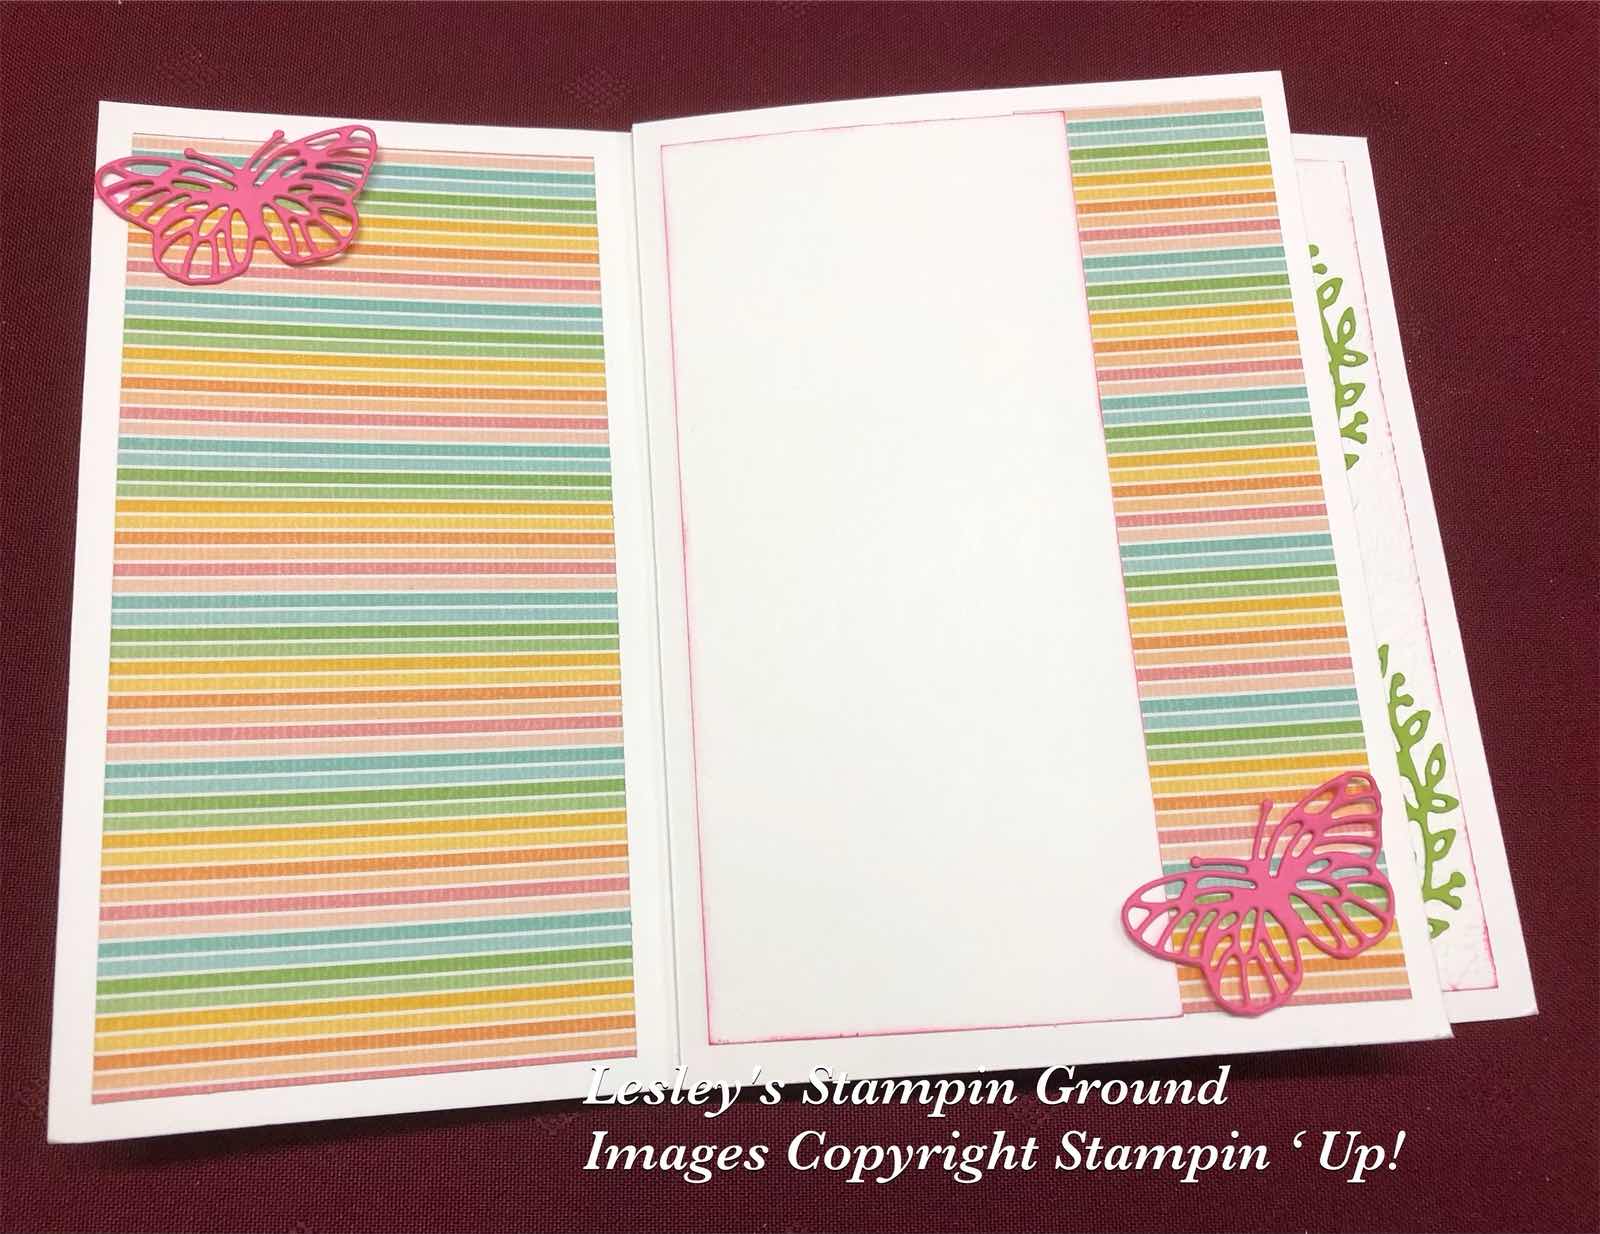
On the next side I attached a larger piece of Designer Series Paper on the left side and the smaller piece on the right side. The smaller Basic White card (6cm x13.9cm) was attached and this is where you will write your personal greeting. I attached 2 more butterflies cut from Polished Pink card. These were attached to the card with Mini Glue Dots (#103683).
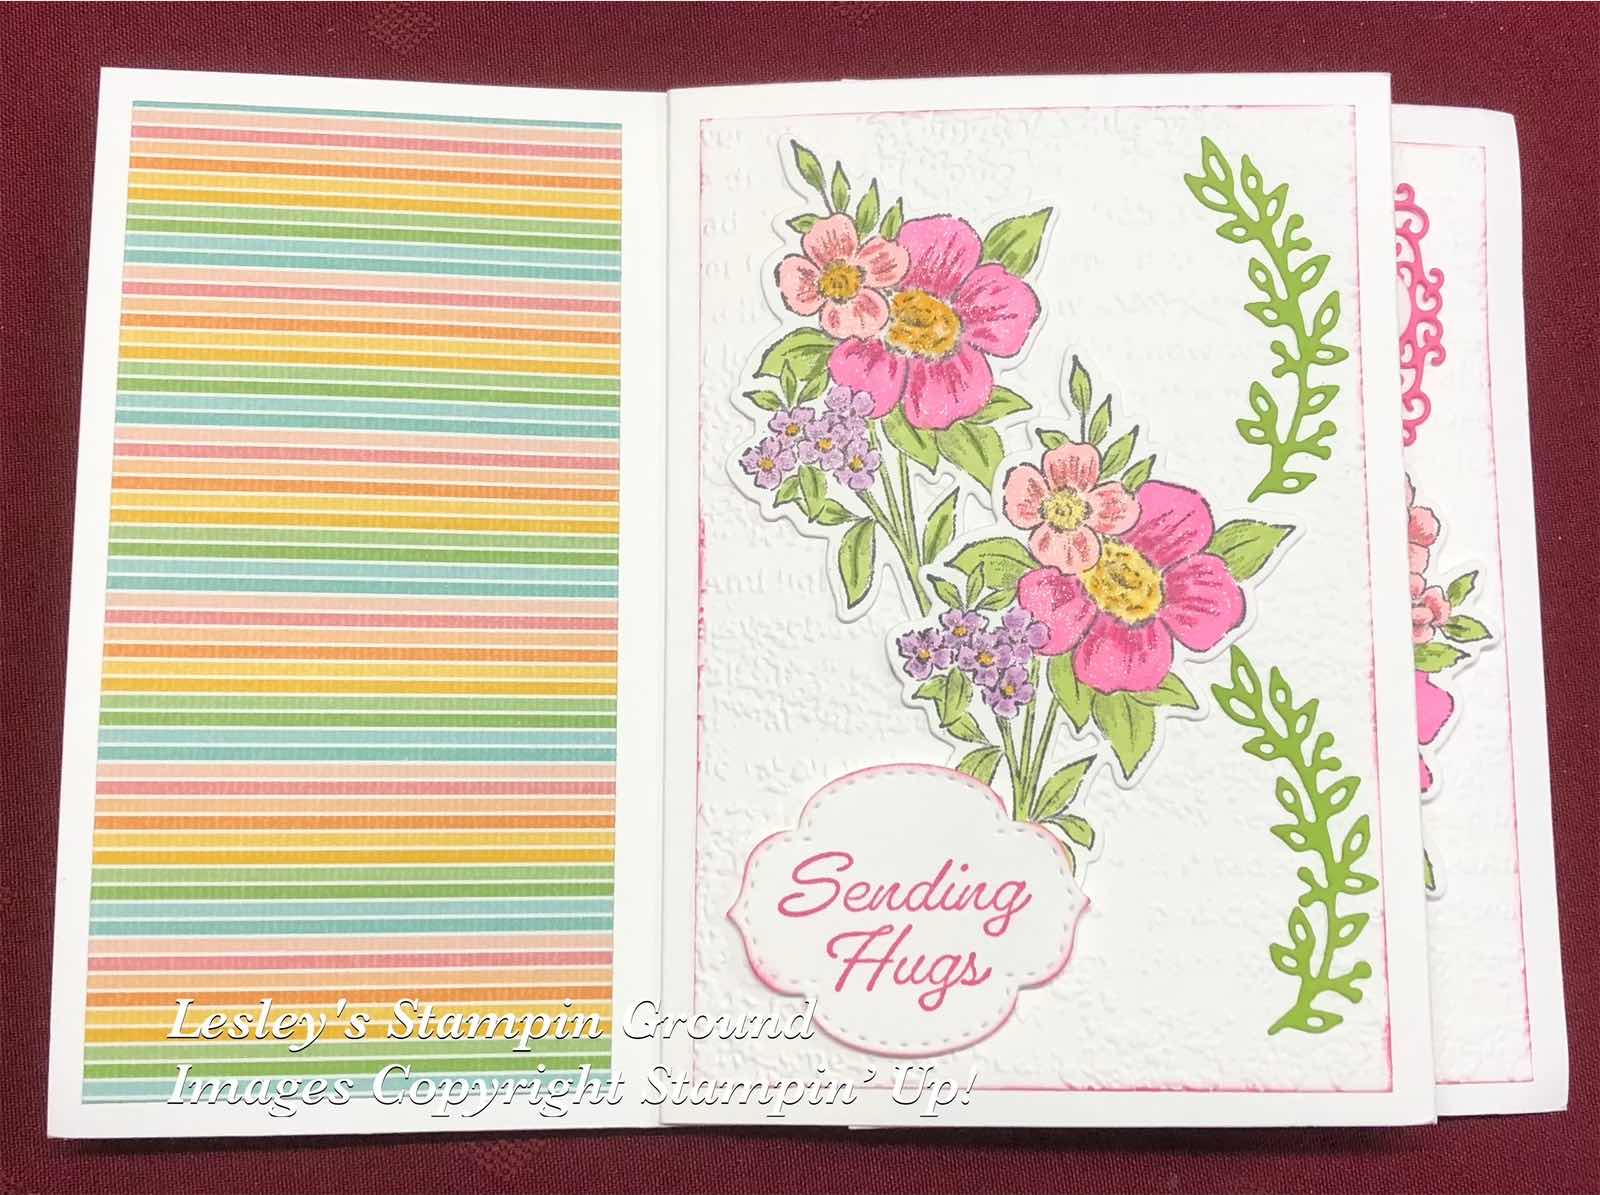
On this side I added the 2 smaller floral images to another of the dry embossed cards. Using Adhesive Sheet on the back of the Granny Apple Green card (#147014), I cut the leaves with a Flowers Of Home die. “Sending Hugs” is from the Eden’s Garden stamp set (#157823), stamped with Polished Pink ink and cut with a Stitched So Sweetly die (#151690).
I attached the DSP to each of the left sides of each “opening”.
“Love what you do and share what you love.”
Saturday, 27 November 2021
Encircled In Beauty Dies
Hello my friends,

“Love what you do and share what you love.”
I have cut the Shaded Spruce card (#147006) with the Encircled In Beauty Dies (#155546) to get this beautiful detailed “doilie”.
The Very Vanilla card front (#106550) was dry embossed with the Timber 3D Embossing Folder (#156406). I attached a piece of the Expressions In Ink 12”x12” Specialty Designer Series Paper (#155464) to the card front, then wrapped the Old Olive/Pretty Peacock Reversible Ribbon (#149496) around. This was attached to the Very Vanilla Base card.
I adhered Adhesive Sheets (#152334) to the back of the Shaded Spruce card before cutting with the detailed die and the outline die to cut the outside. The inside circle cuts at the same time and I cut a small amount from the circle with a Layering Circles Die (#151770) as I wanted it a bit smaller. I find the adhesive sheets so convenient and easy for adhering any detailed cuts outs like this one.
The butterfly was cut with one of the Brilliant Wings Dies (#155523) from Gold Foil Sheet (#132622). I used Mini Stampin’ Dimensionals (#144108) to attach this to the card. The sentiment is from the Art Gallery Stamp Set (#158201) and stamped with Shaded Spruce ink (#147088). A Seasonal Labels Die (#156299) was used to cut the sentiment and it was also attached with Mini Stampin’ Dimensionals. The Genial Gems (#155500) were added to the card, butterfly & sentiment.
“Love what you do and share what you love.”
Tuesday, 9 November 2021
Positive Thoughts
Hello again friends,

“Love what you do and share what you love.”
All the stamped images on this card are from the Positive Thoughts stamp set (#151490).
The flowers and sentiment were stamped with Flirty Flamingo ink (#147052), the leaves with Soft Sea Foam ink (#147102) and the feathers with Crumb Cake ink (#147116). The flowers, leaves and feathers were cut with the Nature’s Thoughts Dies (#153586) and the sentiment with an Ornate Frames Die (#150664).
The cardstock is Basic White (#159228) and Soft Sea Foam (#147012). I used the Stitched Greenery Die (#155451) on the top layer and dry embossed the bottom layer with the Tasteful Textile 3D Embossing Folder (#152718).
Although there is a butterfly in the Positive Thoughts stamp set, I chose to cut a detailed butterfly using the Brilliant Wings Dies (#155523) from the Silver foil from the Silver Foil 12”x12” Specialty Paper Pack (#156457). The butterfly, one of the flowers and the sentiment were all attached with Mini Stampin’ Dimensionals (#104430). The Rhinestone Basic Jewels (#144220) were attached to the sentiment, flower centres and the butterfly.
“Love what you do and share what you love.”
Stay safe & keep crafting!!
Saturday, 9 October 2021
Eden’s Garden
Hi my crafty friends,

You will see more of these products used here over the next few weeks.
The Eden’s Garden Collection (#160849) is an early release product which will be available from 2nd November and some of the products will be then available in the mini catalogue in January. An advantage of being a demonstrator is the you can access these products in advance, so if you would like that opportunity just contact me.
I have used a couple of the products on this card and combined them with some of my other favourite products.
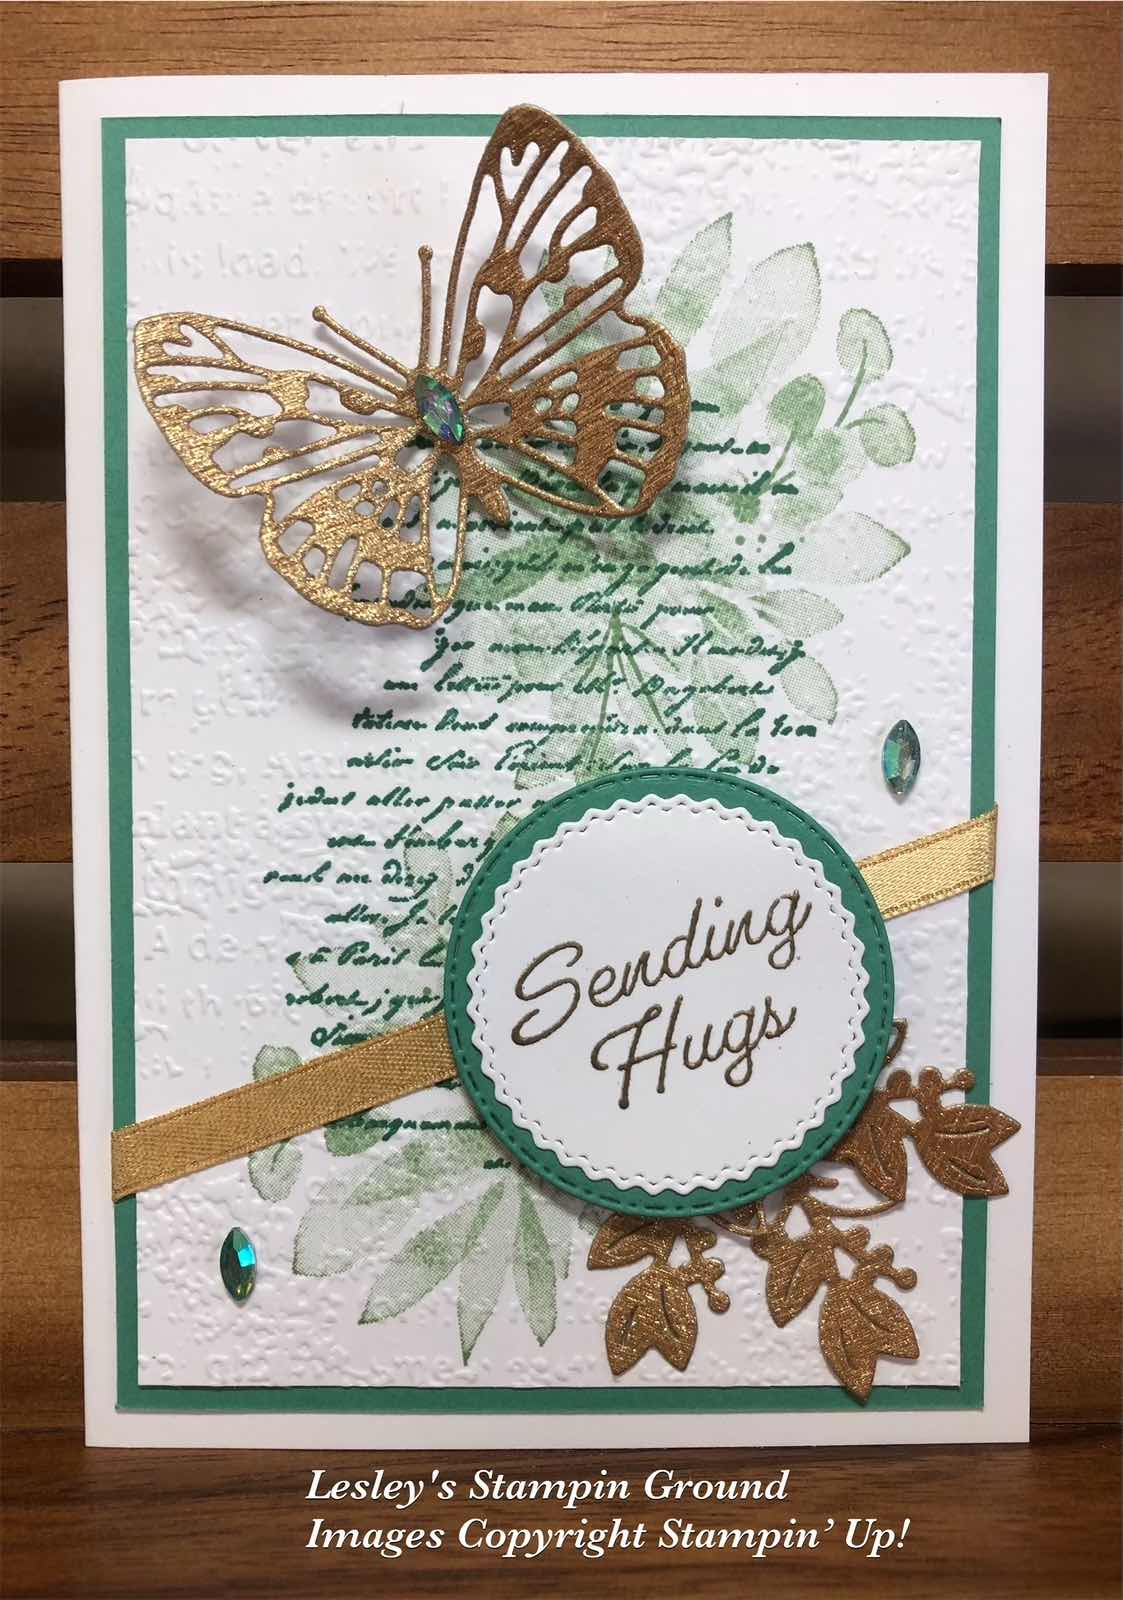
The leaves in the background are from the Eden’s Garden stamp set (#157823) and stamped with Mint Macaron ink (#147106). The “verse” from the Very Versailles stamp set (#149275) was stamped with Just Jade ink (#153115). The Basic White card front (#159228) was the dry embossed with the Timeworn Type 3D Embossing Folder (#156505). This was matted with Just Jade card (#153084), then I wrapped the Gold Shimmer Ribbon (#152156) around the card. This was attached to the Basic White base card.
The butterfly was cut with a die from the Brilliant Wings dies (#155523) using the gold from the Gold & Rose Gold Metallic Specialty Paper (#156844). This was attached to the card with Mini Stampin’ Dimensionals (#144108).
The sentiment is also from the Eden’s Garden stamp set and stamped with VersaMark (#102283) and embossed with Gold Stampin’ Emboss Powder (#155555), then set with the Heat Tool (#129056). I used a die from the Tasteful Labels Dies (#152886) to cut the sentiment. The Just Jade card under the sentiment was cut with a Warm Wraps Die (#153521) and Stampin’ Dimensionals (#104430) were used to attach this to the card.
The gold leaves were cut using a die from the Eden Dies (#157831) from the Gold & Rose Gold Metallic Specialty Paper. I used Mini Glue Dots (#103683) to attach the leaves. The beautiful gems are the Garden Gems (#159277) which are part of the Eden’s Garden collection.
“Love what you do and share what you love.”
Stay safe & keep crafting!!
Monday, 27 September 2021
Brilliant Wings
Hi my friends,

For a butterfly lover, I haven’t made a card with a butterfly for a while, however you could replace the butterfly with a variety of images.
I used the Shimmery White Finish Embossing Paste (#154645) with one of the Plenty Of Patterns Decorative Masks (#155553) to create the background on the larger piece of Basic White card (#159228). The smaller Basic White card was dry embossed with the Ornate Floral 3D Embossing Folder (#152725). Both these white cards were matted with Blackberry Bliss card (#133682). The smaller matted card was attached to the card with Stampin’ Dimensionals (#104430).
I wrapped the Metallic Mesh Ribbon (#153550) around the card front then attached it to the Basic White base card. The butterflies were cut with the Brilliant Wings dies (#155523) from Blackberry Bliss card and Silver Foil Specialty (#156457). The Silver butterfly was attached to the base butterfly with Mini Glue Dots (#103683), then taped to the card.
Happy Birthday is from the Artistically Inked stamp set (#154542) and stamped with Blackberry Bliss ink (#147092). I cut this with the die from the Bloom Dies (#155989). The sentiment was attached with Stampin’ Dimensionals.
“Love what you do and share what you love.”
Stay safe & keep crafting!!
Thursday, 29 July 2021
Expressions In Ink
Hello & welcome again,

“Love what you do and share what you love.”
I think the Expressions In Ink Designer Series Paper (#155464) is everyone’s favourite with beautiful colours, designs and gold foiling. It certainly is my favourite.
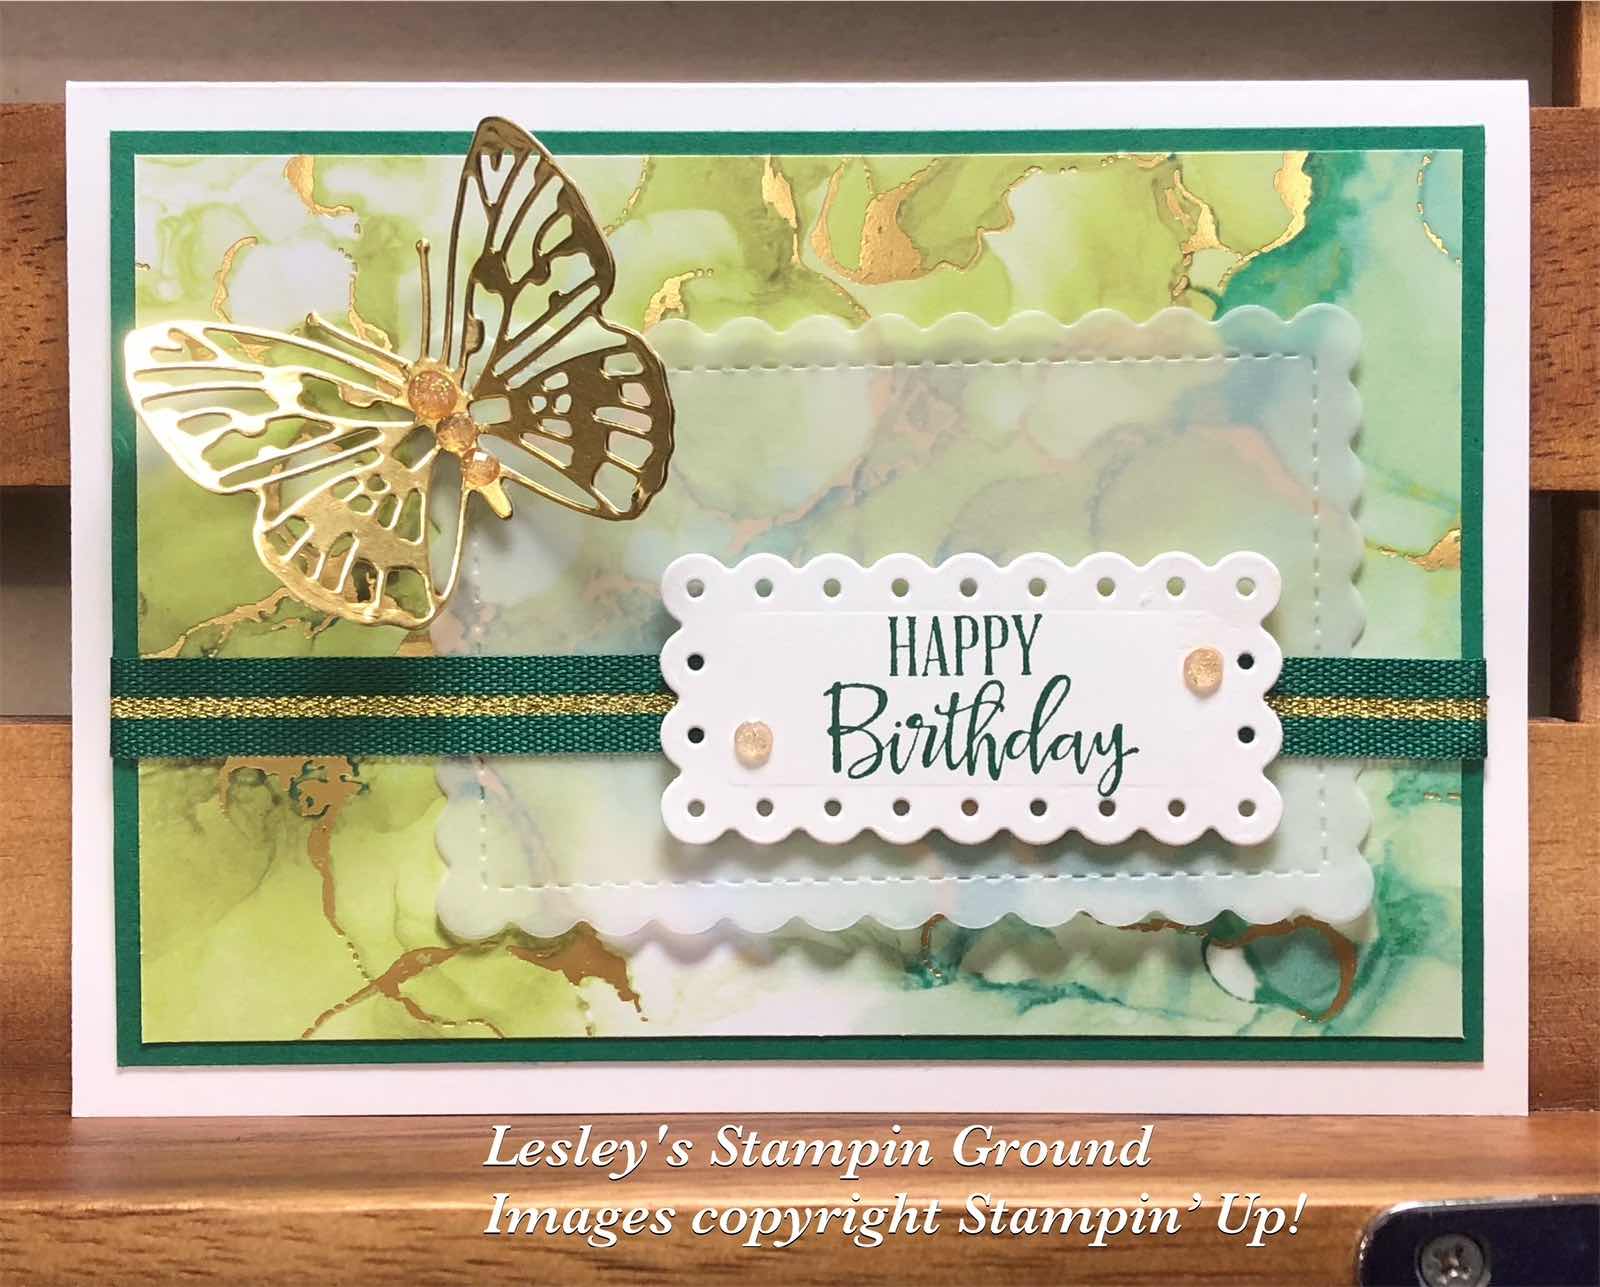
I attached the DSP to a piece of Shaded Spruce card (#147006). I cut a piece of Vellum (#106584) with a Scalloped Contours Die (#155560) and attached this to the card front. The (retired) shaded spruce & gold ribbon was wrapped around the cardfront, then this was attached to the Basic White base card (#159228).
The sentiment from the Peaceful Moments stamp set (#151595) was stamped with Shaded Spruce ink (#147088). This was also cut with a die from the Scalloped Contours dies.
The butterfly from Brilliant Wings Dies (#155523) was cut from Gold Foil Sheet (#132622). The sentiment and butterfly were attached with Mini Stampin’ Dimensionals (#144108). The Genial Gems (#155500) embellishments were attached to the sentiment and body of the butterfly.
“Love what you do and share what you love.”
Thursday, 22 July 2021
Ornate Layers dies
Hello friends,

I do love dies as they make cardmaking easy with beautiful results.
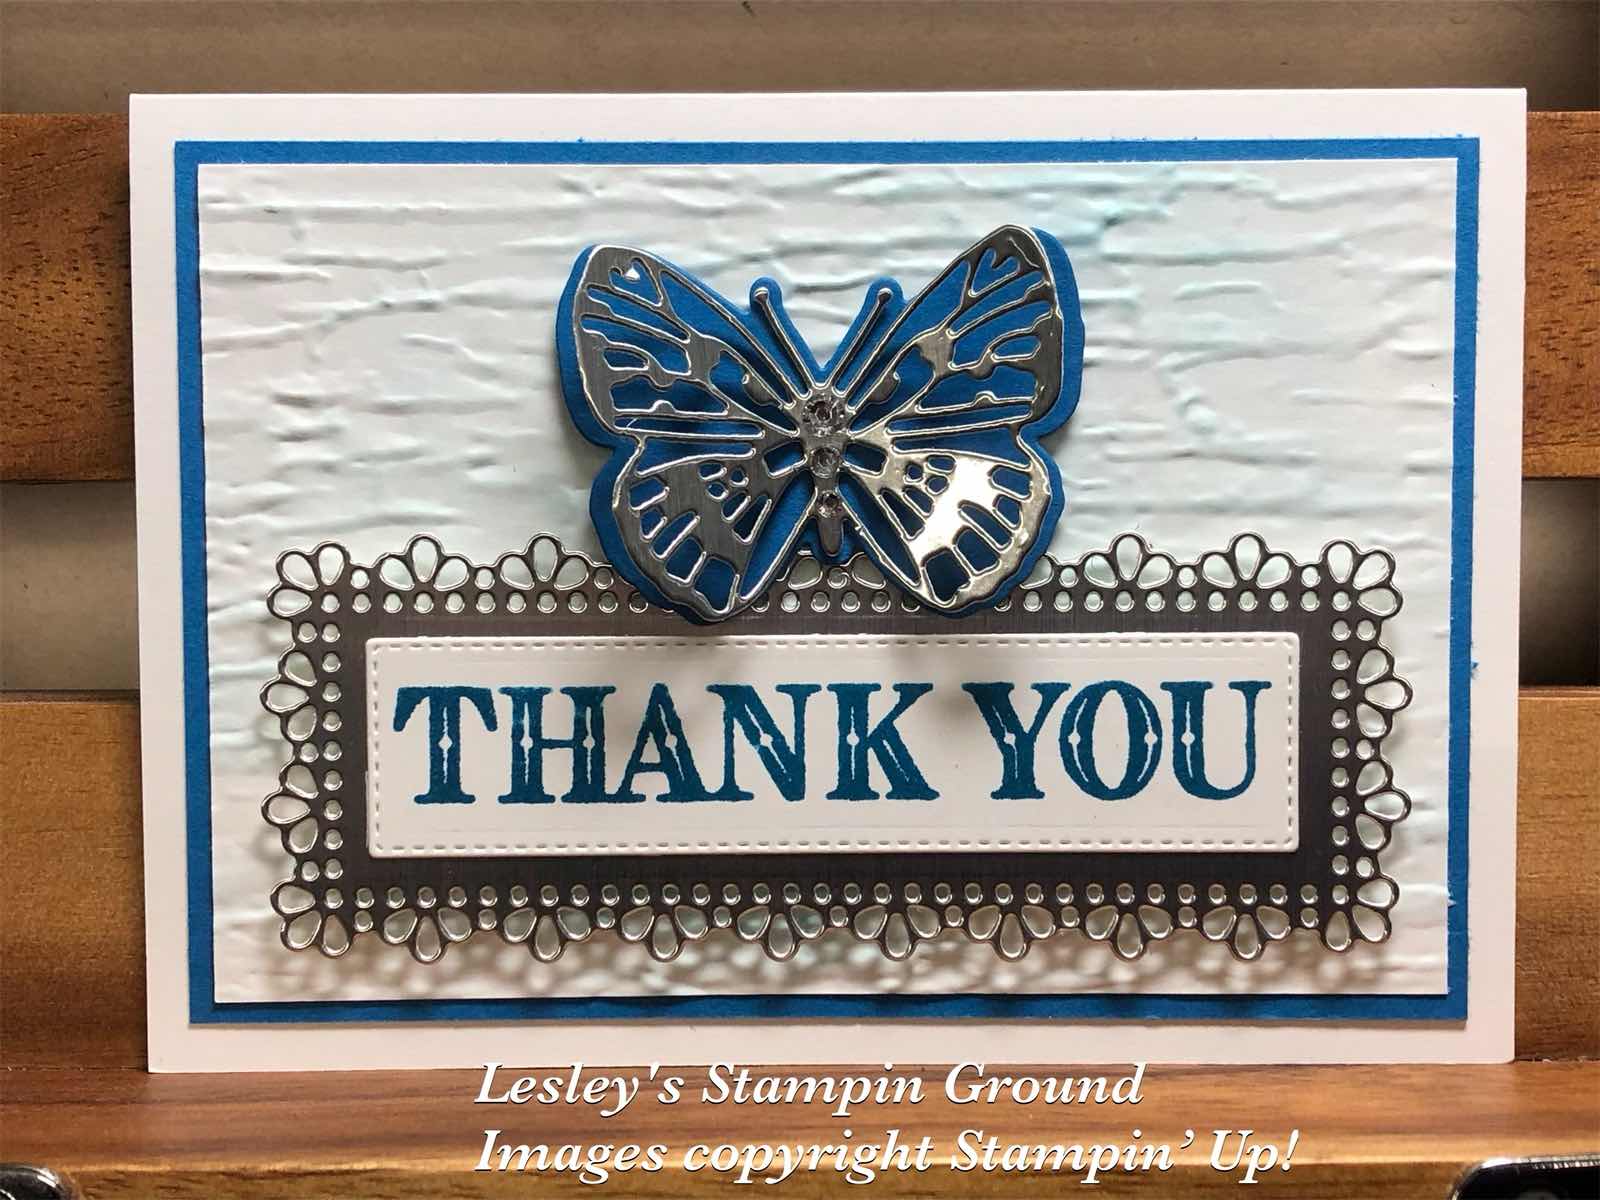
I cut the butterflies using the Brilliant Dies (#155523). Pacific Point card (#116202) was used for the solid base butterfly and Silver Foil 12”x12” Specialty Pack (#156457) for the detailed butterfly on top. This foil is from the upcoming Mini catalogue and consists of 3 sheets - 1 brushed finish, 1 matt finish and 1 mirrored foil finish.
“Thank you” was stamped with Pacific Point ink (#147098). This sentiment is from the Ornate Thanks stamp set (#158301). The sentiment and silver foil underneath were cut with dies from the Ornate Layers (#152726).
I dry embossed the Basic White card front (#159228) using the Bark 3D Embossing Folder (#155431). Using a Blending Brush (#153611) I lightly coloured the embossed card, then attached it to the Pacific Point card.
The sentiment and butterfly were attached to the card using Stampin’ Dimensionals (#104430) and I added Rhinestone Basic Jewels (#144220) to the body of the butterfly.
“Love what you do and share what you love.”
Friday, 2 July 2021
Scalloped Contours dies & Brilliant Wings dies
Hello again,

I have used the Scalloped Contours Dies (#155560) again today for a totally different look to yesterday’s card.
The have cut the 3 layers with the Scalloped Contours Dies. The top layer is from the Expressions In Ink Specialty Designer Series Paper (#155464). The middle layer is Very Vanilla (#106550), then the bottom layer is the Gold from the Gold & Rose Gold 6”x6” Metallic Specialty Paper (#156844).
The butterfly was cut with a die from the Brilliant Wings Dies (#155523) and also cut from the Gold Metallic Paper. “Happy Birthday” is from the Artistically Inked stamp set (#154542) was stamped with VersaMark (#102283) and heat embossed with Gold Stampin’ Emboss Powder from the Metallics pack (#155555), and set with the Heat Tool (#129056). I daubered the sentiment with Shaded Spruce ink (#147088).
The Very Vanilla Layer, sentiment and butterfly were all attached using Stampin’ Dimensionals (#104430) and Mini Stampin’ Dimensionals (#144108). The base card is also Very Vanilla.
Till the 2nd August Stampin’ Up! have a special on selected Designer Series Paper, so a great chance to stock up and save on these beautiful papers.
The following are on special -
155841 - Beauty of the Earth - $17
155696 - Bloom Where You’re Planted - $17
155499 - Hand Penned - $17
152494 - In Good Taste - $31.45
155817 - In The Wild - $17
155807 - Pansy Petals - $17
155605 - Sweet Symmetry - $17
155718 - Tidings Of Christmas - $17
155686 - You’re A Peach - $17
“Love what you do and share what you love.”
Thursday, 4 March 2021
Stitched Triangles Dies
Hello again,


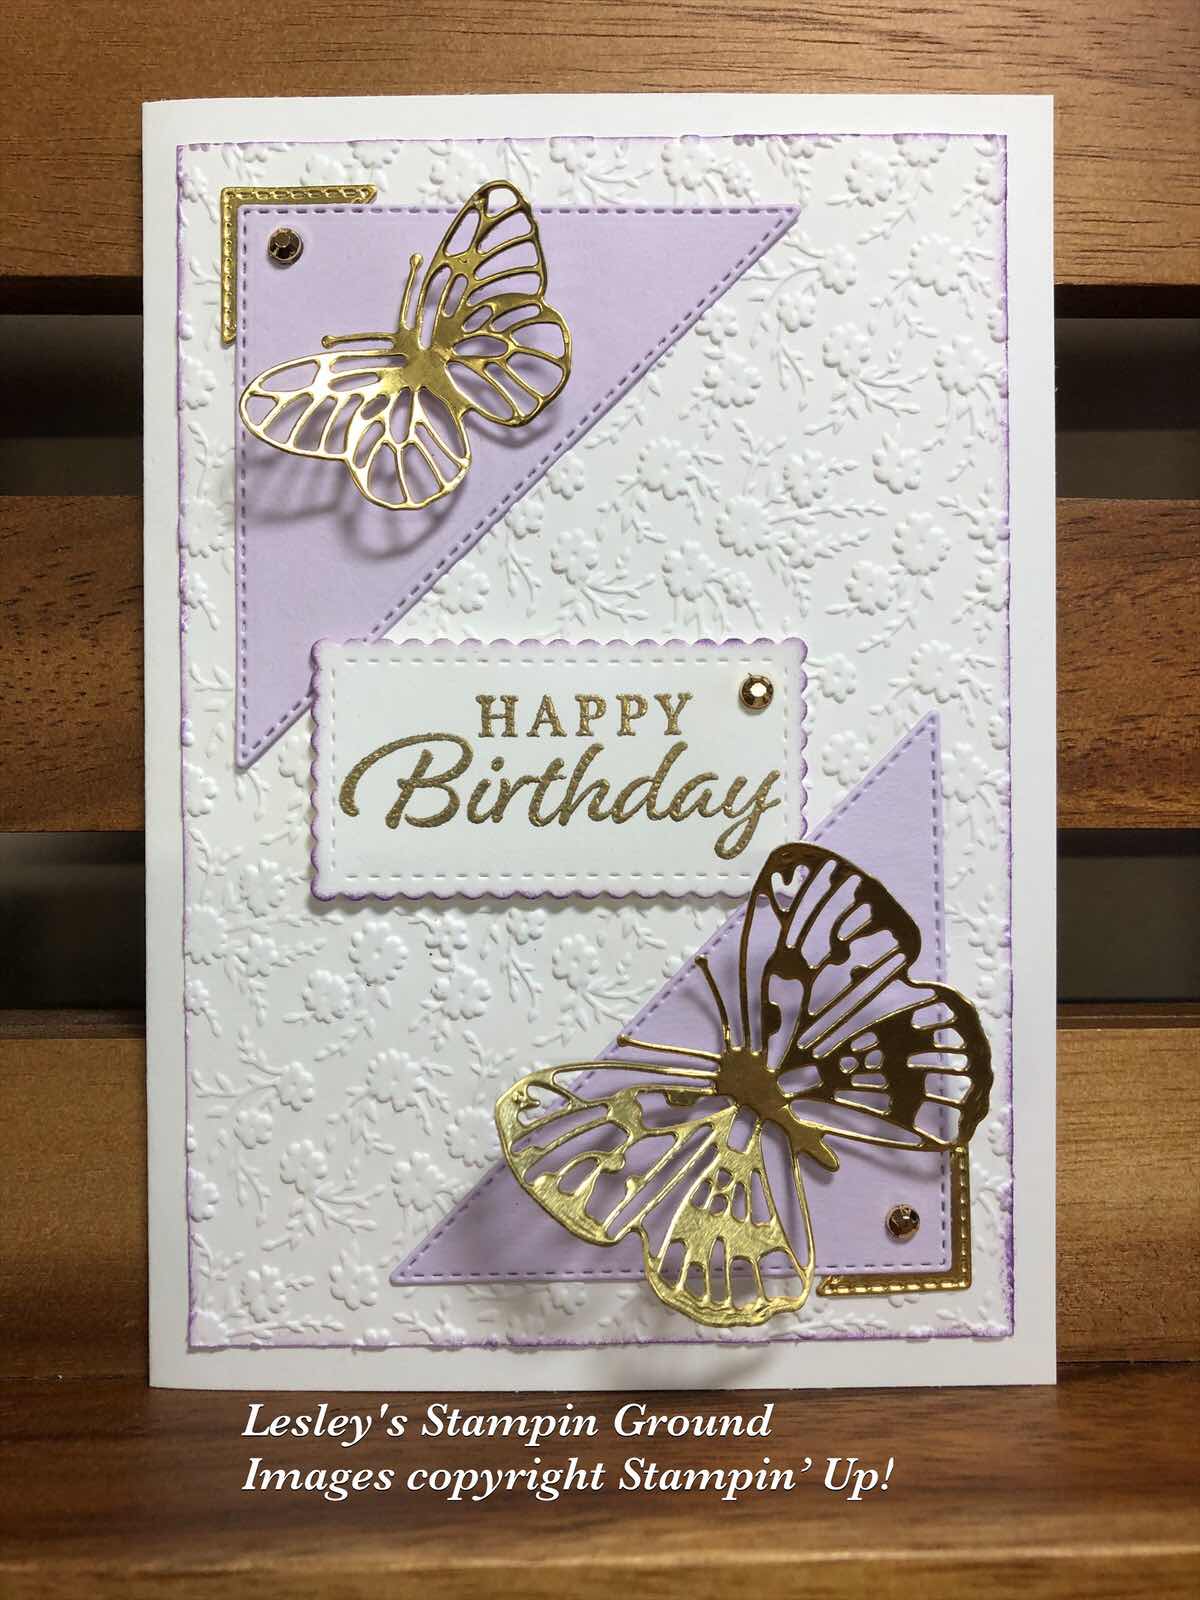
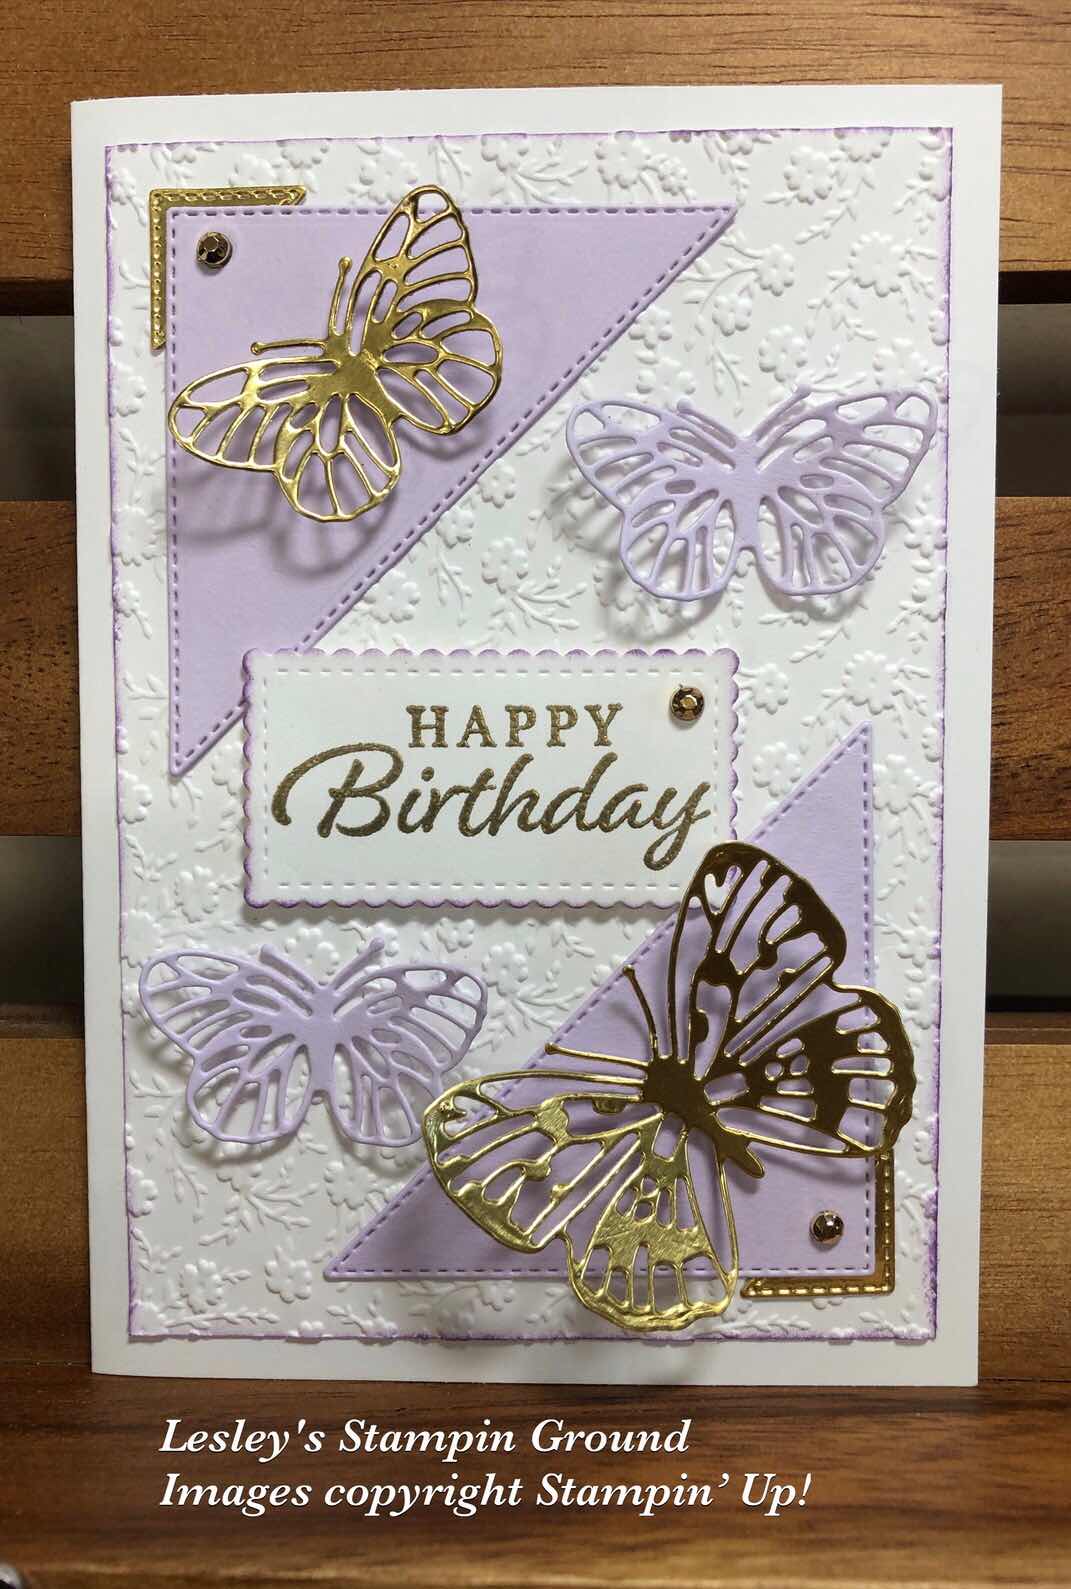
I am still trying to decide if I like the card with 2 butterflies or with 4 butterflies. What do you think?
The cardstock is Basic White (#159228) and Purple Posy (#150887). Two butterflies and the small triangles are Gold Foil Sheets (#132622). I dry embossed the card front with the Ornate Floral 3D Embossing Folder (#152725) and daubered the edge with Highland Heather ink (#147103). The triangles were cut with the Stitched Triangles Dies (#152710).
“Happy Birthday” from Happy Thoughts stamp set (#154507) was stamped with VersaMark (#102283) and heat embossed with Gold Stampin’ Emboss Powder (#109129) and set with the Heat Tool (#129056). A Stitched So Sweetly Die (#151690) was used to cut the sentiment then it was attached to the card with Stampin’ Dimensionals (#104430). The butterflies were cut with the Brilliant Wings Dies (#155523). The gold butterflies were attached with Mini Stampin’ Dimensionals (#144108) and the Purple Posy butterflies were attached with Mini Glue Dots (#103683). Gilded Gems (#152478) were added to finish the card.
Have a great day!!
“Love what you do and share what you love.”
Tuesday, 2 March 2021
Butterfly Brilliance Bundle
Hi friends,

For the butterfly lovers, Butterfly Bouquet is now available to order. This includes a stamp set, dies and designer paper with butterflies everywhere.
There are 6 butterflies on one stamp and there is a die to cut the butterflies separately. There are also dies to cut the more detailed butterflies which I have used on this card.
The butterflies from the Butterfly Brilliance stamp set (#155092) were stamped onto Basic White card (#159228) with Tuxedo Black Memento ink (#132708). Then I sponged around each of the stamped butterflies using Blending Brushes (#153611) with these inks - Highland Heather (#147103), Pacific Point (#147098), Poppy Parade (#147050), Crushed Curry (#147087), Bermuda Bay (#147096) and Magenta Madness (#153117).
I then cut out the detailed butterflies with the Brilliant Wings Dies (#155523). The card used is Highland Heather (#147010), Pacific Point (#116202), Poppy Parade (#121694), Crushed Curry (#131288), Coastal Cabana (#131302) and Magenta Madness (#153085). These were attached over the co-ordinating stamped butterflies using Mini Glue Dots (#103683). I added glitter to each butterfly using the Clear Wink Of Stella Brush (#141897). I cut the butterflies level with the edge of the cardfront then attached this to the Basic Black (#121688) base card.
“Happy Birthday” from the Itty Bitty Greetings stamp set (#151331) was stamped with Gorgeous Grape ink (#147099) and punched with the Classic Label punch (#141491). I attached this with Mini Stampin’ Dimensionals (#144108).
Have a great day!!
“Love what you do and share what you love.”
Monday, 22 February 2021
Brilliant Wings
Hello & welcome again,

Yes, it’s butterflies again using some of the Butterfly Bouquet products. These will be available from 2nd March and are an early release from the next Annual Catalogue.
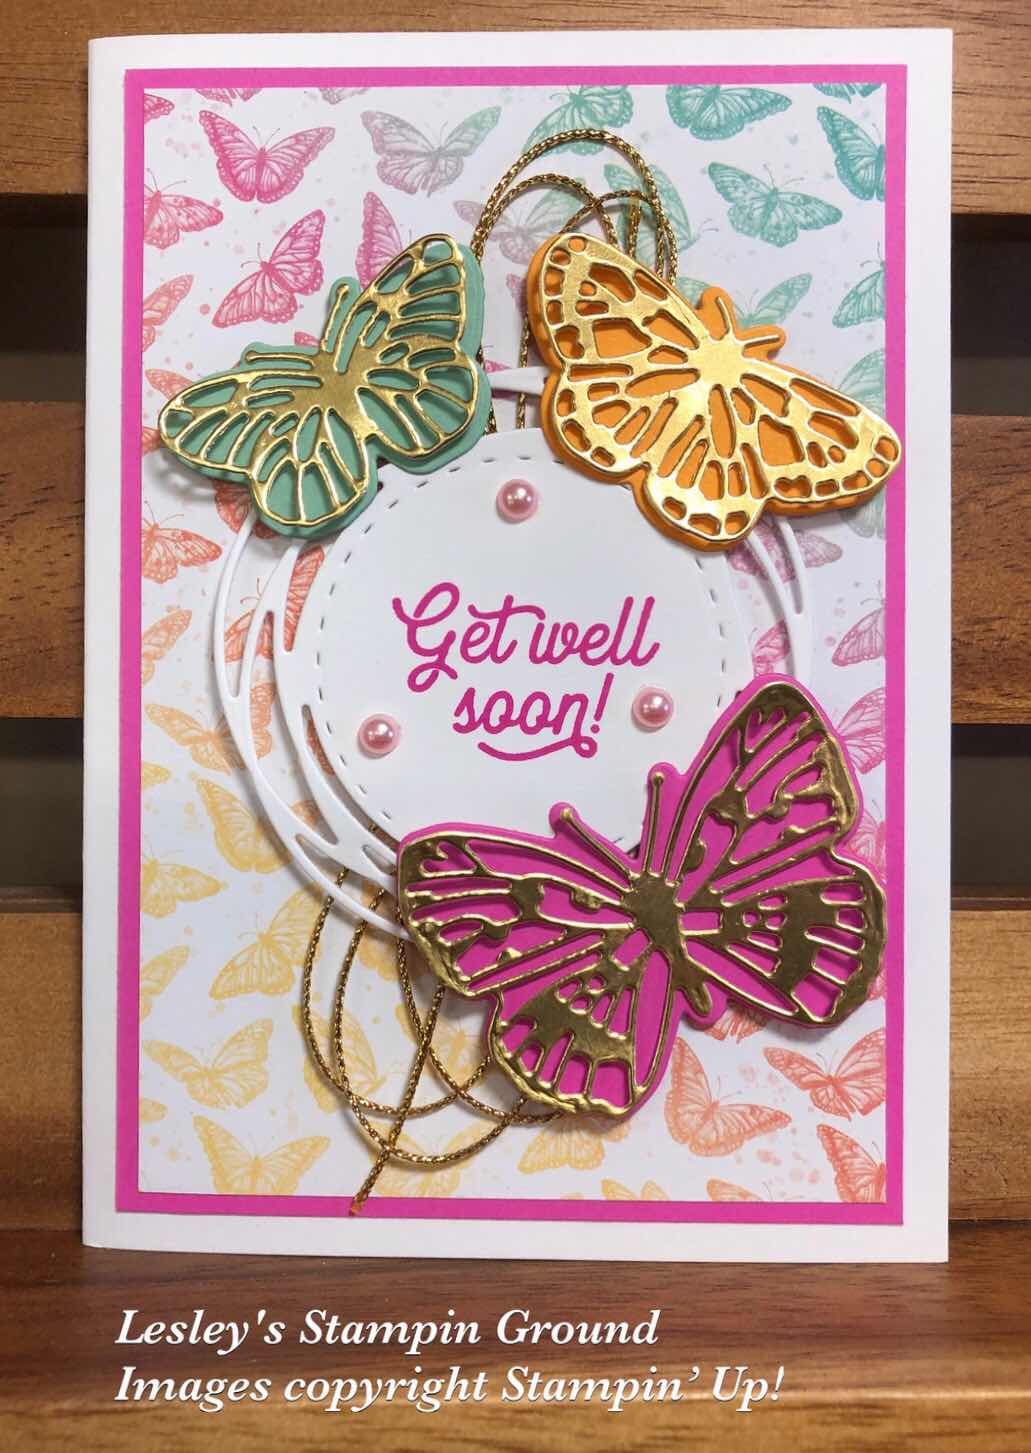
The base card is Basic White (#159228), then the next layer is Magenta Madness (#153085) with the Butterfly Bijou 6” x 6” Designer Series Paper (#156824) on top. The butterflies were cut with the Brilliant Wings Dies (#155523). The solid butterflies were cut from Magenta Madness card, Mango Melody card (#147013) and Mint Macaron card (#138344). The detailed butterflies were cut from Gold Foil Sheets (#132622). The gold butterflies were attached to the coloured butterflies with Mini Glue Dots (#103683).
The sentiment from Many Mates stamp set (#152633) was stamped with Magenta Madness ink (#153117), then cut with a die from the Painted Labels Dies (#151605). I attached some (retired) gold trim to the card then attached the sentiment with Stampin’ Dimensionals (#104430).
The butterflies were also attached with Stampin’ Dimensionals and the card was finished by adding the Pastel Pearls (#154571) to the sentiment.Enjoy your day!!
“Love what you do and share what you love.”
Subscribe to:
Posts (Atom)