Showing posts with label #scrapbookpage. Show all posts

Tuesday, 10 February 2026

Scrapbook page

 Hello,

I don’t get much of a chance to do scrapbooking but when I do I usually like just simple layouts. 


I punched different colours from the Beautiful Bokeh 6”x6” Designer Series Paper (#164607) using the Heartfelt Hexagon punch (#162888).

I stamped the floral image from the Weekend Adventures stamp set (#167318) onto the punched out DSP, using a range of inks - Azure Afternoon (#161663), Fresh Freesia (#155611), Highland Heather (#147103), Flirty Flamingo (#147052), Pool Party (#147107), Crushed Curry (#147087) & Strawberry Slush (#165286).

I attached these pieces to a retired foil sheet and this was attached to the White Willow 12”x12” page (#166703).

The photos were matted with Basic Black card (#121688) and the foil.

The letters were cut with the Mini Alphabet dies (#162934) using Basic Black card backed with Adhesive Sheet (#152334).


“Love what you do and share what you love.”

INSPIRE. CREATE. SHARE. 


https://www.stampinup.com.au


lesley.j.jendra@gmail.com


http://lesleysstampinground.blogspot.com


Sunday, 13 July 2025

Sentimental Framing

 Hi friends,

The Sentimental Framing dies (#165476) have been used for the beautiful frame for these photos.


The base page is from the Wildflower Celebrations Scrapbooking Workshop Kit (#166623). I have matted the smaller Blueberry Bushel card (#146991) with Silver Foil Sheet (#163387) and another piece of Blueberry Bushel card.

I cut the frames from Silver Foil Sheet. I also cut the photos with the same die, to cut the photo so it fitted into the frame. The frames & photos were taped to the page.

I stamped the floral image from the Charming Day stamp set (#166126) with VersaMark (#102283) and added the Silver powder from the Metallics Wow! Embossing Powder (#165678). This was set with the Heat Tool (#129056).

The stamped image and the detailed Silver Foil image were cut with the Charming Day dies (#166135). These were attached to the page with Mini Glue Dots (#103683). Another die from the Sentimental Framing dies was used to cut the pieces for the names.

“Love what you do and share what you love.”

INSPIRE. CREATE. SHARE. 


https://www.stampinup.com.au


lesley.j.jendra@gmail.com


http://lesleysstampinground.blogspot.com


Saturday, 24 May 2025

Party Banners Dies

 Hello again,

I have used the Party Banners Dies (#165264) on this scrapbook page. There are 14 different sized banner dies so would be suitable for making large banners, scrapbook pages or cards, making them very versatile. The largest die is 17.8cm x 13.7cm (7”x5-3/8”) and the smallest 4.4cm x 3.2cm (5–11/8” x 1-1/4”).


I cut the photos as well as the Night Of Navy card (#106577) and Cherry Cobbler card (#121681) with the dies. These were attached to the Mixed Media Florals Designer Series Paper (#164638). 

The flowers & leaves are from the Extraordinary Flora Washi Tape (#165269). (I seemed to be a bit obsessed with this tape). I attached the tape to the Basic White card (#166781) and cut the images with the Extraordinary Flora Die (#165244). These were then added to the page with Mini Glue Dots (#103683).

I used the Mini Alphabet dies (#162934) to cut the letters from Night Of Navy card. These were glued to the page with the Multipurpose Liquid Glue (#110755).

Another product I love is the new Metallic Textures Rub-Ons (#165270). These are the silver leaves on the page. These may be easily missed in the catalogue so check them out on Page 124. These rub ons are so easy to use. Just cut out one of the many images, remove the backing, place the silver/adhesive side on the paper and rub with your finger until the image transfers to the paper. Remove the top layer to reveal the beautiful image. This pack contains both gold & silver rub-ons.

“Love what you do and share what you love.”

INSPIRE. CREATE. SHARE. 


https://www.stampinup.com.au


lesley.j.jendra@gmail.com


http://lesleysstampinground.blogspot.com


Wednesday, 14 October 2020

Forever Fern Scrapbook page

Hello,

After making the Butterfly sampler recently, I wanted to do a similar scrapbook page, so here it is.


The grey background is from the In Good Taste Designer Series Paper (#152494), then this was trimmed slightly and attached to the 12”x12” Real Red card from the Regals Assortment (#147002). The 5 Real Red (#106578) and Whisper White (#106549) rectangles were cut with the Stitched Rectangles Dies (#151820). The leaves were stamped with the Forever Ferns stamp set (#c152559) using Granny Apple Green ink (#147095), Real Red ink (#147084) and Mossy Meadow ink (#147111). These were cut with the Forever Flourishing dies (#152714). I used Granny Apple Green card (#147014), Real Red card and Gold Foil Sheet (#132622) to cut some of the die cut pieces that weren’t stamped. The butterfly is from the Positive Thoughts stamp set (#c151490) and this as well as the gold feather was cut with Natures Thoughts Dies (#153586). The birds are cut with the Birds and More Dies (#152721). The photos were also attached to Real Red card.
I will add journaling to the blank white card.

Have a fantastic day!!


Wednesday, 3 June 2020

Scrapbook page with Forever Flourishing Dies

Welcome friends,

A beautiful scrapbook page using the Forever Flourishing Dies (#152714) which co-ordinate with the Forever Fern Stamp set (#c152559). These are available together in the Forever Fern bundle (#154094) which gives you a 10% discount.


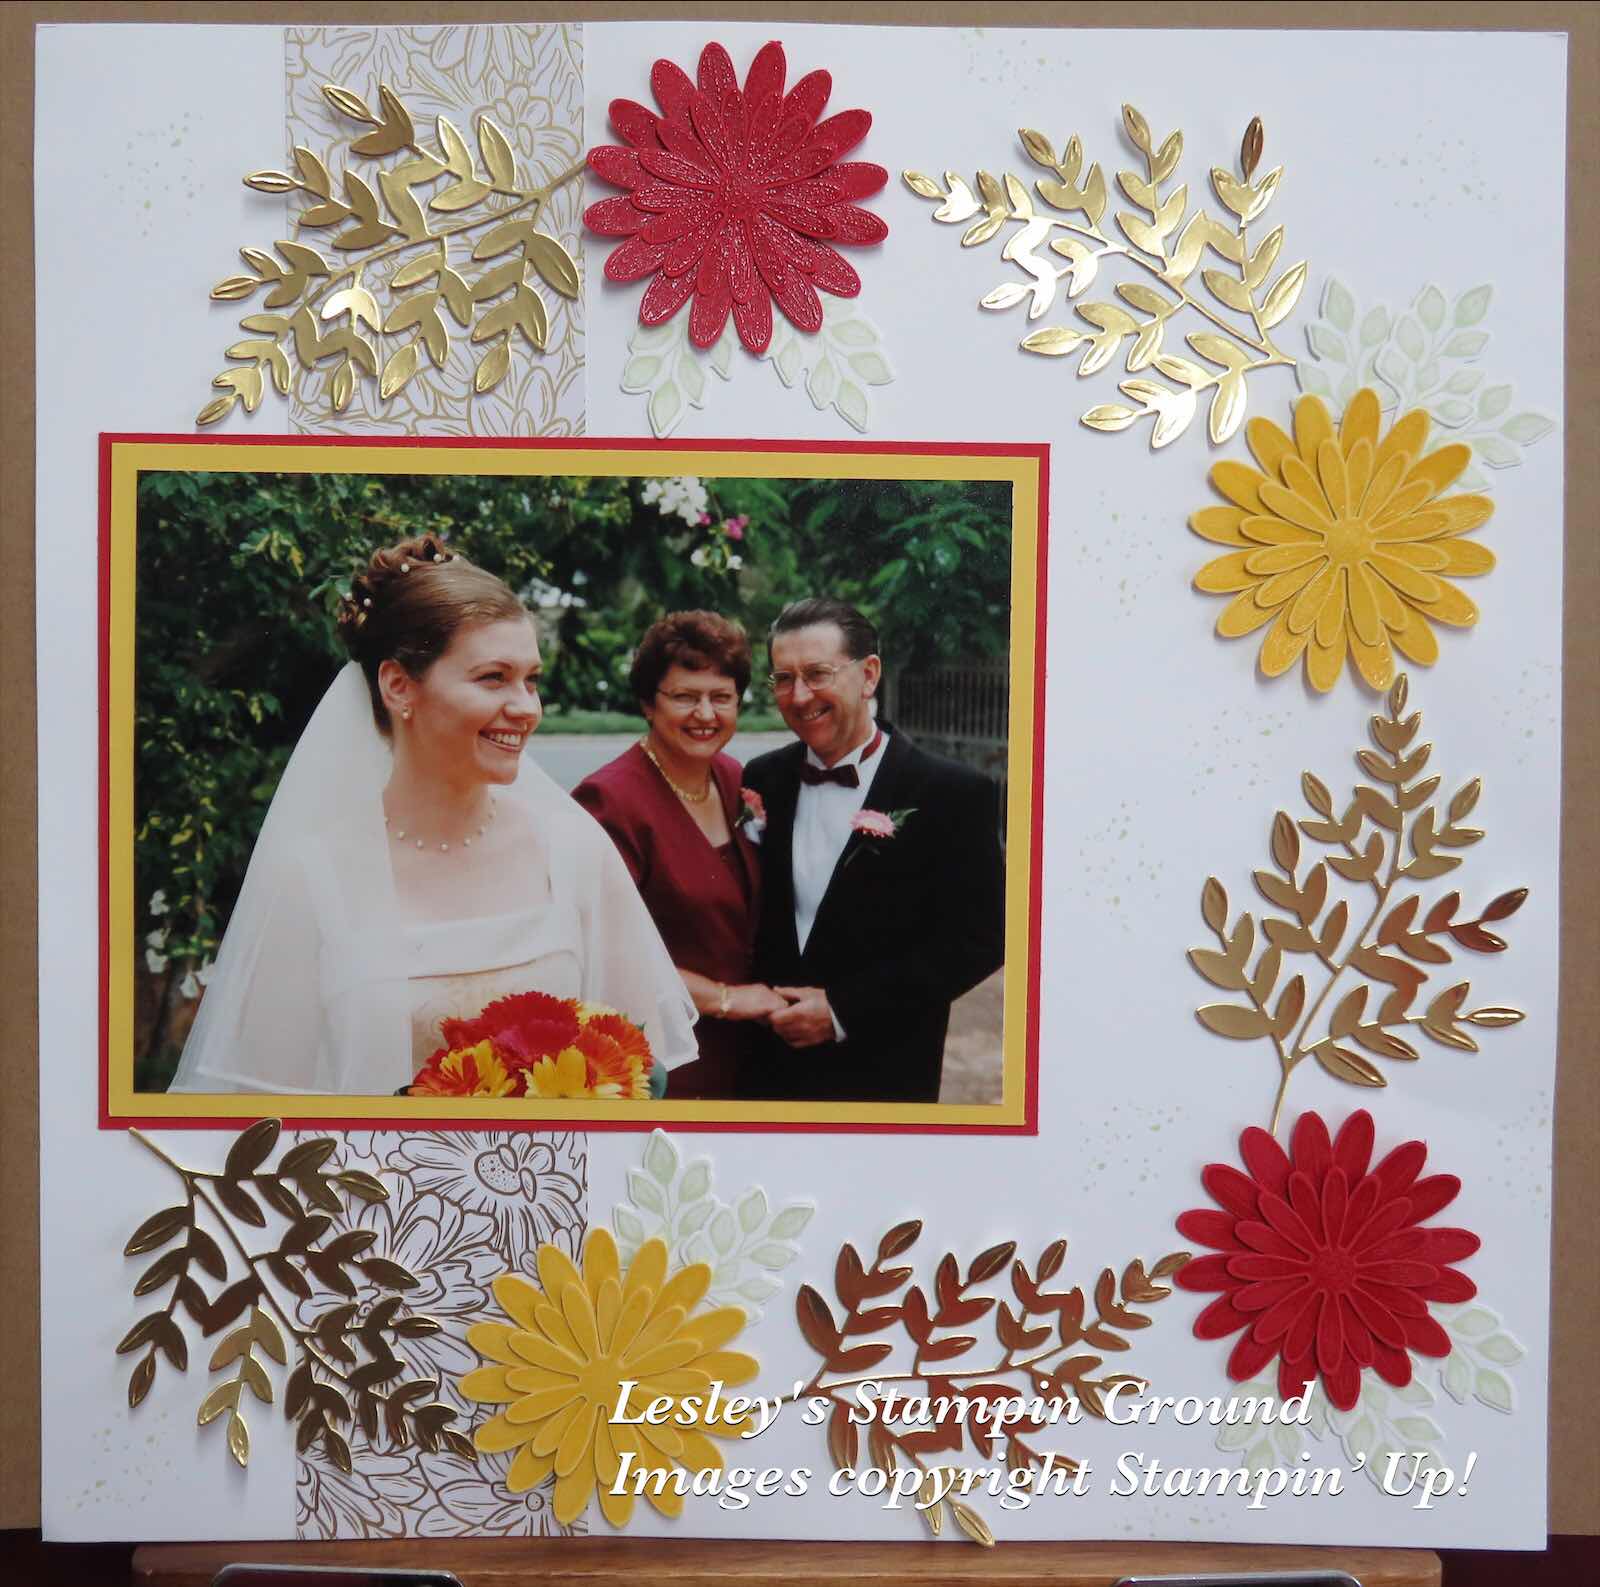
I attached a piece of the Ornate Garden Specialty Designer Series Paper (#152488) to the 12”x12” Whisper White card (#124302). I cut the Gold Foil Sheet (#132622) with a die from the Forever Flourishing Dies (#152714). I also stamped some leaves from the Forever Fern stamp set (#c152559) with Soft Sea Foam ink (#147102) and these were also cut with the Forever Flourishing Dies. I stamped the large and medium daisies from Daisy Lane stamp set (#c149325) using VersaMark (#102283) onto Real Red card (#106578) and Daffodil Delight card (#121680). I then sprinkled the images with Clear Stampin’ Emboss Powder (#109130) and set with the Heat Tool (#129056). Each of these flowers were then punched with the Daisy punch (#143713) for the larger flower and the Medium Punch (#149517) for the smaller flower. I used 2 of each flower image to make each individual flower and assembled them with Mini Glue Dots (#103683). The flowers and leaves were also attached to the page with Mini Glue dots. I then stamped the splotches of dots from the Forever Fern stamp set to the background using Soft Sea Foam ink.

I hope you have had a chance to check out the new catalogue which is now available for ordering. If not you can check it out here

Monday, 11 May 2020

Shimmer Detailed Laser-Cut Specialty Paper

Hi again,

I’ve had a busy few days but finally got back into the craft room today and had a chance to do this scrapbook page with photos from Mother’s Day yesterday.


The beautiful Shimmer Detailed Laser-Cut Specialty Paper (#149611) is a delicately detailed laser-cut sheet with a touch of shimmer. I have used the Vanilla side, the other side is white. With such detail in this paper, I didn't want to add too much to it. I attached this to 12”x12” Very Vanilla card (#144239). I matted the photos with Highland Heather card (#147010) and Basic Black card (#121688). The hearts were cut with 2 separate dies from the Stitched Be Mine dies (#148527) using Heather Highland card and Gold Foil sheet (#132622). The detailed rectangle was cut with an Ornate Layers Die (#152726). I coloured the Flower Faceted Gems (#149479) using Dark Highland Heather Stampin’ Blend (#146883). The letters and numbers were cut from Basic Black card (using an electronic cutter). These were glued using the Fine-Tip Glue Pen (#138309). 

Stay safe & keep crafting!!


Saturday, 4 January 2020

Lovely Lily Pad stamp set and Lily Pad Dies

Hello friends,

I have surprised myself and finished another scrapbook page. It’s a simple one but I love it.


The background page is Whisper White 12”x12” cardstock (#124302). The coloured card is Gorgeous Grape (#147011) and Highland Heather (#147010). I stamped the lilies from the Lovely Lily Pad stamp set (#152288) with VersaMark (#102283) and used White Stampin’ Emboss Powder (#109132) and set it with the Heat Tool (#129056). These were then cut with the co-ordinating Lily Pad Dies (#152315). I also cut the detailed border pieces with the dies as well as the Gorgeous Grape outline of the lily, which I glued onto the stamped lily in the bottom corner of the page. The photo and 2 matts for the photos were cut with the Stitched Rectangles Dies (#148551). As I said, this is a very easy page, but elegant. 

The Lovely Lily Pad Dies and the Lily Pad Stamp set are both free products from Sale-a-bration. I am sure these will be on your wish list. The stamp set is with a $90 order and the dies with a $180 order.

I hope you are enjoying your weekend and doing some crafting.


Tuesday, 16 July 2019

Scrapbook page

Hi again everyone,

A fairly easy scrapbook page today with the background page from the Woven Threads Designer Series Paper (#149497).


The Whisper White card (#106549) at the top and bottom of the page was cut with a die from the Magnolia Memory Dies (#149578) and punched the corners with the Detailed Trio Punch (#146320). The letters were cut with the Hand-lettered Prose dies (#149550) from Roccoco Rose card (#150888) and glued with the Fine-Tip Glue Pen (#138309). The little hearts are the pieces that come out of the border of hearts from the Stitched Labels Dies (#146828). I used the Whisper White 5/8” Polka Dot Tulle Ribbon (#146912) and attached the detailed cutout from the Detailed Bands Dies (#149549) on top of the ribbon. The photos were matted with Roccoco Rose card and Pear Pizzaz card (#131290).

Enjoy whatever you are doing today.


www.lesleyjendra.stampinup.net


lesleyjendra@bigpond.com.au