Showing posts with label #shimmerwhiteembosspowder. Show all posts

Wednesday, 27 May 2020

Detailed Peacock Dies

Hi again friends,

Here is another very sparkly card, again using retiring products.
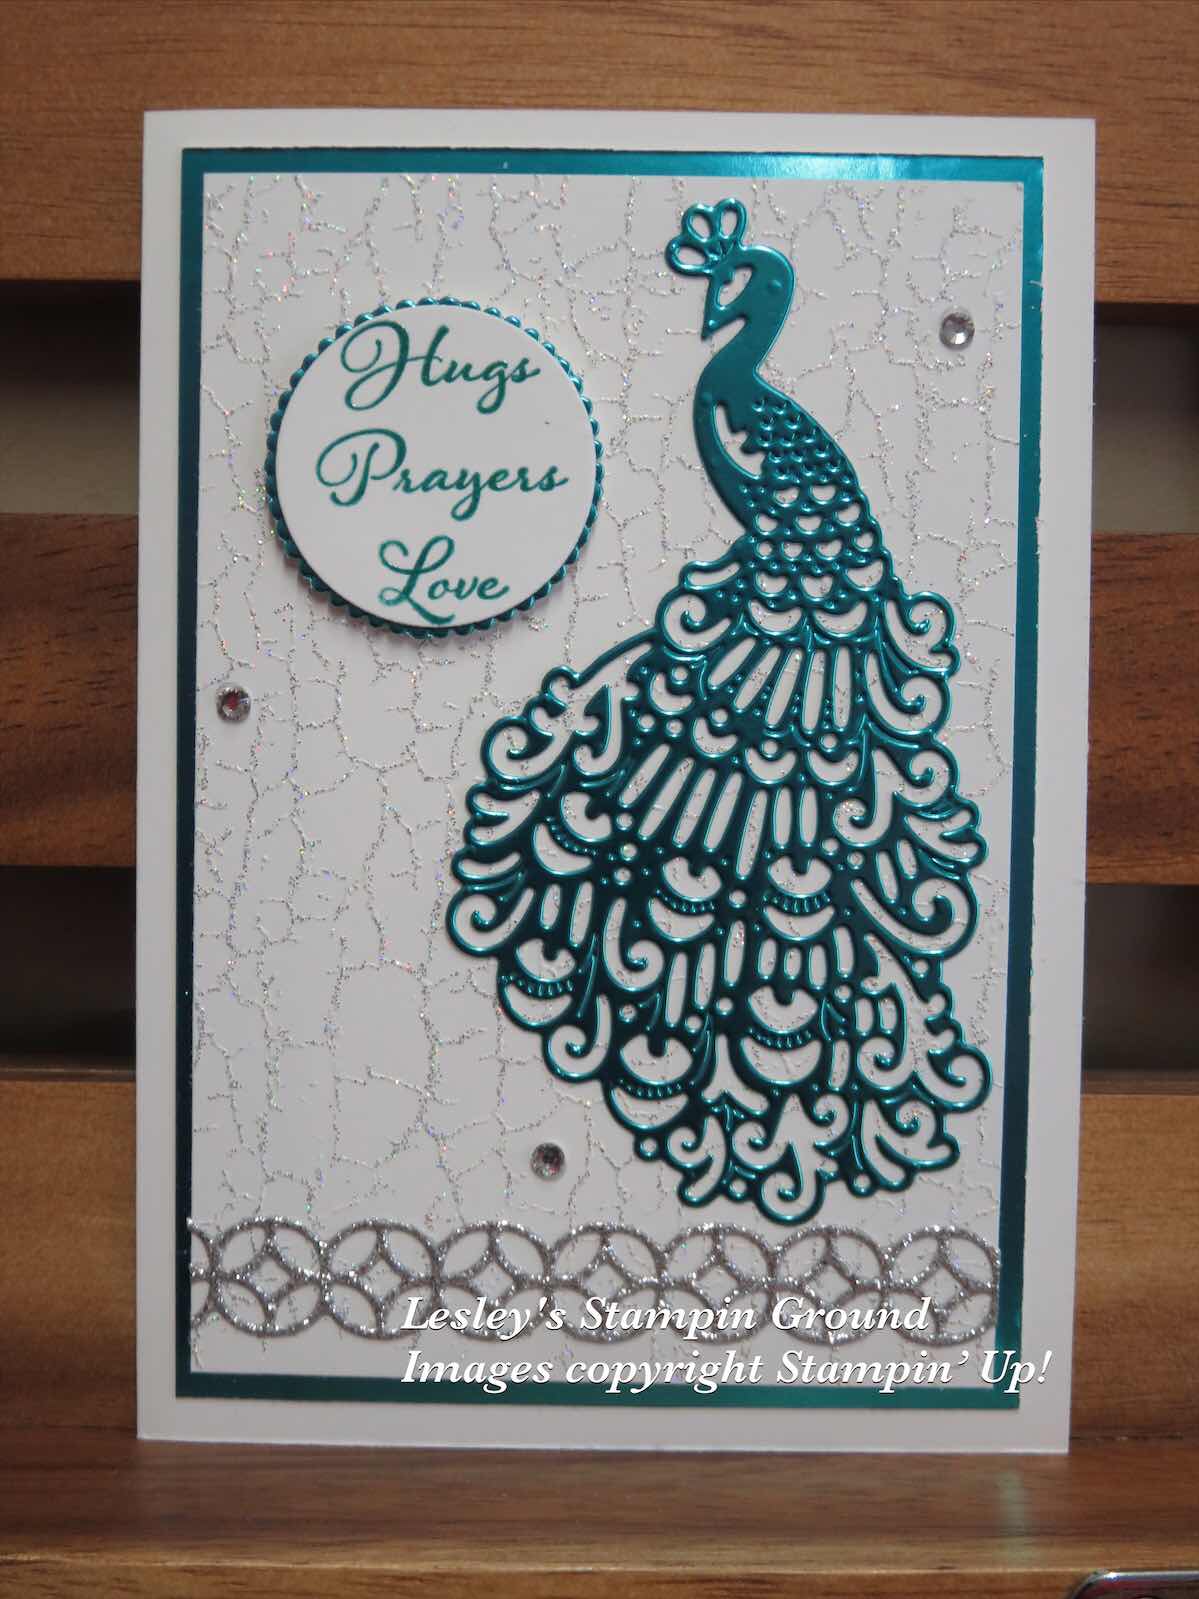


I have used Whisper White card (#106549), Noble Peacock Foil Sheets (#149495) and Silver Glimmer Paper (#146960). I stamped the Crackle Paint background stamp (#148752) with VersaMark (#102283) and sprinkled it with the Shimmer White Stampin’ Emboss Powder (#149511). This was set with the Heat Tool (#129056). This white card was attached to a piece of the Pretty Peacock Noble Peacock Foil Sheet. Instead of “wasting” the foil sheets when you are covering most of it, you can cut a piece from the centre and use it for another project. Another possibility is to cut the peacock from the centre, leaving enough around the edges to attach the white card. The peacock is cut with a Detailed Peacock Die (#149582) and glued to the cardfront with the Fine-Tip Glue Pen (#138309). The Silver Glimmer Paper border was cut with a die from the Flourish Dies (#141478) and also glued to the card. The sentiment from the Positive Thoughts Stamp Set (#c151490) was stamped with Bermuda Bay ink (#147096), then cut with the Layering Circles Dies (#141705). I attached this to the card with Stampin’ Dimensionals (#104430) and added the Rhinestone Basic Jewels (#144220) to finish the card.

The retiring products on this card are the Detailed Peacock Dies, Shimmer White Stampin’ Emboss Powder, Flourish Dies and Noble Peacock Foil Sheets.

The retiring products or last chance products will no longer be available after 2nd June, so time is running out if you still want some of these beautiful products. Click the link below to find what is still available.

lesleyjendra.stampinup.net


Contact me if you need any more information.


Stay safe & keep crafting!!


lesleyjendra.stampinup.net


Monday, 16 December 2019

Mercury Glass Designer Acetate

Hello,

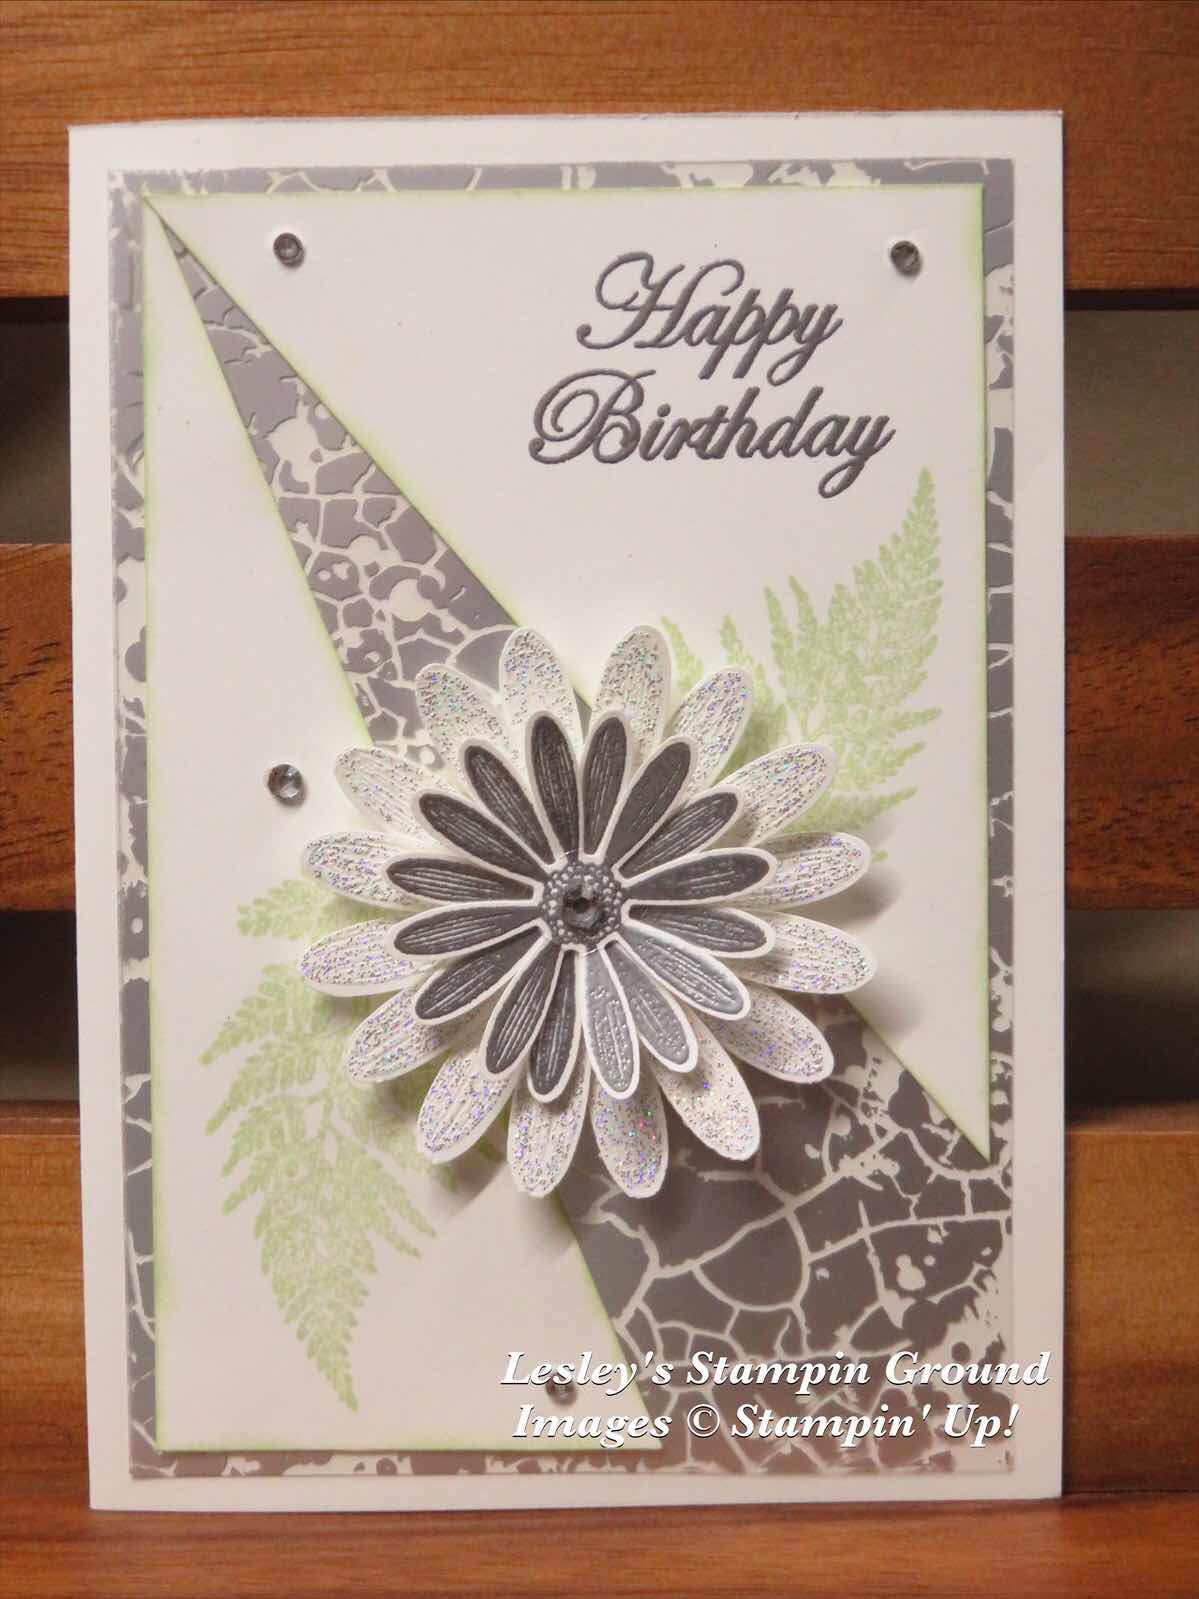
I have made this design a few times recently as it looks so nice and fairly easy to do.


I attached the Mercury Glass Designer Acetate (#150441) to the Whisper White base card (#106549). To cut the Whisper White card front, I measured and made a small mark 3cm from the bottom right corner both vertically and horizontally. From these marks I cut up to the left top corner, which gave me the 2 triangles. I stamped “Happy Birthday” with VersaMark (#102283) and embossed with Silver Stampin’ Emboss Powder (#109131) which needs to be heat set with the Heat Tool (#129056). I stamped the leaves from the Daisy Lane stamp set (#c149325) using Soft Sea Foam ink (#147102). The daisies are also from the Daisy Lane stamp set. The small daisies were heat embossed with Silver Stampin’ Emboss Powder and the large daisies with Shimmer White Stampin’ Emboss Powder (#149511). After setting, these were punched with the co-ordinating Daisy Punch (#143713) and Medium Daisy Punch (#149517). The daisies were assembled using Mini Glue Dots (#103683) and I used a Stampin’ Dimensional (#104430) to attach the flower to the card. Rhinestone Basic Jewels (#144220) were added to the card and flower.

Have a great day.

Saturday, 26 October 2019

Bells Are Ringing

Hi,

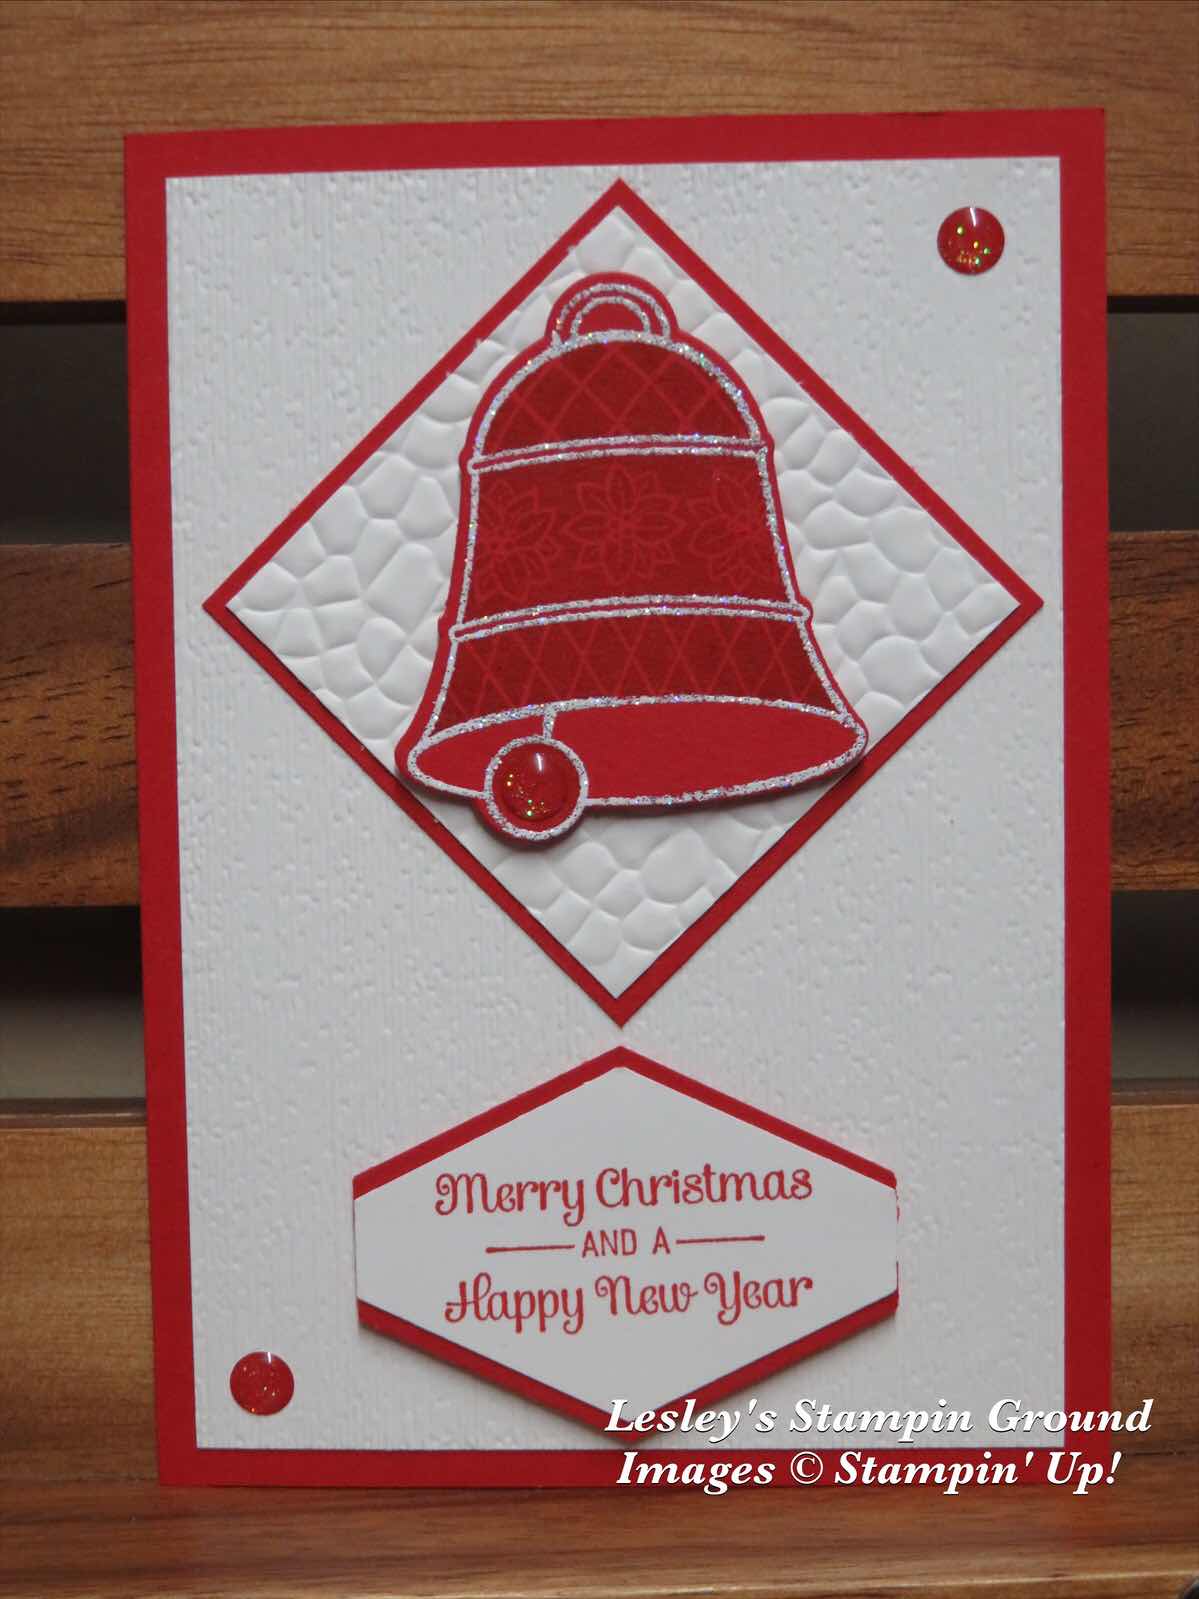
The Bells Are Ringing stamp set (#p150476) is a 2-step set, which allows you to add different images to this bell.


I stamped the bell onto Real Red card (#106578) with VersaMark (#102283) and added the Shimmer White Stampin’ Emboss Powder (#149511) and set with the Heat Tool (#129056). The images on the bell were stamped with Real Red ink (#147084) to give a subtle image. This was then cut with the Detailed Bells Dies (#150656). I embossed the Whisper White cardfront (#106549) with the Subtle 3D Embossing Folder (#151775). The white square was embossed with the Hammered Metal 3D Embossing Folder (#150646). The sentiment is from the Itty Bitty Christmas stamp set (#150513) and stamped with Real Red ink. This was punched with the Tailored Tag punch (#145667). Stampin’ Dimensionals (#104430) were used to attach the bell and the sentiment. The Toile Tidings Glitter Enamel Dots (#150433) were added to finish the card.

Enjoy the rest of your weekend.


Monday, 15 July 2019

Daisy Lane Bundle

Hello,

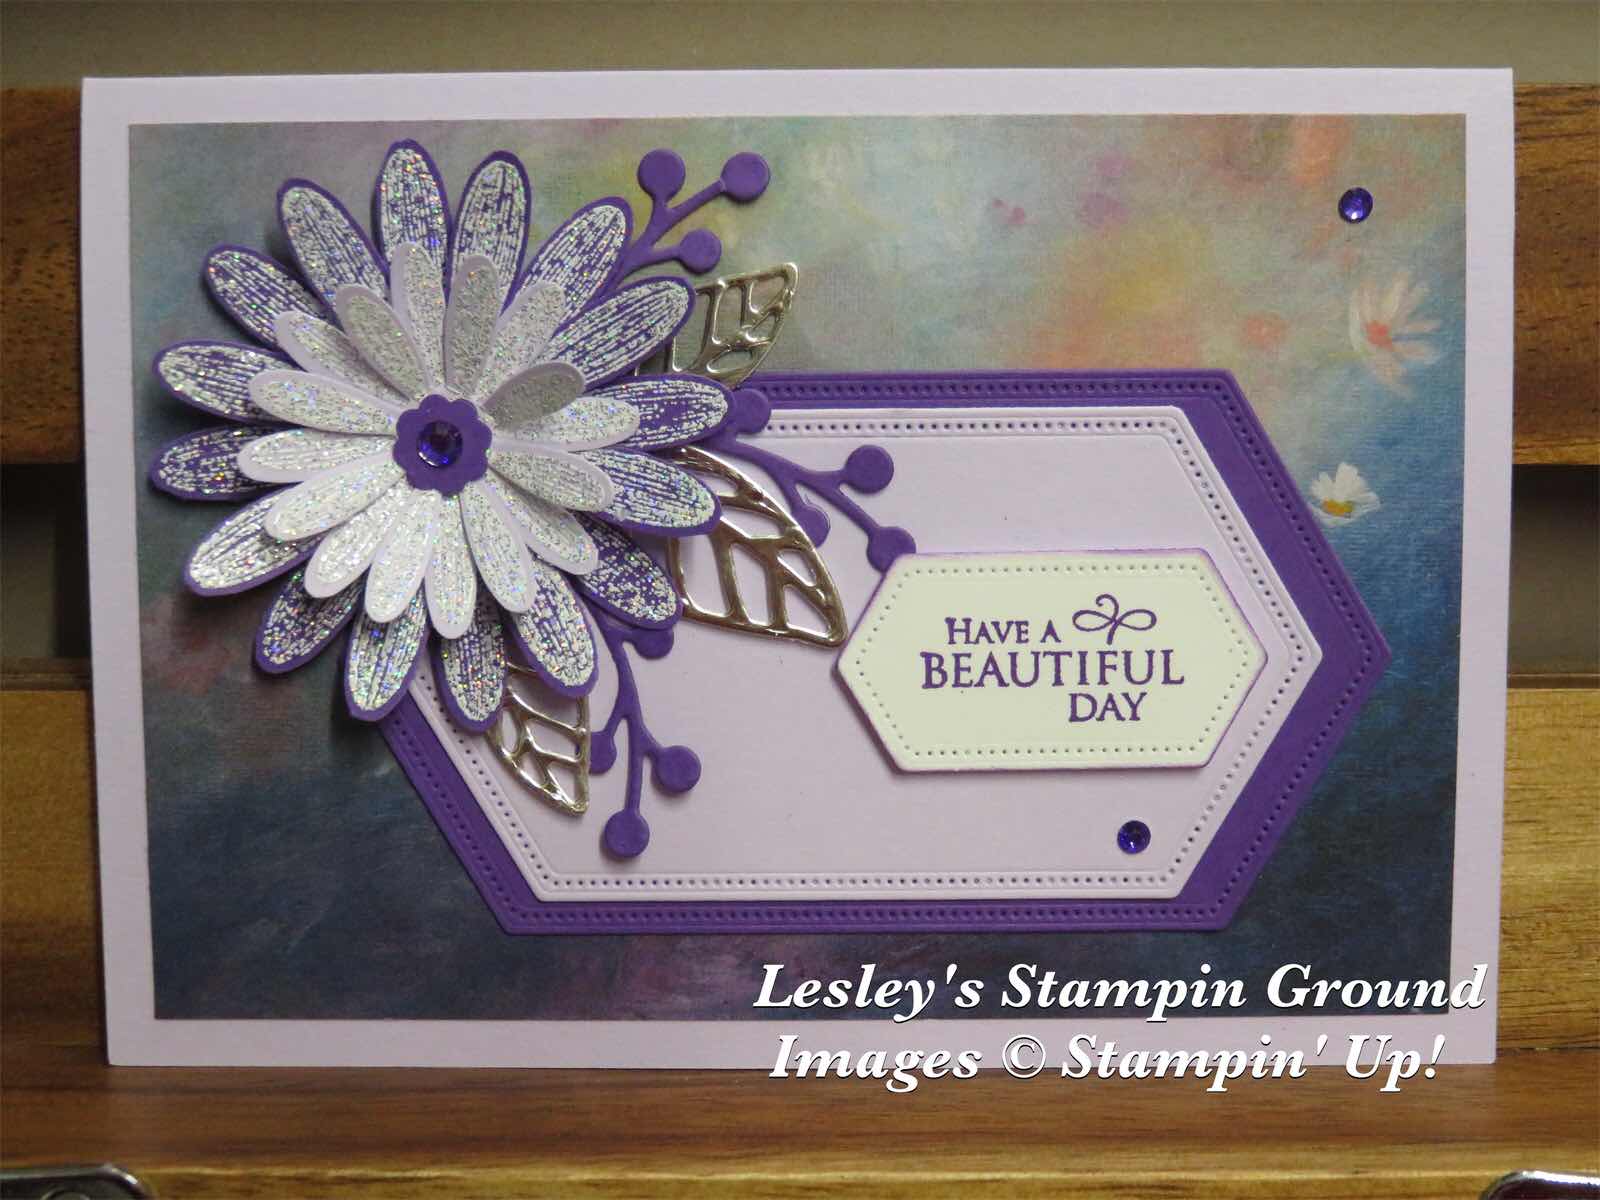
Another very pretty card (actual card always looks much nicer than the photo) - using the beautiful Daisy Lane Bundle (#c151118) which consists of the Daisy Lane stamp set (#c149325) and the Medium Punch (#149517). 


I stamped the large and small daisies twice using VersaMark (#102283) and heat embossed with Shimmer White Stampin’ Emboss Powder (#149511). The large daisy was stamped onto Gorgeous Grape card (#147011) and the smaller one on Purple Posy card (#150887). The daisies were punched with the Daisy Punch (#143713) and the Medium Daisy Punch (#149517). The flower was assembled using Mini Glue Dots (#103683). The Designer Series Paper from Perennial Essence DSP (#149443) was attached to the Purple Posy card (#150887). The sentiment from the Very Versailles stamp set (#c149275) was stamped with Gorgeous Grape ink (#147099) onto Whisper White card (#106549). The sentiment, the Gorgeous Grape card and Purple Posy card were all cut with Stitched Nested Labels Dies (#149638). I attached the flower to the card with Stampin’ Dimensionals (#104430). The leaves are cut with dies from the Magnolia Memory Dies #149578) from Champagne Foil Sheets (#144748) and the buds are from the Flourish Dies (#141478). These were attached to the card with Mini Glue Dots. The embellishments are from the Noble Peacock Rhinestones (#149494).

Have a beautiful day.