Showing posts with label #simplymarbleousdesignerseriespaper. Show all posts

Tuesday, 1 March 2022

Sale-a-bration

Hello my stamping friends,

Sale-a-bration is continuing till 16th March (in Australia) so there is still time to get your free products with a qualifying order. I have used a couple of  Sale-a-bration products on todays card.


I stamped the flowers from the Calming Camellia stamp set (#158117) with Flirty Flamingo ink (#147052) onto Basic White card (#159228). I used the Bouquet Of Love Hybrid Embossing Folder (#157641) to cut the heart and emboss another piece of  Basic White card. This was placed over the stamped flowers using Stampin’ Dimensionals (#104430), then I matted this with Flirty Flamingo card (#141421).

I attached the Simply Marbleous Designer Series Paper (#158128) to the Basic White base card. The row of hearts were cut with a die from the Sweet Heart Dies (#157623). The Flirty Flamingo card was backed with Adhesive Sheet (#152334) before cutting with the die. The smaller individual heart is also cut  from the Bouquet Of Love Dies and attached to the card with Mini Glue Dots (#103683).

The sentiment is from the Peaceful Moments stamp set (#151595) and stamped with Flirty Flamingo ink. The die to cut this is from the Ornate Frames (#150664) and attached to the card with Stampin’ Dimensionals. 

The sale-a-bration products are the Calming Camellia stamp set and the Simply Marbleous Designer Series Paper.


“Love what you do and share what you love.”


Monday, 21 February 2022

Calming Camellia

Hello friends,

The Calming Camellias stamp set (#158117) is a free Host set from Sale-a-bration and this stamped flower is from that set.


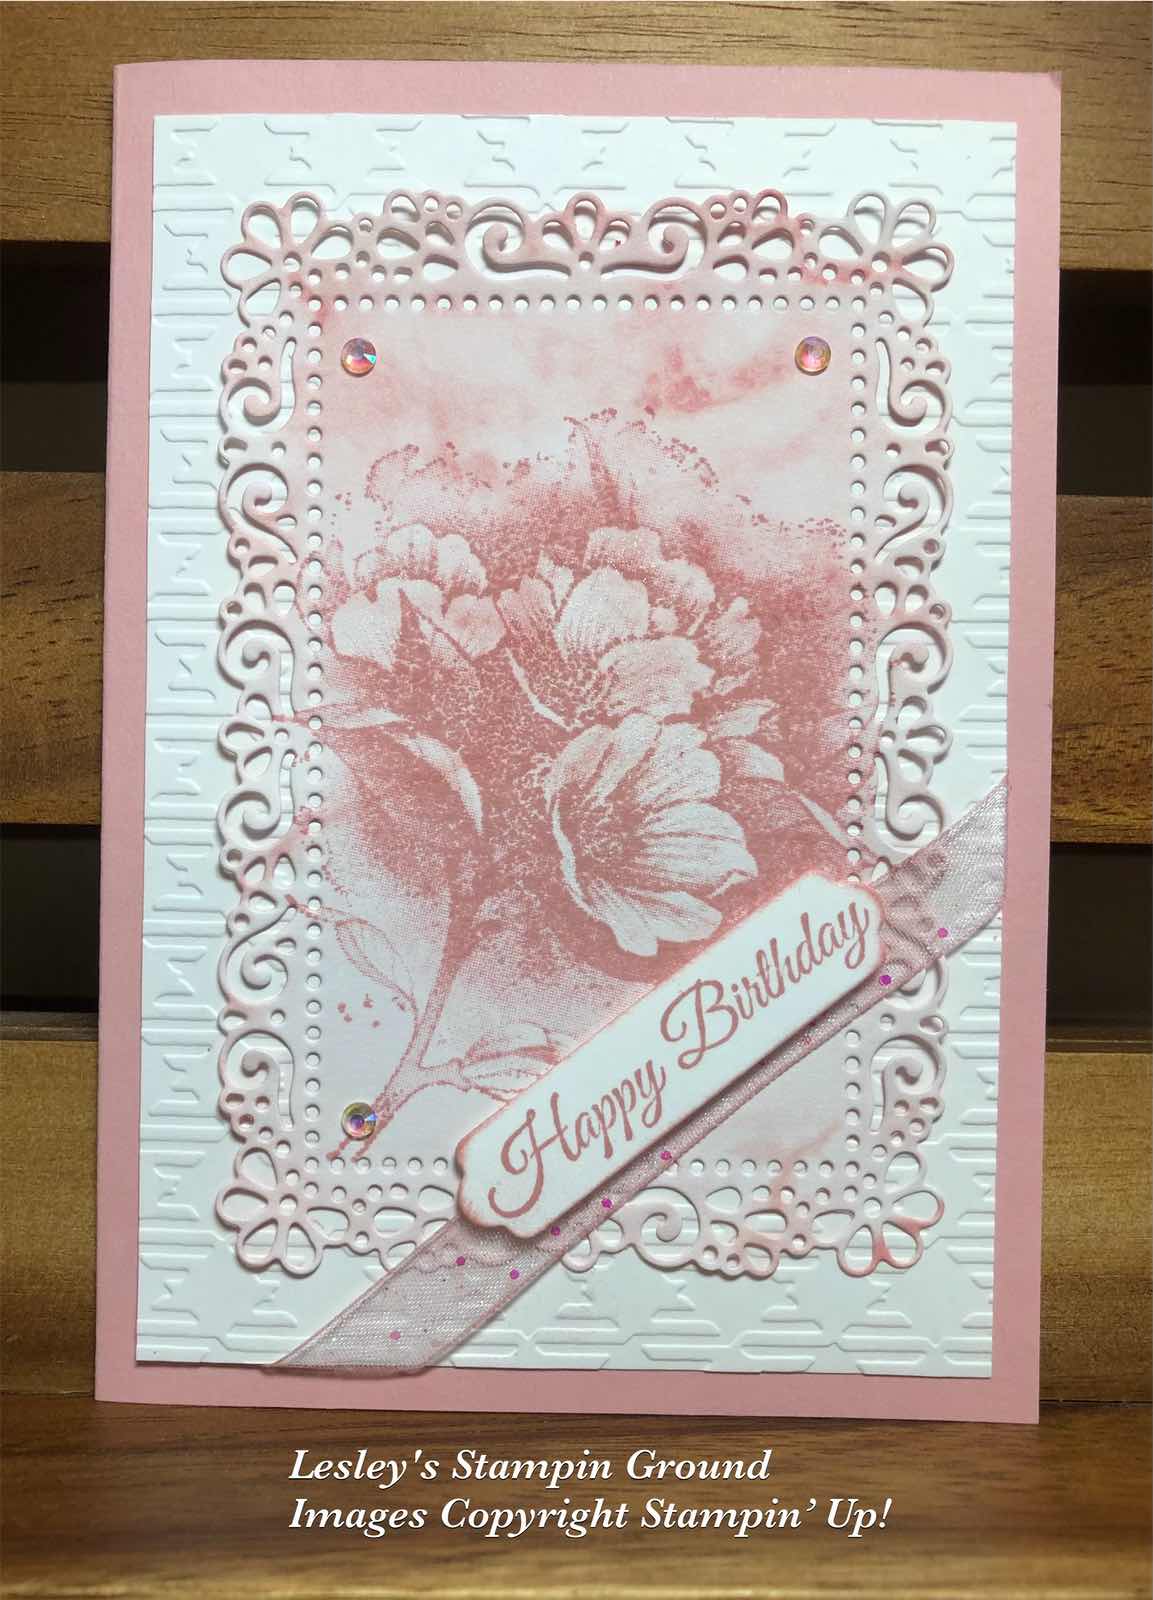
I used Blushing Bride ink (#147100) to stamp the flower onto another Sale-a-bration product - Simply Marbleous Designer Series Paper (#158128). I used the Blushing Bride colour of the DSP. This was cut with an Ornate Layers Die (#152726).

The Basic White card front (#159228) was dry embossed with the Gingham Embossing Folder (#157627). The stamped & die cut piece was attached to the card front and the White Glittered Organdy ribbon (#156408) was wrapped around the corner of the card. Before attaching the ribbon I coloured it with a dauber and  Blushing Bride ink. The base card is Blushing Bride (#131287).

“Happy Birthday” is from the Calming Camellia stamp set and also stamped with Blushing bride ink. A Seasonal Labels Die (#156299) was used to cut the sentiment then attached with Mini Stampin’ Dimensionals (#144108). The Iridescent Rhinestone Basic Jewels (#158130) were added to the card.


“Love what you do and share what you love.”

Tuesday, 8 February 2022

Dahlia Days Bundle

Hello & welcome,

Today I have made 2 cards basically with the same products but what a difference colour makes to the finished cards.


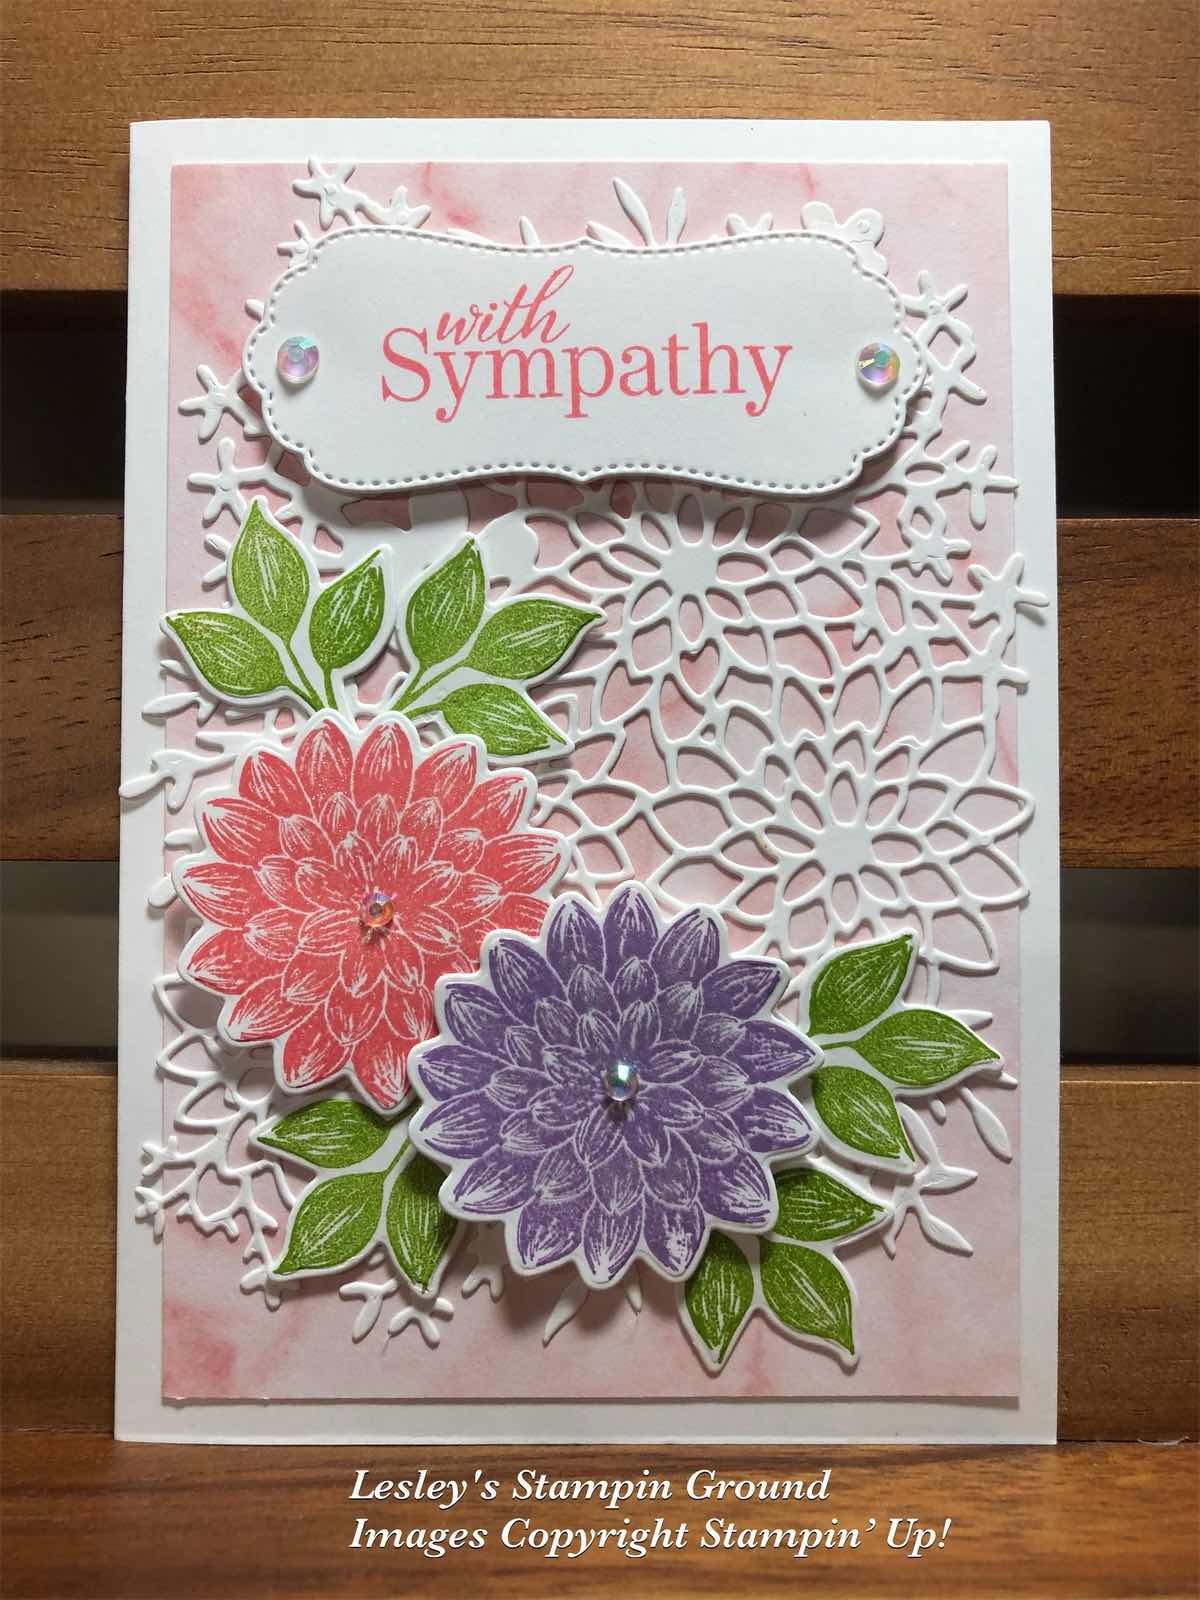
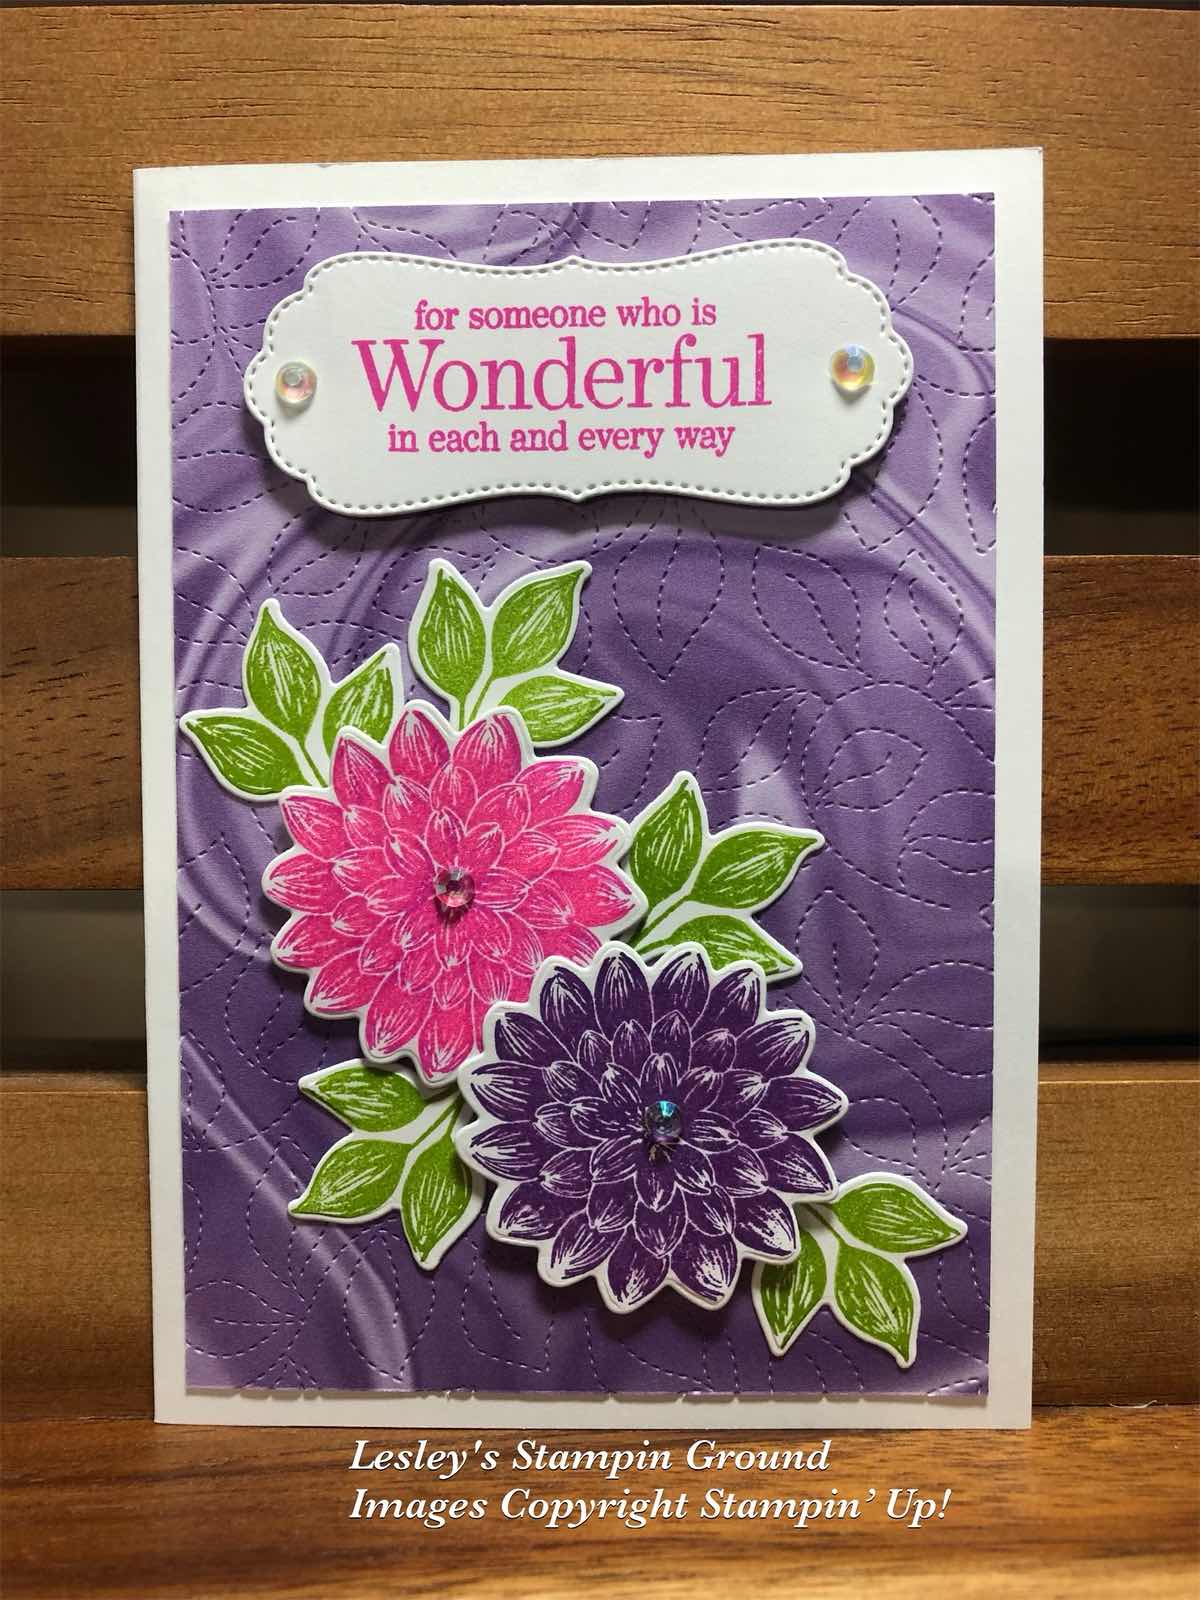
I have used the Dahlia Days stamp set (#157799) for the flowers & leaves on both cards. I have used the detailed background die from the Detailed Dahlias Dies (#157801) to cut the Basic White card (#159228) which was adhered to the Designer Paper on the first card. The Simply Marbleous 6”x6” Designer Series Paper (#158128) has been used on both cards. The stitching on the second card was done with the Stitched Greenery Die (#155451).

On the first card I stamped the flowers with Flirty Flamingo ink (#147052) and Fresh Freesia ink (#155611). I used Magenta Madness ink (#153117) and Gorgeous Grape ink (#147099) for the flowers on the second card. The leaves were stamped with Granny Apple Green ink (#147095). The leaves & flowers are all cut with the Detailed Dahlia dies.

The sentiments are both from the Special Moments stamp set (#158081) - a Sale-a-bration product. “With Sympathy” was stamped with Flirty Flamingo ink and I used Gorgeous Grape ink for the second sentiment. The label die from the Potted Succulents dies (#154330) was used to cut the sentiments. The sentiments and flowers are all attached to the cards with Stampin’ Dimensionals (#104430). I used Mini Glue Dots (#103683) to attach the leaves.

The base cards are Basic White and I added the Iridescent Rhinestone Basic Jewels (#158130) to both cards.

TIP: I used the Adhesive Sheet (#152334) on the Basic White card before cutting with the Detailed Dahlia die. 

“Love what you do and share what you love.”

Thursday, 6 January 2022

Dahlia Days

Hi again my friends,

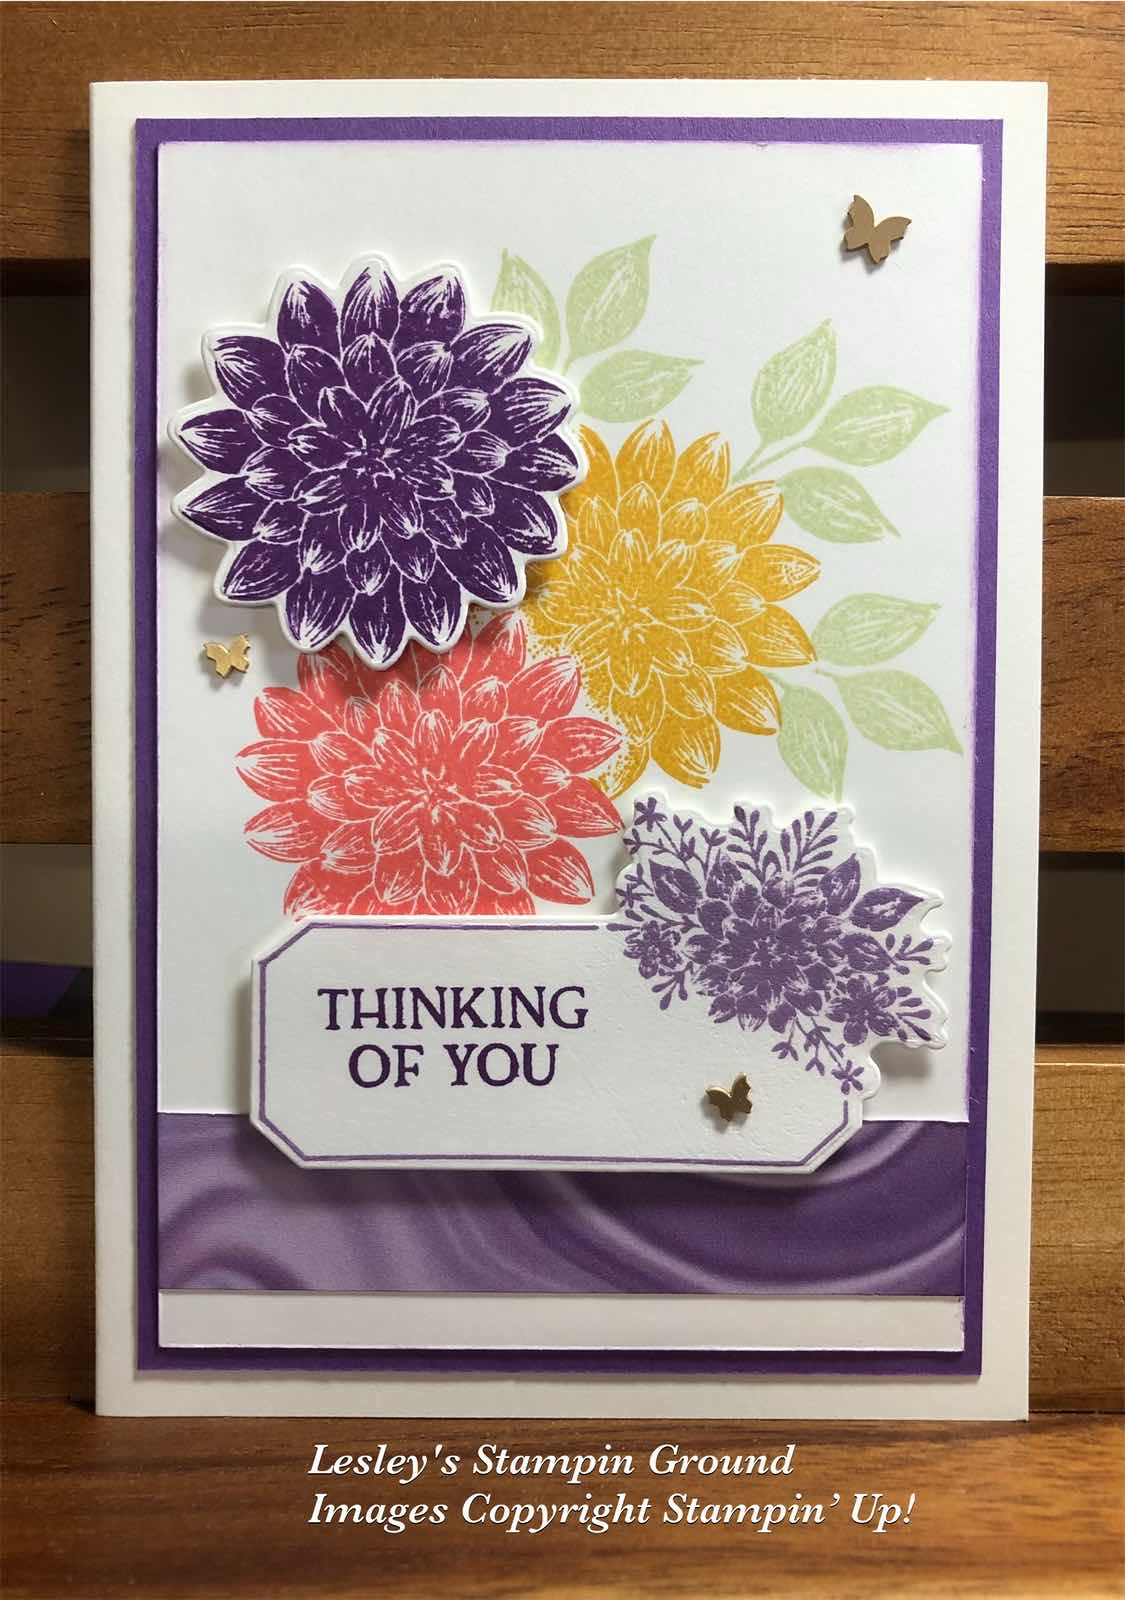
I love the Dahlia Days Bundle (#157802) which consists of the Dahlia Days stamp set (#157799) and the Detailed Dahlias Dies (#157801). I have stamped the images using the masking technique.


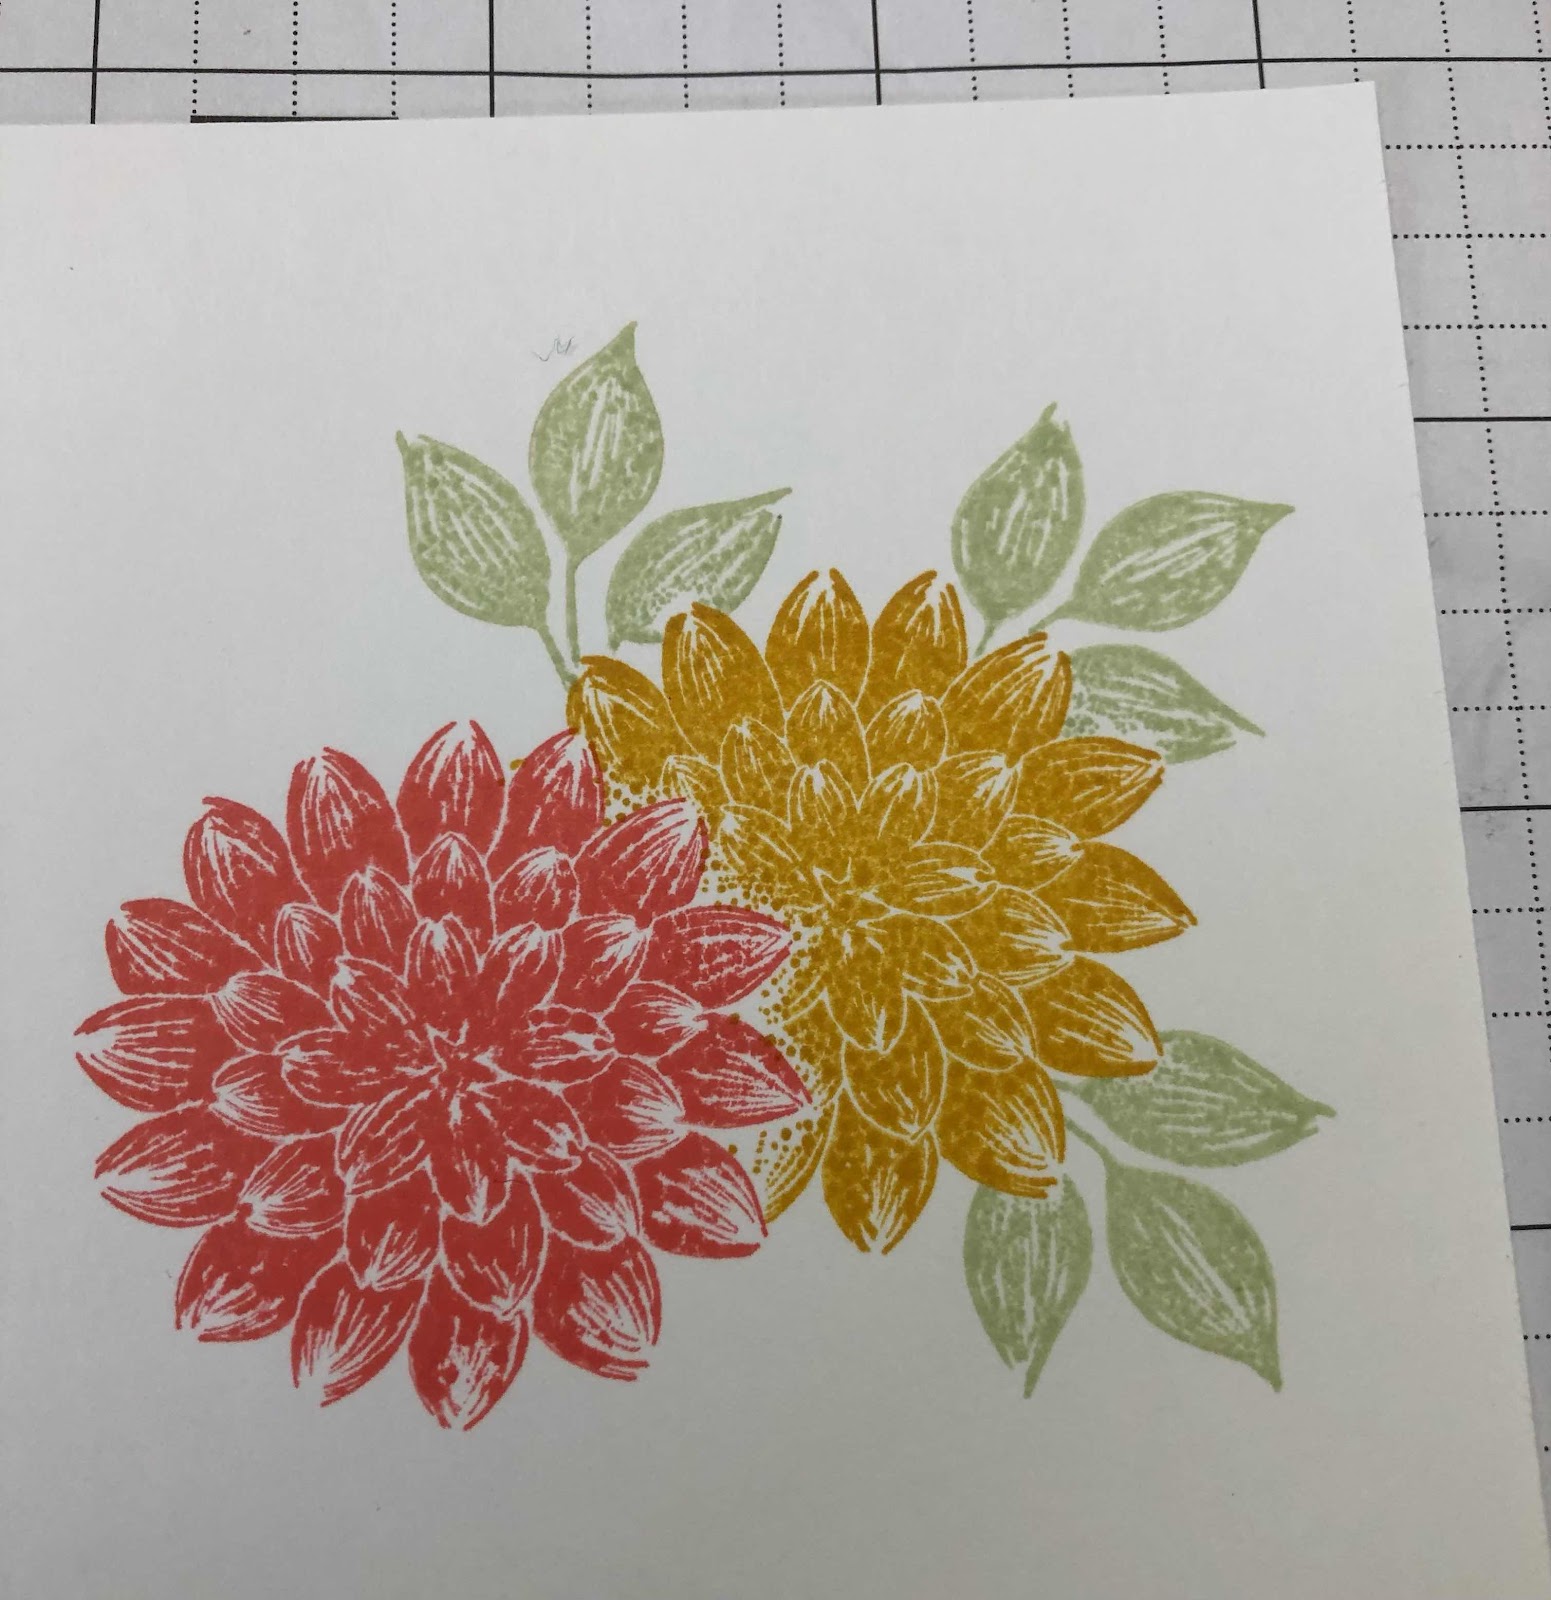
I stamped one dahlia with Gorgeous Grape ink (#147099) on Basic White card (#159228), then cut it with a die from the Detailed Dahlias. I then stamped another  dahlia with Flirty Flamingo ink (#147052) onto the Basic White card front. Using the masking technique (see below) I then stamped the next dahlia with Bumble Bee ink (#153116). Again I masked the Bumble Bee dahlia and stamped the leaves with Soft Sea Foam ink (#147102). I attached the Gorgeous Grape dahlia with Stampin’ Dimensionals (#104430).

I stamped the “label” with Highland Heather ink (#147103), then cut this with the co-ordinating die from the Detailed Dahlias. “Thinking Of You” is from Blossoms In Bloom stamp set (#152684) and stamped with Gorgeous Grape ink.

I cut a strip of the Simply Marbleous 6”x6” Designer Series Paper (#158128), from Sale-a-bration, and attached this to the cardfront. The sentiment was then attached with Stampin’ Dimensionals. I matted the cardfront with Gorgeous Grape card (#147011). The base card is Basic White. The Brushed Brass Butterflies (#158136) were added to the card. How cute are these butterflies.

TIP: To do the masking technique, stamp the image onto a piece of Post-it notes, ensuring you have the sticky part included at the back. Then cut around the image very close to the image. Don’t leave any margin like you would normally do when fussy cutting. 

Stamp your image on your card. 


Then place this mask on top of your stamped image on your card. 


Stamp your next image


Add another mask before stamping the leaves


Remove all masks


You can re-use the mask many times. I keep mine in with the stamp set. Also if you want 2 or more masks of the same image, I stamp one image on the post-it notes and placing 2 or 3 post it notes together, cut all at the same time.


“Love what you do and share what you love.”

Monday, 3 January 2022

In The Moment

Hi my crafty friends,

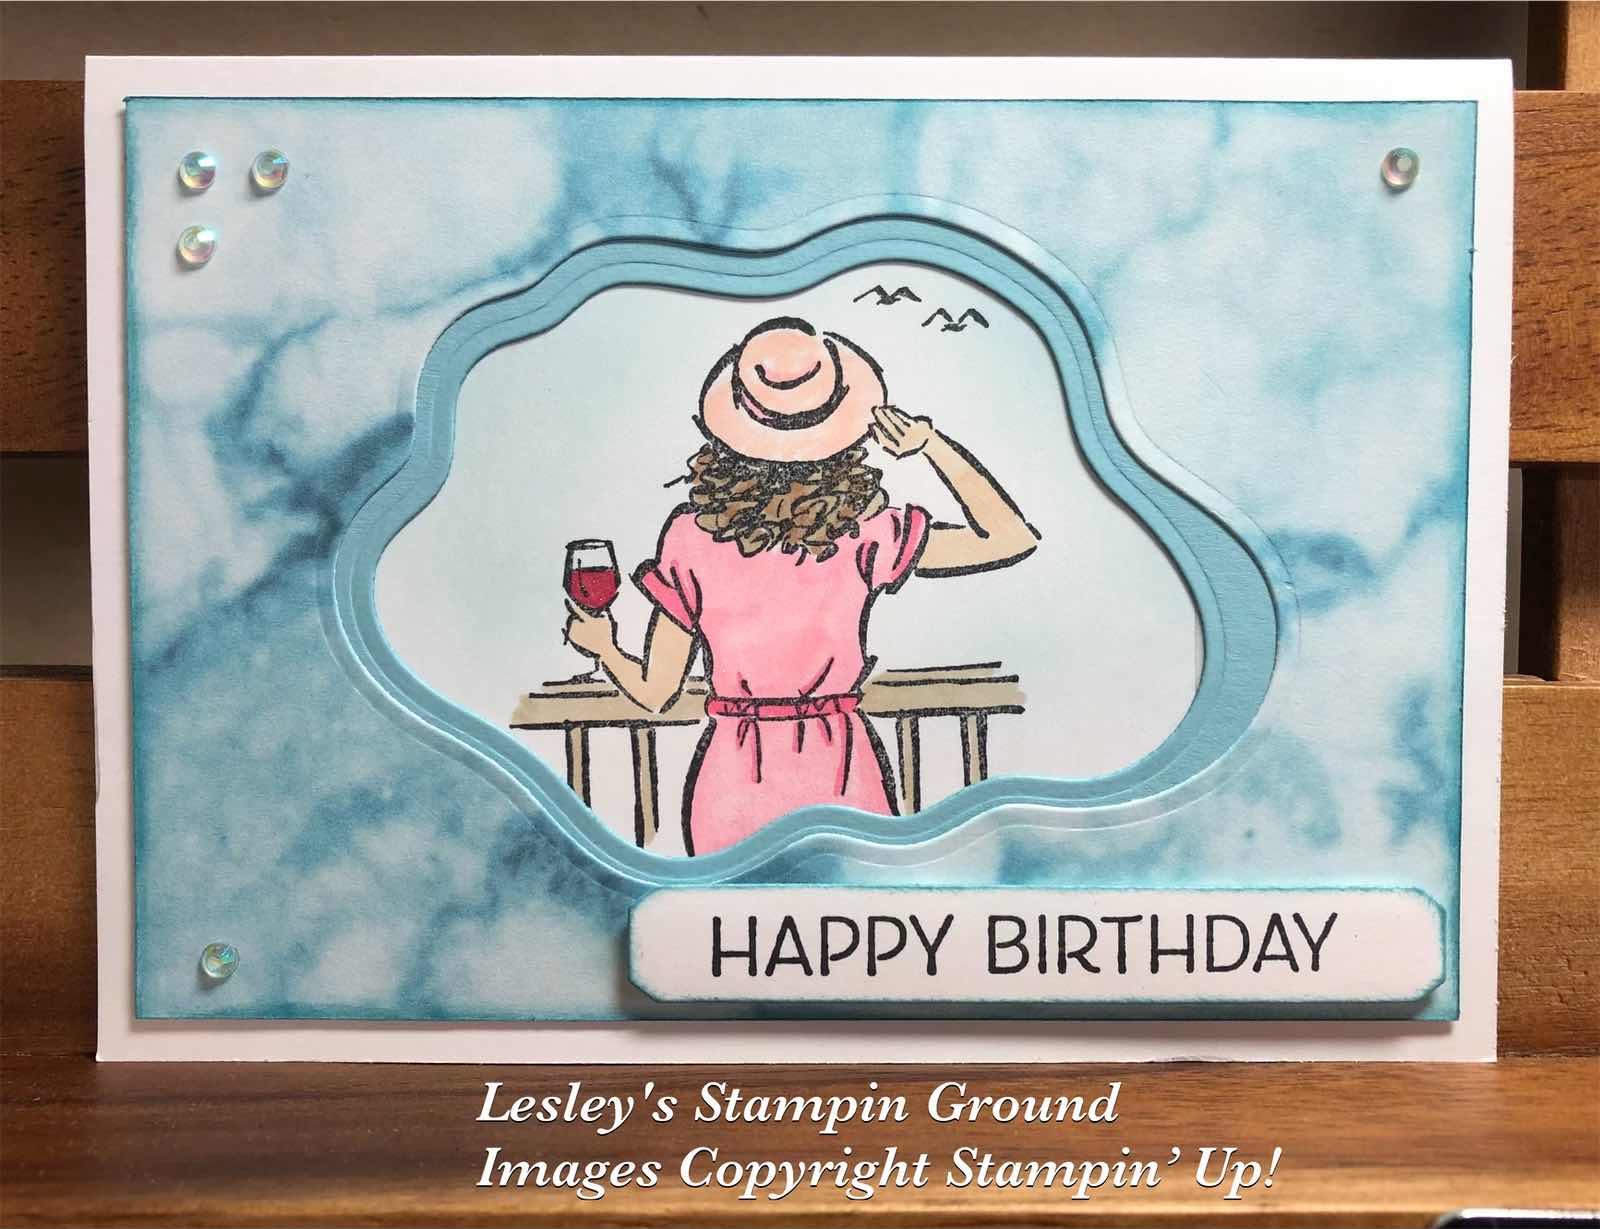
By the time you see this the new Mini catalogue and Sale-a-bration will probably be “live” (4th January). There are so many exciting new products including the In The Moment stamp set (#157987) and the Simply Marbleous 6”x6” Designer Series Paper (#158128) both of which have been used on this card. The DSP is one of the free Sale-a-bration products with a $90 order (in Australia).


I stamped the image from the In The Moment stamp set using Tuxedo Black Memento ink (#132708) on Basic White card (#159228). I used Stampin’ Blends to colour the image. The colours used are Flirty Flamingo (#154884), Cherry Cobbler (#154880), Crumb Cake (#154882), Petal Pink (#154893) and Bronze & Ivory (#154922). I lightly coloured the sky using Balmy Blue ink (#147105) with a Blending Brush (#153611). The Clear Wink Of Stella Brush (#141897) was used to add some glimmer to the dress & wine.

The Balmy Blue card (#147007) and the Simply Marbleous DSP were cut with the Layering Diorama Dies (#155565). These were attached to the Basic White Base card. “Happy Birthday” from the Artistically Inked stamp set (#154542) was also stamped with Tuxedo Black Memento ink. I used the Messages Die (#154422) to cut the sentiment. This was attached to the card with Stampin’ Dimensionals (#104430).

The Iridescent Rhinestones Basic Jewels (#158130) were added for a touch bling.

TIP: Memento ink is great when using Stampin’ Blends as well as a general all purpose ink.


“Love what you do and share what you love.”