Showing posts with label #dahliadaysstampset. Show all posts

Thursday, 14 April 2022

Dahlia Days Bundle

Hi again stamping friends,


The Dahlia Days stamp set (#157799) and the Detailed Dahlias Dies (#157801) are available in the Dahlia Days Bundle (#157802). Of course you can buy these separately but you save 10% when purchased as a bundle and who doesn’t like a bargain!!


I cut the top corner from the Basic White base card (#159228). I also cut the corner from the Abstract Beauty 4”x6” Specialty Designer Series Paper (#158039). The larger piece of DSP is used for the card front and the smaller piece was attached to the Basic White insert as shown below.


I coloured the Metallic Mesh Ribbon (#153550) with a Blending Brush (#153611) and Pacific Point ink (#147098), then wrapped it around the DSP. This was attached to the base card.

“Happy Birthday” from Celebrating You stamp set (#158028) was stamped with Pacific Point ink. Then I stamped the “label” from the Dahlia Days stamp set. The dahlias were stamped with Real Red ink (#147084), Pacific Point ink, Daffodil Delight ink (#147094) and Gorgeous Grape ink (#147099). I used Garden Green ink (#147089) for the leaves. The sentiment, flowers and leaves were cut with the co-ordinating Detailed Dahlias Dies.

I attached one flower and leaf to the top of the “inside” of the card and the 3 flowers and 2 leaves to the front of the card. The sentiment and the gorgeous grape dahlia were attached with Stampin’ Dimensionals (#104430). The embellishments are the Rhinestone Waves Basic Jewels (#159396).

“Love what you do and share what you love.”


Saturday, 12 March 2022

Dahlia Days Bundle

Hello friends,


The Dahlia Days Bundle (#157801) has been used to make this beautiful card.


I cut the Basic White card (#159228) with a Detailed Dahlias Die (#157801) for the detailed background. I cut another piece of Basic White card with a Stitched Rectangles Die (#151820) to create the window. I attached the detailed background behind the window, then attached this to the Copper Foil Sheet (#142020), then to the Basic White base card.

The flowers and leaves are from the Dahlia Days stamp set (#157799). These were stamped with Misty Moonlight ink (#153118), Real Red ink (#147084) and Garden Green ink (#147089). These were cut with the Detailed Dahlias Dies. 

“Thinking Of You” from the Expressions Of Friendship stamp set (#158460) was stamped with VersaMark (#102283) and embossed with Copper Stampin’ Emboss Powder (#155555) then set with the Heat Tool (#129056). I cut this with a Seasonal Labels Die (#156299). The edges of the sentiment were daubered with Sahara Sand ink (#147117).

The leaves were attached with Mini Glue Dots (#103683) and I used Stampin’ Dimensionals (#104430) to attach the flowers & sentiment. The embellishment are the Champagne Rhinestone Basic Jewels (#151193).

“Love what you do and share what you love.”


Sunday, 27 February 2022

Dahlia Days

Hello again,

The rain still hasn’t stopped here and hasn’t let up all day. Hopefully everyone in the flooded areas are safe. On the positive side, it’s good weather for crafting!!


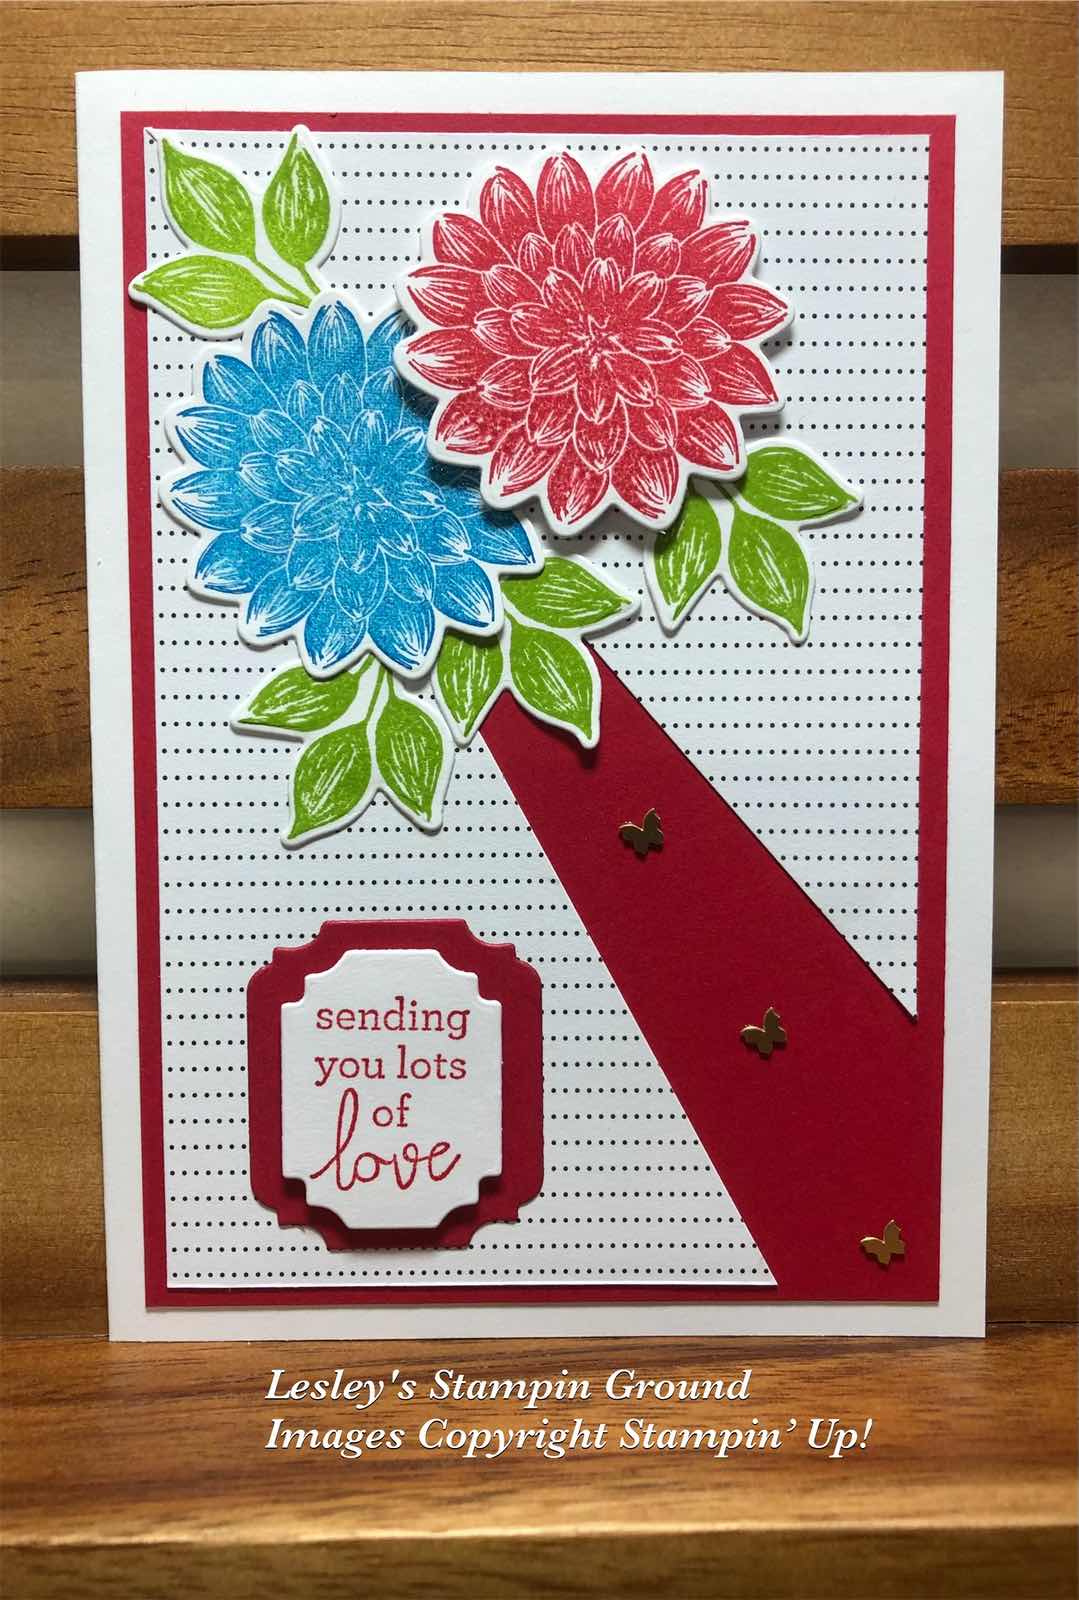
The patterned paper is from the Pattern Party Designer Series Paper (#155426). I cut 2 triangles and attached these to the Real Red card (#106578), then this was attached to the Basic White base card (#159228).

The dahlias, leaves and sentiment are all from the Dahlia Days stamp set (#157799). I used Pacific Point ink (#147098) and Real red ink (#147084) for the dahlias. The leaves were stamped with Granny Apple Green ink (#147095) and the sentiment with Real red ink. The flowers & leaves were cut with dies from the Detailed Dahlias (#157801). The dies to cut the sentiment and the Real Red card under the sentiment are from the Ornate Frames (#150664).

The leaves and blue flower were taped to the card and Stampin’ Dimensionals (#104430) were used for the red flower and sentiment. The Brushed Brass Butterflies (#158136) were attached to the card.

“Love what you do and share what you love.”


Thursday, 6 January 2022

Dahlia Days

Hi again my friends,

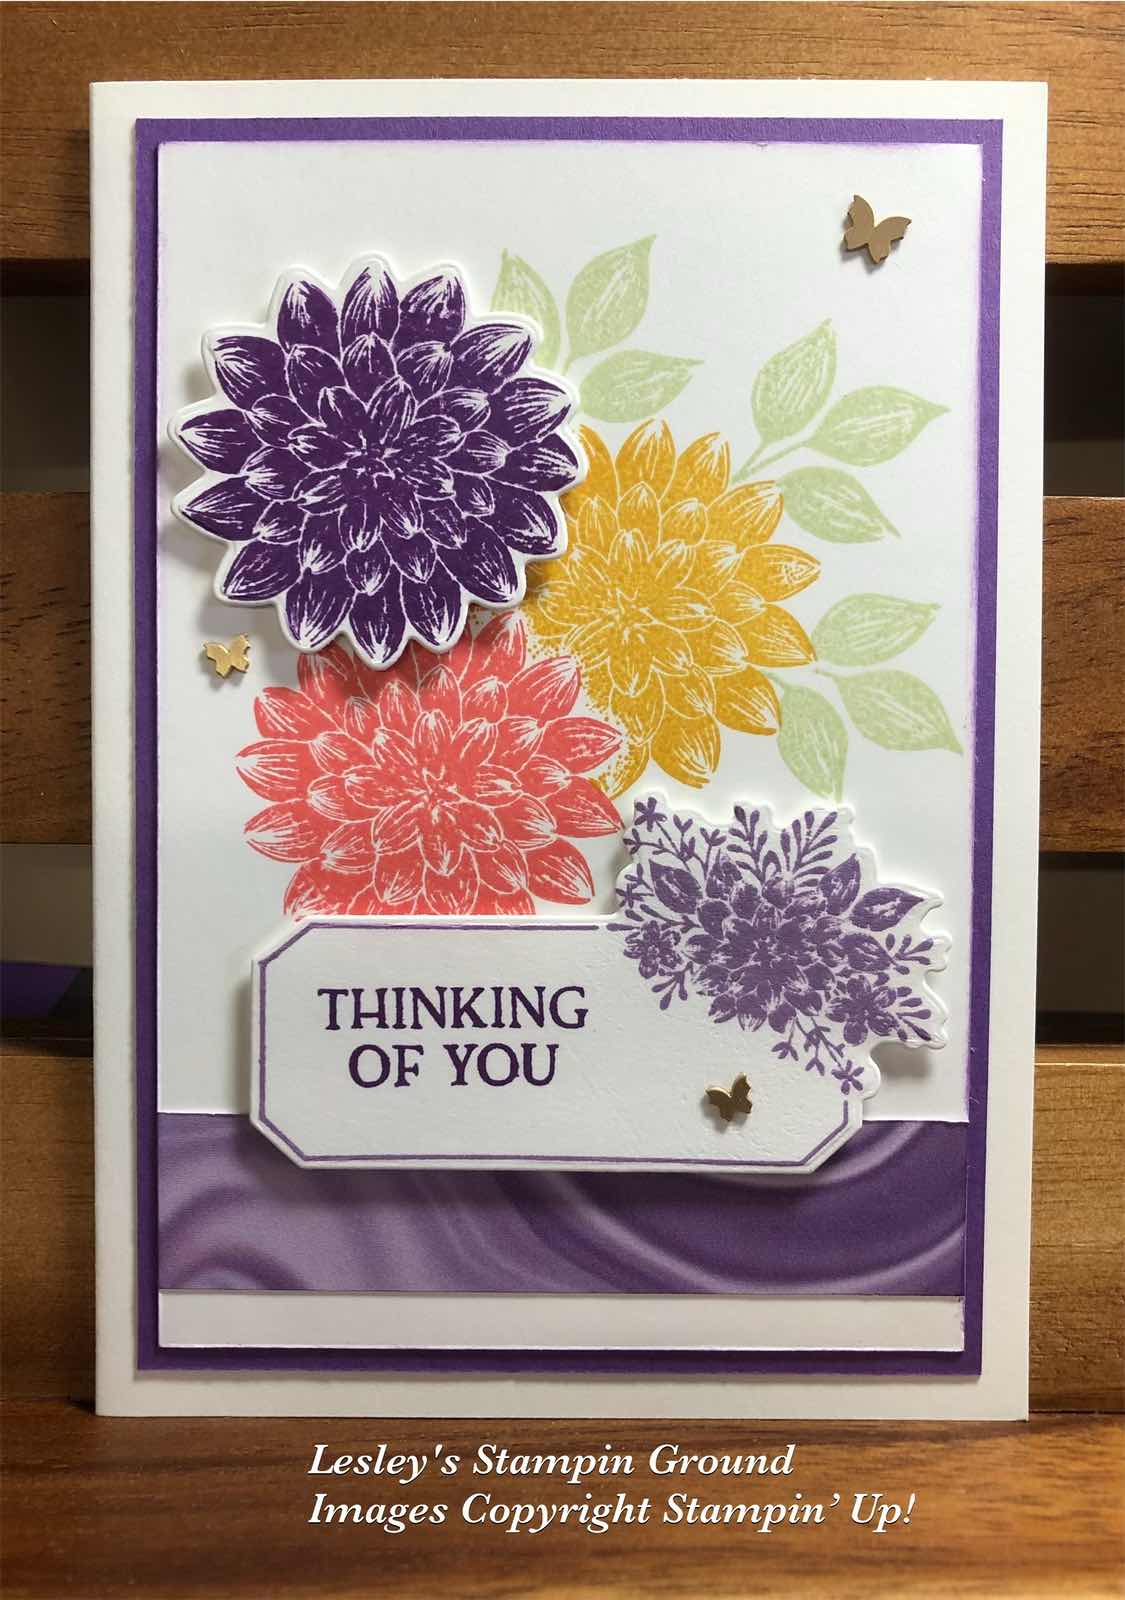
I love the Dahlia Days Bundle (#157802) which consists of the Dahlia Days stamp set (#157799) and the Detailed Dahlias Dies (#157801). I have stamped the images using the masking technique.


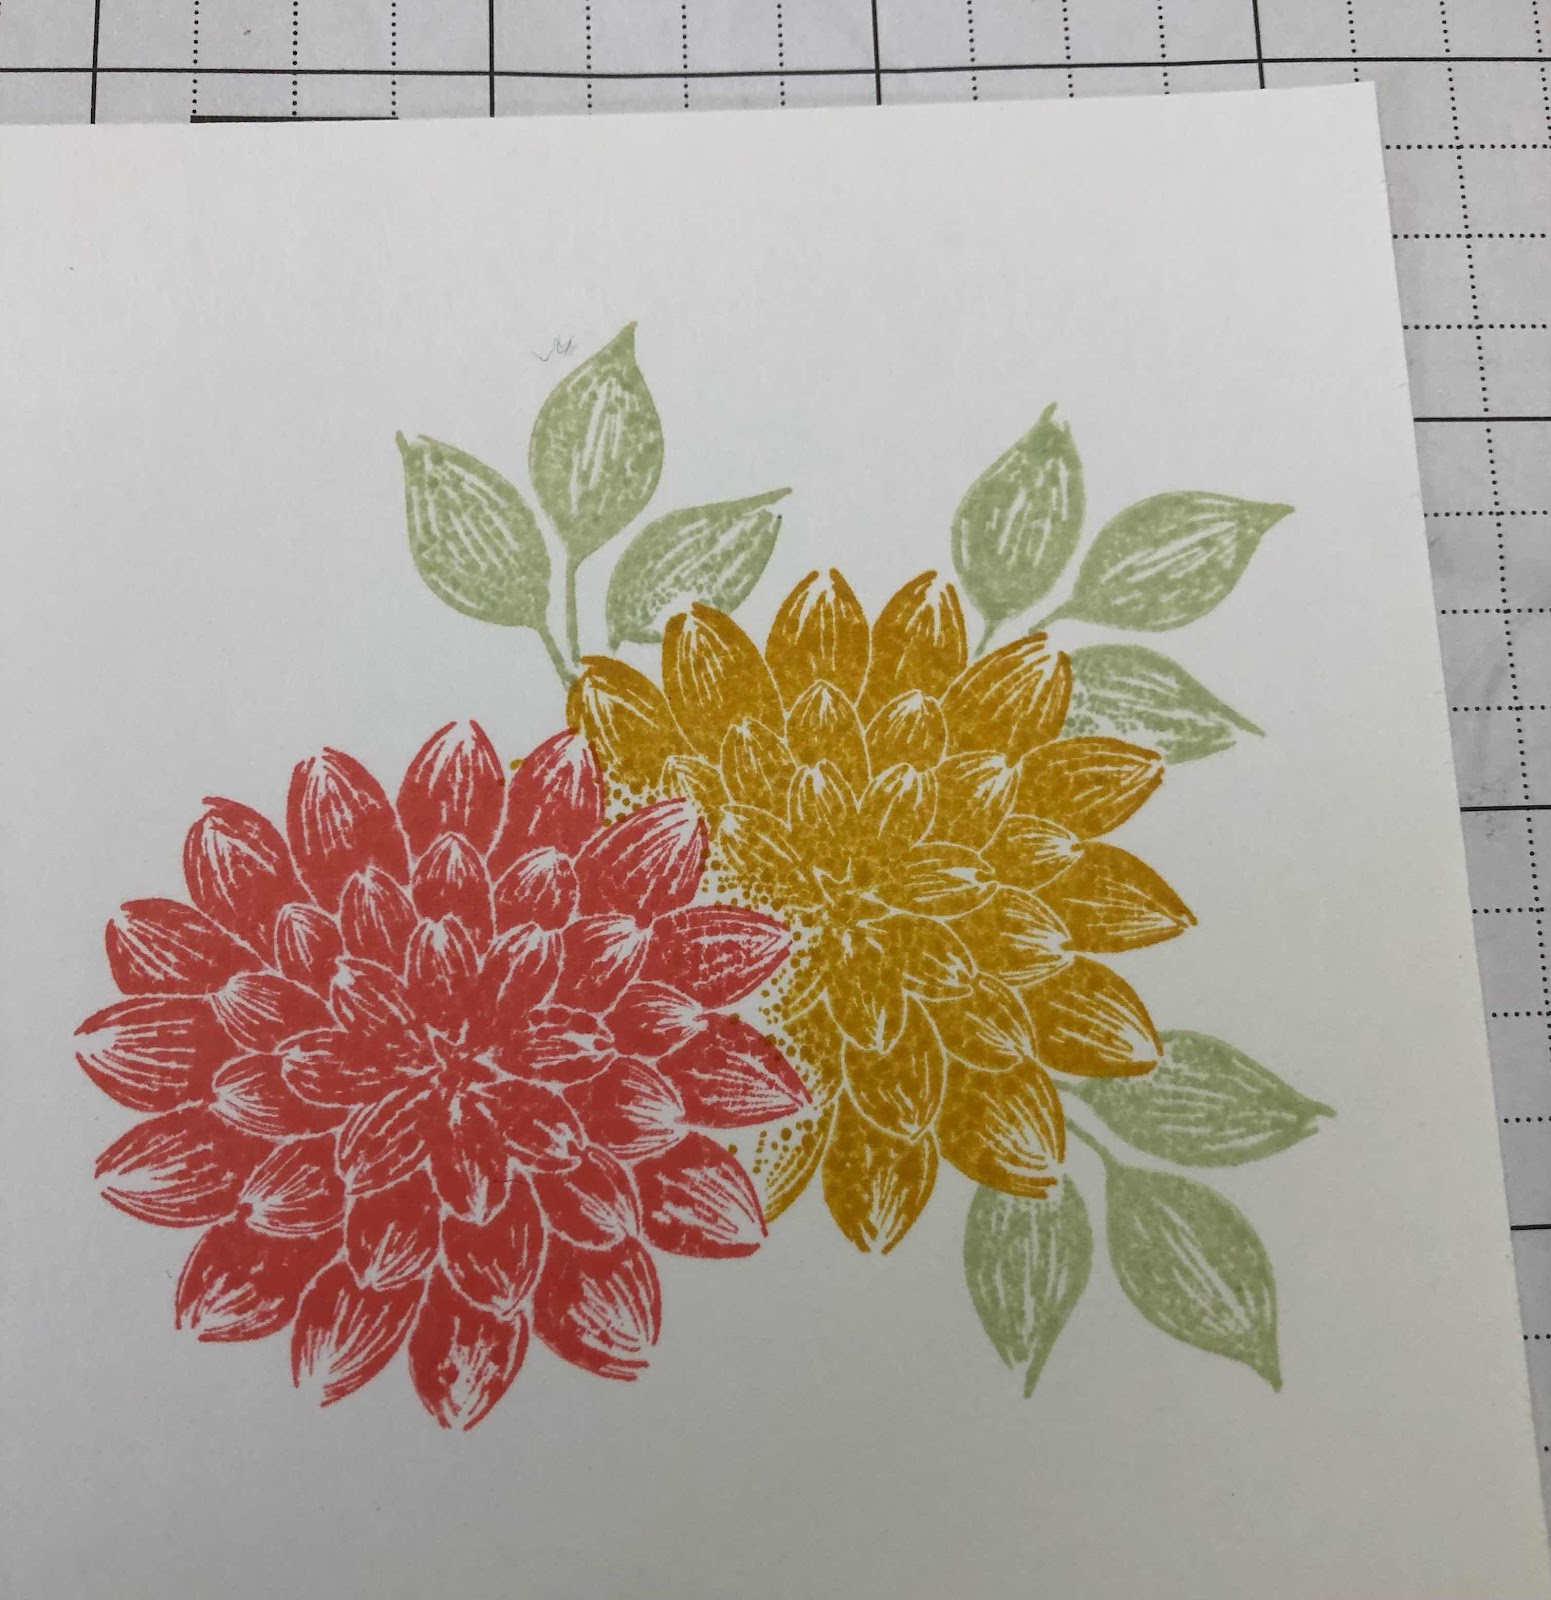
I stamped one dahlia with Gorgeous Grape ink (#147099) on Basic White card (#159228), then cut it with a die from the Detailed Dahlias. I then stamped another  dahlia with Flirty Flamingo ink (#147052) onto the Basic White card front. Using the masking technique (see below) I then stamped the next dahlia with Bumble Bee ink (#153116). Again I masked the Bumble Bee dahlia and stamped the leaves with Soft Sea Foam ink (#147102). I attached the Gorgeous Grape dahlia with Stampin’ Dimensionals (#104430).

I stamped the “label” with Highland Heather ink (#147103), then cut this with the co-ordinating die from the Detailed Dahlias. “Thinking Of You” is from Blossoms In Bloom stamp set (#152684) and stamped with Gorgeous Grape ink.

I cut a strip of the Simply Marbleous 6”x6” Designer Series Paper (#158128), from Sale-a-bration, and attached this to the cardfront. The sentiment was then attached with Stampin’ Dimensionals. I matted the cardfront with Gorgeous Grape card (#147011). The base card is Basic White. The Brushed Brass Butterflies (#158136) were added to the card. How cute are these butterflies.

TIP: To do the masking technique, stamp the image onto a piece of Post-it notes, ensuring you have the sticky part included at the back. Then cut around the image very close to the image. Don’t leave any margin like you would normally do when fussy cutting. 

Stamp your image on your card. 


Then place this mask on top of your stamped image on your card. 


Stamp your next image


Add another mask before stamping the leaves


Remove all masks


You can re-use the mask many times. I keep mine in with the stamp set. Also if you want 2 or more masks of the same image, I stamp one image on the post-it notes and placing 2 or 3 post it notes together, cut all at the same time.


“Love what you do and share what you love.”

Friday, 31 December 2021

Dahlia Days Bundle

Hello & welcome again my friends,

I trust you all had a relaxing Christmas and wishing you a very happy and safe New Year. The new year means a new Stampin’ Up! catalogue and free Sale-a-bration products which commence on 4th January. With every $90 order from the annual and /or Mini catalogue you can choose a free product from the Sale-a-bration brochure and there are some fantastic products to choose from. Please contact me if you would like any further information.

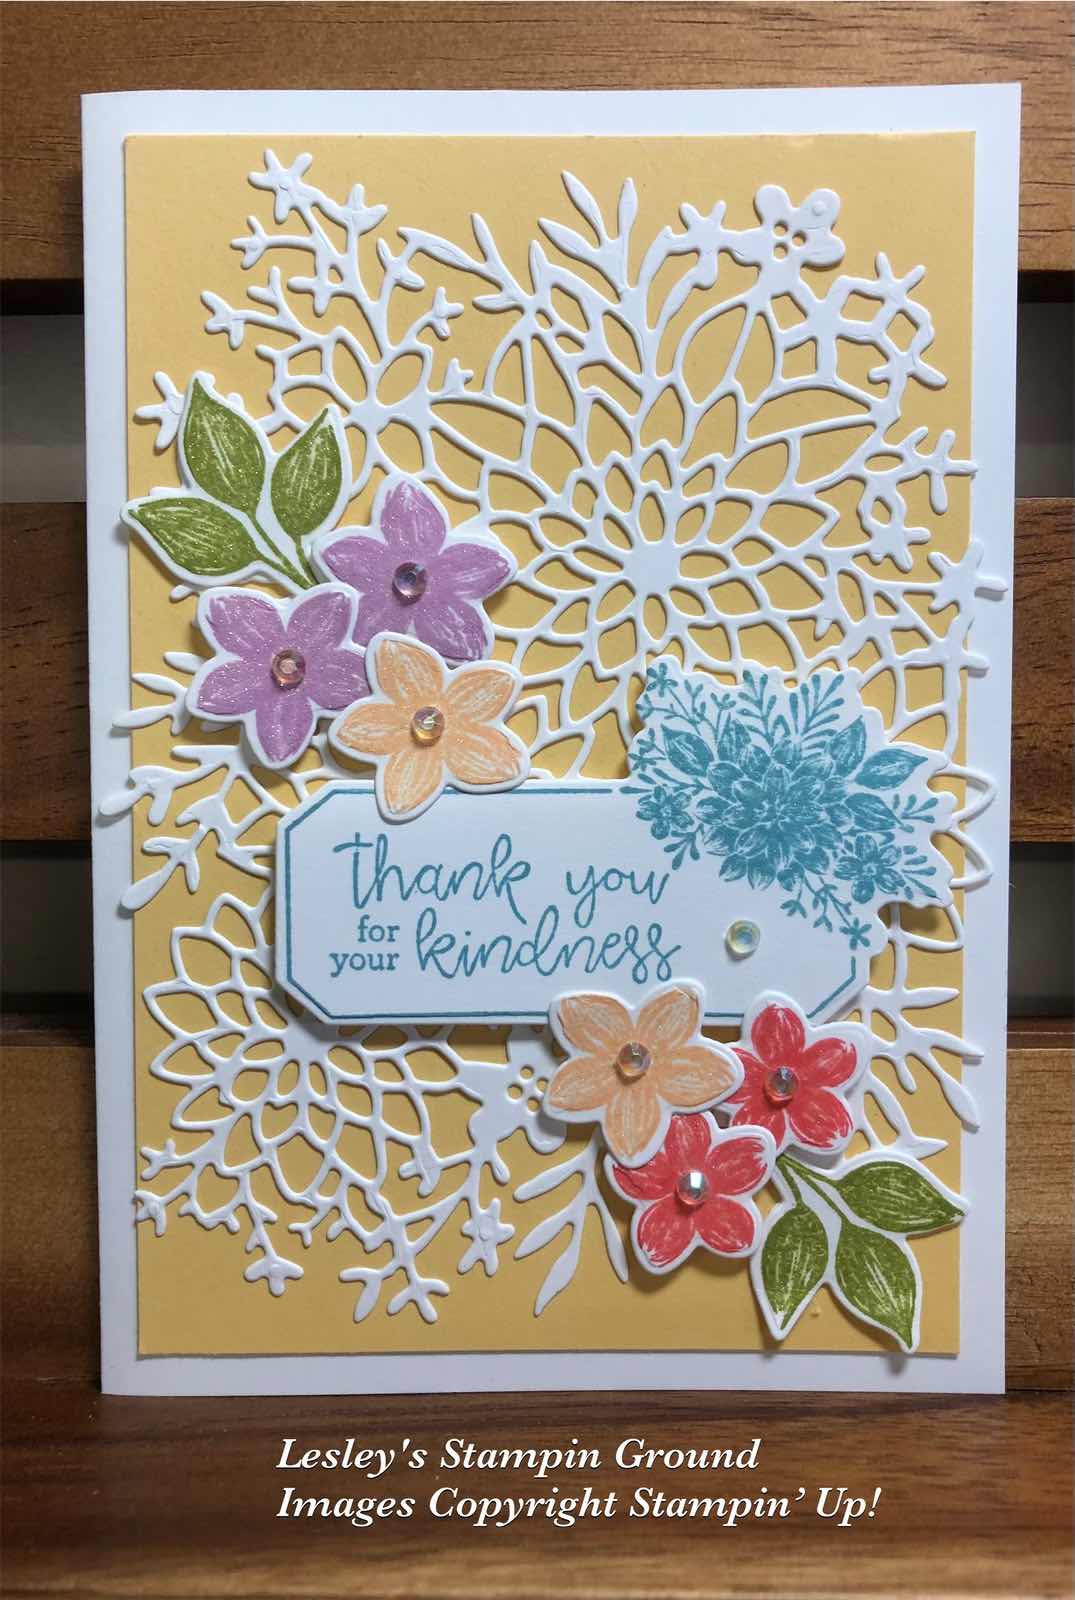
This pretty card uses the Dahlia Days Bundle (#157802) which consists of the Dahlia Days stamp set (#157799) and the Detailed Dahlias Dies (#157801).


I adhered the Adhesive Sheets (#152334) to the back of the Basic White card stock (#159228), then cut this with the larger detailed die from the Detailed Dahlias Dies. This was adhered to the So Saffron card (#108611) which was attached to the Basic White base card.

All the stamped images are from the Dahlia Days stamp set. The inks used are Balmy Blue (#147105), Flirty Flamingo (#147052), Fresh Freesia (#155611), Pale Papaya (#155670) and Pear Pizzaz (#147104). The flowers, leaves and label were also cut with Dahlia Days Dies.

The leaves were attached to the card with Mini Glue Dots (#103683) and the flowers and the label were attached using Stampin’ Dimensionals (#104430). The pretty Iridescent Rhinestone Basic Jewels (#158130) were added to the centre of the flowers and the label. I added shimmer to the stamped images with the Clear Wink Of Stella Glitter Brush (#141897).

Tip: Adhesive sheets are great for detailed die cuts. Just adhere the Adhesive sheets to the back of the card before cutting and it makes it so easy to attach the die cut to the card.


“Love what you do and share what you love.”