Friday, 7 January 2022

Butterflies & Flowers Layering Decorative Masks

Hello & welcome,

I am loving the new products in the Mini Catalogue and one of my favourite products (although there are many!) is the  Butterflies & Flowers Layering Decorative Masks (#158142).


I cut a piece of Basic White card (#159228) with a Scalloped Contours Die (#155560).

The Layering masks, as suggested, have 2 masks which allow layering. I used the “background” to colour the flowers. I used 4 colours for these flowers - Polished Pink (#155712), Highland Heather (#147103), Pale Papaya (#155670) and Daffodil Delight (#147094). Each of these colours were applied using the Blending Brushes (#153611). For the smaller flowers you may find it easier to use Sponge Daubers (#133773).

Then I placed the next mask on top and applied the Shimmery White Embossing Paste (#145645) using a Palette Knife (#142808). What a great effect.

The card front is from the Abstract Beauty Specialty Designer Series Paper (#158039). I wrapped the 2 pieces of the Polished Pink Open Weave Ribbon (#155714) around the corner of the card. The scalloped rectangle was attached to the card with Stampin’ Dimensionals (#104430).

“Happy Birthday” from the Art Gallery stamp set (#158201) was stamped with Magenta Madness ink (#153117) and cut with a Seasonal Labels die (#156299). This was also attached with Dimensionals. The trio of Iridescent Rhinestone Basic Jewels (#158130) was added for some extra sparkle.


TIP: Wash your mask and palette knife as soon as you finish using the embossing paste as this dries very quickly and will be difficult to remove once dried.


“Love what you do and share what you love.”


Thursday, 6 January 2022

Dahlia Days

Hi again my friends,

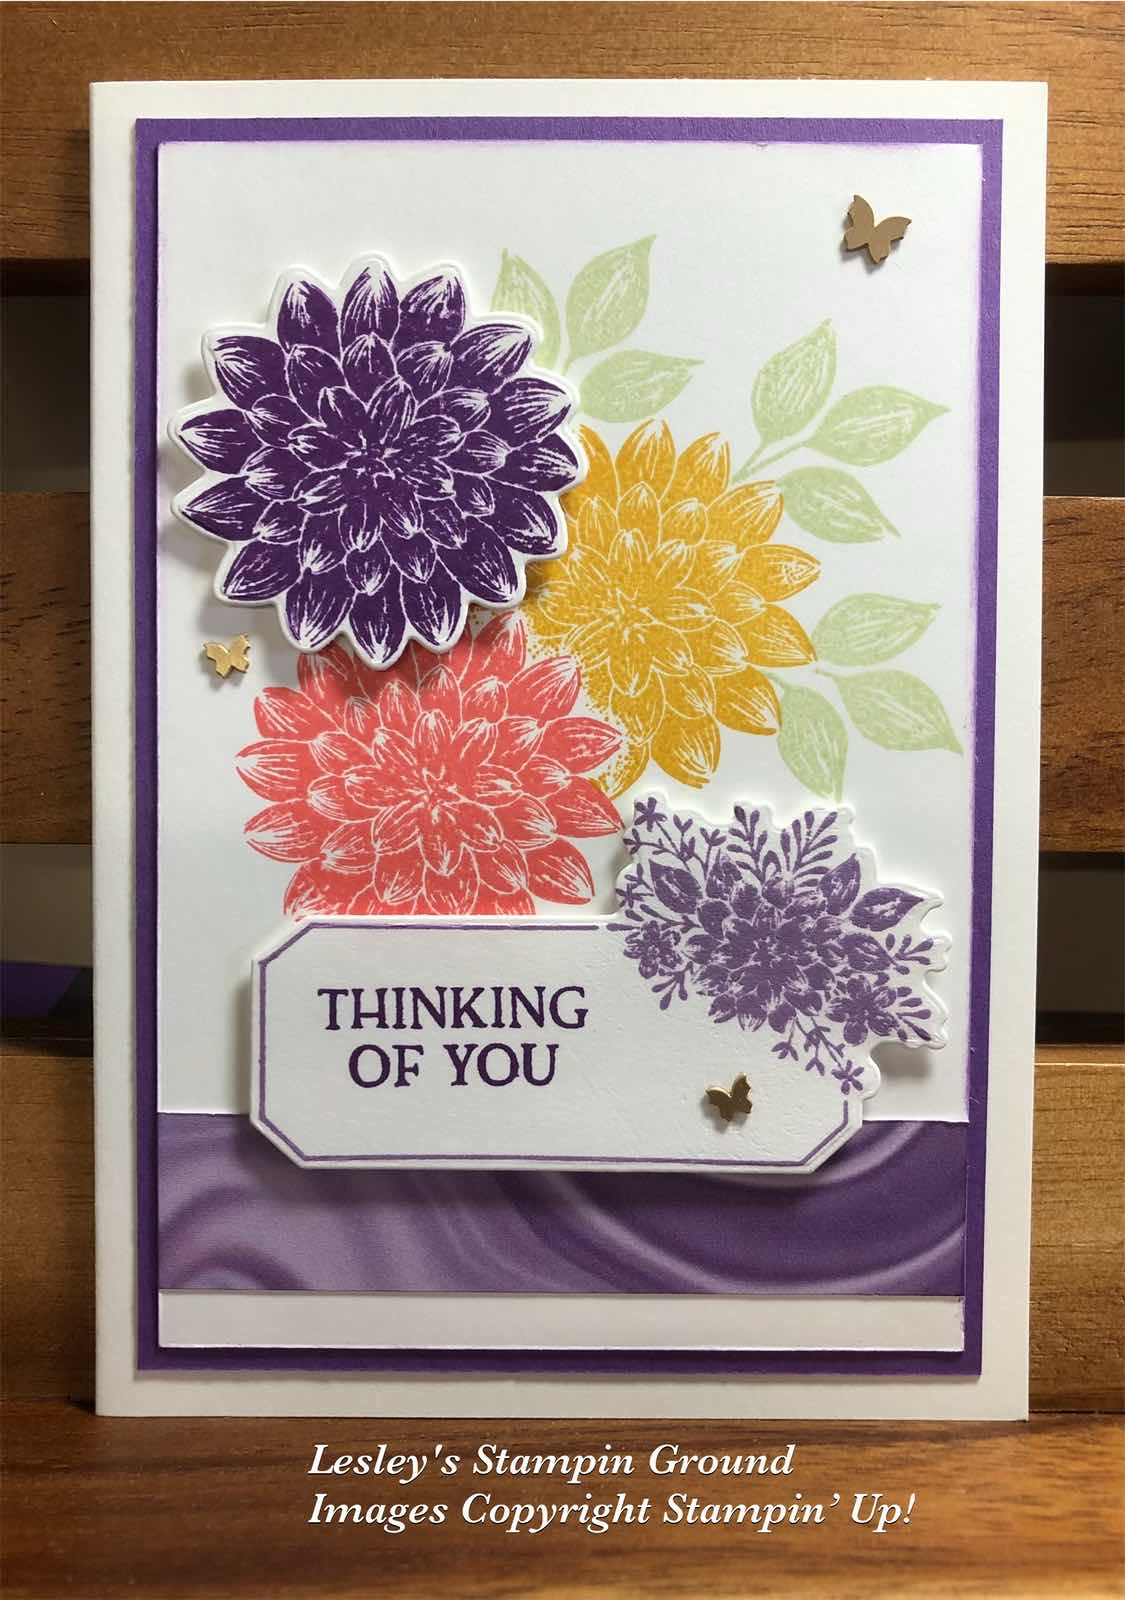
I love the Dahlia Days Bundle (#157802) which consists of the Dahlia Days stamp set (#157799) and the Detailed Dahlias Dies (#157801). I have stamped the images using the masking technique.


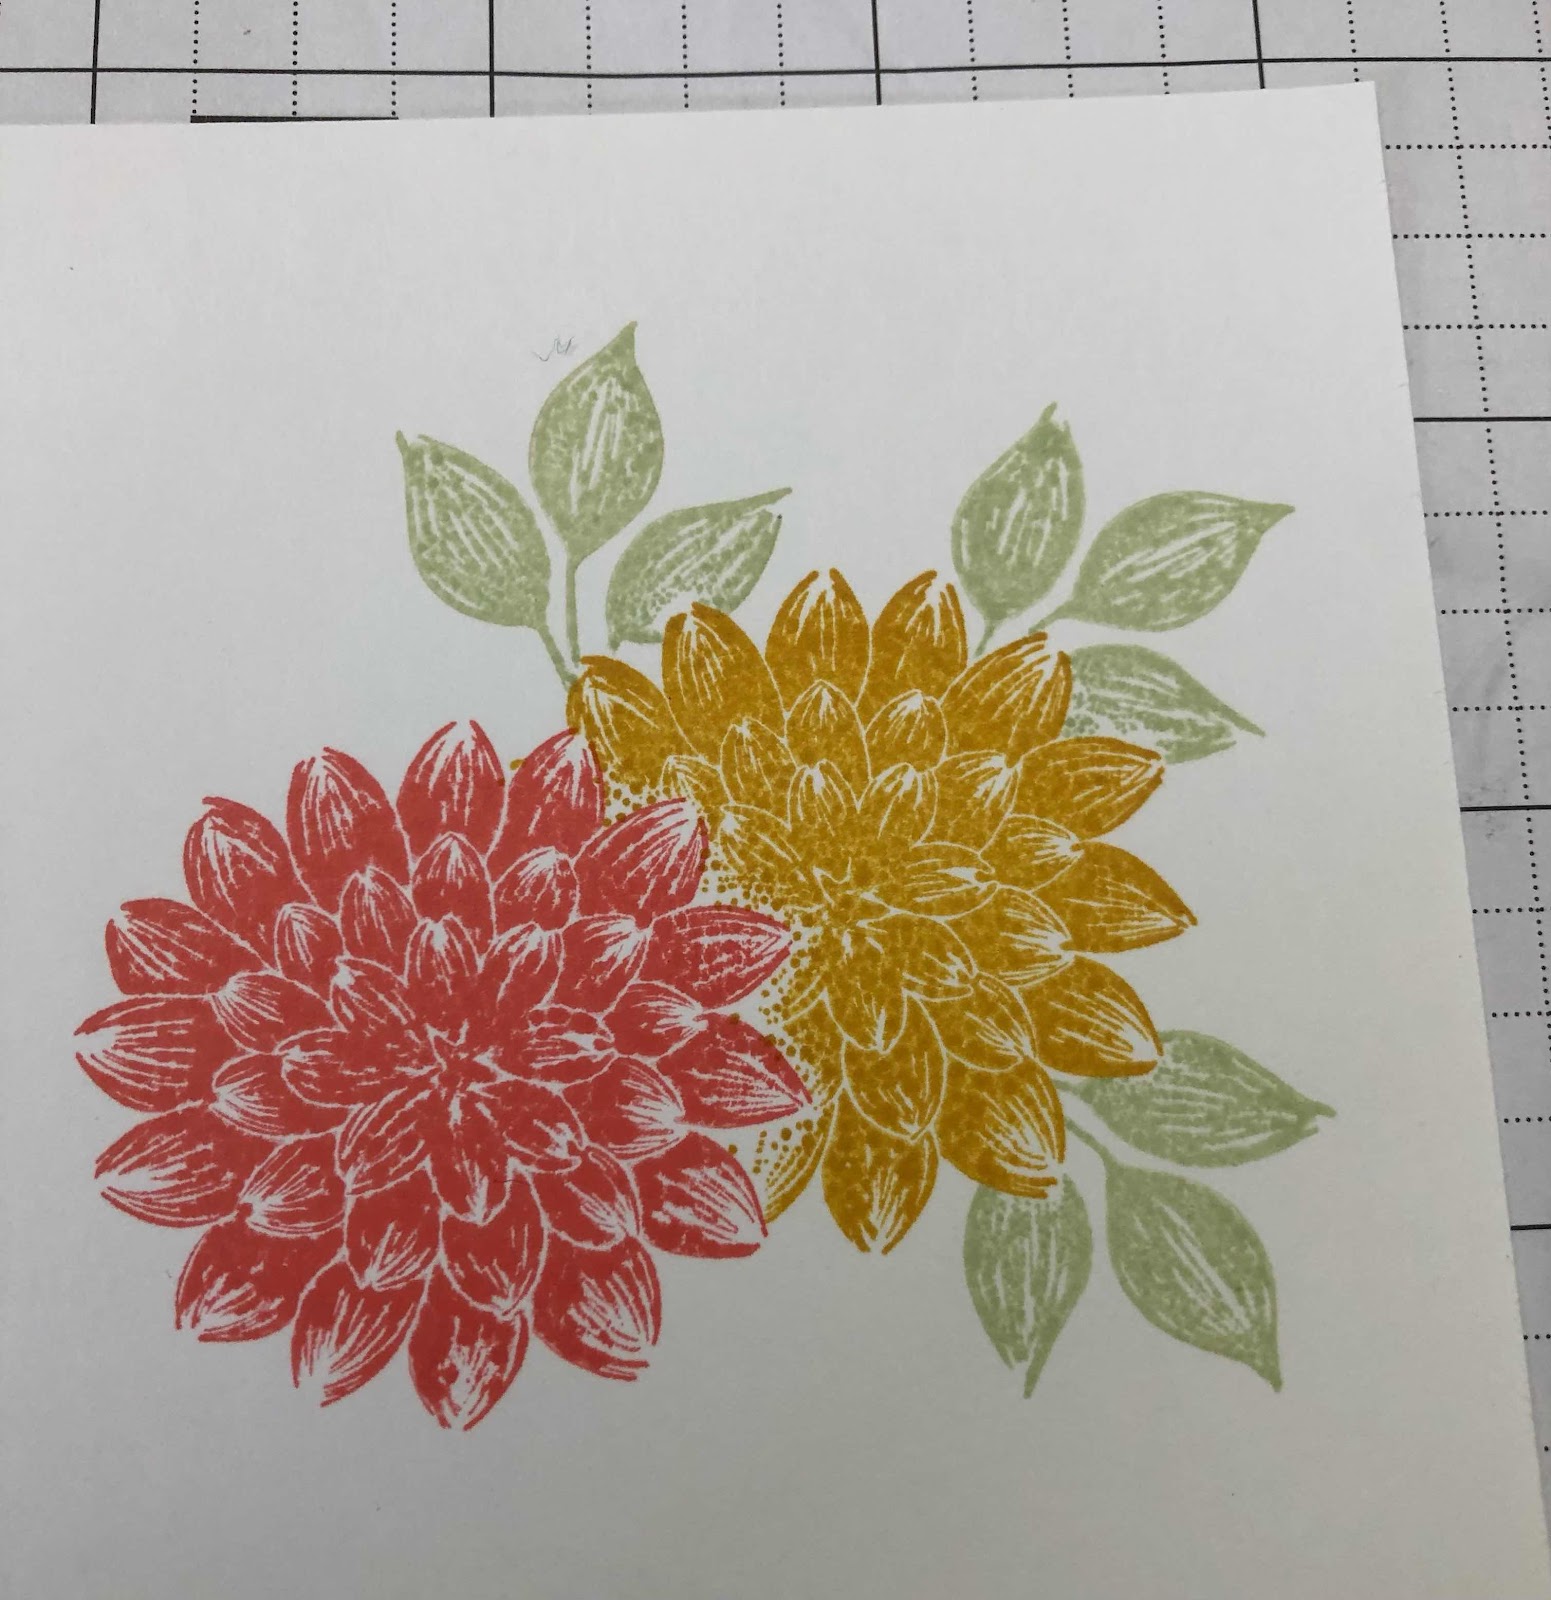
I stamped one dahlia with Gorgeous Grape ink (#147099) on Basic White card (#159228), then cut it with a die from the Detailed Dahlias. I then stamped another  dahlia with Flirty Flamingo ink (#147052) onto the Basic White card front. Using the masking technique (see below) I then stamped the next dahlia with Bumble Bee ink (#153116). Again I masked the Bumble Bee dahlia and stamped the leaves with Soft Sea Foam ink (#147102). I attached the Gorgeous Grape dahlia with Stampin’ Dimensionals (#104430).

I stamped the “label” with Highland Heather ink (#147103), then cut this with the co-ordinating die from the Detailed Dahlias. “Thinking Of You” is from Blossoms In Bloom stamp set (#152684) and stamped with Gorgeous Grape ink.

I cut a strip of the Simply Marbleous 6”x6” Designer Series Paper (#158128), from Sale-a-bration, and attached this to the cardfront. The sentiment was then attached with Stampin’ Dimensionals. I matted the cardfront with Gorgeous Grape card (#147011). The base card is Basic White. The Brushed Brass Butterflies (#158136) were added to the card. How cute are these butterflies.

TIP: To do the masking technique, stamp the image onto a piece of Post-it notes, ensuring you have the sticky part included at the back. Then cut around the image very close to the image. Don’t leave any margin like you would normally do when fussy cutting. 

Stamp your image on your card. 


Then place this mask on top of your stamped image on your card. 


Stamp your next image


Add another mask before stamping the leaves


Remove all masks


You can re-use the mask many times. I keep mine in with the stamp set. Also if you want 2 or more masks of the same image, I stamp one image on the post-it notes and placing 2 or 3 post it notes together, cut all at the same time.


“Love what you do and share what you love.”


Wednesday, 5 January 2022

Horizon Dies

Hi everyone,

Here’s a fairly simple card using mostly dies. It’s great when you can use different sets to achieve a great card.


The tree and birds were cut with the Beautiful Trees Dies (#155840). I used the Beauty Of The Earth Designer Series Paper (#155841) for the tree and Cherry Cobbler card (#121681) for the birds. To make it easy to adhere the tree I used the Adhesive Sheets (#152334) on the back of DSP before cutting. The tree was adhered to another piece of the Beauty Of The Earth DSP. I had stamped the birds from the On The Horizon stamp set (#157770) using Tuxedo Black Memento ink (#132708) onto the green DSP.

The fence and grass were cut with Horizon Dies (157778). I used Very Vanilla card (#106550) for the fence and Mossy Meadow card (#133683) for the grass. The fence, grass and birds were all attached to the card with Mini Stampin’ Dimensionals (#144108). I also cut the grass so it wasn’t the full length so it fitted on the card the way I wanted it.

“Happy Birthday” from Blossoms In Bloom stamp set (#158283) was stamped with Cherry Cobbler ink (#147083). I cut this with a die from the Bouquet Of Love (#157641). These dies are part of the Bouquet Of Love Hybrid Embossing Folder.  Stampin Dimensionals (#104430) were used to attach the sentiment to the card. Clear Wink Of Stella (#141897) was used on the birds for a bit of sparkle.

TIP: When using Dimensionals on both the fence and the grass, ensure you only put Dimensionals on the grass where the pieces don’t overlap.

“Love what you do and share what you love.”

Tuesday, 4 January 2022

Home & Garden Bundle

Hello & welcome,

I hope you are having a good start to the New Year. What better way to start is with the new Mini catalogue and Sale-a-bration available from today. One of the bundles in the mini catalogue is the Home & Garden bundle (#157919) which is fantastic for those men in your life.


The bundle consists of the Home & Garden stamp set (#157910) and the Garden Dies (#157918). All the stamped images including the sentiment, and the die cuts (except the grass) are from this bundle. I stamped the ladder with Soft Suede ink (#147115) on Crumb Cake card (#121685). The rake was stamped with Garden Green ink (#147089) on Basic White card (#159228). The shovel was stamped with Sahara Sand ink (#147117) on Sahara Sand card (#121695). The small spade was stamped with Early Espresso ink (#147114) on Soft Suede card (#119982). The head of the shovel & spade were cut from (retired) Silver Foil. The “grass” is cut with a die from the Horizon Dies (#157778) using Garden Green card (#108605). The Garden Green card had Adhesive Sheets (#152334) adhered to the back before cutting with the dies.

The “timber” under the sentiment and for hanging the tools is Soft Suede card. The “hangers” are Basic Black card (#121688). The card front is from the Heart & Home Designer Series Paper (#157928). This was attached to the Garden Green base card.

The sentiment, ladder, rake, spade & shovel were all attached with Stampin’ Dimensionals (#104430) and Mini Stampin’ Dimensionals (#144108).

TIP: There is a great range of bundles available in the annual catalogue and mini catalogue and when you purchase a bundle you save 10%.


“Love what you do and share what you love.”


Monday, 3 January 2022

In The Moment

Hi my crafty friends,

By the time you see this the new Mini catalogue and Sale-a-bration will probably be “live” (4th January). There are so many exciting new products including the In The Moment stamp set (#157987) and the Simply Marbleous 6”x6” Designer Series Paper (#158128) both of which have been used on this card. The DSP is one of the free Sale-a-bration products with a $90 order (in Australia).


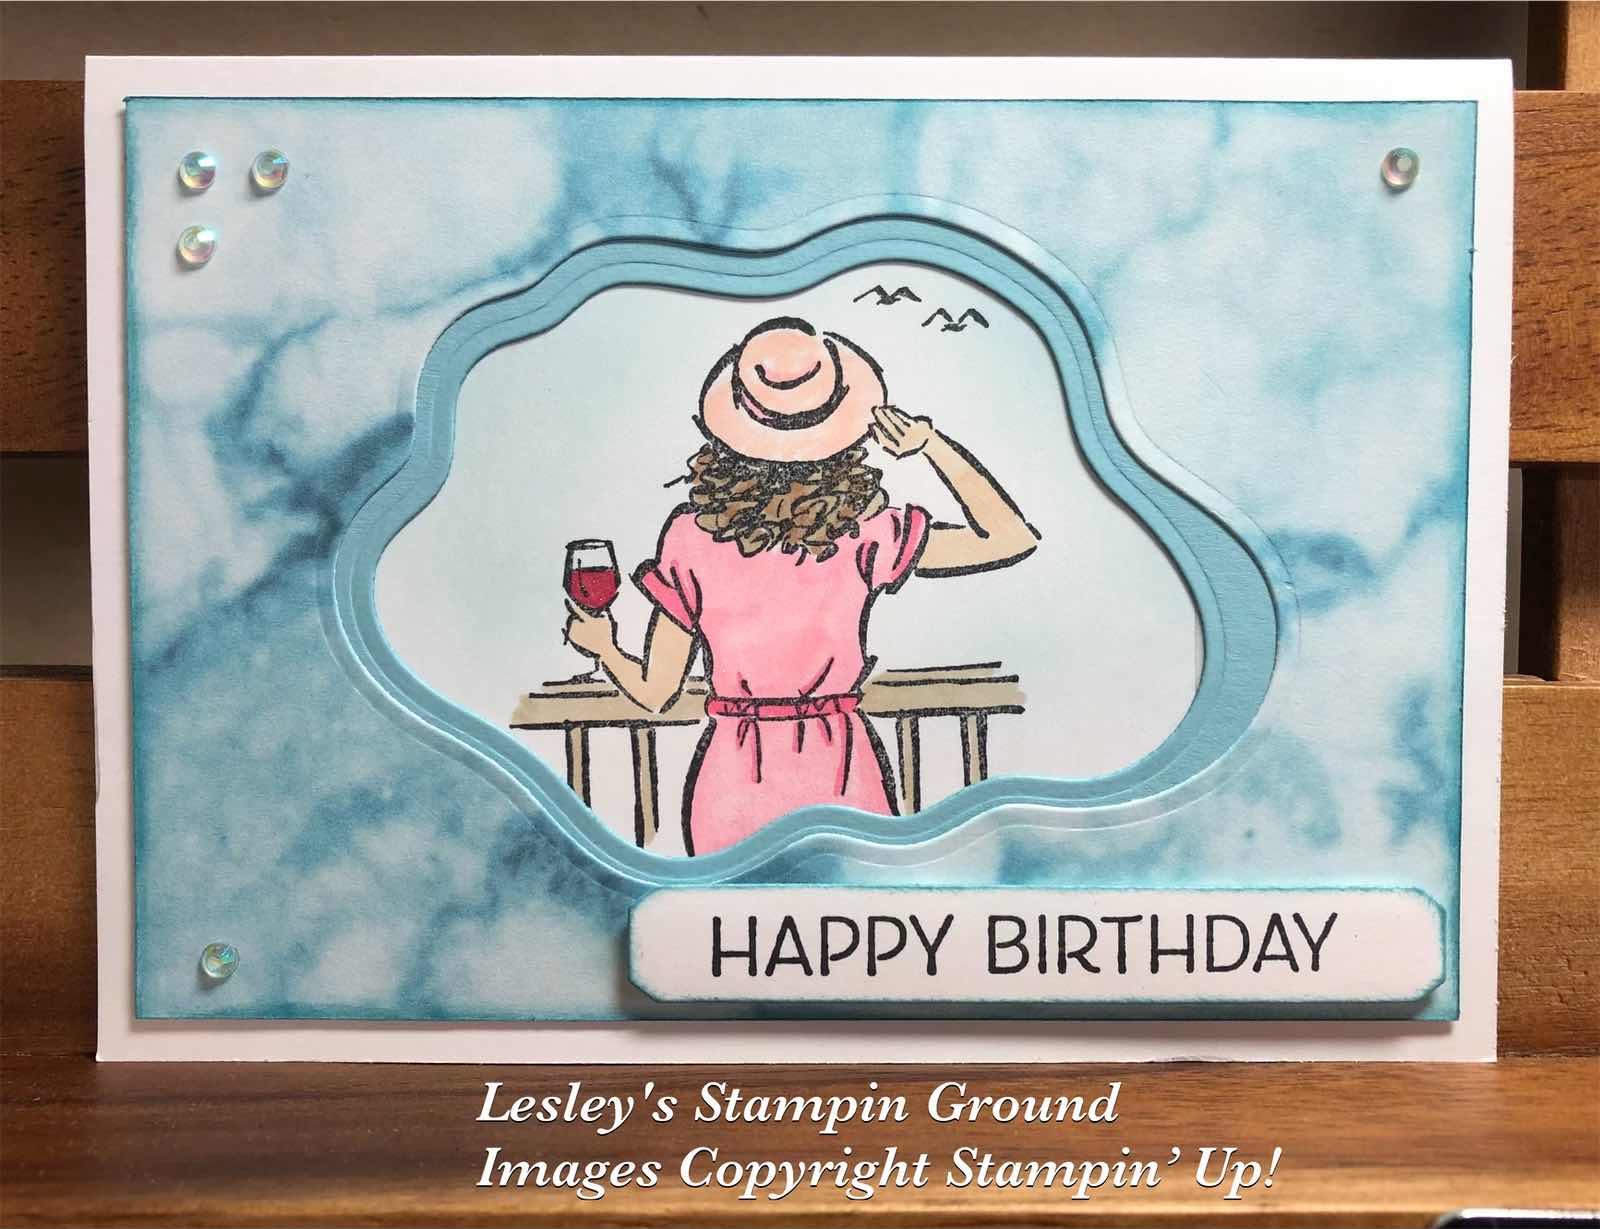
I stamped the image from the In The Moment stamp set using Tuxedo Black Memento ink (#132708) on Basic White card (#159228). I used Stampin’ Blends to colour the image. The colours used are Flirty Flamingo (#154884), Cherry Cobbler (#154880), Crumb Cake (#154882), Petal Pink (#154893) and Bronze & Ivory (#154922). I lightly coloured the sky using Balmy Blue ink (#147105) with a Blending Brush (#153611). The Clear Wink Of Stella Brush (#141897) was used to add some glimmer to the dress & wine.

The Balmy Blue card (#147007) and the Simply Marbleous DSP were cut with the Layering Diorama Dies (#155565). These were attached to the Basic White Base card. “Happy Birthday” from the Artistically Inked stamp set (#154542) was also stamped with Tuxedo Black Memento ink. I used the Messages Die (#154422) to cut the sentiment. This was attached to the card with Stampin’ Dimensionals (#104430).

The Iridescent Rhinestones Basic Jewels (#158130) were added for a touch bling.

TIP: Memento ink is great when using Stampin’ Blends as well as a general all purpose ink.


“Love what you do and share what you love.”


Sunday, 2 January 2022

Butterflies & Flowers Layering Decorative Masks

Hi & welcome again,

When we look through a new catalogue and there is so much to take in, it is easy to miss some great products. I hope you don't miss the Butterflies & Flowers Layering Decorative Masks (#158142). I love the layering of the butterfly.


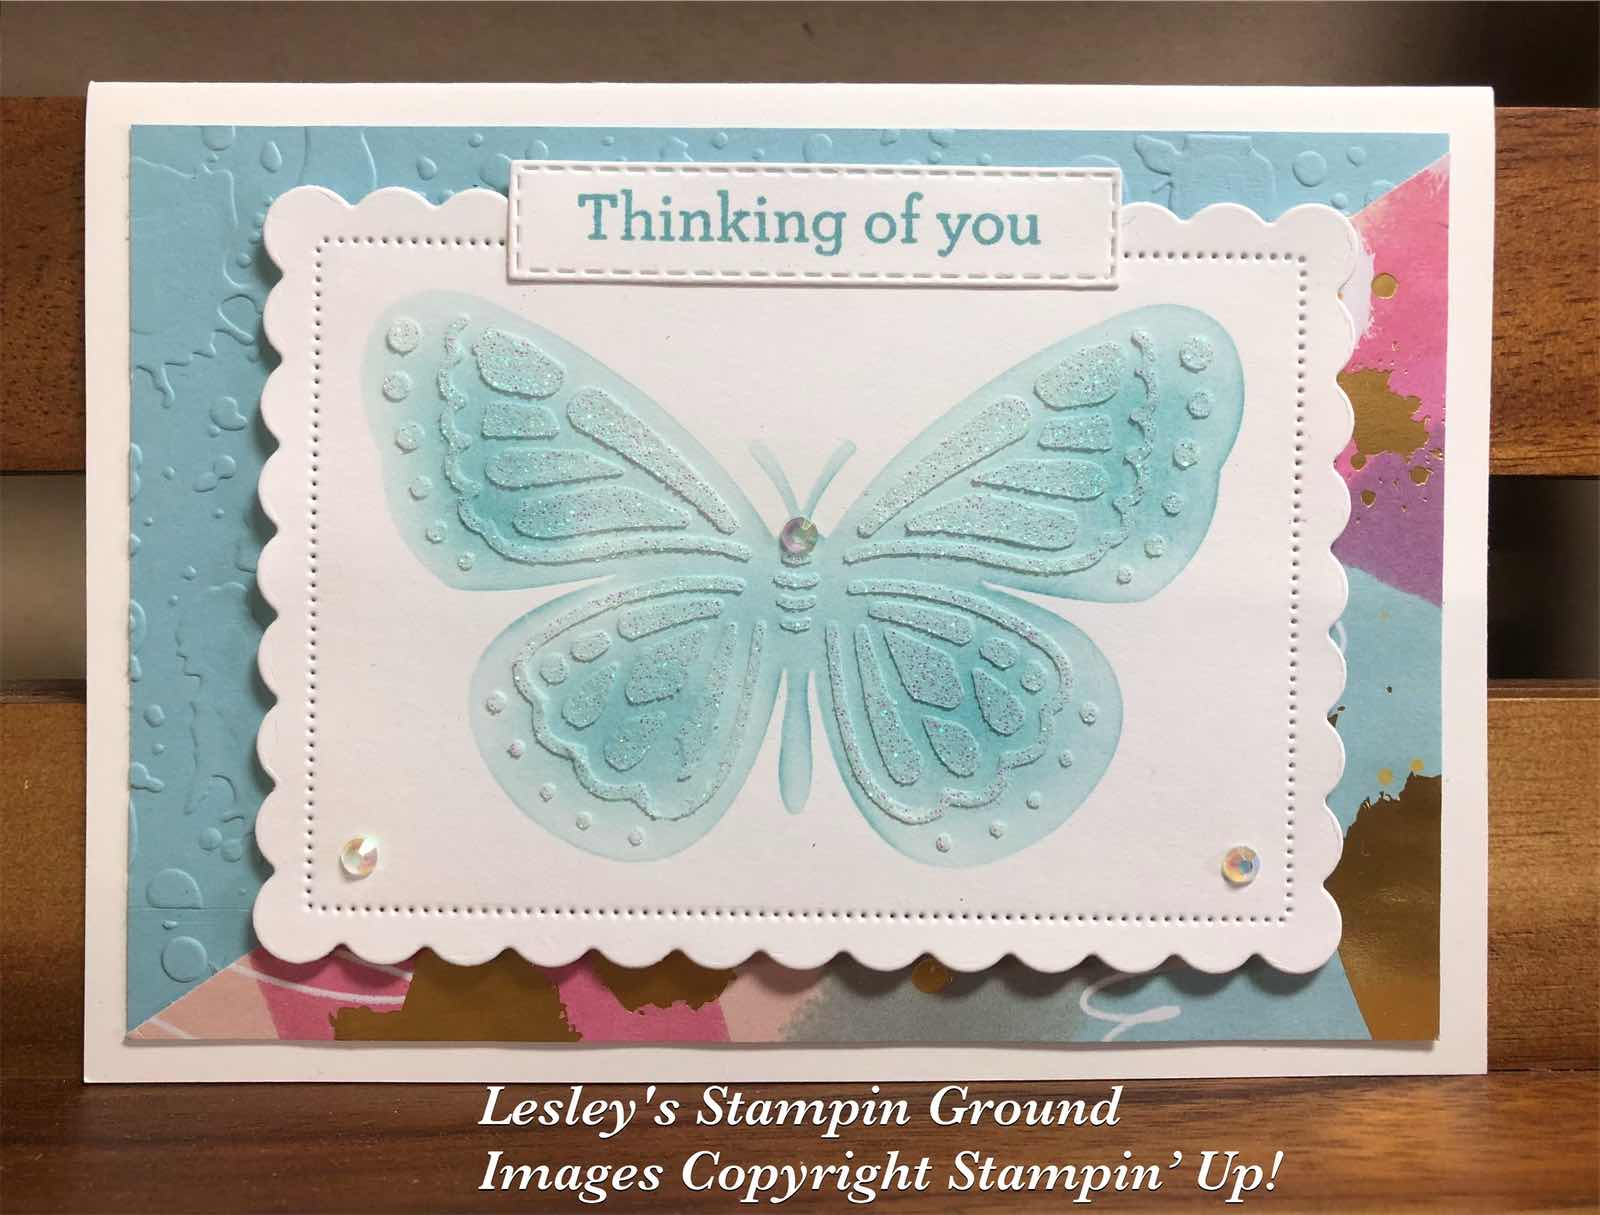
Firstly I cut the Basic White card (#159228) using a Scalloped Contours Die (#155560). There are 2 butterfly masks so I used the solid one first. I positioned this on the die cut white card and using a Blending Brush (#153611) with Balmy Blue ink (#147105), I coloured the background of the butterfly. I then positioned the detailed mask of the butterfly over the coloured image. I used a Palette Knife (#142808) to apply the Shimmery White Embossing Paste (#145645). I love the effect which is always better in real life. This doesn’t take long to dry so ensure you wash the palette knife & mask immediately to remove the excess paste.

I cut a piece of the Abstract Beauty Specialty Designer Series Paper (#158039) and attached this to the Balmy Blue card (#147007) which was dry embossed with the Splatters from the Stripes & Splatters 3D Embossing Folders (#157980). The scalloped rectangle was attached to the card front with Stampin’ Dimensionals (#104430).

“Thinking Of You” is from the Beauty Of Friendship stamp set (#154983) and stamped with Balmy Blue ink then cut with a Stitched Rectangles Die (#151820). I added the Iridescent Rhinestone Basic Jewels (#158130) to the card.

Tip: When using the embossing paste, apply the paste then wipe the knife over the whole image to remove any excess and return to the jar. No need to wast any. Also make sure you close the jar tight to stop it drying out. I also put the jar into a small plastic bag and keep it well sealed. This will ensure it will last longer and not dry out.

“Love what you do and share what you love.”


Saturday, 1 January 2022

Friendly Hello Sale-a-bration

Hello my dear friends,

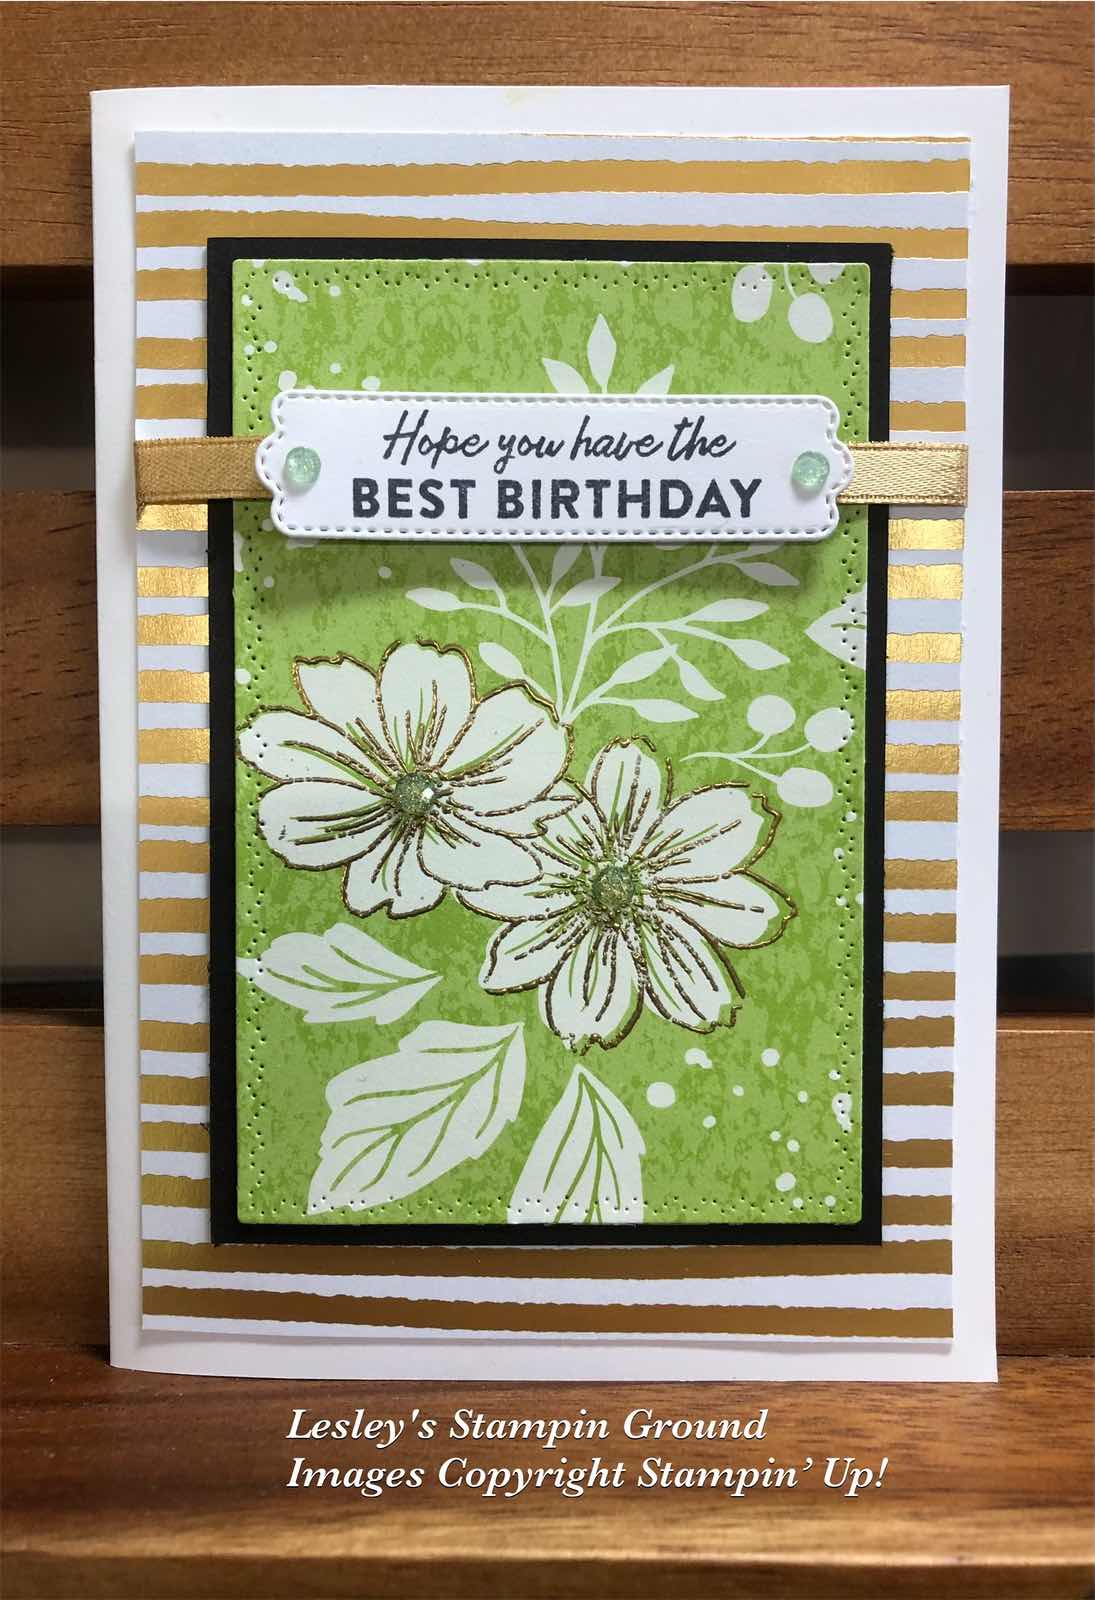
As mentioned yesterday, Sale-a-bration starts on 4th January, which means you get free products with a qualifying order (each $90 in Australia). Today I have used the Friendly Hello stamp set and Designer Series Paper (#159990) bundle which is free with a $180 order. I love how these co-ordinate so nicely.


The flowers from the stamp set fit perfectly on the flowers of the DSP, so I stamped the flowers with VersaMark (#102283) onto the DSP then heat embossed with Gold Stampin’ Emboss Powder (#155555). This was set with the Heat Tool (#129056). I cut the DSP with a Nature’s Thoughts Die (#153586), then matted this with Basic Black Card (#121688).

The gold and white stripe DSP is from the Abstract Beauty 4”x6” Specialty Designer Series Paper (#158039). This is a new size in Designer Series Paper and great for card fronts. I wrapped the Gold Shimmer Ribbon (#152156) around the card front then attached this to the Basic White base card (#159228).

The sentiment is from the Friendly Hello stamp set and stamped with Tuxedo Black Memento ink (#132708). The die from the Pretty Pillow Box dies (#156321) was used to cut the sentiment. I used Stampin’ Dimensionals (#104430) to attach this to the card.

The Genial Gems (#155500) were attached to the sentiment and flower centres.


“Love what you do and share what you love.”