Showing posts with label #shimmerywhiteembossingpaste. Show all posts

Saturday, 12 October 2024

Shimmery White Embossing Paste

 Hello & welcome,

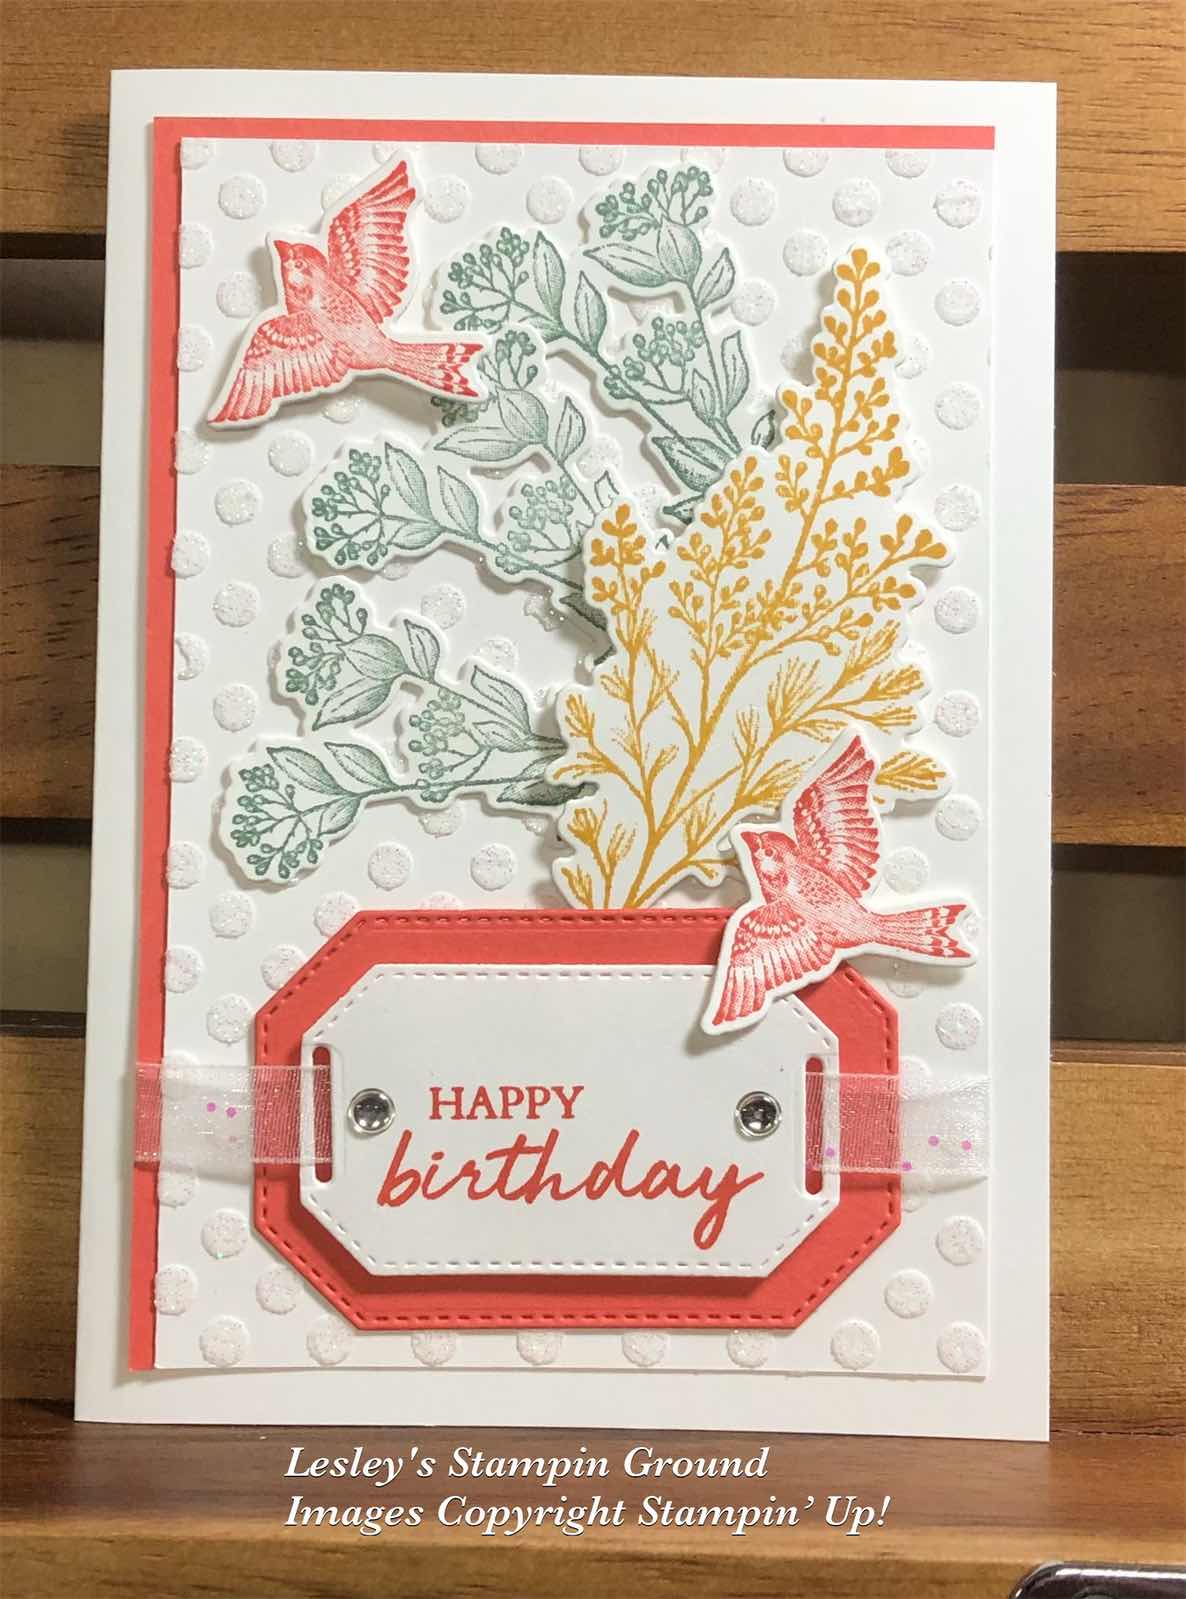
I hope you can see the shimmer in the background of this card. I made my own glimmer paper using the Shimmery White Embossing Paste (#145645) on Soft Sea Foam card (#147012).


I applied the paste over the Soft Sea Foam card using a Palette Knife (#142808) and put it aside to dry.

I cut the birds from the Nests Of Winter 12”x12” Designer Series Paper (#164183) using the co-ordinating die from the Winterly Tree Tops dies (#164065). The leaves from the Graceful Greenery Vellum 12”x12” Specialty Designer Series Paper (#164118) was cut with a Golden Greenery die (#164116).

“ Peace & Joy” from the Peaceful Season stamp set (#164145) was stamped with Cherry Cobbler ink (#147083). The 2 Basic White (#159228) circles were cut with the Spotlight On Nature dies (#163580).

Once the background was dry, I dry embossed it with the Ferns Embossing Folder (#158804) and matted it with Cherry Cobbler card (#121681). This was then taped to the Basic White base card. You can speed up the drying process using the Heat Tool (#129056).

The die cut leaves and circles were attached to the card with Mini Glue Dots (#103683). The birds were attached with Mini Stampin’ Dimensionals (#144108). I added Clear Wink Of Stella (#141897) to the birds & berries for some extra glimmer. The embellishments are from the Cherry Cobbler & Pearl Adhesive-Backed Berries (#164119).

“Love what you do and share what you love.”

Tuesday, 27 February 2024

Inspirational Sketches stamp set

 Hi & welcome again,

I love these birds from the Inspirational Sketches stamp set (#162684).


The birds were stamped with Berry Burst ink (#147143) and Blueberry Bushel ink (#147138), then they were fussy cut.

I applied the Shimmery White Embossing Paste (#145645) to the Basic White card front (#159228) using a Palette Knife (#142808) and a mask from the Artistic Mix Decorative Masks (#159178). This was matted with Pretty Peacock card (#150886) and attached to the Basic White base card.

I adhered Adhesive Sheet (#152334) to the back of the Lost Lagoon card from the Soft Shimmer Paper Combo Pack (#161750), then used a die from the Encircled In Nature dies (#163628). These dies will be available from the Online Exclusives from 5th March. 

Once the paste was dry, which doesn't take long, I attached the wreath to the card. I used Stampin’ Dimensionals (#104430) to attach the birds.

“Congratulations” from the Lovely & Sweet stamp set (#162617) was stamped with Pretty Peacock ink (#150083) and cut with a Sending Die (#159271). Mini Stampin’ Dimensionals (#144108) were used to attach the sentiment to the card. The embellishments are from the Blooming Pearls (#162238).

Clear Wink Of Stella (#141897) was used to add glimmer to the birds.


“Love what you do and share what you share.”

INSPIRE. CREATE. SHARE. 


Friday, 15 September 2023

Abundant Beauty Decorative Masks

Hello & Welcome again,

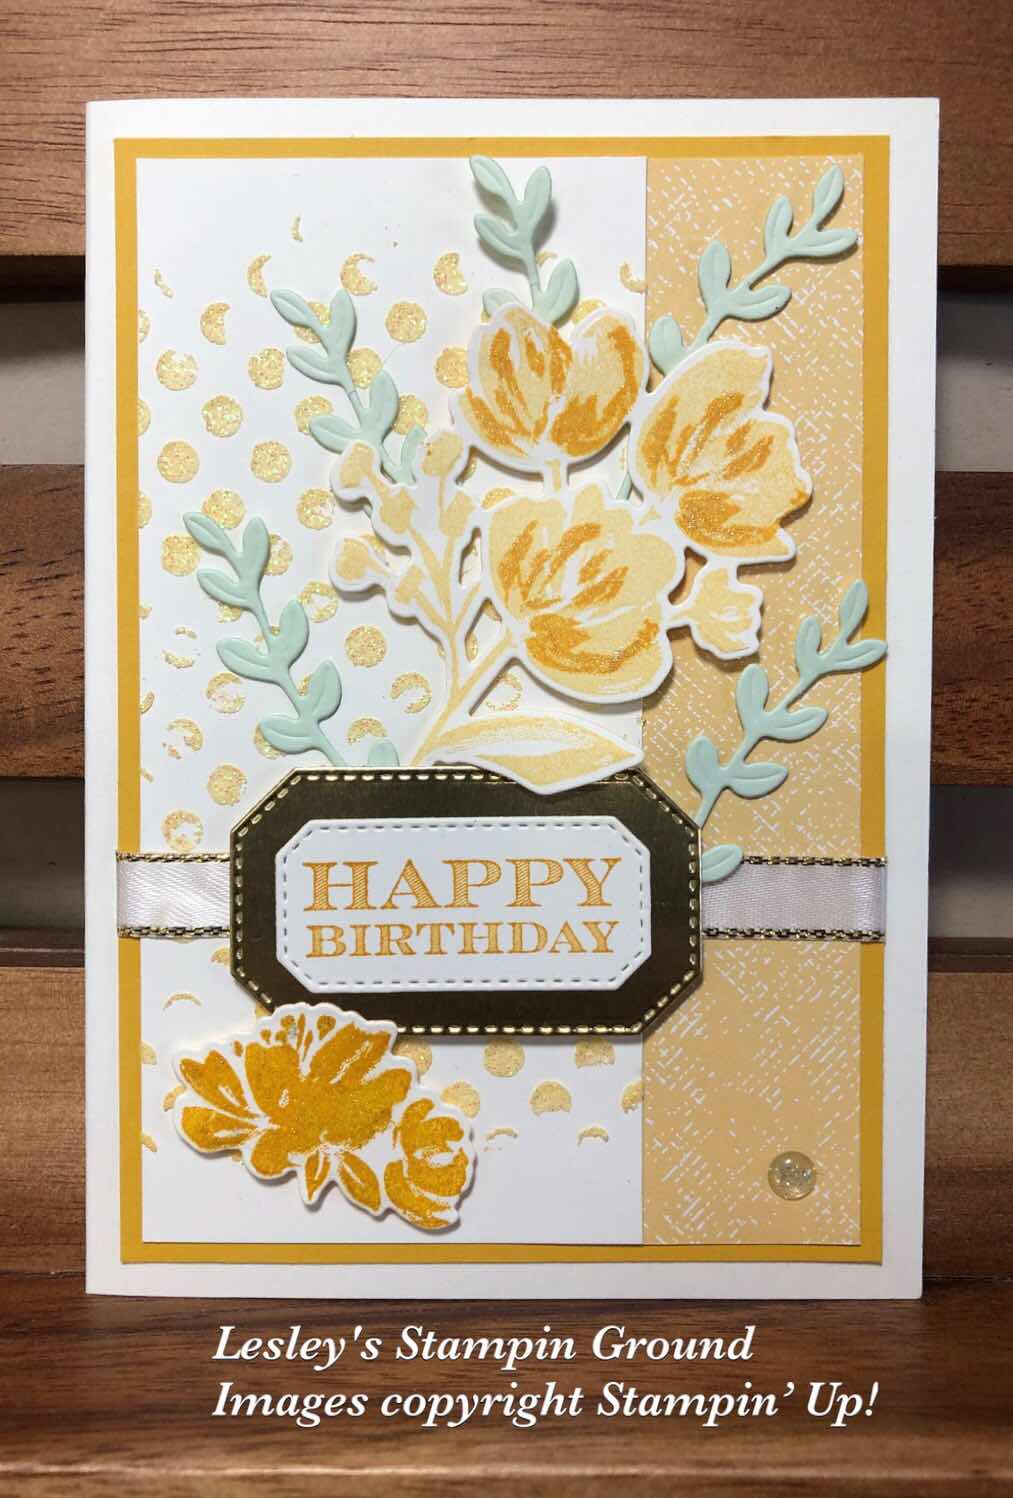
I have been playing with the Abundant Beauty Decorative Masks (#162331) again today.


Using  Blending Brushes (#153611) I added the colour to the 3 flowers. I used Daffodil Delight ink (#147094), Crushed Curry ink (#147087) and Pumpkin Pie ink (#147086). I then applied the Shimmery White Embossing Paste (#145645) using a Palette Knife (#142808) with the mask still in place. I put this aside till the paste was dry, then fussy cut the flowers.

Meantime I stamped the leaves. I stamped 2 leaves on the Basic White card front (#159228). The leaf from Nature’s Prints stamp set (#158793) was stamped with Daffodil Delight ink. The leaf from the Inked & Tiled stamp set (#161158) was stamped with Soft Sea Foam ink (#147102). The other leaves are from the Layering Leaves stamp set (#161277) and stamped with Lost Lagoon ink (#161678) and Pumpkin Pie ink. These are punched with the co-ordinating Bough Punch (#157711).

I used a die from the Earthen Textures dies (#161513) for the “embossing” at the bottom of the card front under the sentiment. The sentiment from the Go To Greetings stamp set (#158763) was stamped with Pumpkin Pie ink and cut with a Cracker & Treat Box Die (#159182). This was attached with Mini Stampin’ Dimensionals (#144108).

I layered the flowers using Stampin’ Dimensionals (#104430) and attached the flower to the card with Mini Glue Dots (#103683). The punched leaves were also attached with Mini Glue Dots.

The Brushed Brass Butterflies (#158136) were added to the card.

“Love what you do and share what you love.”

INSPIRE. CREATE. SHARE.


Thursday, 14 September 2023

Abundant Beauty Decorative Masks

Hello friends,

Have you seen the new Abundant Beauty Decorative Masks (#162331) from the Mini Catalogue? I have had fun playing with them for this card.


For the background I used the mask with all the small leaves. I added colour using Blending Brushes (#153611) with Daffodil Delight ink (#147094), Flirty Flamingo ink (#147052), Granny Apple Green ink (#147095) and Crumb Cake ink (#147116). Then without moving the mask I applied the Shimmery White Embossing Paste (#145645) then put this aside to dry (which doesn't take long).

I then used the mask with the 3 flowers and added Flirty Flamingo ink on the petals, then Berry Burst ink (#147143) towards the centre of the petals. Another mask was used with Melon Mambo ink (#147051) to add the colour to the centre of the flower. These masks are easy to match the images as there is a notch in the mask to line up each mask for perfect positioning.

I fussy cut these flowers and attached them to the card front with Stampin’ Dimensionals (#104430). The leaves are cut with Autumn Leaves dies (#162185) using the Granny Apple Green from the Melon Mambo & Granny Apple Green Foil Sheets (#161953) and attached with Mini Glue Dots (#103683). I added shimmer to the flowers using Clear Wink Of Stella (#141897).

The sentiment from the Cheerful Daisies stamp set (#161290) was stamped with Berry Burst ink and cut with a die from Autumn Leaves. This was attached with Mini Stampin’ Dimensionals (#144108).

The card front was matted with Flirty Flamingo card (#141421) then attached to the Basic White Base card (#159228).

“Love what you do and share what you love.”

INSPIRE. CREATE. SHARE.


Friday, 18 August 2023

Timeless Arrangements

Hi stamping friends,

I have used the Timeless Arrangements dies (#161525) for all the die cut pieces on this card.


For the card front I used the Shimmery White Embossing Paste (#145645) with an Artistic Mix Decorative Mask (#159178). This was applied with a Palette Knife (#142808). After allowing this to dry I punched the corners of this and the Coastal Cabana card (#131302) with the Very Best Trio punch (#159878) and attached it to the Basic White base card (#159228).

The card stock used to cut the leaves are Pool Party (#124391), Daffodil Delight (#121680), Crushed Curry (#131288), Lemon Lolly (#161729), Pecan Pie (#161726) and Copper Clay (#161730). All these were backed with Adhesive Sheets (#152334).

“Thank You” from the Timeless Arrangements stamp set (#161521) was stamped with Coastal Cabana ink (#147097). The sentiment and Coastal Cabana card were cut with Timeless Arrangements dies. Mini Stampin’ Dimensionals (#144108) were used to attach the sentiment.

TIP: Wash the mask & palette knife as soon as you are finished with them as the paste will dry very quickly. Just need water to wash them.

“Love what you do and share what you love.”

INSPIRE. CREATE SHARE.


Tuesday, 18 July 2023

Translucent Florals

Hello,

Recently Stampin’ Up demonstrators got together virtually to play with a new stamp set and dies which will be available in September with the next Mini catalogue. This stamp set & dies are the Translucent Florals. There are some beautiful flowers in this set but here I have just used the leaves.


I stamped the fine leaves from the Translucent Florals stamp set (#162243) with Smoky Slate ink (#147113) on Smoky Slate card (#131291). I then cut the leaf image using a die from the Translucent Florals dies (#162252) onto a piece of scrap card. This was used as a mask and I used a Palette Knife (#142808) to apply the Shimmery White Embossing Paste (#145645).

I stamped the leaves with Garden Green ink (#147089) and these were cut with another of the dies, then attached to the card with Stampin’ Dimensionals (#104430).

“Happy Birthday” is from the Go To Greetings stamp set (#158763) and stamped with Copper Clay ink (#161647). This was cut with a Cracker & Treat Box Die (#159182) then attached this with Mini Glue Dots (#103683) to the Copper Clay Textured Ribbon (#161629).

I used a small piece of Copper Clay card (#161730) to partly matt the card front before attaching it to the Basic White base card (#159228).

“Love what you do and share what you love.”

INSPIRE. CREATE. SHARE.


Sunday, 9 July 2023

Cheerful Daisies

Hi stamping friends,

The background on todays card is from the beautiful Holographic Trio 12”x12” Specialty Paper (#161744) and have used Shimmery White Embossing Paste (#145645) with an Artistic Mix Decorative Mask (#159178) to add the design & texture to half of the card front.


This paste doesn't take long to dry but I set it aside while I stamped and cut all the other pieces. To apply the paste I used a Palette Knife (#142808) and scraped it over the mask. The knife & mask needs to be washed as soon as possible so the paste doesn't set on the utensils.

The flowers from the Cheerful Daisies stamp set (#161290) were stamped with Gorgeous Grape ink (#147099) for the outline. The inside was stamped with Fresh Freesia ink (#155611) and I used Lemon Lolly ink (#161666) for the flower centres. The flowers and leaves were all cut with the Cheerful Daisies dies (#161296). I used Lost Lagoon card (#133686) backed with Adhesive Sheet (#152334) for the leaves.

“Happy Birthday” from the Go To Greetings stamp set (#158763) was stamped with Gorgeous Grape ink then I cut it with a Crackers & Treat Box die (#159182). The flowers & sentiment were all attached with Stampin’ Dimensionals (#104430). The base card is Basic White (#159228).

“Bonus Days” are back till 31st July. This means that for each $90 of Stampin’ Up! products you purchase you will receive a $9 credit to spend in August. Please contact me if you want any further information.

“Love what you do and share what you love.”

INSPIRE. CREATE. SHARE.


Monday, 13 March 2023

Fresh Cut Flowers

Hi everyone,

I have used the Fresh Cut Flowers stamp set (#159018) for the flowers on this card. The Fresh Cut Stems Dies (#160251) to co-ordinate with the stamp set are currently on the clearance rack at a discounted price ($24 in Australia) so a fantastic deal if you are looking for these dies. These are available while stocks last.


The floral image was stamped with Tuxedo Black Memento ink (#132708) on Basic White card (#159228). I used Watercolour Pencils from the Assortment 1 (#141709) and Assortment 2 (#149014). The colours are Granny Apple Green, Old Olive, Garden Green, Melon Mambo, Flirty Flamingo, Real Red, Daffodil Delight, Balmy Blue & Crushed Curry. I coloured parts of the image with the pencils then blended the colour with the Clear Wink Of Stella Brush (#141897). This  spreads the colour slightly and adds glimmer at the same time.

This image was then cut with the Fresh Cut Stems dies. The finer leaves were cut with another die from Granny Apple Green card (#147014) which was backed with Adhesive Sheet (#152334).

For the card front I used the Loveliest Layers Decorative Masks (#160517) and spread over the Shimmery White Embossing Paste (#145645). I allowed it to dry, which doesn't take long, and re-positioned the mask to fill in the blank spaces and repeated with the Embossing Paste. Once this was dry I matted it with Basic Black card (#121688).

I wrapped the Metallic Mesh Ribbon (#153550) around the card front and attached it to the Basic White base card.

“Thank You” from the Irresistible Blooms stamp set (#161140) was stamped with Granny Apple Green ink (#147095) and cut with an All That Die (#159078).

The Granny Apple Green leaves were attached to the card, then the flowers and sentiment were attached with Stampin’ Dimensionals (#104430). A Dragonfly Trinket (#160520) was added to the sentiment using Mini Glue Dots (#103683).

You can find all the products on the Clearance Rack here - lesleyjendra.stampinup.net


“Love what you do and share what you love.”


INSPIRE. CREATE. SHARE.


Tuesday, 28 February 2023

Brushed Bouquet

Hello my friends,

These flowers and leaves are from the Brushed Bouquet bundle (#160474) which consist of the Brushed Bouquet stamp set (#160472) and the Brushed Bouquet Dies (#160473).


Some of the dies cut & emboss at the same time, which you can see with the 2 gold flowers and the green leaves. I have used the gold & green from the Fine Shimmer Paper pack (#160428).

I stamped the flower with Pale Papaya ink (#155670) - using the Stamparatus (#148187) - onto Pale Papaya card (#155669). After cleaning the stamp and without moving it, I re-inked the stamp with VersaMark (#102283) and stamped on top of the first image. I then sprinkled this with Clear Stampin’ Emboss Powder (#155554) and set it with the Heat Tool (#129056). I then stamped a second image on top just with Pale Papaya ink. The flowers were then cut with the co-ordinating die.

For the card front I used a mask from the Loveliest Layers Decorative Mask (#160517) and applied the Shimmery White Embossing Paste (#145645) with a Palette Knife (#142808). This created all the vertical lines. Once this was dry, which doesn't take long, I turned the mask and applied the Embossing paste again to fill the blank spaces and create the horizontal lines. The card front was attached to the Pale Papaya base card.

The flowers & leaves were attached to the card with Stampin’ Dimensionals (#104430) & Mini Glue Dots (#103683).

The sentiment from Dainty Delight stamp set (#161078) was stamped with Pale Papaya ink then cut with a Stitched Rectangles Die (#151820) and attached with Stampin’ Dimensionals.

“Love what you do and share what you love.”

INSPIRE. CREATE. SHARE.


Friday, 15 April 2022

Hello Ladybug Bundle

Hi friends,


When I colour the Shimmery White Embossing Paste (#145645), I always have extra card ready so as not to waste the embossing paste. This card front was left over from a previous card so was perfect for using for this card. 


I used the Butterflies & Flowers Layering Mask (#158142) with the Shimmery White Embossing Paste. I had cut a circle in a piece of scrap card to create the circle with the paste. The Detailed Trio Punch (#146320) was used to punch the corner. The Basic White card front (#159228) was matted with Real Red card (#106578) and then attached to the Basic White base card.

The leaf from the Hello Ladybug stamp set (#157693) was stamped with Granny Apple Green ink (#147095). This was fussy cut and attached to the card. The Basic Black card (#121688) was punched with the Ladybug Builder Punch (#157698). I then VersaMarked (#102283) this and added Clear Stampin’ Emboss Powder (#155554) and set it with the Heat Tool (#129056) to give a shine to the ladybug. The wings were stamped with Real Red ink (#147084) and the spots with Tuxedo Black Memento ink (#132708). The wings were also cut with the Ladybug Builder Punch. The wings were attached to the body of the ladybug. The ladybug was attached to the card with Stampin’ Dimensionals (#104430).

The flowers from the same stamp set were stamped with Daffodil Delight ink (#147094). I stamped another set of flowers and fussy cut one and attached it on top the the base flower with a Stampin’ Dimensional.

“Happy Birthday” is from the Expressions Of Friendship stamp set (#158460) and “My Friend” is from the Hello Ladybug stamp set. These were stamped with Real Red ink and cut with the Messages Die (#154422). The edges were daubered with Real Red ink and attached with Mini Stampin’ Dimensionals (#144108). Red Rhinestone Basic Jewels (#146924) were added to the card.

The Messages Die and the Detailed Trio punch are on the retiring list.

“Love what you do and share what you love.”


Friday, 25 March 2022

Daisy Lane stamp set

Hi & welcome,

I have used more retiring products on this card and also have used a couple of colouring techniques.


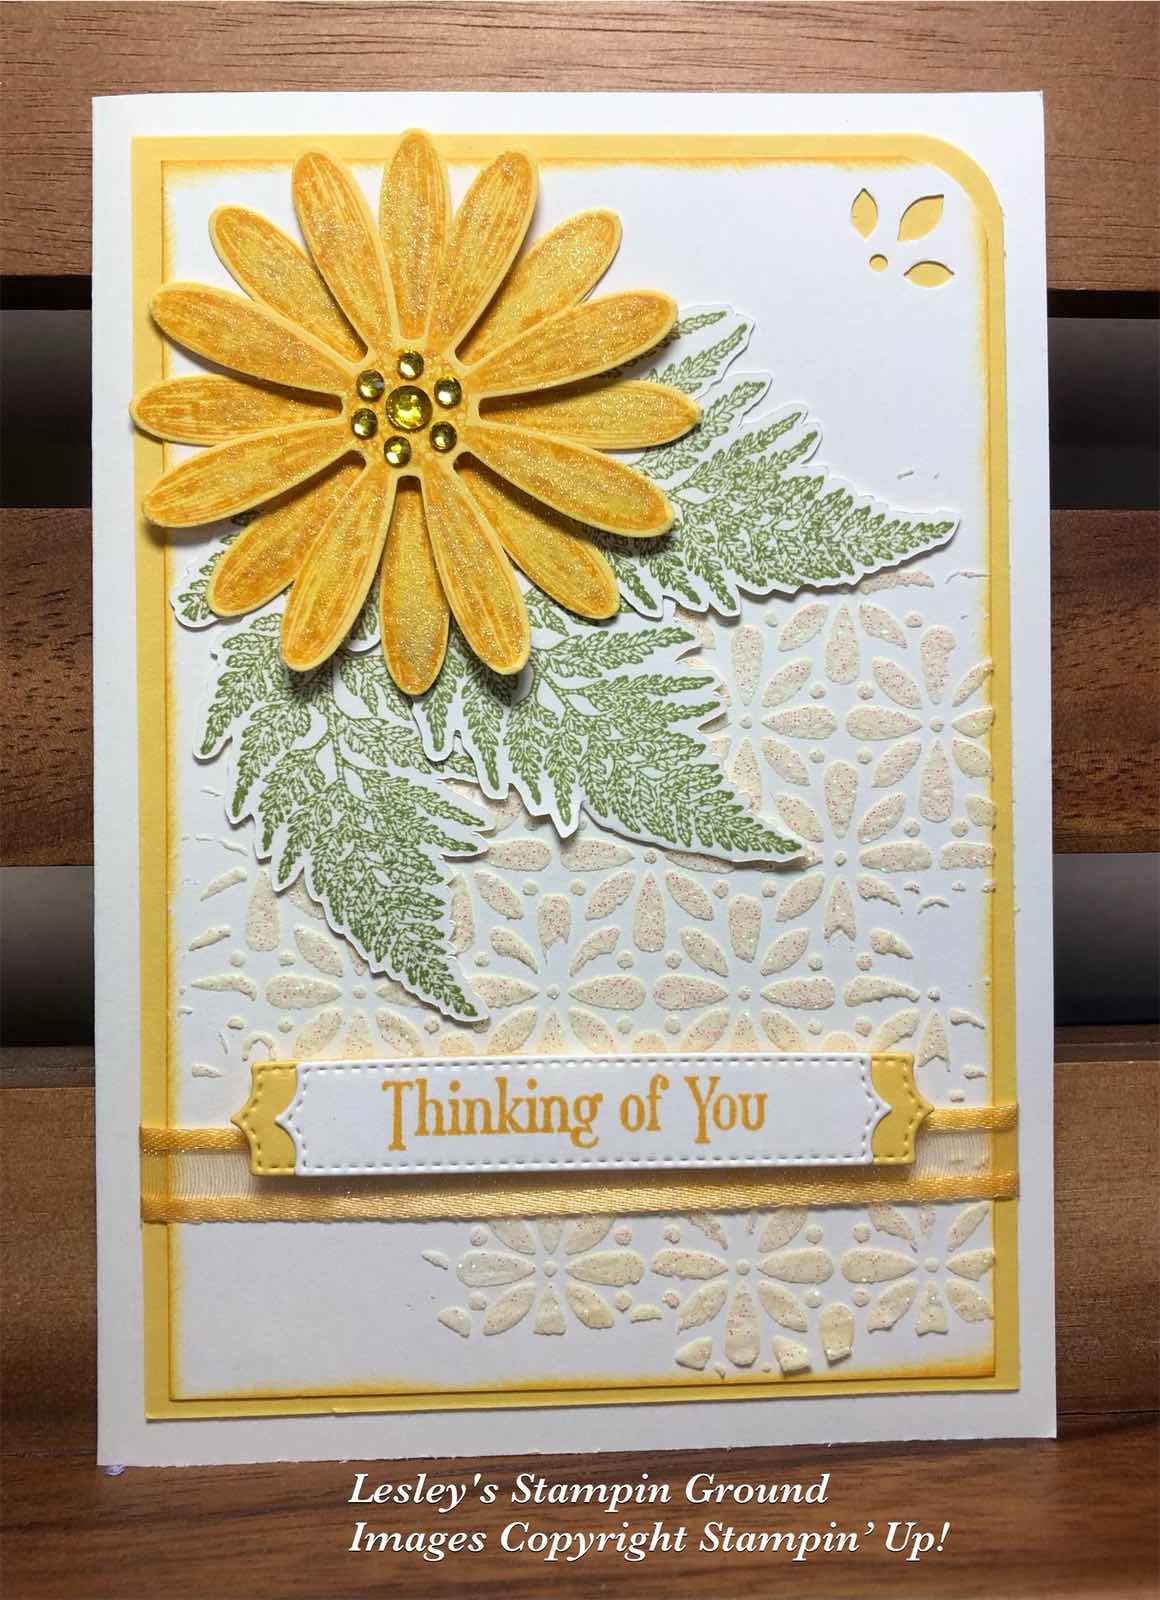
I coloured the Shimmery White Embossing Paste (#145645) with a very small amount of So Saffron ink refill (#105225). A small amount goes a long wag. To mix this I put a small amount of the embossing paste onto a Silicone Craft Sheet (#127853) and gradually added the ink refill till it was the coloured I wanted. Using one of the Butterflies & Flowers Layering Decorative Masks (#158142), I applied the embossing paste with a Palette Knife (#142808) onto the Very Vanilla card (#106550). I didn't want this perfectly embossed.

The daisy and leaves are from the Daisy Lane stamp set (#149325). The flower was stamped twice onto Daffodil Delight card (#121680) with Daffodil Delight ink (#147094). Clear Wink Of Stella (#141897) was added to the petals. These were punched with the Daisy Punch (#143713) and attached with a Stampin’ Dimensional (#104430), offsetting the petals. The leaves were stamped with Pear Pizzaz ink (#147104) and fussy cut. 

I punched the corner with the Detailed Trio Punch (#146320), then attached the Very Vanilla card to the Daffodil Delight card. Before wrapping the ribbon around the card, I also coloured this as I didn't have the colour I wanted. I used the Pale Papaya Open Weave Ribbon (#155672) and coloured it with Daffodil Delight ink and a Blending Brush (#153611).

“Thinking Of You” from Quiet Meadow stamp set (#155082) was stamped with Daffodil Delight ink, then cut with a Potted Succulents Die (#154330). I cut the Daffodil Delight card also with the same die, cut it in half then attached it to the back of the sentiment. This was attached with Stampin’ Dimensionals. 

The leaves and daisy were attached to the card with Mini Glue Dots (#103683). Before adding the embellishments to the flower centre I also coloured these using the Dark Daffodil Delight Stampin’ Blend (#154883), colouring the Rhinestone Basic Jewels (#144220). 

The retiring products used here are the Daisy Lane stamp set, Daisy Punch and the Detailed Trio punch.

Don’t forget to check the retiring list on the following link-

TIP: (1)When colouring ribbons I would usually use white or very vanilla ribbons but this worked with the Pale Papaya being a light colour. 
(2)When using coloured embossing paste I usually have extra card ready to use any excess paste, so as not to waste it. If it is used without adding colour it can be returned to the jar.
(3) The embossing paste will set very quickly, so work quickly and wash the mask, palette knife and silicon mat as soon as finished.

“Love what you do and share what you love.”


Tuesday, 8 March 2022

Butterflies & Flowers Layering Decorative Masks

Hi friends,

I hope that everyone in the flood areas around Sydney are safe . I can’t believe how much these floods have affected so many areas on the East coast of Australia. So devastating for so many. Take care and stay safe everyone.

I am lucky enough not to be in any of the affected flood areas in Brisbane so I can still enjoy my time in the craft room. Here is my latest card.


I cut a circle from a piece of scrap card using the largest die from the Layering Circles Dies (#151770). Then I positioned this on the Basic White card front (#159228) then placed one of the masks from the Butterflies & Flowers Layering Decorative Masks (#158142) on top. I found that using the Stamparatus (#148187) makes it easy to keep these in place with the magnet.

I added a drop of the Fresh Freesia ink (#155612) to a small amount of Shimmery White Embossing Paste (#145645) and mixed this together. I did this on a Silicon Craft Sheet (#127853). Then using a Palette Knife (#142808) I applied the coloured embossing paste over the mask. After removing the mask I was left with a circular image. This doesn’t take long to dry so put the card aside while you do the rest of the elements. However ensure you wash as soon as possible the mask, palette knives and silicon mat.

The flowers from the Honeybee Home stamp set (#157943) were stamped with Tuxedo Black Memento ink (#132708). The flowers were coloured with Stampin’ Blends - Daffodil Delight (#154883), Pale Papaya (#155519), Flirty Flamingo (#154884) & Fresh Freesia (#155518) and Granny Apple Green (#154885) for the leaves. The flowers and the foliage were cut with the Honey Blooms Dies (#157951). I used Granny Apple Green card (#147014) for the foliage. Adhesive Sheets (#152334) were adhered to the Granny Apple Green card before cutting with the dies. The flowers were attached to the card with Stampin’ Dimensionals (#104430). 

I punched the corner of the card front with the Detailed Trio punch (#146320), then matted the card front with Fresh Freesia card (#155614). The sentiment is from the Home & Garden stamp set (#157910) and stamped with Fresh Freesia ink (#155611). I cut this with a die from the Waves Dies (#158840). The White Glittered Organdy Ribbon (#156408) was threaded through the label and wrapped around the cardfront. The base card is Basic White. 

The purple Playing With Patterns Resin Dots (#152467) were attached to the card.


TIP: When colouring the embossing paste I always mix more paste than I probably need as I want enough without having to mix more colour. I then always have an extra piece of card ready so if I do have extra, I can use the excess paste so it doesn’t go to waste. I then have another piece of card for another project.


“Love what you do and share what you love.”


Sunday, 2 January 2022

Butterflies & Flowers Layering Decorative Masks

Hi & welcome again,

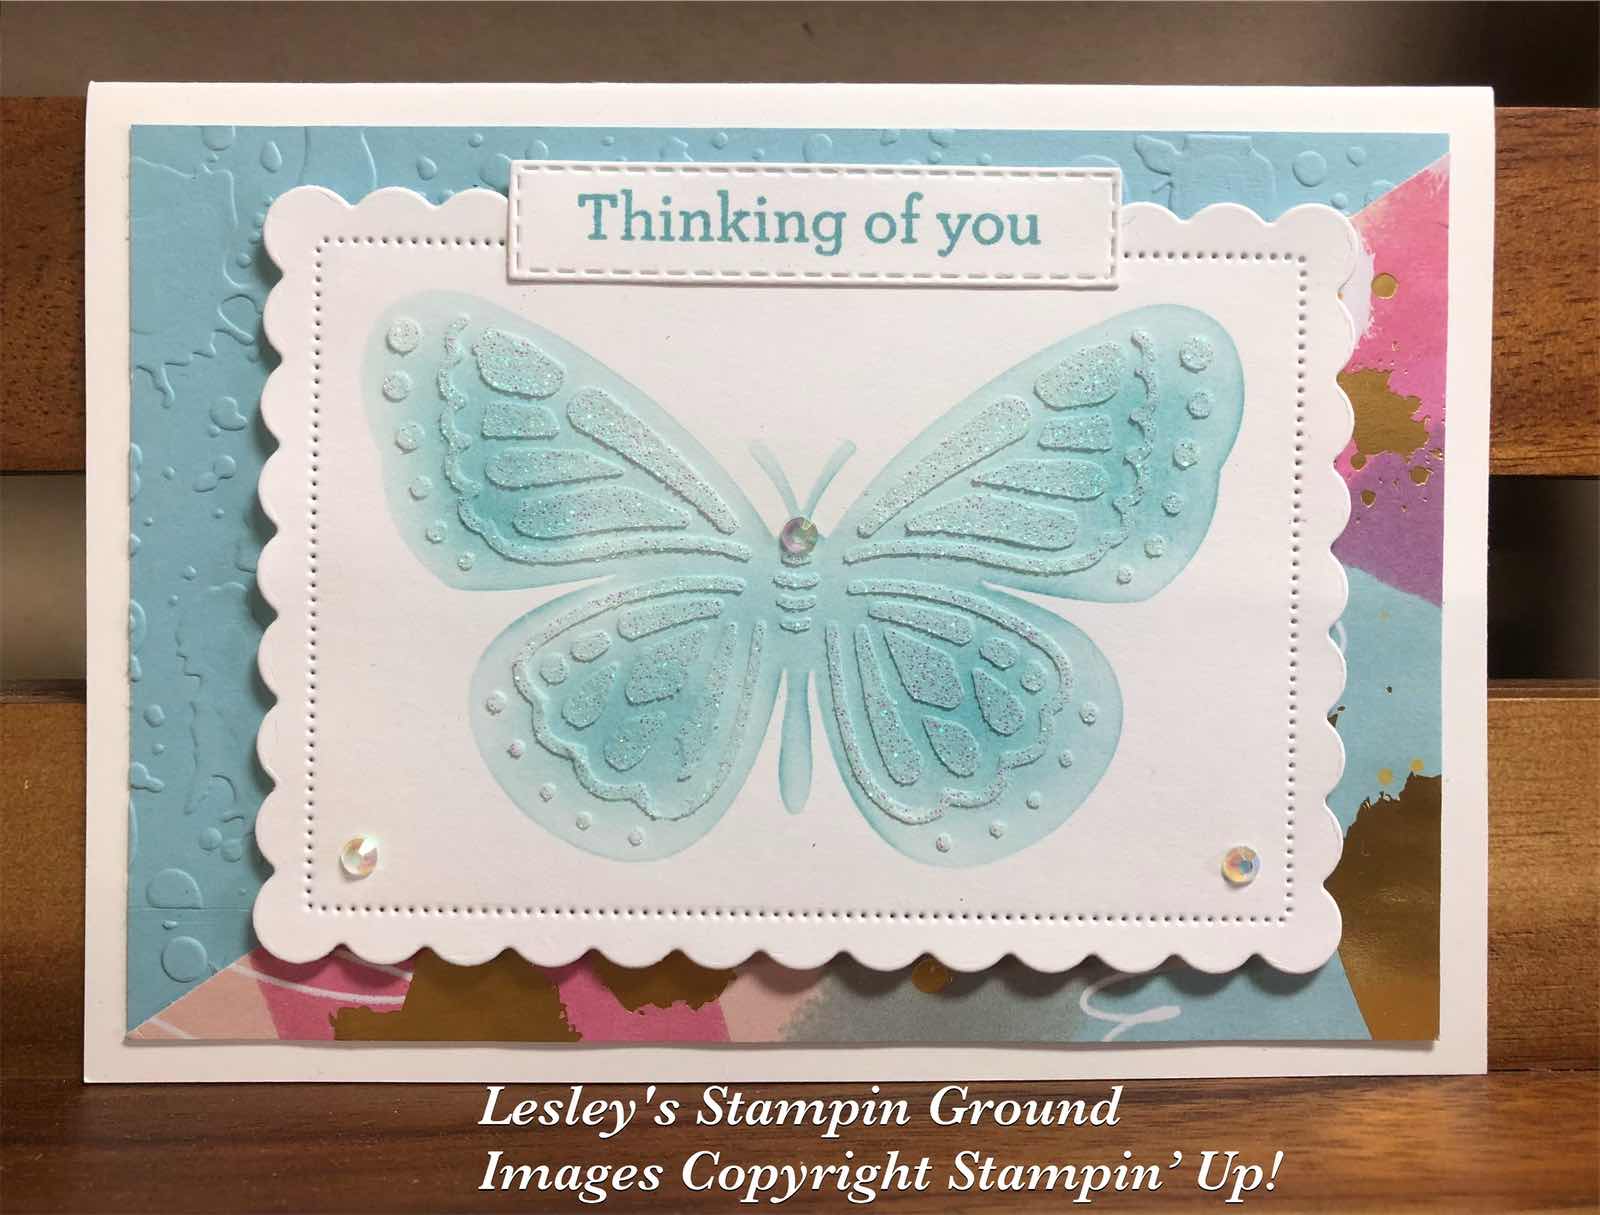
When we look through a new catalogue and there is so much to take in, it is easy to miss some great products. I hope you don't miss the Butterflies & Flowers Layering Decorative Masks (#158142). I love the layering of the butterfly.


Firstly I cut the Basic White card (#159228) using a Scalloped Contours Die (#155560). There are 2 butterfly masks so I used the solid one first. I positioned this on the die cut white card and using a Blending Brush (#153611) with Balmy Blue ink (#147105), I coloured the background of the butterfly. I then positioned the detailed mask of the butterfly over the coloured image. I used a Palette Knife (#142808) to apply the Shimmery White Embossing Paste (#145645). I love the effect which is always better in real life. This doesn’t take long to dry so ensure you wash the palette knife & mask immediately to remove the excess paste.

I cut a piece of the Abstract Beauty Specialty Designer Series Paper (#158039) and attached this to the Balmy Blue card (#147007) which was dry embossed with the Splatters from the Stripes & Splatters 3D Embossing Folders (#157980). The scalloped rectangle was attached to the card front with Stampin’ Dimensionals (#104430).

“Thinking Of You” is from the Beauty Of Friendship stamp set (#154983) and stamped with Balmy Blue ink then cut with a Stitched Rectangles Die (#151820). I added the Iridescent Rhinestone Basic Jewels (#158130) to the card.

Tip: When using the embossing paste, apply the paste then wipe the knife over the whole image to remove any excess and return to the jar. No need to wast any. Also make sure you close the jar tight to stop it drying out. I also put the jar into a small plastic bag and keep it well sealed. This will ensure it will last longer and not dry out.

“Love what you do and share what you love.”


Friday, 10 December 2021

Beauty Of Tomorrow

Hello again,

The Beauty Of Tomorrow Bundle (#156819) consists of the Beauty Of Tomorrow stamp set (#156459) and the Beautiful Leaves Dies (#156468).


I used one of the Basic Patterns Decorative Masks (#150697) and the Shimmery White Embossing Paste (#145645) on the Basic White card front (#159228). This adds a beautiful sparkle and texture. This doesn’t take long to dry, but you can use the Heat Tool (#129056) if desired. I find doing this first, it is dry by the time you stamp and cut everything.

The leaves and the birds are all from the Beauty Of Tomorrow stamp set. The inks used are Bumble Bee (#153116), Soft Succulent (#155778) and Calypso Coral (#147101). These were cut with the Beautiful Leaves dies.

I attached the green leaves with Mini Glue Dots (#103683) and the yellow leaves and birds with Stampin’ Dimensionals (#104430).

The sentiment from Shaded Summer stamp set (#155783) was stamped with Calypso Coral ink and I used the Hippo & Friends Dies (#153585) to cut the Basic White label & Calypso Coral (#124392) label. The card front was attached to the Calypso Coral card, then I wrapped the White Glittered Organdy Ribbon (#156408) around the card. The silver circles from the Silver & Clear Epoxy Essentials (#155567) were added to the sentiment.

Don’t forget to check out the retiring products here - lesleyjendra.stampinup.net and includes this bundle. There are some great bargains and who doesn’t love a bargain.

“Love what you do and share what you love.”


Thursday, 25 November 2021

Adorning Designs Decorative Masks

Hi lovely friends,

Every time I make a Christmas card I think I have probably made enough but then decide I need to use another product, so here is yet another Christmas card. It’s a very easy one to make with lots of sparkle and as usual looks much nicer in reality.


I used the snowflakes mask from the Adorning Designs Decorative Masks (#156328) along with the Shimmery White Embossing Paste (#145645). Using one of Palette Knives (#142808), I wiped the embossing paste over the mask and onto the Balmy Blue card (#147007). This paste dries quickly so ensure you wash the mask & palette knife as soon as possible to remove all paste from the utensils.

After the Embossing Paste dried on the card I wrapped the White Glittered Organdy Ribbon (#156408) around the card front, then attached this to the Basic White base card (#159228).

The sentiment from the Peaceful Deer stamp set (#156891) was stamped with Balmy Blue ink (#147105) and I used a die from the Ornate Frames (#150664) to cut the sentiment. 

The Wonderful Snowflake (#156340) and the sentiment were attached to the card with Stampin’ Dimensionals (#104430) and the embellishments are the Elegant Faceted Gems (#152464).

“Love what you do and share what you love.”


Sunday, 31 October 2021

Harvest Meadow Designer Series Paper

Hello friends,

Here is a beautiful verse for a card to send to someone for no real reason, and isn’t it nice to receive an unexpected card.


I added texture to the Basic White card front (#159228) using a Basic Patterns Decorative Mask (#150697) and the Shimmery White Embossing Paste (#145645) and applied it with a Palette Knife (#142808). This embossing paste dries quickly so ensure you wash the mask and palette knife immediately you are finished using them.

I cut the scallops with a die from the Penned Flowers Dies (#155557) from Misty Moonlight card (#153086). This was attached to the Harvest Meadow Designer Series Paper (#156494), then attached to the embossed card front.

The sentiment is from the Encircled In Friendship stamp set (#155408) and stamped with Misty Moonlight ink (#153118). This and the Misty Moonlight card under the sentiment were cut with Hippo & Friends Dies (#153585). This was attached to the card with Stampin’ Dimensionals (#104430). A clear Elegant Faceted Gem (#152464) was attached to the sentiment.

“Love what you do and share what you love.”

Stay safe & keep crafting!!


Monday, 7 December 2020

Ornate Layers Dies

Hello friends,

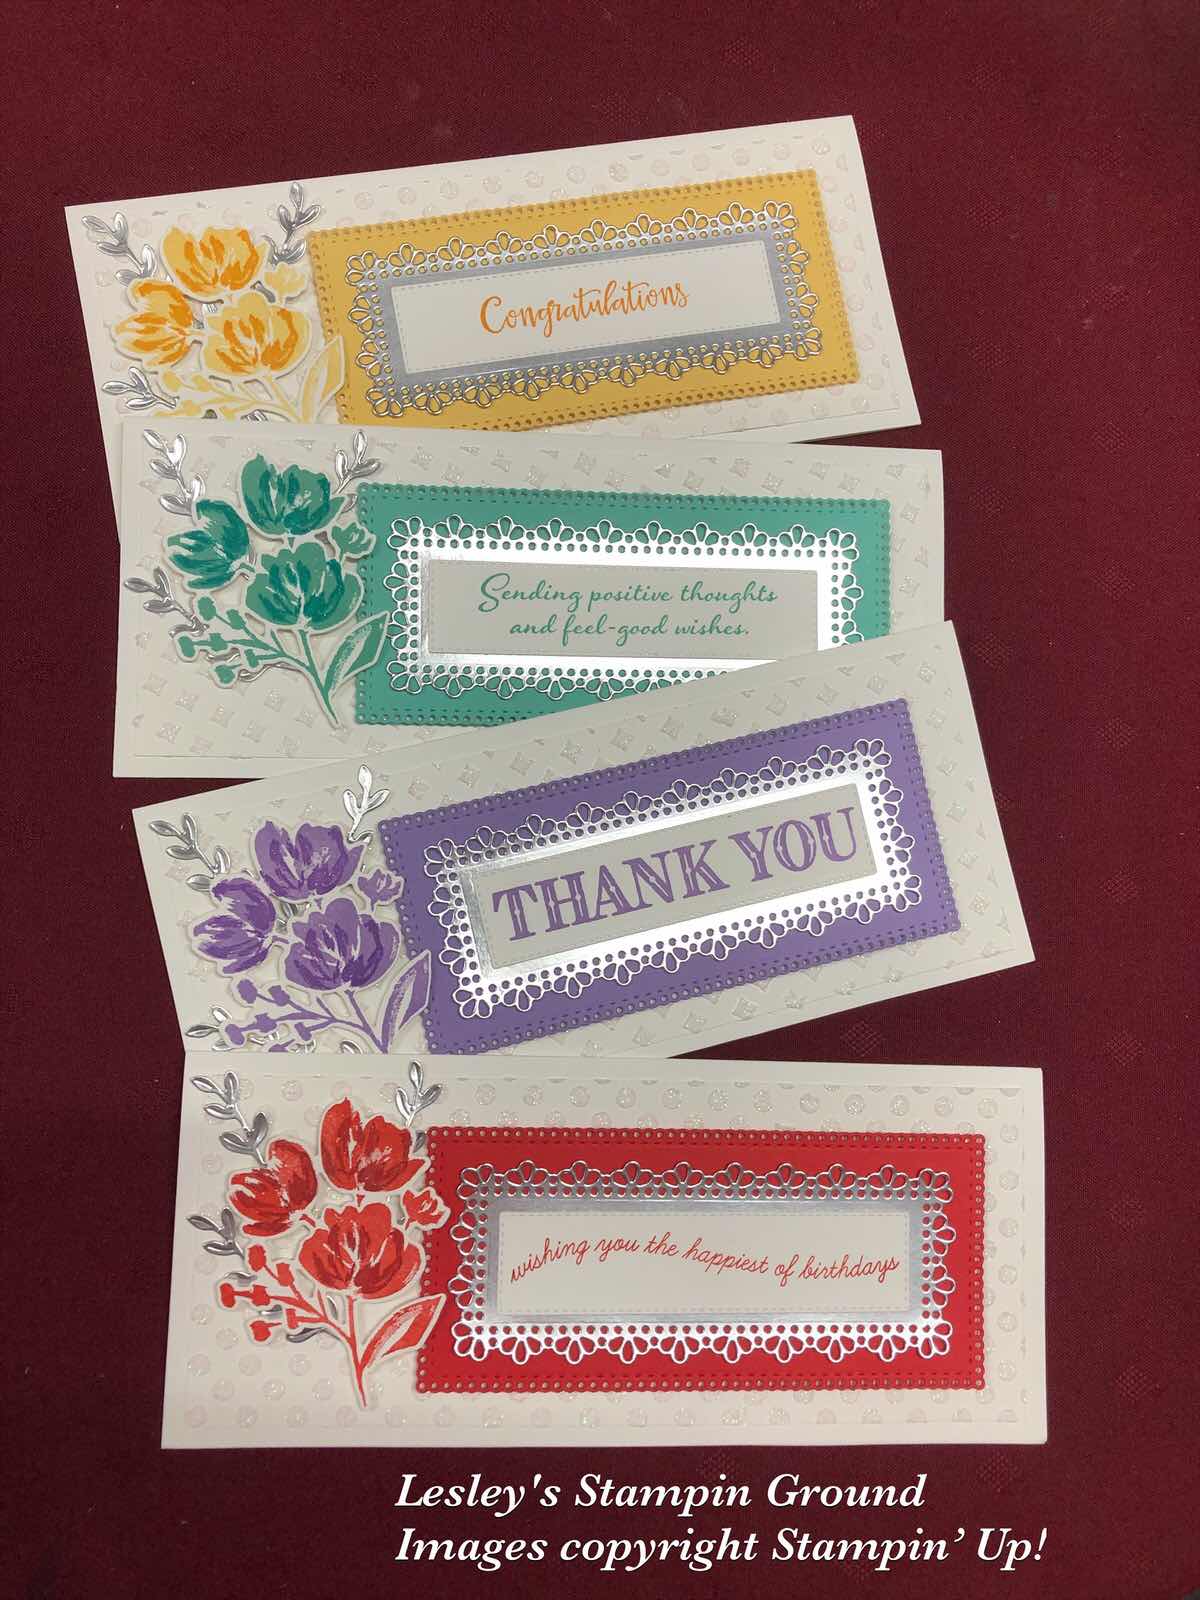
Today I have made 4 cards all the same, just using different colours and sentiments. I love how this worked with a slimline card.


The Whisper White base cards (#106549) were cut at 21cmx18cm and scored at 9cm.
I applied the Shimmery White Embossing Paste (#145645) to the card fronts using Decorative Masks (#150697) and a Palette Knife (#142808)
The flowers were stamped with the floral image from the Art Gallery stamp set (#154421). This is a Two-Step stamp, so I stamped the lighter image for the base of the flowers and the darker colour on top, then cut them with a co-odinating die from the Floral Gallery Dies (#154316). These are available as the Art Gallery bundle (#156227) and will be available from 5th January. 
I used the Ornate Layers dies (#152726) to cut the coloured card, the Silver Foil (#132178) and the sentiment.
The colours I have used for the top card are So Saffron ink (#147109) and Mango Melody ink (#147093) with So Saffron card (#108611).
The next card is Coastal Cabana ink (#147097) and Bermuda Bay ink (#147096) with Coastal Cabana card (#131302)
The 3rd card is Highland Heather ink (#147103) and Gorgeous Grape ink (#147099) with Highland Heather card (#147010).
The 4th card is Poppy Parade ink (#147050) and Cherry Cobbler ink (#147083) with Poppy Parade card (#121694).
“Congratulations” is from the Peaceful Moments stamp set (#151595).
“Sending Positive Thoughts” is from the Positive Thoughts stamp set (#151490).
“Thank You” is from the Ornate Thanks stamp set (#149471).
“Wishing you the Happiest of Birthdays” is from the Quite curvy stamp set (#154430).
The Silver Foil leaves are cut with a Curvy Die (#154319). I used the Adhesive sheet (#152334) on the back of the foil before cutting the leaves and I used Stampin’ Dimensionals (#104430) and Mini Stampin’ Dimensionals (#144108) to attach the sentiment and flowers to the card.
I hope your day has been amazing!!

“Love what you do and share what you love.”


Saturday, 5 December 2020

Art Gallery Bundle

Hello everyone,

Today’s card shows 2 stamp sets which will be available in January - the Art Gallery stamp set (#154421) and the Many Messages stamp set (#154510).


Firstly I created the background on the Very Vanilla card (#106550) using Shimmery White Embossing Paste (#145645) and adding a drop (a little goes a long way) of So Saffron re-inker (#154905). I mixed the ink with the paste then using one of the Basic Pattern Decorative Masks (#150697), placed the mask on top of the card then I applied the paste over the top. I didn't want a perfect finish so just randomly spread the paste using a Palette Knife (#142808). This embossing paste sets quickly, so wash the mask and palette knife as soon as possible. I usually always have some extra paste so I apply it to extra card to use at a later date so as not to waste it. If it’s not coloured it can be returned to the tub.
I attached this card and a piece of the So Saffron Designer Paper from the Subtles 6”x6” Designer Series Paper (#153072) to Crushed Curry card (#131288). I wrapped the Gold 3/8” Metallic-Edge Ribbon (#144146) around the card front before attaching the card to the Very Vanilla base card.
The top flower was stamped with So Saffron ink (#147109) for the base image followed by Crushed Curry ink (#147087) for smaller images of the flower. The flower below the sentiment was stamped with Crushed Curry ink. Both flowers were cut with the co-ordinating dies from the Floral Gallery Dies (#154316). The leaves cut from the Soft Sea Foam card (#147012) were cut with a Curvy Die (#154319). These were attached to the card with Mini Glue Dots (#103683).
The sentiment is from the Many Messages stamp set and cut with a Hippo & Friends Die (#153585). The Gold Foil Sheet (#132622) was also cut with one of these dies. The sentiment and flowers were all attached using Stampin’ Dimensionals (#104430). A Gold Glitter Enamel Dot (#152155) was attached to the lower corner of the card.
Enjoy the rest of your weekend.

“Love what you do and share what you love”


Friday, 30 October 2020

Evergreen Forest 3D Embossing Folder

Hello and welcome,

On today’s card I have used the Shimmery White Embossing Paste (#145645) on the embossed trees, giving a lovely glitter to the trees.


I dry embossed the Whisper White card front (#106549) using the Evergreen Forest 3D Embossing Folder (#153576). Then I lightly applied the Shimmery White Embossing Paste over the embossed trees. I daubered the edges of the card front with Shaded Spruce ink (#147088). I attached the Classic Christmas 6”x6” Designer Series Paper (#155969) to the card. “Peace Joy Love” is from the Dove Of Hope stamp set (#c153406) and stamped with Shaded Spruce ink. “Merry Christmas” from the Perfectly Plaid stamp set (#p149418) was stamped with Real Red ink (#147084). Both these sentiments are cut with the Stitched Rectangles Dies (#151820) and attached with Stampin’ Dimensionals(#104430). The swirl is Red Foil from the Red & Green Foil Sheets (#153510) and cut with a Stitched Stars Die (#150653) and glued to the card using the Fine-Tip Glue Pen (#138309). I added the Red Rhinestone Basic Jewel (#146924) to the sentiment.

“Love what you do & share what you love”.

Have a fantastic day.


Tuesday, 25 August 2020

Dove Of Hope Bundle

Hi & welcome,

This beautiful dove is cut with the Detailed Dove Dies (#153526) and is part of the Dove Of Hope Bundle (#c155158).


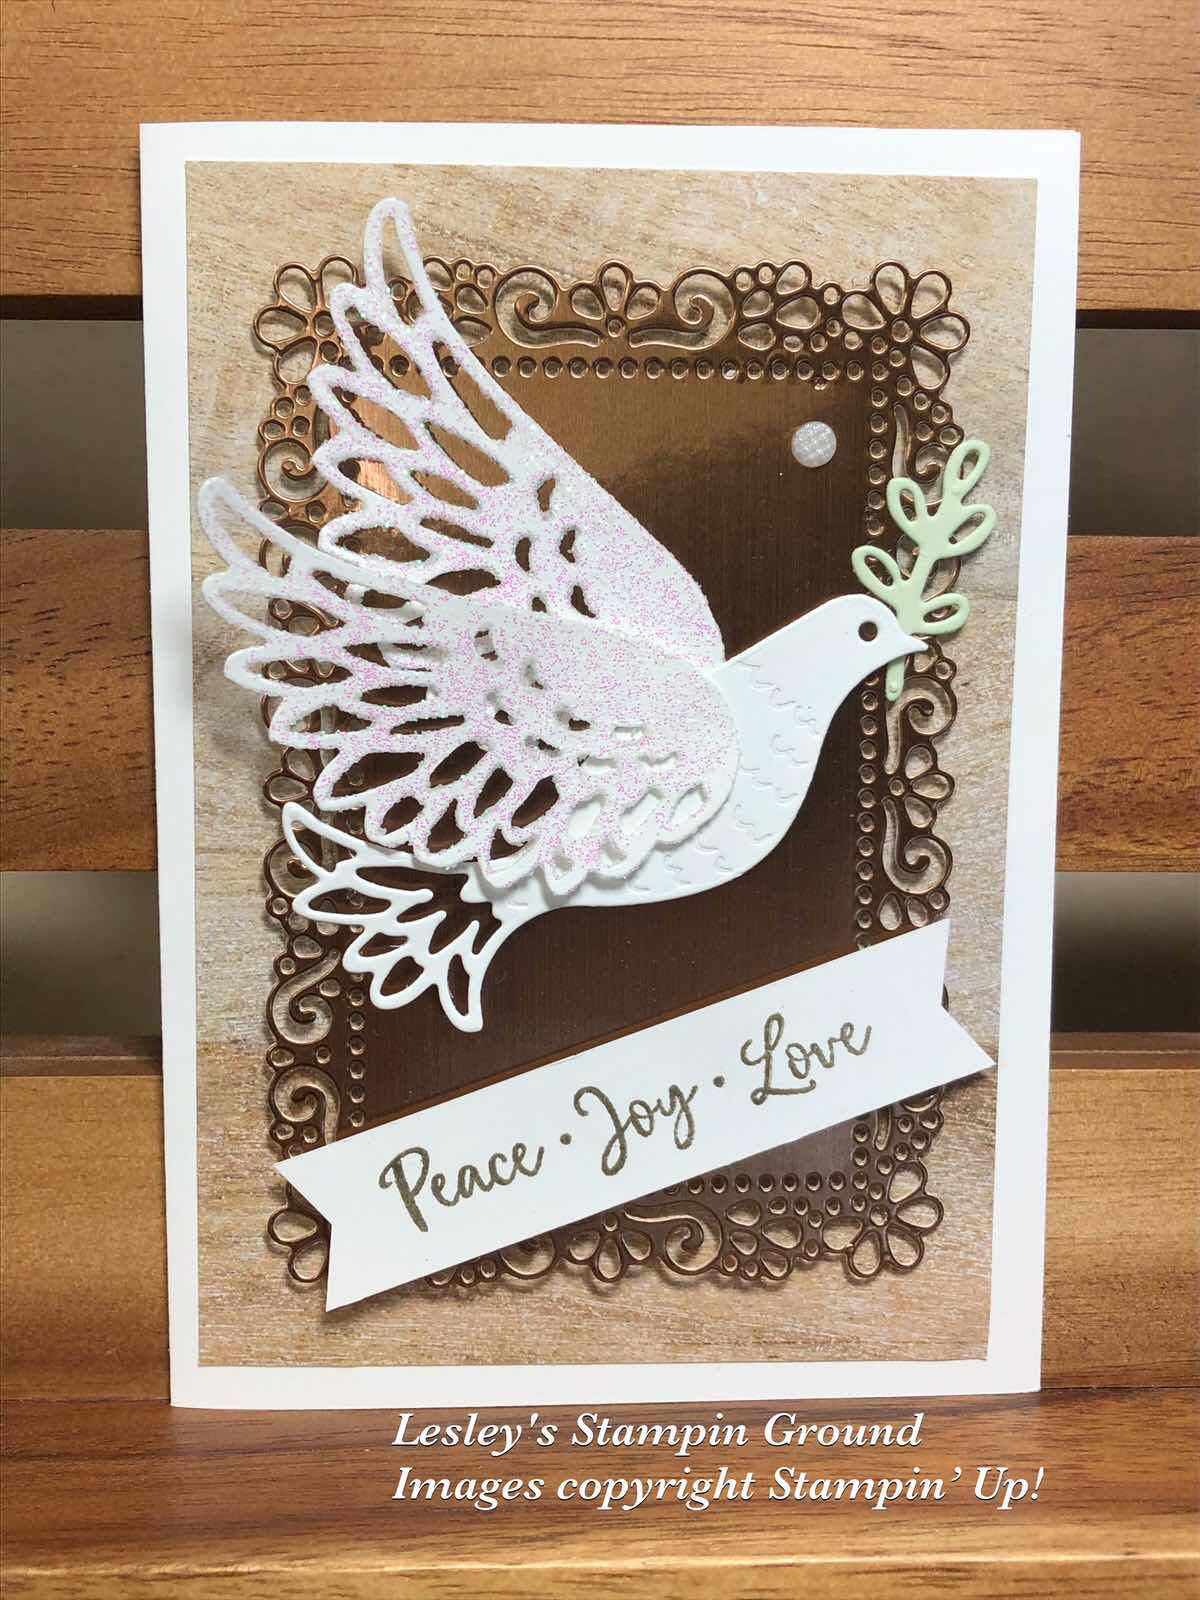
The wings and body of the dove were cut from Whisper White card (#106549). I applied some Shimmery White Embossing Paste (#145645) to the wings, giving them a lovely shimmery texture. I assembled the dove using Mini Glue Dots (#103683) and Stampin’ Dimensionals (#104430). I attached the In Good Taste Designer Series Paper (#152494) to the Whisper White base card (#106549). The Bronze card from the Brushed Metallic 12”x12” cardstock (#153524) was cut with an Ornate Layers Die (#152726), then attached to the DSP with Stampin’ Dimensionals. The dove was attached to this also with Dimensionals. I cut the branch from Soft Sea Foam card (#147012) and this was attached to the card with Mini Glue Dots. The sentiment from the Dove Of Hope stamp set (#153406) was stamped with VersaMark (#102283), heat embossed with Gold Stampin’ Emboss Powder (#109129) and set with the Heat Tool (#129056). I used the Banners Pick A Punch (#153608) to cut each end of the banner. An Elegant Faceted Gem (#152464) was added to the card.

Have a great day and stay safe!!