Showing posts with label #whitestampinembosspowder. Show all posts

Saturday, 3 February 2024

Lovely and Sweet

Hi friends,

The Lovely & Sweet stamp set (#162617) is where you will find this image on today’s card.


I stamped this with VersaMark (#102283) onto Bubble Bath card (#161727) and added White Stampin’ Emboss Powder (#155554) which was then set with the Heat Tool (#129056). I highlighted the 2 flowers by colouring them with the dark Bubble Bath Stampin’ Blends (#161675). This was then cut with one of the Perennial Postage dies (#162607). I dry embossed the card with one of the Basics 3D Embossing Folders (#161598). I cut a piece of Basic Black card (#121688) slightly larger than the Bubble bath card and taped these together. This was then taped to the Berry Burst card (#144249) and attached to the Basic White base card (#159228).

“Congratulations” is also from the Lovely & Sweet stamp set and stamped with Berry Burst ink (#147143). A Sending Die (#159271) was used to cut the sentiment. 

I wrapped a piece of (retired) ribbon around the card, then attached the sentiment with Mini Stampin’ Dimensionals (#144108). The heart embellishments are also retired.

“Love what you do and share what you love.”

INSPIRE. CREATE. SHARE. 


Thursday, 13 April 2023

Butterfly Brilliance

Hello stampin’ friends,

I love butterflies so a little disappointed that the Butterfly Brilliance stamp set (#155092) and co-ordinating Brilliant Wings dies (#155523) are retiring.


Firstly I added colour to a piece of Basic White card (#159228) using Blending Brushes (#153611) with Pale Papaya ink (#155670), Flirty Flamingo ink (#147052), Tahitian Tide ink (#159210) and Highland Heather ink (#147103). I then stamped the butterflies with VersaMark (#102283) and used the White Stampin’ Emboss Powder (#155554) which was set with the Heat Tool (#129056). The butterflies were cut with a Brilliant Wings die. There are 6 butterflies so will use the others for another project.


I dry embossed the Flirty Flamingo card (#141421) with the Gingham Embossing Folder (#157627) and attached this to the Basic White base card. I used a die from the Irresistible Blooms (#161149) to cut the Silver Foil Specialty Paper (#156457). This was backed with Adhesive Sheet (#152334) so it makes it easy to attach it to the card front.

“Thinking Of You” is from the Go To Greetings stamp set (#158763) and I stamped this with Flirty Flamingo ink. A die from the Pretty Pillowbox dies (#156321) was used to cut the sentiment. 

The butterflies and sentiment were all attached to the card with Stampin’ Dimensionals (#104430). The Flat Adhesive-Backed Pearls (#160449) were added to the centre of the butterflies.

The retiring products are the Butterfly Brilliance stamp set, Brilliant Wings dies, Gingham Embossing Folder & Pretty Pillowbox dies.


“Love what you do and share what you love.”


INSPIRE. CREATE. SHARE.


Wednesday, 15 February 2023

Queen Bee

Welcome again,

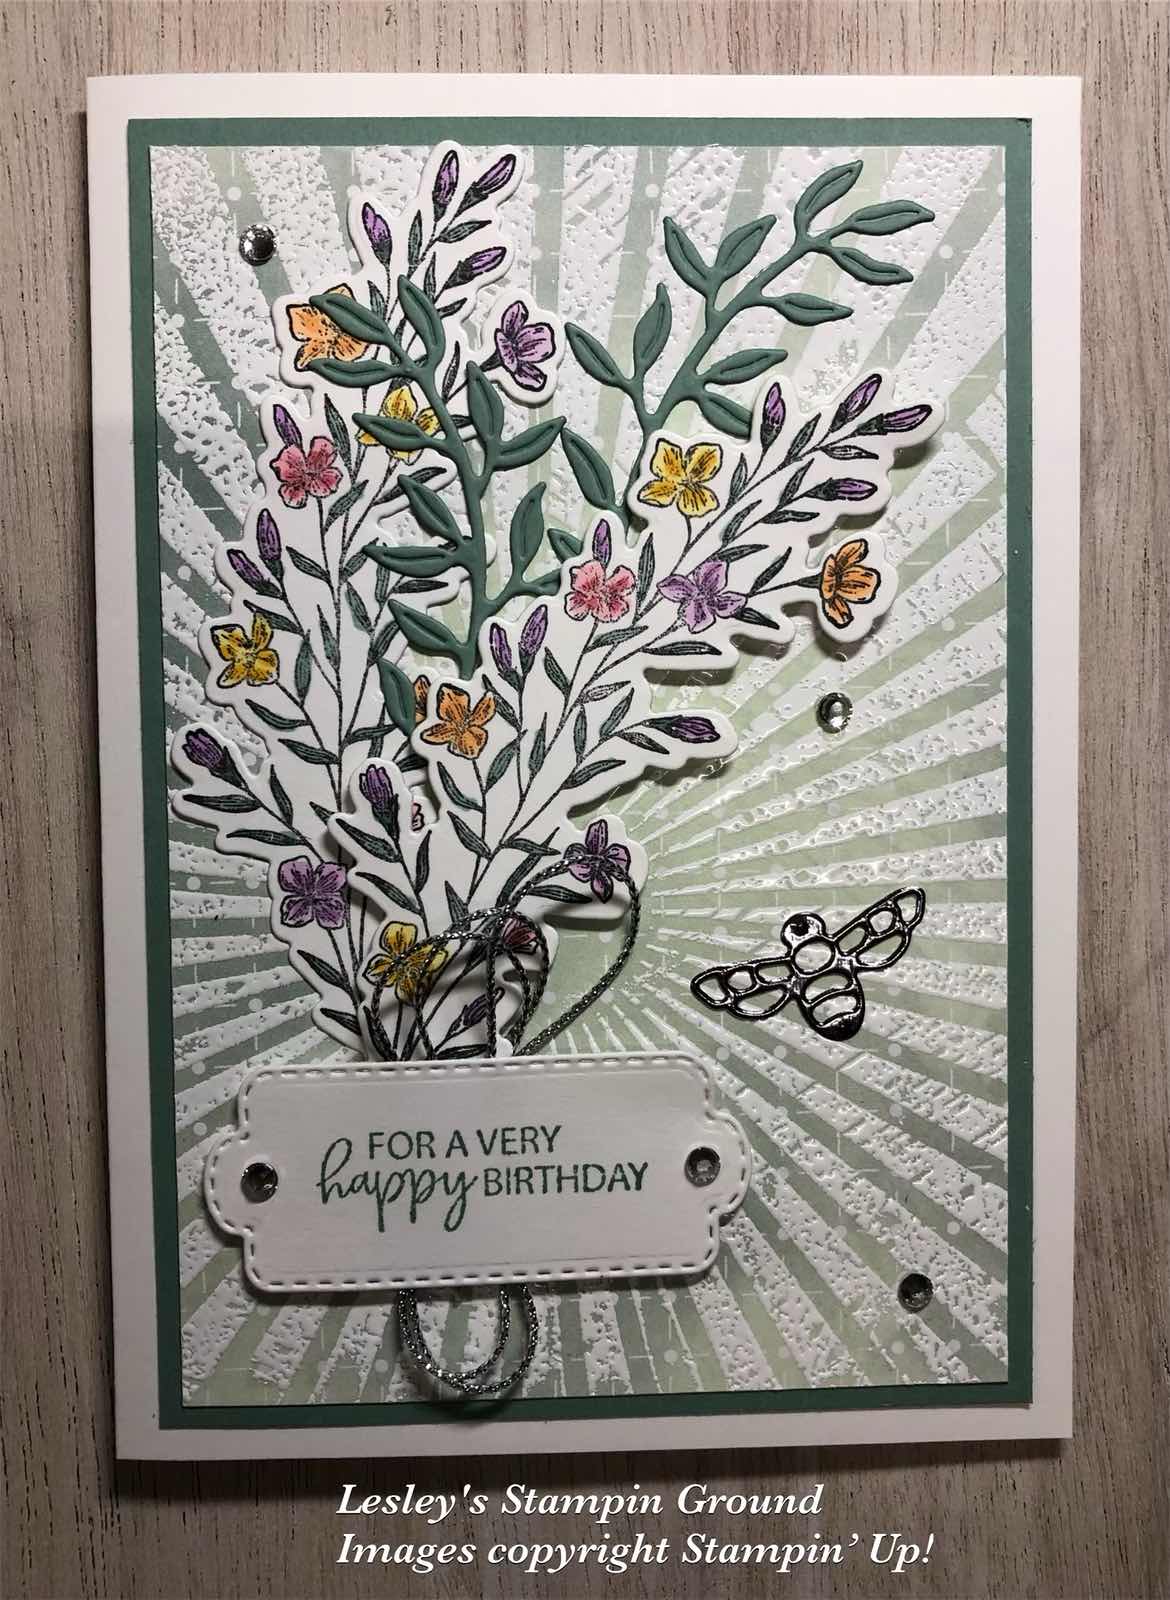
These dainty flowers are from the Queen Bee stamp set (#160476) and coloured with Stampin’ Blends.


The flowers were stamped with Tuxedo Black Memento ink (#132708) on Basic White card (#159228). The Stampin’ Blends to colour these are Soft Succulent (#155521), Fresh Freesia (#155518), Highland Heather (#154887), Daffodil Delight (#154883), Flirty Flamingo (#154884) and Pale Papaya (#155519).

The Queen Bee Dies (#160484) were used to cut these flowers, the leaves, bee and label for the sentiment. I used the Silver Foil (#156457) for the bee and Soft Succulent card (#155777) for the leaves. 

For the card front I used the Rays Of Light Background stamp (#158925) to stamp on the Hello Irresistible 6”x6” Designer Series Paper (#161139). This was stamped with VersaMark (#102283) and embossed with White Stampin’ Emboss Powder (#155554) then set with the Heat Tool (#129056). This was matted with Soft Succulent card and attached to the Basic White base card.

The Soft Succulent leaves and the bee was backed with Adhesive Sheet (#152334). I usually use this adhesive for all detailed die cuts as it makes it so easy to attach them to the card. The floral images were attached with Mini Glue Dots (#103683) and Stampin’ Dimensionals (#104430). 

The Silver Simply Elegant Trim (#155766) was attached under the sentiment and the sentiment was attached with Stampin’ Dimensionals. The Rhinestone Basic Jewels (#144220) were added to the card.


“Love what you do and share what you love.”


INSPIRE. CREATE. SHARE.


Thursday, 8 September 2022

Daisy Garden background stamp

Hi again,

I have heat embossed the daisy image from the Daisy Garden background stamp (#155079) for this subtle coloured card.


The daisy image was stamped with VersaMark (#102283) onto Vellum Card stock (#106584), then embossed with White Stampin’ Emboss Powder (#155554) and set with the Heat Tool (#129056).

I cut the Soft Sea Foam card (#147012) with a Scalloped Contours Die (#155560), then cut the middle out using a Stitched Rectangles Die (#151820) to make a frame. I attached the Vellum to the “frame”.

The Leaf Fall 3D Embossing Folder (#159847) was used to dry emboss the Basic White card front (#159228). This was attached to the base card.

The “frame” was attached to the card with Stampin’ Dimensionals (#104430). “Thinking Of You” from the Go To Greetings stamp set (#158763) was stamped with Soft Sea Foam ink (#147102) and cut with another Stitched Rectangles die. The Elegant Faceted Gems (#152464) were added to the card & sentiment.


“Love what you do and share what you love.”


Friday, 22 April 2022

Elegantly Said stamp set

Hello & welcome again,

Today I am using a retiring stamp set - the Elegantly Said stamp set (#155095).


I stamped the beautiful flourish image several times on the Basic White card (#159228). I used VersaMark (#102283) and sprinkled this White Stampin’ Emboss Powder (#155554) then set it with the Heat Tool (#129056). I then lightly coloured the card using Blending Brushes (#153611) with Polished Pink ink (#155712), Fresh Freesia ink (#155611), Daffodil Delight ink (#147094) and Coastal Cabana ink (#147097).

I attached the white card to a piece of the Brushed Metallic 12”x12” cardstock (#153524). The Fresh Freesia Open Weave Ribbon (#155615) was wrapped around the card front before attaching this to the Basic White base card.

The flower and the sentiment are both from the Elegantly Said stamp set and stamped with Fresh Freesia ink. I stamped the flower using the Stamparatus (#148187). Once I stamped with the ink, I then re-stamped it with VersaMark and used Clear Stampin’ Emboss Powder (#155554) and set with the Heat Tool. This gives the shiny embossed look with the colour of ink used.

The flower was cut with a Painted Labels Die (#151605) and the sentiment and the gold were cut with the Hippo & Friends Dies (#153585). The flower & sentiment were attached to the card with Stampin’ Dimensionals (#104430). The Pastel Pearls (#154571) were added to the card.

“Love what you do and share what you love.”


Saturday, 26 February 2022

Heart & Home Doilies

Hello friends,

The deluge of rain and flooding is continuing in the south east of Qld, so I hope everyone is safe. I am lucky to be well & truely out of flood level, so can occupy myself in the craft room.

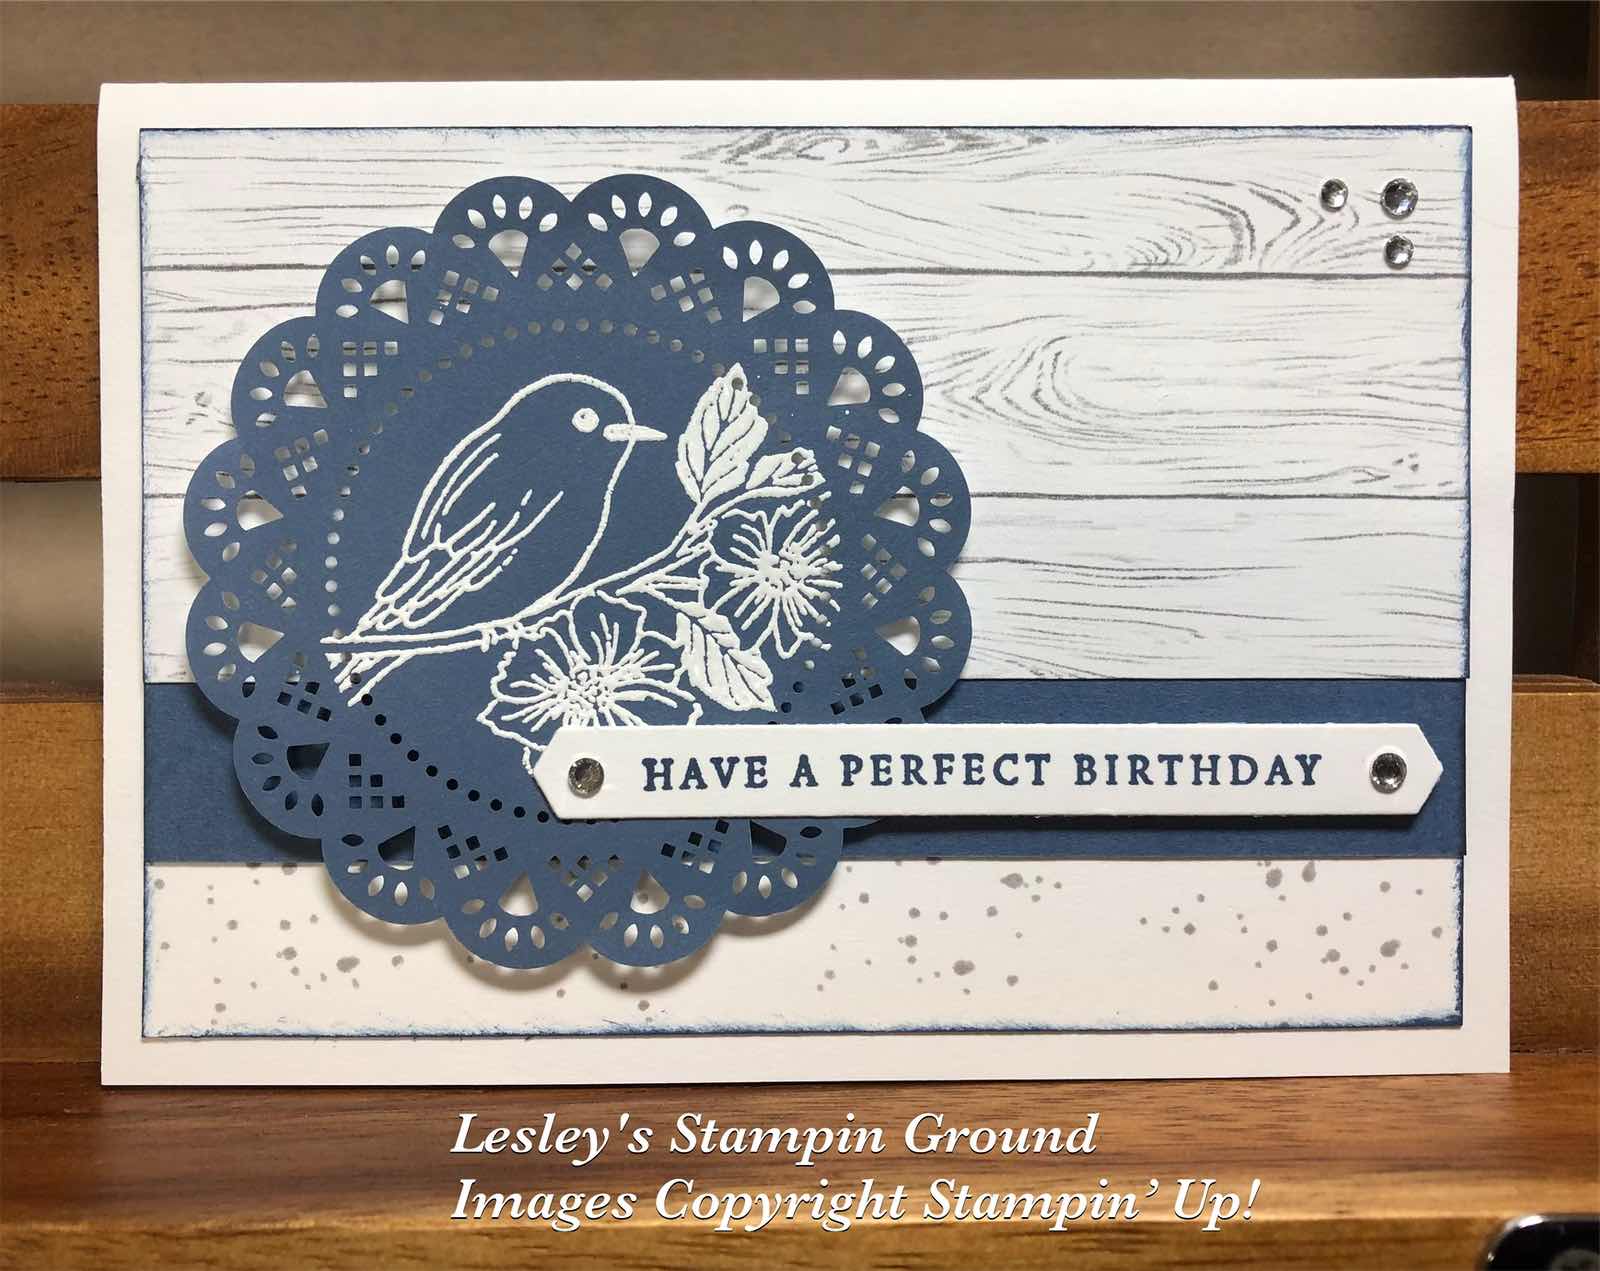
I have stamped on one of the Heart & Home Doilies (#157956) using an image from the Friendly Hello stamp set (#158075). This is a set from Sale-a-bration which is continuing till 16th March in Australia.


I cut a circle from a post-it note with a Layering Circles Die (#151770) to make a mask about the size of the dotted area of the inside of the doily. I then placed the mask over the doily (see above) so when I stamped the image it only stamped on the solid area. I stamped the image with VersaMark (#102283), removed the mask, then added the White Stampin’ Emboss Powder (#155554) and set with the Heat Tool (#129056).

I stamped the splotches from the Colour & Contour stamp set (#154994) with Smoky Slate ink (#147113) onto the Basic White base card (#159228). I added a strip of Misty Moonlight card (#153086) to the card, then added a piece of the Home & Heart Designer Series Paper (#157928). I daubered the edges of the card front with Misty Moonlight ink (#153118).

The sentiment is from the Blessings Of Home stamp set (#157930) and stamped with Misty Moonlight ink. I used the Messages Die (#154422) to cut the sentiment. The doily was attached to the card with Stampin’ Dimensionals (#104430). The right side of the sentiment was attached with Mini Stampin’ Dimensionals (#144108) and a Mini Glue Dot (#103683) on the left of the sentiment, as the doily is already on Dimensionals.

The embellishments used are the Rhinestone Basic Jewels (#144220).


“Love what you do and share what you love.”


Thursday, 16 December 2021

Eden’s Garden stamp set

Hello everyone,

All the stamped images here are from the Eden’s Garden stamp set (#157823).


I stamped the leaves on the Vellum cardstock (#106584) using VersaMark (#102283), then used the White Stampin’ Emboss Powder (#155554) and set it with the Heat Tool (#129056). I attached the Ever Eden 12”x12” Specialty Designer Series Paper (#159996) to the vellum and then attached the vellum to a piece of Basic White card (#159228) of the same size. I wrapped the Soft Succulent Open Weave Ribbon (#155780) around the card front.

The leafy image and sentiment were stamped with Soft Succulent ink (#155778). The circles were cut with the Layering Circles dies (#151770) and I used Soft Succulent card (#155777) under the stamped images. The larger circles were attached to the card with Stampin’ Dimensionals (#104430). The card front was attached to the Basic White base card. 

The Garden Gems (#159277) were added to finish the card.

The Ever Eden DSP and the Garden Gems are available till 3rd January or while stocks last.


I am taking a couple of weeks off so I will be back with my blog after Christmas. I would like to wish you all a very Merry Christmas and all the best for the New Year.

“Love what you do and share what you love.”


Tuesday, 14 December 2021

Shaded Summer

Hello crafty friends,


The White Stampin’ Emboss Powder (#155554) works well on darker coloured card like I have done here.


The floral image from Shaded Summer stamp set (#155783) was stamped with VersaMark (#102283) onto the Night Of Navy card (#106577), then sprinkled with the White Embossing Powder. This was set with the Heat Tool (#129056). I then dry embossed this card with the Timber 3D Embossing Folder (#156406). The Harvest Meadow Designer Series Paper (#156494) was attached to the card front.

“Happy Birthday” is also from the Shaded Summer stamp set and stamped with Real Red ink (#147084). This Basic White card (#159228) and the Real Red card (#106578) under the sentiment were cut with Stitched So Sweetly dies (#151690). I used Stampin’ Dimensionals (#104430) to attach the sentiment to the card. The white leaves under the sentiment were cut with the Summer Shadows Dies (which were from the last Sale-a-bration). These were glued to the card with the Fine-Tip Glue Pen (#138309). I added the Red Rhinestone Basic Jewels (#146924) to the flower centre and sentiment.

“Love what you do and share what you love.”


Friday, 13 November 2020

Ornate Style stamp set

Hi my friends,

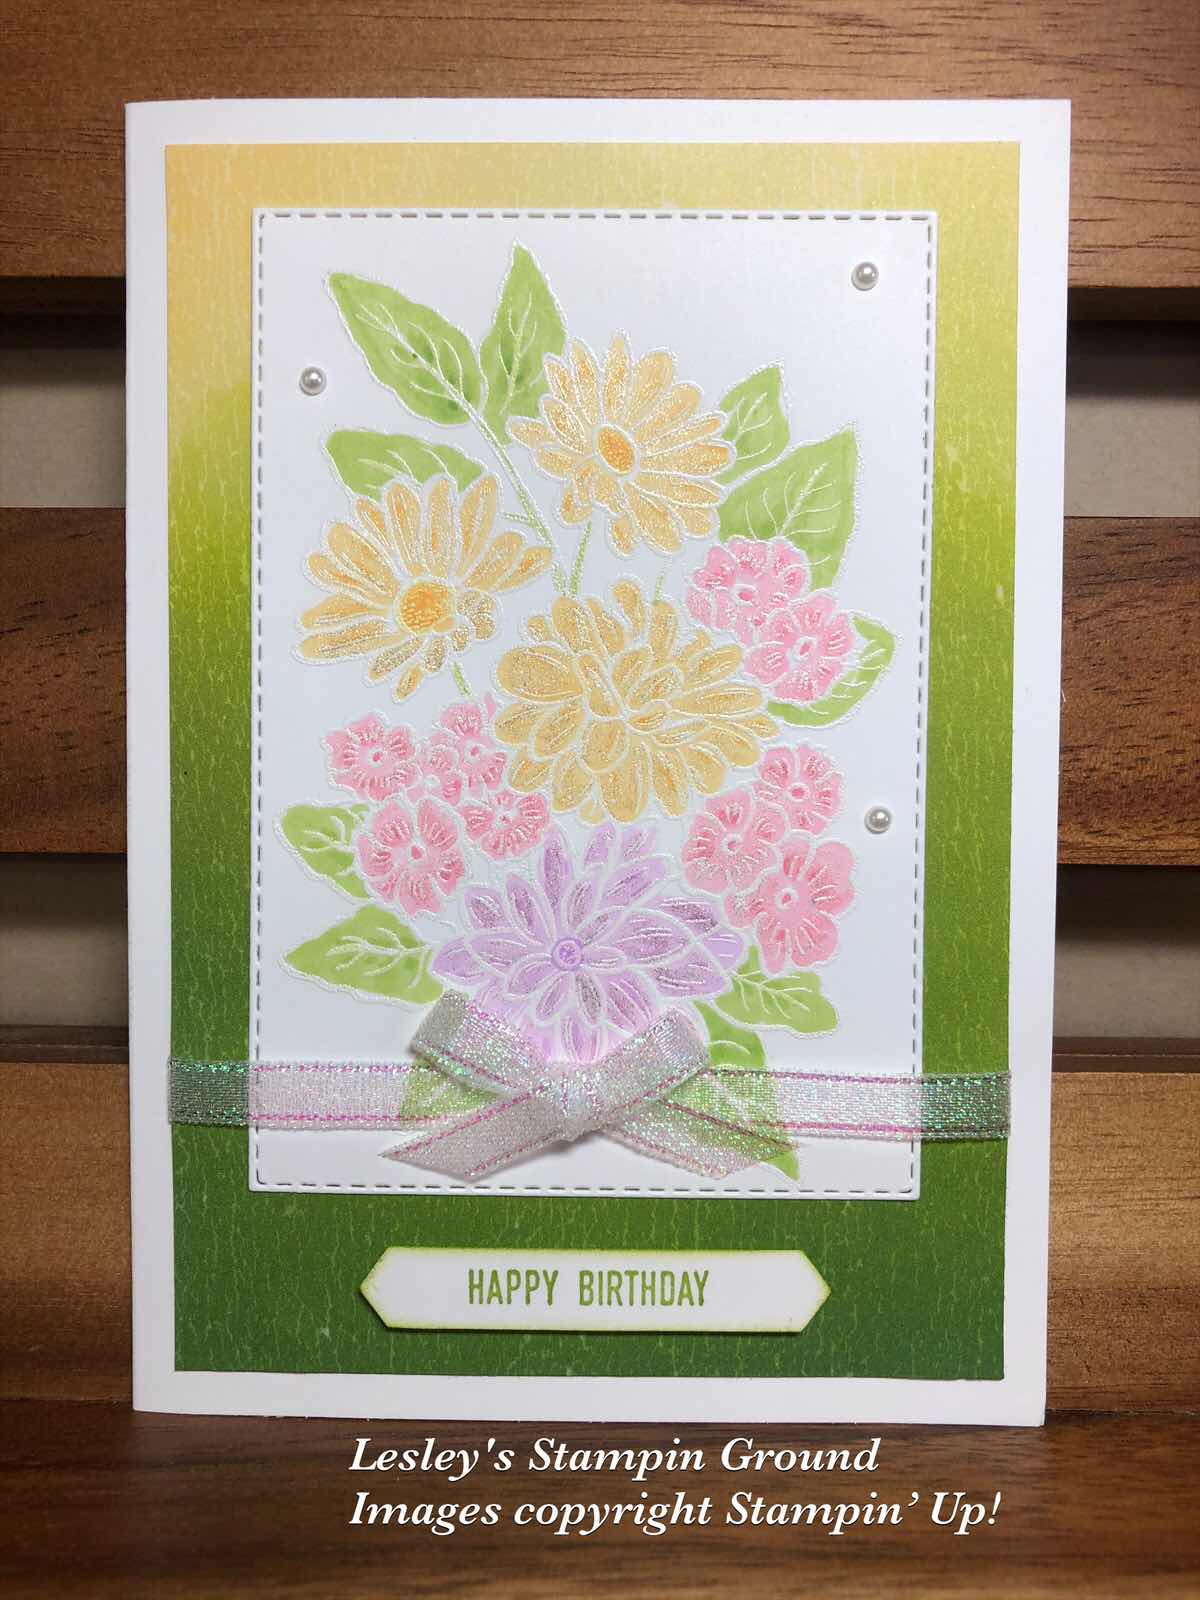
Don’t you love it when you have something in mind and it turns out just as you imagined, or sometimes even better. This is what happened with this card and as usual looks much better in real life. I love the subtle colours in the floral image with the ombré effect for the background.


I stamped the floral image from the Ornate Style stamp set (#152572) onto Whisper White card (#106549). This was stamped with VersaMark (#102283) and heat embossed with White Stampin’ Emboss Powder (#109132) which of course needs to be set with the Heat Tool (#129056). I coloured the image with the following Stampin’ Blends - Granny Apple Green (#154885), So Saffron (#154905), Mango Melody (#154888), Flirty Flamingo (#154884) and Purple Posy (#154896). When colouring with the stampin’ blends, the white emboss resists the colouring, so you still have the subtle white embossed image.
This white card was cut with a Stitched Rectangles Die (#151820) and attached to the Artistry Blooms Designer Series Paper (#152495).
The Snowflake Splendor 1/4” Ribbon (#153548) was wrapped around the card front and a bow was also made with the ribbon. The bow was attached to the card with Mini Glue Dots (#103683). The card front was attached to the Whisper White base card.
“Happy Birthday” from the Itty Bitty Greetings stamp set (#146667) was stamped with Granny Apple Green ink (#147095) and punched with the Classic Label punch (#141491). Mini Stampin’ Dimensionals (#144108) were used to attach this to the card.
I added some shimmer to the flowers using the Clear Wink Of Stella Glitter Brush (#141897) then finished the card with the Pearl Basic Jewels (#144219).

Have a great weekend.

“Love what you do and share what you love.”


Sunday, 7 June 2020

Forever Fern Bundle with Daisy Lane

Hello friends,

I was so pleased with the finished result of this card, very subtle but gorgeous (even if I do say so myself). As usual it looks so much better in real life.


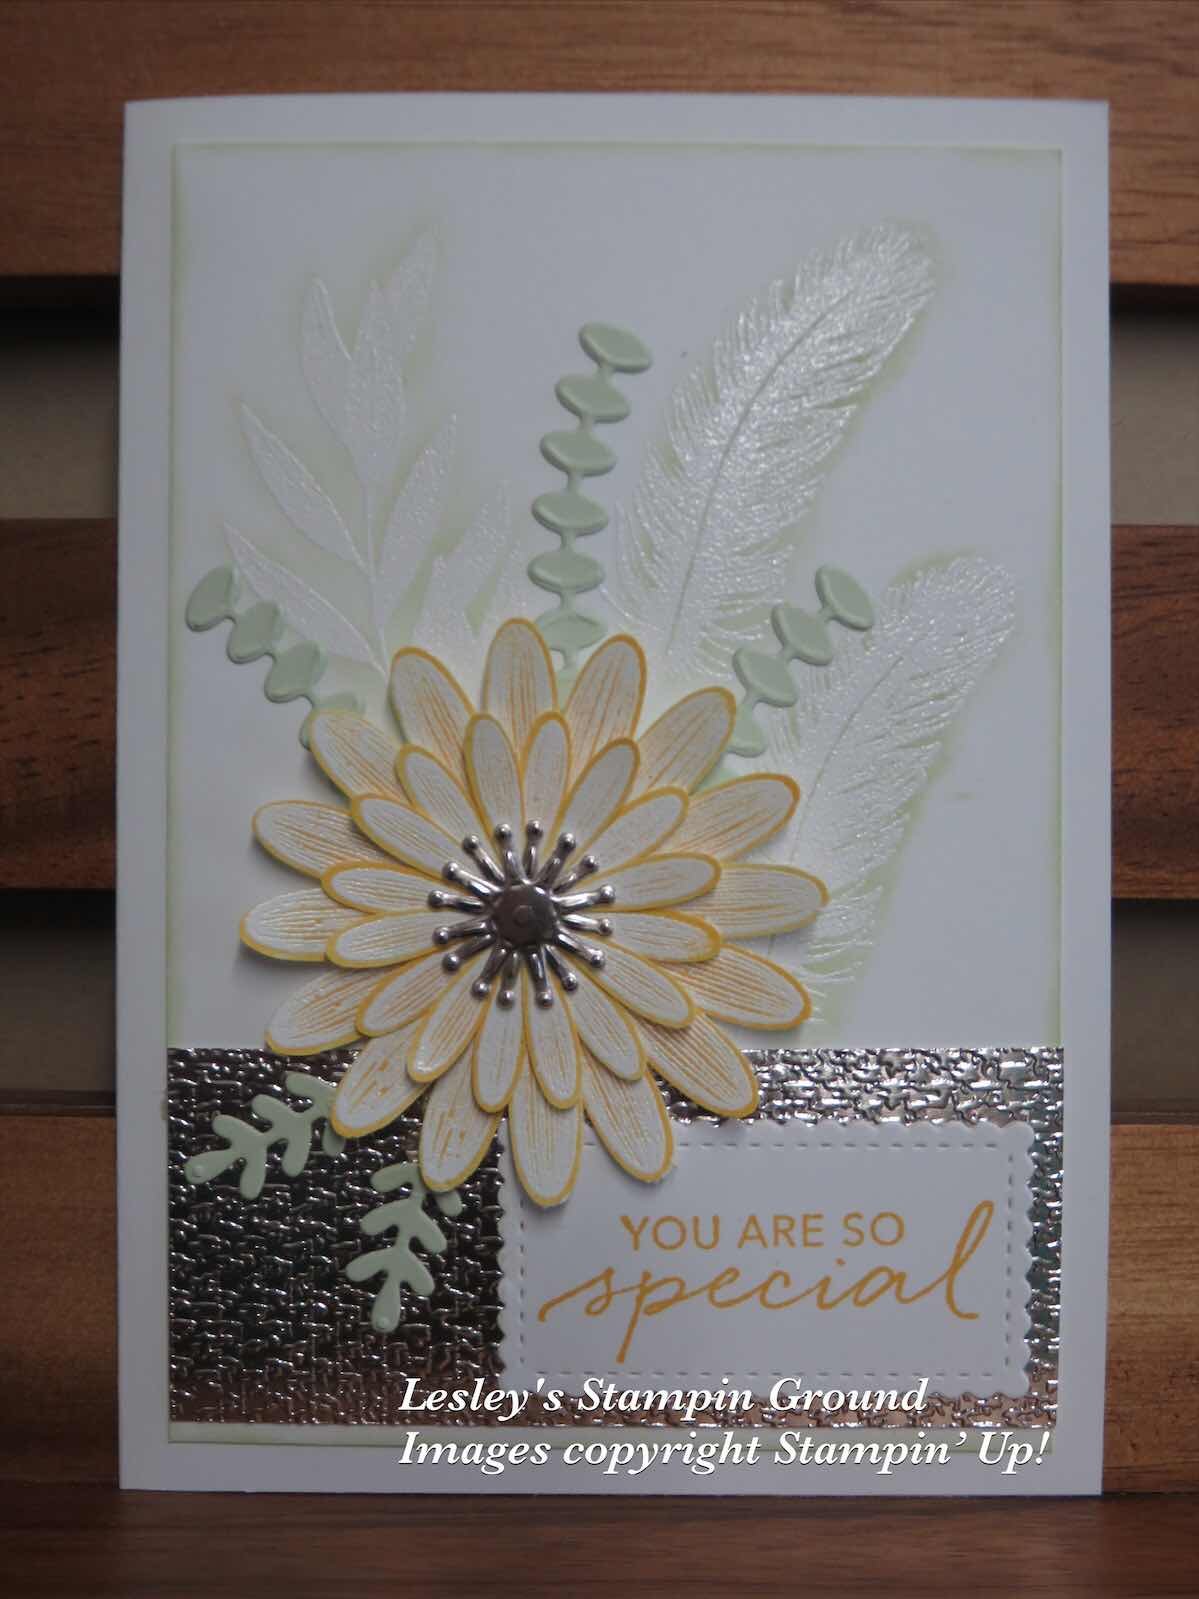
I stamped the leaf from the Forever Fern stamp set (#c152559) onto the Whisper White card front (#106549) using VersaMark (#102283). This was then embossed with White Stampin’ Emboss Powder (#109132) and set with the Heat Tool (#129056). I did the same with the feathers from the Tasteful Touches stamp set (#152562). Then I lightly daubered the leaf and feathers with Soft Sea Foam ink (#147102). I stamped 2 of each of the daisy images from the Daisy Lane stamp set (#c149325). Again these were stamped with VersaMark and White Emboss Powder on Whisper White card and I daubered the images with Daffodil Delight ink (#147094). The daisies were punched with the Daisy punch (#143713) for the larger daisy and the Medium Daisy Punch (#149517) for the smaller daisies. For the centre of the daisies I used a die from the Magnolia Memory Dies (#149578) and Champagne Foil Sheet (#144748). The daisy was assembled using Mini Glue Dots (#103683) and the whole daisy was attached to the card with Stampin’ Dimensionals (#104430). I used the Forever Flourishing Dies (#152714) to cut the leaves from the Soft Sea Foam card (#147012). The Champagne Foil Sheet was embossed with the Tasteful Textile 3D Embossing Folder (#152718). “You are so Special” is from the Tasteful Touches stamp set and I stamped this with Daffodil Delight ink. A die from the Stitched So Sweetly Dies (#151690) cut the sentiment.

Enjoy whatever you are doing today and keep crafting!!