Showing posts with label #artisticdies. Show all posts

Wednesday, 3 April 2024

Artistic dies

 Hi friends,

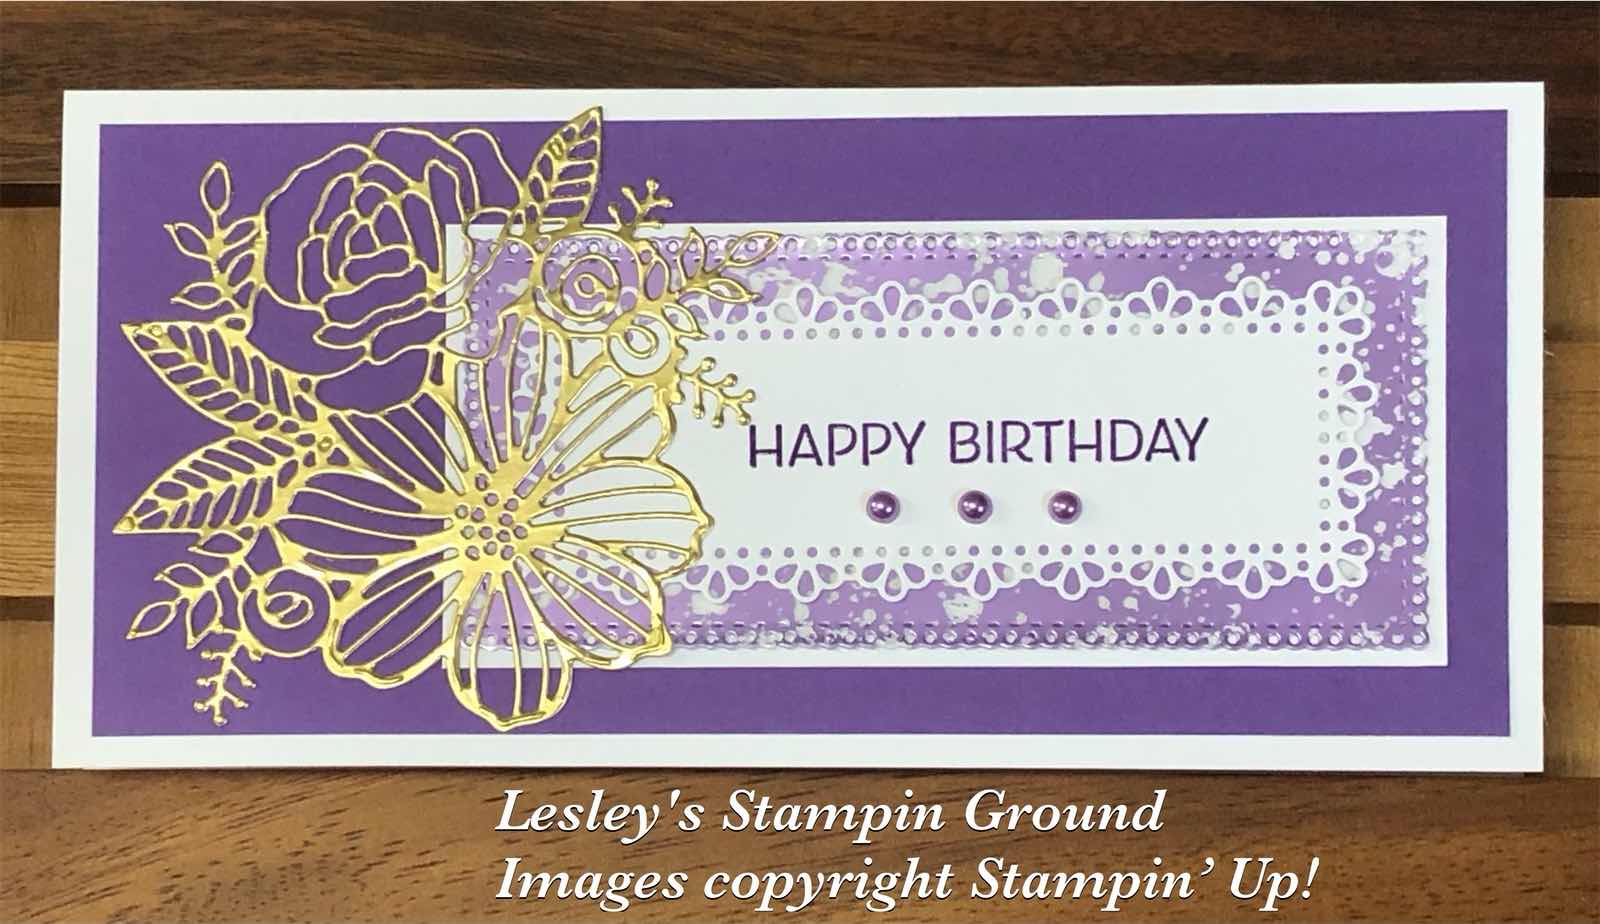
The die for this beautiful floral image is from the Artistic Dies (#155371).


I used Gold Foil Sheet (#132622) which was backed with Adhesive Sheets (#152334). The Orchid Oasis card front (#159265) was dry embossed with one of the Basics Embossing Folder (#161598). I wrapped the Orchid Oasis Metallic Woven Ribbon (#159199) around the card front, then attached this to the Basic White base card (#159228).

I cut a piece of Basic White card with the same floral die and just attach the piece that fitted in with the flower.

“Happy Birthday” from the Go To Greetings stamp set (#158763) was stamped with Orchid Oasis ink (#159214). This was cut with an Enduring Beauty Die (#162672). Mini Stampin’ Dimensionals (#144108) were used to attach the sentiment to the card.

The retiring products are the Artistic Dies, Orchid Oasis card & ink and the Metallic Woven Ribbon.

“Love what you do and share what you love.”

INSPIRE. CREATE. SHARE. 


Monday, 4 December 2023

Artistic dies

Hi & welcome again my friends,

I am back after a lovely relaxing holiday so ready to get back into my craft room with the lead up to Christmas. Here is a super easy card using the Artistic dies (#155371).


I scored the top and bottom of the Basic White card (#106550) using the Paper Trimmer (#152392) with the scoring blade.

I used the Holographic Trio Specialty Paper (#161744) for the floral image cut with the Artistic die. This paper was backed with Adhesive Sheet (#152334) making this detailed die-cut piece easy to adhere to the card. The edges of the card front was daubered with Berry Burst ink (#147143), then attached to the Berry Burst card (#144249).

“Thinking Of You” from the Go To Greetings stamp set (#158763) was stamped with Berry Burst ink and cut with a Cracker & Treat Box die (#159182). I attached this with Stampin’ Dimensionals (#104430).

The Iridescent Adhesive-Backed Discs (161954) were added to finish the card.


Wednesday, 21 June 2023

Artistic Dies

Hello friends,

This beautiful floral image is cut with an Artistic Die (#155371) and using the Soft Shimmer Paper Combo Pack (#161750).


I coloured the Basic White card front (#159228) using Fresh Freesia ink (#155611), a Blending Brush (#153611) and an Artistic Mix Decorative Mask (#159178). I daubered the edges with Berry Burst ink (#147143) and attached it to the Basic White base card. 

I cut the Berry Burst Paper from the Soft Shimmer Paper Combo pack. This was backed with Adhesive Sheet (#152334) and attached to the card front. I then cut the Bubble Bath from the same paper pack and using the same die and used the “inside pieces” of the flower and placed these into the flower.

“Congrats” is from the Phrases For All stamp set (#161403). I stamped this with Berry Burst ink, then re-stamped it with VersaMark (#102283) and added Clear Stampin’ Emboss Powder (#155554) which was set with the Heat Tool (#129056). I then cut this with a Labels Aglow die (#159551). This die is much longer than the sentiment so I cut the sentiment a second time to cut the label shorter. This was attached to the card with Stampin’ Dimensionals (#104430). The Berry Burst Gems from the Tinsel Gems Four-Pack (#161623) were added to the card.


“Love what you do and share what you love.”

INSPIRE. CREATE. SHARE.


Saturday, 10 June 2023

Artistic Dies

Hello,

The Artistic Dies (#15537) have been used to cut this floral image.


I used a piece of (retired) Brushed Metallic Gold Foil which was backed with Adhesive Sheet (#152334) to cut this floral image.

The card front is Fresh Freesia card (#155614) and was dry embossed with the Countryside Blossoms Embossing Folder (#161473). I cut the rectangles using the Countryside Corners dies (#161471) from Bubble Bath card (#161727) and daubered them with Bubble Bath ink (#161664). The sentiment from the Go To Greetings stamp set (#158763) was stamped with VersaMark and embossed with Gold Stampin’ Emboss Powder (#155555), then set with the Heat Tool (#129056).

The rectangles were taped to the card front then the die cut floral image attached on top. The Tinsel Gems Four pack (#161623) were added.

“Love what you do and share what you love.”


INSPIRE. CREATE. SHARE.


Saturday, 10 December 2022

Framed Florets

Hi friends,

I have used the flowers from the Framed Florets stamp set (#161815) as well as the detailed flowers cut with the Artistic Dies (#155371) on todays card.


The stamped flowers were stamped with Tuxedo Black Memento Ink (#132708) on Basic White card (#159228). These were coloured with Stampin’ Blends - Sweet Sorbet (#159224). Daffodil Delight (#154883), Granny Apple Green (#154885) and Soft Sea Foam (#154902). The Framed Florets Dies were used to cut the stamped images. The stamp set & dies can be purchased as a bundle - the Framed Florets Bundle (#162407) which means you save 10%.

The Artistic Dies were used to cut the Basic White card for the detailed flower and this was attached to the Basic White card front using Mini Glue Dots (#103683). I cut the corners of the white card with the Very Best Trio Punch (#159878) and the corners of the Sweet Sorbet card with the retired Detailed Trio Punch. This was attached to the Basic White base card.

Happy Birthday from the Artistically Inked stamp set (#154542) was stamped with Sweet Sorbet ink (#159224). I cut this with a Sending Die (#159271), cut off the ends and cut between the words. This was attached with Stampin’ Dimensionals (#104430).

“Love what you do and share what you love.”

CREATE. INSPIRE. SHARE.


Thursday, 8 December 2022

Artistic Dies

Hi everyone,

I was having a mental block today when it came to making a card so I have made my version of a card from Tammy Wilson, from the 2021 Stampin’ Up Design Team. Thanks for the inspiration.


I cut the Basic White card (#159228) with a die from the Artistic Die (#155371) for the floral image. The Soft Sea Foam card (#147012) was dry embossed with the Timber 3D Embossing Folder (#156406), then matted within the Brushed Metallic Cardstock (#153524). The base card is Basic White.

The floral image was attached with Mini Glue dots (#103683). The DSP is from the Design A Daydream Designer Series Paper (#159161) and attached with Stampin’ Dimensionals (#104430). I cut the Gold Foil with a die from the Flowers Of Home dies (#157938) and also attached with Mini Glue dots to the DSP.

“Happy Birthday” is from the Artistically Inked Stamp set (#154542). This was stamped with VersaMark (#102283) and I used Gold Stampin’ Emboss Powder (#155555) which needs to be set with the Heat Tool (#129056). The die from Sending (#159271) was used to cut the sentiment.

I attached the Gold Simply Elegant Trim (#155765) and the Soft Sea Foam Seam Binding Ribbon (#159680) under the sentiment. Stampin’ Dimensionals were used to attach the sentiment to the card. Elegant Faceted Gems (#159189) were also added.


“Love what you do and share what you love.”

INSPIRE. CREATE. SHARE.


Sunday, 6 November 2022

Artistic Dies

Hi friends,

Here’s a lovely bright & cheery card using many of my favourite colours for the background.


I coloured the background using Ink Refills on Shimmery White card (#121717). I sprayed water on the card then added the following colours - Granny Apple Green (#147163), Orchid Oasis (#159215), Rich Razzleberry (#115664), Daffodil Delight (#119672) and Polished Pink (#155713) using a Water Painter (#151298). I randomly added the colours then sprayed extra water to allow the colours to blend. This can be put aside to dry if you have time or dry it with the Heat Tool (#129056), which is what I did. This was matted with the Daffodil Delight card (#121680) then attached to the Basic White base card (#159228).

I cut the Gold Foil Sheet (#132622) with an Artistic Die (#155371) for the floral image. The gold was backed with Adhesive Sheet (#152334), so it’s easy to attach the detailed die cut to the card.

The sentiment from the Sending Smiles stamp set (#158701) was stamped with Daffodil Delight ink (#147094) and cut with a Sending Die (#15927). This was attached to the card with Mini Stampin’ Dimensionals (#144108). The embellishments are the Glossy Dots Assortment (#158827).

TIP: You can achieve a lighter coloured background by adding more water to the ink before applying to the card or a darker background by adding less water.

“Love what you do and share what you love.”


Monday, 2 May 2022

Happiness Abounds stamp set

Hi again my friends,

By the time you see this, the new Annual catalogue should be live. There are so many awesome new products available as well as many of the favourites carrying over from the previous catalogue. I have already made a number of cards using the beautiful flowers from the Happiness Abounds stamp set (#159238) and the co-ordinating Blossoming Happiness Dies (#158823) which of course are available together in the Happiness Abounds Bundle (#158824).


I stamped the flowers with VersaMark (#102283) and heat embossed with the Gold Stampin’ Emboss Powder (#155555) and set with the Heat Tool (#129056). These were then cut with a die from the Blossoming Happiness Dies. The flowers were coloured with Highland Heather Stampin’ Blends (#154887) and Fresh Freesia Stampin’ Blends (#155518). I also used the Color Lifter (#144608) to remove some of the colour for more depth on the lighter flower.

The slots were cut in the Basic White card (#159228) using another die from the Blossoming Happiness dies, then I dry embossed the card with the Stripes from the Stripes & Splatters 3D Embossing Folder (#157980). This was matted with Highland Heather card (#147010), then attached to the Basic White base card.

I backed the Gold Foil (#132622) with Adhesive Sheets (#152334) before cutting the leaves with an Artistic Die (#155371). This was attached to the cardfront. The flowers were attached using Mini Glue Dots (#103683) and Stampin’ Dimensionals (#104430). The gold trim is from the Simply Elegant Trim (#155766).

“Best Wishes” is from the Happiness Abounds stamp set and stamped with Highland Heather ink (#147103), then cut with a Sending Die (#159271). This was attached using the Mini Stampin’ Dimensionals (#144108).

PLEASE NOTE: From 3rd May 2022 you can only order from the new 2022-2023 Annual catalogue and the January-June 2022 Mini catalogue. The mini catalogue is still available till 30th June 2022.


“Love what you do and share what you love.”


Wednesday, 6 April 2022

All Together Designer Series Paper

Hello stamping friends,

The All Together 6”x6” Designer Series Paper (#160039) has a beautiful range of black & white images which could be coloured. I have just chosen to leave them as is for this card.


I chose 7 different designs and cut them with the Layering Circles Dies (#151770). These were attached to the Basic White card front (#159228) which was dry embossed with the Timeworn Type 3D Embossing Folder (#156505). This was matted with the Basic Black card (#121688) then attached to the Basic White base card.

I cut the leaves with a die from the Artistic Dies 155371) using the Silver Foil from the Blue Foils (#159983). This pack is available for a limited time. I had Adhesive Sheet (#152334) adhered to the back of the foil before cutting with the die to make it easy to attach the fine detailed die cut to the card. 

The sentiment is from the Encircled In Friendship Stamp Set (#155408) and stamped with Tuxedo Black Memento ink (#132708). The sentiment & silver foil under the sentiment were cut with Layering Circles Dies and attached to the card with Stampin’ Dimensionals (#104430).


TIP: Adhesive Sheets are great to attach a detailed cut out to your card. Just adhere the adhesive sheet to the back of the card you are using to cut with the die before cutting, then remove the backing of the adhesive and attach the die cut to the card.


“Love what you do and share what you love.”


Tuesday, 22 February 2022

Daisy Lane

Hello again my friends,

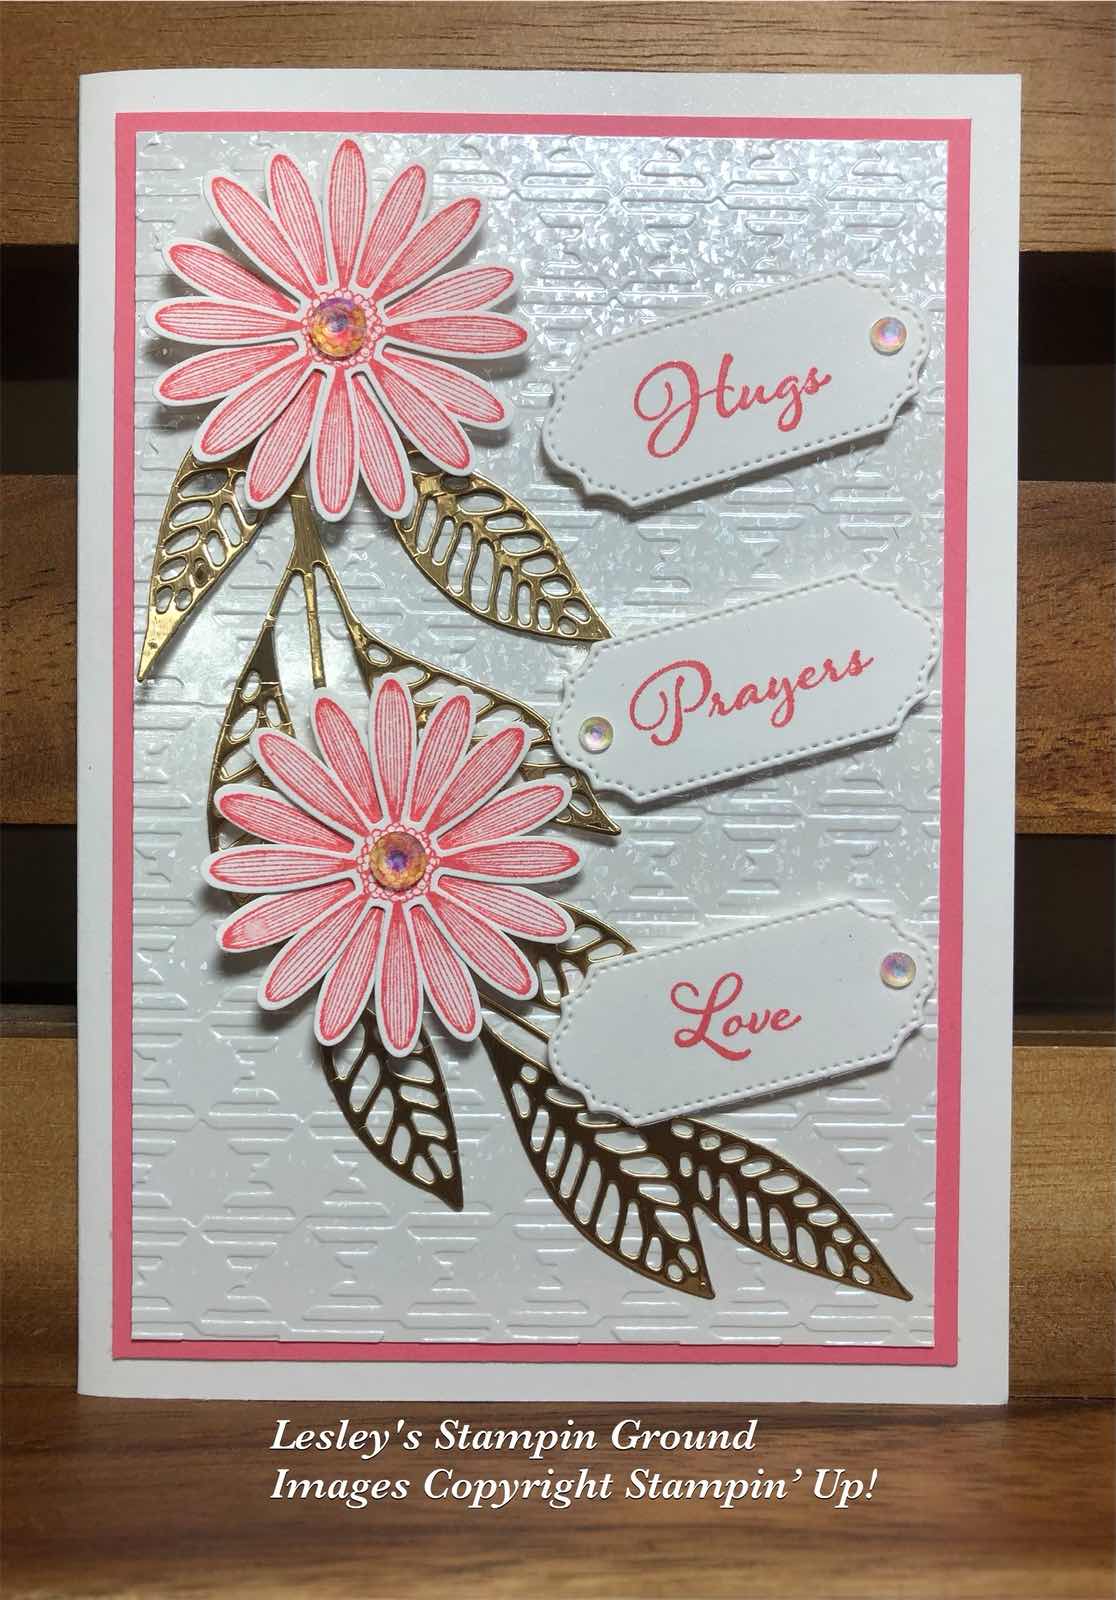
These daisies are stamped from the Daisy Lane stamp set (#149325). I stamp 2 images for each flower and offset them for a lovely flower.


The flowers were stamped with Flirty Flamingo ink (#147052) and punched with the Medium Daisy punch (#149517). The flowers were assembled using Mini Glue Dots (#103683) at the centre of the daisy.

The Mother Of Pearl 12”x12” Specialty Paper (#157666) was embossed with the Gingham Embossing Folder (#157627), then matted with Flirty Flamingo card (#141421). The base card is Shimmery White cardstock (#121717).

The leaves are cut with a die from the Artistic Dies (#155371). I backed the Gold Foil sheet (#132622) with Adhesive Sheets (#152334) before cutting with the die, then the leaves were adhered to the Mother Of Pearl card. The daisies were attached with Stampin’ Dimensionals (#104430).

“Hugs, Prayers & Love” is from the Positive Thoughts stamp set (#151490). Those 3 words are on one stamp. I wanted individual words, so I masked 2 of the words with a post it note, inked the other word, removed the post it note, then stamped the word on Shimmery White card. I did this with each word, then cut the words individually with an Ornate Frames die (#150664). These were then attached to the card with Mini Stampin’ Dimensionals (#144108). I added the Iridescent Rhinestone Basic Jewels (#158130) to each of the labels and the centre of the flowers.


“Love what you do and share what you love.”


Sunday, 16 January 2022

Slim Line card & envelopes

Hi friends,

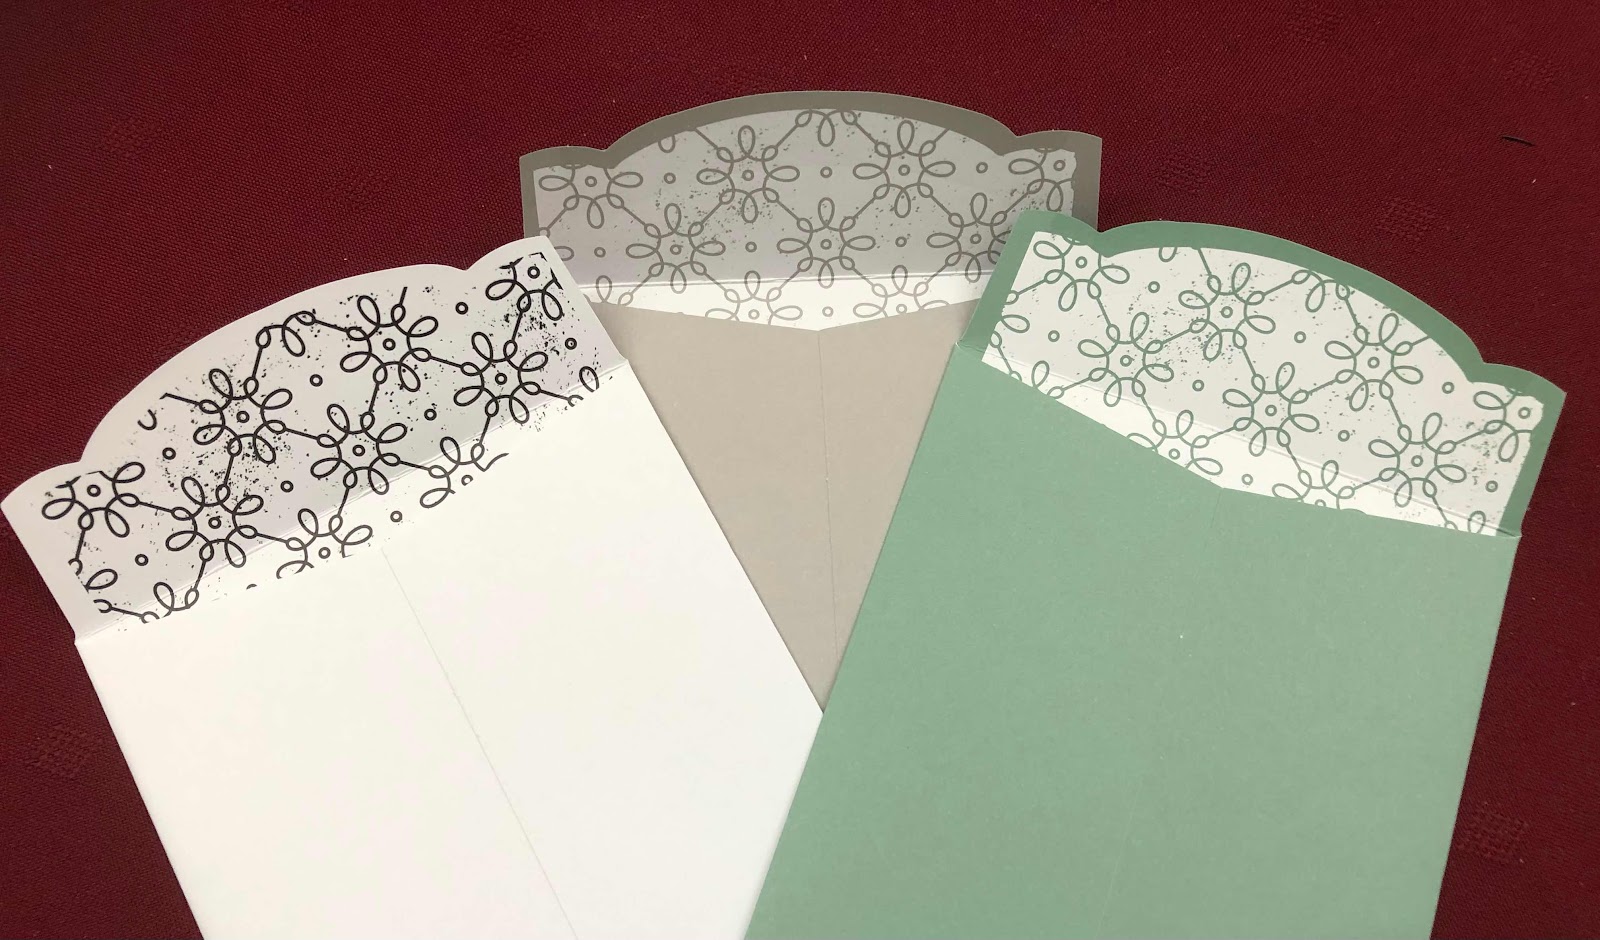
I hope you haven’t missed the lovely Slimline Envelopes (#157981) in the new Mini Catalogue. There are 15 envelopes in 3 colours with a design printed inside. The colours are White, Smoky Slate and Soft Succulent.


I cut a piece of Basic White card (#159228) 21cm x19cm and scored in half at 9.5cm (on the 19cm side) so this fitted neatly into the envelope.


I stamped the flowers and leaves from the Friendly Hello stamp set (#159990) from Sale-a-bration. The flowers were stamped with Tuxedo Black Memento Ink (#132708) and added the colour with the Pale Papaya Stampin’ Blends (#155519). The leaves were stamped with Granny Apple Green ink (#147095). The flowers & leaves were fussy cut. The sentiment is from the Positive Thoughts stamp set (#151490) using Granny Apple Green ink, then cut with a die from the Beautiful Shapes (#158046).

The Gold leaves were cut with the Artistic Dies (#155371) using the Gold & Rose Gold 6”x6” Metallic Specialty Paper (#156844) which had Adhesive Sheet (#152334) adhered to the back. The flowers, leaves & sentiment were attached to the Vellum 12”x12” Layering Designs (#157764). I used Stampin’ Dimensionals (#104430) for the flowers & Mini Glue Dots (#103683) for the stamped leaves. This was then attached to the Granny Apple Green card (#147014) which had been attached to the base card. The heart embellishments are retired.

Don’t forget to decorate your envelope.


TIP: When using vellum I attach all the pieces to the vellum first before attaching it to the card, then only add adhesive on the back of the vellum where it won’t be seen from the front. It’s easy to see from the back where all the elements are already attached. The heart at the bottom left is also covering a glue dot.


“Love what you do and share what you love.”


Wednesday, 4 August 2021

Blackberry Beauty Specialty Designer Series Paper

Hi everyone,

I hope you have had a chance to see the new Mini catalogue with so many beautiful products as well as Sale-a-bration. If you would like a catalogue please email me if you live in Australia. 
 Many of the products are for Christmas but there many other products which can be used for a variety of occasions. I love these new specialty papers used here.


The gorgeous Blackberry Beauty 12”x12” Specialty Designer Series Paper (#156458) was matted with the Gold Foil Sheet (#132622). This was then attached to the Cork 12”x12” Specialty Paper (#156393). The base card is Blackberry Bliss (#133682).

The sentiment from Positive Thoughts stamp set (#151490) was stamped with VersaMark (#102283) and embossed with Gold Stampin’ Emboss Powder (#155555), then set with the Heat Tool (#129056). This was cut with a Stitched Rectangle Dies (#151820) and attached to the card with Stampin’ Dimensionals (#104430).

The leaves are cut with the Artistic Dies (#155371) using the Rose Gold from the Gold & Rose Gold 6”x6” Metallic Specialty Paper (#156844). I had the Adhesive Sheet (#152334) adhered to the back before cutting which makes it easy to attached this detailed cut out to the card.


“Love what you do and share what you love.”


Stay safe and keeping crafting!!


Monday, 2 August 2021

Artistic Dies

Hello my friends,

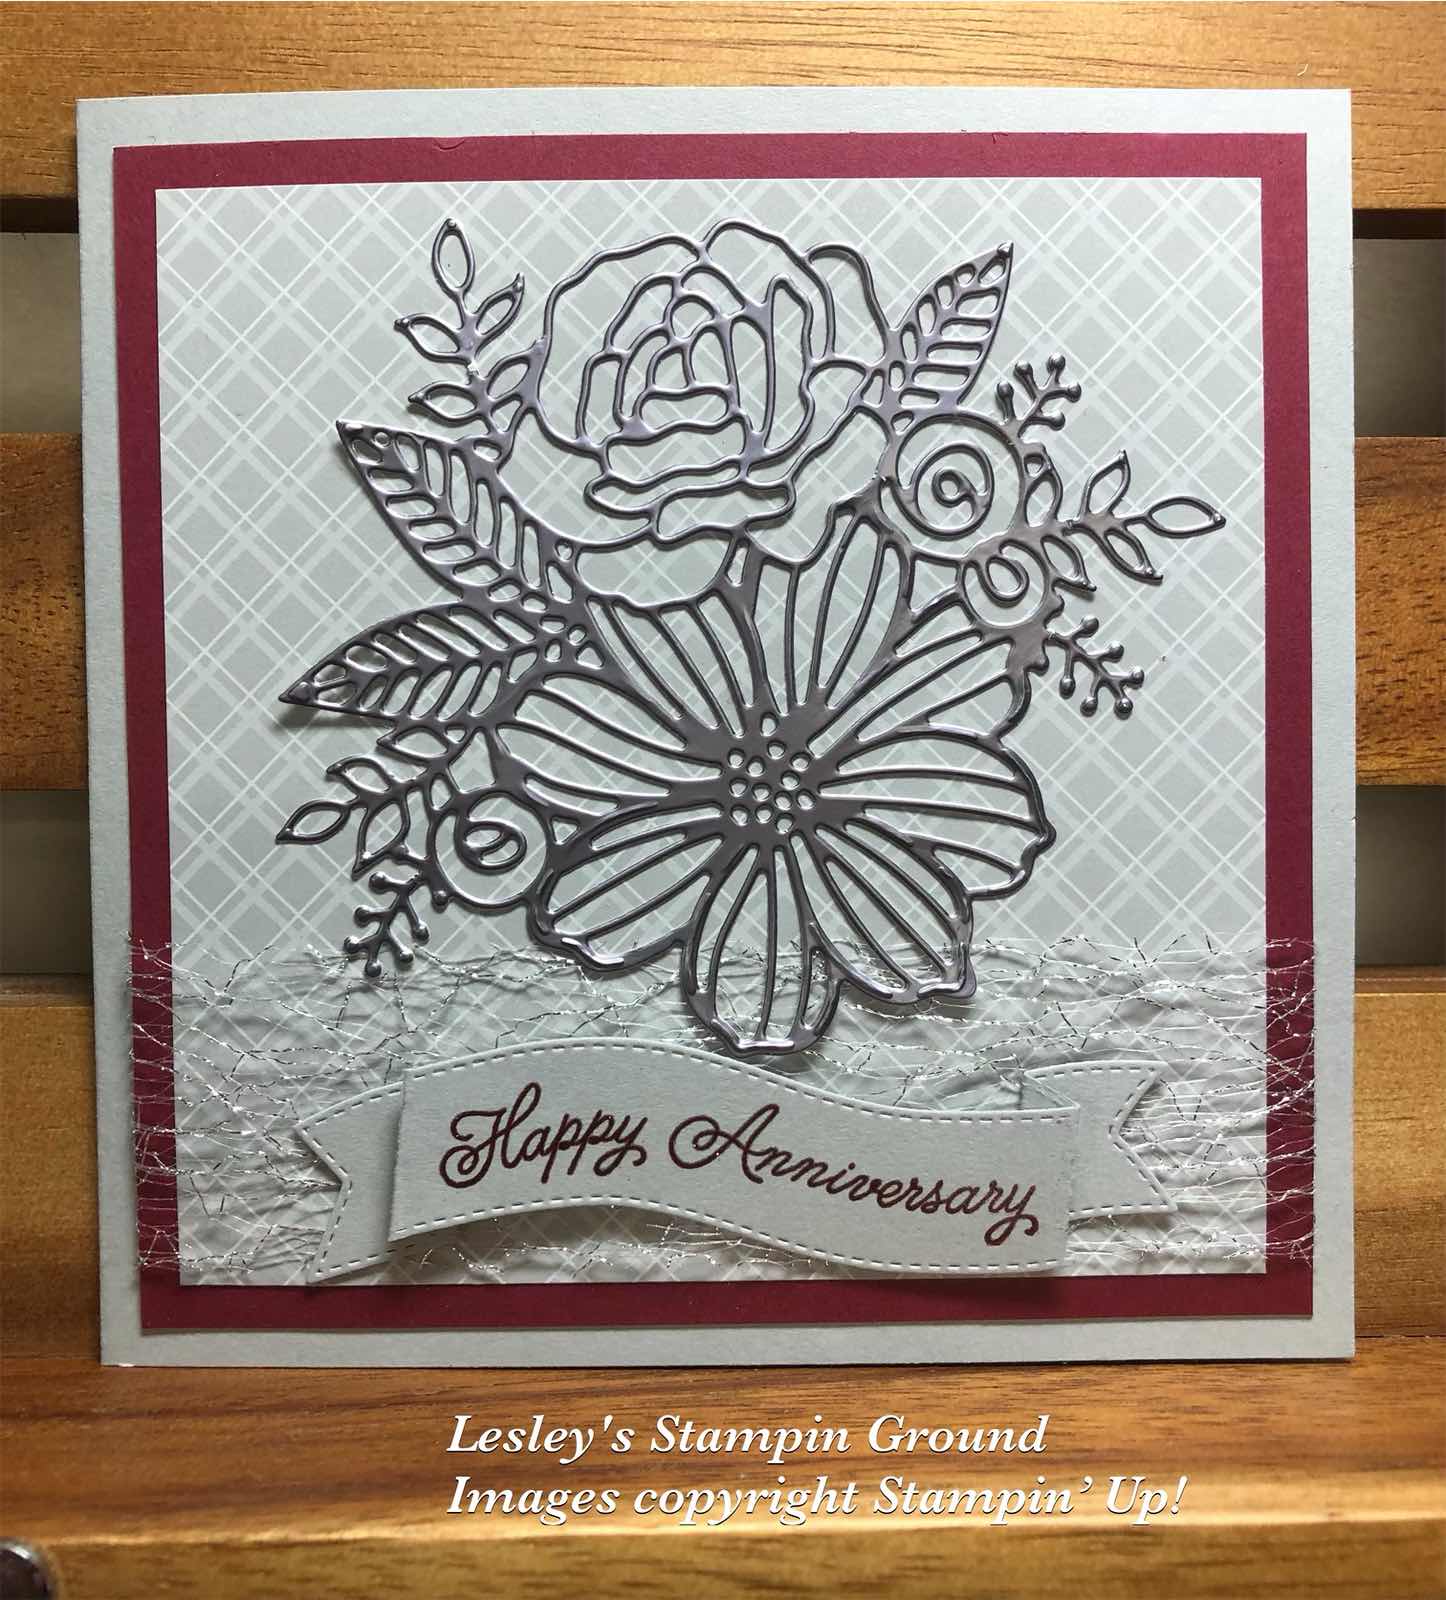
Here’s another card using the beautiful Artistic Dies (#155371). I had cut the image from the Silver Foil 12”x12” Specialty Paper (#156457) for another card but I wasn’t happy with the colour combination so used another colour for that card, so had to make another card with the Silver. Much happier with this one. The finished size of the card is 14cm x 14cm.


The base card is Smokey Slate (#131291), followed by Merry Merlot card (#147005) then Smokey Slate from the Neutrals 6”x6” Designer Series Paper (#155226). I wrapped the Metallic Mesh Ribbon (#153550) around the card front.

The Silver Foil Specialty Paper had Adhesive Sheet (#152334) adhered to the back before cutting with the Artistic die. This was attached to the card with ease.

“Happy Anniversary” from the Always In My Heart stamp set (#158183) was stamped with Merry Merlot ink (#147112) using the Stamparatus (#148187). I then re stamped it with VersaMark (#102283) and sprinkled it with Clear Stampin’ Emboss Powder (#155554) and set it with the Heat Tool (#129056). This was then cut with a die from the Floral Hearts Dies (#154306). This banner was then attached with Mini Glue Dots (#103683) and Stampin’ Dimensionals (#104430).

Just a note regarding the sentiment. With narrow and longer photopolymer stamps, you can easily make them curve which is what I have done with this stamp, so that it suited the curve on the banner. Just curve it as you are applying it to the clear acrylic block.

The Silver Foil is from the Mini Catalogue which you can order from on 3rd August. This pack has 3 different finishes - Brushed, Matte and Mirror Foil finish. I used the Matte finish on this card.


“Love what you do and share what you love.”


Stay safe & keep crafting!!


Sunday, 1 August 2021

Artistically Inked Bundle

Welcome,

I have used the beautiful Artistically Inked Bundle (#155456) on today’s card.


I stamped the 2 flowers using Fresh Freesia ink (#155611) and Polished Pink Ink (#155712), and the leaves with Soft Succulent ink (#155778). These were cut with the Artistic Dies (#155371). I attached Adhesive Sheet (#152334) to the back of the Gold 12”x12” Shimmer Vellum (#156471) and then cut this with another Artistic Die. I then attached the cut stamped flowers and leaves to the Gold Vellum.

I stamped “Thanks” from the Artistically Inked stamp set with Polished Pink ink (#155712) onto the Basic White card front (#159228). This was then dry embossed with the Painted Texture 3D Embossing Folder (#154317) and attached to the Polished Pink base card (#155711). The flowers were then attached to the card front and I added the Genial Gems (#155500) to finish the card.


“Love what you do and share what you love.”

Stay safe.


Friday, 30 July 2021

Artistic Dies

Hello,

I do love mauve and gold together, so teamed them up today for this slim-line card.


The base card is Basic White (#159228) with Gorgeous Grape card (#147011) for the following layer. The finished size of this card is 21x10cm. I cut the Hydrangea Hill Mercury Glass Designer Acetate (#154574) with a die from the Ornate Layers Dies (#152726). This was attached to a slightly larger piece of Basic White card.

“Happy Birthday” from the Artistically Inked stamp set (#154542) was stamped with Gorgeous Grape ink (#147099). I used the Stamparatus (#14817), so without moving the card or stamp, I re-stamped with VersaMark (#102283) and added Clear Stampin’ Emboss Powder (#155554) and set it with the Heat Tool (#129056). This gives an embossed image, so it can be done with any colour not just the embossing powder colours we have available. I cut the sentiment with another Ornate Layers die and attached it to the designer acetate.

The Gold Foil (#132622) was cut with a die from the Artistic Dies (#155371). For ease of adhering this detailed cut-out to the card, I had Adhesive Sheet (#152334) attached to the back of the gold foil before cutting. The Pastel Pearls (#154571) were added under the sentiment.

“Love what you do and share what you love.”


Tuesday, 13 July 2021

Expressions In Ink Specialty Designer Series Paper

Hello stamping friends,

The Expressions In Ink Specialty Designer Series Paper (#155464) has a range of gorgeous papers with Gold foiling and I have used one here for the card front.


“Happy Birthday” from the Peaceful Moments stamp set (#151595) was stamped with VersaMark (#102283) and heat embossed with Gold Stampin’ Emboss Powder from the Metallics pack (#155555). This was set with the Heat Tool (#129056).

I cut the bottom edge of the DSP as well as the Gold Foil Sheet (#132622) with a scalloped die from the Scalloped Contours Dies (#155560). The scalloped rectangles were cut with the same die set. I attached the gold scallops to the DSP, and the sentiment was attached to the Gold scalloped label with Stampin’ Dimensionals (#104430).

The Gold Foil leaves were cut with a die from the Artistic Dies (#155371) which had Adhesive Sheet (#152334) attached to the back of the foil before cutting. The base card is Basic White (#159228).

“Love what you do and share what you love.”


Saturday, 3 July 2021

Basic Borders Dies

Hi my friends,

I am loving this detailed floral die from the Artistic dies (#155371).


I stamped “Happy Birthday” from the Artistically Inked stamp set (#154542) with Polished Pink ink (#155712) at the base of the card front. I cut the Basic White card front  (#159228) with a Basic Borders Die (#155558), then attached this to the Polished Pink card (#155711)

Using the Blending Brushes (#153611), I coloured a piece of Basic White card using Polished Pink ink (#155712), Fresh Freesia ink (#155611), Pale Papaya ink (#155670) and Granny Apple Green ink (#147095). This was then cut with the Artistic die. I had attached a piece of Adhesive Sheet (#152334) to the back of the card before cutting for ease of attaching the detailed cut out to the card.

I added the Clear Wink Of Stella (#141897) to the detailed cut out but as usual doesn’t show on the photo. The Pastel Pearls (#154571) were added to finish the card. 


“Love what you do and share what you love.”


Friday, 11 June 2021

Expressions In Ink

Hello my friends,

I just adore the Expressions In Ink suite (#155459) with the gorgeous Specialty Designer Series Paper, stamp set and dies.


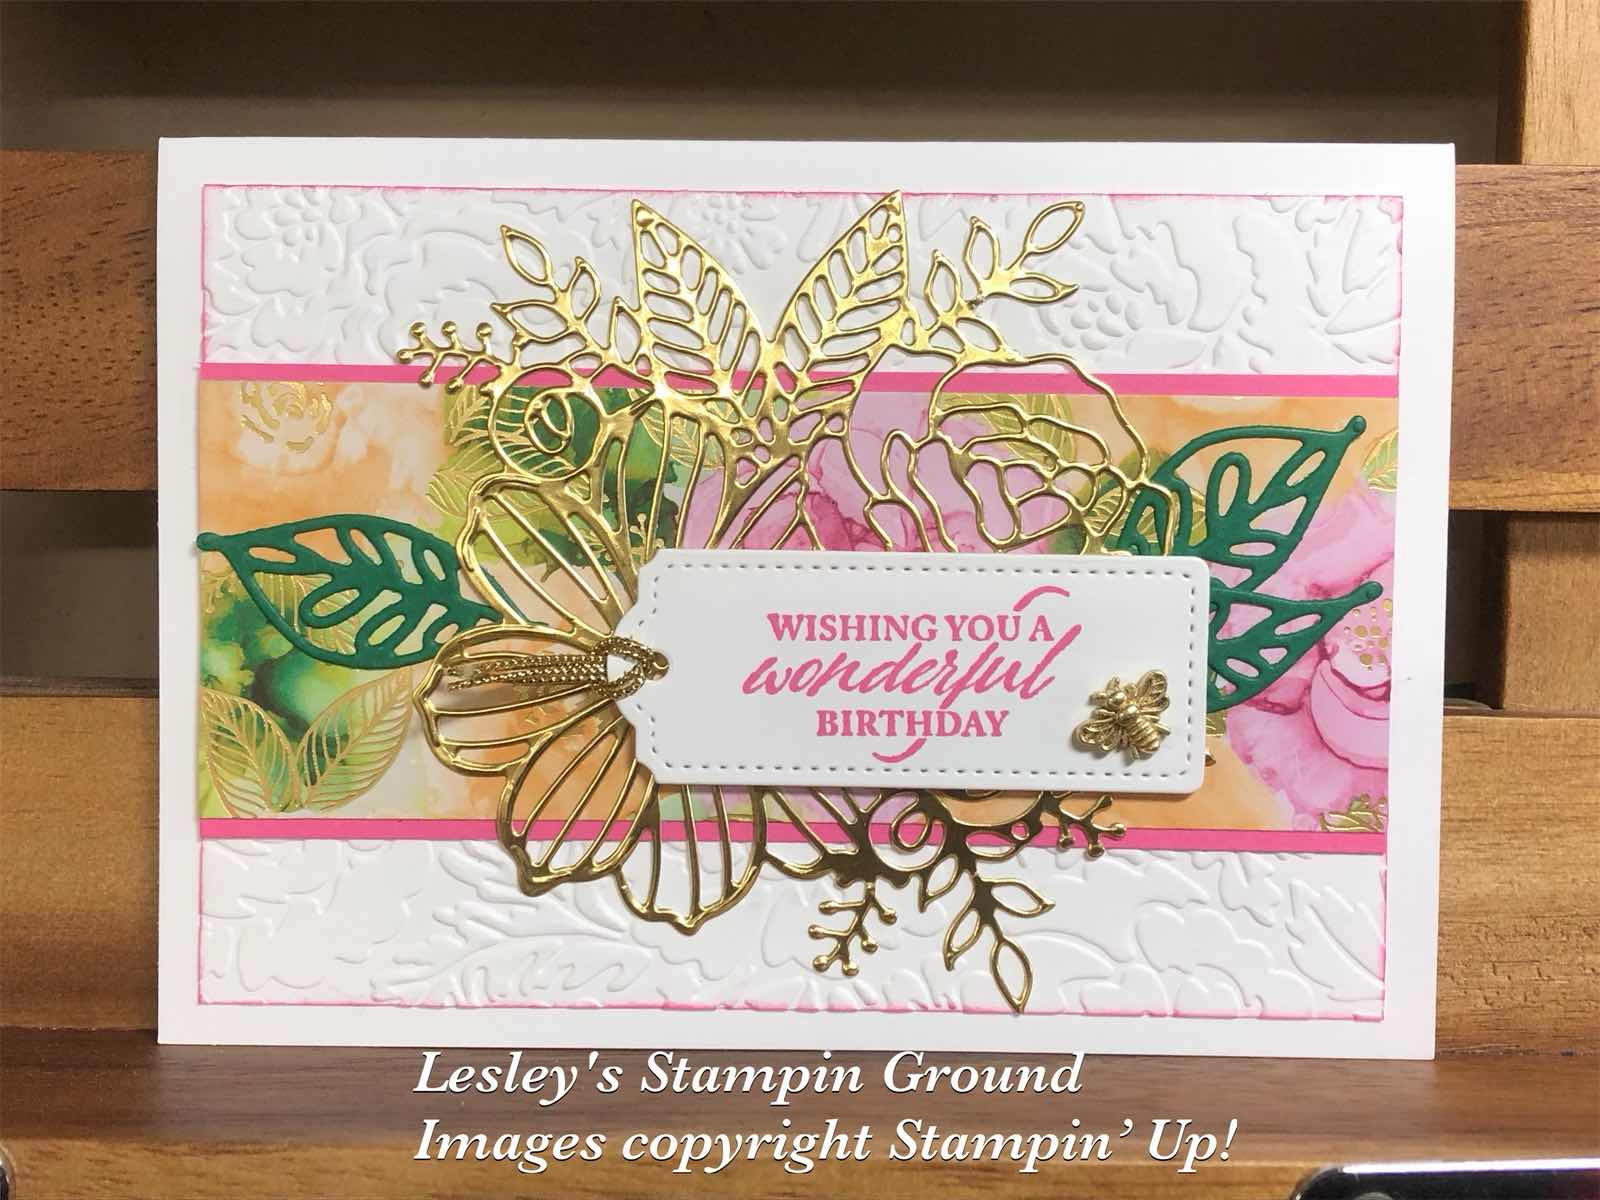
The base card and card front are Basic White (#159228). I Embossed the card front with the Pretty Flowers Embossing Folder (#155428) and daubered the edges with Polished Pink ink (#155712). The Expressions In Ink Specialty Designer Series Paper (#155464) was attached to the Polished Pink card (#155711), then attached to the cardfront.

I used the Gold Foil Sheets (#132622) to cut the detailed floral piece using a die from the Artistic Dies (#155371). I had adhered a piece of Adhesive Sheet (#152334) to the back of the Gold Foil Sheet and Shaded Spruce card (#147006) before cutting with the dies. The Shaded Spruce leaves are cut with a die from the Blooms Dies (#155989).

The sentiment is from the Elegantly Said stamp set (#155095) and stamped with Polished Pink ink. A Tailor Made Tags Die (#155563) was used to cut the sentiment. I used the Gold Trim from the Simply Elegant Trim (#155766) to add to the tag and a cute little bee from the Bumblebee Trinkets (#155568) was attached with a Mini Glue Dot (#103683). The tag was attached with Stampin’ Dimensionals (#104430).


Enjoy your weekend!!


“Love what you do and share what you love.”