Tuesday, 8 March 2022

Butterflies & Flowers Layering Decorative Masks

Hi friends,

I hope that everyone in the flood areas around Sydney are safe . I can’t believe how much these floods have affected so many areas on the East coast of Australia. So devastating for so many. Take care and stay safe everyone.

I am lucky enough not to be in any of the affected flood areas in Brisbane so I can still enjoy my time in the craft room. Here is my latest card.


I cut a circle from a piece of scrap card using the largest die from the Layering Circles Dies (#151770). Then I positioned this on the Basic White card front (#159228) then placed one of the masks from the Butterflies & Flowers Layering Decorative Masks (#158142) on top. I found that using the Stamparatus (#148187) makes it easy to keep these in place with the magnet.

I added a drop of the Fresh Freesia ink (#155612) to a small amount of Shimmery White Embossing Paste (#145645) and mixed this together. I did this on a Silicon Craft Sheet (#127853). Then using a Palette Knife (#142808) I applied the coloured embossing paste over the mask. After removing the mask I was left with a circular image. This doesn’t take long to dry so put the card aside while you do the rest of the elements. However ensure you wash as soon as possible the mask, palette knives and silicon mat.

The flowers from the Honeybee Home stamp set (#157943) were stamped with Tuxedo Black Memento ink (#132708). The flowers were coloured with Stampin’ Blends - Daffodil Delight (#154883), Pale Papaya (#155519), Flirty Flamingo (#154884) & Fresh Freesia (#155518) and Granny Apple Green (#154885) for the leaves. The flowers and the foliage were cut with the Honey Blooms Dies (#157951). I used Granny Apple Green card (#147014) for the foliage. Adhesive Sheets (#152334) were adhered to the Granny Apple Green card before cutting with the dies. The flowers were attached to the card with Stampin’ Dimensionals (#104430). 

I punched the corner of the card front with the Detailed Trio punch (#146320), then matted the card front with Fresh Freesia card (#155614). The sentiment is from the Home & Garden stamp set (#157910) and stamped with Fresh Freesia ink (#155611). I cut this with a die from the Waves Dies (#158840). The White Glittered Organdy Ribbon (#156408) was threaded through the label and wrapped around the cardfront. The base card is Basic White. 

The purple Playing With Patterns Resin Dots (#152467) were attached to the card.


TIP: When colouring the embossing paste I always mix more paste than I probably need as I want enough without having to mix more colour. I then always have an extra piece of card ready so if I do have extra, I can use the excess paste so it doesn’t go to waste. I then have another piece of card for another project.


“Love what you do and share what you love.”


Monday, 7 March 2022

Daffodil Daydream stamp set

Hello all crafting friends,

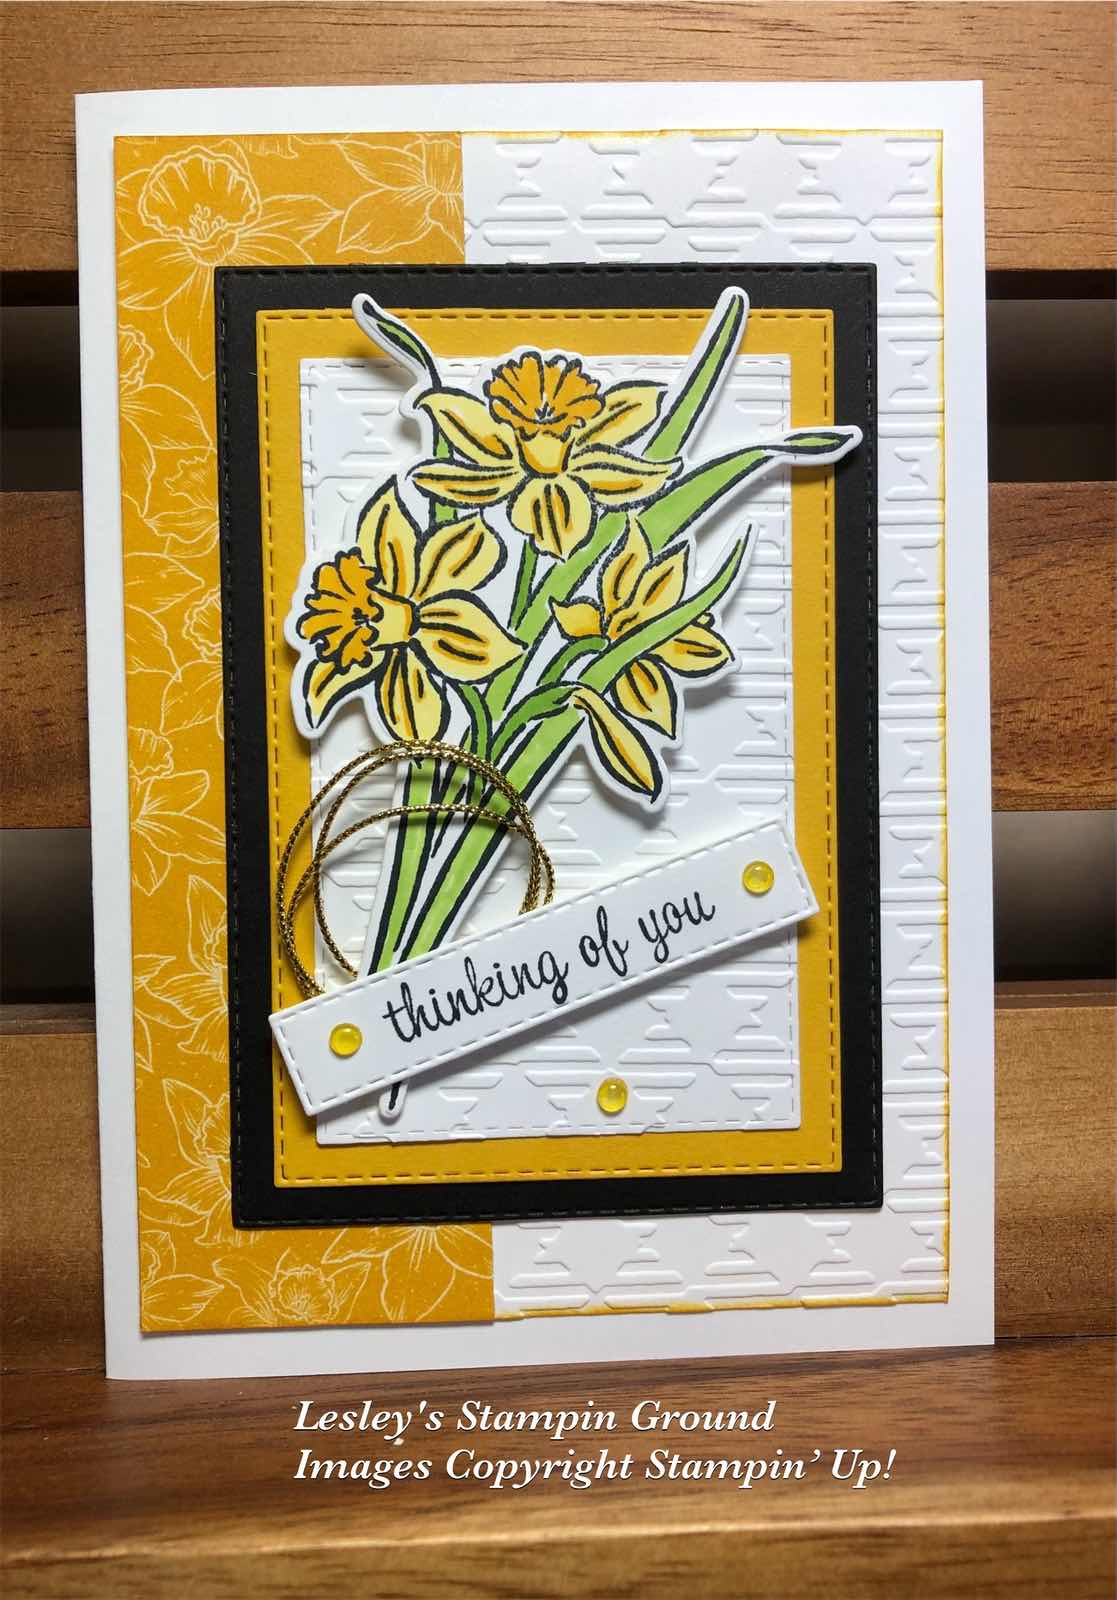
The Daffodil Dream Bundle (#157795) was used on this card and consists of the Daffodil Daydream stamp set (#157786) and the Daffodil Dies (#157794).


The daffodils were stamped with Tuxedo Black Memento ink (#132708) on Basic White card (#159228). The flowers were coloured with Daffodil Delight Stampin’ Blends (#154883) and for the leaves I used Granny Apple Green Stampin’ Blends (#154885). The co-ordinating die from the Daffodil Dies was used to cut the stamped image.  

I dry embossed the Basic White card front with the Gingham Embossing Folder (#157627). The designer paper from the Sale-a-bration Daffodil Afternoon 12”x12” Designer Series Paper (#158127) was attached to the card front.

The Basic Black card (#121688), Crushed Curry card (#131288) and the Basic White card were all cut with Stitched Rectangles Dies (#151820). I also dry embossed the small white rectangular card with the Gingham embossing folder. I taped the rectangles together and attached them to the card. The daffodils were attached to the card with Stampin’ Dimensionals (#104430). 

The gold trim is from the Simply Elegant Trim (#155766). The sentiment is in the Expressions Of Friendship stamp set (#158460) and stamped with Tuxedo Black Memento ink, cut with another Stitched Rectangles die and attached with Mini Stampin’ Dimensionals (#144108). The embellishments are the  Clear Polished Dots (#158134) which were coloured with the Dark Daffodil Delight Stampin’ Blends.

TIP: To colour the embellishments using Stampin’ Blends, I find it easier to colour with the brush end of the blends. Colour the embellishments while they are still attached to the plastic they are adhered to. Allow them to dry, which doesn’t take long then transfer them to the card. Any clear or white embellishments can be coloured this way.

“Love what you do and share what you love.”


Saturday, 5 March 2022

Blessings Of Home Bundle

Hello,

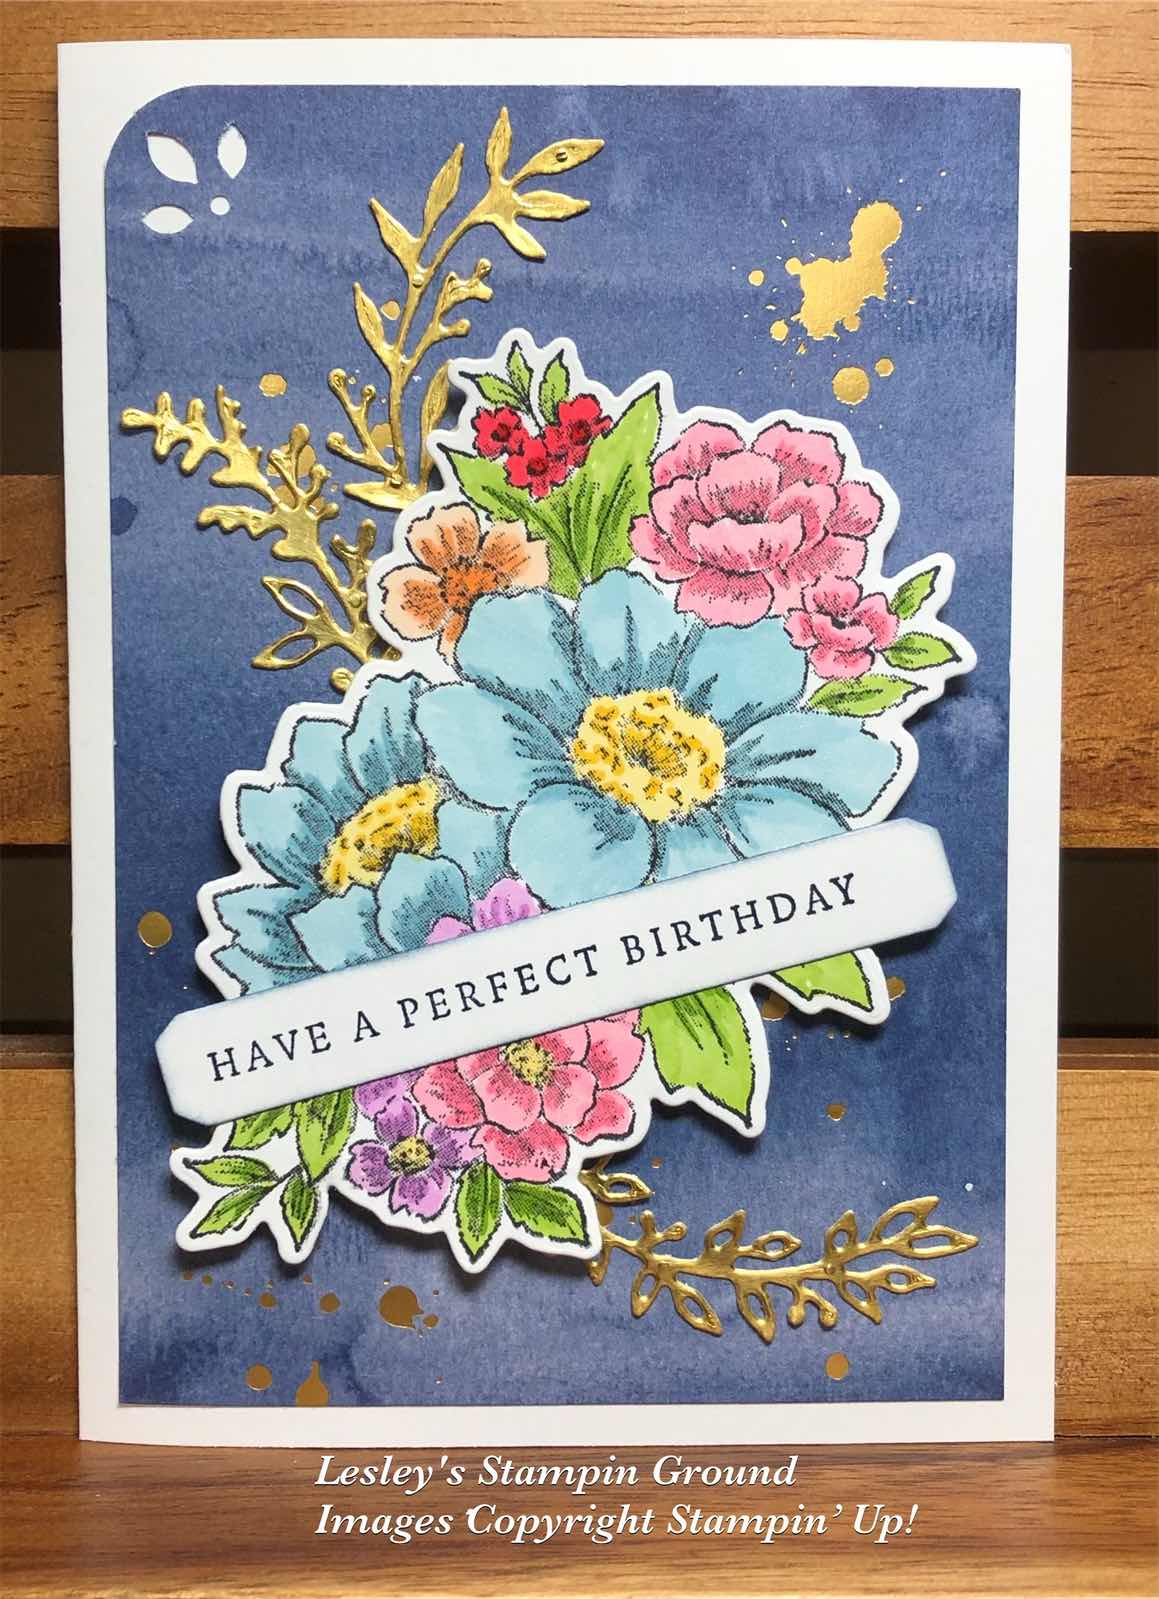
I find colouring is very relaxing, so I love colouring this beautiful floral image from the Blessings Of Home stamp set (#157930) with Stampin’ Blends.


The Stampin’ Blends used are Balmy Blue (#154830), Flirty Flamingo (#154884), Pale Papaya (#155519), Daffodil Delight (#154883), Fresh Freesia (#155518), Granny Apple Green (#154885) and Poppy Parade (#154958). A die from the Flowers Of Home Dies (#157938) was used to cut the image.

The foliage was also cut with the Flowers Of Home Dies and I used Gold Foil Sheets (#132622) which had been backed with Adhesive sheet (#152334).

One of the designs from the Abstract Beauty 4”x6” Specialty Designer Series Paper (#158039) was used for the background. I used the Detailed Trio Punch (#146320) to punch the top left corner. This was then attached to the Basic White base card (#159228). The flowers were attached to the card with Stampin’ Dimensionals (#104430)

The sentiment is also from the Blessings Of Home stamp set and stamped with Night Of Navy ink (#147110). This was cut with the Messages Die (#154422) and taped on the flowers.

“Love what you do and share what you love.”

Friday, 4 March 2022

Very Versailles & masking technique

Hi stamping friends,

I have been using the masking technique again on this card.


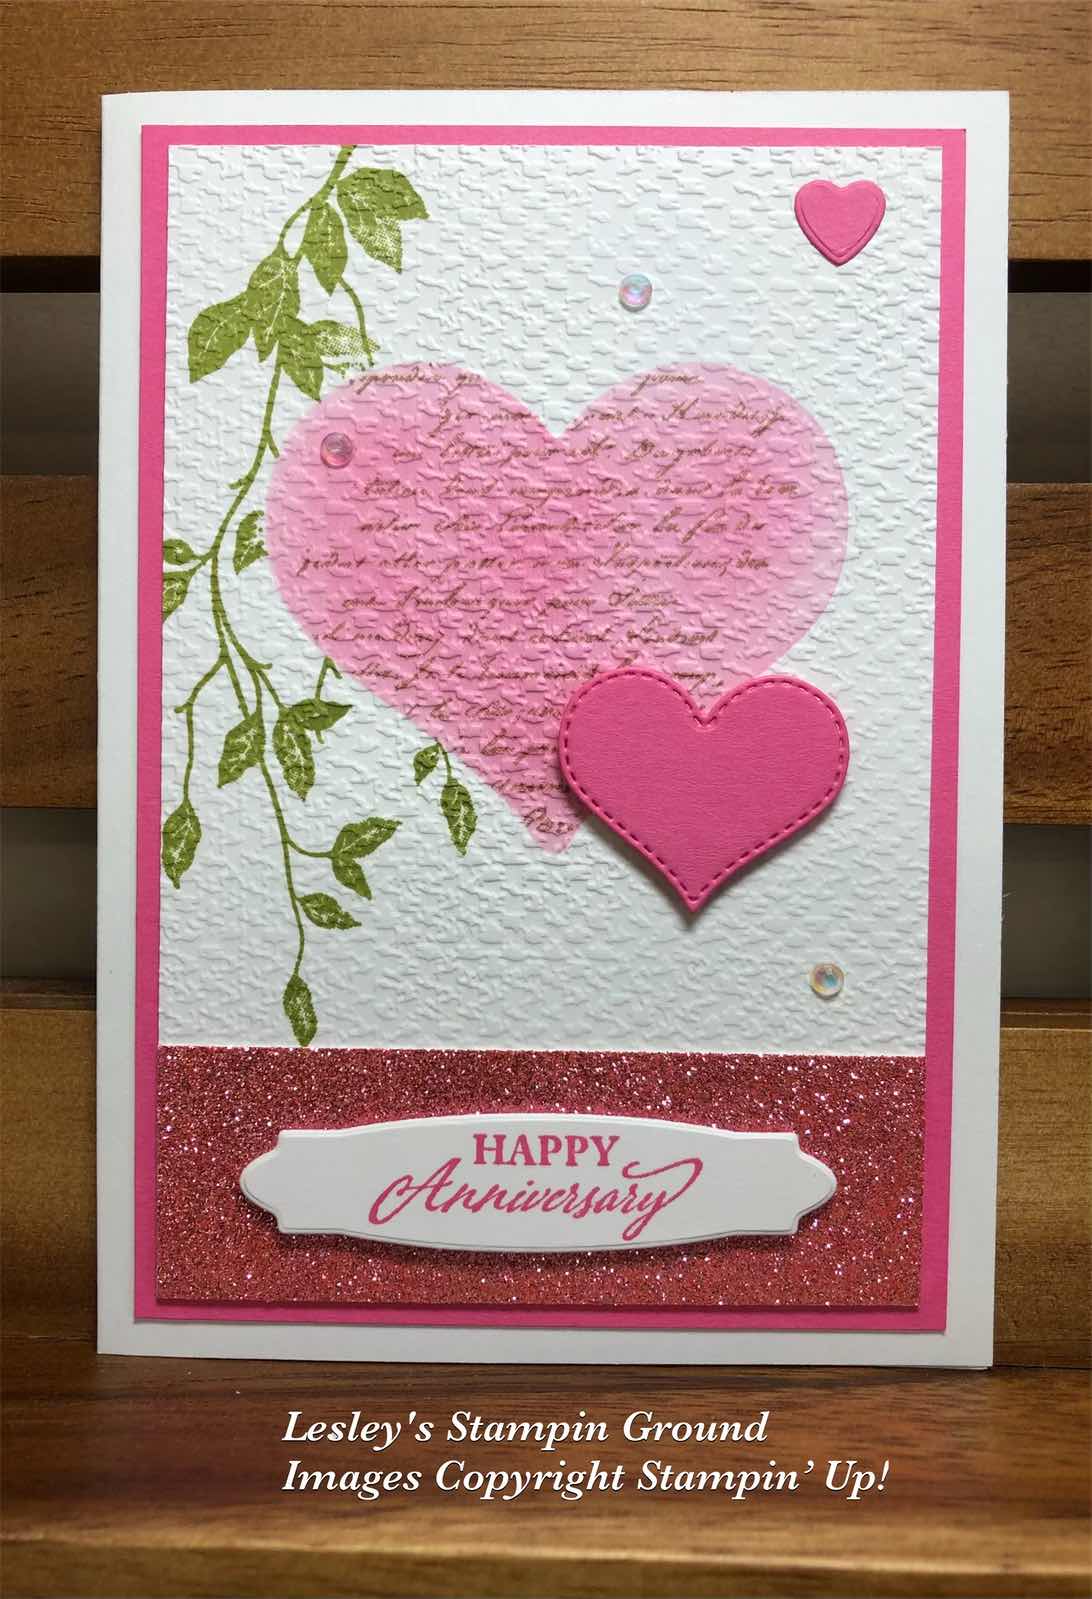
I used the larger heart from the Bouquet Of Love Dies (#157641) to cut a piece of scrap card and a piece of photocopy paper. This can be done at the same time. These were used for the masks. I placed the piece of scrap card with the heart cut out onto the Basic White card front (#159228). I used Polished Pink ink (#155712) and a Blending Brush (#153611) to create the heart. I removed the scrap card and replaced it with the photocopy paper as this is thinner and is a better mask when stamping. (See below).  I stamped the verse from the Very Versailles stamp set (#149275) with Crumb Cake ink (#147116) on top of the heart.


Then I placed the heart from the photocopy paper over the pink heart and stamped the foliage also from the Very Versailles stamp set onto the card with Pear Pizzaz ink (#147104).


Next I dry embossed the card front with the Tasteful Textile 3D Embossing Folder (#152718), then matted it with Polished Pink card (#155711) and attached it to the Basic White base card.

The smallest heart was cut with a Sweet Heart die (#157623) and the other heart with a die from Bouquet Of Love. I used Polished Pink card for both these hearts. Mini Stampin’ Dimensionals (#144108) were used to attach the larger heart to the card and a Mini Glue Dot (#103683) for the small heart.  The Supple Shimmer Specialty Paper (#158068) was attached to the card front. “Happy Anniversary” from Elegantly Said stamp set (#155095) was stamped with Polished Pink ink and cut with another die from Bouquet Of Love, then attached to the card with Stampin’ Dimensionals (#104430).

The embellishments are the Iridescent Rhinestone Basic Jewels (#158130).

TIP: When stamping & dry embossing the card front, stamp first then emboss. If you emboss first you won’t get a good stamped image because of the uneven surface.


“Love what you do and share what you love.”


Thursday, 3 March 2022

Dragonfly Garden

Hi friends,

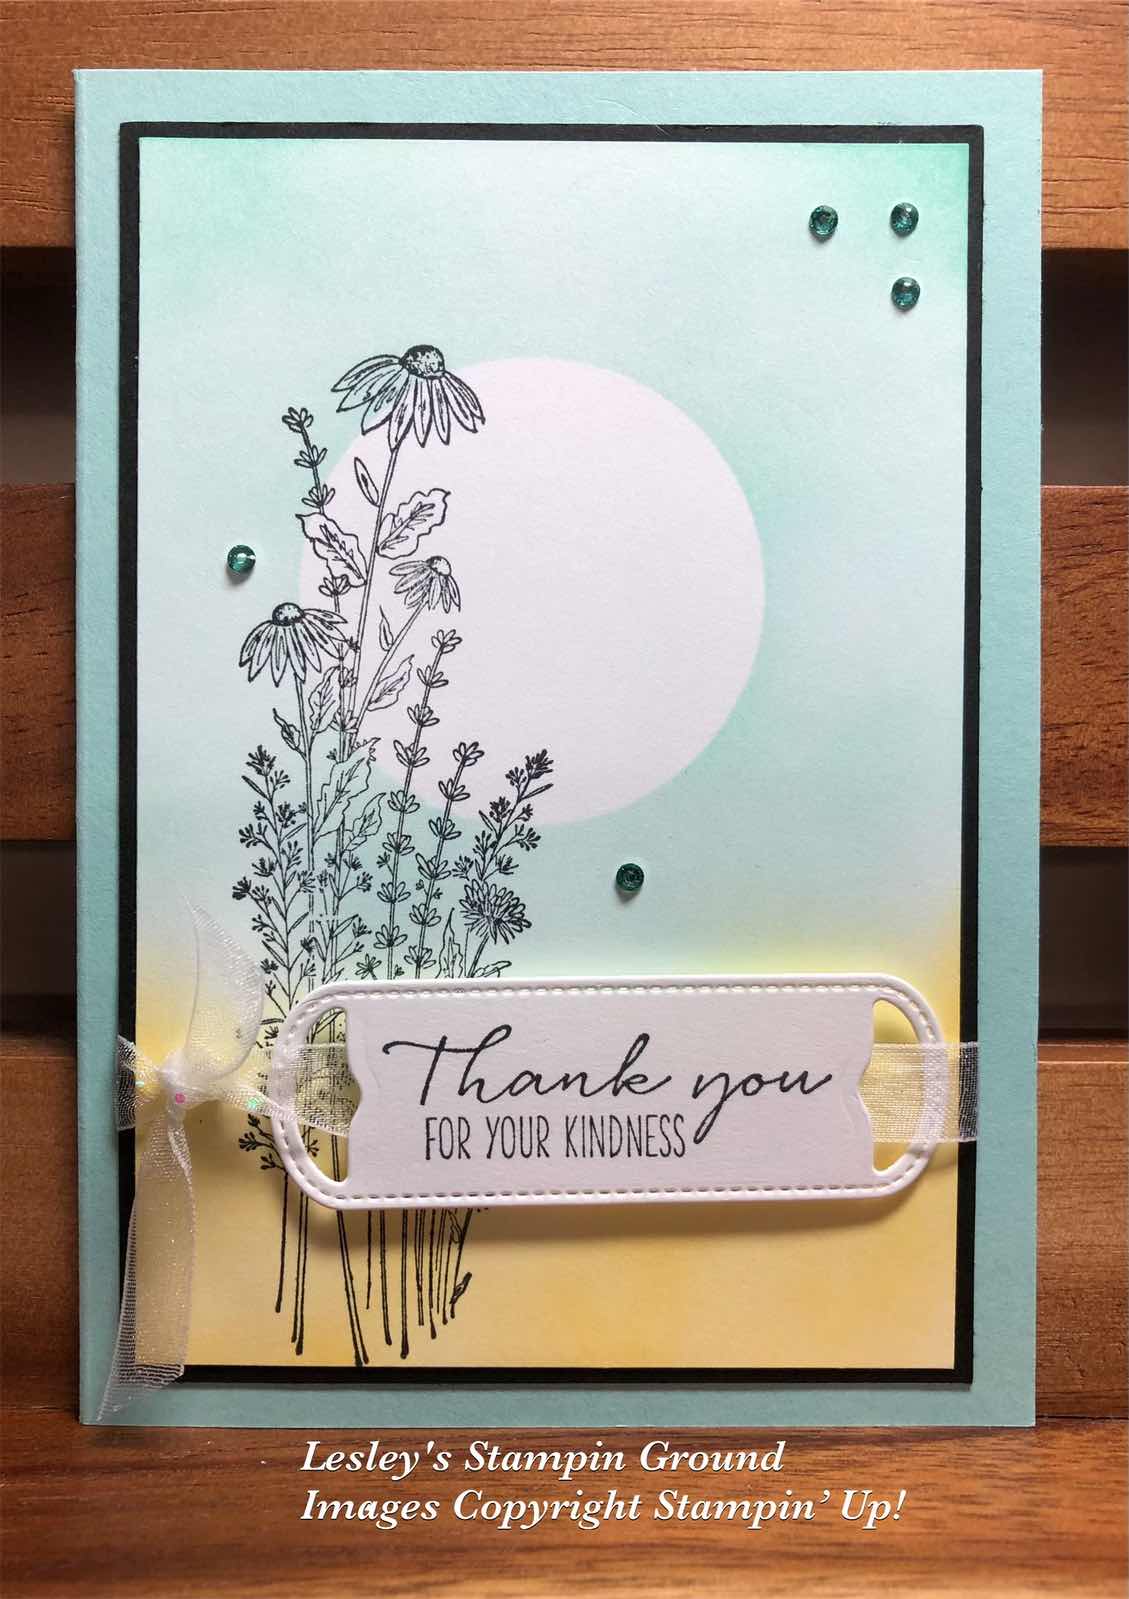
A simple masking technique was used for the circle on this card.


I punched a 2”circle from a post it note and placed it on the Basic White card front (#159228). The circle was created by blending Pool Party ink (#147107) with a Blending Brush (#153611) onto the white card. I then used Daffodil Delight ink (#147094) at the bottom of the card.

I stamped the floral image and sentiment from the Dragonfly Garden stamp set (#154411) with Tuxedo Black Memento ink (132708). The sentiment was cut with a Waves Die (#158840). I threaded the White Glittered Organdy Ribbon (#156408) through the sentiment label and wrapped it around the card front. The sentiment was attached with Stampin’ Dimensionals (#104430). The card front was matted with Basic Black card (#121688).

The base card is Pool Party (#124391) and the embellishments are from the new Rhinestone Waves Basic Jewels (#159396).

TIP: Post it notes are great for making masks as it is a thin paper and it has the sticky area so you can attached it to the card and remove it easily.

“Love what you do and share what you love.”

Wednesday, 2 March 2022

Artfully Composed Designer Series Paper

Hello friends,

I am still thinking of all those in the devastating flooded areas along the east coast of Australia. Hoping you are all safe and take care.

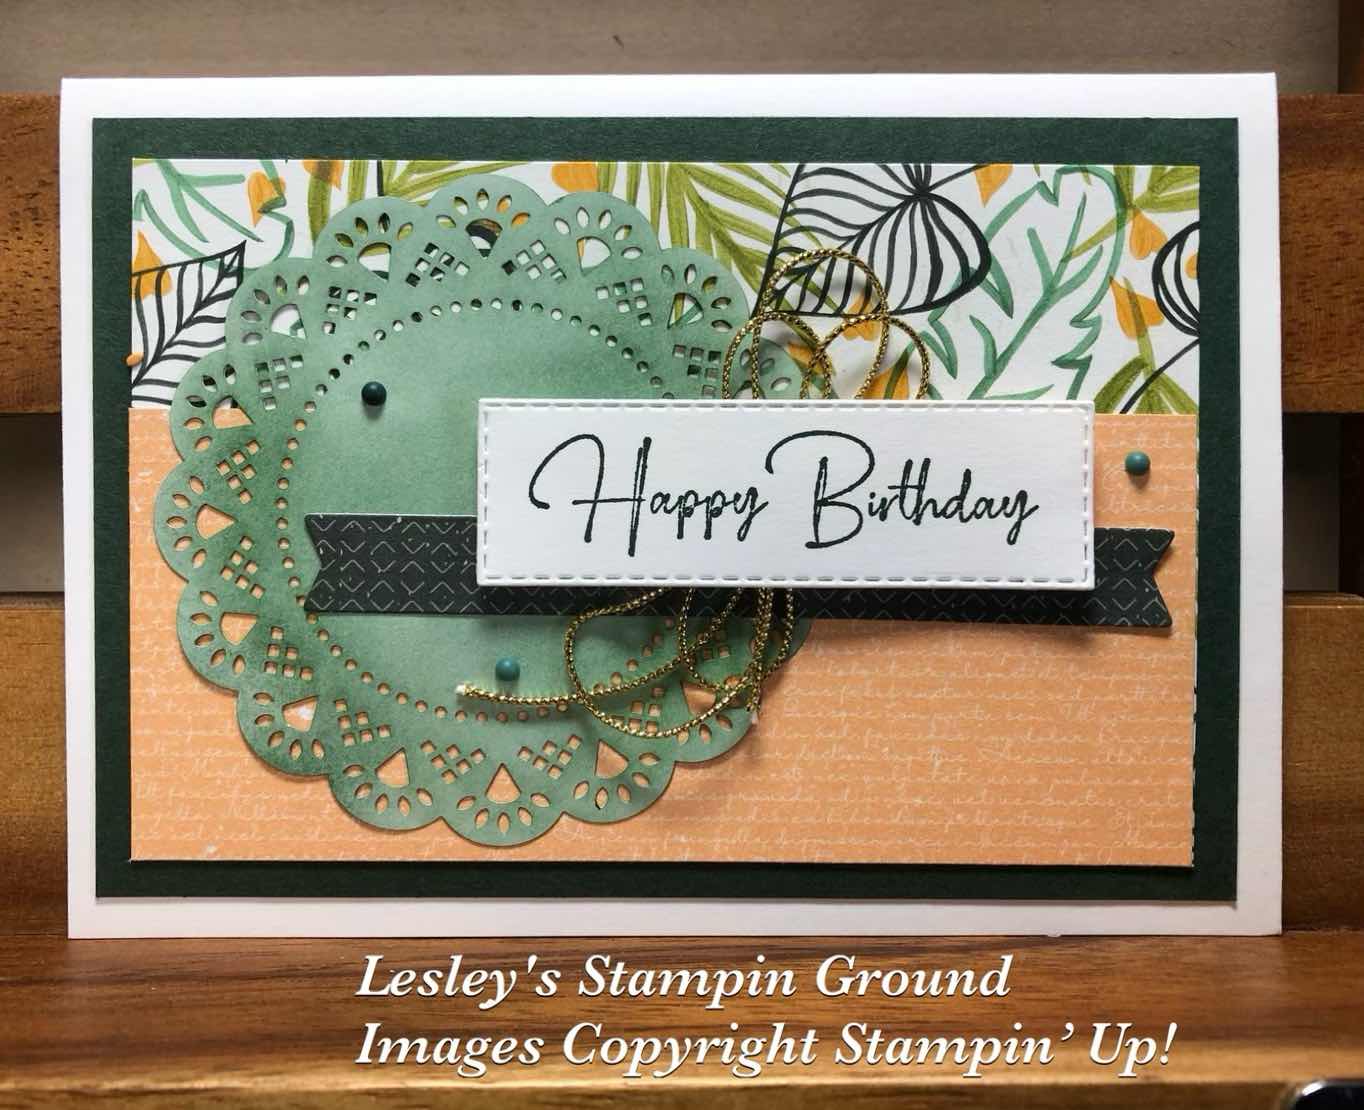
Todays card is an easy one using Designer Paper. You could choose any DSP for this card. I chose the Artfully Composed 12”x12” Designer Series Paper (#157750).


I attached 2 of the designs from this pack onto Evening Evergreen card (#155575) and then this was attached to the Basic White base card (#159228). I coloured the white side of one of the Heart & Home Doilies (#157956) using a Blending Brush (#153611) and Evening Evergreen ink (#155576).

I cut another piece of the same DSP with a label die from the Bloom Dies (#155989). This was taped to the card. The gold trim is from the Simply Elegant Trim (#155766). “Happy Birthday” is from the Flowing Flowers stamp set (#157880) and stamped with Evening Evergreen ink. I used a Stitched Rectangles Die (#151820) to cut the sentiment, then attached it to the card with Stampin’ Dimensionals (#104430). The 3 embellishments are the (retired) Matt Decorative Dots.

TIP: The Heart & Home Doilies come in 3 colours - Basic Gray, Cinnamon Cider & Misty Moonlight. However you can have any colour by colouring the back of the doilies which is white. Just use Blending Brushes and any coloured ink.

“Love what you do and share what you love.”


Tuesday, 1 March 2022

Sale-a-bration

Hello my stamping friends,

Sale-a-bration is continuing till 16th March (in Australia) so there is still time to get your free products with a qualifying order. I have used a couple of  Sale-a-bration products on todays card.


I stamped the flowers from the Calming Camellia stamp set (#158117) with Flirty Flamingo ink (#147052) onto Basic White card (#159228). I used the Bouquet Of Love Hybrid Embossing Folder (#157641) to cut the heart and emboss another piece of  Basic White card. This was placed over the stamped flowers using Stampin’ Dimensionals (#104430), then I matted this with Flirty Flamingo card (#141421).

I attached the Simply Marbleous Designer Series Paper (#158128) to the Basic White base card. The row of hearts were cut with a die from the Sweet Heart Dies (#157623). The Flirty Flamingo card was backed with Adhesive Sheet (#152334) before cutting with the die. The smaller individual heart is also cut  from the Bouquet Of Love Dies and attached to the card with Mini Glue Dots (#103683).

The sentiment is from the Peaceful Moments stamp set (#151595) and stamped with Flirty Flamingo ink. The die to cut this is from the Ornate Frames (#150664) and attached to the card with Stampin’ Dimensionals. 

The sale-a-bration products are the Calming Camellia stamp set and the Simply Marbleous Designer Series Paper.


“Love what you do and share what you love.”