Showing posts with label #wellwrittendies. Show all posts

Tuesday, 16 February 2021

True Love Scrapbook page

Hi everyone,

Here’s a scrapbook page for a change. Wish I had more time for scrapbooking but I always seem to run out of time.


I had cut all the flowers from the inside of this page of True Love Designer Series Paper (#154281) for cards, so decided to use the outside for this scrapbook page. Can’t waste these beautiful flowers.  I fussy cut around the flowers, leaving it in one piece. I coloured the flowers and leaves with a variety of Stampin’ Blends - Granny Apple Green (#154885), Old Olive (#154892), Mango Melody (#154888), Rococo Rose (#154900), Poppy Parade (#154958), Cherry Cobbler (#154880), Balmy Blue (#154830), Calypso Coral (#154881), Highland Heather (#154887), Rich Razzleberry (#154898), Flirty Flamingo (#154884), Magenta Madness (#153106) and Purple Posy (#154896). I then attached this paper to the 12”x12” Basic White cardstock (#159231). 

The photos were matted with Gold Foil Sheets (#132622) and Basic Black card (#121688). I attached the Square Vellum Doilies (#152484) to the page.
“Happy Birthday” is cut with the Well Written dies (#151816) from Gold foil sheets which had Adhesive Sheets (#152334) attached to the back for ease of attaching.

Enjoy your day!!

“Love what you do and share what you love.”


Tuesday, 26 January 2021

Lacy Petals Dies

Hi,

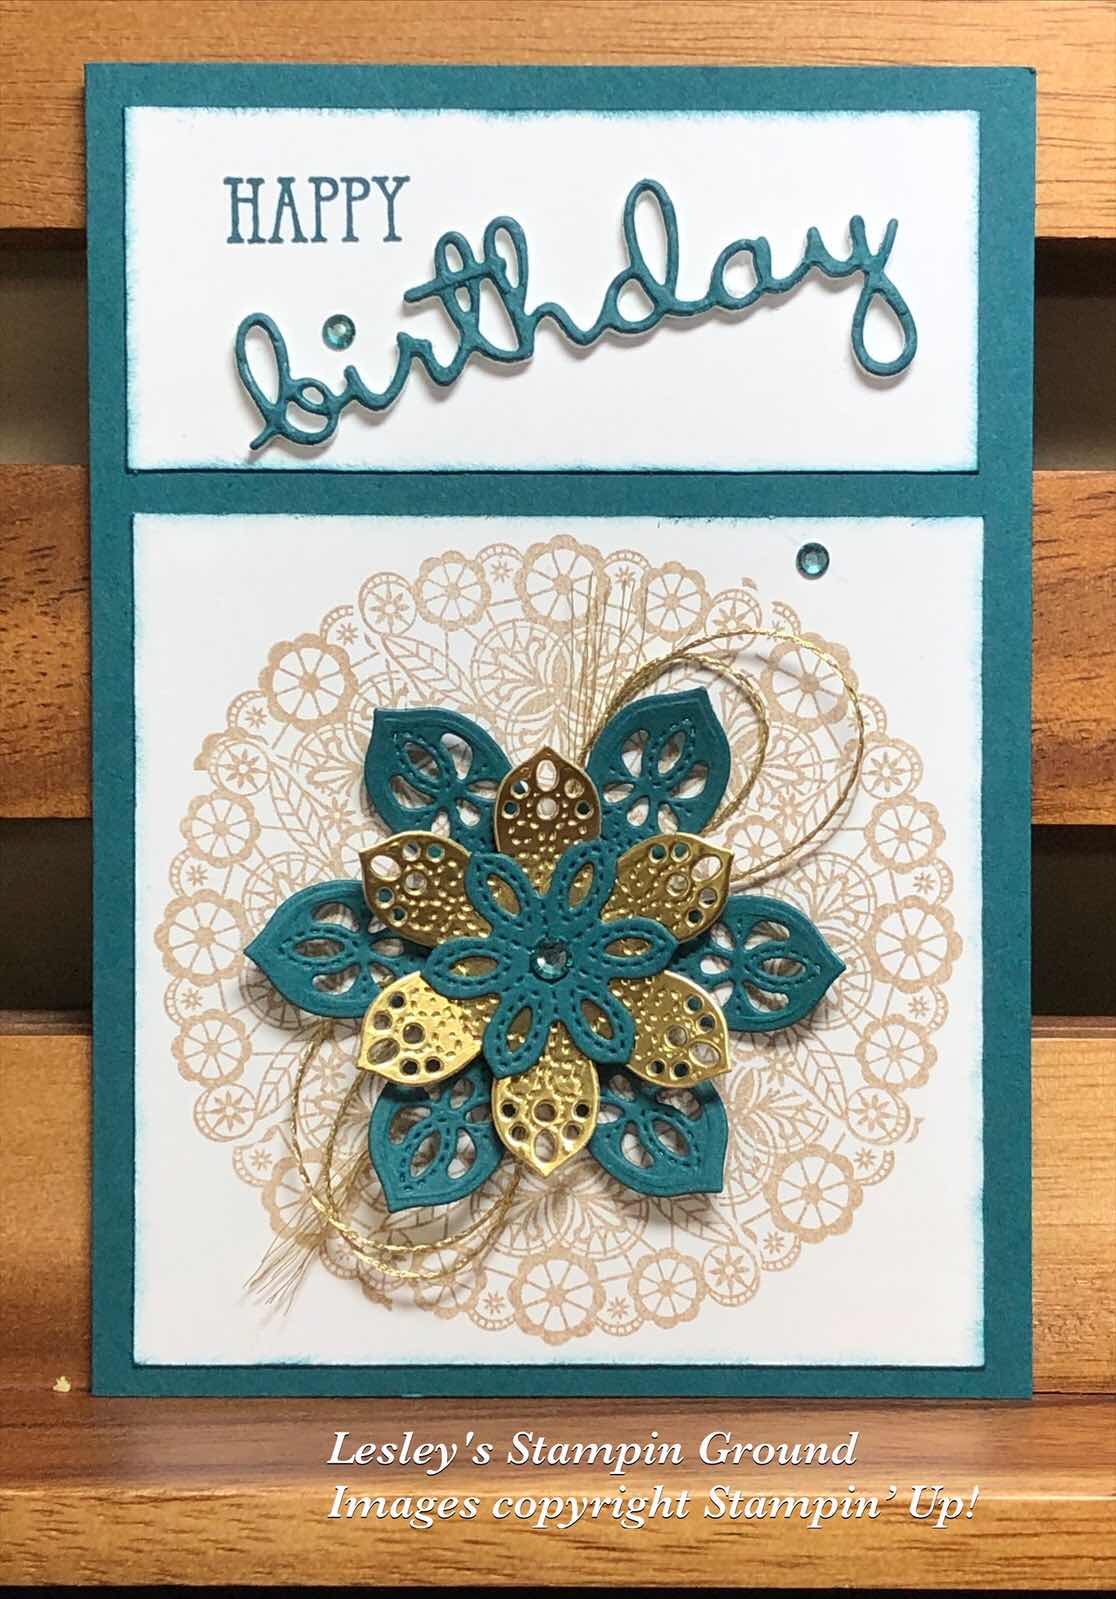
I have been playing with the Delicate Petals Bundle (#156258) again.


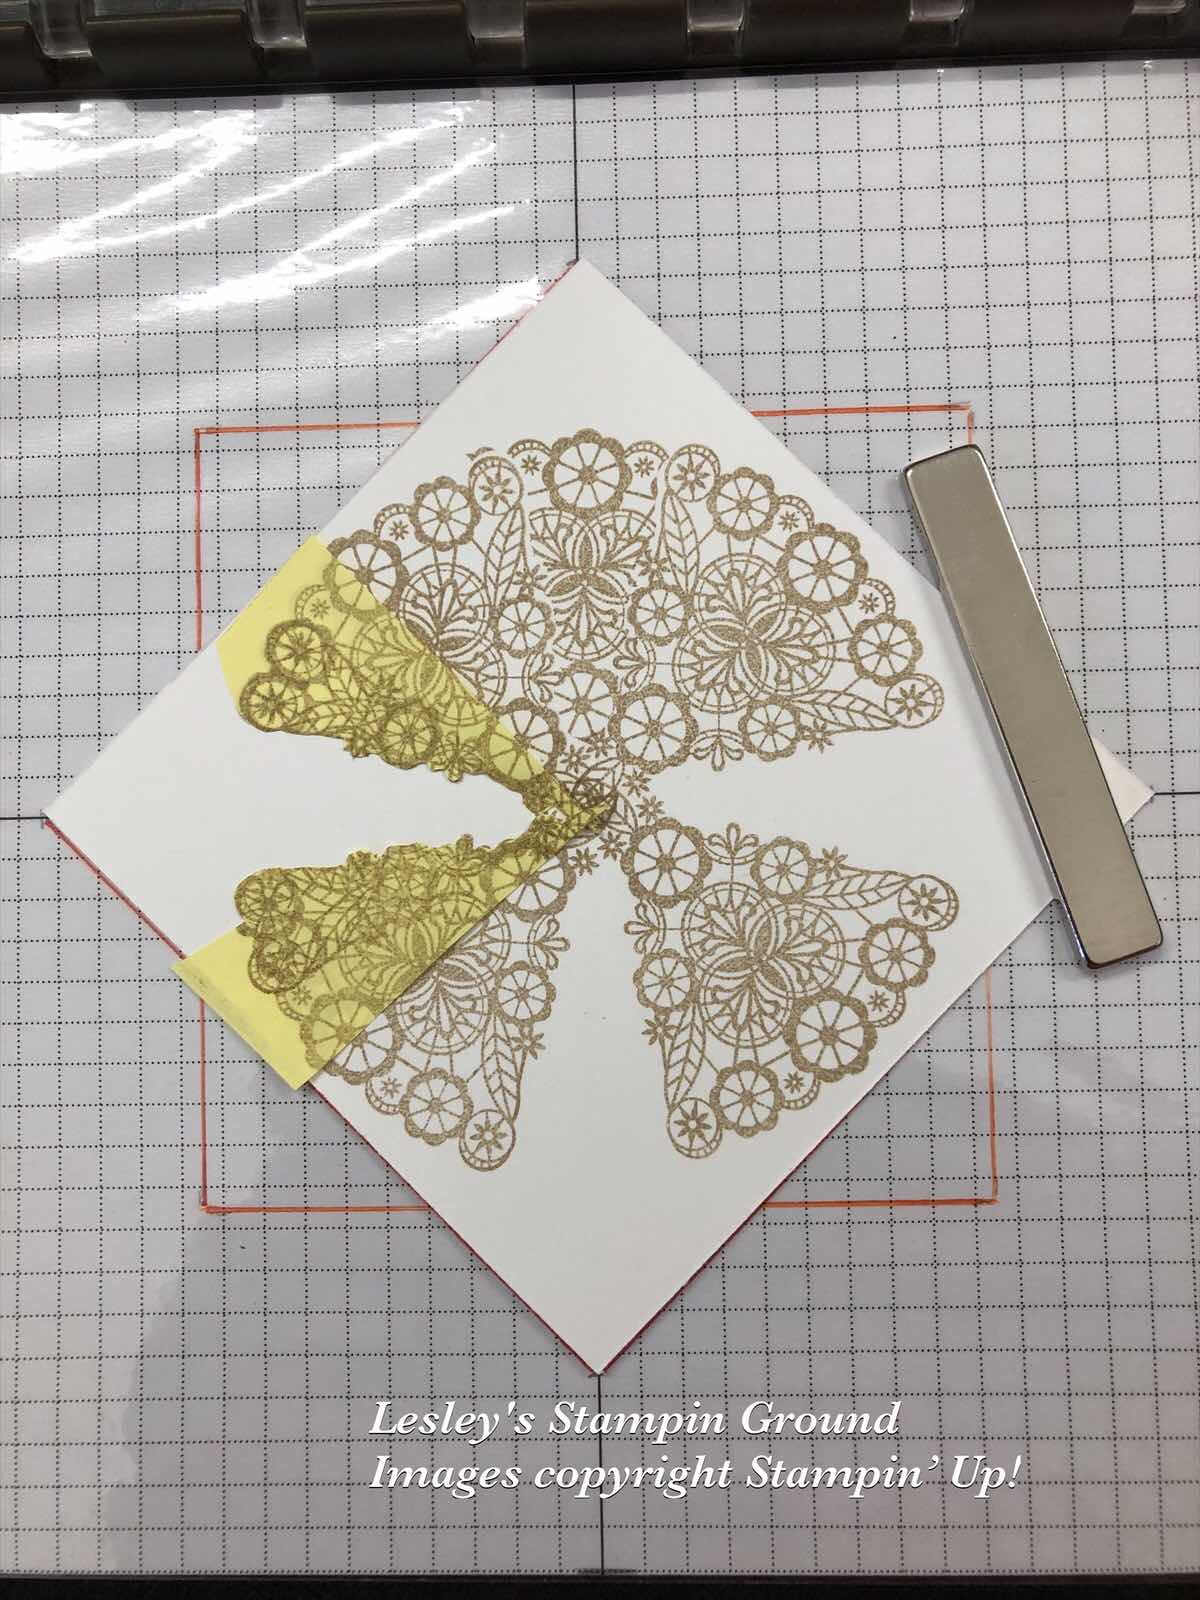
I stamped the detailed circle on the Basic White card (#159228) using Crumb Cake ink (#147116). To stamped this I cut the white card 9.5cm x 9.5cm and placed it on the Stamparatus (#148187) as shown below. I have a piece of the grid paper marked with a square and diamond the same size as the card.


Place the card on the square then place the stamp in position as shown.


Stamp the image, then turn the card and stamp again. Do this on all 4 sides.


To complete the circle I then moved the card to the “diamond” shape. As the image is larger than the gap in between the stamped image, I used the masking method. To do this I stamped a post-it-note and cut this around the edge of the image and cut this in half. I placed the stamped post-it-note over 2 of the stamped images, then stamped again on the card. The post-it-note stops the image being stamped over and only stamps the unmasked area. 


The petals and flowers were cut with Pretty Peacock card (#150886) and Gold Foil Sheet (#132622). I attached the Gold Trim from the Forever Greenery Trim Combo Pack (#152475) before attaching the petals to the card. The Pretty Peacock petals were attached with Mini Glue Dots (#103683) and the Gold Foil flower was attached with Mini Stampin’ Dimensionals (#144108).
“Happy” is from the Well Said stamp set (#148796) and stamped with Pretty Peacock ink (#150083). I attached a piece of Pretty Peacock card to the Foam Adhesive Sheets (#152815). This is double sided adhesive foam which you can cut with open dies and so I cut “birthday” using a die from the Well Written Dies (#151816). This has adhesive on the back so makes it easy to attach to the card.
I coloured 3 Rhinestone Basic Jewels (#144220) using the Pretty Peacock Stampin Blends (#154895) before adding to the card. Remember you can colour your embellishments with Stampin’ Blends to co-ordinate with the colours on your card.

Have a great day!!


“Love what you do and share what you love.”


Wednesday, 2 December 2020

Zany Zebras

Welcome everyone,

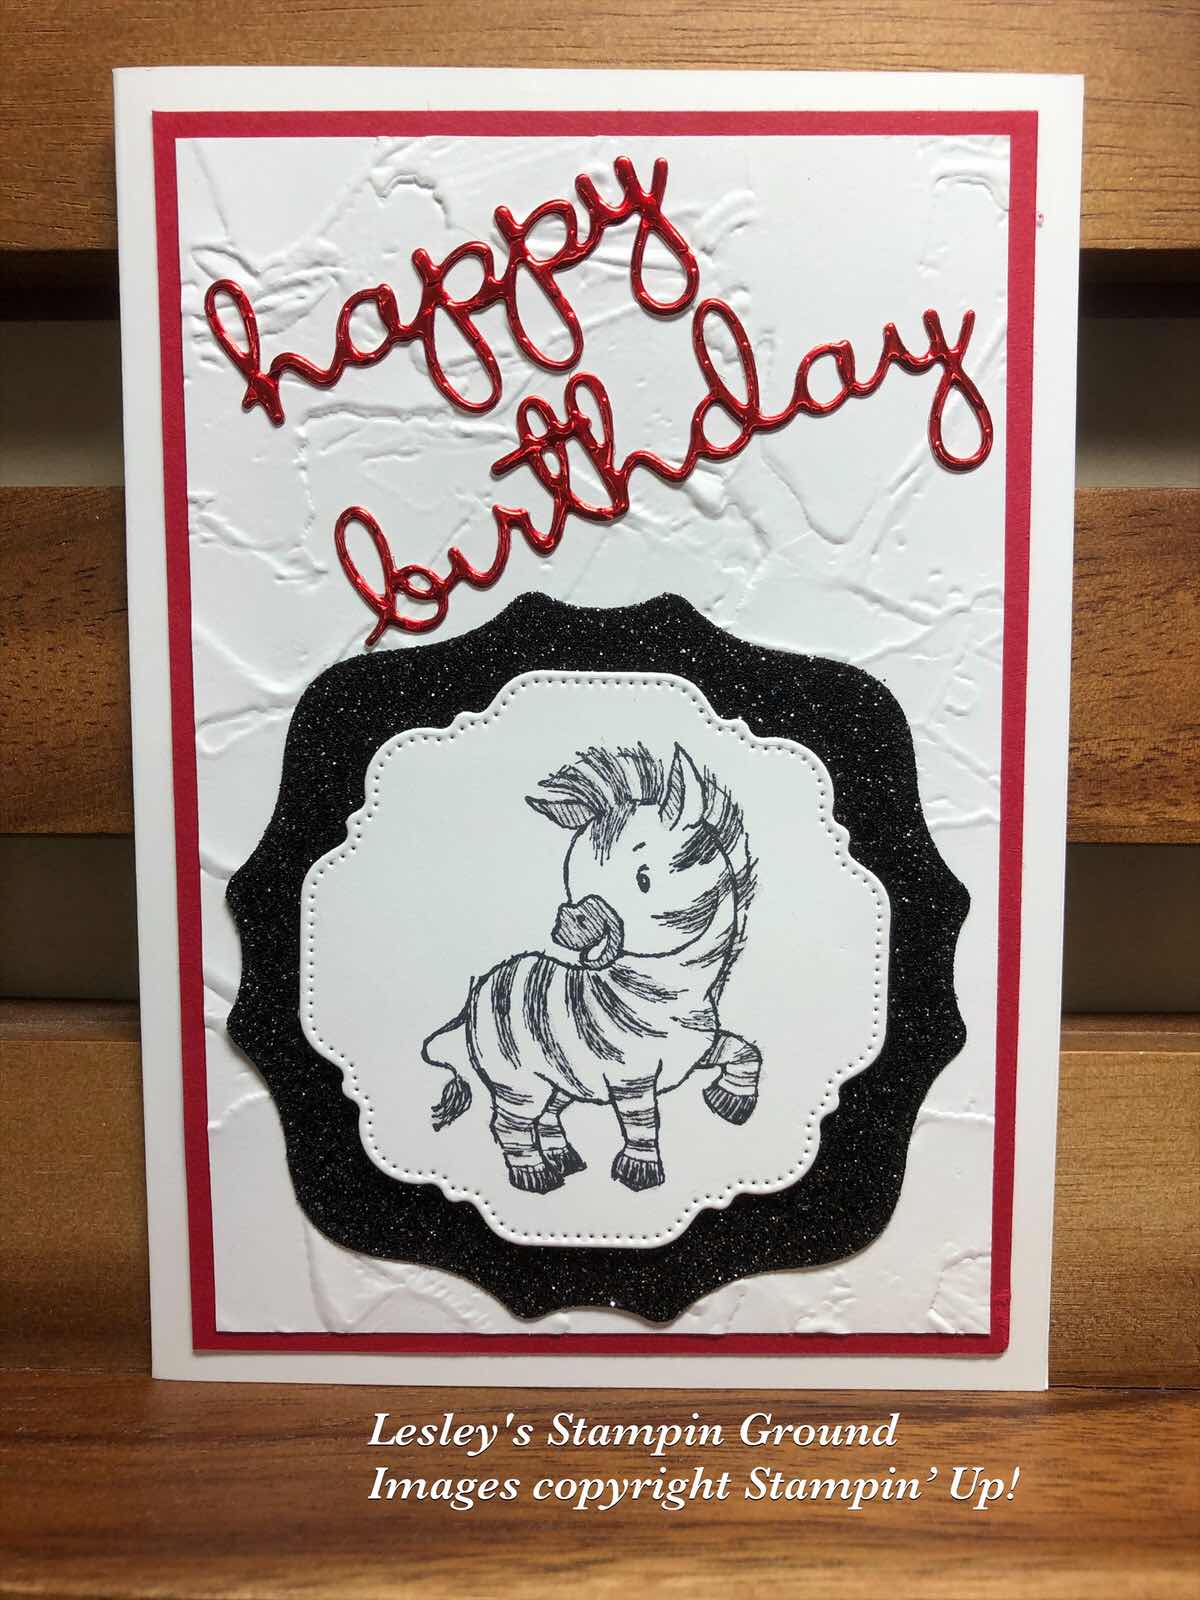
I think you all know I love dies and have used 3 different sets on this cute card. I also love some glitter and shine on my cards so have also used some glitter here.


The base card is Whisper White (#106549) and the next layer is Real Red card (#106578). The Whisper White card on top has been dry embossed with the Painted Texture 3D Embossing Folder (#154317). This is a sneak peek from the upcoming mini catalogue available from 5th January.
I stamped the cute Zebra from the Zany Zebras stamp set (#c152536) on Whisper White card. This, as well as the Black Glitter Paper (#153518) were cut with dies from the Hippo & Friends Dies (#153585). I attached these using Stampin’ Dimensionals (#104430).
The dies for “Happy Birthday” are from the Well Written Dies (#151816) and cut from the Red Foil from the Red & Green Foil Sheets (#153510). I had adhered Adhesive Sheets (#152334) to the back of the foil before cutting. Using these adhesive sheets allows you to easily attach fine detailed pieces to your project.

I also added some extra glimmer to the zebra using the Clear Wink Of Stella brush (#141897) where the line markings are but I don't think it shows very well in the photo.

Have a great day.

“Love what you do and share what you love!”


Thursday, 12 November 2020

Many Layered Blossoms Dies

Hi friends,

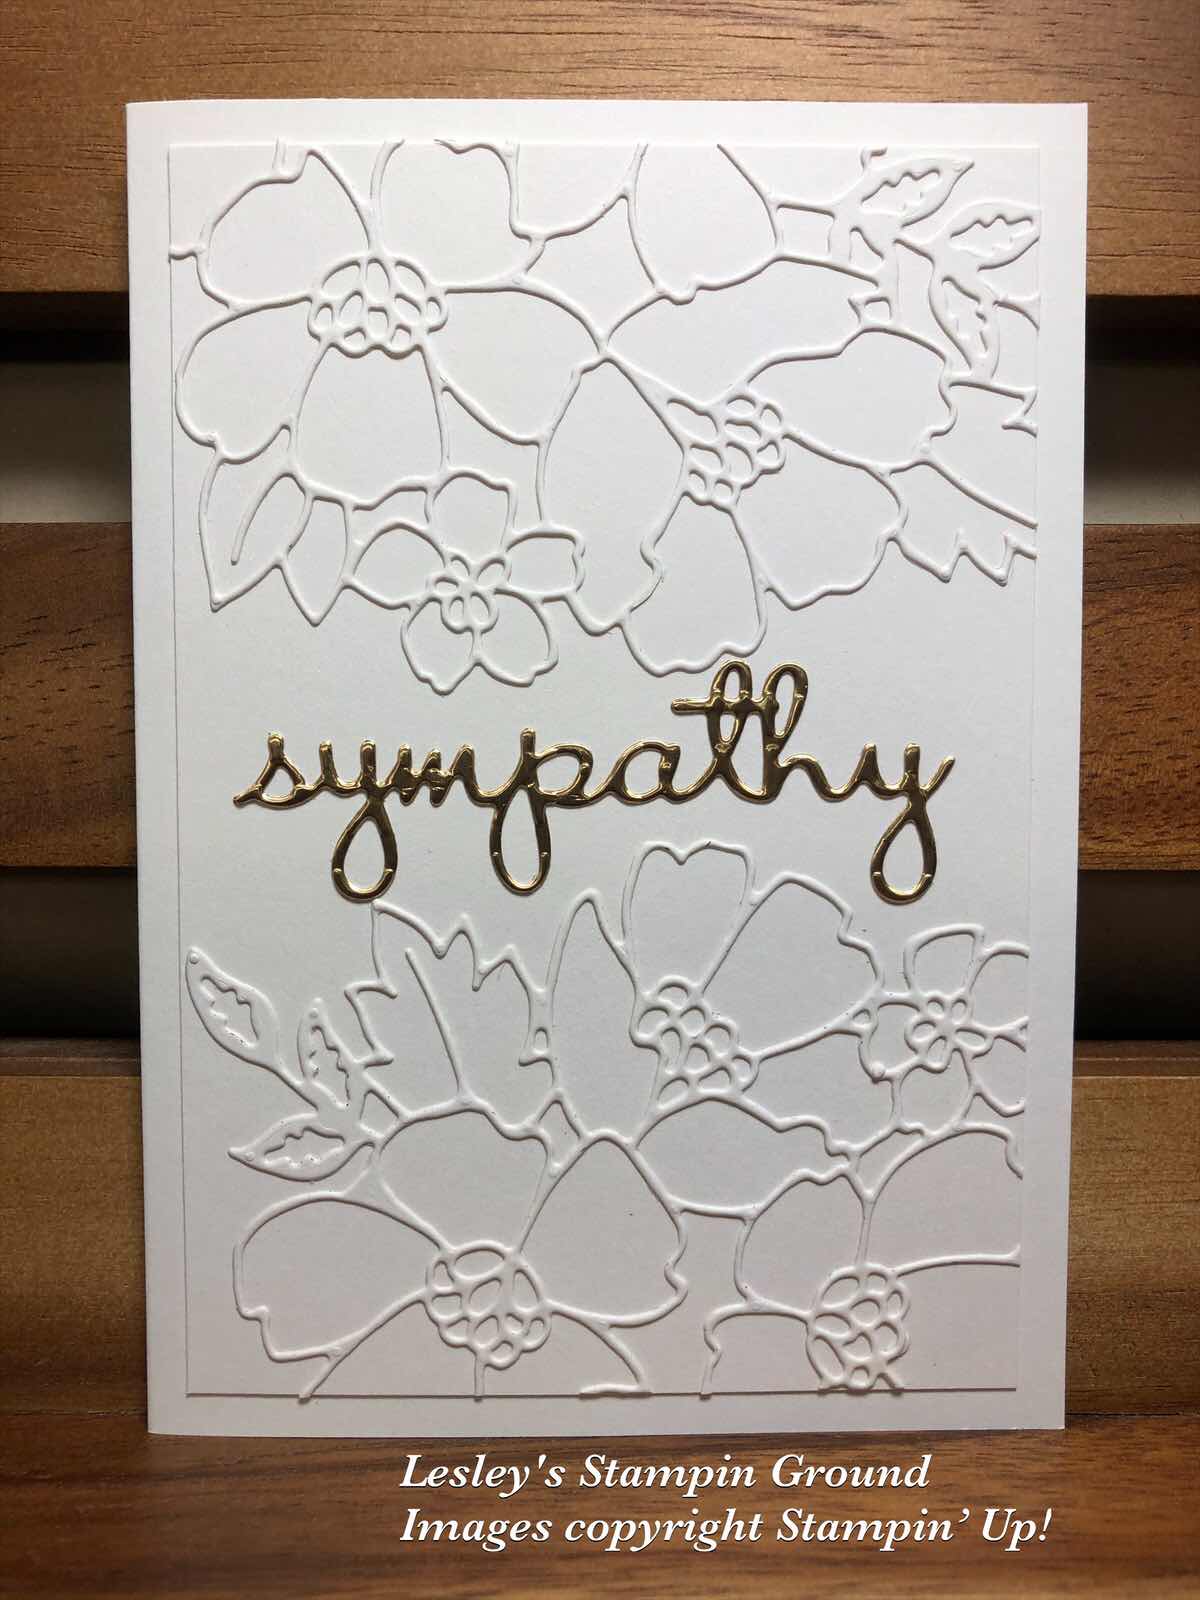
When I make a sympathy card I like to make it simple but elegant, so I have used the beautiful Many Layered Blossoms Dies (#153583) on this card and it is stamp free.


I adhered the Adhesive Sheets (#152334) on the back of the Shimmery White cardstock (#121717) then cut the flowers with a die from the Many Layered Blossoms Dies. I cut the die cut flowers in half and attached the pieces to the Shimmery White card front and trimmed the pieces that extended over the edge.
“Sympathy” is cut with a Well Written Die (#151816) from Brushed Metallic 12”x12” cardstock. This was also backed with Adhesive sheets and attached to the card. The base card is also Shimmery White card.

How easy is that. It could also be used for a wedding or anniversary card just by changing the sentiment.

Have a great day.

“Love what you do and share what you love”.


Thursday, 22 October 2020

Rectangular Postage Stamp Punch

Hello again,

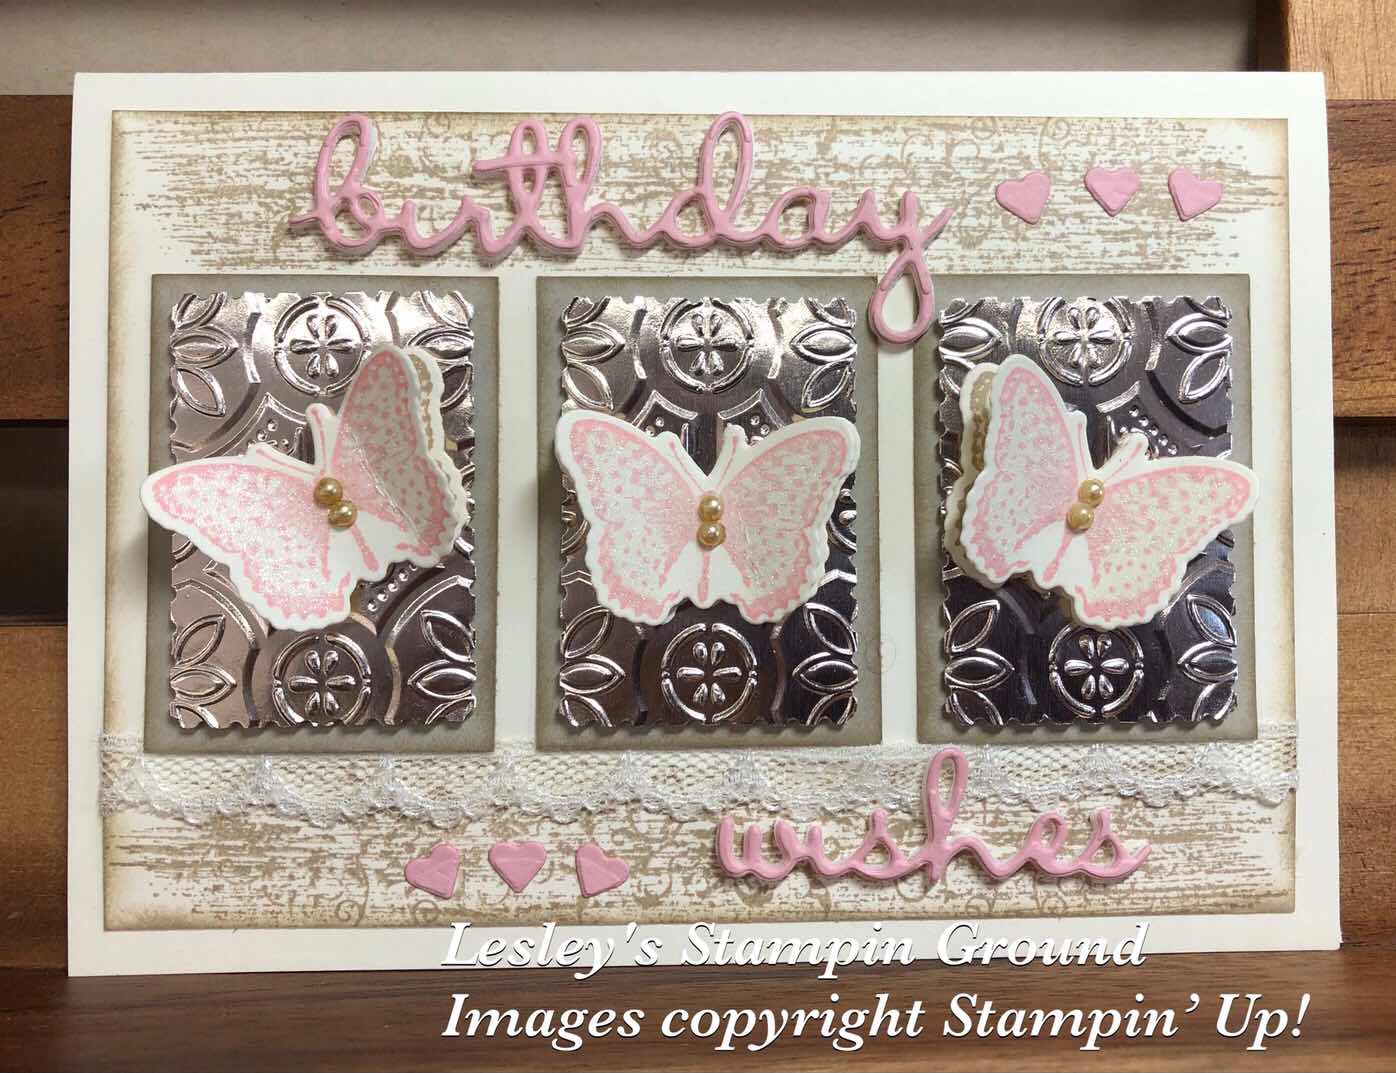
Today I was challenging myself again, this time to use colours I don't use very much, but when I do use them I wonder why I don’t use them more often. The colours are Sahara Sand and Blushing Bride.


The base card and card front are Very Vanilla (#106550). I stamped the image from the Woven Heirlooms stamp set (#c149306) on the top and bottom of the card front with Sahara Sand ink (#147117). I also sponged the edges with Sahara Sand ink.
I punched 3 Rectangular Postage Stamps (#152709) from Champagne Foil Sheet (#144748), then embossed these with the Tin Tile 3D Embossing Folder (#151801). I attached these to Sahara Sand card (#121695) cut slightly bigger than the punched rectangles. The Very Vanilla 3/8” Scalloped Lace Trim (#149593) was wrapped around the card front. I stamped 3 butterflies from the Positive Thoughts stamp set (#151490) with Sahara Sand ink and another 3 with Blushing Bride ink (#147100). The Sahara Sand butterflies were attached to the Foil Sheet, then the Blushing Bride butterflies were added on top with Mini Stampin’ Dimensionals (#1144108).
I attached a piece of Blushing Bride card (#131287) to the Foam Adhesive Sheets (#152815), then cut “birthday wishes” using dies from the Well Written Dies (#151816). The Foam Adhesive Sheets are double sided adhesive foam sheets and great for adding depth and dimension to your project. The little hearts are also cut with a die from the Well Written Dies, using Blushing Bride card and glued to the card with the Fine-Tip Glue Pen (#138309). 
I coloured the Pearl Basic Jewels (#144219) with Soft Suede Stampin’ Blends (#154906) and attached them to the butterflies.

Have a great day!!


Sunday, 18 October 2020

Quite Curvy Bundle

Hello,

Here’s another seek peak of the Quite Curvy Bundle (#156228) which will be available for purchase from November 3rd.


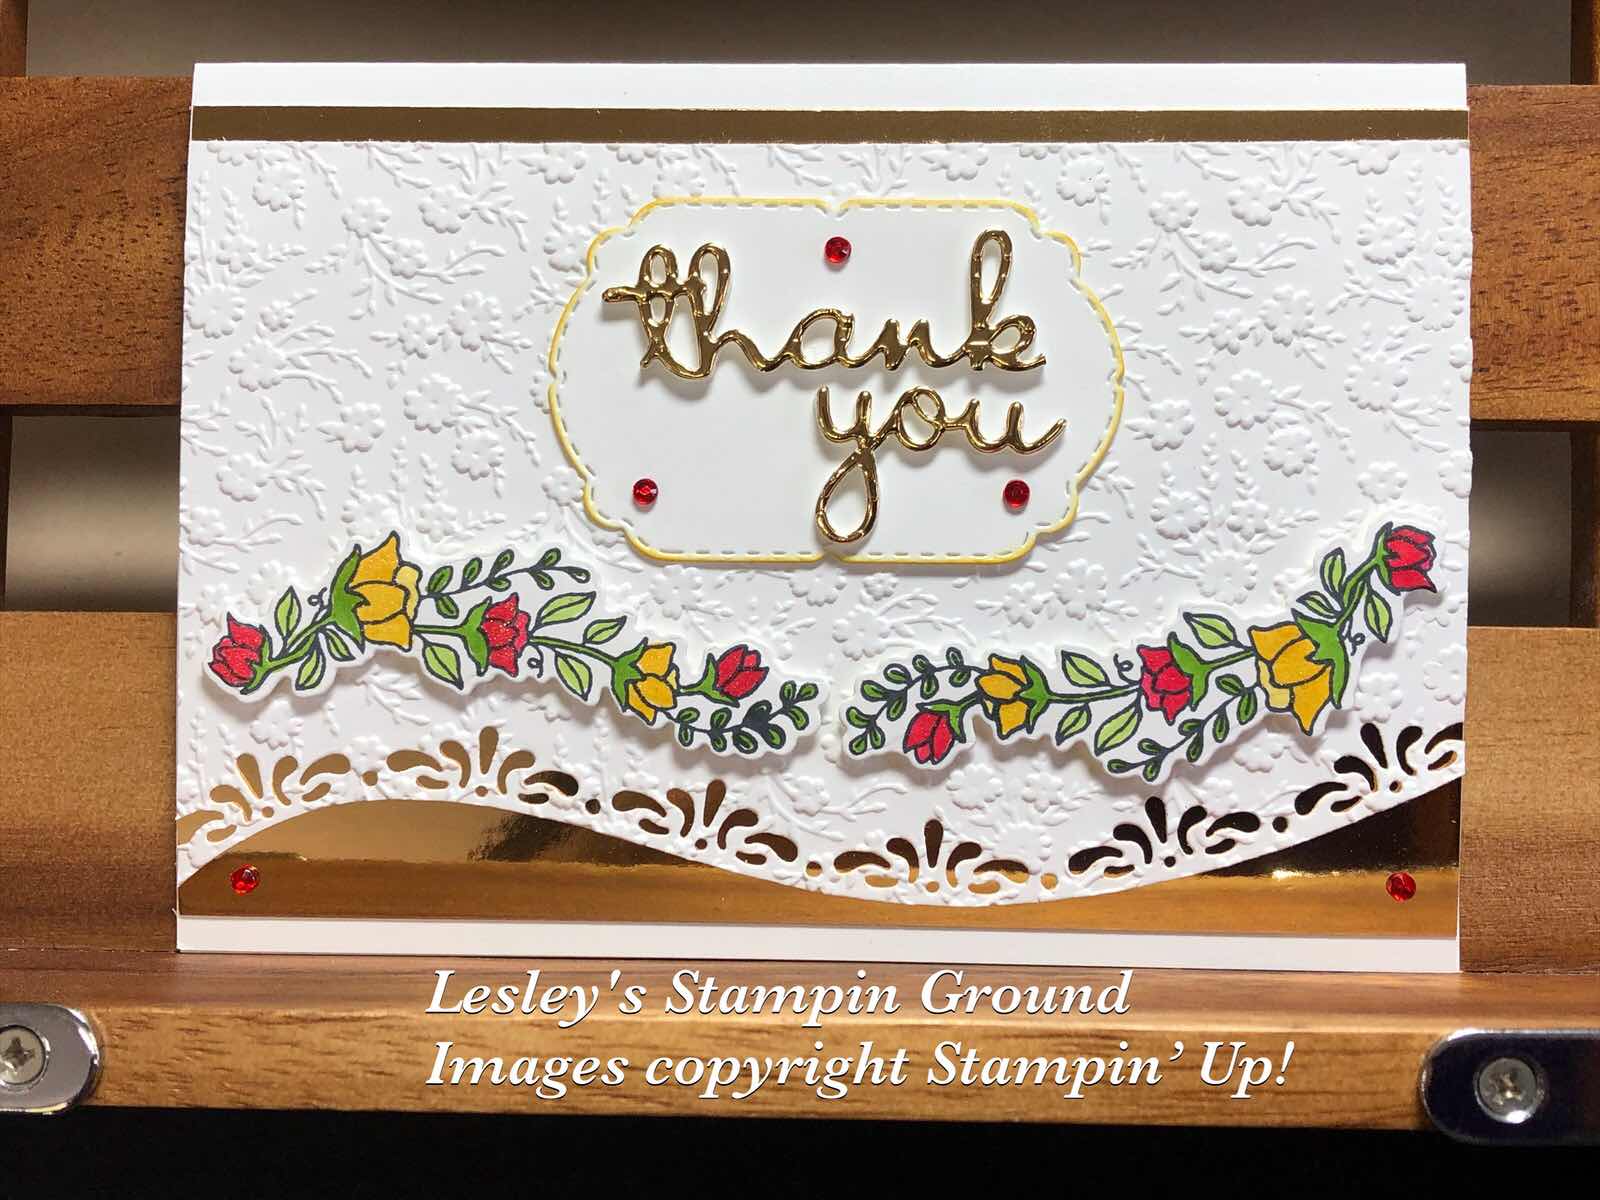
I cut the Whisper White card front (#106549) with one of the Curvy Dies (#154319), then dry embossed this with the Ornate Floral 3D Embossing Folder (#152725). This was then attached to a piece of the Brass Foil Sheet (#153057) and attached to the Whisper White base card.
I stamped the floral image from the Quite Curvy stamp set (#p154430) twice, using Tuxedo Black Memento Ink (#132708). These were then coloured with Stampin’ Blends - Real Red (#154899), Daffodil Delight (#154883)and Granny Apple Green (#154885). These were cut with a Curvy Die and attached to the card with Stampin’ Dimensionals (#104430).
I attached a piece of the Brass Foil to a Foam Adhesive Sheet (#152815), then cut “Thank You” using the Well Written Dies (#151816). This was then attached to the label cut with the smallest of the Celebration Labels Dies (#153570). The edges were daubered with Daffodil Delight ink (#147094), then the label was attached to the cardfront. The Red Rhinestone Basic Jewels (#146924) were added to finish the card.

Hope you have had a great weekend!!


Thursday, 15 October 2020

Curvy Dies

Hi everyone,

There is such a large variety of Stampin’ Up! dies which co-ordinate with stamp sets or just cut a beautiful image. There’s no stamping on this card, just some beautiful die cut images.


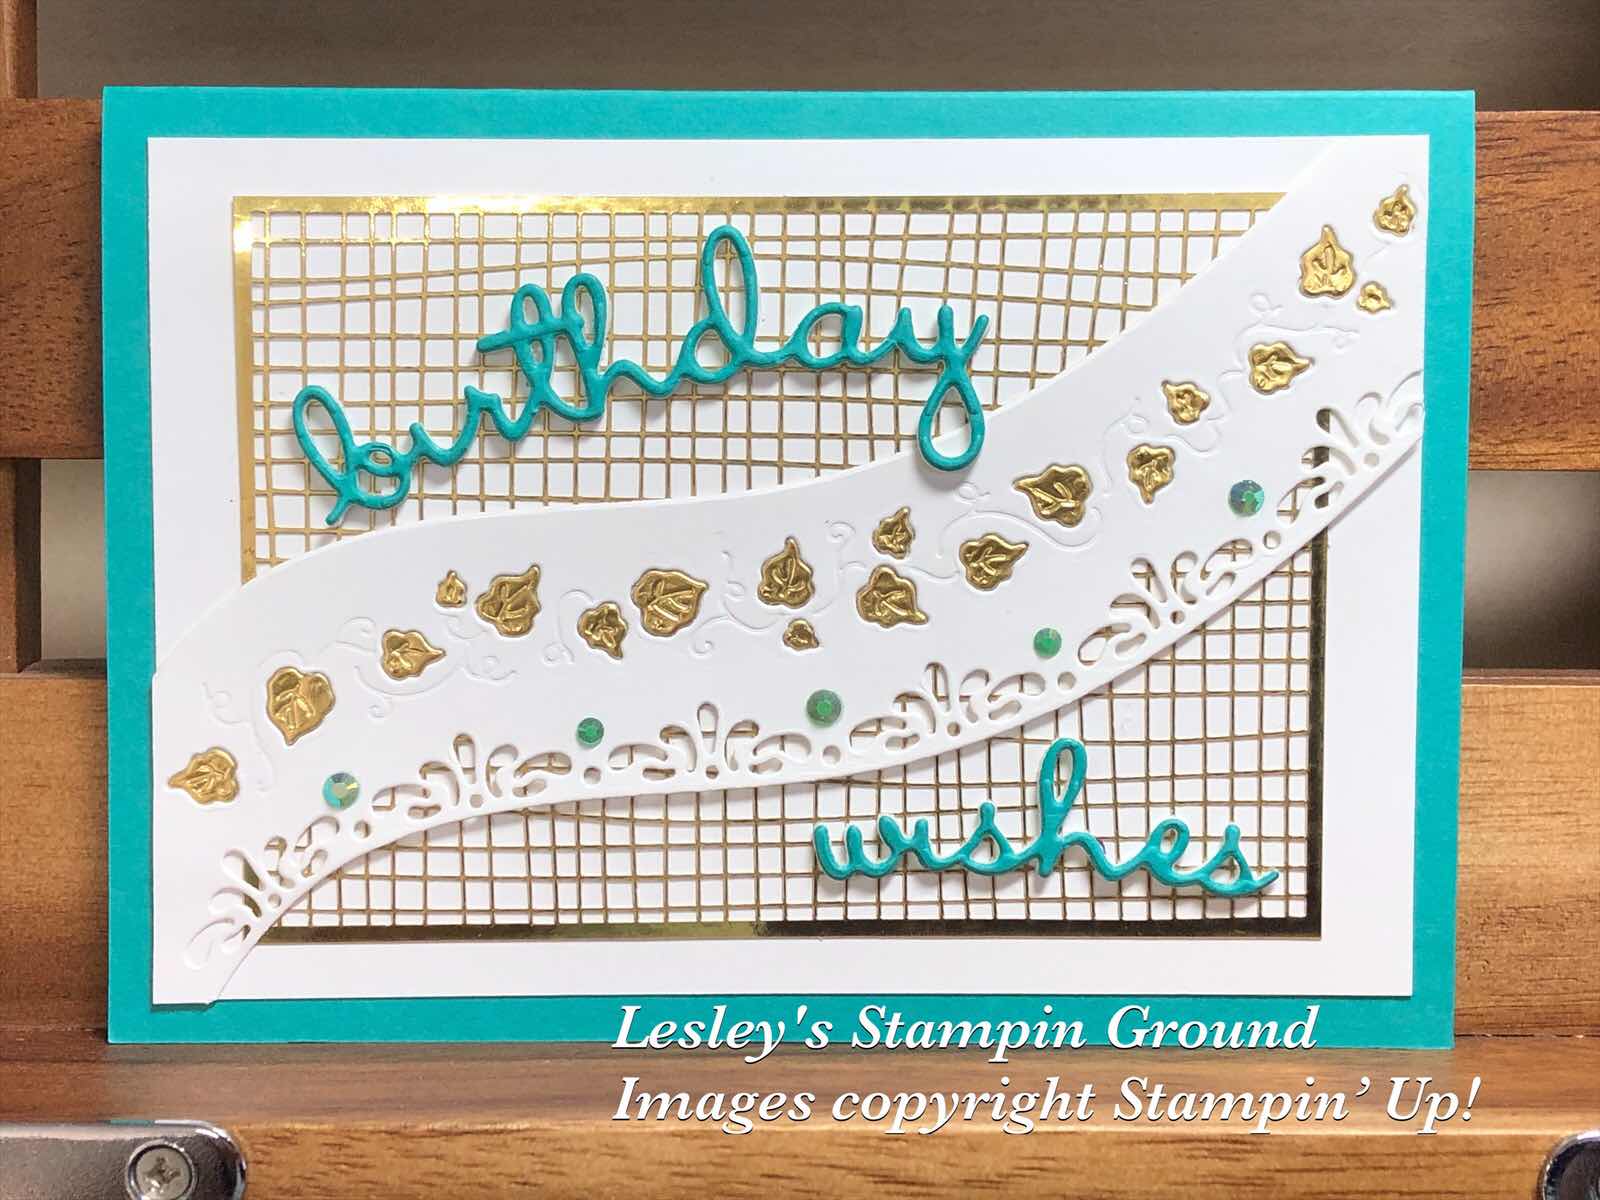
Firstly, I attached the pre-cut card front from the Forever Gold Laser-Cut Specialty Paper (#152493) to the Whisper White card (#106549). The base card is Bermuda Bay (#131286). The curvy white piece was cut with 3 of the Curvy Dies (#154319) and attached on top of the card using Mini Glue Dots (#103683). The leaves were also cut from Gold Foil Sheets (#132622) which had Adhesive Sheets (#152334) adhered to the back. I then attached each gold leaf to the card in the matching cut outs.
I attached Bermuda Bay card to Foam Adhesive Sheets (#152815), then cut the “Birthday Wishes” using the Well Written Dies (#151816). These Foam Adhesive Sheets are adhesive on both sides and are great to add dimension to more fiddly die cuts, although are best with more open dies rather than more detailed dies.
The embellishments are Flowers For Every Occasion (#153645) and adhered using the Fine-Tip Glue pen (3138309).

Have a great day!!


Thursday, 7 May 2020

Fanciful Fragrance & Stitched Lace Dies

Hello friends,

The Fanciful Fragrance stamp set (#149281) which I have used to stamp the perfume bottles, is one of the retiring products from the annual catalogue.


The bottles were stamped with Smokey Slate ink (#147113), on Whisper White card (#106549), then cut with the largest circle from the Stitched Shapes Dies (#145372). The Smokey Slate DSP from the Neutrals 6”x6” Designer Series Paper (#149614) was attached to the Whisper White base card. I cut another piece of white card using the Stitched Lace Dies (#149625) and this was attached to the bottom of the card. The Cherry Cobbler (#121681) border was cut with a die from the Ornate Borders Dies (#152724). I cut this once, then turned the die around and cut again, which made it look like “ribbon”. Birthday Wishes were cut with dies from Well Written dies (#148534) - another retiring product. These were glued to the card with the Fine-Tip Glue Pen (#138309). I used Stampin’ Dimensionals (#104430) to attach the circle, then added the Metallic Pearls (#146282) to the border.

Stay Safe & have a great weekend.


Sunday, 6 October 2019

Feels Like Frost Designer Series Paper

Hello,

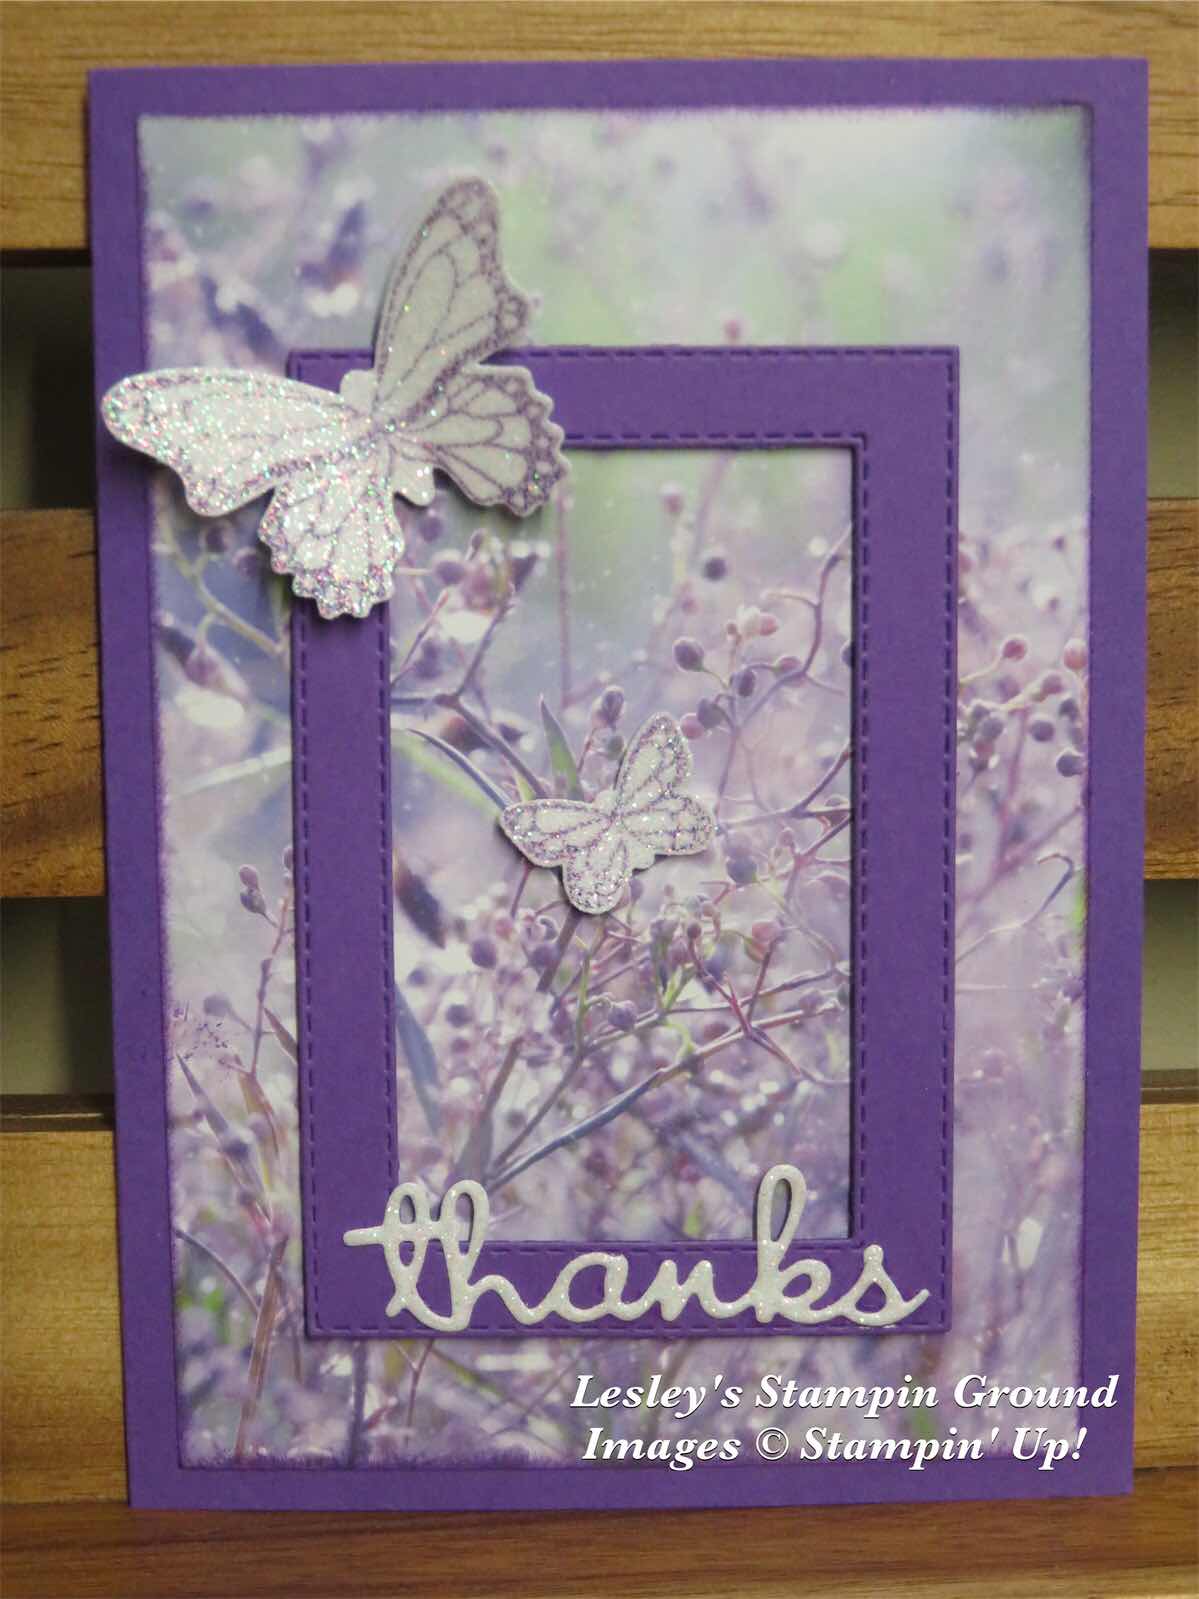
Did you know you can stamp an image on the Sparkle Glimmer Paper (#146957)? That’s how I got these very sparkly butterflies on this pretty but simple card.


The butterflies are from the Butterfly Gala stamp set (#p148580) and stamped with Gorgeous Grape ink (#147099), then punched with the co-ordinating Butterfly Duet Punch (#148523). The base card and frame are Gorgeous Grape card (#147011). The frame was cut with the Stitched Rectangles dies (#148551). The Designer  Series Paper is Feels Like Frost (#150444). Many of the designs in this pack can be used for other occasions than Christmas which makes it very versatile. As well as the beautiful photographic images, the reverse side of this paper has a variety of white & silver foil designs.  “Thanks” is cut with a Well Written Die (#148534) also from Sparkle Glimmer Paper. The butterflies and frame were attached with Mini Stampin’ Dimensionals (#144108) and “thanks’ was glued with the Fine-Tip Glue Pen (#138309). 
 

Have a great day.


Monday, 22 July 2019

Rooted In Nature

Hello,

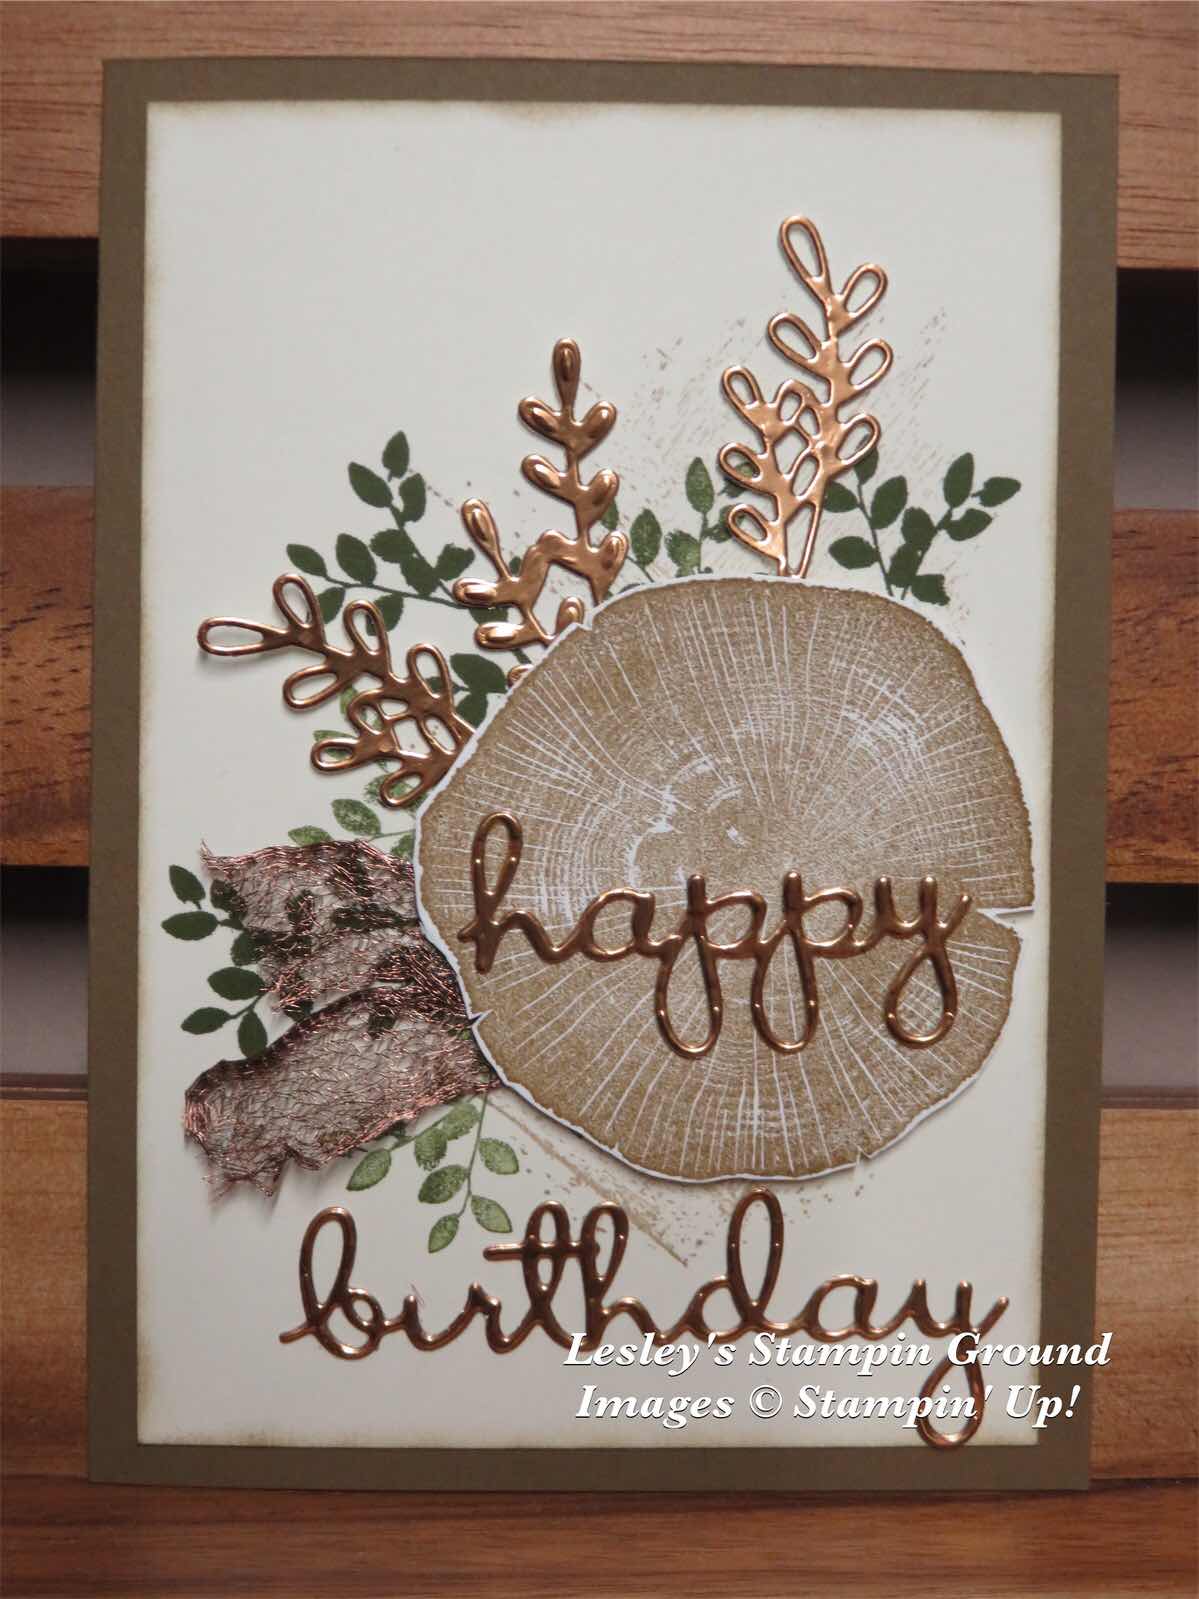
Time for a masculine card so I have used the Rooted In Nature stamp set (#c148217).


Firstly I stamped the Very Vanilla cardfront (#106550) with an image from the Gallery Grunge stamp set (#c151275) using Crumb Cake ink (#147116). The leaves were stamped with Mossy Meadow ink (#147111). I then stamped the “piece of timber” using Soft Suede ink (#147115) and fussy cut it. These 2 images are from the Rooted In Nature stamp set.  I attached this to the card with Stampin’ Dimensionals (#104430). I cut “happy”, “birthday” and the “leaves” from Copper Foil Sheet (#142020). The words are from the Well Written dies (#148538) and the leaves are from the Detailed Peacock Dies (#149582). The leaves were attached with Mini Glue Dots (#103683) and the words were glued with the Fine-Tip Glue Pen (#138309). The ribbon is 1/4”Copper trim (#144179) and the base card is Soft Suede (#119982).

Have a great day.


Monday, 8 July 2019

Very Versailles

Hello,

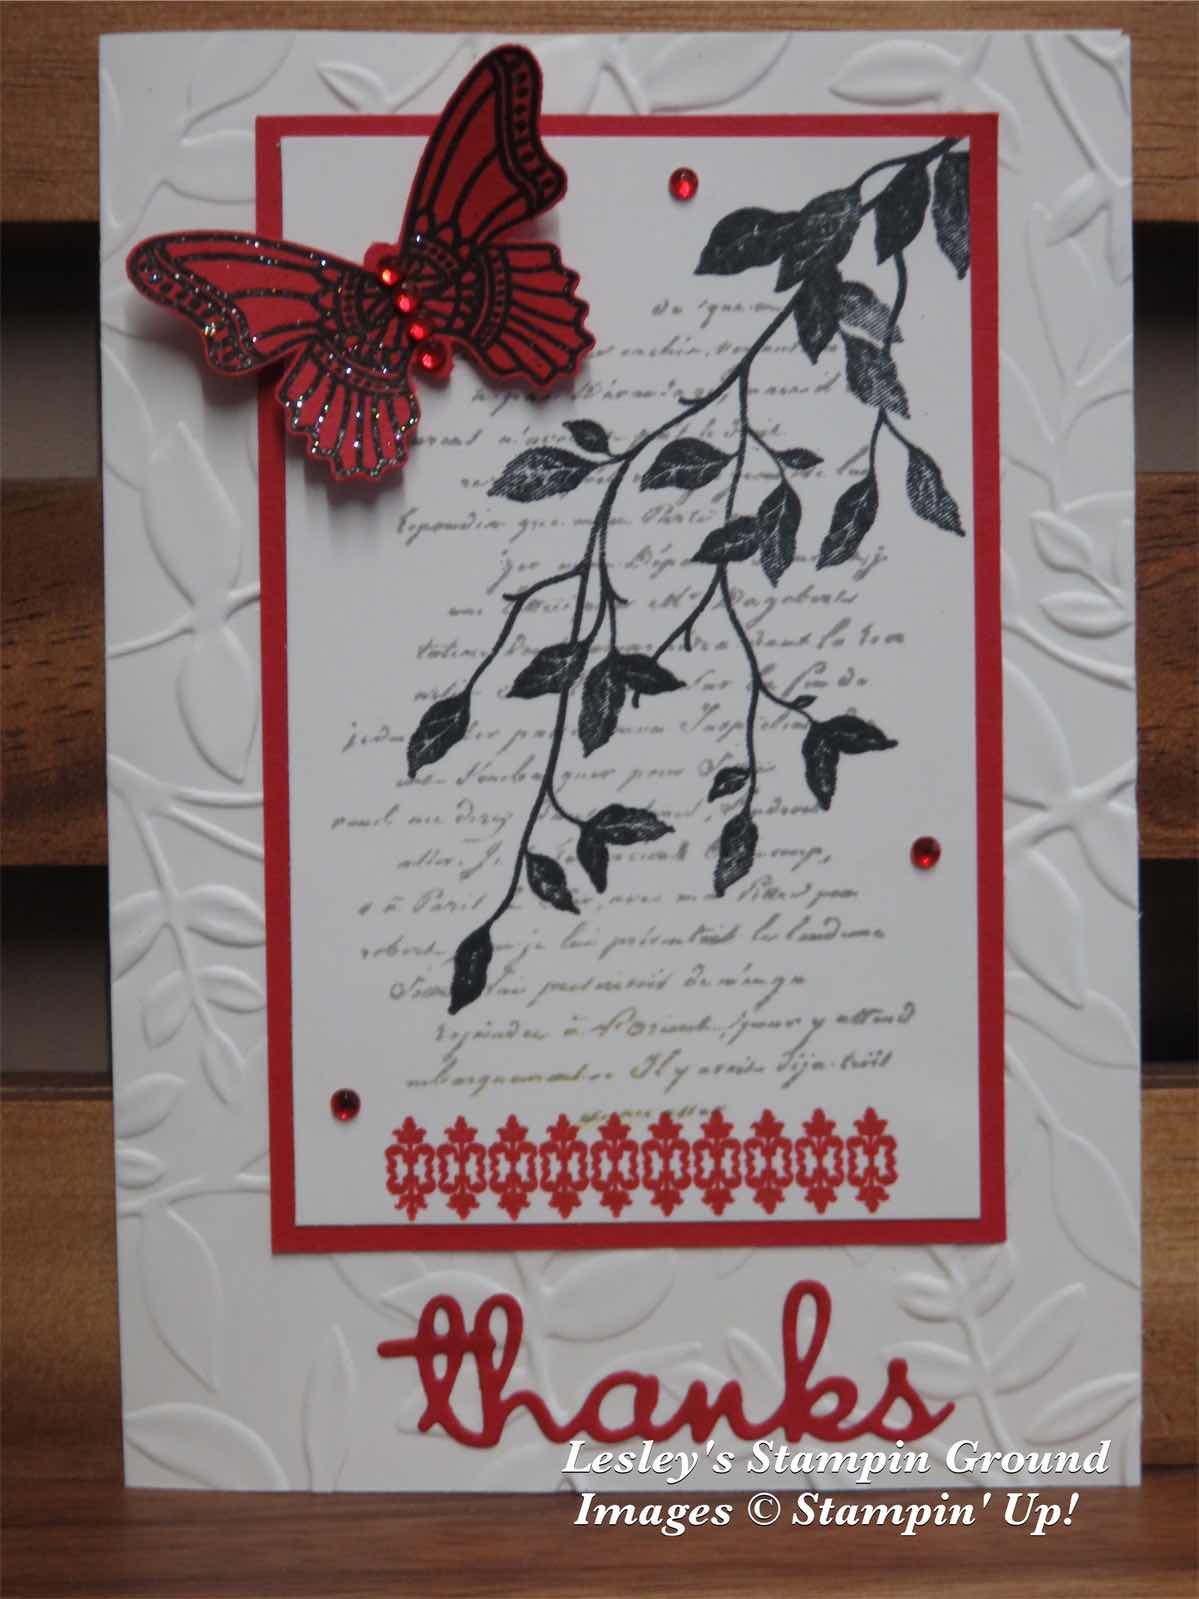
My original plan for this card was just black and white, but then decided it would be great to add some red.


I embossed the Whisper White base card (#106549) with the Layered Leaves 3D Embossing Folder (#152321). The script image from the Very Versailles stamp set (#149275) was stamped with Smokey Slate ink (#147113). The branch from the same stamp set was stamped with Tuxedo Black Memento ink (#132708). The fancy border was stamped with Real Red ink (#147084). I stamped the butterfly from Butterfly Gala stamp set (#148580) on Real Red card (#106578). This was stamped with VersaMark (#102283) and embossed with Shimmer Black Emboss Powder (#149512) and set with the Heat Tool (#129056). The butterfly was punched with the Butterfly Duet punch (#148523) and attached to the card with Stampin’ Dimensionals (#104430). “Thanks” is cut with a die from the Well Written Dies (#148534) from Real Red card and glued with the Fine-Tip Glue Pen (#138309). Red Rhinestone Basic Jewels (#146924) were added to the card and butterfly to add a bit of bling.

Have a great day.

Wednesday, 19 June 2019

Daisy Lane

Welcome,

I wanted to make a bright and cheery card today and I thought this worked well.


The cardstock is Whisper White (#106549), Mango Melody (#147013) and Granny Apple Green (#147014). The leaves were stamped with Granny Apple Green ink (#147095). I used the masking method to stamp the 2nd leaf. The daisies were stamped with Mango Melody ink (#147093). These images are from the Daisy Lane stamp set (#149325). The daisies were punched with the Daisy Punch (#143713) and the Medium Daisy Punch (#149517). I stamped and punched 2 of each size and glued them together with the Multipurpose Liquid Glue (#110755) and attached the whole daisy with Stampin’ Dimensionals (#104430). I also stamped the small daisy onto the Mango Melody card using VersaMark (#102283) for a very subtle background image. “Thanks” is cut with a die from Well Written dies (#148534) and glued to the card with the Fine-Tip Glue Pen (#138309). A Clear Faceted Gem (#144142) was attached to the daisy centre.

Have a great day.