Showing posts with label #simplestamping. Show all posts

Wednesday, 29 May 2024

Spotlight On Nature

 Hi friends,

It isn't very often that I make a card without embossing or dies etc, so thought I would do a simple one today and just added some colouring with Stampin’ Blends.


I stamped the background on the left with a stamp from the Textured Timber stamp set (#163656) using Basic Beige ink (#163806). The flower and butterfly from the Spotlight On Nature stamp set (#163579) were stamped with Tuxedo Black Memento ink (#132708). The Stampin’ Blends to colour these are Poppy Parade (#154958), Summer Splash (#163826) and Daffodil Delight (#154883).

The sentiment from the Everyday Details stamp set (#162861) was stamped with Poppy Parade ink (#147050). I also stamped the crosshatch image from the Spotlight On Nature with Daffodil Delight ink (#147094) onto the background.

I matted the card front with Basic Black card (#121688) and Poppy Parade card (#121694), then this was attached to the Basic White card (#159228).

“Love what you do and share what you love.”

INSPIRE. CREATE. SHARE. 


https://www.stampinup.com.au


lesley.j.jendra@gmail.com


http://lesleysstampinground.blogspot.com


Monday, 15 April 2024

Bottled Happiness stamp set

 Hi & welcome again,

It’s not often that I just stamp without using embossing folders, dies or heat embossing, but I have for this card using the Bottled Happiness stamp set (#158684).


I stamped the bottle with Pretty Peacock ink (#150083) onto Basic White card (#159228). The flowers were stamped with Calypso Coral ink (#147101). This is a Two-step stamp set so the leaves can be lined up with the flowers easily. The leaves were stamped with Lost Lagoon ink (#161678). The sentiment from the Bottled Happiness stamp set was also stamped with Pretty Peacock ink.

The Pretty Peacock DSP is from the Glorious Gingham 6”x6” Designer Series Paper (#163170). I wrapped the Pretty Peacock & Gold Metallic Ribbon (#162588) around the DSP then attached it to the Basic White base card.

The White card with the stamped images was attached to the card with Stampin’ Dimensionals (#104430). The embellishments from the Petal Pink & Pretty Peacock Foiled Gems (#162587) were added to finish the card.

The retiring products are the Bottled Happiness stamp set and the Glorious Gingham DSP.

“Love what you do and share what you love.”

INSPIRE. CREATE. SHARE. 


Tuesday, 13 February 2024

Gold Foiled Flowers Cards & Envelopes

 Hello friends,

You don't need to do much when using the gorgeous cards from the Gold Foiled Flowers Cards & Envelopes (#162589). These cards are great for any special occasion.


I chose a very simple design so it didn’t cover too much of the design of the card. I used a Wild Ferns die (#162654) to cut the Pretty Peacock card (#150886). This was backed with Adhesive Sheet (#152334), so I attached this straight onto the card.

“Happy Birthday” from the Go To Greetings stamp set (#158763) was stamped with Pretty Peacock ink (#150083) and cut with another Wild Ferns die. This was attached to the card with Stampin’ Dimensional (#104430).

To finish the card I added the Pretty Peacock gems from the Petal Pink & Pretty Peacock Foiled Gems (#162587).

How easy is that!!


“Love what you do and share what you love.”

INSPIRE. CREATE. SHARE. 


Saturday, 9 December 2023

Biggest Wish

Hello friends,

I love using dies and embossing folders for my cards and find it very hard to do just stamping, so here is a card which looks like it is just stamping. However I have used some dies to cut masks and then I used an embossing folder once the stamping was done.


I cut a rectangle from a piece of scrap paper using a die from the Deckled Rectangles (#159173). I placed the outside piece of the mask on the Basic White card (#159228) and applied the Daffodil Delight ink (#147094) with a Blending Brush (#153611). I also cut another rectangle with the next size Deckled Rectangles die. I attached this to the card and covered the yellow with the piece cut from inside of the first mask. This left a border area which I used Starry Sky ink (#159212) and this was also done using a Blending Brush.

“Happy” from the Biggest Wish stamp set (#155052) was stamped with Crumb Cake ink (#147116) and “Birthday” was stamped with Starry Sky ink. I used the Stamparatus to stamp the words making it easy to get the words straight.

I used the Timber 3D Embossing Folder (#156406) to dry emboss the Basic White card front, then this was matted with Starry Sky card (#159264). The base card is Basic White.


“Love what you do and share what you love.”

INSPIRE. CREATE. SHARE. 


Tuesday, 5 September 2023

Fresh As A Daisy Designer Series Paper

Hello again my friends,

Stampin’ Up! have such a great range of beautiful designer series papers which make card making easy as well as adding something special to your card. This DSP is from the Fresh As A Daisy Designer Series Paper (#161289). One of the pages in this pack has a variety of designs for card fronts and this is one of the designs.


I matted the DSP with Shaded Spruce card (#147006) then this was attached to the Basic White base card (#159228). The finished card is 12cm x 12cm.

“Thank You” from the Timeless Arrangements stamp set (#161521) was stamped with Shaded Spruce ink (#147088). The sentiment and the Shaded Spruce card under the sentiment were cut with the Timeless Arrangements dies (#161525). The leaves were also cut with dies from the same set. I used Adhesive Sheet (#152334) on the back of the Shaded Spruce card before cutting the leaves. The sentiment was attached to the card with Mini Stampin’ Dimensionals (#144108).

The embellishments are from the Tinsel Gems Four-Pack (#161623).

“Love what you do and share what you love.”

INSPIRE. CREATE. SHARE.


Saturday, 2 September 2023

Inked & Tiled

Hello friends,

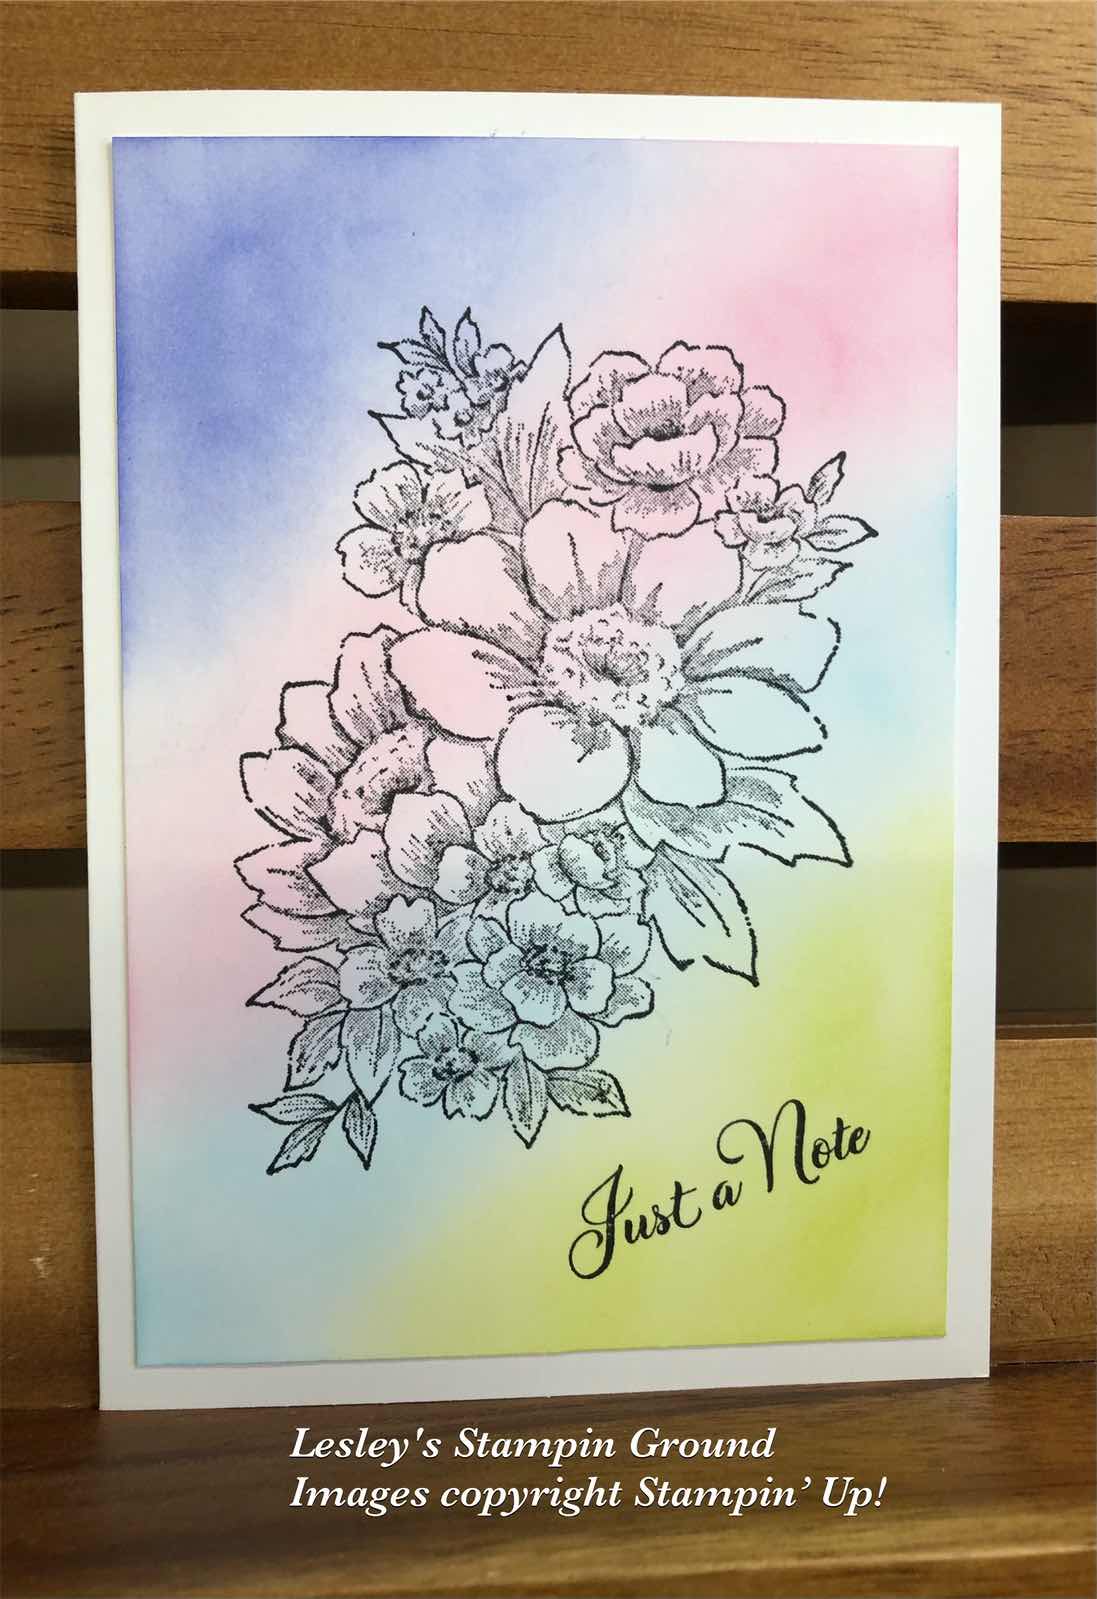
A quick & easy card today using the Inked & Tiled stamp set (#161158).


 I used the Stamparatus to stamp the floral image making it easy to stamp the 2 colours. I covered the flowers with post it notes before inking the stem & leaves with the Lost Lagoon ink (#161678). Then I removed the post it notes before stamping the image. I then covered the stem with a post it note and inked the flowers with Coral Calypso ink (#147101) then stamped the flowers.

I taped the Inked Botanicals 6”x6” Designer Series Paper (#161157) to the Very Vanilla card front (#106550) and daubered the edges with Calypso Coral ink. The Lost Lagoon Bordered Ribbon (#161171) was wrapped around the card front. 

Just a Note is from the Inked & Tiled stamp set and I used Calypso Coral ink. This was cut with a (retired) Beautiful Shapes die. Mini Stampin’ Dimensionals (#144108) were used to attach the sentiment to the card. The Brushed Brass Butterflies (#158136) were added to the card.

As I said, a quick & easy card.

“Love what you do and share what you love.”

INSPIRE. CREATE. SHARE.


Saturday, 12 August 2023

Earthen Textures

Hello everyone,

Todays card is a very easy one. The dies to cut the circles are from the upcoming catalogue. They are the Deckled Circles dies (#162286) and there are 14 dies in this set with the largest one 14.6cm (5-3/4”) in diameter and the smallest 2.5cm (1”), so there is a great range of sizes.


I stamped the leaves/twigs from the Earthen Textures stamp set (#161504) using Daffodil Delight ink (#147094) and Granny Apple Green ink (#147095) onto Basic White card (#159228).

The sentiment is also from a new stamp set - So Sincere (#162283) and stamped with Granny Apple Green ink. The circles were cut with the Deckled Circles dies. I attached the sentiment to the Daffodil Delight (#121680) circle with Stampin’ Dimensionals (#104430). This was then taped to the card front.

I used Granny Apple Green card (#147014) to matt the card front and attached it to the Daffodil Delight base card.

I used Clear Wink of Stella (#141897) on the stamped Daffodil Delight leaves and added the Iridescent Pearl Basic Jewels (#158987) to finish the card.

The size of the finished card is 12 x12cm. The Granny Apple green card is 10.5 x10.5cm and the white card is 9.5 x 9.5cm.

“Love what you do and share what you love.”

INSPIRE. CREATE. SHARE.


Wednesday, 4 January 2023

Beautifully Happy

Welcome and Happy New Year to everyone,

I hope your Christmas & New Year was a relaxing time for you. I had a lovely Christmas but then suffered from a vomiting bug which slowed me down for a week but I’m now back on track. I am looking forward to an exciting year ahead.

Tomorrow (5th January) is the start of the new Mini catalogue (till 1st May) and Sale-a-bration (till 28th February) which is very exciting. If you aren’t sure what Sale-a-bration is, well you can receive free products when you place a qualifying order ($90 or $180 in Australia). Please contact me if you want more information.

Today I have made 3 cards using the Beautifully Happy stamp set (#160804) which is a Sale-a-bration product. The first card is simple stamping, the second card I have stepped it up a bit and the 3rd is stepped up even more. However all cards are easy to make, just requiring a few more products for the 3rd card.


For this first card I stamped on the Basic White base card (#159228). I stamped the image with Tuxedo Black Memento Ink (#132708). This stamp set is a Two-Step set which allows you to stamp the outline then stamp other parts of the image with different colours. The flowers were stamped with Pale Papaya ink (#155670), the leaves with Soft Sea Foam ink (#147102) and the buds with Pear Pizzaz ink (#131290). It is very easy to line up the images. The sentiment from the same stamp set was also stamped with Memento ink.


The second card was stamped exactly the same but on a separate piece of card. I also added the splotches to the background using Crumb Cake ink (#147116). I daubered the edges of the card front with Pale Papaya ink, then attached it to the Basic White base card.


The third card was also stamped the same. I also stamped 2 single flowers and fussy cut these and added them just above the sentiment with Mini Stampin’ Dimensionals (#144108).

I punched the corners of the Basic White card & Pale Papaya card (#155669) with the Very Best Trio Punch (#159878). I am so excited that this punch is still available and is one of the few carry over items from the previous mini catalogue. It is my favourite punch.

 The sentiment was cut with a die from the Waves Dies (#158840). I threaded the Pale Papaya Open Weave Ribbon (#155672) through the label and attached it to the back of the card front. The card front was attached to the base card. The sentiment was attached with Stampin’ Dimensionals (#104430).

I added the shimmer to the stamped images with the Clear Wink Of Stella Brush (#141897) and the embellishments are the Fine Sparkle Adhesive-Backed Gems (#159967).

As you can see, you can make a simple card which still looks great or step it up, depending on what you like and what tools you own. If you are just starting out stamping, start with something simple then build up to more advanced as you get more products.


“Love what you do and share what you love.”

INSPIRE. CREATE. SHARE.


Saturday, 17 December 2022

Blessings Of Home

Hi everyone,

It’s very unusual for me to do a card with “simple stamping”. I think you know I like to use dies, punches, embossing folders, embossing powders etc. However if you are just starting card making, want something simple or are in a rush to make a card you can still achieve lovely results with basic supplies.


I coloured the Basic White card (#159228) for the background using Blending Brushes (#153611) with Orchid Oasis Ink (#159214), Polished Pink ink (#155712), Tahitian Tide ink (#159210) and Parakeet Party ink (#159208).

Next I stamped the beautiful floral image from the Blessings Of Home stamp set (#157930) with Tuxedo Black Memento ink (#132708). The sentiment from the Go To Greetings stamp set (#158763) was also stamped with this ink. The card front was attached to the Basic White base card. 

How simple is that!!

TIP: If you have trouble getting your sentiment straight on your card, stamp it on an angle, as I have done here, and it will look great.


“Love what you do and share what you love”.


INSPIRE. CREATE. SHARE.


Thursday, 15 December 2022

He’s The Man Specialty Designer Series Paper

Hello friends,

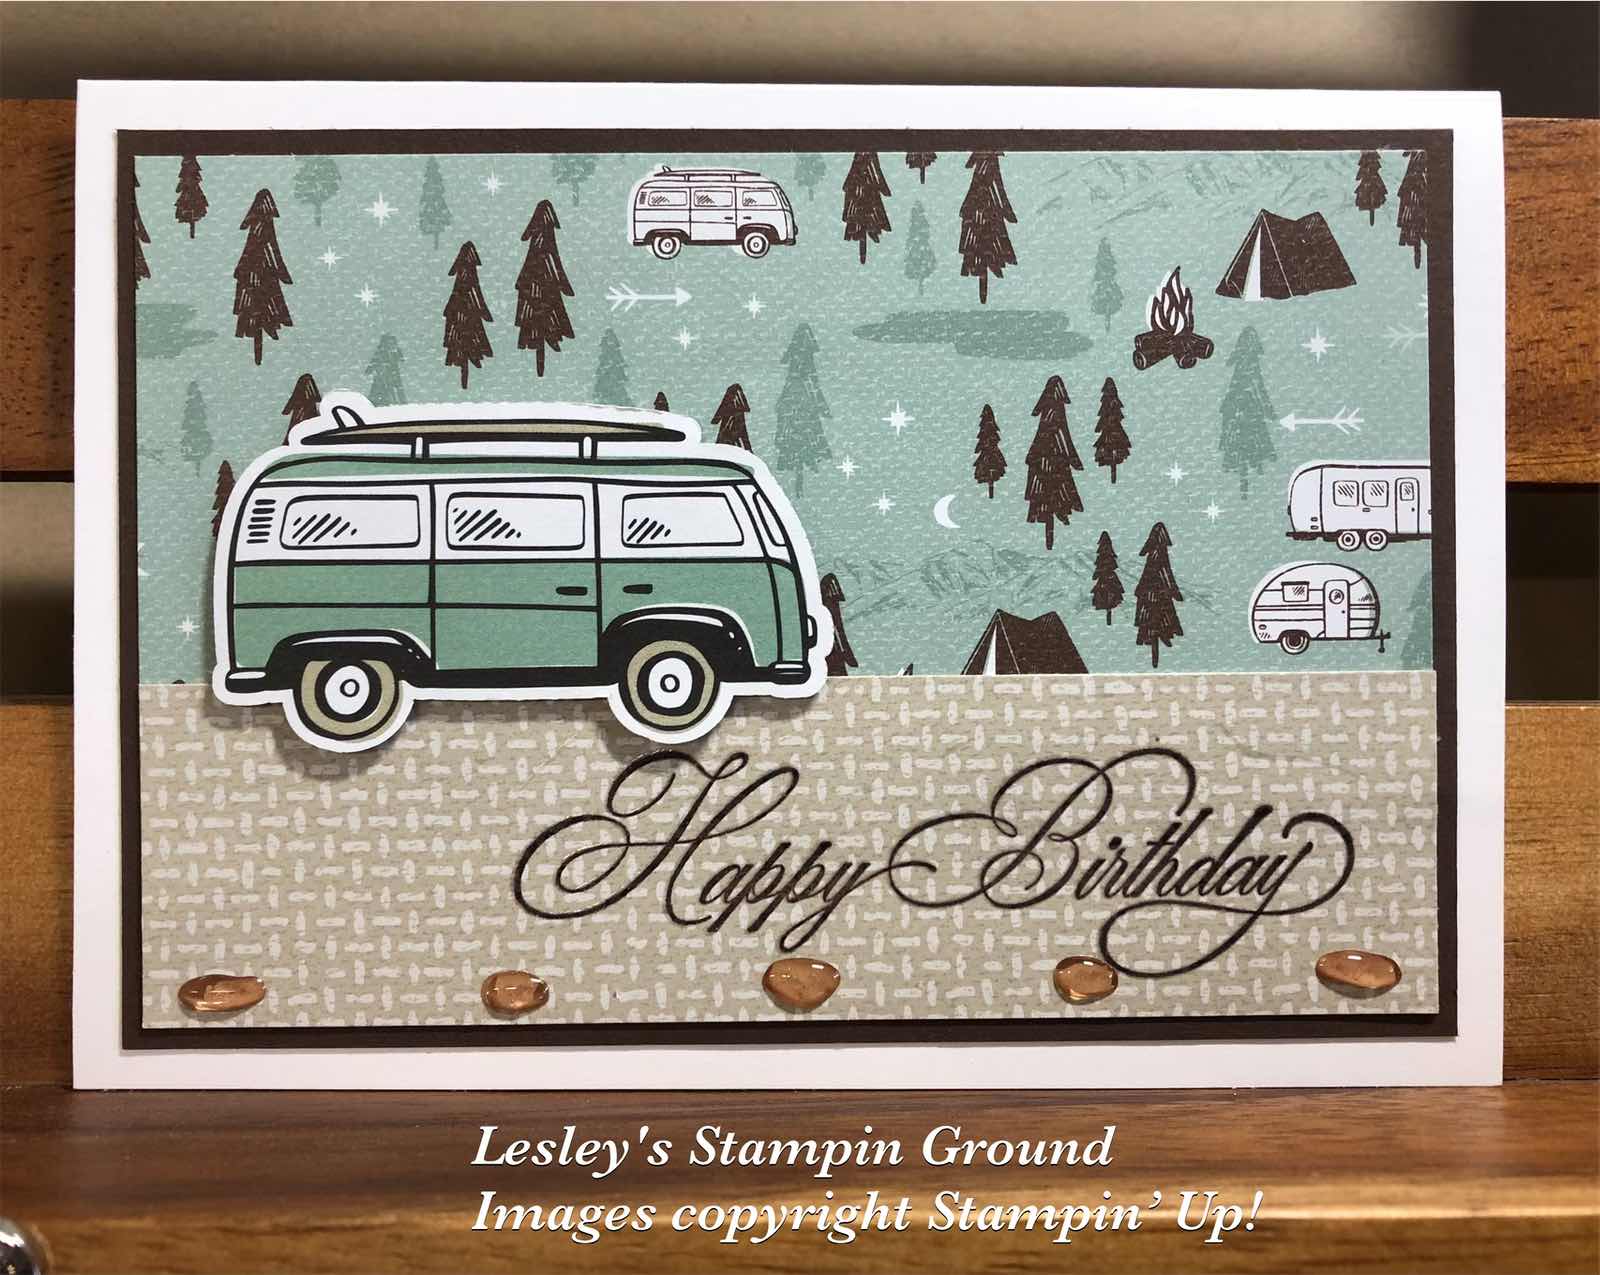
If you are looking for a product for simple masculine cards you can’t go past the He’s The Man Specialty Designer Series Paper (#159068). As well as a great variety of masculine designs there are 2 sheets of die-cuts which you just need to pop out and attach to your card. How simple is that!


The two designs of DSP on this card are from this pack, as well as the van which is one of the die-cuts.

I stamped the sentiment from the Go To Greetings stamp set (#158763) with Early Espresso ink (#147114). I used the Stamparatus (#148187) to stamp this as I also wanted to stamp with VersaMark (#102283) and add Clear Stampin’ Emboss Powder (#155554) and of course set it with the Heat Tool (#129056).

The DSP was matted with Early Espresso card (#121686), then attached to the Basic White base card (#159228). The van was attached to the card with Stampin’ Dimensionals (#104430). I added the now retired Pebbles Enamel Shapes to the card.

I always say you can make a quick & easy but lovely card using Designer Paper. 

“Love what you do and share what you love.”


INSPIRE. CREATE. SHARE. 


Thursday, 6 October 2022

Lights Aglow Specialty Designer Series Paper

Hi again friends,

The beautiful Lights Aglow Specialty Designer Series Paper (#159535) has a lovely range of designs great for Christmas cards. Two of the designs have been used on this card.


The green & gold paper was cut with a Twinkling Lights Die (#159541) for the Christmas tree, I attached the red DSP to the Very Vanilla card (#106550). I dry embossed another piece of Very Vanilla card with one of the Wintry 3D Embossing Folders (#155433) and attached this to the card.

The tree was attached with Stampin’ Dimensionals (#104430). Season’s Greetings is from the Leaves Of Holly stamp set (#159601). This was stamped with Evening Evergreen ink (#155576) then cut with a die from the Natural Prints dies (#158800).

The gold embellishments are the Festive Pearls (#159963) and added to the sentiment and tree.

Another quick and easy card.

“Love what you do and share what you love.”


Monday, 19 September 2022

Fresh Cut Flowers stamp set

Hello again,

For today’s card I have used the same stamp set as yesterday - Fresh Cut Flowers (#159018) but this time without the dies for a simple stamped card. Remember the dies to co-ordinate with this stamp set are only available till the end of September.


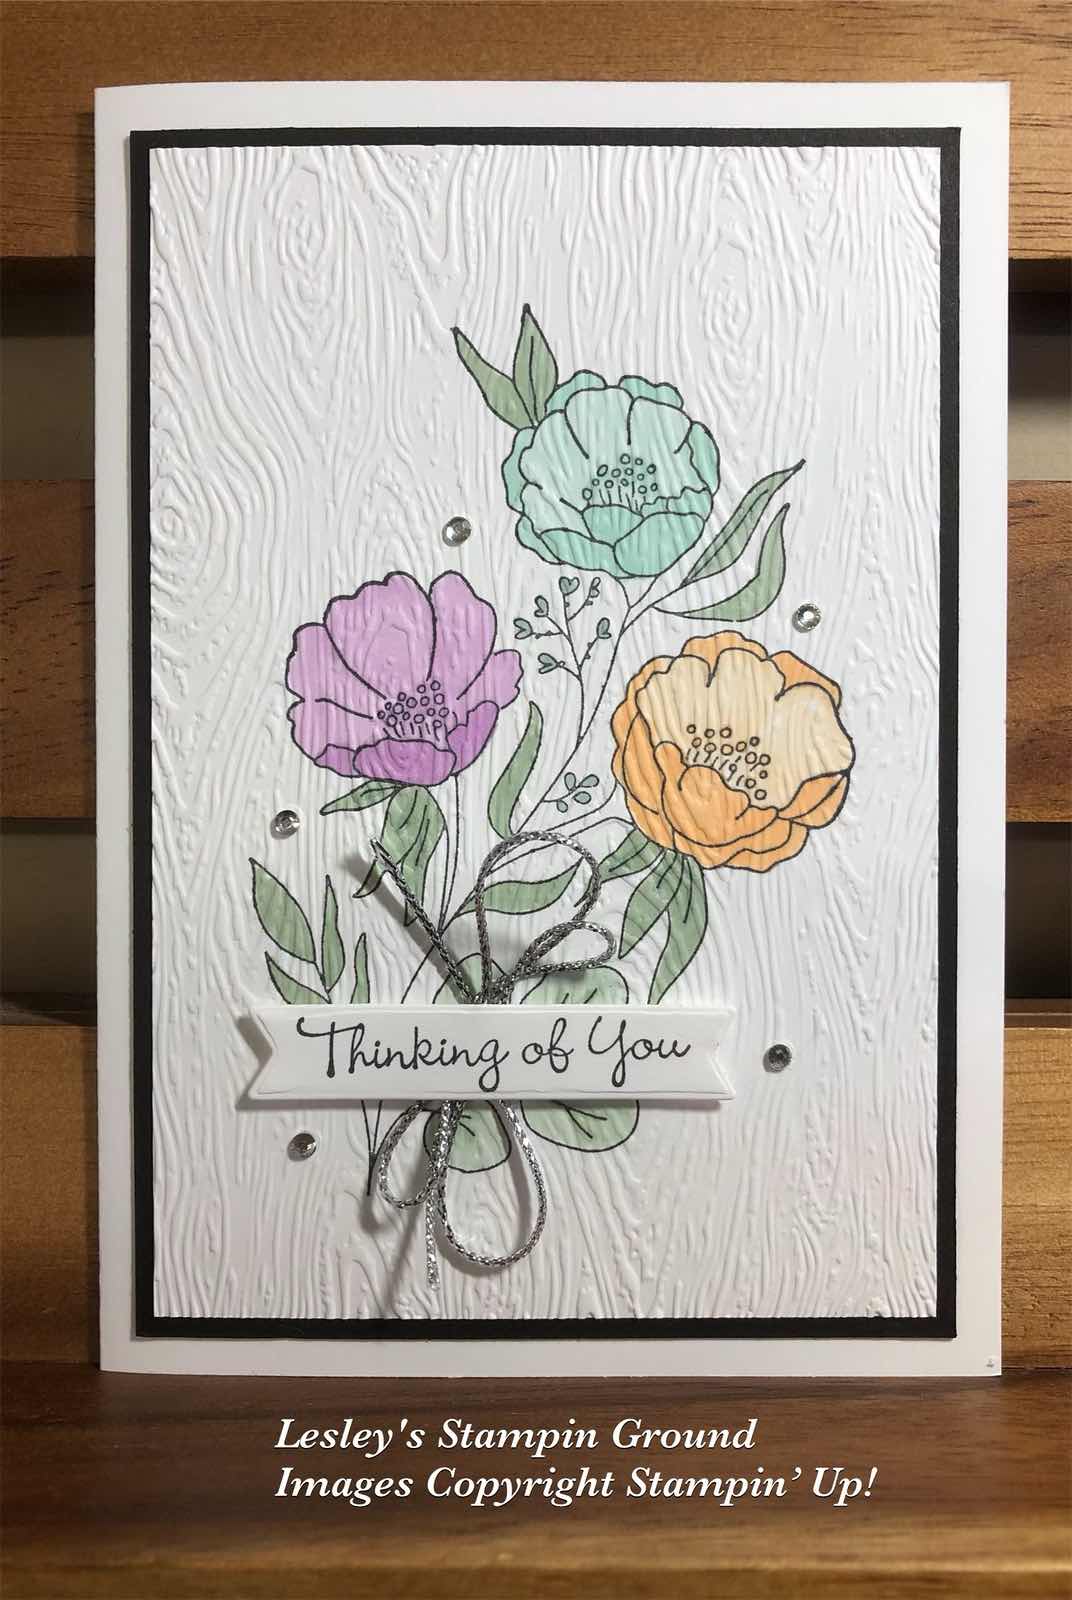
I stamped the floral image with Tuxedo Black Memento ink (#132708) onto Basic White card (#159228). This was coloured with Fresh Freesia Stampin’ Blends (#155518), Pool Party Stampin’ Blends (#154894), Pale Papaya Stampin’ Blends (#155519) and Mint Macaron (#154889). I then dry embossed the card front with the Timber 3D Embossing Folder (#156406). This was matted with Basic Black card (#121688) and attached to the Basic White base card.

“Thinking Of You” from the Go To Greetings stamp set (#158763) was stamped with Tuxedo Black Memento ink, then cut with a Give It A Whirl Die (#154336). The Silver Simply Elegant Trim (#155766) was attached to the card with the sentiment attached on top with Mini Stampin’ Dimensionals (#144108). The Rhinestones Basic Jewels (#144220) were added to the card.

Check out the “Perfect Partners” dies available only during September-

Thursday, 3 February 2022

Oceanfront stamp set

Hello friends,

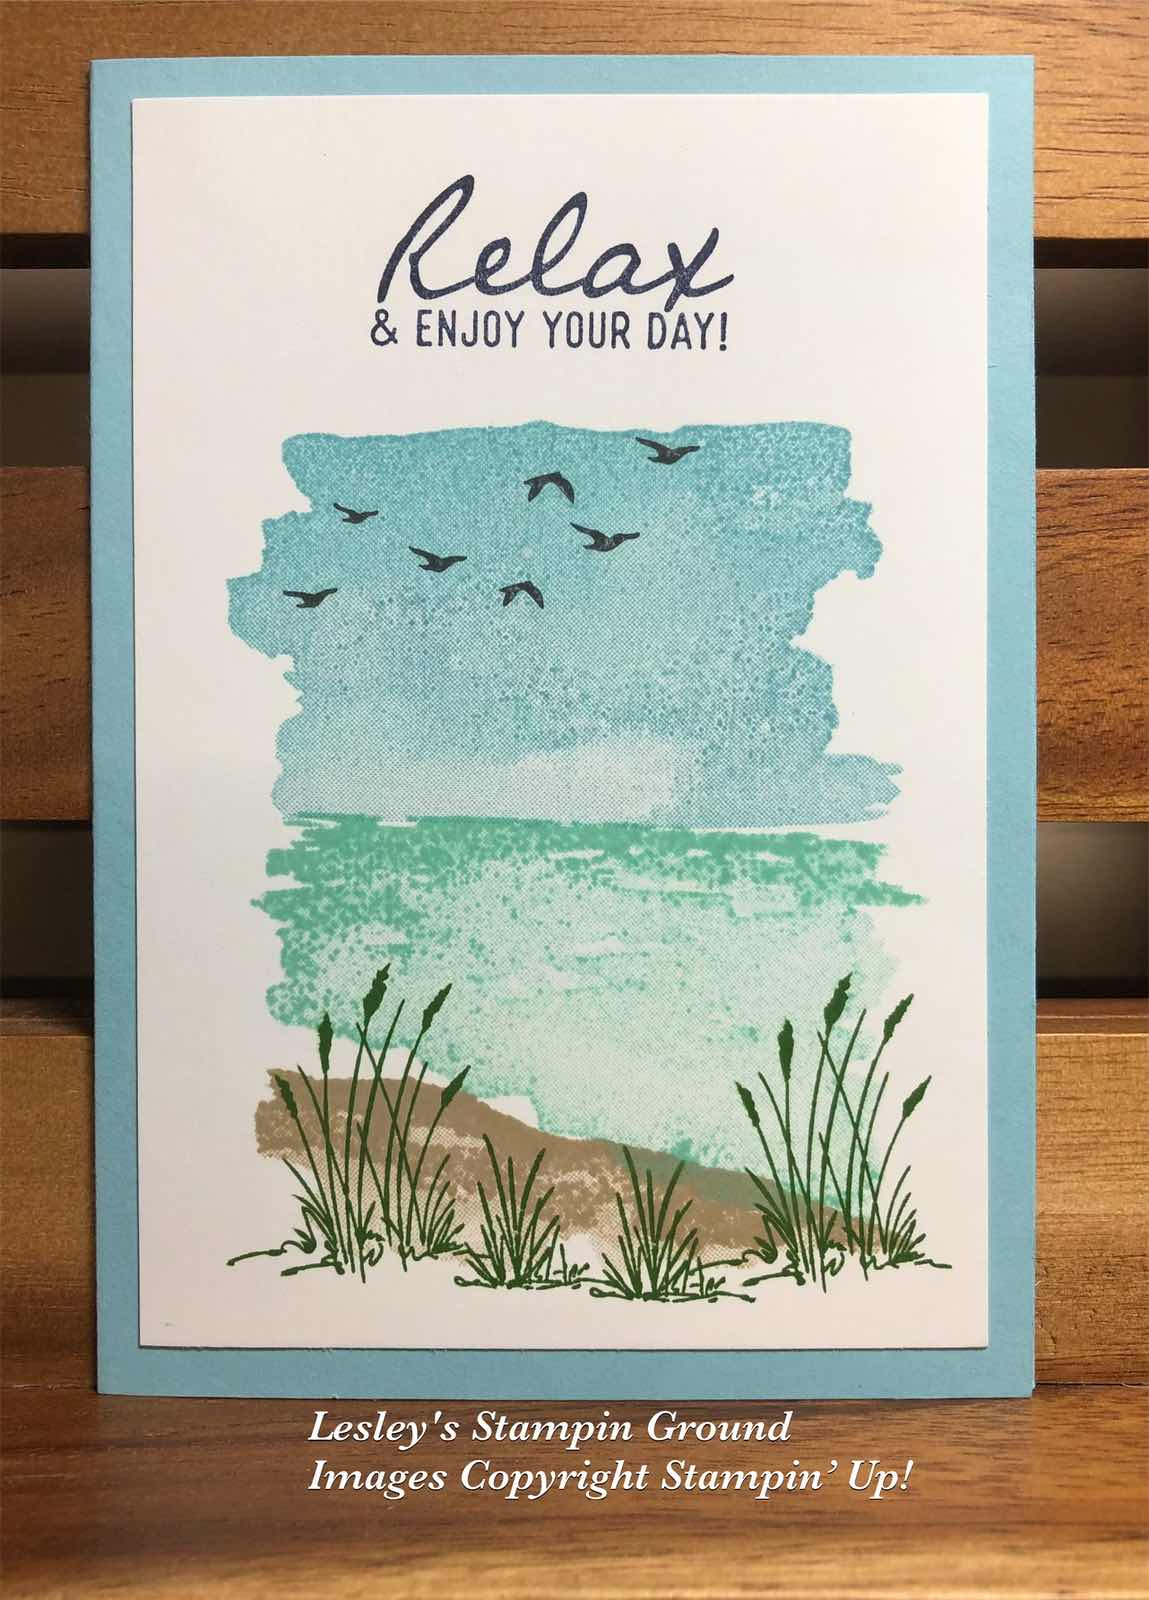
It isn’t very often that I just stamp on a card, (as I am sure you know I love dies and embossing), but I have just stamped on this card using the Oceanfront stamp set (#157862).


I stamped the foreground with Crumb Cake ink (#147116) onto Basic White card (#159228). The sea was stamped with Pool party ink (#147105), then the sky with Balmy Blue ink (#147105). I used Garden Green ink (#147089) for the grass. The birds are from the On The Horizon stamp set (#157770) and stamped with Tuxedo Black Memento ink (#132708). The sentiment also from On the Horizons stamp set was stamped with Night Of Navy ink (#147110). The card front was attached to the Balmy Blue card (#147007). So this is a quick & easy card with simple stamping.

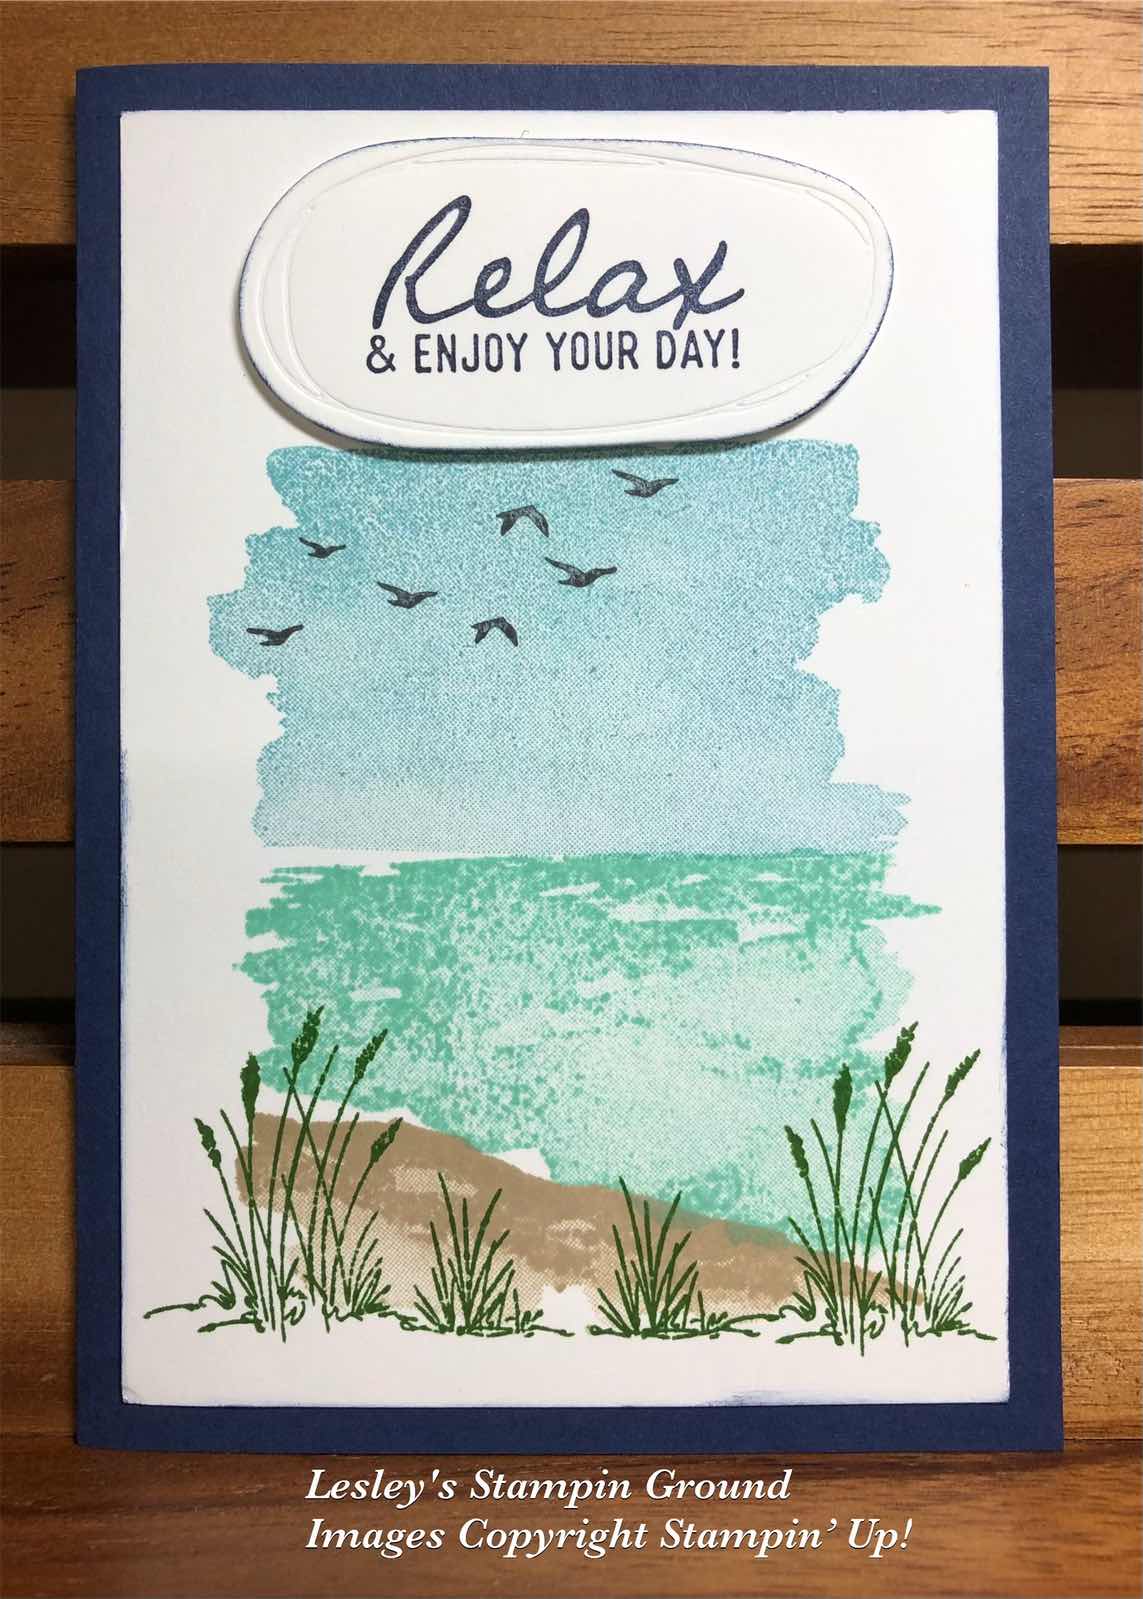
Then I couldn’t resist and add some extra elements to step it up a bit. Below is the next card which is stamped exactly the same except I stamped the sentiment on a separate piece of card and cut it with one of the Beautiful Shapes Dies (#158046) and attached it to the card with Stampin’ Dimensionals (#104430). I chose Night Of Navy card (#106577) for the base card.


Then the next card had another element added which is the boat from Sailing Home stamp set (#149457). The boat was stamped with Night Of Navy ink, cut with a Smooth Sailing Die (#149576) and attached to the card with Mini Stampin’ Dimensionals (#144108). The card front was matted with Night Of Navy card and attached to the Balmy Blue base card.


I hope this has shown how easy it is to just stamp a simple card or you can add a couple of extra elements to step it up and they are all great masculine cards.


“Love what you do and share what you love.”


Thursday, 28 January 2021

A Touch Of Ink

Hi again everyone,

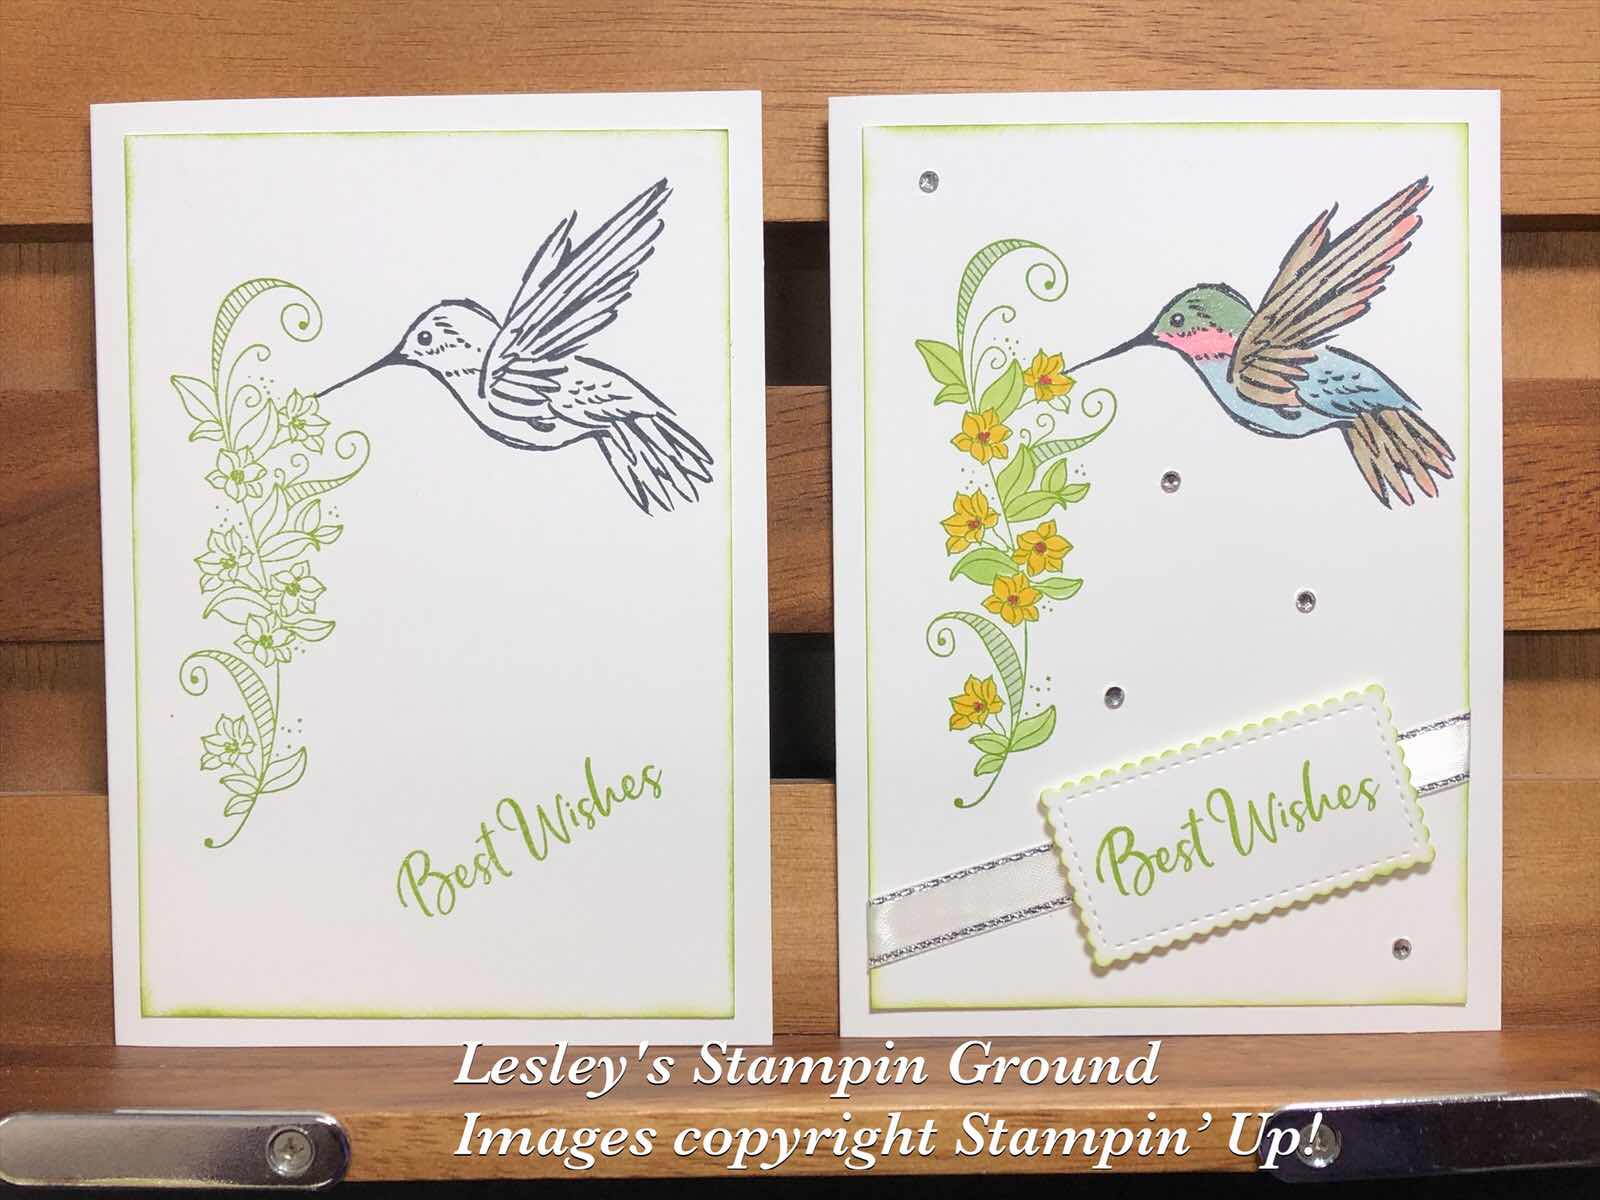
I often see simple stamping cards but I find it difficult to just stamp. So today I just stamped the first card, then stepped it up just a bit with colouring, embellishments, ribbon and dies.


I stamped the flourish from the Beauty Abounds Stamp set (#148726) using Granny Apple Green ink (#147095). The hummingbird from A Touch Of Ink stamp set (#155233) was stamped with Tuxedo Black Memento ink (#132708). This stamp set is from Sale-a-bration with a $180 order. “Best Wishes” is also from this set and stamped with Granny Apple Green ink.
On the 2nd card I coloured the images with the following Stampin’ Blends - Granny Apple Green (#154885), Soft Sea Foam (#154902), Daffodil Delight (#154883), Poppy Parade (#154958), Mint Macaron (#154889), Crumb Cake (#154882), Flirty Flamingo (#154884), Balmy Blue (#154830).
The Silver Metallic-Edge Ribbon (#144213) was wrapped around the card. A die from the Stitched So Sweetly dies (#151690) was used to cut the sentiment and then attached using Stampin’ Dimensionals (#104430). 
The edges of the card front and sentiment were sponged with Granny Apple Green ink and I used the Clear Wink Of Stella Glitter Brush (#141897) to add glitter to the bird. Rhinestone Basic Jewels (#144220) were added to finish the card.

Have a great day!!

“Love what you do and share what you love.”


Wednesday, 21 October 2020

Very Versailles

Hello friends,

I thought I would challenge myself today and make a card with just stamping. As you would know, I love to use embossing powders, dry embossing, dies, embellishments and anything with a bit of sparkle, so I find it very difficult to just stamp. Here is my card.


The card stock is Whisper White (#106549). All the images are from the Very Versailles stamp set (#c149275). The inks I used are Bumble Bee (#153116) for the leaves, sentiment and border,  Just Jade (#153115) for the fancy frame with the sentiment and the border, and Soft Sea Foam (#147102) for the script background.
The edges of the card front were sponged with Bumble Bee ink before attaching it to the base card.

So yes, a very quick and simple stamping card.


Have a fabulous day!!


Monday, 12 October 2020

Curvy Christmas

Hi everyone,

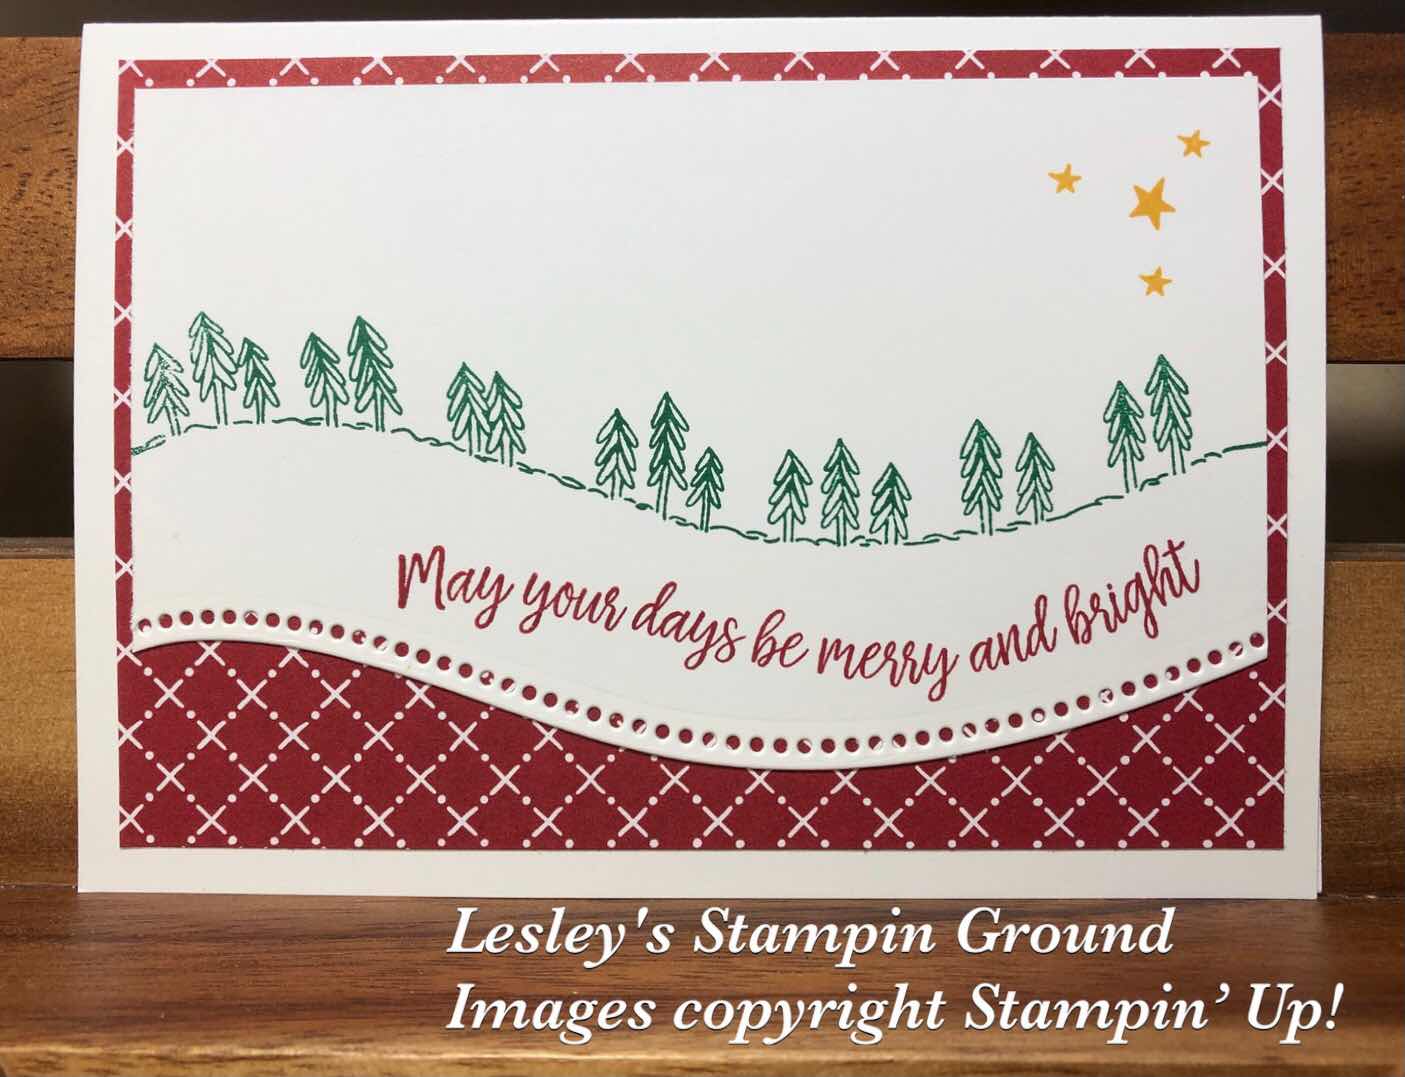
Here is a super easy Christmas card and would be a great one if you are short on time and want to make multiples.


Using the Stamparatus (#148187) would be ideal for making multiples of this card. The sentiment, trees and stars are all images from the Curvy Christmas stamp set (#155364). The trees were stamped with Shaded Spruce ink (#147088). Cherry Cobbler ink (#147083) was used to stamp the sentiment and Bumble Bee ink (#153116) for the stars. The curved border was cut with one of the Curvy Dies (#154319). The stamped Whisper White card (#106549) was attached to the Classic Christmas 6”x6” Designer Series Paper (#155969), which was then attached to the Whisper White base card.

This stamp set and dies as well as the Quite Curvy stamp set (#154430) will be available from the 3rd November.


Have a great day!!


Monday, 6 April 2020

Free As A Bird

Hello again,

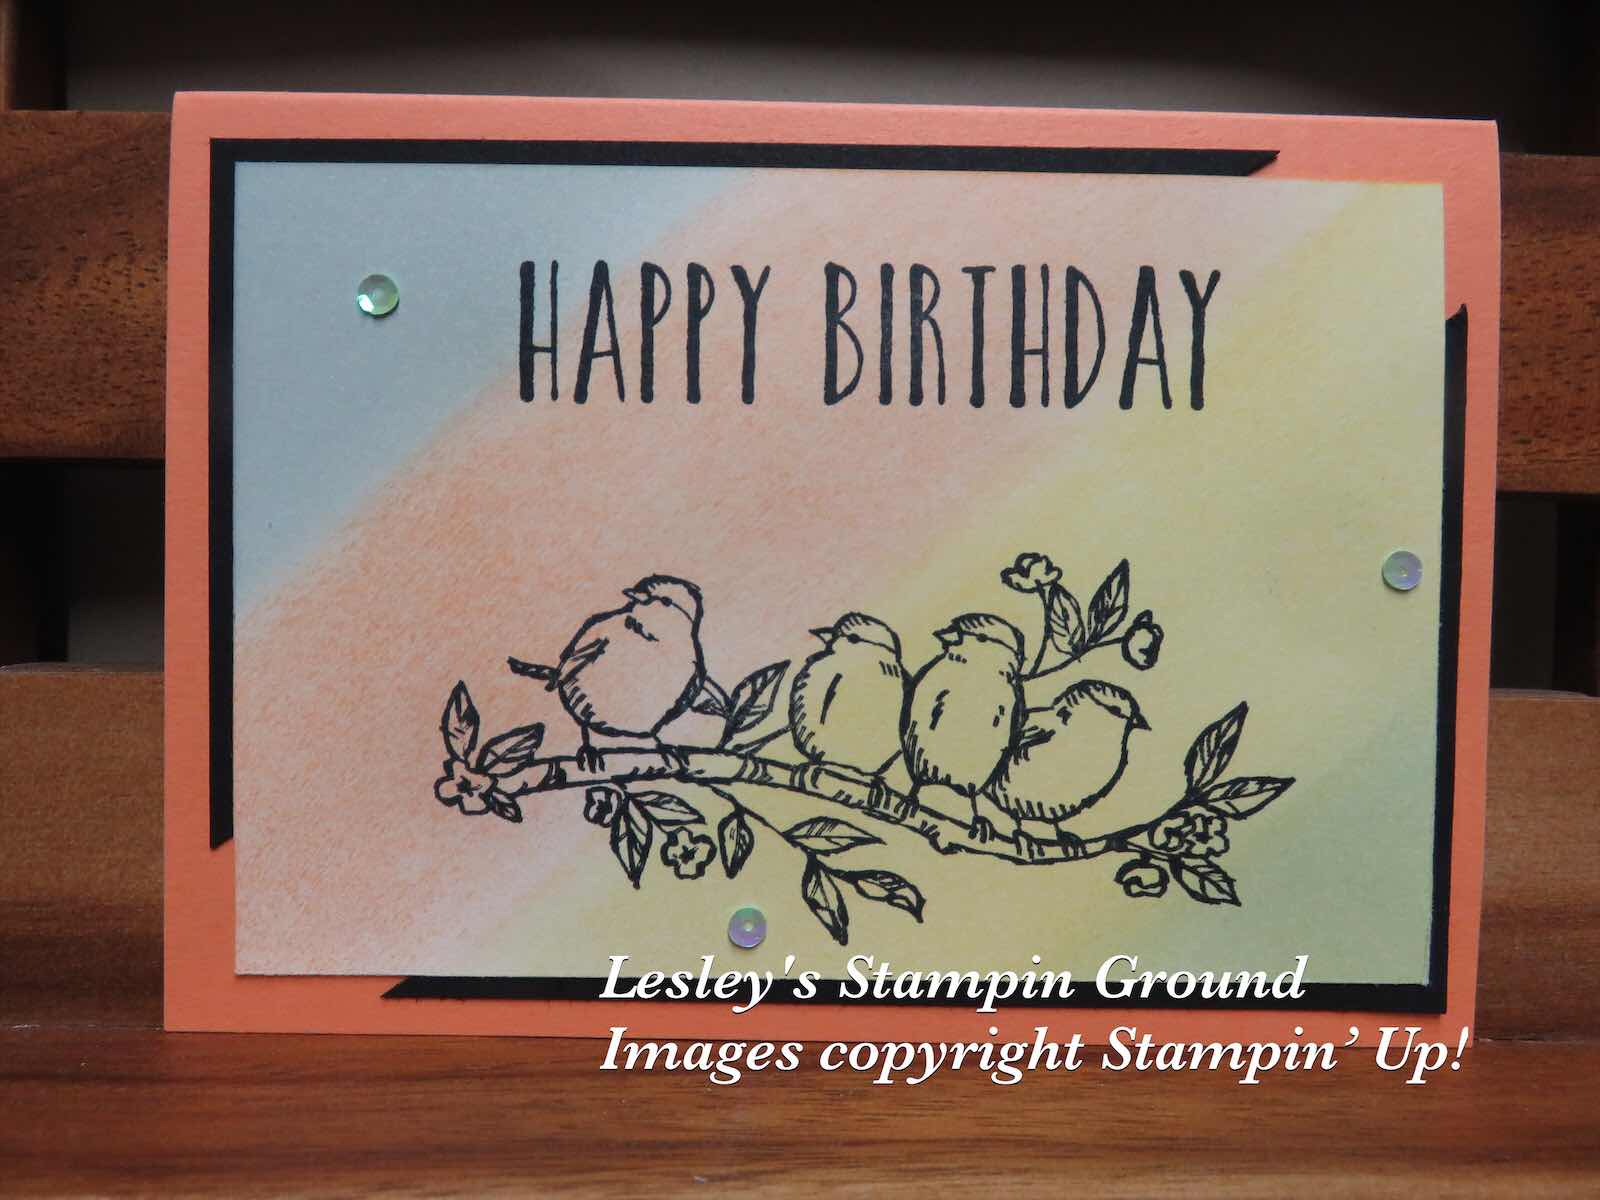
As you know, I love to use embossing folders, embossing powders and dies on most of my cards, so today I challenged myself not to use any of these with this simple stamping card.


I brayered on WhisperWhite card (#106549) using Seaside Spray ink (#150085), Grapefruit Grove ink (#147142), So Saffron ink (#147109) and Soft Sea Foam ink (#147102). The bird image from Free As A Bird stamp set (#c149468) and “Happy Birthday” from Perennial Birthday stamp set (#151240) were both stamped with Tuxedo Black Memento ink (#132708). The card front was attached to Basic Black card (#121688) then onto Grapefruit Grove card base (#146995). I couldn’t resist adding some Iridescent Sequins (#144212) to the card.

Today’s job in self isolation was to clean out and de clutter some cupboards as well as sorting out the freezer. Another productive day.

Stay safe and keep crafting!


Friday, 28 February 2020

Music From The Heart

Hello everyone,

Sorry for my absence over the last couple of weeks but have been on holidays. Today’s card is simple, especially when using the Stamparatus (#148187) to stamp the piano keys.


The card is Whisper White (#106549). I stamped the piano keys using the Stamparatus, and Tuxedo Black Memento ink (#132708). I then fussy cut at the bottom of the keys and attached a piece of Silver Foil Sheet (#132178). I also used the Stamparatus to stamp the lines to ensure they were straight. All the stamped images are from the Music From The Heart stamp set (#p151674). The 3 small hearts are stamped with Real Red ink (#147084) and I coloured the heart on the treble cleft with Light Real Red Stampin’ Blends (#147933). I fussy cut the treble cleft and attached it to the card with Stampin Dimensionals (#104430).

Nice and simple!!


Sunday, 9 February 2020

Music From The Heart

Hello & welcome again,

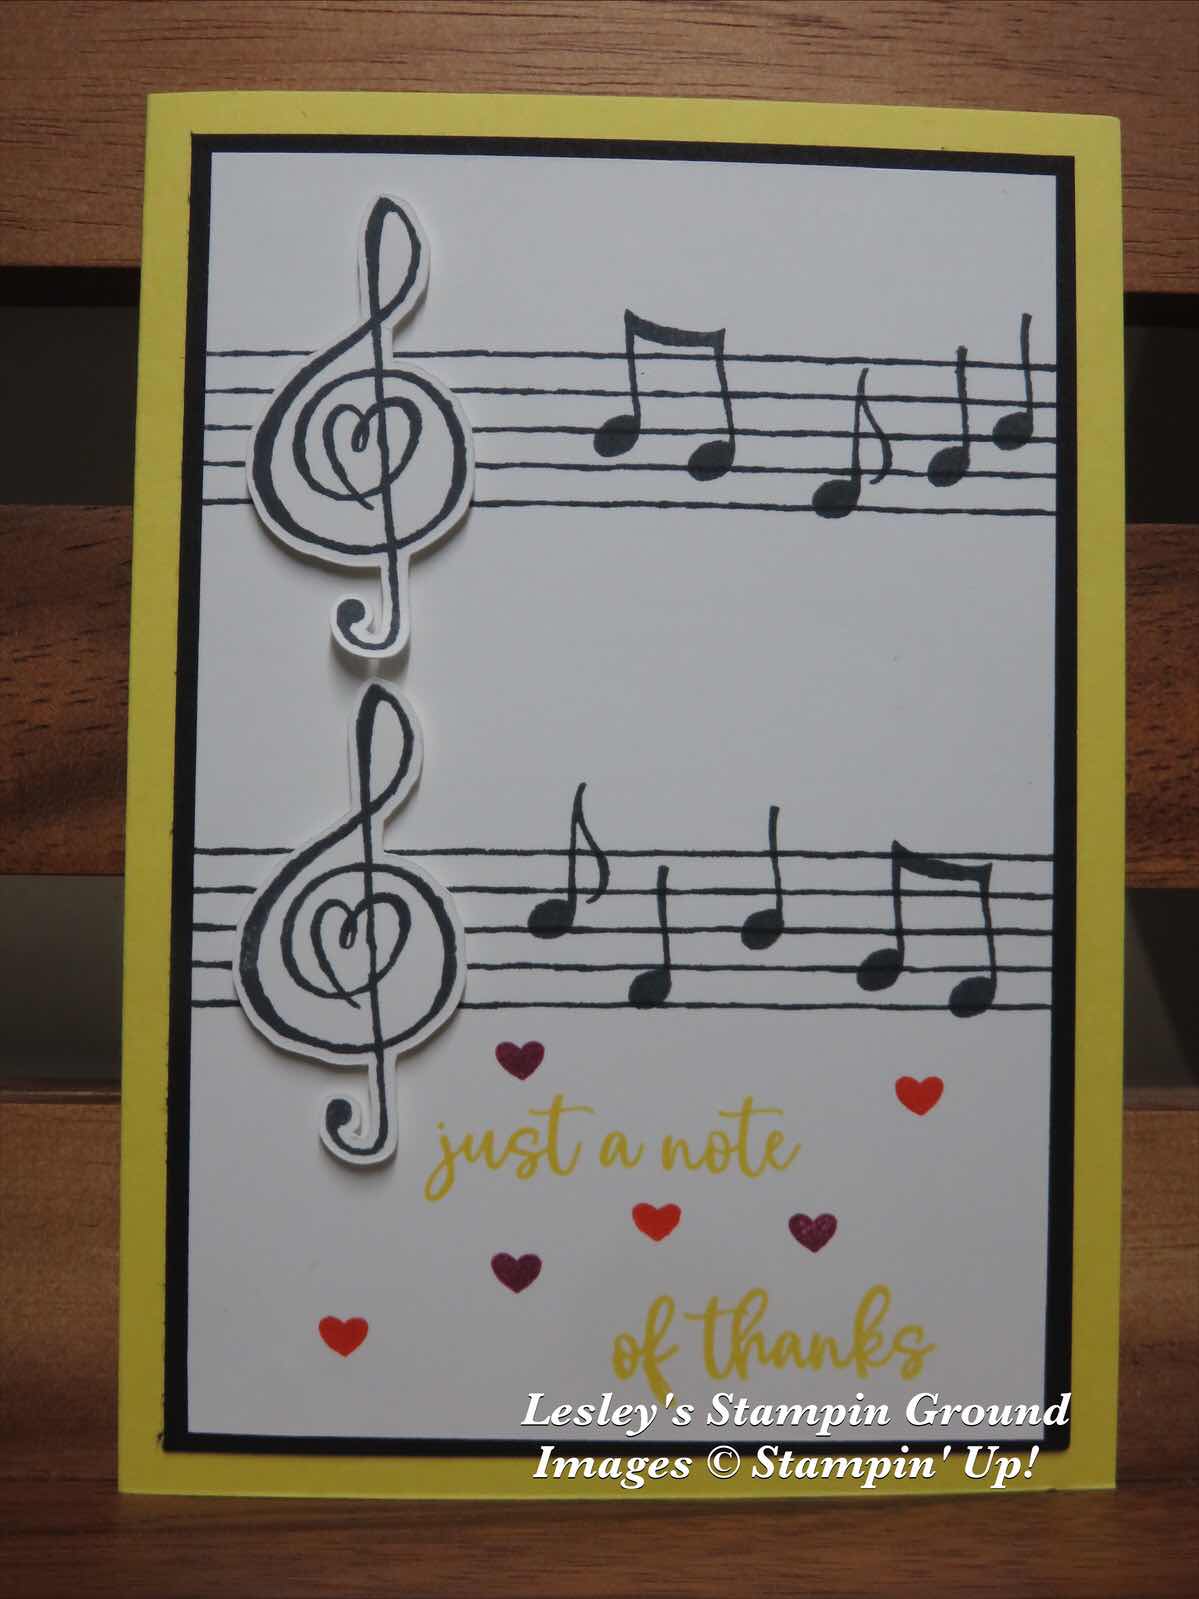
Because Stampin’ Up! have so many beautiful co-ordinating products, I find it difficult to just stamp, but I have done it on this card. I have fussy cut the treble clef symbols.


I stamped the lines and notes with Tuxedo Black Memento ink (#132708) on Whisper White card (#106549). The sentiment is stamped with Pineapple Punch ink (#147141) and the little hearts with Poppy Parade ink (#147050) and Rich Razzleberry ink (#147091). I attached the White card to Basic Black card (#121688) and the base card is Pineapple Punch (#146994). I attached the treble clefs with Stampin’ Dimensionals (#104430). All the stamped images are from the Music From The Heart stamp set (#151674). Simple stamping!

Have a great day.


Tuesday, 28 January 2020

Best Dressed Designer Series Paper

Hello & welcome,

It is so easy to make a quick and easy card with beautiful Designer Series Paper and a sentiment. I have used Best Dressed 6”x6” DSP (#151319), but of course you could use anything you already have.


I cut this sheet to the desired size, then cut a piece 3.5cm long ways and flipped it over to use the reverse side at the bottom of the card. I added the Gold Shimmer Ribbon (#152156) along where I joined the paper. This ribbon was part of the Christmas Time Is Here Suite, and is still available to order. The sentiment is from Peaceful Moments stamp set (#c151595) and stamped with Blackberry Bliss ink (#147092) on Whisper White Card (#106549). This card and the Blackberry Bliss card were cut with dies from the Stitched So Sweetly Dies (#151690) and attached to the card with Stampin’ Dimensionals (#104430). The Gold Glitter Enamel Dots (#152155) are also from Christmas Time Is Here suite and also still available. The Designer Series paper was attached to Blackberry Bliss card and the base card is Whisper White. 

So easy!!!